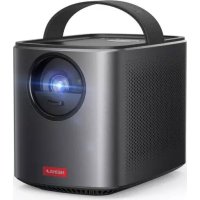
Mars II Pro - Projector Anker - Free user manual and instructions
Find the device manual for free Mars II Pro Anker in PDF.



| Brand | Anker |
| Model | Mars II Pro |
| Category | Projector |
| Display Technology | 0.3-inch DLP (1 280 × 720 pixels) |
| Light Source | RGB LED |
| Brightness | 500 ANSI lumens |
| Contrast Ratio | 1000:1 |
| Throw Ratio | 1.2 |
| Projected Image Size | From 30 to 150 inches |
| Native Resolution | 1 280 × 720 pixels |
| Built-in Speakers | 2 × 10 W |
| Bluetooth | Version 4.2 |
| Built-in Battery | Lithium-polymer, 3 350 mAh / 14.52 V |
| Video Playback Time | Up to 3 hours |
| Music Playback Time (speaker mode) | Up to 30 hours |
| Power Consumption | Less than 57 W (standby <0.5 W) |
| Power Supply | AC Adapter (included) |
| Connectivity | HDMI, USB (charging/playback), 3.5 mm audio output |
| Special Features | Auto Focus, Keystone Correction, Bluetooth Speaker Mode, Screen Cast |
| Dimensions (W × H × D) | 122 × 138 × 178 mm |
| Weight | 1 483 g |
| Operating Temperature | 0 to 35 °C |
| Cleaning | Soft lens cloth; lens cleaner (no liquids) |
| Safety | Do not look into the beam; avoid moisture, shocks, high temperatures |
| Warranty | 30 days satisfaction guarantee; 12 months manufacturer defect warranty |
Frequently Asked Questions - Mars II Pro Anker
User questions about Mars II Pro Anker
0 question about this device. Answer the ones you know or ask your own.
Ask a new question about this device
Download the instructions for your Projector in PDF format for free! Find your manual Mars II Pro - Anker and take your electronic device back in hand. On this page are published all the documents necessary for the use of your device. Mars II Pro by Anker.
USER MANUAL Mars II Pro Anker
For FAQs and more information, please visit:
www.SeeNebula.com
support@SeeNebula.com
+1 (800) 988 7973 (US) Mon-Fri 9:00am - 5:00pm (PT) +44 (0) 1604 936200 (UK) Mon-Fri 6:00 - 11:00 (GMT) +49 (0) 69 9579 7960 (DE) Mo-Fr 6:00 - 11:00 +81 03 4455 7823 (日本) 月 - 金 9:00-17:00
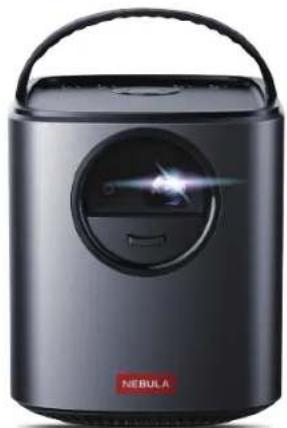
natural_image
Black NEBULA portable digital camera with a circular lens and handle (no visible text or symbols on device body)©Anker Innovations Limited. All rights reserved. NEBULA and the NEBULA logo are trademarks of Anker Innovations Limited, registered in the United States and other countries. All other trademarks are the property of their respective owners.
Model: D2323
V01
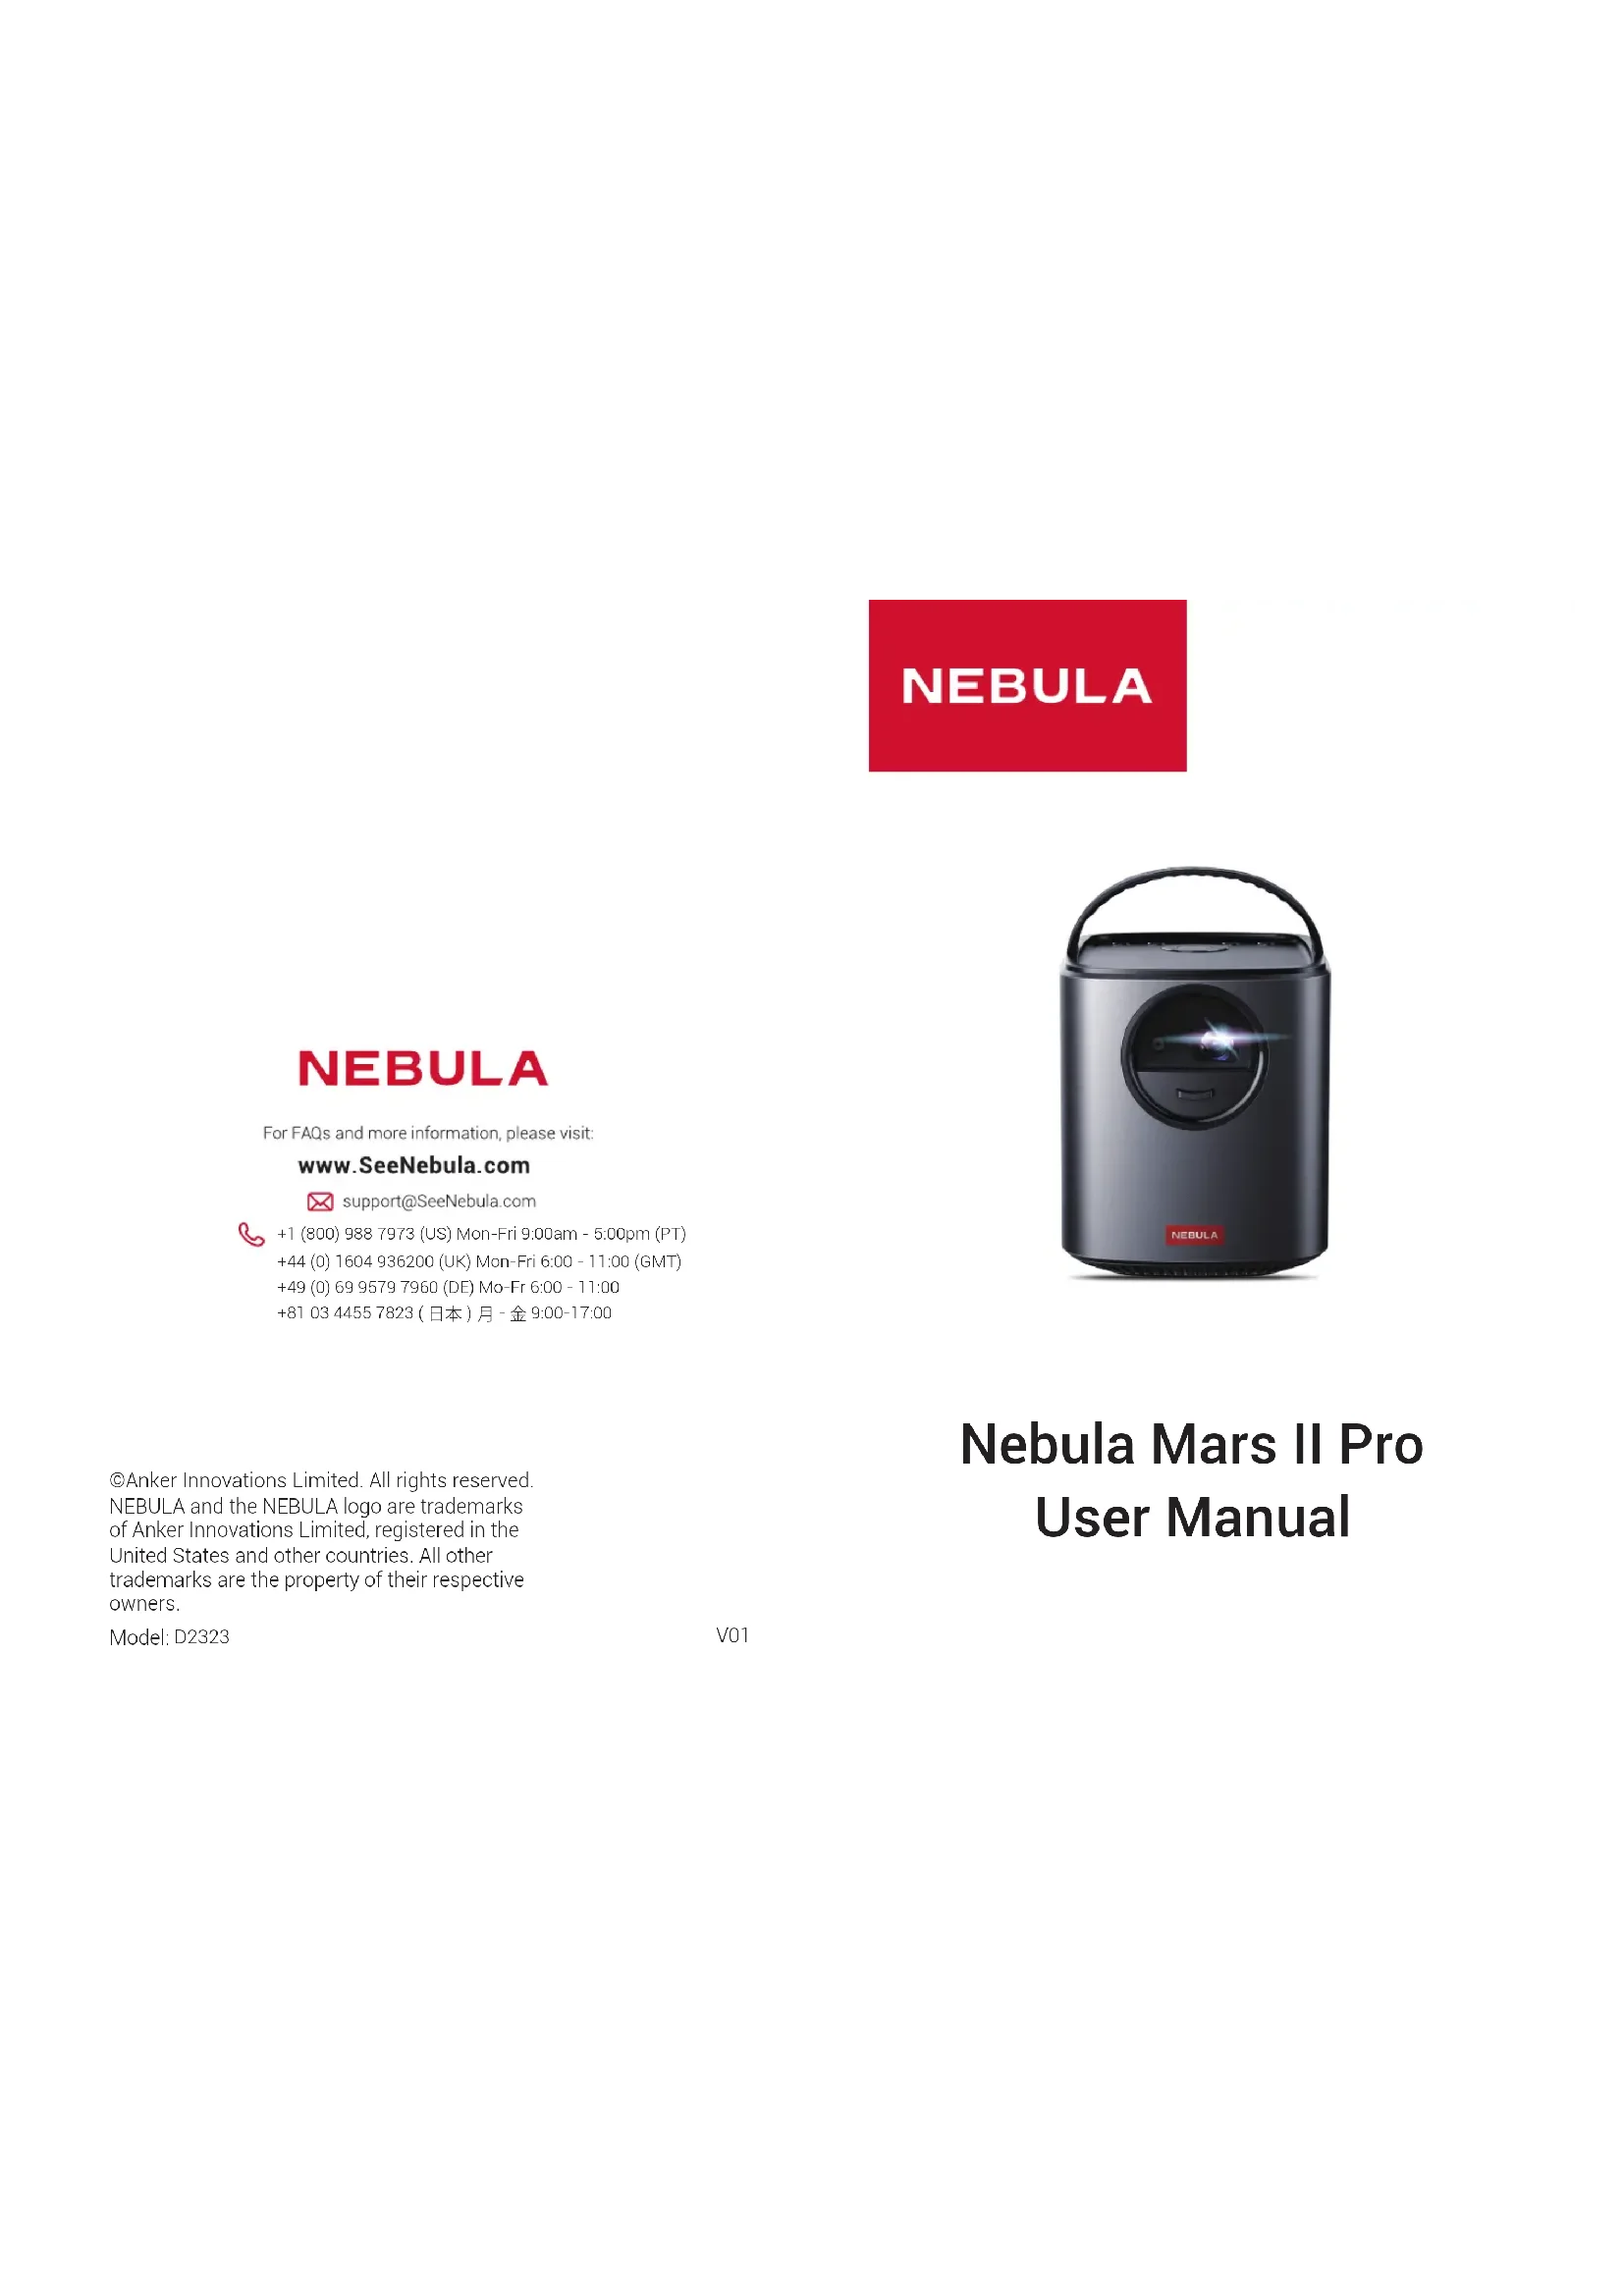
Nebula Mars II Pro User Manual
| English 01 | |
| Deutsch 21 | |
| Español 39 | |
| Français 57 | |
| Italiano 76 | |
| Português 93 | |
| 日本語 | 111 |
| 简体中文 | 129 |
| لغربية | 147 |
Safety Instructions
Read and understand all instructions before you use this device. Do not make any changes or settings that are not described in this manual. If physical injury, loss of data or damage is caused by failure to follow instructions, the warranty does not apply.
Setup
• To reduce the risk of fire and/or electric shock, do not expose the device to rain or moisture, and objects filled with liquids, such as vases, should not be placed on the device.
- Do not place the device on soft surfaces such as tablecloths or carpets as doing so could be a fire-hazard.
- Do not place the device in areas susceptible to excessive dust and dirt or near any appliance generating a strong magnetic field.
• To prevent overheating, do not block or clog the ventilation openings.
- Never place the device in a confined space. Always leave enough space around the device for ventilation.
- Protect the device against direct sunlight, heat, large temperature fluctuations and moisture.
- When the device runs for a long period of time and the surface becomes hot, shut it down and unplug the power cord. Resume operation only after the device has cooled.
• Always handle the device with care. Avoid touching the lens.
- Never place heavy or sharp objects on the device or the power cord.
• To avoid electric shock, do not disassemble.
- Only use attachments or accessories specified by the manufacturer.
- Avoid extreme vibration. It may damage the internal components.
- Do not allow children to handle the device without supervision.
- Under the following conditions, a layer of moisture can appear inside the device which can lead to malfunctions: a) if the device is moved from a cold to a warm area; b) after a cold room is heated; c) when the device is placed in a damp room. To avoid any moisture, seal the device in a plastic bag before moving it to another room, and wait for one to two hours before you take it out of the bag.
Power Supply
- Use only the provided power adapter.
• Power off the device before removing the power supply from the socket. - Protect the power cord from being walked on or pinched, particularly at plugs, convenience receptacles, and the point where they exit from this device.
- Unplug this device if there are lightning storms or when unused for a long period of time.
- Where the power plug or an appliance coupler is used as the disconnect device, the disconnect device shall remain readily operable.
- Before you make or change any connections, ensure that all devices are disconnected from the power outlet.
- Never touch the power cable or the power connector with wet hands.
Hearing Safety
- To avoid hearing damage, do not listen for extended periods at high volume. Set the volume at a safe level.
Battery
- Do not replace the built-in battery yourself. Contact an authorized service center to replace it.
- The remote control contains coin type batteries which can be swallowed. Keep the batteries out of reach of children.
- Risk of explosion! Keep batteries away from heat, direct sunlight, or fire. Never discard batteries in fire.
- When the remote control is not used for a long period of time, remove the batteries.
- There is a danger of explosion if the battery is incorrectly replaced. Replace only with the same or equivalent type.
- Batteries contain chemical substances, they should be disposed of properly.
- Charge the device regularly. Do not store the device with a completely discharged battery.
Cleaning
- Power off the device and remove it from the power supply before cleaning the surface.
- Use a soft, lint-free cloth. Never use liquid, gaseous, or easily flammable cleansers (like sprays, abrasives, polishes, and alcohol).
- Do not use any liquid cleaning agents to clean the lens as they may damage the protective coating on the lens.
- Wipe over the surfaces gently. Be careful that you do not scratch the surfaces.
- Use lens cleaning paper to clean the lens of the projector.
Repairs
- Do not make any repairs to the device yourself. Only have your device repaired by an authorized service center.
- Improper maintenance can result in injuries or damage to the device.
• Refer all servicing to qualified service personnel.
Caution:
- Possibly hazardous optical radiation emitted from this device.
- Do not stare at operating beam. The bright light may hurt your eyes.
What's Included
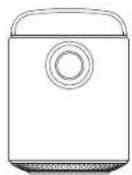
Main unit
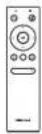
Remote control with batteries
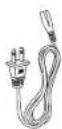
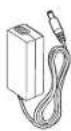
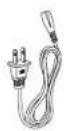
Power Adapter Power cord
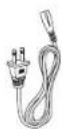

Manual
Overview
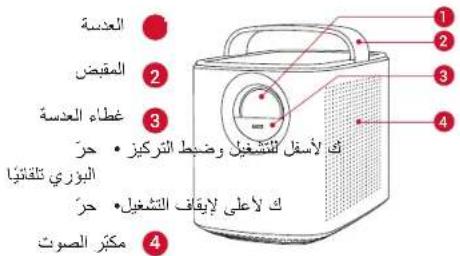
1. Front View
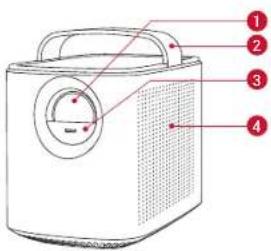
text_image
Diagram of a microwave oven with numbered parts labeled 1 to 4 for identification.Lens
2 Handle
3 Lens cover
- Slide down to power on and automatically adjust focus
- Slide up to power off
4 Loudspeaker
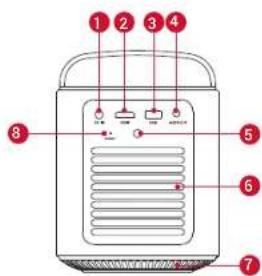
2. Rear View
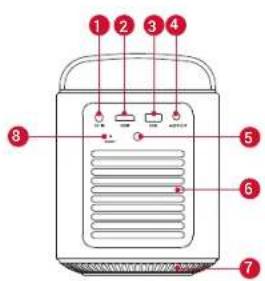
text_image
1 2 3 4 5 6 7 8DC IN
- Connect to power supply
2 HDMI
- Connect to a playback device with HDMI output
3 USB
- Connect to a USB storage device
- Charge a USB device as a power bank
4 AUDIO OUT
- Connect to a headphone or an external speaker
5 Infrared Receiver
6 Air ventilation (outlet)
7 Air ventilation (inlet)
8 RESET
- Press and hold for 3 seconds to reset
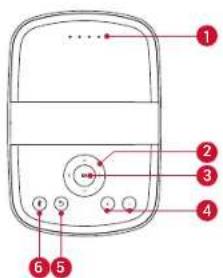
3. Top View
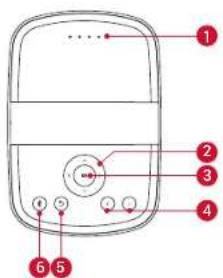
text_image
Diagram of a mobile phone with numbered labels pointing to key ports or buttonsLED indicators
- Power level
2 ∧, ∨, <, > Navigation buttons
- Navigate menus or adjust the selected contents
3 OK
- Press to confirm a selection or entry
- Pause / resume play
4 + / -
• Volume up / down
5
- Return to the previous menu
6
- Press to enter/exit Bluetooth mode
• In standby mode, press to wake up the projector
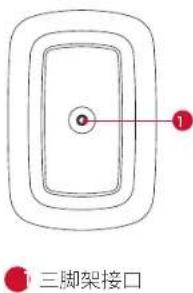
4. Bottom View
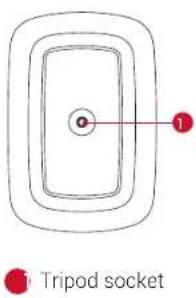
text_image
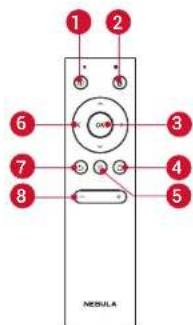
Tripod socket5. Remote Control
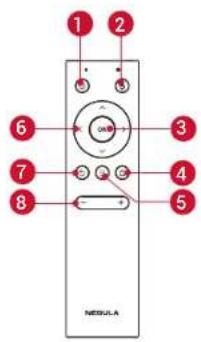
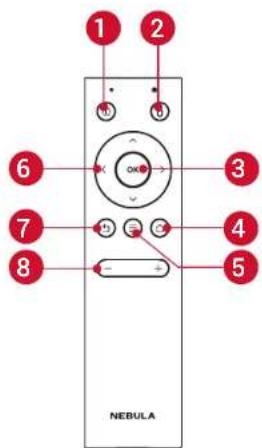
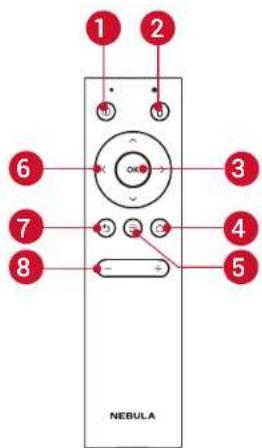
text_image
1 2 3 6 7 8 4 5 NESULA● ①
• Power on / off / switch to standby
2
- Press to enter / exit mouse key mode.
3 OK
- Press to confirm a selection or entry
- Pause / resume during play
4
- Press to access the home menu
5 三
- Access more options during play (availability of options are dependent on the source input).
- Press and hold to adjust focus
6 ∧, ∨, <, > Navigation buttons
- Navigate menus or adjust the selected contents
7
- Return to a previous menu
8 - / +
• Volume down / up
Getting Started
1. Placement
Place Mars II Pro on a stable, flat foundation in front of the projection surface. For the best results, the projection surface should be white and flat. The distance between the projector and the projection surface must be a minimum of 1 meter (39.4 inches) and a maximum of 3 meters (118 inches).
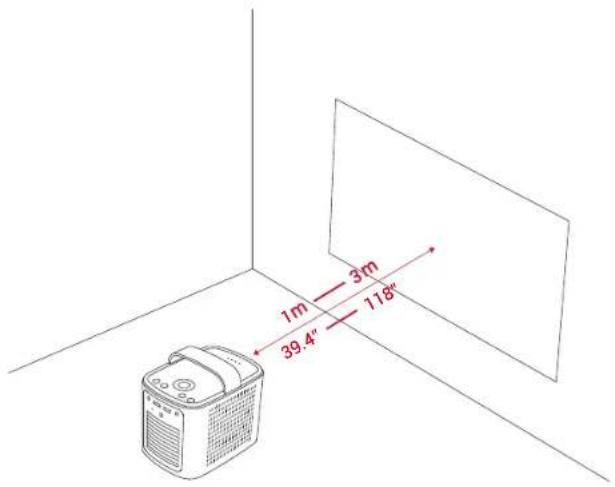
text_image
1m 3m 39.4" 118"
- It is unnecessary to tilt the projector towards the projection surface. You can correct the projection image with the built-in keystone correction.
- The distance between the projector and the projection surface determines the image size.
2. Prepare the Remote Control
① For first-time use, remove the plastic battery insulation tab to activate the remote control batteries.
② To replace the battery, slide off the battery compartment backplate to open the battery compartment, insert new batteries (matching the polarity (+/-) indicated), and close the battery compartment.
3. Get Started
① Fully charge the built-in battery before using for the first time.
② Connect the projector to the outlet by using the provided power adapter and power cord, the built-in battery will be charged and the LED indicators will light on.
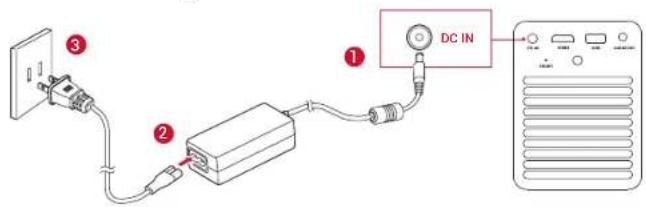
text_image
Diagram showing connection between a power outlet, connected to an AC input device with labeled components and connections.③ Slide down the lens cover, and the projector will automatically turn on. When the projector is in standby mode, you can also press ① on the remote control to turn it on.
④ Angle the projector towards a suitable projection surface or wall.
⑤ To focus the image, slightly move the projector to engage autofocus or press and hold the ≡ on the remote control to manually adjust.
For first time use, follow the on-screen instructions to complete the basic set-up.
Nebula App
To easily control the projector, we recommend you to download the devoted Nebula App, Nebula Connect. Using this app, you can use your smartphone's keyboard to input text and control the projector by operating a mouse on the screen.
① Download the Nebula Connect app from the App Store (iOS devices) or Google Play (Android devices).
② Enable Bluetooth on your smartphone and select [Nebula] as the device to be connected.
③ Open the Nebula Connect app and follow the on-screen instructions to complete the connection setup.
Settings
Go through the set-up process when you turn on the projector for the first time.
1. Network
This projector can be connected to the Internet via a wireless (Wi-Fi) connection.
① On the home menu, select [Settings] > [Network] and press OK
② Follow the on-screen instructions to complete the network connection.
2. Bluetooth
Bluetooth Speaker Mode
You can use this projector as a standalone Bluetooth speaker.
① Press ✝ on the projector to switch to Bluetooth speaker mode.
② Enable Bluetooth on your smartphone and select [Nebula] as the device to be connected.
Projector Mode
You can connect Bluetooth headphones or a speaker to Mars II Pro while it's in projector mode.
① On the home menu, select [Settings] > [Bluetooth] and press OK.
② Follow the on-screen instructions to complete the Bluetooth connection.
3. Projector
On the home menu, select [Settings] > [Projector], and press OK
| [Image Mode] [Auto] / [Standard Mode] / [Battery Mode] | |
| [Color Temperature] | [Normal] / [Cool] / [Warm] |
| [Auto Keystone Correction] | Enable / disable auto keystone correction. |
| [Keystone Correction] | Manually make keystone correction. The default value is 0. |
| [Auto Focus] Enable / disable auto focus. | |
| [Projector Mode] | [Front]: The device is located in front of the projection surface. |
| [Rear]: The device is located behind the projection surface. | |
| [Front Ceiling]: The device is hanging from the ceiling in an upside-down position. The image is rotated by 180 degrees. | |
| [Rear Ceiling]: The device is hanging from the ceiling in an upside-down position behind the projection surface. The image is rotated by 180 degrees and horizontally mirrored. | |
4. App Manager
① On the home menu, select [Settings] > [App Manager] and press OK ② Select an app and check the current version, open or force stop, check the storage used, clear data or cache, or uninstall it.

When more than 3 apps are installed, you can select [All] at the bottom line of the home page to enter the [Apps] page. Select an app and press on the remote control, and then you can select [Move To Home] or [Uninstall].
5. Others
On the home menu, select [Settings] to find more setting options.
| [General] | |
| [Language] Select an on-screen display language. | |
| [Keypad Tone] Turn the keypad tone on/off. | |
| [Automatic Sleep Interval] | 5 min / 15 min / 30 min |
| [Background] Select a background. | |
| [Clear Cache] | Clear all the cached data stored on the projector. |
| [Date&Time] | |
| [Automatic Date&Time] Enable / disable automatic date and time. | |
| [Date] | Manually set date. |
| [Time] | Manually set time. |
| [Select time zone] | Select the time zone. |
| [Use 24-hour format] | Select 24-hour format or 12-hour format. |
| [Upgrade] | |
| [Check Update] | Check if it is the latest version. Follow the on-screen instructions to update the software version. |
| [About] | |
| [Recovery] | All data on the built-in storage will be erased. |
Using the Nebula Mars II Pro
1. Connect to HDMI Playback Devices
This projector supports connections with various HDMI playback devices such as TV stick, TV box, DVD player, set-top box (STB), game console or other devices.
① Connect this projector to an HDMI playback device with an HDMI cable (not provided).
② On the home menu, select [HDMI], and press OK! It will automatically start the HDMI playback when connected to an HDMI playback device for the first time.)
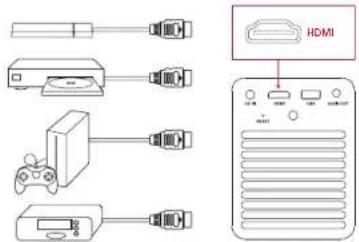
text_image
Diagram showing connected devices including a HDMI interface with ports and connectors2. Screen Cast
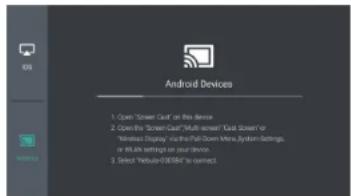
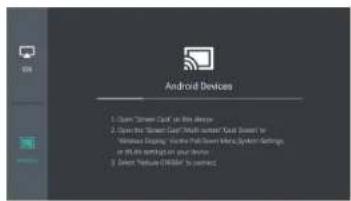
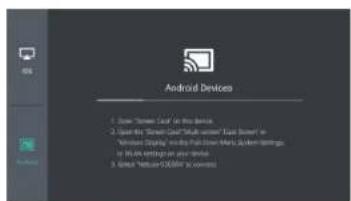
You can wirelessly cast the screen of your smartphone or tablet onto the projection surface.
For iOS devices:
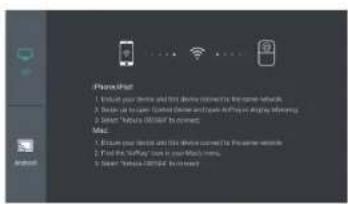
text_image
Phone Mail 1. Ensure your device and this device connects to the same network. 2. Ensure us to scan, following phone and system details or display information. 3. Ensure "Me" (MeNet) to remove Mail: 4. Ensure your device and this device connects to the same network. 5. Find the Me/Me link in your Mail window. 6. Find Me/Me network to removeFor Android devices:
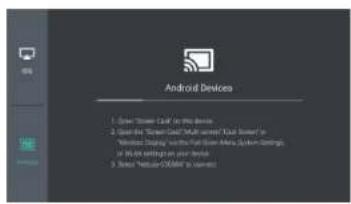
text_image
Android Devices 1. Open Texted Format in the device 2. Open Texted Software to Open Texted Format (Text Based) in Windows Display on the Full Stack System, System Settings, in Web settings on your device 3. Open Texted 2000000000000000000000000000000000000000000000000000000000000000000000000000000000000000000000
Certain content may be unavailable to be cast due to copyright restrictions. In this case, you can stream the content via the same app installed in your Nebula Mars II Pro.
3. Select an App
Once connected to a wireless network, you can access online services, enjoy movies, music, and pictures, and browse online. Apart from the pre-installed apps, you can also install additional apps from the Nebula Store or from a USB flash drive.
- On the home menu, select an Internet service from "Apps" or "Nebula Store".
- Press OK to confirm.
4. Connect to a USB Storage Device
With this projector, you can enjoy music, video, and pictures, or install apps that are stored on a USB 2.0 storage device by using the OTG cable (not provided).
① On the home menu, select [File Manager] and press OK.
② Select a file and then press OK.
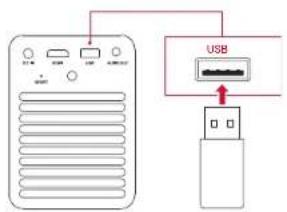
text_image
Diagram showing connection between a device and an USB port, with labeled ports and connection arrowsSpecifications

Specifications are subject to change without notice.
Power supply: DC 19V=3A
Power consumption: < 57W
Standby power consumption: < 0.5W
Display technology: 0.3 inch 1280 × 720p DLP
Light source: RGB LED
Projection image size: 30 - 150 inch
Resolution: 1280 × 720 pixels
Brightness: 500 ANSI Lumens
Contrast ratio: 1000:1
Projection ratio: 1.2
Speaker drivers: 10 w × 2
Bluetooth: V4.2
Built-in battery type: Li-Polymer
Capacity: 3350 mAh 14.52V
Video play duration: 3 hours
Music play duration: 30 hours
Remote control batteries: CR2032 × 2
Operating temperature: 0°C to 35°C / 32°F to 95°F
Operating humidity: 15% \~ 85% (non-condensing)
Storage temperature and humidity: < 65°C / 149°F, < 90% humidity
Dimension (W × H × D): 122 × 138 × 178 mm / 4.8 × 5.4 × 7 in
Weight: 1,483 g / 52.3 oz
Troubleshooting
① Fail to power on by the remote control?
- Make sure that the device is connected to the power supply.
- Slide down the lens cover.
② Fail to power on by sliding down the lens cover?
• Make sure that the device is connected to the power supply.
- Slide up the lens cover and wait for 10 seconds, then try again.
③ The remote control doesn't work?
- Remove the battery insulation tab to activate the remote control batteries.
- Replace new batteries.
④ Blurred image?
- You can either slightly move the projector or press the navigation buttons to focus on the image.
⑤ Reversed projection image?
- On the home menu, select [Settings] > [Projector mode] and switch to the correct state.
Notice

Declaration of Conformity
This product complies with the radio interference requirements of the European Community.
Hereby, Anker Innovations Limited. declares that this device is in compliance with the essential requirements and other relevant provisions of Directive 2014/53/EU. For the Declaration of Conformity, visit the Web site www.seenebula.com.
BT Maximum output power: 8 dBm; BT Frequency band: 2402\~2480 MHz;
Wi-Fi Max Output Power: 19 dBm (2.4G); 15 dBm (5G);
Wi-Fi Frequency Band: 2412\~2472 MHz (2.4G); 5150\~5250 MHz, 5725\~5850 MHz (5G).
5150\~5250 MHz can be used indoor only.
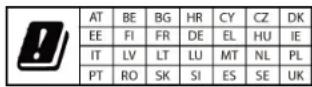

Your product is designed and manufactured with high quality materials and components, which can be recycled and reused.

This symbol means the product must not be discarded as household waste, and should be delivered to an appropriate collection facility for recycling. Proper disposal and recycling helps protect natural resources, human health and the environment. For more information on disposal and recycling of this product, contact your local municipality, disposal service, or the shop where you bought this product.
The following importer is the responsible party (contact for EU matters only).
Importer: Anker Technology (UK) Ltd
Importer Address: Suite B, Fairgate House, 205 Kings Road, Tyseley, Birmingham, B11 2AA, United Kingdom
FCC Notice
This device complies with the FCC rules, Part 15. Operation is subject to the following two conditions: (1) This device may not cause harmful
interference, and (2) This device must accept any interference received, including interference that may cause undesired operation.
Warning: Changes or modifications not expressly approved by the partly responsible for compliance could void the user's authority to operate the equipment.
Note: This equipment has been tested and found to comply with the limits for a Class B digital device, pursuant to part 15 of the FCC Rules. These limits are designed to provide reasonable protection against harmful interference in a residential installation.
This equipment generates, uses and can radiate radio frequency energy and, if not installed and used in accordance with the instruction manual, may cause harmful interference to radio communications. However, there is no guarantee that interference will not occur in a particular installation. If this equipment does cause harmful interference to radio or television reception, which can be determined by turning the equipment off and on, the user is encouraged to try to correct the interference by one or more of the following measures:
- Reorient or relocate the receiving antenna.
- Increase the separation between equipment and receiver.
- Connect the equipment into an outlet on a circuit different from that to which the receiver is connected.
- Consult the dealer or an experienced radio/TV technician for help.
FCC Radiation Exposure Statement:
This equipment complies with FCC radiation exposure limits set forth for an uncontrolled environment. This equipment should be installed and operated with a minimum distance of 20cm between the radiator and your body. This transmitter must not be co-located or operated in conjunction with any other antenna or transmitter.
Notice: Shielded cables
All connections to other computing devices must be made using shielded cables to maintain compliance with FCC regulations.
The following importer is the responsible party:
Company Name: Fantasia Trading LLC
Address: 9155 Archibald Avenue, Suite 202, Rancho Cucamonga, CA 91730, USA
Telephone:1-909-484-1530
Trademarks
HDMI ^TM
HDMI, and HDMI logo and High-Definition Multimedia Interface are trademarks or registered trademarks of HDMI licensing LLC in the United States and other countries.
Bluetooth®
The Bluetooth ^® word mark and logos are registered trademarks owned by the Bluetooth SIG, Inc. and any use of such marks by Anker Innovations Limited is under license. Other trademarks and trade names are those of their respective owners.
Warranty
30-Day Money-Back Guarantee for Any Reason
You may return your undamaged product and packaging within 30 days of purchase to receive a FULL REFUND for any reason. If the reason for return isn't quality-related, the customer must pay for the return shipping.
12-Month Warranty for Quality-Related Issues
Nebula's products are warranted to be free from material and workmanship defects for 12 months from the date of purchase. Within this period, Nebula will provide a replacement and cover any return shipping costs for products that fail in normal use.
Please Note: Any provided shipping labels must be used within 20 days from the date they're issued by Nebula Support.
Anker Innovations Limited
Room 1318-19, Hollywood Plaza, 610 Nathan Road, Mongkok, Kowloon, Hong Kong
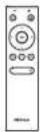
Remotelicing with batteries
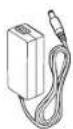
Ladegerät
text_image
Diagram of a microwave oven with numbered parts labeled 1 to 4text_image
Diagram of a mobile phone with numbered labels pointing to key ports or buttonsLED-Anzeigen
- Ladestand
2 _i_i<_i> Navigationstasten
text_image
Diagram showing connection between a power outlet, connected to an AC input device with labeled componentstext_image
iPhone/iPad 1. Ensure your device and this device can next to the same network. 2. Swap up to open Control Center and open AirPlay on Apple Mining. 3. Select Naidu-000 SP (on connect) Next: 1. Ensure your device and this device can next to the same network. 2. Find the AirPlay "sort" in your Black menu. 3. Select Naidu 000 SP (on connect)Für Android-Geräte:
text_image
Android Devices 1 Open "Spider Care" on the device 2 Open this "Spider Care" (Multi-screen) Kids Screen or Netsuita Display for the Full Zoom Window System Settings, or link settings on your device 3 Select "Netsuita-010586" to connect
text_image
Diagram showing connection between a server and USB device with labeled ports and arrows indicating signal or data flow.Technische Daten

text_image
Diagram of a portable radio with numbered parts labeled 1 to 4 for identification.Lente
2 Asa
text_image
Diagram of a mobile phone with numbered labels pointing to key ports or buttonsIndicadores LED
- Nivel de potencia
natural_image
Simple diagram with concentric rectangular shapes and a central circle, no text or symbols presenttext_image
Diagram showing connection between a power outlet, connected to an AC unit via cable and switch, with a DC input terminal labeled.text_image
Diagram showing connected devices including a game controller, an HDM device, and a server with labeled ports and connectors.text_image
iPhone/iPad 1. Ensure your device and this device can next to the same network. 2. Surge up to open Context Center and open Airbnb or Apple Marketing. 3. Select "Nebate 100000" via network. Next: 1. Ensure your device and this device can next to the same network. 2. Find the Airbnb costs in your Black menu. 3. Select "Nebate 100000" via network.text_image
Android Devices 1. Open "Spider Craft" on the device 2. Open this "Spider Craft" with custom "Kua Screen" or "Wireless Display" for the mobile system, System Settings, or Web AN Settings on your device 3. Select "HKEY-0010000" to connect
text_image
Diagram showing connection between a server and an USB device, with labeled ports and a red arrow indicating the USB connection.Especificaciones

text_image
Diagram of a microwave oven with numbered parts labeled 1 to 4 for identification.text_image
Diagram of a mobile phone with numbered labels pointing to key buttons and display areasVoyants LED
natural_image
Simple diagram with concentric rectangular shapes and a central circle, no text or symbols presentAttache du trépied
5. Télécommande
text_image
1 2 6 3 7 4 8 5 NEBULA● ①
text_image
Diagram showing connection between a device with labeled components including a DC input and connected cablestext_image
iPhone-Shad 1 Ensure your device send this device can next to the same network. 2 Stop up to open Control Center and open AirPlay on Apple/Mercking. 3 Select "Mailbot-030 SNR" to queue. Mail: 4 Ensure your device and this device connect to the same network. 5 Find the "AirPlay" case in your MailBot.com. 6 Select "Mailbot-030 SNR" to queue.text_image
Android Devices 1. Open "Screen Call" on this device 2. Quick Screen Call "HemsUp" or "Kissi Screen" or "Webless Display" via the Full-Cross Menu System Settings, or HMs settings on your device 3. Select "HemsUp-005694" to connect
text_image
Diagram showing connection between a server and USB device with labeled ports and an arrow indicating data transfer or setup.Spécifications

Alimentation: CC 19 V = 3 A
text_image
Diagram of a microwave oven with numbered parts labeled 1 to 4 for identification.text_image
Diagram of a mobile phone with numbered labels pointing to key ports or buttonsIndicatori LED
• Livello di carica
natural_image
Abstract diagram with concentric rectangular layers and a central circle, no text or symbols presenttext_image
Diagram showing connection between a power outlet, switch, and connected to an AC input device with labeled components.text_image
Diagram showing connected devices including gaming hardware, a console, and a HDMI interface with labeled portstext_image
iPhone iPad • Show your device and Pi's device connected to the wireless network. • Assign up to Open Control Center and open Airkey to Apple Wireless. • Listen to a Google Cloud for a connection. Mail: • Show your device and Pi's device connected to the wireless network. • Find the Safari key for your basic news. • Send: "Make iOS 80%" to account.text_image
Android Devices 1 Open Screen Level in the Device 2 Open Text Screen Level in the Web Server / User Interface 3 Open Text Settings / User Interface / Open Text System Settings or XML Settings on your device 3 Select "Required USB" to optimize
text_image
Diagram of a microwave oven with numbered parts labeled 1 to 4 for identification.Lente
2 Alça
3 Protetor da lente
text_image
Diagram of a mobile phone with numbered labels pointing to key ports or buttonsLEDs indicadores
- Nível de potência
natural_image
Simple diagram with concentric rectangular shapes and a central circle, no text or symbols presenttext_image
Diagram showing connection between a device with labeled components including a DC input and connected devicestext_image
Diagram showing connected devices including gaming console, PC, and HDMI interface with labeled portstext_image
iPhone Post • Drive your device and this device opened to the smartwatch. • Save up for some Control Center and open clothing in display windowing. • Open Textless USB/USB to screen. Home: • Drive your device and this device opened to the open screen • Add the WiFi power in your home screen. • Open Textless USB/USB to screen.106 107
text_image
Android Devices 1. Open System Start and End Users 2. Open Web Server Tools open "Cloud Book" 3. Windows Display or the Full-Open Audio System Settings or Web Application on your website 4. Use "Windows" (F2007) to access
text_image
Diagram showing connection between a server and an USB port, with labeled ports and connection arrowsDimensões (L × A × P): 122mm × 138mm × 178mm
Peso:1.483g
text_image
Diagram of a portable radio with numbered parts labeled 1 to 4 for identification.レンズ
2 ハンドル
3 レンズカバー
text_image
Diagram of a mobile phone with numbered labels pointing to key ports or buttonsLED インジケーター
- 電源レベル
natural_image
Simple diagram of concentric rectangular shapes with a central circle and a red arrow pointing to the center (no text or symbols)三脚取り付け部
5. リモコン
text_image
1 2 3 6 7 8 4 5 NEBULA● ①
text_image
Diagram showing connection between a device via cable and DC input, with labeled components and connections.text_image
Diagram showing connected devices including a router, a game controller, and an HDMI interface with labeled ports.2. スクリーンキャスト
text_image
iPhone- iPad 1. Show your phone and the device learned to the phone network. 2. Show an open Sistral Bank and open Airbnb or empty shopping. 3. Show mobile WiFi or power. Mail: 4. Show your devices and the device created to the phone network. 5. Show the WiFi on your website. 6. Show the WiFi or power.Android デバイスの場合:
text_image
Android Devices 1. Open "Camera Lock" on the device 2. Open the "Window Call" on the device with a new "New Window" for Wireless Devices. "New Software Info System Settings" on the devices on your device 3. Open "New Device to switch" to connect
text_image
Diagram showing connection between a server and USB device with labeled ports and an arrow indicating data flow製品仕様

text_image
Diagram of a portable radio with numbered labels pointing to the front panel镜头
2 提手
3 镜头盖
- 下滑可开机且自动调焦
- 上滑可关闭电源
4 扬声器
132 133
2. 后视图
text_image
1 2 3 4 8 5 6 7DC IN
- 连接电源
2 HDMI
- 通过 HDMI 输出连接播放设备
3 USB
- 连接到 USB 存储设备
- 将 USB 设备作为移动电源充电
4 音频输出
- 连接到耳机或外接扬声器
5 红外接收器
6 通风口(出风)
7 通风口(进风)
8 重置
- 按住3秒钟可重置
3. 顶视图
简体中文
text_image
Diagram of a mobile phone with numbered labels pointing to key ports or buttonsLED 指示灯
·电量
2 ∧₁∨₁<₁> 导航按钮
· 导航菜单或调整所选择的内容
③ OK
- 按下以确认选择或进入
· 暂停 / 恢复播放
4 + / -
· 音量升高 / 降低
5
- 返回之前的菜单
6
- 按下可进入 / 退出蓝牙模式
- 在待机模式下,按下可唤醒投影仪
134 135
4. 底视图
text_image
三脚架接口5. 遥控器
text_image
1 2 6 3 7 4 8 5 NEBULA● ①
- 开机 / 关机 / 切换为待机
2
- 按下可进入 / 退出鼠标模式。
③ OK
- 按下以确认选择或进入。
- 在播放时暂停或恢复
4
- 按下可访问主页菜单
5 三
text_image
Diagram showing connection between a power outlet, switch, and computer interface with labeled componentstext_image
Diagram showing connected devices and a HDMI interface with labeled ports and connectors2. 屏幕映射
text_image
iPhone iPad 1. Enable your custom and this device connected to the game browser 2. Enable up to open Touched Server and open Play or display streaming 3. Enable "minutes GPS" to connect Mats 4. Enable your custom and this device connected to the game browser 5. Enable the GPS user in your March 2021 6. Enable "minutes GPS" to connect对于 Android 设备:
text_image
Android Devices 1. Show "Tunes" User at Web Device 2. Add My Tools at Web Server - Web Button" in "Windows Display", adding My Tools at Web Settings in Web Settings on your device 3. Show "New User 2000" to save
text_image
Diagram showing connection between a server and USB device with labeled ports and connection arrows规格

规格和设计如有变更,恕不另行通知。
电源:DC 19V=3A
功耗: <57W
待机功耗:<0.5W
Rebote control with kasklerje
محول الطاقة
الديل ملك الطاقة

نظرة عامة
1. Minظر الأمامي
text_image
Diagram of a mobile phone with numbered labels pointing to key ports and buttons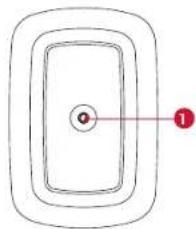
natural_image
Simple diagram of concentric rectangular shapes with a central circle and a red arrow pointing to the center (no text or symbols)text_image
Diagram showing connection between a power outlet, connected to an AC input device with labeled componentsالترجمة في جهاز الإسقط هذا بسوحة، نوصي ب Minority Policy Policy Policy Policy Policy Policy Policy Policy Policy Policy Policy Policy Policy Policy Policy Policy Policy Policy Policy Policy Policy Policy Policy Policy Policy Policy Policy Policy Policy Policy Policy Policy Policy Policy Policy Policy Policy Policy Policy Policy Policy Policy Policy Policy Policy Policy Policy Policy Policy Policy Policy Policy Policy Policy Policy Policy Policy Policy Policy Policy Policy Policy Policy Policy Policy Policy Policy Policy Policy Policy Policy Policy Policy Policy Policy Policy Policy Policy Policy Policy Policy Policy Policy Policy Policy Policy Policy Policy Policy Policy Policy Policy Policy Policy Policy Policy Policy Policy Policy Policy Strategy, NetEase, Nebula