Dry & Clean 51016 - Steam cleaner Leifheit - Free user manual and instructions
Find the device manual for free Dry & Clean 51016 Leifheit in PDF.



| Product type | Window cleaner (window vacuum) |
| Tank capacity | 100 ml |
| Battery type | Lithium-ion |
| Squeegee width | 28 cm |
| Runtime | Approx. 38 min |
| Charging time | Approx. 180 min |
| Weight (without accessories) | 0.7 kg |
| Power adapter | Model ZD006C050100EU / S005BNV0500100, input AC 100-240 V, output 5.0 V / 1.0 A |
| Consumption when not charging | 0.07 W / 0.04 W |
| Use | Household only |
| Package contents | Device with battery, tank, suction nozzle, charger, instruction manual |
| Tank maintenance | Clean with clear water, do not use rigid objects |
| Appliance maintenance | Clean with a damp cloth, do not immerse in water |
| Safety | Do not use on rough surfaces, do not vacuum flammable or sticky liquids |
| Spare parts available | Rubber squeegee (separate ref.), 17 cm suction nozzle (optional) |
| Accessory compatibility | Leifheit telescopic handles with Click system |
| Recycling | Do not dispose of with household waste; lithium-ion battery must be recycled |
| Compliance | EU declaration of conformity available at www.leifheit.de |
Frequently Asked Questions - Dry & Clean 51016 Leifheit
User questions about Dry & Clean 51016 Leifheit
0 question about this device. Answer the ones you know or ask your own.
Ask a new question about this device
Download the instructions for your Steam cleaner in PDF format for free! Find your manual Dry & Clean 51016 - Leifheit and take your electronic device back in hand. On this page are published all the documents necessary for the use of your device. Dry & Clean 51016 by Leifheit.
USER MANUAL Dry & Clean 51016 Leifheit
!
D SICHERHEITSHINWEISE 2
NL VEILIGHEIDSINSTRUCTIES 3
F CONSIGNES DE SÉCURITÉ 4
CZ BEZPEČNOSTNÍ POKYNY 5
① AVVERTENZE DI SICUREZZA 6
E ADVERTENCIAS DE SEGURIDAD 7
PT INSTRUÇÕES DE SEGURANÇA 8
GB SAFETY INSTRUCTIONS 9
⑤ SÄKERHETSINSTRUKTIONER 10
DK SIKKERHEDSANVISNINGER 11
RUS УКАЗАНИЯ ПО БЕЗОПАСНОСТИ 12
PL WSKAZÓWKI BEZPIECZEŃSTWA 13
SK BEZPEČNOSTNÉ POKYNY 14
TR GÜVENLİK UYARILARI 15
D BEDIENUNGSANLEITUNG 16
NL GEBRUIKSAANWIJZING 20
F MODE D'EMPLOI 24
CZ NÁVOD K OBSLUZE 28
① MANUALE DI ISTRUZIONI 32
E MANUAL DE INSTRUCCIONES 36
PT MANUAL DE INSTRUÇÕES 40
GB OPERATING INSTRUCTION 44
⑤ DRIFTSINSTRUKTIONER 48
DK BETJENINGSVEJLEDNING 52
RUS РУКОВОДСТВО ПО ЭКСПЛУАТАЦИИ 56
PL INSTRUKCJA OBSŁUGI 60
SK NÁVOD NA OBSLUHU 64
TR KULLANIM KILAVUZU 68
When using an electrical device, basic safety measures should always be observed:
- Only use the window cleaner as described in these instructions.
- Do not store or charge the window vacuum in the open but always at room temperature and in a dry place.
- Do not operate the charger with moist or wet hands.
- Do not insert any objects into the ventilation slots.
- This appliance can be used by children aged from 8 years and above and persons with reduced physical, sensory or mental capabilities or lack of experience and knowledge if they have been given supervision or instruction concerning use of the appliance in a safe way and understand the hazards involved. Children shall not play with the appliance. Cleaning and user maintenance shall not be made by children without supervision.
- This device contains batteries that cannot be replaced
- The window cleaner may only be operated with the supplied charger.
- Fully charge the window cleaner prior to the first use (see start-up / charging the battery).
- Always remove the charger from the socket and window cleaner after charging.
- Repairs may only be performed by authorised customer service technicians. Never open the basic device by yourself. The individual components of the basic device may not be disassembled, repaired or modified.
- Unplug the device before cleaning or maintenance. When cleaning, ensure that no liquids make their way into the switches and buttons.
VHODNÉ IBA NA POUŽITIE V DOMÁCNOSTI!

GÜVENLİK UYARILARI

Abbildung 12:

Abbildung 7: Tank entleeren
Entriegeln des Tank
3. GEBRUIK VOLGENS DE BEPALINGEN
Afbeelding 5
Afbeelding 12:

Afbeelding 6

Afbeelding 9

3. UTILISATION SPECIFIQUE
Figure 5

Figure 6
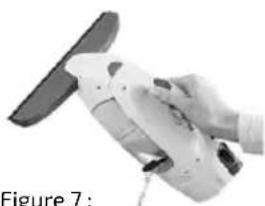
Figure 8

Figure 9

3. POUŽITÍ K URČENÉMU ÚČELU
Obrázek 5
Obrázek 12: Dicht maken van de tankdeksel

Obrázek 6


Obrázek 9

3. IMPIEGO CONFORME ALLE NORME
Figura 5

Figura 6


Figura 9

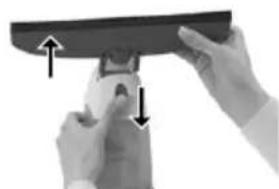
Imagen 5
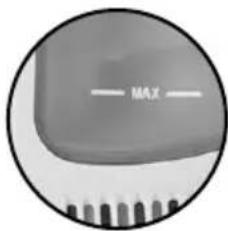
Imagen 6
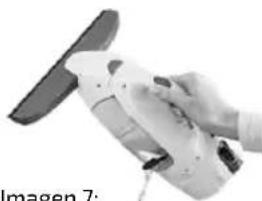

Imagen 9

Figura 5

Figura 6


Figura 9


You can also find the operating instructions on the Leifheit homepage at www.leifheit.com
Contents:
- TECHNICAL DATA 6. SPECIAL ACCESSORIES
- DELIVERY SCOPE 7. DISPOSAL
- PROPER USE 8. COMPLIANCE / DECLARATION OF CONFORMITY
- START-UP / CHARGING THE BATTERIES 9. TROUBLESHOOTING
- USE
Dear customer,
Congratulations on your purchase of the Leifheit window cleaner.
Please read the operating instructions for the window vacuum before use and store these for later use or subsequent owners. These will assist you in operating the device sensibly and correctly from the start and to avoid mistakes in operation. Pay particular attention to the safety instructions provided in these operating instructions.
We hope that you are satisfied with the window cleaner.
If you would like to contact us in writing, our contact form is available to you on the LEIFHEIT home page www.leifheit.com or you can choose to use the postal service.
Regards,
your Leifheit team
1. TECHNICAL DATA
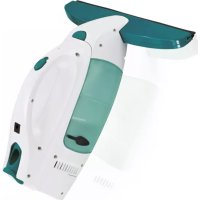
Type of device: Window vacuum cleaner
Tank volume: 100 ml
Battery type: Lithium ion battery
Wide rubber lip: 28 cm
Operating time: approx. approx. 38 Min.
Charging time: approx. 180 min.
Weight (without accessories): 0.7 kg
Charge adapter
| Explanation of symbols: | D K = external |
| power supply | |
| Model identifier: | ZD006C050100EU / S005BNV0500100 |
| Input voltage: | AC 100-240 V |
Input AC frequency: 50/60 Hz
Output voltage: DC 5,0 V
Output current: 1,0 A
Output power: 5,0 W
Average active efficiency: 76,68 % / 74,90 %
No-load power consumption: 0,07 W / 0,04 W
Manufacturer's name or trade mark, commercial registration number and address:
Use the appliance only with Leifheit approved accessories and spare parts.
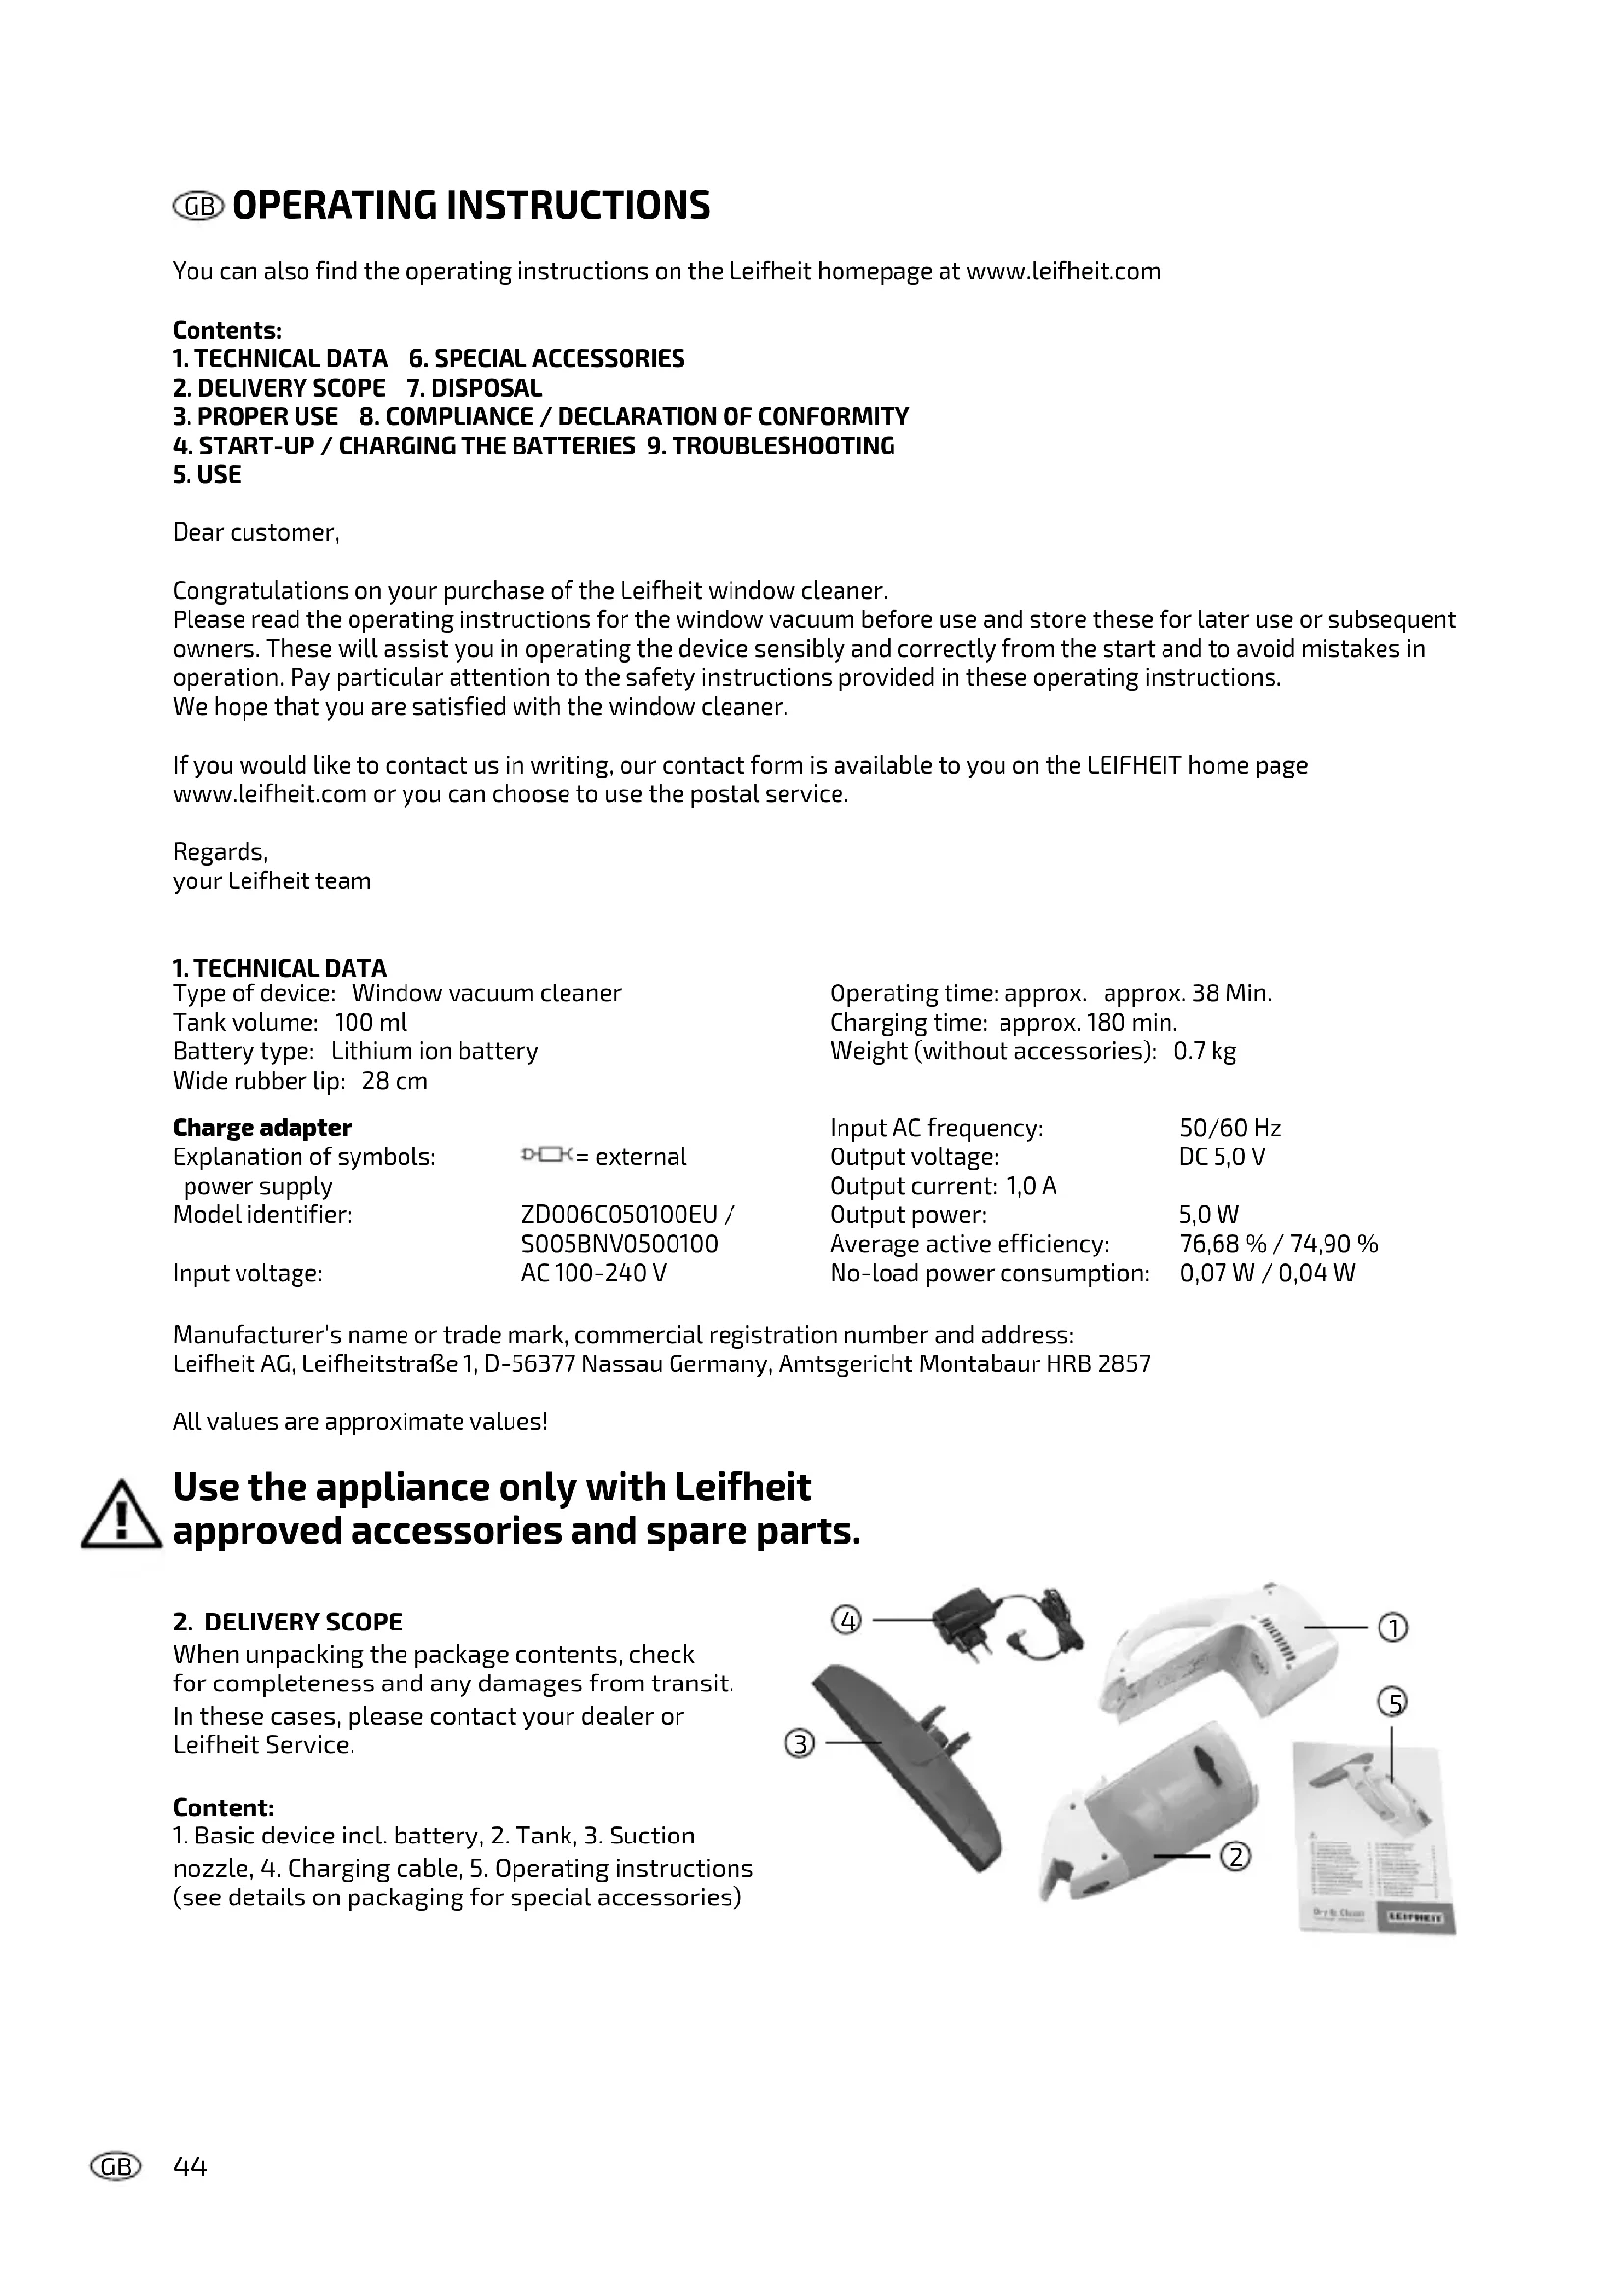
2. DELIVERY SCOPE
When unpacking the package contents, check for completeness and any damages from transit. In these cases, please contact your dealer or Leifheit Service.
Content:
- Basic device incl. battery, 2. Tank, 3. Suction nozzle, 4. Charging cable, 5. Operating instructions (see details on packaging for special accessories)

3. PROPER USE
- Please note that this product is only intended for household use. Leifheit does not provide a manufacturer's warranty for commercial use.
- Only use this device for cleaning wet, smooth surfaces, such as windows, mirrors and tiles.
• No dust may be sucked in. - Do not use the window cleaner on rough surfaces so as to avoid damage to the rubber lip.
• The device is not suitable for suction of large quantities of fluids above 100 ml, flammable or sticky fluids. - Only use this device in connection with conventional window cleaning agents (no spirits, no foam cleaner). We recommend: Leifheit Glass Cleaning Liquid or Window Spray.
- Only use this device with the accessories and spare parts approved by Leifheit.
Any other use is considered to be improper. The manufacturer is not liable for damages resulting from improper use. The user alone shall bear the risk for this

Figure 2: Window cleaner operating controls
4. START-UP / CHARGING THE BATTERIES
- The window cleaner is not delivered with a fully charged battery. Therefore, please fully charge the battery prior to the first use.
- The battery reaches full capacity after some full charges and use cycles.
- Attach the suction nozzle to the tank. Push the two accompanying locking tabs into the tank's upper surface until you hear the connection make an audible click. The visible screws should be facing down in this position (see figure 3).
- Before you charge the device, please ensure that the device is switched off (see figure 4).
- Connect the charger to the charging connector. Plug the charger into the socket. The LED display will flash green while the charging.
The LED will be solid green once the battery is fully charged.
- The battery may only be charged by using the supplied charger.
• The charger is only to be used in connection with the Leifheit window cleaner. - Always charge the rechargeable battery after work and always store the device fully charged.
5. USE
- Suction clean the surface
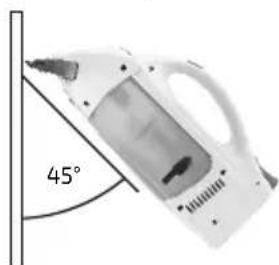
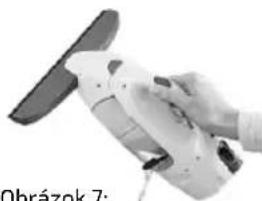
- Clean the window as usual with water and a cleaning agent. Switch the window vacuum on by pushing the main power switch; the indicator light will be a steady green. Place the rubber lip of the device on the surface to be vacuumed and use light pressure to pull it from top to bottom across the surface. To achieve the best results, hold the appliance at a 45° angle to the pane (see figure 5).
- Hard-to-reach surfaces can be suctioned either from top to bottom, sideways or upside down. If a windowsill or very wide window frames prevent or hinder a vacuuming to the bottom edge of the window pane, vacuum across the pane once at the end of the vacuuming process.

Figure 3: Attaching the suction nozzle
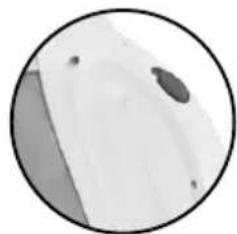
Figure 4:
Appliance switch in the off position

Figure 5: Suction angle
NOTE: The powered-on device operates quietly in stand-by mode. The window cleaner generates its full power once the rubber lip of the window cleaner is placed on the glass pane or is lightly pressed. The battery charge lasts longer due to this automatic power control.
- After suction cleaning the window, power off the device by pressing the appliance switch.
- Interrupting work
- Place the device on its base (see figure 2) and power it off while it is not in use. NOTE: If the window vacuum is not used for 2 minutes while it is switched on (no contact between rubber lip and a hard surface), the device will switch into sleep mode; the LED will flash in green. The vacuum function will be activated automatically once the rubber lip comes into contact with a window pane. To interrupt or stop work for a long period of time, always use the main power switch to shut the device off.
- Emptying the container during work
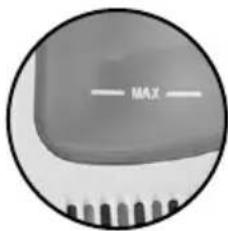
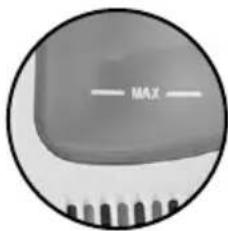
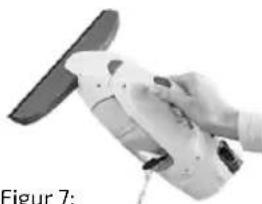
- If the maximum fill level (marked „MAX“ see figure 6) of the dirty water tank has been reached, the tank must be emptied. NOTE: If the maximum fill level is exceeded, small amounts of water may leak out of the ventilation slots if the device is tilted too far. In order to avoid this, empty the tank before the maximum fill level is exceeded. - To do this, power off the device, open the side closure on the dirty water tank and pour the water into a container or drain (see figure 7). Then close the tank again.
- Ending work / cleaning the device
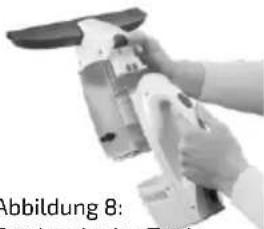
- Power off the device. Unlock the tank via the release button and remove it (see figure 8).
NOTE: The device cannot be powered on when the tank is unlocked.
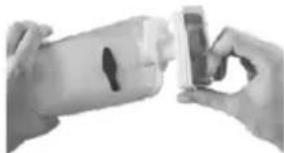
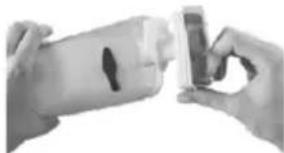
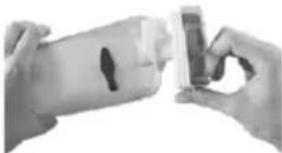
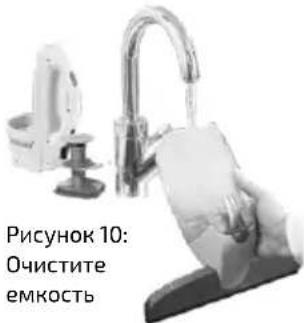
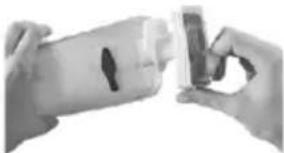
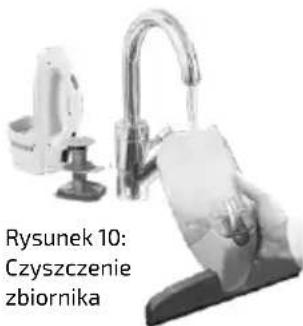
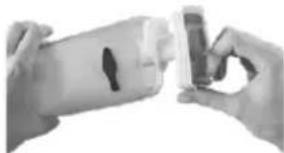
- Remove the bottom cap from the tank and empty it through the opening in the base (see figure 9). Rinse the tank out with clean water (see figure 10).
- Do not put any hard objects, such as a washing-up brush, into the tank as this may cause damage.
- Release the suction nozzle (see figure 11) and clean both nozzle and rubber lip under flowing water.
- Leave the device to dry fully while in the open position. Charge the battery after the work is complete.
- Lock the tank before the next use by pushing the tank cover until it connects with the tank. Be careful to ensure that the tank cover is pushed into the correct position (see figure 12).
- Push the tank onto the basic device from above until you hear the connection make an audible click. Insert the tank into the housing at a slight angle. (see figure 13).
CAUTION: The basic unit contains electrical components. Therefore, do not clean the basic unit under running water!
NOTES
-
Do not use the window cleaner on rough surfaces.
-
Clean the device with a damp cloth.
-
Never submerge the device in water.
-
If your product does not work properly under normal conditions, please contact your dealer with your proof of purchase.

Figure 13: Attaching the tank
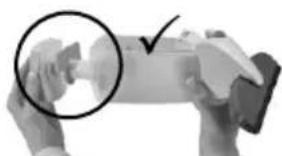
Figure 12: Lock the tank cover

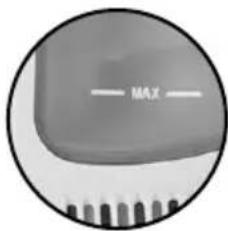
Figure 6: Maximum fill level

Figure 7: Emptying the tank

Figure 8: Unlock the tank

Figure 9: Remove the bottom cap
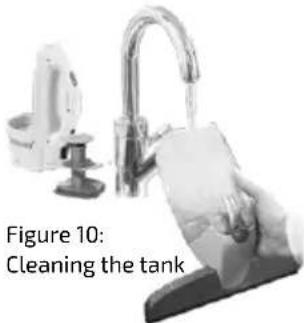

Figure 11: Release suction nozzle
WARNING:
NEVER OPERATE THE DEVICE IN A PARTIALLY ASSEMBLED CONDITION!
6. SPECIAL ACCESSORIES
A small 17 cm suction nozzle is separately available for narrow windows and windows with glazing bars.
The window cleaner can be attached to all Leifheit telescope handles thanks to the Click System function. This allows you to also reach hard-to-reach / high surfaces: Steel telescope handle (65 - 110 cm), Steel telescope handle with an articulated joint (65 - 190 cm), Aluminium telescope handle (145 - 400 cm).
7. DISPOSAL
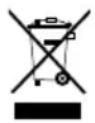
The symbol on the product or its packaging indicates that this product is not to be treated as normal household waste, but rather must be taken to a collection point for recycling electrical and electronic equipment. You can obtain additional information from your local authorities, the municipal waste disposal service or the shop where you purchased the product.
ATTENTION: always observe the following information when handling lithium-ion rechargeable batteries:
- Do not damage the rechargeable battery or open it as this can cause a short circuit. Risk of fire! Risk of hazardous or poisonous substances.
- Do not place the rechargeable batteries in open flames; do not subject them to direct sunlight or heat.
8. COMPLIANCE / DECLARATION OF CONFORMITY
Leifheit hereby declares that this appliance is in conformity with the basic requirements of the German Product Safety Act and other applicable provisions and Directives. The EU Declaration of Conformity can be found under www.leifheit.com.


- TROUBLESHOOTING
| Error Note | |
| LED flashes red 1. The rechargeable battery is empty. Recharge the device.2. If the device is partially or fully charged► Use the main power switch to shut the device off and immediately on again - up to three times - to exclude a short-term error.If the flashing continues► Let the device stand at room temperature for a few minutes while it is switched off.Low temperatures of the device can cause short-term errors.If the flashing continues► Contact your seller where you purchased the device. | |
| Streaks on window | 1. You may be holding the appliance too steeply or shallowly against the pane.You will get the best result when the window vacuum cleaner is held at an approximately 45° degree angle to the pane.2. Check the rubber lip for damage - this can be changed if required.3. The rubber lip can be purchased separately in stores. For simple use just gently wet the rubber lip before you push it sideways into the suction nozzle. |
| Water exits from the ventilation opening | 1. The tank has reached the maximum limit of 100 ml and must be emptied2. Fitful movements while using the device overhead can cause water to leak through the fan.Empty the tank regularly and avoid very fitful movements of the device. |
⑤ BRUKSANVISNING
Utgående effekt: 5,0 W
Genomsnittlig
3. ÄNDAMÅLSEN LIG ANVÄNDNING
Bild 4: Strömbrytaren i av-läge
5. ANVÄNDNING
1. Rengöra ytor
Bild 5
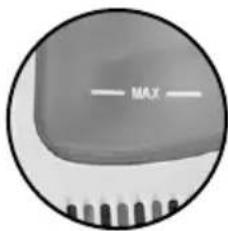
Bild 6

Bild 8

Bild 9


Bild 11:
Lossa sugmunstycket
WARNING:
ANVÄND ALDRIG APPARATEN OM INTE ALLA BESTÅNDSDELAR ÄR Å PLATS!
6. EXTRA TILLBEHÖR
3. TILSIGTET BRUG
Figur 4:
Kontakt i off-position
Figur 5
Figur 6
Figur 9
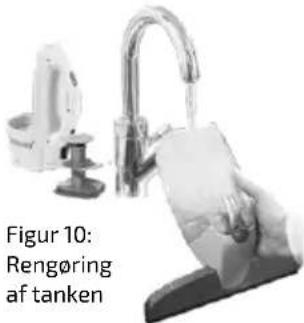

Рисунок 12:

Рисунок 6


Рисунок 9
Rysunek 5
Rysunek 6

Rysunek 9
3. POUŽITIE NA STANOVENÝ ÚČEL
Obrázok 5

Obrázok 6
Obrázok 9

3. TALİMATLARA UYGUN KULLANIM
Şekil 5

Şekil 6


Şekil 9

Quality and Design by Leifheit AG
Leifheitstraße 1
D-56377 Nassau/Germany
www.leifheit.com
- VHODNÉ IBA NA POUŽITIE V DOMÁCNOSTI
- GÜVENLİK UYARILARI
- GEBRUIK VOLGENS DE BEPALINGEN
- UTILISATION SPECIFIQUE
- POUŽITÍ K URČENÉMU ÚČELU
- IMPIEGO CONFORME ALLE NORME
- CONTENTS
- TECHNICAL DATA
- USE THE APPLIANCE ONLY WITH LEIFHEIT APPROVED ACCESSORIES AND SPARE PARTS
- DELIVERY SCOPE
- CONTENT
- PROPER USE
- START-UP / CHARGING THE BATTERIES
- USE
- CAUTION: THE BASIC UNIT CONTAINS ELECTRICAL COMPONENTS. THEREFORE, DO NOT CLEAN THE BASIC UNIT UNDER RUNNING WATER
- NOTES
- WARNING
- NEVER OPERATE THE DEVICE IN A PARTIALLY ASSEMBLED CONDITION
- SPECIAL ACCESSORIES
- DISPOSAL
- ATTENTION: ALWAYS OBSERVE THE FOLLOWING INFORMATION WHEN HANDLING LITHIUM-ION RECHARGEABLE BATTERIES
- COMPLIANCE / DECLARATION OF CONFORMITY
- ⑤ BRUKSANVISNING
- ÄNDAMÅLSEN LIG ANVÄNDNING
- ANVÄNDNING
- RENGÖRA YTOR
- ANVÄND ALDRIG APPARATEN OM INTE ALLA BESTÅNDSDELAR ÄR Å PLATS
- EXTRA TILLBEHÖR
- TILSIGTET BRUG
- POUŽITIE NA STANOVENÝ ÚČEL
- TALİMATLARA UYGUN KULLANIM
Brand : Leifheit
Model : Dry & Clean 51016
Category : Steam cleaner