La Palma S 900 - Heating Klarstein - Free user manual and instructions
Find the device manual for free La Palma S 900 Klarstein in PDF.
Download the instructions for your Heating in PDF format for free! Find your manual La Palma S 900 - Klarstein and take your electronic device back in hand. On this page are published all the documents necessary for the use of your device. La Palma S 900 by Klarstein.
USER MANUAL La Palma S 900 Klarstein
Dear Customer, Congratulations on purchasing this device. Please read the following instructions carefully and follow them to prevent possible damages. We assume no liability for damage caused by disregard of the instructions and improper use. Scan the QR code to get access to the latest user manual and more product information. CONTENTS Technical Data 20 Safety Instructions 21 Installation 22 Operation 25 Device Control by Smartphone 27 Maintenance 29 Disposal Considerations 34 Declaration of Conformity 3420
SAFETY INSTRUCTIONS Product related safety warnings
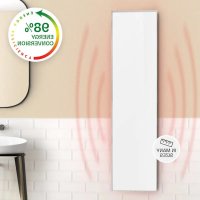
- The infrared heaters operate at a surface temperature of around 95°C when wall mounted.
- Do NOT touch the heater when switched on.
- Prolonged contact may cause injuries or burns.
- Do NOT cover the heater with anything. Covering may cause overheating and can result in re.
- This hybrid heater is having infrared and convection in one heater, please pay special attention to make sure the air inlet and outlet are not covered by any objects in any cases.
- The heater should NOT be used to dry textiles and no objects shall be placed or leaned against the heater.
- Keep a distance of at least 40cm in the front and 20cm on the sides to any object, wall, oor. Failure to do so will cause heat to build up behind the heater and will void your warranty.
- This heater is designed to be wall mounting, please don’t mount them on the ceiling.
- This heater can be easily operated using your smartphone, via the same WLAN, via a dierent WLAN, or via a 3G/4G or 5G mobile network. This makes it possible to operate your heater remotely, without your direct supervision. However, please make sure that all safety precautions stated in this manual must be taken even with remote operation. Dangers for children and persons with limited abilities
- This appliance can be used by children aged from 8 years and above and persons with reduced physical, sensory or mental capabilities or lack of experience and knowledge if they have been given supervision or instruction concerning use of the appliance in a safe way and understand the hazards involved. Children shall not play with the appliance.
- Cleaning and user maintenance shall not be made by children without supervision.
- Children of less than 3 years should be kept away unless continuously supervised.
- Children aged from 3 years and less than 8 years shall only switch on/o the appliance provided that it has been placed or installed in its intended normal operating position and they have been given supervision or instruction concerning use of the appliance in a safe way and understand the hazards involved. Children aged from 3 years and less than 8 years shall not plug in, regulate and clean the appliance or perform user maintenance
- CAUTION — Some parts of this product can become very hot and cause burns. Particular attention has to be given where children and vulnerable people are present.
- If the supply cord is damaged, it must be replaced by the manufacturer, its service agent or similarly qualied persons in order to avoid a hazard.
- Do NOT operate the heater in small rooms when occupied by people not22
capable of leaving the room by themselves. The surface of the heater can reach a surface temperature of up to 95°C, keep out of reach of children and disabled persons.
- Keep away babies and children from all packaging material such as plastic bags to avoid danger of suocation. Electric safety directions
- When installing, repairing or servicing the heater it must be turned o and disconnected from power. Before installation please check if the heater is free of damages.
- If the heater or the power cord is damaged in any form do NOT use the heater. Repairs, maintenance or any changes must be carried out by an authorized dealer.
- DO NOT attempt to repair the heater by yourself, this will void your warranty.
- • If the heater has been dropped do NOT operate it and contact your dealer to make sure it is free of any damages.
- This heater is designed to operate at 220V-240V, 50Hz AC. If your supply mains do not comply with this, do NOT use the heater.
- The heater must not be located immediately below a socket-outlet
- WARNING: The glass heater must not be used if the glass surface is damaged.
- WARNING: Do not use this heater in small rooms when they are occupied by persons not capable of leaving the room on their own, unless constant supervision is provided. INSTALLATION Wall mount The kit supplied in the package is designed for mounting vertically on a solid wall. If mounted onto other types of walls, you will need appropriate xings (not supplied). Please make sure the wall is safe to mount. We highly recommend to have the panel installed by a qualied electrician or authorized installer. The heater must be at least 20 cm removed from all objects, walls, etc.; the distance to the oor must be at least 20 cm. Please be noted that the 500W/750W and 1000W are designed to be mounted horizontally on the wall, please don’t mourn vertically. 900W model is designed to be mounted vertically, please do not mount horizontally.23
Step 1. Use the supplied template to mark the position of the holes on the wall. Step 2. Drill holes using a 8-mm drill. Step 3. Insert the dowels into the holes. Step 4. Screw in the supplied screws to the wall. Step 5. Mount the panel on the screws. Step 6. Move the panel to the left and then down until it is secured.24
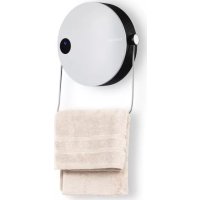
Portable The 900W model is suitable also for the portable purpose, please follow the instruction below.
OPERATION General introduction of the control system The La Palma Smart series has an integrated WIFI control box, meaning there is no other additional thermostat needed to control the heater. Once the heater has been connected to the APP, the smartphone will take control and communicate with the control box. If your home internet is not working, it is still possible to operate the heater via the remote controller or button on the control box. Once the heater is re-connected to the WIFI, the smart phone will take control again. Controls Display 1 Power button 2 WIFI button 3 “+” button 4 “-“ button 5 Timer button 6 Heating status indicator 1 Weekday 2 Open window Sign 3 Timer Sign 4 WIFI Sign 5 Time 6 Temperature26
Open window detection: This heater is equipped with an open window detection function. If our control system detects that the room temperature decreases dramatically in short period when the heater is in the heating status, it will recognize that a window is open. The window sign on the screen will start to ash and the heater will power o for 30 minutes and get back to the previous setting automatically after 30 minutes. You can deactivate and activate this function by long pressing for 5 seconds the “-” button, and the open window sign on the screen will disappear and appear accordingly. Temperature calibration Long press “+” button for 5 seconds to enter the temperature calibration, adjust the number by pressing “-” or “+” button, the calibration ranges from -5 to +5 degrees. WIFI reset Turn on the heater and long press “WIFI” button for 5 seconds until the WIFI indicator starts to ash to reset the Wi connection. WIFI function ON/OFF Turn on the heater and long press “Timer” button for 10 seconds to deactivate the WIFI function of this heater and the WIFI sign on the screen will disappear, long press “Timer” button for 10 seconds to activate it on again. Manual control To enter the manual mode, activate the power switch, press power button to power on the heater. Adjust your desired temperature by pressing “-” or “+” button, 2 seconds later the screen will retain to the reading of current room temperature. If you would like to set up the timer, press timer button and “00H” will appear on the screen and you can set the timer by press “-” and “+” button to start the count- down timer. You can also use the remote controller to operate your heater manually. However, when using the remote controller, make sure you are pointing the remote controller to the control box on the back27
If you integrate the device into your home WiFi, you can conveniently operate it via the associated Klarstein app. The app not only allows you to remotely control the device via your smartphone, but also gives you access to recipes and additional information. Follow these steps to connect your smartphone to your Klarstein device: 1 Download the Klarstein app rst by scanning the QR code with your smartphone (see below), or download it directly from App Store or Google Play. 2 Make sure your smartphone is connected to the same WiFi network that your Klarstein device is to be connected to. 3 Open the Klarstein app. 4 Sign in to your account. If you do not have an account, sign up in the Klarstein app. 5 Follow the instructions from the app. App Download Use the scan function of your smartphone to scan the QR code and save the app on your smartphone. Note: The app provides further information on how to use the app and help on how to connect to your device as soon as you open it for the rst time. iOS Android28
Troubleshooting connection problems If your Klarstein device cannot be found in the WLAN, check the following: 1 The device is not plugged in. Make sure that your device is plugged into an electric socket. 2 The device is not in pairing mode. Make sure that the WiFi indicator (LED) on the smart device control panel is blinking as described in the ‘Reset WiFi settings‘ instruction of your smart device (instructions are usually available on device connection process). 3 The WiFi access point does not operate on 2.4 GHz. Make sure that your access point operates on 2.4 GHz band and you have a separate SSID on 2.4 GHz band. If you are not sure about the operating band of your access point, please contact your internet provider company. Important: please note that if your WiFi router is dual band - operating on both
2.4 GHz and 5 GHz band - you need to separate the SSIDs for each band and use
the 2.4 GHz SSID for connection. 4 Firewall settings of your WiFi network; the rewall setting of your WiFi network may not allow the Klarstein app to congure the WiFi settings on your smart device. Please make sure that you are not using a public WiFi network, e.g. airports, dormitories, companies, etc. 5 Dierent credentials used in smartphone and the app. Make sure that the WiFi credentials entered in the Klarstein app are the same as the ones that your smartphone is connected to. Following the above mentioned points, if your smart device still fails to connect to the app, please contact us via email for support: appsupport@go-bbg.com29
MAINTENANCE Cleaning Always unplug your heater and let it cool down completely before cleaning. Never dip into water and never splash water on it. Clean the heater with a soft damp cloth. For glass models use a soft cloth and glass cleaner. Never use a wet cloth and make sure to dry the heater when clean with a dry cloth. Do not use any abrasive materials, solvents or harsh cleaning sponges as this could cause scratches or other irreparable damage. Before operating the heater again it must be completely dry. Using/Working Please note that the heater may discolour with use. This is due to airborne pollution and is not a fault. If you notice any noise, smells, visible changes or exceptionally high temperatures please discontinue use and contact an authorised dealer. Repair Repairs must be carried out by authorised dealer. If you attempt to alter the product or to proceed with any repairs yourself it will void your warranty.30
0.5 kW manual heat charge control, with integrated
Minimum heat output (indicative)
0.0 kW manual heat charge control with room and/or
outdoor temperature feedback
Maximum continuous heat output
max,c - kW electronic heat charge control with room and/ or outdoor temperature feedback
0.5 kW Type of heat output/room temperature control
At minimum heat output el min
0.0 kW single stage heat output and no room
with mechanic thermostat room temperature control
with electronic room temperature control no electronic room temperature control plus day timer
electronic room temperature control plus week timer yes Other control options (multiple selections possible) room temperature control, with presence detection
room temperature control, with open window detection
with distance control option yes with adaptive start control no with working time limitation no with black bulb sensor no Contact details Chal-Tec GmbH, Wallstraße 16, 10179, Berlin, Germany31
0.75 kW manual heat charge control, with integrated
Minimum heat output (indicative)
0.0 kW manual heat charge control with room and/or
outdoor temperature feedback
Maximum continuous heat output
max,c - kW electronic heat charge control with room and/ or outdoor temperature feedback
0.75 kW Type of heat output/room temperature control
At minimum heat output el min
0.0 kW single stage heat output and no room
with mechanic thermostat room temperature control
with electronic room temperature control no electronic room temperature control plus day timer
electronic room temperature control plus week timer yes Other control options (multiple selections possible) room temperature control, with presence detection
room temperature control, with open window detection
with distance control option yes with adaptive start control no with working time limitation no with black bulb sensor no Contact details Chal-Tec GmbH, Wallstraße 16, 10179, Berlin, Germany32
0.9 kW manual heat charge control, with integrated
Minimum heat output (indicative)
0.0 kW manual heat charge control with room and/or
outdoor temperature feedback
Maximum continuous heat output
max,c - kW electronic heat charge control with room and/ or outdoor temperature feedback
0.9 kW Type of heat output/room temperature control
At minimum heat output el min
0.0 kW single stage heat output and no room
with mechanic thermostat room temperature control
with electronic room temperature control no electronic room temperature control plus day timer
electronic room temperature control plus week timer yes Other control options (multiple selections possible) room temperature control, with presence detection
room temperature control, with open window detection
with distance control option yes with adaptive start control no with working time limitation no with black bulb sensor no Contact details Chal-Tec GmbH, Wallstraße 16, 10179, Berlin, Germany33
Model identier(s): 10039839, 10039840, 10039841, 10039842 Item Symbol Value Unit Item Unit Heat output Type of heat input, for electric storage local space heaters only Nominal heat output P nom 1 kW manual heat charge control, with integrated thermostat
Minimum heat output (indicative)
0.0 kW manual heat charge control with room and/or
outdoor temperature feedback
Maximum continuous heat output
max,c - kW electronic heat charge control with room and/ or outdoor temperature feedback
0.0 kW single stage heat output and no room
with mechanic thermostat room temperature control
with electronic room temperature control no electronic room temperature control plus day timer
electronic room temperature control plus week timer yes Other control options (multiple selections possible) room temperature control, with presence detection
room temperature control, with open window detection
with distance control option yes with adaptive start control no with working time limitation no with black bulb sensor no Contact details Chal-Tec GmbH, Wallstraße 16, 10179, Berlin, Germany34
DISPOSAL CONSIDERATIONS If there is a legal regulation for the disposal of electrical and electronic devices in your country, this symbol on the product or on the packaging indicates that this product must not be disposed of with household waste. Instead, it must be taken to a collection point for the recycling of electrical and electronic equipment. By disposing of it in accordance with the rules, you are protecting the environment and the health of your fellow human beings from negative consequences. For information about the recycling and disposal of this product, please contact your local authority or your household waste disposal service. This product contains batteries. If there is a legal regulation for the disposal of batteries in your country, the batteries must not be disposed of with household waste. Find out about local regulations for disposing of batteries. By disposing of them in accordance with the rules, you are protecting the environment and the health of your fellow human beings from negative consequences.
DECLARATION OF CONFORMITY
Manufacturer: Chal-Tec GmbH, Wallstrasse 16, 10179 Berlin, Germany. Importer for Great Britain: Chal-Tec UK limited Unit 6 Riverside Business Centre Brighton Road Shoreham-by-Sea BN43 6RE United Kingdom The complete declaration of conformity of the manufacturer can be found at the following link: https://use.berlin/Artikelnummer35