TEM500W - Toaster WestBend - Free user manual and instructions
Find the device manual for free TEM500W WestBend in PDF.


| Product Type | Toaster with egg cooker and warming plate |
| Brand | WestBend |
| Model | TEM500W |
| Power Supply | 120 V AC, 60 Hz (polarized plug) |
| Power Consumption | Approximately 900 W (estimate) |
| Dimensions (approx.) | 30 x 20 x 25 cm (estimate) |
| Weight (approx.) | 1.5 kg (estimate) |
| Main Functions | Toaster (toast), egg cooking (soft-boiled, medium-boiled, hard-boiled), poaching eggs, combined egg + toast function, warming plate |
| Toaster Capacity | 2 slices of bread |
| Egg Cooker Capacity | Up to 4 eggs |
| Browning Control | Browning control lever (graduations) |
| Control Panel | Touch with buttons TOAST, EGG, EGG/TOAST, CANCEL |
| Included Accessories | Measuring cup with egg piercer, poaching tray, steam tray, warming plate, lid |
| Care and Cleaning | Wipe exterior with a damp cloth; wash accessories in hot soapy water (dishwasher safe, top rack); descaling with vinegar |
| Safety | Do not immerse, do not use outdoors, unplug after use, hot surface, risk of steam burns, do not use with aluminum foil-wrapped foods |
| Spare Parts and Repairability | Parts available via WestBend (www.westbend.com, customercare@focuspg.com, phone 866-290-1851); no user-serviceable parts |
| Warranty | 1-year limited (parts and labor), household use only, proof of purchase required |
| General Information | Household use only; optional registration at www.registerfocus.com; recipe book included |
Frequently Asked Questions - TEM500W WestBend
User questions about TEM500W WestBend
0 question about this device. Answer the ones you know or ask your own.
Ask a new question about this device
Download the instructions for your Toaster in PDF format for free! Find your manual TEM500W - WestBend and take your electronic device back in hand. On this page are published all the documents necessary for the use of your device. TEM500W by WestBend.
USER MANUAL TEM500W WestBend
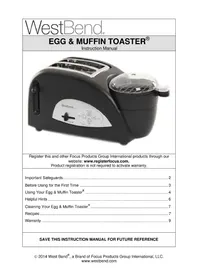
natural_image
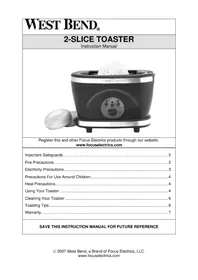
Black WestBend electric toaster with open lid and control panel (no visible text or symbols on body)Register this and other Focus Products Group International products through our website: www.registerfocus.com.
Product registration is not required to activate warranty.
Important Safeguards....2
Before Using for the First Time .... 3
Using Your Egg & Muffin Toaster ^® 4
Helpful Hints....6
Cleaning Your Egg & Muffin Toaster ^® 7
Recipes 7
Warranty....9
SAVE THIS INSTRUCTION MANUAL FOR FUTURE REFERENCE
IMPORTANT SAFEGUARDS

CAUTION
To prevent personal injury or property damage, read and follow all instructions and warnings.
When using electrical appliances, basic safety precautions should always be followed including:
- Read all instructions.
- Do not touch hot surfaces. Use handles or knobs.
- To protect against fire, electric shock, and injury to persons do not immerse cord, plugs, or other electric parts in water or other liquids.
- Close supervision is necessary when this appliance is used by or near children.
- Always unplug from outlet when not in use and before cleaning. Allow to cool before putting on or taking off parts and before cleaning.
- Do not operate any appliance with a damaged cord or plug, after the appliance malfunctions, or has been damaged in any manner. For service information see warranty page.
- The use of accessory attachments not recommended by Focus Products Group International may cause fire, electric shock, or injury.
- Do not use this appliance outdoors.
- Do not let cord hang over the edge of the table or counter, or touch hot surfaces.
- Do not place on or near a hot gas or electric burner, or in a heated oven.
- Attach plug to appliance first, then plug cord into wall outlet. To disconnect, turn any control to "OFF," then remove plug from wall outlet.
- Do not use appliance for other than intended use.
- Extreme caution must be used when moving an appliance containing hot oil or other hot liquids.
- Do not attempt to repair this appliance yourself.
- A short power-supply cord is provided to reduce risks resulting from becoming entangled in or tripping over a longer cord.
- Longer extension cords are available, but care must be exercised in their use. While use of an extension cord is not recommended, if you must use one, ensure that the marked electrical rating of the extension cord is equal to or greater than that of the appliance. If the plug is of the grounded type, the extension cord must be a grounding-type 3-wire cord. To avoid pulling, tripping or entanglement, position the extension cord so that it does not hang over the edge of the counter, table or other area where it can be pulled on by children or tripped over.
- This appliance has a polarized plug (one blade is wider than the other). To reduce the risk of electric shock, this plug is intended to fit into a polarized outlet only one way. If the plug does not fit fully into the outlet, reverse the plug. If it still does not fit, contact a qualified electrician. Do not attempt to modify the plug in any way.
- Do not use an outlet or extension cord if the plug fits loosely or if the outlet or extension cord feels hot.
-
Oversized foods, metal foil packages, or metal utensils must not be inserted in a toaster as they may involve a risk of fire or electric shock.
-
A fire may occur if the appliance is covered or touching flammable material, including curtains, draperies, walls, and the like, when in operation.
- Do not attempt to dislodge food when toaster is plugged in.
- Avoid toasting foods with frostings or fillings that may run or that are made with open fillings. Frostings and fillings can catch fire.
- Do not toast pastries, tarts and the like at any setting other than the lowest or lightest setting and never toast twice as these items can ignite if over-heated and cause fire.
- Failure to clean and replace crumb tray after each use may result in fire hazard.
- Lift and open the egg cooker lid carefully to avoid scalding.
- Do not attempt to operate the egg poacher without water in the reservoir.
• For household use only.
SAVE THESE INSTRUCTIONS

BEFORE USING FOR THE FIRST TIME
Please check all packaging material carefully before discarding. Accessory parts may be contained within the packaging material.
See "Cleaning your Egg & Muffin Toaster®" section of this manual.
Be sure the carriage lever is not in the locked down position before plugging in the cord.
Before placing any food items in the toaster slots, plug in the appliance, select the "TOAST" function and run an initial cycle. Make sure the toasting slots are free of any debris or packing materials. Press the carriage lever down until it locks in position. This initial toasting cycle will clean residue from the heating elements.
English - 3
Please note that a small amount of smoke and/or odor may occur upon heating due to the release of manufacturing oils - this is normal. Some minor expansion/contraction sounds may occur during heating and cooling - this is also normal.
CAUTION: Do not immerse any part of the base appliance (including the heating-tray) in water or any other liquid.
"TOAST" - Operates the toaster only.
“EGG/TOAST” - Operates the toasting and egg poaching/cooking functions together. Note: Bread will toast at the same time as the eggs cook. Toast will remain in the slots to keep warm until the eggs have completed cooking. When eggs are done, the toast will pop up.
“EGG”- Operates the egg function only.
“CANCEL” - Turns the appliance off at any time during the cooking cycle.
Toaster Only Function:
- Place the appliance on a clean, dry, flat surface.
- Place the food to be toasted into one or both of the slots.
- Select the desired level of darkness by adjusting the browning control lever.
- Plug the appliance into a 120 volt, AC electrical outlet only.
- Push the "TOAST" button on the touchpad. The "TOAST" button will flash, indicating the function is selected.
- Press the carriage lever down until it locks in position. The "TOAST" button will be illuminated to indicate the toasting cycle is in operation. Note: The carriage lever will not stay down if the appliance is not plugged into an electrical outlet.
- When the pre-selected browning level of toast is reached, the toast will automatically pop up and the "TOAST" light will turn off.
- To remove the toast from the toasting slots, push up on the carriage lever.
- Unplug the appliance from the electrical outlet after each use.
The “CANCEL” Function: Press the “CANCEL” button to stop the toasting cycle before it is finished. Do not pull up on the carriage lever to stop the toasting process, this may damage the appliance.
English - 4
Egg Poaching:
CAUTION: Use extreme care when operating the egg poacher as hot steam is released through the steam vent.
- Place the appliance on a clean, dry, flat surface and remove the lid and trays. Fill the measuring cup with water to the "soft" or "medium" line above the "POACHED EGG" mark and pour into the heating tray, or add 2 to 2 12 tablespoons of water into the heating tray.
- Place the steaming tray on top of the heating tray.
- We recommend applying a small amount of butter or oil to the poaching tray. Break an egg into the poaching tray and place the poaching tray on top of the steaming tray. If desired, break the egg yolk by poking it with a fork. The egg may also be scrambled.
- Place the lid on top of the steaming tray.
- Plug the appliance into a 120 volt, AC electrical outlet only.
- Push the "EGG" button on the touchpad. The "EGG" button will illuminate.
- When the poaching is complete, the light will turn off.
- Remove the poaching tray and lid. CAUTION: Remove the lid and tray carefully to avoid scalding.
- Unplug the appliance from the electrical outlet after each use.
Egg Cooking:
- Place the appliance on a clean, dry, flat surface and remove the lid and trays from the appliance.
- Select the cooked consistency and number of eggs to be cooked. This appliance can cook up to 4 eggs at a time. Use the provided measuring cup or the below chart, add the corresponding amount of water to the heating tray to achieve desired results.
- Place the steaming tray on the heating tray. Clean the eggs to be cooked by rinsing, then place them in the holes in the steaming tray.
- Place the lid on top of the steaming tray.
- Plug the appliance into a 120 volt, AC electrical outlet only.
- Push the "EGG" button on the touch pad. The "EGG" button will illuminate.
- When cooking is complete, the light will turn off.
- Remove the steaming tray and lid from the heating tray. CAUTION: Remove the steaming tray and lid carefully to avoid scalding.
- Unplug the appliance from the electrical outlet after each use.
| Boiled Egg | Soft | Medium | Hard | ||
| # of Eggs Tbsp. | Water Tbsp. Water | Water Tbsp. Water | |||
| 1 | 3^1/2 | 4^1/2 | 7 | ||
| 2 | 3^1/4 | 4^1/4 | 6^3/4 | ||
| 3 | 2^3/4 | 3^3/4 | 6^1/4 | ||
| 4 | 2^1/2 | 3^1/2 | 6 | ||
Egg & Toast Function (for breakfast sandwich):
- Place the appliance on a clean, dry, flat surface and remove the lid and trays from the appliance.
- Place the food to be toasted into one or both of the slots.
- Select the desired level of darkness by adjusting the browning control dial.
- Fill the measuring cup with water to the "soft" or "medium" line above the "POACHED EGG" mark and pour into the heating tray, or add 2 to 2 12 tablespoons of water directly into the heating tray.
- Place the steaming tray on top of the heating tray.
- We recommend applying a small amount of butter or oil to the poaching tray. Break an egg into the poaching tray and place the poaching tray on top of the steaming tray. If desired, break the egg yolk by poking it with a fork. The egg may also be scrambled.
- Place the warming tray on top of the poaching tray and add pre-cooked meat, if desired. Note: DO NOT use raw or uncooked meats in this appliance.
- Place the lid on top of the warming tray.
- Plug the appliance into a 120 volt, AC electrical outlet only.
- Push the "EGG/TOAST" button on the touchpad. The "EGG/TOAST" button will flash.
- Press the carriage lever down until it is locked in position. The "EGG," "TOAST," and "EGG/TOAST" buttons will illuminate. Note: Neither the egg cooking, or the toasting process will start until the carriage lever is locked down.
The Egg & Muffin Toaster ^® “EGG/TOAST” function enables synchronized toasting and egg cooking. The bread will toast to the color set by the browning control lever but will not pop up until the egg cycle has completed. The carriage will remain down, keeping the bread warm until the egg has completed cooking. - When both the egg cycle and toasting are complete, the appliance will automatically shut off and the toast will pop up. The “EGG,” “TOAST,” and “EGG/TOAST” button lights will no longer be illuminated, which signals the appliance has turned off.
- To remove the toast from the toasting slots, lift up on the carriage lever and remove the toast.
- Remove the lid and trays from the heating tray. Allow the remaining steam to dissipate. CAUTION: Remove the lid and tray carefully to avoid being scalded with steam.
- Unplug the appliance from the electrical outlet after each use.
HELPFUL HINTS
- Use caution when removing the trays from the toaster, steam will be released and could cause scalding.
- The egg cooker timing is controlled by the amount of water placed in the heating tray. The more water added, the longer the appliance will cook.
- We do not recommend using most non-stick cooking sprays in the poaching tray. If you do use a non-stick spray, be sure that it is a 100% oil cooking spray with no flours or binders.
-
If you have issues with breakage when hard boiling eggs, puncture each egg, after cleaning, with the egg piercer located on the bottom of the measuring cup, then place them in the steaming tray, hole side up. This will prevent the eggs from cracking and possible spillover.
-
Even pierced, there is still some possibility of egg expanding and leaking out of the shell. This is normal.
- This toaster does not have a bagel setting; both sides of the food being toasted will brown.
- Please note that many variables factor into making toast; moisture content and temperature of the bread, thickness, sugars and starches, and grains can all affect the browning of the bread when making toast.
- Wheat and whole grain breads tend to require longer toasting times. We recommend toasting somewhere between settings 3 and 5.
- When toasting, you may notice variations in toast color from side to side. This is normal, especially when toasting one slice of bread.
CLEANING YOUR EGG & MUFFIN TOASTER®
- Unplug the appliance from the electrical outlet and allow to cool completely before cleaning.
- Wipe down the exterior of the appliance with a damp cloth.
- Thoroughly wash the heating tray, steaming tray, poaching tray, warming tray, and the lid in warm, soapy water.
- The steaming tray, poaching tray, warming tray and the lid can be washed in the dishwasher when placed on the top rack.
- The heating tray may accumulate mineral deposits after use. To remove these deposits add 12 teaspoon concentrated vinegar and 12 cup water to the heating tray. With the lid in place, turn on the egg cooker function and allow the solution to boil for approximately 10 minutes. CAUTION: The water will be hot! After 10 minutes, press the “CANCEL” button, unplug the appliance, and let cool. When cooled, carefully dump out the remaining water, then wipe clean with a soft cloth.
CAUTION: Do not immerse any part of the appliance base (including the heating-tray) in water or any other liquid.
This appliance has no user serviceable parts.
RECIPES
Egg & Muffin Sandwich
1 English muffin
1 Poached egg
1 Slice of Cheddar cheese
1 Slice of pre-cooked Canadian Bacon, Ham, or Sausage Patty (optional)
To assemble: Lay the poached egg on top of the English muffin half followed by the pre-cooked meat and then the slice of cheese. Top the sandwich with the other half of the English muffin.
Eggs Benedict
2 English muffins, split and open
Salt and pepper to taste
4 Poached eggs
Hollandaise sauce to taste (see recipe)
4 Slices of pre-cooked Canadian bacon
To assemble: Lay a slice of Canadian bacon on top of each English muffin half followed by a poached egg. Season with salt and pepper. Spoon Hollandaise sauce over the eggs.
Hollandaise Sauce
2 Egg yolks
Pinch of salt
4 tbs. Heavy cream
Pinch of sugar
2 tbs. Butter
Chicken-broth (optional)
1 tbs. Lemon juice
Dash of hot sauce
1 tbs. White vinegar
Combine all ingredients except the white vinegar and chicken broth in the top of a double boiler, over boiling water. Stir until thick, about 3 minutes. Note: Do not reheat or cover the pot. Thin if needed with the chicken broth. Stir in the vinegar immediately.
Eggs Benedict with Chicken
Prepare Eggs Benedict as directed except omit the Canadian bacon. Cut one skinless, boneless chicken breast into bite-size strips. Add 2 tbs. cooking oil to a medium skillet; cook and stir for 2 to 3 minutes or until no longer pink. Assemble the Eggs Benedict as usual.
Eggs Florentine
2 English muffins, split and open
Steamed spinach leaves
4 Eggs
Hollandaise sauce
Salt and pepper to taste
To assemble: Prepare this just like the Eggs Benedict recipe but replace the Canadian bacon with the spinach leaves. Lay the spinach leaves on top of each English muffin half followed by a poached egg. Season with salt and pepper. Spoon Hollandaise sauce over the eggs.
Smoked Salmon (lox) Bagel
1 Toasted plain bagel (or any bagel you like)
Thin slices of lox (smoked salmon)
1 Tomato slice (optional)
Plain cream cheese
1 Onion slice
Capers
To assemble: Spread cream cheese on one half of the bagel. Add thin slices of smoked salmon on top of the cream cheese. Top with a slice of tomato and onion; sprinkle with capers. Spread the other half of the bagel with cream cheese and place on top.
PRODUCT WARRANTY
Appliance 1 Year Limited Warranty
Focus Products Group International, LLC (“the Company”) warrants this appliance from failures in the material and workmanship for one (1) year from the date of original purchase with proof of purchase, provided that the appliance is operated and maintained in conformity with the Instruction Manual. Any failed part of the appliance will be repaired or replaced without charge at the Company’s discretion. This warranty applies to indoor household use only.
This warranty does not cover any damage, including discoloration, to any non-stick surface of the appliance. This warranty is null and void, as determined solely by the Company, if the appliance is damaged through accident, misuse, abuse, negligence, scratching, or if the appliance is altered in any way.
THIS WARRANTY IS IN LIEU OF ALL IMPLIED WARRANTIES, INCLUDING WARRANTIES OF MERCHANTABILITY, FITNESS FOR A PARTICULAR PURPOSE, PERFORMANCE, OR OTHERWISE, WHICH ARE HEREBY EXCLUDED. IN NO EVENT SHALL THE COMPANY BE LIABLE FOR ANY DAMAGES, WHETHER DIRECT, INDIRECT, INCIDENTAL, FORSEEABLE, CONSEQUENTIAL, OR SPECIAL ARISING OUT OF OR IN CONNECTION WITH THIS APPLIANCE.
If you think the appliance has failed or requires service within its warranty period, please contact the Customer Care Department at (866) 290-1851, or e-mail us at customercare@focuspg.com. A receipt proving the original purchase date will be required for all warranty claims, hand written receipts are not accepted. You may also be required to return the appliance for inspection and evaluation. Return shipping costs are not refundable. The Company is not responsible for returns lost in transit.
Valid only in USA and Canada
REPLACEMENT PARTS
Replacement parts, if available, may be ordered directly from the Company several ways. Order online at www.westbend.com, e-mail customercare@focuspg.com, over the phone by calling (866)290-1851, or by writing to:
Focus Products Group International, LLC.
Attn: Customer Care Dept.
P. O. Box 53
West Bend, WI 53095
To order with a check or money order, please first contact Customer Care for an order total. Mail your payment along with a letter stating the model or catalog number of your appliance, which can be found on the bottom or back of the appliance, a description of the part or parts you are ordering, and the quantity you would like. Your check should be made payable to Focus Products Group International, LLC.
Your state/province's sales tax and a shipping fee will be added to your total charge. Please allow two weeks for processing and delivery.
This manual contains important and helpful information regarding the safe use and care of your product. For future reference, attach dated sales receipt for warranty proof of purchase and record the following information:
Date purchased or received as gift: ____
Where purchased and price, if known: ____
Item number and Date Code (shown bottom/back of product): ____
WestBend®
natural_image
Black WestBend electric toaster with open lid and control panel (no visible text or symbols on device body)Focus Products Group International, LLC.
Attn: Customer Care Dept.
P. O. Box 53
West Bend, WI 53095
natural_image
Black WestBend electric toaster with a digital display and control buttons (no visible text or symbols on the device body)Focus Products Group International, LLC.
- SAVE THIS INSTRUCTION MANUAL FOR FUTURE REFERENCE
- IMPORTANT SAFEGUARDS
- CAUTION
- To prevent personal injury or property damage, read and follow all instructions and warnings.
- SAVE THESE INSTRUCTIONS
- BEFORE USING FOR THE FIRST TIME
- Toaster Only Function:
- Egg Poaching:
- Egg Cooking:
- Egg & Toast Function (for breakfast sandwich):
- HELPFUL HINTS
- CLEANING YOUR EGG & MUFFIN TOASTER®
- This appliance has no user serviceable parts.
- RECIPES
- Egg & Muffin Sandwich
- Eggs Benedict
- Hollandaise Sauce
- Eggs Benedict with Chicken
- Eggs Florentine
- Smoked Salmon (lox) Bagel
- PRODUCT WARRANTY
- Appliance 1 Year Limited Warranty
- Valid only in USA and Canada
- REPLACEMENT PARTS
- WestBend®
Brand : WestBend
Model : TEM500W
Category : Toaster