We. SEE - Television LOEWE - Free user manual and instructions
Find the device manual for free We. SEE LOEWE in PDF.



| Brand | Loewe |
| Model | We. SEE |
| Product type | OLED TV |
| Power supply | 220-240 V, 50/60 Hz |
| Operating system | VIDAA OS |
| Screen resolution | 4K Ultra HD |
| Connectivity | Wi-Fi, Ethernet, Bluetooth 5.0 |
| HDMI ports | 4 HDMI inputs (including 1 with eARC) |
| USB ports | 2x USB 2.0, 2x USB 3.0 |
| Audio output | Optical (TOSLINK), 3.5 mm headphone jack |
| Voice control | Alexa support, built-in microphone |
| Remote control | Bluetooth, backlit keys |
| Recording | On external USB hard drive (DR+) |
| VESA standard | 400 x 400 mm (Loewe adapter screws required) |
| Data protection | TÜV Rheinland certified, minimal collection |
| Screen maintenance | Soft, damp cloth, no abrasive products |
| Safety instructions | Do not open the rear panel, risk of electric shock |
| After-sales service | Loewe Technology GmbH, tel. 00 800 94 99 71 |
| Operating temperature | Dry indoor, 10°C to 35°C |
| Standby consumption | Very low (eco-standby) |
Frequently Asked Questions - We. SEE LOEWE
User questions about We. SEE LOEWE
0 question about this device. Answer the ones you know or ask your own.
Ask a new question about this device
Download the instructions for your Television in PDF format for free! Find your manual We. SEE - LOEWE and take your electronic device back in hand. On this page are published all the documents necessary for the use of your device. We. SEE by LOEWE.
USER MANUAL We. SEE LOEWE
EN Extended operating instructions
Common Interface (CI/CI Plus)....40
Conditional Access Modul (CA Modul) 40
VESA Standard 41
Hotel-Modus 42
Software Update....44
Impressum 45
natural_image
Diagram of hands operating a mechanical device with arrows indicating motion (no text or symbols)natural_image
Technical line drawing of an electrical circuit board with no visible text or symbolsnatural_image
Pure electrical circuit lines without any symbolsCommon Interface (CI/CI Plus)
natural_image
Line drawing of a table with cylindrical objects and directional arrows indicating movement or assembly (no text or symbols)
① ANT SAT – Satellitenantenne
DVB-S/S2 HD
F-Buchse - 75 Ohm / 13/18 V / 500 mA
② ANT TV - Terrestrisch/Kabel
analog / DVB-T/T2/CHD
Dolby, Dolby Vision, Dolby Atmos, Dolby Audio, and the double-D symbol are registered trademarks of Dolby Laboratories Licensing Corporation. Manufactured under license from Dolby Laboratories.
Confidential unpublished works. Copyright © 2012-2020 Dolby Laboratories. All rights reserved.
dts HD.
For DTS patents, see http://patents.dts.com. Manufactured under license from DTS, Inc. (for companies headquartered in the U.S./Japan/Taiwan) or under license from DTS Licensing Limited (for all other companies). DTS, DTS-HD, and the DTS-HD logo are registered trademarks or trademarks of DTS, Inc. in the United States and other countries. © 2020 DTS, Inc. ALL RIGHTS RESERVED.

Bluetooth®
I oewe Technology GmbH,
Customer Care Center
Industriestraße 12
96317 Kronacn
Germany
Tel: 49 9261 99 500
F-Mail: ccc@loewe.de
www.loewe.lv
AUS
INDIMPORTS P/L
142 Bell Street Preston
3072 Victoria
Australia
Tel+61394167037
E-Mail info@ndimports.com
BE NL LU
Loewe Opta Benelux NV/SA
Lilenbaan 84
2160 Wemmec gem
Belgium
Tel:32 3 2/09930
E-Mail: ccc@loewe.be
CH
Telon AG
Rutistrasse 26
8952 Schlieren
Switzerland
Tel: 41-447321511
E-Mail: infoKD@telcn.ch
CY
Hajkyiakes & Sons Ltd.
121 Prodromos Str.
2064 Strovolos/Nicosia
Cyprus
Tel+357-77777007
F-Mail.service@hadjkyriakos.com.cy
CZ PL HU SK RO
HR LV LT EE
ASBIS POLAND SP 70.0
LI.M.SLOWKOWSKIEGO810
IDEAL IDEA CITY PARK - BUDYNEK +4
05-090 RASZYN
POLAND
Tel: +48 507 607 506
E-mail: serwis@ccwc@asbispoland.com
DK NO SE FI
Nordio Agency ApS
Industrivej 2
I owe Technology UK limited
1 Langlands Cour, Glasgow
S/50YB
UK
Tel: 0808-1697926
E Mail: service.gb@loewe.de
GH
Hashcom Ghana Limited
Atlantic Tower,
Airport Accre.
Ghana
Tel:+233 24 408 8621
Tel.: 1233 50 133 9802
L Mail: ceo@hashcomsoftware.com
F-Mail info@hascomsoftware.com
GR
Issagog ki Frimbori F lados S A
321 Mesogion Av.
152 31 Chalandri-Athens
Greece
Tel 130 2106/21200
E-Mail: christina_argyrepoulou@isembelgr
ID
P.V2 INDONESIA
Greenlake City Ruko Wall Street RXORIO
J. Kresek Raya, Duri Kosambi - Jakarta Barat 11/50
Tel: +622129018127
IN
Savvy India
No.81 Pr ksha Building 2nd Floor
1st Temple Street. Between 10th &
11th Cross. Malleswaram,
Banga cre 560 003
560073
India
Tel +91-7760928674
E Mail: tech@savvyind a.in
www.savvyincia.in
IRL
Loewe Technology UK - railed
1 Langlands Court, Glasgow
C/50YB
UK
Tel.: 1800-849060
E Mail: service.ie@loewe.de
IT
InSpeedy
Via Finaudi 2
20832 Desio (MB)
Italy
Tel 00 800 69 30 8
E Mail: loewe@inspeedy.com
KZ
PROVISION Ltd
Aimaly, sl. Salpaev 90/1 Office 200
050046
Kazakhstan
Tel:+77004529046
E-mail: ocorul@gmail.com
www.loewety.kz
NG
Couteigh Investment Limited
3A Karimu Ko.un Street
VICTORIA ISLAN, LAGOS
Nigeria
Tel: +234 802 306 1090
12348057139999
E mail: customercare@loewe.ng
www.locwcng
PT
Gaplasa S.A.
Parque Suècia
Avda. col Forte. 3
Shopping center "RYSGALLY"
74400C ASHGARAT
Moo. 993 65 68/740
Tel. +99360197-197
E-Mail: info@preslugechorne-lm.com
www.prestigehome.tm.com
TR
About this user manual....53
Data Protection....54
Safety/Warning 55
Remote control 58
Remote control button mapping....59
Remote control button mapping....60
Remote control button mapping....61
Pairing of the remote control / Bluetooth....62
Programming various audio devices....63
Connecting the TV set....64
Connecting the soundbar klang bar i....64
Connecting antennas....64
Connecting an external device via HDMI cable 65
Connecting to an audio system via HDMI eARC 65
Connecting to an audio system via optical audio cable....65
Connecting to an audio system via analogue audio cable....66
Connecting to the mains supply....66
Headphones....66
Meaning of the LED colours....67
External 4k players ....67
Getting started - first steps....68
Channel list menu 70
Electronic Programme Guide – EPG 71
Channel list....72
Main menu 75
VIDAA account....81
Voice control with Alexa....81
Recording to external HDD or USB 82
Recording 82
Teletext 86
HbbTV 86
Common Interface (CI/CI Plus)....87
Conditional Access module (CA module)....87
VESA standard....88
Hotel mode....89
Software Update....91
Technical information....92
Imprint 93
Conformity / Manufacturer's declaration....94
Environment....95
Disposal 95
Licences 96
Service 97
Disclaimer
The screen graphics shown are only exemplary. Depending on the device type, the available hardware/software components may differ.
All information in this document is correct at the time of going to press. Due to the ongoing development of TV sets and software, deviations between the TV set and the user manual are possible.
No claims can be derived from the different information, illustrations or descriptions.
The information in this document is subject to change without notice and does not represent any obligation on the part of Loe-we Technology GmbH.
All rights reserved, including those of translations, technical changes and errors.
Many Thanks
for choosing Loewe and placing your trust in us.
With Loewe, you have not only chosen a modern and technically innovative television, but also a timeless design, razor-sharp picture quality, brilliant sound for enjoying movies and music, and intuitive operation with the Loewe remote control, smartphone or tablet. In short: Loewe stands for perfect home entertainment.
We hope you enjoy premium home entertainment from Loewe and look forward to welcoming you as a customer.
Many features, one result: perfect home entertainment.
Simply more entertainment.
The Loewe os user interface is intuitive and graphically optimised.
So you can quickly find the content you want - from TV to online.
See chapter: Home.
Perfectly networked.
Thanks to numerous connections, your Loewe TV becomes your entertainment centre.
Connect it to the Internet, DVD/Blu-Ray players, external speakers and much more.
Hard disk for your TV archive.
Record the TV programme or pause it and resume it at a later time.
Depending on the type of set, record to an externally connected USB hard disk or to the hard disk built into the TV set.
With DR+ (Digital Recording), this is no problem for your Loewe TV.
See chapter: Recordings.
Your contact.
We will be happy to help you with any questions you may have about your Loewe product.
You can reach the Customer Care Center at GB: 07799 470903 IRL: 1800-849060.
Service hours: Mon-Fri from 9:00-17:00.
Position of the label
You will find the label with the model number and the operating voltage on the back of the television.
About this user manual
In the interest of safe and long-term trouble-free use of the set, please read the chapter Safety Instructions/Warning before operating the TV set.
This user manual can be used for all current Loewe bild and We. By Loewe TV sets. The features and functions of your TV set vary depending on the type of set.
Features may be described which your TV set may not have or which are only available in certain countries.
The chapter Technical data is divided into device lines and provides information about the features of your TV set. If there are differences in the functional descriptions, please refer to the chapter Technical Data.
With the aid of the item number of your TV set, you can assign the appropriate technical data to your TV set in the unit overview, see chapter Technical data, section Unit overview.
You will find the article number of your TV set on the type plate on the back of the set or in the TV menu under System settings Extras -> Equipment of the TV -> Hardware.
The Glossary chapter provides explanations of certain terms used in the TV set and in the user manual.
Paragraphs beginning with the symbol indicate important notes, tips or prerequisites for the following settings.
Terms which you will find in the menu or printed on the remote control or the TV set are printed in bold type in the text.
In the descriptions, the required operating elements are arranged to the left of the text containing the instructions for action.
Depending on the additional devices connected, the menus in the TV set may differ from those described here. The screen graphics shown are only exemplary. The hardware/software components available may differ depending on the type of set and/or the software version.
All channel names, programme contents and the photos, music titles, albums and album graphics shown in this user manual are given as examples.
In addition to the remote control, a PC keyboard can be connected to one of the USB ports of your TV set and used to operate the TV set.
This symbol indicates places in the user manual where the use of a keyboard would be particularly useful. would be particularly useful.
Note: This user manual is designed to be printable, but is not intended primarily for that purpose. Rather, it is intended to point out new features or software adjustments quickly and without delay and to provide you with a source of information that is always as up-to-date as possible. While print editions are always bound to editions and print deadlines, information in this document can flow in almost real time. For this purpose, the manual grows continuously and according to demand.
Data Protection
For proper operation, the software of your Loewe TV uses personal data. This is naturally handled with the utmost care and confidentiality in accordance with the applicable legal system. This has been confirmed and certified to Loewe Technology GmbH by the internationally active, independent testing service provider TÜV Rheinland Group (TÜV Rheinland).

Loewe focuses on user data protection and adheres to the principle of "minimal data collection" in order to reduce it to the bare minimum.
We take data protection concerns seriously and want to ensure that privacy is protected when using our devices and websites. We have therefore created privacy statements explaining how we handle data. We reserve the right to adapt the content from time to time. It is therefore advisable to take note of our information on data processing again at regular intervals.
The data protection statements shown when setting up the device for the first time or when visiting a Loewe website explain the facts in detail. To ensure optimum use of all software features and functions, consent is required.
Safety/Warning
For your safety, and to avoid unnecessary damage to your unit, please read and follow the safety instructions below.
Key

This symbol indicates risks caused by high voltages.

This symbol is to alert the user to other, more specific risks.

This symbol indicates dangers caused by the development of fire.

This symbol indicates dangers caused by sharp edges.
Do not remove set rear panel
Warning: When opening or removing the rear panel, there is the danger of electric shock and the risk of serious injury from high voltages.

ATTENTION ELECTRIC SHOCK DANGER - DO NOT OPEN

Never open the rear panel yourself. Leave repairs and servicing work on your TV set to qualified, authorised television technicians.
Please contact your dealer or our customer service.
Intended use and environmental conditions

This TV set is intended exclusively for the reception and playback of picture and sound signals.
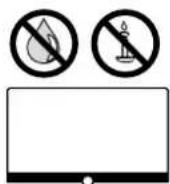
The TV set is designed for dry rooms (living rooms and office spaces). It must not be used in rooms with a high level of humidity (e.g. bathroom, sauna) or outdoors.

When using the set, make sure that it is protected from moisture (dripping and splashing water or condensation).
High humidity and dust concentrations lead to power leaks in the set. This can lead to danger of injury and damage to the set by electric tensions or a fire.
If you've brought the set from the cold into a warm environment, leave it off for around an hour due to the formation of condensation. Do not place objects filled with liquid over the set. Protect the set from dripping and splashing water.
Candles and other open flames must be kept away from the set at all times to prevent the fire from spreading.
The materials we used in this device comply with all regulatory requirements. However, the migration of substances cannot be ruled out. We therefore suggest you avoid permanent contact between food and the TV set.
Transport

Improper handling during transportation can lead to damage to the display and risks of injury.
The screen consists of glass or plastic and can break if handled improperly.

At least two people are required to transport the set. Only transport the set in a vertical position.
No pressure should be applied to the glass or the plastic during transport.
The correct unpacking of the set is shown in the operating manual 1.
To avoid damaging the mechanical structure of the TV set and the floor stand, remove the TV set from its base and move the two parts separately. When the TV set is set up in its new location, at least 2 people are required to reassemble it.
Mains cable/power supply

Unplug the power cord immediately from the mains socket if you notice something unusual, or the unit shows recurring malfunctions. Incorrect voltages can damage the set.

This set may only be connected to a mains power supply with the voltage and frequency indicated on the rating plate using the enclosed mains cable.
The mains power plug of the TV set must be easily accessible so that the set can be disconnected from the mains at any time.
When pulling the mains power plug out, do not pull the cable but the plug housing. The cables in the mains power plug could be damaged and cause a short circuit when plugged in again.
A mains power cable with a damaged insulation can lead to electric shock and presents a fire hazard. Never use a damaged mains cable.
Lay the mains cables so that they cannot be damaged. Do not tread on the mains cable.
The mains cable must not be kinked or laid over sharp edges.
If you use a portable multiple socket to connect the TV set, do not cascade several multiple sockets consecutively.
Air circulation and high temperatures

Like any electronic device, your TV set requires air for cooling. If air circulation is impeded, it may result in a fire.
The ventilation slots on the rear panel of the set must therefore remain free. Please do not cover the set.
Wall mounting: Leave at least 10 cm of space all around the set at the side, above and below.
Table / stand foot: Leave at least 10 cm clear space around the set at the side and at the top.

natural_image
Two identical rectangular diagrams with dimension arrows, enclosed in a dashed square border (no text or symbols)Foreign bodies

Foreign bodies inside of the set can lead to short circuits and fires.
Danger of injury and damage exists.

Therefore avoid metal parts, needles, paper clips, liquids, wax or similar passing through the ventilation slits of the rear panel into the interior of the set.
Should something get into the interior of the appliance, immediately pull out the mains power plug of the set and inform the customer service department for checking.
Installation

Never place a television set in an unstable location. A television set may fall, causing serious personal injury or death. Many injuries, particularly to children, can be avoided by taking simple precautions such as:
- Using cabinets or stands recommended by the manufacturer of the television set.
- Only using furniture that can safely support the television set.
- Ensuring the television set is not overhanging the edge of the supporting furniture.
- Not placing the television set on tall furniture (for example, cupboards or bookcases) without anchoring both the furniture and the television set to a suitable support.
- Not placing the television set on cloth or other materials that may be located between the television set and supporting furniture.
- Educating children about the dangers of climbing on furniture to reach the television set or its controls.
If the existing television set is going to be retained and relocated, the same considerations as above should be applied.
Loewe TV sets are specified for Loewe accessories. We strongly recommend the use of original Loewe setup solutions.
Note the instructions regarding the mounting for the different possible setup solutions! A corresponding documentation is included with every Loewe product.
Check before the installation of the set, whether the final location with regard to the surface (pressure sensitivity) and stability (static) is designed for the load from the set! This applies in particular to high-gloss lacquered surfaces and surfaces made of real wood, real wood veneer and plastic surfaces.
The usual usage position of the TV set should be followed. The TV set can only be operated horizontally upright(A). The inclination can amount to a maximum of 10 degrees for wall mounting (B). The TV set must never be operated in portrait orientation, (C), horizontal (D) or overhead on the ceiling (E).

Position the set so that it is not exposed to direct sunlight and additional heating from radiators!
Do not place the TV in a location where vibrations can arise! This can lead to damage.
In the case of setup solutions for third-party manufacturers with a motor drive, it is to be ensured that the adjustment of the TV set does not occur manually. It is generally not advisable to use the installation options of other manufacturers with locking devices in certain positions.
When using accessories from third-party manufacturers, please ensure that you can adjust the TV set easily to the respective setup solution.
When adjusting the TV set, ensure that the pressure applied to the set frame is not too great. Especially in large format displays, there is the danger of damaging the display.
The mounting of a TV set on a holder according to the VESA standard requires mandatory use of the Loewe VESA adapter bolts. Otherwise, damage to the TV may result.
The Locwe VESA adapter bolts must be attached to the TV set with a torque of approx 4 Nm. You can obtain these from your Locwe dealer (you can find further information found in the online user handbook).
Make sure that after unpacking and setting up the TV set the packaging material does not fall carelessly into the hands of children.
Please also note the disposal instructions for packaging and carton (see chapter Environment/Disposal/Licences).
Supervision

Do not let unsupervised children handle the TV set nor let them play in the immediate vicinity of the TV set!
The set could be knocked over, moved or pulled down from the stand surface and injure people.

Do not leave the TV set unattended when switched on!
Volume

Loud music can lead to hearing damage. Avoid extreme sound volume, especially over extended periods of time and when using headphones!
Thunderstorms

Electrical surges due to lightning strike can damage the set both via the antenna system and via the mains power supply.
During thunderstorms, pull out the mains power plug and all connected antenna cables from the TV set!
If you have connected a network cable to the LAN port, remove this as well!
Even in the case of prolonged absence, the mains power plug and all connected antenna cables should be disconnected from the TV set.
Cleaning and care/chemicals

Disconnect the TV from the mains before cleaning!
Damages caused by chemicals can lead to adverse effects and development of fire.
Never expose the set or accessories to aggressive (e.g. corrosive) chemicals such as alkalis or acids!
Only clean the TV set, the front screen and the remote control with a damp, soft, clean and colour neutral cloth, without any aggressive or scouring cleaning agents!
The loudspeaker panel of your TV set is textile-covered. Hooverthe surface regularly with a soft brush attachment!
For contaminations or stains:
Moisten a soft, colour neutral cloth with detergent solution or commercially available stain remove and rub the stain gently away! You can also treat the stain directly with a commercial dry stain remover spray (hoover up the dust).
Do not moisten the covering fabric directly with detergent solution or stain remover (risk of stain circle formation)! Do not use solvents to clean the fabric!
Note the usage instructions of the manufacturer when using stain remover!
When cleaning loudspeaker panels which have been exposed to nicotine, there is an increased risk of stain circle formation.
Remote control
Preparing the remote control
Removing the battery protection

The remote control is supplied with batteries. To make them ready for use, remove the plastic flag as shown below.
Inserting or replacing batteries
Press and slide open the battery compartment cover on the top of the remote control.
Only use leak-proof micro-cells of the LR 03 (AAA) Alkali-Manganese type. Do not use different types of batteries and do not mix old and new batteries together.
Make sure that the batteries do not get into the hands of children. The batteries used must not be exposed to excessive heat such as sunlight, fire or similar!
Note: The position of the batteries is indicated in the battery compartment (in opposite directions). Pay attention to the correct polarity of + and - when inserting the batteries. Do not be guided by the battery contacts (springs), but by the illustration at the bottom of the battery compartment.

Dispose of used batteries in an environmentally friendly way (see chapter Environment/Legal information).
Push the cover back on after having inserted the batteries.
Remote control button mapping
Depending on the application (TV / video / audio / photo / apps) and function (for example, dr+, EPG, PIP, Teletext, HbbTV etc.), the key assignment can deviate from the assignment described here.

① Microphone
② Sound mute / on.
③ Call the TV mode.
④ Press and hold to speak to voice assistant.
⑤ EPG (Electronic Programme Guide) on / off.
⑥ Pressing briefly: Play / Pause media or Start / Pause / Continue the timeshift television.
Pressing longer: Display illuminated media control keys.
⑦ Teletext / MediaTek on / off.
⑧ Exit displayed menu / application.
⑨ Increase volume.
⑩ When not illuminated: Call channel list.
When illuminated: Play / Pause media or Start / Pause / Continue the timeshift television.
In the menu: Confirm selection
⑪ When not illuminated: Move left in menu or Start / Pause / Continue the timeshift television.
When illuminated: Skip backwards
⑫ When not illuminated: Move down in menu or open the Search menu. When illuminated: Stop / End timeshift (return to live image).
⑬ Decrease volume.
⑭ Colour buttons - Execute corresponding function at that time.
⑮ Access the media and video on demand.
⑯ Switches the TV set on or switches to standby mode.
Press briefly while TV set is switched on: TV set and all CEC-enabled devices connected to the HDMI ports will be switched off to standby (System Standby).
⑰ Call the Audio mode.
⑱ Select channels with numeric buttons directly.
⑲ Call Sources menu.
20 Pressing briefly: Call System settings.
Pressing longer: Initiate Bluetooth pairing, making the TV visible to other Bluetooth devices.
②1 Call up the Home menu.
②2 Step / level back in the menu. While watching TV, switch to the previously watched channel.
②3 Next channel.
24 When not illuminated: Move up in the menu.
While watching TV, press to call the detailed information on the broadcast.
When illuminated: Opens Record menu.
25 When not illuminated: Move right in the menu or Pause the timeshift playback and open timeshift controls.
When illuminated: Skip forwards
26 Previous channel.
Remote control button mapping
Depending on the application (TV / video / audio / photo / apps) and function (for example, dr+, EPG, Teletext, HbbTV etc.), the key assignment can deviate from the assignment described here.

① Microphone
② Sound mute / on.
③ Call the TV mode.
④ Press and hold to speak to voice assistant.
⑤ EPG (Electronic Programme Guide) on / off.
⑥ Pressing briefly: Play / Pause media or Start / Pause / Continue the timeshift television.
Pressing longer: Display illuminated media control keys.
⑦ Call Sources menu.
⑧ Exit displayed menu / application.
⑨ Increase volume.
⑩ When not illuminated: Call channel list.
When illuminated: Play / Pause media or Start / Pause / Continue the timeshift television.
In the menu: OK button (confirm selection).
11 When not illuminated: Move left in menu or Start / Pause / Continue the timeshift television.
When illuminated: Skip backwards
⑫ When not illuminated: Move down in menu or open the Search menu. When illuminated: Stop / End limeshift (return to live image).
⑬ Decrease volume.
⑭ Colour buttons - Execute corresponding function at that time.
⑮ Access the media and video on demand.
16 Switches the TV set on or switches to standby mode.
Press briefly while TV set is switched on: TV set and all CEC-enabled devices connected to the
HDMI ports will be switched off to standby (System Standby).
⑰ Device key. This button allows you to control other devices with the Loewe remote control.
⑱ Select channels with numeric buttons directly.
⑲ Teletext / MediaTek on / off.
20 Pressing briefly: Call System settings.
Pressing longer: Pairs the remote control with the TV via Bluetooth.
21 Call up the Home menu.
② Step / level back in the menu. While watching TV, switch to the previously watched channel.
②3 Next channel.
24 When not illuminated: Move up in the menu.
While watching TV, press to call the detailed information on the broadcast.
When illuminated: Opens Record menu.
25 When not illuminated: Move right in the menu or Pause the timeshift playback and open timeshift controls.
When illuminated: Skip forwards
26 Previous channel.
Note: The key assignment may differ depending on the software or device version.
Remote control button mapping
Depending on the application (TV / video / audio / photo / apps) and function (for example, EPG, Teletext, HbbTV etc.), the key assignment can deviate from the assignment described here.

① Microphone
② Sound mute / on.
③ Call the TV mode.
④ Press and hold to speak to voice assistant.
⑤ EPG (Electronic Programme Guide) on / off.
⑥ Pressing briefly: Play / Pause media or Start / Pause / Continue the timeshift television.
Pressing longer: Display illuminated media control keys.
⑦ Teletext / MediaTek on / off.
⑧ Exit displayed menu / application.
⑨ Increase volume.
10 When not illuminated: Call channel list.
When illuminated: Play / Pause media or Start / Pause / Continue the timeshift television.
In the menu: OK button (confirm selection).
11 When not illuminated: Move left in menu or Start / Pause / Continue the timeshift television.
When illuminated: Skip backwards.
⑫ When not illuminated: Move down in menu or open the Search menu. When illuminated: Stop / End timeshift (return to live image).
⑬ Decrease volume.
⑭ Colour buttons - Execute corresponding function at that time.
⑮ Access the media and video on demand.
16 Switches the TV set on or switches to standby mode. Press briefly while TV set is switched on: TV set and all CEC-enabled devices connected to the HDMI ports will be switched off to standby (System Standby).
⑰ Call the Audio mode.
⑱ Select channels with numeric buttons directly.
⑲ Call Sources menu.
20 Pressing briefly: Call System settings.
Pressing longer: Pairs the remote control with the TV via Bluetooth.
②1 Call up the Home menu.
Step / level back in the menu. While watching TV, switch to the previously watched channel.
②3 Next channel.
24 When not illuminated: Move up in the menu.
While watching TV, press to call the detailed information on the broadcast.
When illuminated: Opens Record menu.
25 When not illuminated: Move right in the menu or Pause the timeshift playback and open timeshift controls.
When illuminated: Skip forwards.
26 Previous channel.
Pairing of the remote control / Bluetooth


You can connect your remote control to the Loewe TV via Bluetooth standard. To do this, press and hold the Menu button at least three seconds. Observe the screen displays for successful pairing.
To unpair, visit the menu and then select: Settings -> Network -> Bluetooth -> Equipment Management. There, select Smart TV Remote and press the Unpair button.
Programming various audio devices
The TV set can be paired with various audio devices by programming the remote control.
To do this, simply press and hold the TV key ③ or the audio key ⑰ and one of the number keys for at least three seconds.
The LED above the TV or audio key then flashes twice to confirm successful programming.
To activate the control pad (keys ⑩, ⑪, ⑫, ⑲, ㉑, ㉒) for controlling external players with their own play/pause button, press and hold the play/pause button ⑥ for at least three seconds. The control pad is illuminated for confirmation.
Note: Permanent recording by the built-in microphone does not take place. The microphone is only activated to use the voice control and does not remain permanently on reception.
TV and Audio device are programmable. This is done by pressing the TV key +
| Device number | Device name Key combination and reference | |
| 1 | SL7 TV | TV + 0 |
| 2 | SL1/2/3/4/5 TV | TV + 6 |
| 3 Audio device (sound bar) AUDIO + 0 | (default device at AUDIO key) | |
| 4 Loewe | Blu-Ray player AUDIO + 1 | |
| 5 | Audio device (klang s1 - s3) | AUDIO + 2 |
| 6 | Audio device (klang mr - RC5) | AUDIO + 3 |
| 7 | Audio device (RC5) | AUDIO + 4 |
| 8 | Audio device (gaming RCU - NEC) | AUDIO + 5 |
| 9 Audio device (NEC) AUDIO + 6 | ||
Connecting the TV set
Before making any connections to an external devices, make sure both TV set and device are disconnected from power. Most TV connectors are hidden under the back cover. To access these connectors, you must remove the back cover by pulling the top and bottom parts away as shown in the illustration. Both parts are held in place only by magnets, so there is no need to use any tools or remove screws.

natural_image
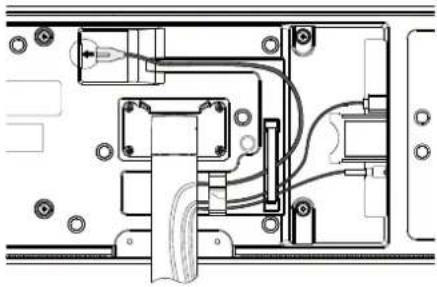
Diagram of a hand operating a mechanical device with arrows indicating motion (no text or symbols)When connecting external devices to these internal connectors, first connect the cable to the connector on the TV set. Then route the cable out of the TV using the built-in cable management system, and then route the cable through the neck of the stand (in case you use provided Table stand solution).
natural_image
Technical line drawing of a mechanical assembly with no visible text or symbolsWhen you have finished connecting external devices to the TV, replace the back cover.
Connecting the soundbar klang bar i
bild i set variants are provided with a klang bar i soundbar. Alternatively, you can buy a klang bar i as optional component for your standard bild i TV. klang bar i soundbar is provided in a separate carton box, where you will also find detailed assembly instructions. Follow these instructions to install the soundbar on the TV.
Connecting antennas
Terrestrial / cable analogue /
DVB-T/T2/C HD antenna:
Plug the cable of antenna, cable TV system or room antenna into the ANT TV socket.
If you want to use analogue cables/DVB-C connection and a DVB-T antenna together, use an external antenna switch (available from your dealer).
Satellite antenna DVB-S/S2 HD:
Connect a connecting cable from the from the LNB to the ANT SAT socket of the TV set.

Connecting an external device via HDMI cable
The HDMI connections (High Definition Multimedia Interface) allow the transmission of digital video and audio signals from a player (e.g. DVD player, Blu-ray player, camcorder, set-top box) via a single cable.
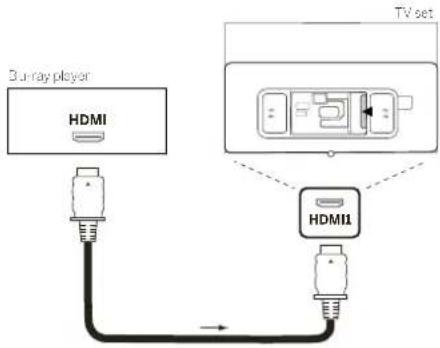
Connect the device by an HDMI cable with a Type A connector (not supplied) to one of the HDMI sockets of the TV set. To fully enjoy the capabilities of your TV, use a cable labelled „Premium High-Speed HDMI Cable” or better.
Connecting to an audio system via HDMI eARC

Use an HDMI cable (not supplied) to connect HDMI eARC socket of the TV set to the HDMI ARC/eARC socket of an audio system or soundbar. It is recommended to use a cable marked as „Ultra High-Speed HDMI Cable” with a Type A connector.
Ultra High Speed HDMI Cables are designed to support the new eARC feature in addition to the highest resolution video modes. The Standard HDMI Cable with Ethernet and the High Speed HDMI Cable with Ethernet will also support eARC.
Connecting to an audio system via optical audio cable
For this type of connection, you will need to use a digital optical cable (not supplied) with a Mini TOSLINK connector on one end and a standard TOSLINK connector on the other end. Alternatively, you can use standard TOSLINK cable with a Mini TOSLINK adapter.
Before making this connection, ensure you removed plastic protection caps from the cable connectors.

flowchart
graph TD
    A["Audio System"] --> B["Optical"]
    B --> C["TV set"]
    C --> D["AUDIO OUT/ TOSLINK"]
    D --> E["Power Supply"]
    style A fill:#f9f,stroke:#333
    style B fill:#ccf,stroke:#333
    style C fill:#cfc,stroke:#333
    style D fill:#fcc,stroke:#333
Connect the audio output of the TV labelled AUDIO OUT TOSLINK to the digital audio input of an audio system.
Connecting to an audio system via analogue audio cable

Use a stereo cinch/jack adaptor cable to connect the audio output AUDIO OUT TOSLINK to the analogue audio input of the audio system.
Connecting to the mains supply
Connect the TV set to a 220-240V mains socket.
Plug the mains supply cable into the mains supply connector (AC IN) of the TV and guide the cable out of the TV as shown on the picture below.

natural_image
Pure electrical circuit lines without any symbolsConnect the mains supply plug of the mains supply cable to a power outlet.
Headphones
Connecting wired headphones
To connect wired headphones to the TV, connect them to the 3.5mm audio output, labelled "AUDIO OUT" or "AUDIO OUT/TOSLINK".
Connecting Bluetooth headphones
Press (idmenu) button and go to [Settings] -> [Network] -> [Bluetooth].
Ensure that [Bluetooth] menu item is turned on.
Switch the Bluetooth headphones to pairing mode. For the procedure, refer to the user manual of the headset.
Enter [Equipment Management] menu.
Your headphones should appear in the list of [Available devices].
Select them and confirm with OK to pair headphones with the TV.
Note: According to manufacturer/type of your Bluetooth device, the volume can be adjusted directly on the playback device.
Note: If you experience Bluetooth connection quality issues, such as dropouts and disconnections, try shortening the distance between the headphones and the TV.
To unpair Bluetooth headphones:
Press (menu) button and go to [Settings] -> [Network] -> [Bluetooth] -> [Equipment Management].
In the list of Bluetooth devices, select the device you want to unpair and press OK.
Headphone settings
Press (idmenu) button and go to [Settings] -> [Sound] -> [Headphone].
Note: [Headphone] menu is available only when headphones are connected to the TV.
You can change these settings:
[Headphone mode] – Select behaviour of the TV speakers when headphones are connected.
[Headphone only] – The TV speakers are disabled when headphone is connected.
[Headphone with speakers] – Both the TV speakers and headphones outputs sound.
[Headphone Volume] – Menu to change the headphone volume. In [Headphone only] mode, you can change the headphone volume directly using the volume buttons on the remote control. In [Headphone with speakers] mode, the headphone volume can be changed from this menu, while the volume of the TV speakers is controlled using the volume buttons on the remote control.
Tip: When headphones are connected, you can change headphone volume by pressing the (menu) button and selecting [Headphone volume] from the quick menu.
Meaning of the LED colours
Under the screen is a small LED that gives you basic information about the status of the TV.
| LED colour TV status | |
| White Standby mode. | |
| Green Switched on. | |
| Blue TV is on with screen off. | |
| Blue Automatic calibration of the OLED panel during standby mode. | |
| Red Recording active. |
External 4k players
You have the option of connecting 4k-capable external players such as Blu-Ray players or streaming boxes from various providers to your Loewe TV.
It is important to note that configurations should be made in the control menus of the external players to ensure optimum picture reproduction on the TV.
Each manufacturer uses its own nomenclature here. Make sure not to set a fixed frame rate / refresh rate / video resolution in the settings of the external player. Ideally, these criteria should be set automatically (see example picture). It is important that the settings for frame rate and, if necessary, dynamic range are adapted to the source material / native material.
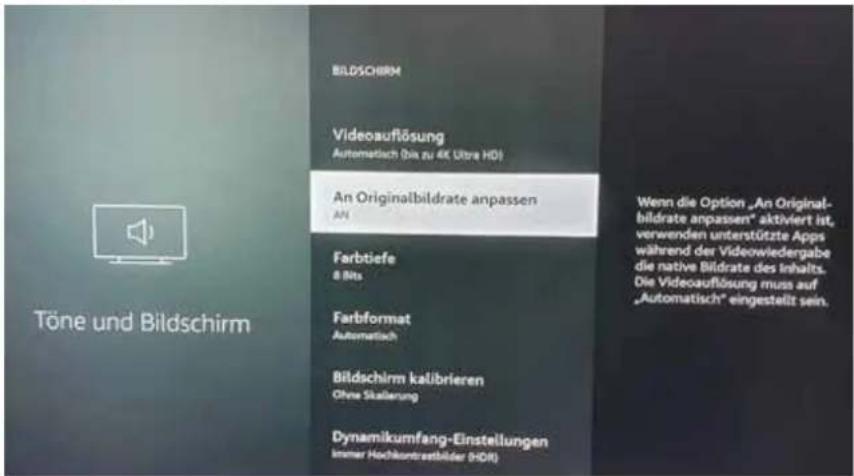
Note: Picture shows menu of an external 4k player (exemplary)
Getting started - first steps
Before starting the TV for the first time, make sure that you have completed the connection of your external devices and that the TV is connected to the power supply.
-
Press the ⏻ (Standby) button on the remote control to turn on the TV.
-
You will be welcomed by the Installation wizard which will help you to set up the TV set in a few simple steps.
To navigate in the Installation wizard:
- Use the arrow buttons to select the desired item.
- Press the OK button to confirm the selected item.
- Press the <button to go back one step.
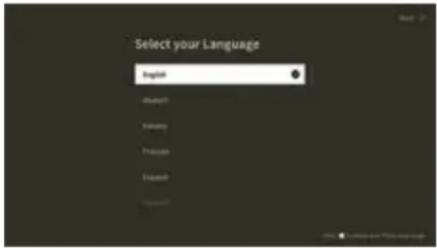
STEP 1 – Select the language
STEP 2 - Connecting to the internet
Optional step. If you wish to skip this step, press the right arrow button.
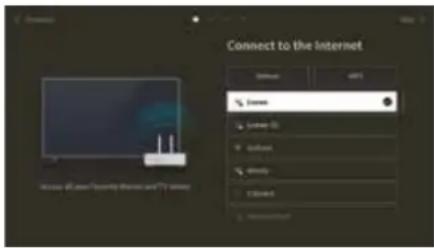
If you have connected the TV to your home network with an Ethernet cable and your network configuration allows DHCP, you will be automatically connected to the Internet.
Alternatively, you can use Wi-Fi connection. You must first select your network from a list of available networks. You will then be prompted to enter your Wi-Fi password. You can do this by typing on the on-screen keyboard.
STEP 3 – Select the country
Select the country in which TV set will be used. This will enable the TV to install optimal functions for the country selected.

STEP 4 – Terms & Conditions
Carefully read all the information provided about the terms and conditions! If you choose to clear some or all of the check boxes, some or all of the smart features will be turned off. You can change these settings later in the [Support] menu.

Continue to the next step by selecting [OK]
STEP 5 – Sign in to VIDAA account
Optional step. If you wish to skip this step, press the right arrow button.
Sign in to your existing VIDAA account or create a new one.
A VIDAA account gives you all the best features of your smart TV and always keeps it up to date.
Note: Without a VIDAA account, some functions of the TV are not available or only available to a limited extent.

STEP 6 - Input source selection
Select one of possible inputs as default source.

If you selected TV as your default source, you will have option to tune in channels.
Select one of the options from which you wish to tune channels: [Satellite], [Antenna], [Cable]
Set the desired tuning options and start tuning.
Home menu

The Home menu is the central overview page of your TV set. From this menu, you can search for content, manage input sources, or enter system settings.
You can enter home menu by pressing △(Home) button.
- Top menu (Search, Inputs, System Settings, Profile)
Search – allows you to search for applications by keywords.
Sources - Select or rename the input source. You can access locally connected devices (such as AV, HDMI, USB).
System settings – opens the TV configuration menu e.g., with settings for picture, sound, Network.
Profile information – allows you to log in to your VIDAA account.
• The time is displayed at the top right of the screen.
- If your TV is connected to the internet, the corresponding icon representing the type of network connection will be displayed next to the time information.
- List of recommendations
This row contains a list of recommendations for the application that is currently selected. This list of recommendations only appears for some applications.
1. List of apps
This row contains a list of favourite apps. The library of all installed apps is available by accessing .My Apps' tile in same row. Add applications to the Home menu:
- Enter apps library by accessing, My Apps' tile.
• In the library, select the app you want to add to home menu. - Press (Settings) button, select option [Sort] and confirm with OK.
- You can now move the app tile in the list by using the arrows on the remote control.
- Move the app tile to a new position in the top row of apps and confirm the new position by pressing OK.
2. Additional rows
Additional rows are dedicated to recommendations from your installed apps.
Channel list menu
Your Loewe TV manages the channels found during the initial setup in stored channel lists. You can view and edit these channel lists in the channel list menu.
To access the channel list menu, press the Menu button in TV mode
A pop-up appears on the right edge of the screen showing you the currently selected channel list. Here you can select channels directly (control cross) and also add them to the favourites or the home screen by pressing the menu key.
To select another channel list, navigate to the right with the control pad of the remote control to „Channel list selection“.
To the right and down, you can also navigate to the Favourites selection.
At the bottom right, the filter function allows you to edit channel lists.
To filter the list, the criteria resolution (HD/SD), child lock (if set), encryption and sorting by number or name are available, which you can activate in each case by setting check marks (see the chapter on remote control).
Electronic Programme Guide – EPG
EPG stands for Electronic Programme Guide and provides you with on-screen programme details. With the system, as with a printed programme guide, you can learn about the current programme. In addition programmes can be memorised and also recordings can be programmed.
To open/close EPG, press the ⋯(EPG) button
![Video NBA JCCA-3CDA Newscat VOLAT 00:00 Molecular (GPT) [User Sample], Image Preset to Edit Image Preset Share - Movie Color Mode (Movie Preset, Movie Preset, etc.)](/content/2026/04/607437/images/56ab7b123e9ad9ae28b9645bac13f6f961041abf0b28721e4b8fb0e7e841e79f.jpg)
Note:
- EPG is only available for DVB stations.
- The first time you start EPG, a wizard will start that guides you through the necessary presettings.
• Depending on the number of stations selected for EPG, it may take some time until the programme information is displayed
EPG Operation
In the left column there is a list of stations of the selected source/station list (e.g. DVB-C, personal list).
^/Scrolling in the station list page by page.
Up/Down arrows: Scrolling in the station list.
Left/Right arrows: Scrolling through the programmes.
In the station list the currently running programs are highlighted by lighter fields. A white vertical line indicates the current time in the running programs.
OK: Detailed information on the selected programme will be called.
Red Button: Opens schedule screen.
Green button: Displays a menu where you can assign colours to specific broadcast content (for example, News, Movies, Sport). Use the arrows and the OK button to assign the desired content type to a specific colour. Exit this menu by pressing the green button. Programmes that belong to the categories you selected are now highlighted in colour in the program guide.
Yellow button: View the previous day's list of programmes.
Blue button: View the next day's list of programmes.
Programme preview
Use arrows to mark desired station in the station list.
Press OK briefly to confirm selection.
In the top left window, the current programme of the selected station is displayed now.
Recording a programme via EPG
You can programme timer recordings of TV programmes conveniently using the EPG.
Press OK button to open Detailed info of selected programme.
Select option [DR+] and press OK button.
Check the timer data and update it if necessary (e.g. directory, start, end, recording type).
In the EPG a recording symbol is placed behind the title of the programme.
Memorising a programme via the EPG
A programme that has not started yet can be memorised. For memorised programmes, the TV set will ask at the beginning of a programme if it should change the channel accordingly or switch on from the stand-by mode.
Mark the desired programme with arrows.
Press OK button to open Detailed info of selected programme.
Select option [Reminder] and press OK button.
In the EPG, a memorise symbol is placed behind the title of the programme.
Channel list
While watching TV, press the OK button on the remote control to call up the channel list.
Use the ▲ / ▼ buttons to select a channel. Press the OK button to switch the TV to the selected channel.
You can exit the Channel list at any time by pressing the «exit» button.
Selecting a channel list
If you have tuned in channels on both TV tuners, you will have multiple channel lists available. To switch between channel lists:
While watching TV, press OK to open the active channel list.
Press the right) button to select the "TV" symbol.
Press the ▶ (right) button to select one of the available channel lists: [Antenna], [Cable], [Satellite]. The number of channel list options
depend on available signal sources.
Confirm the selection by pressing OK button.
Favourites list
The favourites list is a channel list where you can save selected channels that interest you. There are four favourites lists available.
Adding channels to favourite list
While watching TV, press OK to open the active channel list.
Change channel list to the one from which you want to add channels to your favourites list. See the chapter "Selecting a channel list".
Press button.
Use OK button to select all the channels you want to add to your favourites list. The selected channels will be displayed with a tick on the right-hand side.
Press left) button and select [Add to Favourite].
Select to which favourite list will be selected channels added and press OK to confirm.
Entering favourite list
While watching TV, press OK to open the active channel list.
Press the ▶ (right) button to select "FAV".
Select one of four favourite lists you want to display.
Note: If you want a specific channel list or favourites list to be active, you need to display it in channel list menu and switch to any available channel in it. You can then use the number buttons on the remote control to switch to the channels of the active channel list/favourites list.
Editing the Channel list
To delete or move channels to a different position in the channel list or favourites list, follow the instructions below:
While watching TV, press OK to open the active channel list.
Change channel list to the one you want to edit. See the chapter "Selecting a channel list" and "Favourites list".
Press the right button and select [Edit].
Press the OK button to display channel list edit menu.
Move the cursor using ▲ buttons and select channel you wish to edit.
To move selected channel to a new position:
Press the ◀ (left) button.
Use the ▲ / ▼ buttons to move channel to the new position and confirm new position with the OK button.
To delete selected channel:
Press the ▶ (right) button to delete select channel.
Group editing
Use the ▲ / ▼ buttons to select multiple channels which you wish to edit by pressing OK. When all channels to be edited are selected, press ▶ (right) button to delete all selected channels or press ◀ (left) button to group and move all selected channels to a new position.
Channel list filter
While watching TV, press OK to open the active channel list.
Press the right button and select [Filter].
The filter settings are now displayed on the left side of the channel list.
Adjust the filtering options according to your preferences. You will see the changes in the channel list immediately after defining the new criteria.
Press button to hide filter settings.
Note: All filter settings are remembered and remain active even after you turn off the TV. If you miss channels in the channel list, check the filter settings and adjust them if necessary.
Adding channels to Home menu
You can add shortcuts for selected channels to the Home menu.
While watching TV, press OK to open the active channel list.
Press button.
Use OK button to select all the channels you want to add to the Home menu. Selected channels will be displayed with a tick on the right hand side.
Press left) button and select [Add to Home].
The channels can be found in the Home menu under the "Shortcuts" tab. Select any channel via the Home menu and press OK to switch to that channel.
To remove channels from Home menu:
Press ⓐ button to open Home menu.
Select "Shortcuts" tab and select channel you want to remove.
Press ☐ remove selected channel.
Channel quick search
There is an option to quickly search for tuned channels by their name.
While watching TV, press the ▼ (down) button and the on-screen keyboard will appear. Enter the name or partial name of the channel you are searching for. Then select OK on the on-screen keyboard and the result will be displayed on the screen in the form of channels containing the search term. You can now select one of the results and switch to that channel.
You can exit the Quick Search menu at any time by pressing the (exit) button.
Programming remote control to Set Top Box (STB)
You have the possibility to program your remote control for use with certain Set Top Boxes. All you need to do is enter a three digit numerical code.
You can find a list of all available devices and their codes at the end of this user guide.
Proceed as follows:
- First, activate the device mode by pressing the ⬙(Device) button for three seconds.
- Then press and hold the ⬙(Device) button and the button to enter Set Top Box or Learn mode. The LED will flash twice to confirm execution.
-
Within the STB mode, then perform the following steps:
-
To program, press and hold the ⬙ (Device) button and OK button for five seconds.
-
The audio LED flashes twice.
-
Now enter the code.
-
The audio LED flashes once to confirm.
-
Press the ⏻ (On/Off) button to test.
-
If the Set Top Box responds, pressing the OK button will complete the process and the I FD will flash twice for confirmation. Otherwise, proceed again from step 3.
If an incorrect code is entered, the LED will light for two seconds to indicate the error. The current mode remains active.
If you do not press any button for ten seconds after entering the code, the process will end automatically. The audio LED lights up for two seconds afterwards to indicate the termination.
Automatic search
You can also search for the desired device from the list. To do this, proceed as follows:
-
Press and hold the ⬙ (Device) button and OK button for 5 seconds.
-
The LED will light up twice for confirmation.
-
Navigate up or down with the control pad to select a device from the list.
-
When selected, the LED will light up for one second.
-
Press the ⏻ (On/Off) button to test
-
If the STB responds, pressing the OK button will exit this mode and the LED will flash twice to indicate success.
Again, 10 seconds after there is no input, the process will end. The LED will illuminate for two seconds to indicate termination.
Teaching the remote control
All buttons except the device button can be taught-in for the operation of devices that are not included in the integrated database. The functions of the selected button are then completely or partially overwritten with the new codes.
To do this, the Locwe remote control must be positioned with the remote control to be replaced so that the infrared windows are in line of sight with each other at a distance of 1-5cm.
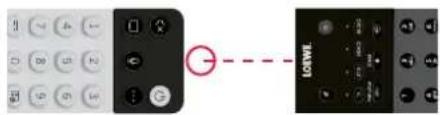
The learning process is started in STB/learn mode.
- First activate the device mode by pressing the ⬙(Device) button for three seconds.
- Then press and hold the (Device) button and the Button to enter the Set Top Box or learning mode. The LED will flash twice to confirm execution.
-
Within the STB mode, then perform the following steps:
-
Press and hold the ⬙ (Device) button and the red colour button for five seconds.
-
The LED lights up twice for confirmation and remains lit when the learning function is activated.
-
Press the button on the Loewe remote control that is to be learned. The LED flashes once.
-
Now press the desired button on the original remote control.
-
The LED flashes twice for confirmation and then remains lit. If a learning error occurs, the LED flashes ten times but then remains illuminated.
-
If necessary, repeat the procedure or learn more buttons according to step 3.
-
Finally, press the ⬙ (Device) button or wall longer than ten seconds without pressing a button.
Main menu
The main menu is accessed by pressing the MENU button 21 and selecting [Settings].
Use the arrow keys on the remote control to move the cursor in the menu.
Press the OK button to confirm the selected menu item.
Press the BACK button ^22 to return to the previous menu.
Press the EXIT button⑧ to exit the menu.
Please note that the following menu description is for guidance only. Actual menu items and available functions will vary depending on the TV model, country, current input, signal type, and TV settings.
Picture
[Picture Mode] – Select one of the pre-set picture modes:
[Standard] - Standard option suitable for most content.
[Cinema Day] – Recommended when watching a movie in a brightly lit room.
[Cinema Night] – Recommended when watching a movie in a dark room.
[Dynamic] – The brightest setting, but with lowered colour accuracy. Recommended for use only when it is difficult to see the image on the screen in other modes due to high room brightness.
[Sports] – The optimal picture setting for watching sporting events.
[Aspect Ratio] – The aspect ratio of an image is the ratio of its width to its height. Different content you are watching may have different aspect ratios. A TV screen has an aspect ratio of 16:9, and black bars may appear at the top/bottom or on the sides if content with a different aspect ratio is displayed. Alternatively, part of an image may be cut off. In such case, you can use this menu to change the aspect ratio and find the optimal option for viewing the content.
[Automatic] – The TV will try to find the optimal aspect ratio to fit the image on the screen.
[16:9] – The optimal option for 16:9 content. Stretches a 4:3 image to full screen.
[4:3] – The optimal option for viewing content created in a 4:3 aspect ratio.
[Panoramic] - Stretches an image horizontally.
[Movie Zoom] – Some movies are recorded in such an aspect ratio that there are black bars on top and bottom. In this case, you can use this option to zoom in, which removes the black bars but also cuts out part of the image on the sides.
[Direct] – Also known as point-to-point, it displays the image in its original format without any alteration.
[Smart Scene] – This feature allows the TV to constantly recognize the scene in the content you are watching and enhance the picture quality on all input sources.
Note:
- Some apps have explicit restrictions that content recognition is not allowed.
- When [Game Mode] is turned on, [Smart Scene] is automatically turned off and cannot be set.
[Game Mode] – Enables game mode on the selected input. Recommended option when using the TV with a game console. This mode will: - Disable all image post-processing functions to minimize input lag and improve responsiveness to gamepad button presses.
- Reduce motion blur.
- Accurately process YUV 4:4:4 format signals to present accurate image colours.
Note:
This function may not be applicable in some input sources or applications.
[Auto Low Latency Mode] – Provides smooth viewing of content from external devices connected to the TV.
Note:
- This function may not be applicable in some input sources or applications.
- When [Game Mode] is turned on, [Auto Low Latency Mode] is automatically turned off and cannot be set.
[Picture Mode Settings] – configuration of advanced picture settings:
[Apply Picture Settings] – apply current picture mode to current input source or to all sources.
[OLED Light] - Adjusts the luminance of the TV panel.
[Brightness] - Adjusts the image brightness setting.
[Contrast] – Adjusts the image contrast level.
[Colour Saturation] – Adjusts the image colour intensity.
[Sharpness] - Makes the edges of objects in the picture sharper or finer.
[Adaptive Contrast] – Makes dark areas of the image darker and light areas lighter so that more detail can be seen.
[Ultra Smooth Motion] – Inserts additional interpolated frames between the original frames to increase the frame rate of the content being viewed and improve the overall smoothness of motion, especially for fast-moving objects.
[Clear Motion] – Makes motion clearer and reduces flickering.
[Noise Reduction] – Removes picture artifacts/graininess.
[MPEG Noise Reduction] – Reduces block noise and mosquito noise caused by video compression.
[Colour Temperature] - Adjusts how warm (red) or cool (blue) the white areas of an image appear.
[Expert Settings] – Options for fine-tuning the image for experts.
[Overscan] – Some content may have noise at the edges of the image. This option zooms in the image slightly to remove the noise. [Reset Current Mode] – If you have made changes to the settings of the current picture mode and want to restore its original settings, use this option.
[OLED calibration] – Start calibration of the OLED screen. Do not exert any mechanical force on the screen during calibration. This calibration is also performed automatically during the night when the TV is in standby mode.
Sound
[Sound Mode] - Select one of the pre-set sound modes:
[Standard] – Standard option suitable for most content. Preserves the characteristics of original sound.
[Theatre] – Recommended when watching movies. This mode enhances the surround sound effect and highlights low-frequency sounds, such as explosions.
[Music] - Recommended when listening to the music.
[Speech] – Setting to improve speech intelligibility, recommended for example when watching the news.
[Late Night] – Normalizes the volume of loud and soft sounds to the same level.
[Sports] – Recommended when watching sporting events.
[Dolby Atmos] – Dolby Atmos creates surround sound from your TV's speakers and enhances it to make it richer. It creates a true premium entertainment experience.
Note: This feature is only applicable to Dolby Atmos content.
[Headphone] – settings for your wired or Bluetooth headphones. This menu item becomes available when you connect your headphones. [Headphone mode] – Select behaviour of the TV speakers when headphones are connected.
[Headphone only] – The TV speakers are disabled when headphone is connected.
[Headphone with speakers] – Both the TV speakers and headphones outputs sound.
[Headphone Volume] – Menu to change the headphone volume. In [Headphone only] mode, you can change the headphone volume directly using the volume buttons on the remote control. In [Headphone with speakers] mode, the headphone volume can be changed from this menu, while the volume of the TV speakers is controlled using the volume buttons on the remote control.
[Sound Mode Settings] - Configuration of advanced sound settings:
[Apply Audio Settings] - Apply current sound mode to current input source or to all sources.
[Equalizer] – Displays a menu to change the volume of different frequencies. This setting affects only the TV speakers.
[Wall Mount Setup] – Optimizes the sound settings for the TV mounted on the wall.
[Auto Volume Control] – Automatically changes volume of all channels to the same level, so there is no difference in volume when switching from one channel to another.
[Reset Current Mode] – If you have made changes to the settings of the current sound mode and want to restore its original settings, use this option.
[Speakers] – Settings for internal and external speakers.
[Audio Output] – Select the type of speaker that will output sound.
[BT Sound Bar] – Bluetooth soundbar.
[ARC] – Soundbar or AV receiver connected via HDMI to the connectors labelled ARC or eARC.
[TV Speaker] - Internal TV speakers.
[SPDIF Only] – External audio device connected via an optical audio cable.
[Digital Audio Output] – When you want to use an external audio device that is connected to the TV via HDMI or optical audio cable, you need to select whether the TV or the external device will be used to decode the audio. This menu is used for this purpose. Some devices may not support all audio codecs needed to decode audio. With incorrect settings, you may not hear any sound from the external device.
[Auto] – The automatic setting will try to select optimal option for your audio output. If you do not have sound from an external device, try selecting other options in this menu.
[Pass Through] - the TV sends the original audio track without processing to an external device that decodes it.
[PCM] - The TV decodes the audio track and sends the decoded track to an external audio device.
[Dolby Audio] - The TV sends Dolby Digital compressed audio with support for up to 5.1 channels to an external device. This option is recommended only for devices connected via an optical audio cable.
[Dolby Audio Plus] - The TV sends Dolby Digital Plus compressed audio with support for up to 7.1 channels to the external device. This option only works for devices connected via HDMI ARC/eARC.
[Digital audio delay] – If the sound from external speakers is out of sync with the picture on the TV, use this option to reduce the delay between sound and picture.
[Lip Sync] – If the sound from the TV's internal speakers is out of sync with the picture on the TV, use this option to reduce the delay between sound and picture.
[Balance] – Adjusts the volume of the TV's left and right speakers to optimize the sound for a specific location.
Note: This function is not applicable when Dolby Atmos is turned on.
[eARC] – Activates the eARC function, which is required if you want to output audio from the TV to an external device via an HDMI cable.
Network
[Network Configuration] - Select the type of internet connection and configure it.
[Off] – This option disconnects the TV from the internet.
[Ethernet] – Select this option if the TV is connected via a LAN cable. If DHCP is enabled on the router, the TV will automatically connect to the Internet. To enable DHCP on the router, refer to the router's user guide.
[IP Settings] – Use this option to manually assign an IP address to the TV. Change [IP Setting Mode] from [DHCP] to [Manual].
Fill in the data for the network connection: IP address, Netmask, Gateway, DNS server. Then select [Save] to apply the changes.
[Wireless] – Select this option if you want to connect your TV to the network wirelessly. Select a wireless network from the list of available networks and enter the password.
[Refresh] – If you don't see your wireless network listed, use this option to refresh the list.
[Advanced Setting] – Advanced wireless network settings.
[PIN] – An alternative option for connecting to a wireless network. The TV will generate a PIN code that must be entered into the router's web interface. This is usually found in the WPS menu of the router interface. For more information, refer to the router's user guide.
[PBC] – An alternative option for connecting to a wireless network. Select this option and then press the physical WPS button on the router. Please note that not all routers may have a WPS button. If your router does not have this button, use another connection option.
[IP Settings] – Use this option to manually assign an IP address to the TV. Change [IP Setting Mode] from [DHCP] to [Manual]. Fill in the data for the network connection: IP address, Netmask, Gateway, DNS server. Then select [Save] to apply the changes.
[Add] – If you have configured your wireless network as hidden, you can add it to the list by typing its name (SSID) in this menu.
[Internet Connection] – Menu to check internet connection.
[Connection Test] – Tests the TV's connection to the Internet.
[Network Information] – Displays detailed network information.
[Wake on Wireless Network] – This function allows you to turn on wirelessly connected TV from standby mode. This can be done using a screencast enabled app from your phone.
[Wake on LAN] – This function allows you to turn on TV connected via LAN cable from standby mode. This can be done using a screencast enabled app from your phone.
[Bluetooth] – Bluetooth settings.
[Bluetooth] - Switch Bluetooth on/off on your TV.
Note: This option must be enabled if you want to use the remote for voice control.
[Equipment Management] – A menu where you can connect or disconnect Bluetooth devices, such as a soundbar or headphones.
[TV Bluetooth Speaker] – This option allows you to play music from your phone via Bluetooth directly through the TV's speakers. Follow the on-screen instructions to find out how to do this. While playing music, you can select [Screen off], which turns off the screen to save power. To turn the screen on, press any button on the remote control except ⑯ (standby).
Channel
[Auto Scan] – Allows you to tune in TV channels through the TV tuner. [Rescan] option scans all channels of the current mode. Select [Change setup] to tune in channels from the desired mode: Antenna, Cable, Satellite.
Tuning Antenna channels
From the main menu, select [Settings] -> [Channel] -> [Auto Scan] -> [Change Setup] and select [Antenna]. Go to the next screen by pressing the right arrow button. Here, select the desired options for your tuning:
[Channel] – Select [All Channels] to tune free and encrypted channels. Select [Free Channels] to tune only free channels.
[Scan Mode] – Select DTV to tune only digital TV channels, select ATV to tune only analogue TV channels. Select ATV+DTV to tune both digital and analogue channels.
[Antenna Power] – If you are connected to standard passive antenna, use the [Off] option. If you are using an antenna booster, you can power it directly from the antenna input by setting this option to [On].
Once you have completed the settings, press the right arrow button on the remote control to start the tuning process.
Tuning Cable channels
From the main menu, select [Settings] -> [Channel] -> [Auto Scan] -> [Change Setup] and select [Cable]. Go to the next screen by pressing the right arrow button. Here, select the desired options for your tuning:
[Channel] – Select [All Channels] to tune free and encrypted channels. Select [Free Channels] to tune only free channels.
[Scan Mode] – Select DTV to tune only digital TV channels, select ATV to tune only analogue TV channels. Select ATV+DTV to tune both digital and analogue channels.
[Search Mode] – [Frequency Scan] searches for channels on all available frequencies. Tuning may take longer. [Network Scan] tunes the homing channel first and quickly tunes the other channels based on the information from it.
[Network ID] – Available only for [Network Scan]. Fill in the identification number provided by your cable service provider.
[Start Frequency] – Available only for [Network Scan]. Fill in the frequency provided by your cable service provider.
[LCN] – If this option is set to on, the channels will be sorted based on operator preference. In this case, it may not be possible to change the
channel order manually. If LCN is set to off, the channels will be sorted by frequency and you have the option to manually sort the channels. Once you have completed the settings, press the right arrow button on the remote control to start the tuning process.
Tuning Satellite channels
From the main menu, select [Settings] -> [Channel] -> [Auto Scan] -> [Change Setup] and select [Satellite]. Press the right arrow button to go to the next screen. Select your satellite operator from the list, or if you wish to tune the satellite manually, select option [Standard]. In the next screen select your satellite system:
[Single Satellite] – Use this option if only one satellite is connected to the TV.
[DiSEqC] – Use this option if you have DiSEqC equipment. DiSEqC 1.0 supports up to 4 satellites. If you have motorized antenna, use DiSEqC 1.2
[Unicable] – If you have Unicable satellite distribution in your home, select this option. Make sure you know the Unicable band and frequency that can be used. This information should be available on the equipment or can be provided to you by the landlord.
Press the right arrow on the remote control to proceed to the next setup step.
You will be given the option to select the type of channel you want to tune to. To tune in free and encrypted channels, select [All Channels]. Select [Free Channels] to tune only free channels.
Once you have completed the settings, press the right arrow button on the remote control to start the tuning process.
This option opens the channel management window with multiple options. You can edit the channel list, edit favourites lists, export to USB, or import from USB.
Editing the Channel list
From the main menu, go to [Settings] -> [Channel] > [Channel Edit] and select the channel list or favourites list you want to edit.
Select the channel or multiple channels you want to move or delete with OK. A check mark appears next to the selected channels.
To move selected channels to a new position: Press the left arrow button on the remote control and use the up/down arrows to move the selected channel(s) to a new position.
To delete selected channels: Press the right arrow button on the remote control and confirm deletion.
To restore deleted channels: Press the red button on the remote control. Press the OK button to select the channels you want to restore, then press the left arrow to return them to the channel list.
Filter: Press the yellow button on the remote control to display the filter, where you can select the type of channel to display in the channel list.
Search: Press the blue button on the remote to search for a specific channel by entering its name in the search box.
Exporting / Importing channel list via USB
To export channel list to USB: Make sure you have an external USB storage device connected to your TV. From the main menu, go to [Settings] -> [Channel] -> [Channel Edit] and select [Export to USB]. The channel list is exported to the connected storage device.
To import channel list from USB: Connect the USB storage device containing the exported channel list. From the main menu, go to [Settings] -> [Channel] -> [Channel Edit] and select [Import from USB]. The channel list is imported.
[Advanced Settings] – Advanced settings related to TV channels.
[Manual Scan] – Allows you to scan a single digital TV multiplex or a single analogue TV channel.
[Channel List Auto Update] – Some programme providers offer an automatic update of the channel lists. You may allow or block an automatic channel list update.
[Programme Guide Auto Update] – The TV will automatically update the TV Guide during the night in standby mode.
[Cl+ Module Settings] – Settings for CAM module / Cl+ card.
Accessibility
[Audio Type] – Audio settings for the visually impaired.
[Audio Type] – Sets the audio type for TV channels.
[Normal] – Standard audio without audio commentary.
[Visually Impaired] – Plays a special soundtrack for the visually impaired whenever one is available. This soundtrack uses an audio commentary to describe the action taking place on-screen.
[Voiceover Volume] – Changes the volume of the narration audio track separately from the standard audio.
[Subtitle Settings] – Subtitle settings.
[Subtitle] – Here you can pre-set whether a subtitle is always to be displayed as soon as it is offered by the channel.
[Primary Subtitle] – Default subtitle language.
[Secondary Subtitle] – Secondary subtitle language when primary subtitle languages are not available.
System
[Time] – Sets the internal time of the TV. The correct time is important if you use reminders or time recording.
[Time format] – Here you can select the format in which the time will be displayed on the TV. 12 or 24-hour format.
[Date/Time] – If option [Auto Synchronisation] is turned on, the TV will automatically get the time information from the digital TV broadcast or the Internet. If this option is deactivated, you can set the date and time manually.
[Time Zone] – Make sure the correct time zone is selected here, as an incorrect time zone may result in the wrong time on the TV.
[Daylight Saving] – Here you can manually set daylight saving time on or off. The [Sync from DTV] function sets the daylight saving time automatically based on the information received from the digital TV stream.
[Timer Settings] – Settings for different TV timers.
[Sleep Timer] – Sets a sleep timer that automatically turns off the TV after a set time.
[Power On Timer] – Here you can set the time when the TV will turn on automatically. Select [Once] if you only want the TV to start once at the specified time. Select [Weekly] to select the days of the week on which the TV starts up repeatedly each week.
[Power Off Timer] – Here you can set the time when the TV will automatically switch off. Select [Once] if you want to turn off the TV once at the specified time. By selecting [Weekly], you can select the days of the week on which the TV turns off repeatedly each week.
[Menu Timeout] – In this menu, you can change how long the menu will be displayed on the screen since the last time you pressed the button on the remote control.
[Auto Sleep] – In this menu, you can change the time after which the TV will automatically turn off since the last time you pressed the button on the remote control.
[System PIN] – Sets the PIN used to access Parental Control, Auto Channel Scan and Reset to Factory defaults. The default PIN code is "1111". [Parental control] – You can select and set various security options to prevent unauthorised use of the TV set and to protect your children from unsuitable programmes. Channels and content blocked by parental controls can be accessed by entering the correct PIN.
[Locks] – Activates the parental control function. Before changing this setting, you must enter the PIN code. The default PIN code is "1111".
[Block Time] – Sets the time range and days of the week when TV channels will be blocked.
[Channel Block] – Selects the channels that will be blocked.
[Content Block] - Set the blocking based on the age restriction of the content.
[Input Block] – Blocks the specified TV inputs.
[App Block] – Blocks the specified Apps.
[Reset To Default] – Resets the parental control menu items to their default values.
[Language and Location] – Language and country settings for your TV.
[Location] - This will affect tuning options and also the availability of certain features, such as the Alexa app.
[Menu Language] – Set the TV menu language.
[Primary Audio] – The default audio language for digital TV broadcast.
[Secondary Audio] – Secondary audio language for digital TV broadcast. Selected when the primary audio language is not available.
[Digital Teletext] – Character set for teletext. If there are incorrect or missing characters in the teletext, change the character set here to the correct one.
[Voice Service] - Settings related to the TV's voice control function.
[Application Settings] – Settings for applications and features.
[Content Sharing] – When this feature is enabled, media such as videos, music and other content can be streamed from other devices on the same network to your TV.
[HbbTV] – HbbTV provides additional services on the currently watched TV channel. When this feature is enabled, HbbTV will be available for TV channels that support it. The TV must be connected to the internet. While watching an HbbTV-enabled channel, you can open the HbbTV menu by pressing the red button on the remote control.
[Clear Cache] – The cache, user data and temporary files of the browser, apps and HbbTV are removed.
[Delete Cookies] – This will remove browser and application cookies.
[Do Not Track] – Websites and apps tracking preference.
[Model] – Do not collect my browsing data.
[Mode2] – Do not reveal my tracking preference.
[Prime Video] – Removes this TV from your Prime Video account.
[Netflix] – Removes this TV from your Netflix account.
[HDMI & CEC] – Settings for HDMI inputs and devices connected via HDMI.
[HDMI Format] – Sets the HDMI format based on the EDID version. The correct format is required for the TV to get the correct information about the supported picture and sound settings from the external device connected via HDMI. If you are not receiving any picture from the connected device, try changing this setting.
[Standard format] – Choose for a device that supports up to Full HD resolution.
[Enhanced format] – Choose for a device that supports UHD/4K resolution and HDR.
[Auto] - This will automatically select the optimal option.
[CEC Control] – This feature allows HDMI devices to control each other.
[Device Auto Power Off] – When the TV is switched off, all connected HDMI devices are automatically switched off.
[Device Auto Power On] – When the TV is switched on, a device connected via HDMI ARC/eARC (e.g. a soundbar) is automatically switched on.
[TV Auto Power On] – When you turn on any external device connected via HDMI, the TV will automatically turn on.
[CEC Device Lists] – List of devices connected via HDMI.
[Advanced Settings] – Other system related settings.
[TV name] – Select a TV name that will be visible to external devices and apps.
[DR+ & Time Shift] – Settings for record and time shift.
[DR+ Setup] – Select the storage drive to be initialized before using it for recording.
[Time Shift Setup] – Select the memory unit to be initialized before using it for time shift.
[Start in advance] – In the case of scheduled recording, here you can set the time by which the recording starts earlier.
[Delay Ending] – Set the amount of time by which the scheduled recording will be extended. Due to commercials, the recorded content may end later than the time shown in the program guide. The additional recording time will ensure that all requested content is recorded.
[Input Labels] – Menu to rename the inputs displayed in the Inputs list.
[Setup Wizard] – Opens the setup wizard that appears the first time you turn on the TV.
[Sports Mode Auto Detection] – When this function is switched on, the TV automatically switches the picture and sound mode to sports mode for sports programmes.
[Fast Power On] – The TV will start up faster, but standby power consumption will be higher.
[Power on Mode] – This menu option decides what happens to the TV when it is reconnected to power or after a power failure.
[On] - The TV turns on automatically when connected to power.
[Standby] – The TV will be in standby mode when connected to power.
[Remember] – The TV will be in the same condition as it was when the power was disconnected. If the TV was on when the power was disconnected, it will also be on when the power is reconnected. If it was off when the power was disconnected, it will remain in standby mode when the power is reconnected.
[Usage Mode] – Select the correct mode for the way you use the TV.
[Home Mode] - Mode for home use.
[Store Mode] – Mode for use in retail. The screen will be brighter and there will be a demo mode.
Support
[System Info] - Detailed information about TV.
[Signal Info] – Displays information about the signal of the current input.
[Network Connection Status] – Displays detailed information about the network connection.
[Input Connection Status] – Displays a list of inputs and information about whether they are transmitting a signal to the TV.
[Version] – Displays the current version of the TV software.
[Self Diagnosis] – A set of various tests of the functionality of a TV set. If you experience a problem while using your TV, you can run these tests to see if the problem is with your TV or a connected external device.
[Picture Test] – Performs a TV picture test. The TV displays a color pattern on the screen.
[Sound Test] – Performs a sound test of the TV's speakers.
[Network Test] – Performs a network test to see if the TV is connected to the Internet.
[Input Connection Test] – Performs an input connection test. Displays information about the received signal from the selected input.
[Status Check] – In this menu you can see the total running time of the TV.
[Format Hard Disk] – Formats the internal hard disk. Note that this action erases all data on the storage.
[my Loewe] – The QR code will be displayed. Scan it with your smartphone and download the my Loewe app. "my Loewe" is the gateway to the world of Loewe and gives you access to all user manuals for your Loewe products.
[System Upgrade] – Settings related to updating your TV's software.
[Auto Firmware Upgrade] – If this feature is enabled, the TV will automatically search the internet for new software on a regular basis. If a new version is available, a notification window will appear on the screen.
[Check Firmware Upgrade] – It immediately searches for a new software version.
[System App Auto Upgrade] – If this feature is enabled, TV will automatically update installed apps in the background.
[Upgrade from USB] – In this menu, you can perform a software update from a connected storage device. The latest software is available on the official Locwe website https://www.locwe.tv/int/support
Warning: The software update will take a few minutes. Do not unplug or switch off the TV, disconnect the USB stick or the network during the update. These actions can potentially damage the TV.
[Disclaimer and Privacy] – You can re-read all the information about the terms and conditions. If you choose to clear some or all of the check boxes, some or all of the smart features will be turned off.
[Mobile App Download] – The QR code will be displayed. Scan it with your smartphone and download an app that allows your smartphone to control your TV.
[Reset to Factory Default] – Resets all TV settings to factory defaults.
VIDAA account
A VIDAA account gives you all the best features of your smart TV and always keeps it up to date.
Creating a new account
If you don't have a VIDAA account, create a new one to enjoy best features of your smart TV. Before creating a new account, make sure your TV is connected to the network.
- Press (home) button on your remote and select (VIDAA Account) icon in the top navigation bar on the Home screen.
- Select [Create Account] on screen.
- Enter your first name, last name, email address and password. Names are optional.
- Select [Create Account].
Signing into an account
Before signing into your VIDAA account, make sure your TV is connected to the network.
- Press the (home) button on the remote control and select (VIDAA Account) icon in the top navigation bar on the Home screen.
- Register your device to your VIDAA Account. After entering your email and password, select [Sign In].
Voice control with Alexa
This TV has Amazon Alexa built-in, allowing you to use your voice to control your TV. Interact with Alexa by pressing and holding ⏻ (microphone) button and speaking into the microphone on your remote control.
To use the Alexa, TV must be connected to the network. To fully integrate Alexa with your TV, you must be signed into your VIDAA account. It is possible to use Alexa on the TV without a VIDAA account, but with limited functionality.
Setting up Alexa
- Press (home) button, then select (Settings) icon, and select [System] -> [Voice Service] -> [Amazon Alexa].
- Select [Set voice assistant to Alexa] and [Set up now]. If you selected Alexa in the guide when you first turn on the TV, it will take you directly to the [Set up now] step.
- You are now at the "Sign in to Amazon account" screen. Scan the QR code with your phone or visit the website on your phone or computer and enter the on-screen code. The code will expire after 10 minutes. If you don't have an Amazon account, create a new one.
- Once your Amazon account is connected, the TV screen will change to the next step. You can log in to your VIDAA account. If you have signed in before, this step will be skipped.
- Give your TV a name from the list or customise it.
- Select [Authorise] and follow on-screen steps in Alexa Skill Setup. Now, Alexa is set up and ready. You can enjoy interacting with Alexa using your voice by just pressing and holding the (microphone) button on your remote control. Ask Alexa after the tone.
Notes:
- Alexa is not available in some countries.
- You can use Alexa without signing in to your Amazon account by selecting [Do it later]. You can also skip VIDAA account sign in step, by leaving the screen. In this case, you can still use your voice to search on the internet or change the volume on your TV. To use additional Alexa commands, sign in to your Amazon and VIDAA accounts at any time in Settings.
- Download and install the remote control app on your mobile device at (home) -> [Settings] -> [Support] -> [Mobile App Download]. Press the microphone icon in the app to interact with Alexa on your TV.
- You can select the language used by Alexa at (home) -> [Settings] -> [System] -> [Voice Service] -> [Amazon Alexa] > [Alexa Language].
Recording to external HDD or USB
If you want to use an external storage drive for recording, you must format it to NTFS or FAT32 file system on your computer or notebook. For the specific implementation, please refer to the documentation of your operating system.
After formatting an external storage drive, you must tell the TV to use the drive for recording:
-
Connect a storage drive to the TV.
-
Press the (menu) button and go to [Settings] -> [System] -> [Advanced Settings] -> [DR+ & Time Shift] -> [DR+ Setup].
-
From the list, select a drive you wish to use for recording.
The selected drive will be now used for recording. If you wish to use a different drive for recording, please repeat the steps above.
Recording
Digital recorder (dr+)
You can record programmes you want to watch later using a Digital Recorder.
Recording can be started/stopped manually, which can be conveniently done via the programme guide (EPG).
If additional languages are being transmitted for a DVB broadcast, these will also be recorded. DVB subtitles can also be recorded.
While recording a TV programme, you can watch previous recordings, switch to another input source or launch any application. However, if you decide to switch to another channel on the tuner from which you are recording, the recording will have to be interrupted.
Note: Only digital channels can be recorded.
Recording via Programme information
To start recording the programme you are currently watching, press ▲(up) and press OK to open the detailed information about the programme you are currently watching. Press the OK button again and the [Schedule Recording] menu is displayed.
Recording via Programme Guide
Open the Programme Guide by pressing the (EPG) button. In the guide, select the programme you want to record. Please note that pressing the blue button will bring up the next day's guide and the yellow button will take you back to the previous day's guide. After selecting the programme to be recorded, press OK to open the detailed information. Select [DR+] and press the OK button to display the [Schedule Recording] menu.
[Schedule Recording] menu
In this menu you can set the recording details.

[Recording mode] - Select the type of recording.
[Manual Stop] – Recording starts immediately after the recording setup is complete. The end of recording is not defined in this option. Recording will only be terminated by manual user intervention or when the hard drive space is exhausted.
[Time] – Recording will start and end at the time defined by the user.
[Start Time] – Set the time when the recording will start.
[End time] - Set the time when the recording will end.
[Programme] – Record the specified programme. Recording will start and stop based on the timing information obtained from the electronic programme guide.
[Repeat] – Option to decide whether the recording should be a one-time or periodic. Only available for [Time] and [Programme] recording modes.
[Once] - One-time recording.
[Daily] – Repeated recording of the programme or during the selected time each day.
[Mon to Fri] – Repeated recording of the programme or during the selected time on weekdays.
[Sat to Sun] – Repeated recording of the programme or during the selected time on the weekend.
[Weekly] – Here you have the option to specify the days of the week on which to repeat the recording on a weekly basis.
When you have completed the settings for recording, select [Save] to save the settings.
Standby recording
When you press ⏻ button to turn off the TV while recording is in progress, a menu appears asking you to confirm the next action: [Cancel] – Return to watching TV and continue recording.
[Power Off] – The TV turns off and the recording stops. The recording up to this point is saved to a storage drive.
[Standby recording] – The TV turns off, and recording continues in the background.
If you have scheduled recording for a time when the TV is turned off, recording will start even if the TV is in standby mode. The TV will remain in standby mode, and you can recognize a recording in progress by the red LED on the bottom of the TV.
Note: Never unplug the TV from the power outlet while recording. You may lose the recorded content or damage the storage drive!
Setting an additional recording start/end time
It is possible to start the scheduled recording earlier or end the recording later to compensate for possible programme delays caused by commercials.
Press the button to open the menu and select [Settings] -> [Advanced Settings] -> [DR+ and Time Shift]. Edit these 2 items to define the recording start/end time extension:
[Start in advance] – In the case of scheduled recording, here you can set the time by which the recording starts earlier.
[Delay Ending] – Set the amount of time by which the scheduled recording will be extended. Due to commercials, the recorded content may end later than the time shown in the program guide. The additional recording time will ensure that all requested content is recorded.
Solving recording conflicts
When setting up a new scheduled recording, you may run into a conflict when the time of the new recording partially overlaps with another saved scheduled recording. In this case, an information screen will be displayed. Since the TV can only record from one channel at a given time, this conflict needs to be resolved by deleting the old or new scheduled recording.

[See Conflict details] – Displays information about conflicting scheduled recordings. Press the Ⓧ button to exit the information screen. [Cancel] – The new scheduled recording is discarded, and existing scheduled recording is retained. [Save] – The existing scheduled recording is discarded, and new scheduled recording is saved.
Recording control panel
During recording, you can call up the recording control panel by pressing the ◀(left) or ▶(right) button. You can tell that the TV is recording by the red LED light on the bottom of the TV.
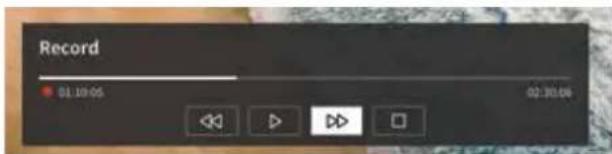
You can use the arrow keys and the OK button to select and confirm the options in the control panel.
Press the ◀ button to hide the control panel. Please note that hiding the panel does not stop the recording.
- Rewind the recording. Press this button multiple times to change the rewind speed. You can rewind the recording at any time and watch it while recording is in progress.
II - Pause the currently viewed content. Recording continues in the background.
- Resume playback of the recording.
- Fast-forward the recording. Press this button multiple times to change the playback speed.
- Press this button at any time to stop recording. The option to save the recording or delete it will be displayed.
Recording list
[Recording list] is a place where you can access all your recordings. From here you can play them, delete them and edit any scheduled recordings. If you have recordings on an external storage drive, make sure it is connected to the TV.
List of recordings
While watching broadcast TV, press the (menu) button to open the menu and select [Recording List].
![Recorded Job Title Recorded Video (Receiving) Scheduled Edit Animal world [0] - 12.5x 100% (Video - Live) America's Next Top Maps [0] - 12.5x 100% (Video - Live) World Business Report [0] - 12.5x 100% (Video - Live) World News Today [0] - 12.5x 100% (Video - Live) Outside Source [0] - 12.5x 100% (Video - Live) Outside Source [0] - 12.5x 100% (Video - Live) Outside Source](/content/2026/04/607437/images/ad5fceceede07b02a83fa8dcf7ba852d725f36dbdd7a8a53dfd6fef45dd9fdf5.jpg)
Start playback of any of the available records by selecting it and pressing the OK button.
At the top of the screen there is a filtering option (default setting is "All"). You can select this filter by moving the cursor up until the filter is highlighted. Press the OK button to change the filter setting. You can choose to display only recordings with a certain type of content, e.g., News, Sports, etc.
To the right of the filter is the [Edit] item. By selecting this item and pressing the OK button, you can mark recordings for deletion. Select the recordings you want to delete with the OK button - the marked items will be displayed with a check mark on the right side. Press the ▶ button (right) to delete the selected recordings.
Scheduled recordings menu
While watching broadcast TV, press the (menu) button to open the menu and select [Recording List]. Press the right) button to display [Scheduled] menu.
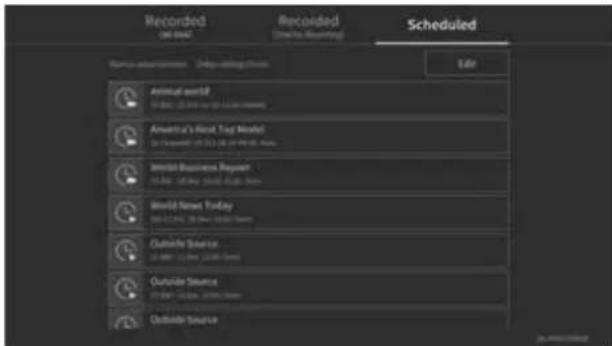
Here you can view a list of all upcoming recordings. By selecting an upcoming recording and pressing the OK button, you can edit the recording options.
By selecting [Edit] and pressing OK, you can mark scheduled recordings for deletion. Press the OK button to select the scheduled recordings you want to delete - the selected entries will be displayed with a check mark on the right side. Press the ▶ button (right) to delete the selected scheduled recordings.
TV viewing with time shift
Time shift is a function that allows you to pause the live TV programme or DVB radio programme you are currently watching. During pause, the programme is loaded into a temporary time shift buffer. The maximum time delay is three hours. When you resume playback after a certain amount of time has elapsed, you can watch the programme stored in the buffer, allowing you to rewind and fast-forward from the point at which you started the time shift to the current live TV content.
The Time shift function requires a storage drive. For TVs with integrated storage drive this is done on the internal hard drive, for TVs without an integrated hard drive on an externally connected USB storage device.
Note: It is not possible to leave currently watched channel during time shift. If you want to use the TV while recording a programme, we recommend using standard recording via Digital recorder, which will also record in the background on another source or when the TV app is running. Ongoing recording via the Digital recorder can be fast-forwarded and rewound.
Press the ◀ (left) or ▶ (right) button on the remote control to start the time shift.
The live TV screen freezes and the time shift control panel appears.
The control panel disappears after a few seconds of no activity. You can call it up again by pressing the ◀ (left) or ▶ (right) button.
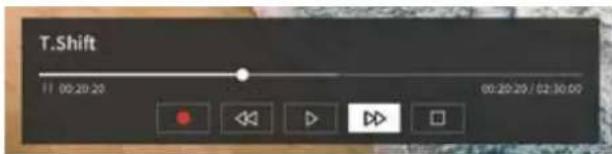
You can use the arrow keys and the OK button to select and confirm the options in the control panel.
Press the ◀ button to hide the control panel. Please note that hiding the panel does not stop the time shift.
- Converts buffered time shift content (up to 3 hours) to standard recording. The recording can then be saved to a storage drive.
- Rewind the buffered content. Press this button multiple times to change the rewind speed.
- Resume playback of buffered content.
II - Pause the currently viewed content. Time shift buffering continues in the background. - Fast-forward the buffered content. Press this button multiple times to change the playback speed.
- Stops the time shift. All buffered content will be deleted.
Teletext
Press the (teletext) button to open the teletext. Press the (exit) button to leave the teletext.
Teletext control panel
As soon as you open teletext, the control panel appears on the right side of the screen. This panel disappears after a few seconds of inactivity. You can close it manually by pressing the (back) button. You can open it anytime by pressing the OK button.
Use the arrow keys to select any item on the bar and confirm with OK.
[Teletext] – First press – show picture of broadcast TV behind the teletext; Second press – change the view to split screen (teletext/TV Picture); Third press – close the teletext.
[Index] - Jump to the index page.
[Page up] – View the next page of the teletext.
[Page down] – View the previous page of the teletext.
[Hold] – If a teletext page has multiple subpages, these are automatically cycled through. Hold option will stop the cycle at the currently displayed subpage. If the hold option is enabled, a green letter "H" will appear at the top.
[Reveal] – Show/hide hidden information on the teletext page. If the reveal option is enabled, a green letter "R" will appear at the top.
[Subpage] - Use the number buttons 0-9 to navigate to the desired sub-page by entering a 4-digit number.
[Cancel] – Hide the teletext control bar.
Direct keys control
When the control panel is hidden, you can use the remote control buttons to control the teletext:
0 - 9 – Enter the desired page number directly.
◀/▶ Use left/right key to go to the previous/next page.
▲/▼ - Use up/down key to go to the next/previous subpage (if available).
Colour buttons – The coloured writing on the bottom line shows you which colour button you need to use to select the topic area or page number.
HbbTV
HbbTV (Hybrid broadcast broadband television) offers the user variety of multimedia content, e.g., media centres or additional information about the current programme, if the channel provides it.
Note: To use HbbTV, the TV must be connected to the internet.
Controlling an HbbTV application
Red button – While watching TV, press to display an HbbTV menu.
Colour buttons – Execute a corresponding command/function displayed in the on-screen hints.
(€) (exit) – Closes an HbbTV application.
Opening an HbbTV application
If an HbbTV application is available for the chosen channel after changing channels, a notification will usually appear in the corner of the screen. Press the red button to display an HbbTV application.
The appearance, key assignments and available functions of the HbbTV applications are dependent on the provider. Loewe do not guarantee the accessibility, functionality or content of HbbTV applications.
Disabling/enabling HbbTV
If you do not wish to use HbbTV and don't want HbbTV notifications to appear when you switch between channels, you can disable HbbTV. To disable/enable HbbTV for all channels, go to the menu and select [Settings] -> [System] -> [Application Settings] -> [HbbTV]. You can also manually disable/enable an HbbTV on the currently watched channel by pressing the (menu) button and changing [HbbTV] item to on/off.
Common Interface (CI/CI Plus)
Common Interface, also called CI, is an interface in the TV set, into which a Conditional Access Module (CA module) can be plugged. The CA module and the smartcard from a corresponding Pay TV supplier enable reception of encrypted channels.
CI Plus is an advanced development of the DVB Common Interface Standard. CI Plus slots are in principle downward compatible to the previous CI standard, i.e. CA modules and Smart Cards according to the past CI standard can continue to be used in CI Plus slots, as far as the programme provider permits this.
Programme providers who use the CI Plus standard can assign different rights for their broadcast programmes.
For instance, the programme provider can restrict or completely prevent recording or later watching of an encoded programme.
If there are such regulations, these also apply to timeshift television accordingly.
A screen message informs you of this fact, if you would like to record such a programme. Recording is carried out in such a case (an appropriate entry is displayed in the list of recordings). It is then, however, depending on the program provider, no longer possible to watch the recorded programme or only for a limited time.
Note: All restrictions mentioned here are the responsibilities of the broadcaster. The TV simply values the signalling set by the broadcaster as neutral.
Furthermore, the programme provider can prevent external copying of protected programmes.
It could be necessary to enter the youth protection PIN of the CA module when programming the data, if you want to record a CI Plus protected programme, which has been protected against viewing by minors.
The Parental lock PIN can also be stored in the TV set. The access code of the TV set is required for watching the programme later.
Software update for CI Plus capable CA modules
From time to time, there will be new system software for your CA module. There are two software update types.
Recommended update:
Information on an available update is displayed. You can either run this or cancel the procedure. If you do not install the update, the information will reappear in regular intervals until the update has been installed.
Forced update:
Information on an available update is displayed. The module does no longer decode until the update has been successfully implemented.
Conditional Access module (CA module)
In order to receive coded digital channels, a Conditional Access module (CA module) and a Smart Card must be inserted in the CI slot of your TV set.
The CA module and the Smart Card are not part of the set of equipment supplied with the TV set. They are usually available from your dealer. Loewe does not provide any guarantee for the functioning of the CA module.
The TV set must first recognise and set up the CA module during initial operation. Therefore, it can take up to a minute until decoding starts during initial operation.
Inserting the Smart Card into the CA module
Push the Smart Card into the CA module as far as it will go. The side of the card with the gold chip on it should be pointing towards the thicker side of the insertion slot (see illustration). Note the direction of the arrow printed on the Smart Card.
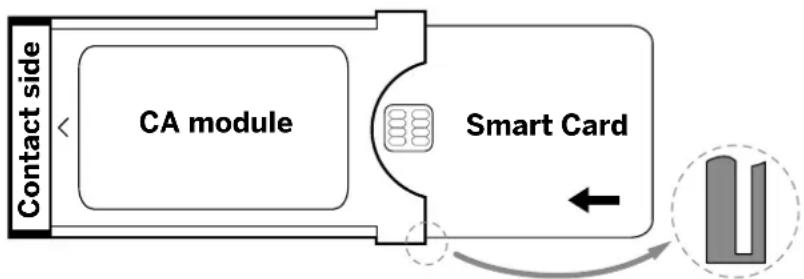
flowchart
graph LR
    A["Contact side"] --> B["CA module"]
    B --> C["Smart Card"]
    C --> D["Output"]
    style A fill:#f9f,stroke:#333
    style B fill:#ccf,stroke:#333
    style C fill:#cfc,stroke:#333
    style D fill:#fcc,stroke:#333
Inserting the CA module into the TV set's CI slot
Switch off the TV by unplugging it from the socket.
Remove the cover from the rear of the set.
Insert the CA module carefully into the CI slot, ensuring that the contact side goes in first. Do not use force. Make sure the module is not twisted in the process. Push the CA module in as far as it will go.
Finally, close the side cover.

flowchart
graph TD
    A["Device 1"] --> B["Port 1"]
    A --> C["Port 2"]
    B --> D["Device 3"]
    C --> D
    D --> E["Device 4"]
    style A fill:#f9f,stroke:#333
    style E fill:#bbf,stroke:#333
VESA standard
Instructions on using third-party mounting options according to the VESA standard
Loewe flat screen TV sets are specified for Loewe accessories. When using third-party mounting options according to the VESA standard, the manufacturer's instructions on the mounting options must be observed.
Loewe accepts no liability for the use of mounting options from other manufacturers.
On the rear wall of the TV set, there are four points of screw connections to receive the VESA adapter bolts.
Mounting a Loewe flat screen TV set to a holder according to the VESA standard necessarily requires the use of Loewe VESA adaptor bolts. Otherwise, the TV set may be damaged.
Screw the Loewe VESA adapter bolts with a torque of approx. 4 Nm into the screwing points of the TV rear panel (see Fig. 1). First, possibly existing screws in the four screwing points must be removed.

natural_image
Line drawing of a table with mechanical components and directional arrows indicating movement (no text or symbols)
The Loewe VESA adaptor bolts are used to ensure stability and the necessary minimum distance of 5 mm between rear wall of the TV set and VESA holder (see Fig. 2). The VESA holder must not rest on the rear panel.
When mounting the TV set, always check that all four Loewe VESA adaptor bolts are used. For each mounting point, only one VESA adapter bolt may be used. It is inadmissible to screw several VESA adapter bolts or extend individual adapter bolts.
Measure the hole distance between the screwing points of your TV set. A hole distance of 400 x 400 mm on the rear of the TV set means VESA 400 standard.
Thus, a suitable mount bracket must also correspond to the VESA 400 standard. If the VESA standard of your TV set fits the standard of the desired bracket, the bracket has also to be approved for the weight and size of the TV set (for weight and TV set size refer to chapter
Technical Data).
Loewe is not responsible for the permissible load-carrying capacity and the professional fixing of the holder.
Please observe additionally and definitely the points described in the chapter on safety instructions.
If you use a VESA mounting options from other manufacturers, you can order the Vesa adapter bolts M6x32 (No. 90473.988) at your authorized dealer of Loewe.
Hotel mode
To enter hotel mode, press the (menu) button, then go to [Settings] -> [Sound] -> [Speakers] -> [Balance]. While the cursor is on the [Balance] menu item, use the remote control to enter the PIN code. You can request a PIN code to enter hotel mode by calling the service center.
[Hotel Mode] – Activates/deactivates hotel mode.
[Search Lock] – If set to On, the user cannot tune channels.
[Submenu Lock] – If set to On, the user can only change basic settings through the main menu.
[Lock Current Settings] – If set to On, any setting changes made by the user will not be saved when the TV is switched off.
[App Lock] – Select the apps that should be disabled and removed from the Home menu. The content recommendations of the selected apps will also be hidden.
[Max Volume] - Limit the maximum volume that the user can set using the volume buttons.
[Min Volume] - Limit the minimum volume that the user can set using the volume buttons.
[Power On Volume] - Set the default volume when the TV starts up.
[On Source] - Set the default source when the TV starts up.
[On Channel] – The default station when the TV is turned on. Can be only set when the default source is TV.
[Power on Mode] – This menu option decides what happens to the TV when it is reconnected to power or after a power failure. [On] – The TV turns on automatically when connected to power.
[Standby] – The TV will be in standby mode when connected to power.
[Remember] – The TV will be in the same condition as it was when the power was disconnected. If the TV was on when the power was disconnected, it will also be on when the power is reconnected. If it was off when the power was disconnected, it will remain in standby mode when the power is reconnected.
[Auto Sleep] – If set to On, the TV will go into standby mode within 15 minutes if no button presses are detected on the remote control.
[Source Lock] – Select the input sources that should not be accessible to the user.
[Logo] – Settings for the logo at startup. The options are:
[Off] - The TV will start without a welcome screen.
[Local] – The Locwe logo is displayed at start-up.
[Welcome] – The text "Welcome" is displayed at start-up.
[USB Input] – Displays the image imported via USB. Import a JPG file (1920 x 1080 pixels resolution, no larger than 512 kB) from the root directory of a connected USB storage device. After selecting the file from the list, the file is imported into the internal memory of the TV and used as the welcome screen at startup.
[Language Selection] - If it is set to on, the language selection for the menu will be displayed when the TV is switched on.
[Hotel Info Display] – When the TV starts, it displays a set of up to 3 images with information for hotel guests. Import a JPG files (1920 x 1080 pixels, not larger than 512 kB) from the root directory of a connected USB storage device. When the files are selected from the list, they are imported into the internal memory of the TV. Change the [Interval Time] to set how long to display each image. Press the (back) button to return to the hotel mode menu.
[Clone] – Copy all settings to a USB storage device or restore them from a USB storage device.
[Hotel Info web page] – When the TV starts, the hotel's homepage will be displayed. Before viewing the home page, the guest must agree to the end user agreement and privacy policy.
Position and function of the connections
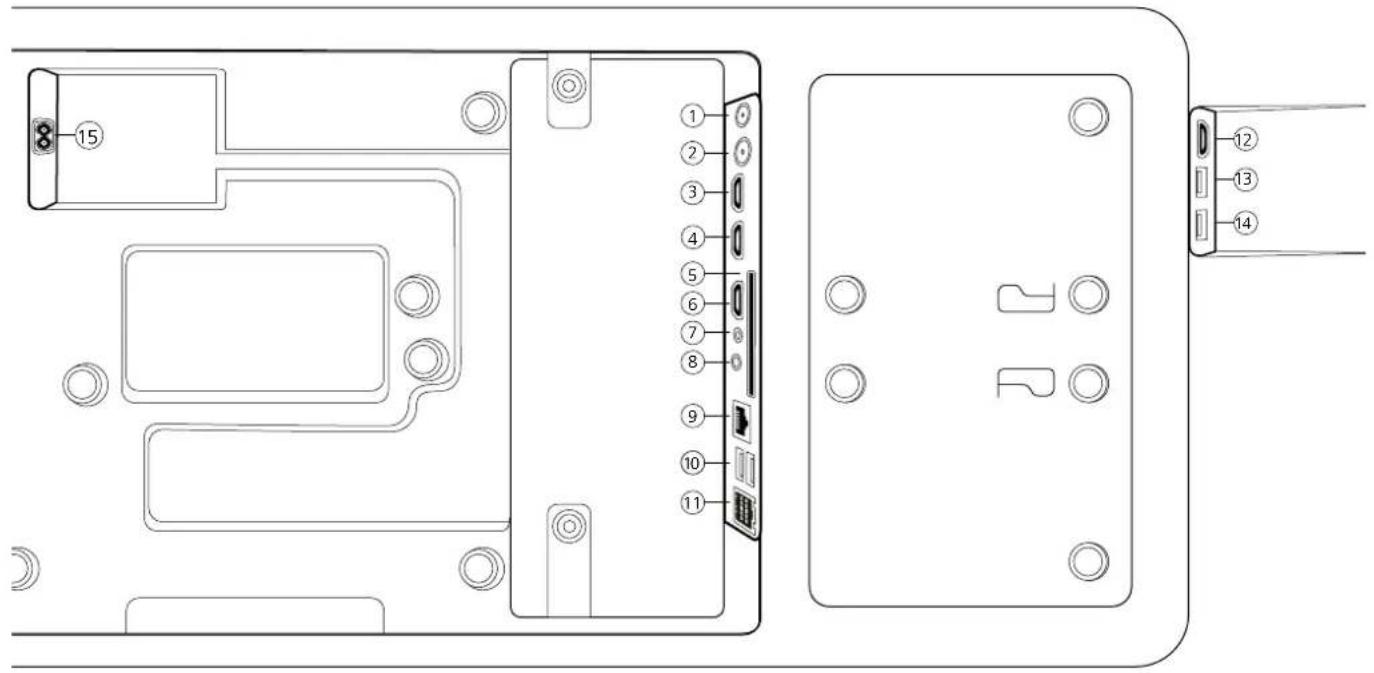
① ANT SAT - Satellite antenna
DVB-S/S2 HD
F socket - 75 Ohm / 13/18 V / 500mA
② ANT TV - Terrestrial/cable analogue / DVB-T/T2/C HD IEC socket - 75 Ohm / 5 V / 80mA
③ HDMI 3 - HDMI input 3
HDMI - Digital Video IN/Audio IN
④ HDMI 2 - HDMI input 2
(with enhanced Audio Return Channel)
HDMI - Digital Video IN/Audio IN/OUT
⑤ COMMON INTERFACE -CI slot 1 (standard V1.4)
⑥ HDMI 1 - HDMI input 1
HDMI - Digital Video IN/Audio IN/OUT
⑦ SERVICE
⑧ AUDIO OUT/TOSLINK - Audio output (analogue/digital) ^1 Jack 3,5 mm (analogue) L/R
Mini TOSLINK (digital)
⑨ LAN - Network connection
RJ-45 - Ethernet / Fast Ethernet
⑩ 2x USB 2.0 - USB connection
USB type A - USB 2.0 (max. 500mA)
⑪ klang bar i
⑫ HDMI 4 - HDMI input 4
HDMI - Digital Video IN/Audio IN
⑬ USB 3.0 - USB connection
USB type A - USB 3.0 (max. 1000mA)
⑭ USB 3.0 - USB connection
USB type A - USB 3.0 (max. 1000mA)
⑮ AC IN - Mains connection
Mains socket - 220-240 V - 50 / 60 Hz
Software Update
You have the option of updating the software on your Loewe TV set.
During the software update (package update), all software versions in the TV set are queried and updated if necessary.
You can load new software from various sources (if available).
Current software versions can be downloaded from the Loewe Internet site (see below) and installed on your unit via a USB stick.
If your TV set is connected to the Internet, the TV set can also be updated directly via the Internet.
USB stick - requirements
Note: The intended way to import an update is via an existing Internet connection. Locwe recommends that you do not update via USB. Although this is possible at any time, it should be reserved for the specialist retail partner and in exceptional cases. An update in this way leads to a reset to factory settings and requires subsequent initial setup.
If you want to use your own USB stick, here are some hints or requirements:
- Format in FAT32.
- Only one partition.
- Do not use encrypted sticks.
- Do not use sticks that pretend to be a CD-ROM drive.
- There must be no hidden files.
• The shape of the stick is important.
Maximum dimensions in mm: 70x20x10.
- In case of doubt, the USB stick should be formatted as „FAT32“ without „extended attributes“.
Software download via the Loewe website for update via USB
If available, you can download new software for your TV set from our homepage.
To do so, visit our homepage at:
www.loewe.tv/de/support
On the support homepage, you can select your product under Software.
Then you can select and download the available software for your TV set under Select software.
Unpack the downloaded file into the root directory of your USB stick.
Then carry out the software update as described below.
Technical information
About the OLED screen
The TV set with OLED screen you have purchased satisfies the most rigorous quality requirements and has been inspected with respect to pixel errors.
Despite of thorough care when manufacturing the display, it cannot be 100% guaranteed that no subpixel defects will occur due to technical reasons.
Please understand that these types of effects, as long as they are within the limits specified in the standard (ISO 9241-307, fault class II), cannot be considered as a device defect in terms of the guarantee.
Organic Light Emitting Diodes are an image technology based on self-luminous pixels that offer clear benefits in terms of image quality and performance.
Under certain conditions, persistent, one-sided loads on the OLED material can result in persistence image faults which are irreversible.
Residual image issues can arise by using static image content over a longer period, such as static images, subtitles or ticker displays, looping dash-shows or video sequences, static displays serving as presentation monitors or with video games, black bars in some screen formats.
These residual image issues are not defects within the meaning of the warranty.
To minimise such issues, Loewe has developed a special algorithm for detecting image content.
If static images are displayed for too long, the TV set automatically switches to a screen-friendly contrast mode. After a new user operation, the device immediately returns to its normal state. In addition, menu insertions are gradually reduced or displayed transparently after one minute.
Under normal viewing conditions, such residual image issues do not arise.
Information about connected USB hard drives
Disconnecting the TV set from mains during operation or an inadvertent disruption to the power supply (e.g., power failure) can cause damage to the hard disk file system and hence loss of the recorded broadcasts.
Never ever disconnect the USB storage device from the TV set during a copy process. We recommend that you switch the TV to standby mode before disconnecting it from the mains.
Loewe are not liable for the loss of data on the integrated hard disk of your TV set. To avoid data loss, we recommend copying important recordings to an external storage medium.
Software-Update
Current software versions can be downloaded from the Loewe Internet site (see below) and installed on your TV set using a USB stick.
If your TV set is connected to the Internet, the TV set can be updated directly via the Internet.
For more information on the software update, please refer to the user handbook which can be downloaded from the Loewe Internet site.
Compatibility
It cannot be guaranteed that Loewe devices will work initially and permanently with all connectable peripherals.
Imprint
Locwe Technology GmbH
Industriestraße 11
D-96317 Kronach
www.loewe.tv
Printed in Germany
Editorial date 07/21-1.2 SB/MJ/JK
© Loewe Technology GmbH, Kronach
The information in this document is subject to change without notice and does not constitute any obligation on the part of Loewe Technology GmbH.
All rights including translation, technical modifications and errors reserved.
Conformity / Manufacturer's declaration
CE
Hereby, Loewe Technology GmbH declares that this product meets the essential requirements and other relevant provisions of Directive 2014/53/EU and all applicable EU directives.
In the frequency range 5150 to 5350 MHz, this TV set is restricted to indoor use in the following countries: Belgium, Bulgaria, Denmark, Germany, Estonia, Finland, France, Greece, Ireland, Italy, Croatia, Latvia, Lithuania, Luxembourg, Malta, Netherlands, Austria, Poland, Portugal, Romania, Sweden, Slovakia, Slovenia, Spain, Czech Republic, Hungary, United Kingdom, Cyprus.
You can find the complete declaration of conformity in the product selection at:
www.loewe.tv/int/support
Environment
Power consumption
Your TV set is equipped with an eco-standby power supply. In the standby mode, the power consumption drops to low power (see chapter Technical data). If you want to save even more energy then disconnect the device from the mains. Please also note that the EPG data (Electronic Programme Guide) is lost and possibly programmed timer recordings cannot be carried out by the TV set.
The TV set will be completely separated from mains only when you unplug the mains cable.
The power consumed by the TV set during operation depends on the setting in the system settings. To achieve the values specified in the technical data, it is necessary to deactivate the „Wake-on-LAN“ function. If you activate this function, the annual energy consumption will not increase by more than 20%.
If you activate the automatic dimming, your TV picture will adapt to the ambient brightness. This reduces the power consumption of the TV set.
Automatic shutdown
If the TV is not operated for 4 hours (adjustment of volume, programme change, etc.) the TV will automatically switch to stand-by mode to save energy. A prompt to terminate this shutdown process appears one minute before the 4 hours expire.
Disposal
You have chosen a very high-value and durable product.
Packaging and cardboard
The disposal of the packaging will be gladly handled for you by your specialist dealer. If you dispose of the packaging yourself, dispose of the packaging in sorted waste disposal and according to the local disposal regulations. Place cardboard and paper in the waste paper, foils and polystyrene in the recyclable waste collection.
Nevertheless we recommend keeping the original box and packaging material on hand so that the device can be transported with optimal protection if necessary.
The set
Your Loewe product is made with quality materials and components that are recyclable and reusable.

This symbol means that electrical and electronic equipment incl. cables must be disposed of separately from household waste at the end of their service life.
You can return your old set for free at designated recycling centres, or at your dealer, if you buy a similar new device.
Additional details about returns (even for non-EU countries) are also available from your local government. They make an important contribution to the protection of our environment.
The Batteries

The original equipment batteries do not contain harmful substances such as cadmium, lead or mercury.
Used batteries should not be disposed of in household waste. Dispose of used batteries free of charge in the collection containers set up at the dealer or at the public collection points.
Licences
Dolby VISION·ATMOS
Dolby, Dolby Vision, Dolby Atmos, Dolby Audio, and the double-D symbol are registered trademarks of Dolby Laboratories Licensing Corporation. Manufactured under license from Dolby Laboratories.
Confidential unpublished works. Copyright © 2012-2020 Dolby Laboratories. All rights reserved.
dts HD.
For DTS patents, see http://patents.dts.com. Manufactured under license from DTS. Inc. (for companies headquartered in the U.S./Japan/Taiwan) or under license from DTS Licensing Limited (for all other companies). DTS, DTS-HD, and the DTS-HD logo are registered trademarks or trademarks of DTS, Inc. in the United States and other countries. © 2020 DTS, Inc. ALL RIGHTS RESERVED.

Bluetooth®
The Bluetooth® word mark and logos are registered trademarks of Bluetooth SIG Inc. and any use of such marks by Loewe Technology GmbH takes place under license. Other trademarks and trade names are those of their respective owners.
This set contains a software which is partly based on the work of the Independent JPEG Group.
This product includes software developed by the OpenSSL Project for use in the OpenSSL Toolkit (http://www.openssl.org/).
This software is provided by the OpenSSL project "as is" and any expressed or implied warranties, including, but not limited to, the implied warranties of merchantability and fitness for a particular purpose are disclaimed. In no event shall the OpenSSL project or its contributors be liable for any direct, indirect, incidental, special, exemplary, or consequential damages (including, but not limited to, procurement of substitute goods or services; loss of use, data, or profits; or business interruption) however caused and on any theory of liability, whether in contract, strict liability, or tort (including negligence or otherwise) arising in any way out of the use of this software, even if advised of the possibility of such damage.
This product includes cryptographic software written by Eric Young (eay@cryptsoft.com).
This product includes software written by Tim Hudson (tjh@cryptsoft.com).
This product contains software which was developed by third parties and / or software which is subject to GNU General Public License (GPL) and/or GNU Lesser General Public License (LGPL). You can pass on and modify them in accordance with Version 2 of the GNU General Public License or optionally every later version which is published by the Free Software Foundation.
The publication of this programme by Loewe is carried out WITHOUT ANY GUARANTEE OR SUPPORT, particularly without an implicit guarantee concerning MARKET MATURITY or the USABILITY FOR A SPECIFIC PURPOSE. Details can be found in the GNU General Public License. You can obtain the software via the Loewe customer service department.
The GNU General Public License can be downloaded from:
http://www.gnu.org/licenses/
AT DE
I oewe Technology GmbH,
Customer Care Center
Industriestraße 12
96317 Kronacn
Germany
Tel: 49 9261 99 500
F-Mail: ccc@loewe.de
www.loewe.lv
AUS
INDIMPORTSP/L
142 Bell Street Preston
3072 Victoria
Australia
Tel+61394167037
E-Mail info@ndimports.com
BE NL LU
Loewe Opta Benelux NV/SA
Lilenbaan 84
2160 Wemmec gem
Belgium
Tel:32 3 2/09930
E-Mail ccc@loewe.be
CH
Telon AG
Rutistrasse 26
8952 Schlieren
Switzerland
Tel: 41-447321511
E-Mail: infoKD@telcn.ch
CY
Hajkyiakes & Sons Ltd.
121 Prodromos Str.
2064 Strovols/Nicosia
Cyprus
Tel+357-77777007
F-Mail: service@hadikyriakos.com.cy
CZ PL HU SK RO
HR LV LT EE
ASBIS POLAND SP 70.0
LI.M.SLOWKOWSKIEGO810
IDEAL IDEA CITY PARK - BUDYNEK +4
05-090 RASZYN
POLAND
Tel: +48 507 607 506
E-mail: serwis@ccwc@asbispoland.com
DK NO SE FI
Nordio Agency ApS
Industrivej 2
I owe Technology UK limited
1 Langlands Cour. Glasgow
S/50YB
UK
Tel: 0808-1697926
E Mail: service.gb@loewe.de
GH
Hashcom Ghana Limited
Atlantic Tower,
Airport Accre.
Ghana
Tel:+233 24 408 8621
Tel.: 1233 50 133 9802
L Mail: ceo@hashcomsoftware.com
F-Mail info@hascomsoftware.com
GR
Issagog ki Frimbori F lados S A
321 Mesogion Av.
152 31 Chalandri-Althens
Greece
Tel 130 2106/21200
E-Mail: christina_argyrepoulou@isembelgr
ID
P.V2 INDONESIA
Greenlake City Ruko Wall Street RXORIO
J. Kresek Raya, Duri Kosambi - Jakarta Barat 11/50
Tel: +622129018127
IN
Savvy India
No.81 Prksha Building 2nd Floor
1st Temple Street. Between 10th &
11th Cross. Malleswaram,
Banga cre 560 003
560073
India
Tel +91-7760928674
E Mail: tech@savvyind a.in
www.savvyincia.in
IRL
Loewe Technology UK - railed
1 Langlands Court, Glasgow
C/50YB
UK
Tel.: 1800-849060
E Mail: service.ie@loewe.de
IT
InSpeedy
Via Finaudi 2
20832 Desio (MB)
Italy
Tel 00 800 69 30 8
E Mail: loewe@inspeedy.com
KZ
PROVISION Ltd
Aimaly, sl. Salpaev 90/1 Office 200
050046
Kazakhstan
Tel:+77004529046
E-mail: ocorul@gmail.com
www.loewety.kz
NG
Couteigh Investment Limited
3A Karimu Ko.un Street
VICTORIA ISLAN, LAGOS
Nigeria
Tel: +234 802 306 1090
12348057139999
E-mail: customercare@loewe.ng
www.loewc.ng
PT
Gaplasa S.A.
Parque Suècia
Avda. colorte. 3
Shopping center "RYSGALLY"
74400C ASHGARAT
Moo. 993 65 68/740
Tel. +99360197-197
E-Mail: info@preslugechorne-fm.com
www.prestigerhome.tm.com
TR
Common Interface (Cl/Cl+) 134
natural_image
Two identical rectangular diagrams with dimension arrows, enclosed in a dashed square border (no text or symbols)Corpi estranei

natural_image
Diagram of hands operating a mechanical device with arrows indicating motion (no text or symbols)natural_image
Technical line drawing of a mechanical assembly with no visible text or symbolsnatural_image
Pure electrical circuit lines without any symbolsCommon Interface (CI/CI+)
natural_image
Line drawing of a table setup with cylindrical objects and directional arrows indicating movement or assembly (no text or symbols)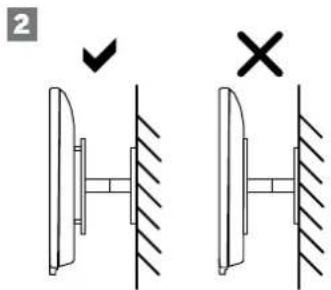
① ANT SAT - Antenna satellitare
DVB-S/S2 HD
presa F - 75 Ohm / 13/18 V / 500mA
② ANT TV - Digitale terrestre/cavo analogico / DVB-T/T2/C HD presa IEC - 75 Ohm / 5 V / 80mA
③ HDMI 3 - Ingresso HDMI 3
HDMI - Digital Video IN/Audio IN
④ HDMI 2 - Ingresso HDMI 2
(con enhanced Audio Return Channel)
HDMI - Digital Video IN/Audio IN/OUT
⑤ COMMON INTERFACE - Slot CI1 (standard V1.4)
⑥ HDMI 1 - Ingresso HDMI 1
HDMI - Digital Video IN/Audio IN/OUT
⑦ ASSISTENZA
⑧ AUDIO OUT/TOSLINK - Uscita audio (analogico/digitale)
Jack 3,5 mm (analogico) Destra/sinistra Mini TOSLINK (digitale)
⑨ LAN - Connessione di rete
RJ-45 - Ethernet / Ethernet veloce
⑩ 2x USB 2.0 - Porta USB
USB tipo A - USB 2.0 (max. 500mA)
⑪ klang bar i
⑫ HDMI 4 - Ingresso HDMI 4
HDMI - Digital Video IN/Audio IN
⑬ USB 3.0 - Porta USB
USB tipo A - USB 3.0 (max.1000mA)
⑭ USB 3.0 - Porta USB
USB tipo A - USB 3.0 (max. 1000mA)
⑮ AC IN - Alimentazione
Presa elettrica - 220-240 V - 50 / 60 Hz
Dolby, Dolby Vision, Dolby Atmos, Dolby Audio, and the double-D symbol are registered trademarks of Dolby Laboratories Licensing Corporation. Manufactured under license from Dolby Laboratories.
Confidential unpublished works. Copyright © 2012-2020 Dolby Laboratories. All rights reserved.
dts HD.
For DTS patents, see http://patents.dts.com. Manufactured under license from DTS, Inc. (for companies headquartered in the U.S./Japan/Taiwan) or under license from DTS Licensing Limited (for all other companies). DTS, DTS-HD, and the DTS-HD logo are registered trademarks or trademarks of DTS, Inc. in the United States and other countries. © 2020 DTS, Inc. ALL RIGHTS RESERVED.

Bluetooth®
The Bluetooth® word mark and logos are registered trademarks of Bluetooth SIG Inc. and any use of such marks by Loewe Technology GmbH takes place under license. Other trademarks and trade names are those of their respective owners.esto apparecchio contiene un software che è in parte basato sul lavoro di Independent JPEG Group.
I oewe Technology GmbH,
Customer Care Center
Industriestraße 12
96317 Kronacn
Germany
Tel: 49 9261 99 500
F-Mail: ccc@loewe.de
www.loewe.lv
AUS
INDIMPORTSP/L
142 Bell Street Preston
3072 Victoria
Australia
Tel+61394167037
E-Mail info@ndimports.com
BE NL LU
Loewe Opta Benelux NV/SA
Lilenbaan 84
2160 Wemmec gem
Belgium
Tel: 32 3 2/09930
E-Mail: ccc@loeweb
CH
Telon AG
Rutistrasse 26
8952 Schlieren
Switzerland
Tel: 41-447321511
E-Mail: infoKD@tel on ch
CY
Hajkyriakes & Sons Ltd.
121 Prodromos Str.
2064 Strovoclos/Nicosia
Cyprus
Tel+357-77777007
F-Mail: service@hadikyriakos.com.cy
CZ PL HU SK RO
HR LV LT EE
ASBIS POLAND SP 70.0
LI.M.SLOWKOWSKIEGO810
IDEAL IDEA CITY PARK - BUDYNEK +4
05-090 RASZYN
POLAND
Tel: +48 507 607 506
E-mail: serwis@ccwc@asbispoland.com
DK NO SE FI
Nordio Agency ApS
Industrivei 2
I owe Technology UK limited
1 Langlands Cour. Glasgow
S/50YB
UK
Tel: 0808-1697926
E Mail: service.gb@loewe.de
GH
Hashcom Ghana Limited
Atlantic Tower,
Airport Accre.
Ghana
Tel:+233 24 408 8621
Tel.: 1233 50 133 9802
L Mail: ceo@hashcomsoftware.com
F-Mail info@hascomsoftware.com
GR
Issagog ki Frimbori F lados S A
321 Mesogion Av.
152 31 Chalandri-Athens
Greece
Tel 130 2106/21200
E-Mail: christina_argyrepoulou@isembelgr
ID
P.V2 INDONESIA
Greenlake City Ruko Wall Street RXORIO
J. Kresek Raya, Duri Kosambi - Jakarta Barat 11/50
Tel: +622129018127
IN
Savvy India
No.81 Prksha Building 2nd Floor
1st Temple Street. Between 10th &
11th Cross. Malleswaram,
Banga cre 560 003
560073
India
Tel +91-7760928674
E Mail: tech@savvyind a.in
www.savvyindia.in
IRL
Loewe Technology UK - railed
1 Langlands Court, Glasgow
C/50YB
UK
Tel.: 1800-849060
E Mail: service.ie@loewe.de
IT
InSpeedy
Via Finaudi 2
20832 Desio (MB)
Italy
Tel 00 800 69 30 8
E Mail: loewe@inspeedy.com
KZ
PROVISION Ltd
Aimaly, sl. Salpaev 90/1 Office 200
050046
Kazakhstan
Tel:+77004529046
E-mail: ocorul@gmail.com
www.loewety.kz
NG
Couteigh Investment Limited
3A Karimu Ko.un Street
VICTORIA ISLAN, LAGOS
Nigeria
Tel: +234 802 306 1090
12348057139999
E-mail: customercare@loewe.ng
www.loewc.ng
PT
Gaplasa S.A.
Parcue Suècia
Avda. col Forte. 3
Shopping center "RYSGALLY"
74400C ASHGARAT
Moo. 993 65 68/740
Tel. +99360197-197
E-Mail: info@preslugechorne-lm.com
www.prestigehome.tm.com
TR
natural_image
Two identical rectangular diagrams with dimension arrows, enclosed in a dashed square frame (no text or symbols)Corps étranger
Insérer ou changer
les piles
natural_image
Diagram of a hand operating a mechanical press or press device with arrows indicating force direction (no text or symbols present)natural_image
Technical line drawing of an electrical connector assembly (no text or symbols)flowchart
graph TD
    A["Blu-ray player"] --> B["HDMI"]
    B --> C["HDMI1"]
    C --> D["Terminal Interface"]
natural_image
Pure electrical circuit lines without any symbolsDésactiver/activer HbbTV
natural_image
Line drawing of a table setup with cylindrical objects and directional arrows indicating movement or assembly (no text or symbols)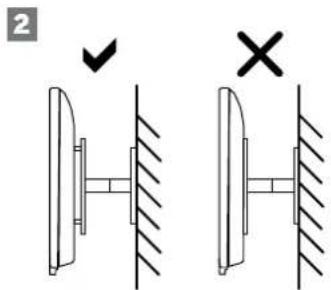
① ANT SAT - Antenne satellite
DVB-S/S2 HD
I oewe Technology GmbH,
Customer Care Center
Industriestraße 12
96317 Kronacn
Germany
Tel: 49 9261 99 500
F-Mail: ccc@loewe.de
www.loewe.lv
AUS
INDIMPORTSP/L
142 Bell Street Preston
3072 Victoria
Australia
Tel+61394167037
E-Mail info@ndimports.com
BE NL LU
Loewe Opta Benelux NV/SA
Lilenbaan 84
2160 Wemmec gem
Belgium
Tel: 32 3 2/09930
E-Mail: ccc@loeweb
CH
Telon AG
Rutistrasse 26
8952 Schlieren
Switzerland
Tel: 41-447321511
E-Mail: infoKD@tel on ch
CY
Hajkyriakes & Sons Ltd.
121 Prodromos Str.
2064 Strovolos/Nicosia
Cyprus
Tel+357-77777007
F-Mail: service@hadikyriakos.com.cy
CZ PL HU SK RO
HR LV LT EE
ASBIS POLAND SP Z O.O.
LI.M.SLOWKOWSKIEGO810
IDEAL IDEA CITY PARK - BUDYNEK +4
05-090 RASZYN
POLAND
Tel: +48 507 607 506
E-mail: serwis@ccwc@asbispoland.com
DK NO SE FI
Nordio Agency ApS
Industrivei 2
I owe Technology UK limited
1 Langlands Cour. Glasgow
S/50YB
UK
Tel: 0808-1697926
E Mail: service.gb@loewe.de
GH
Hashcom Ghana Limited
Atlantic Tower,
Airport Accre.
Ghana
Tel:+233 24 408 8621
Tel.: 1233 50 133 9802
L Mail: ceo@hashcomsoftware.com
F-Mail info@hascomsoftware.com
GR
Issagog ki Frimbori F lados S A
321 Mesogion Av.
152 31 Chalandri-Athens
Greece
Tel 130 2106/21200
E-Mail: christina_argyrepoulou@isembelgr
ID
P.V2 INDONESIA
Greenlake City Ruko Wall Street RXORIO
J. Kresek Raya, Duri Kosambi - Jakarta Barat 11/50
Tel: +622129018127
IN
Savvy India
No.81 Prksha Building 2nd Floor
1st Temple Street. Between 10th &
11th Cross. Malleswaram,
Banga cre 560 003
560073
India
Tel +91-7760928674
E Mail: tech@savvyind a.in
www.savvyindia.in
IRL
Loewe Technology UK - railed
1 Langlands Court, Glasgow
C/50YB
UK
Tel.: 1800-849060
E Mail: service.ie@loewe.de
IT
InSpeedy
Via Finaudi 2
20832 Desio (MB)
Italy
Tel 00 800 69 30 8
E Mail: loewe@inspeedy.com
KZ
PROVISION Ltd
Aimaly, sl. Salpaev 90/1 Office 200
050046
Kazakhstan
Tel:+77004529046
E-mail: ocorul@gmail.com
www.loewety.kz
NG
Couteigh Investment Limited
3A Karimu Ko.un Street
VICTORIA ISLAN, LAGOS
Nigeria
Tel: +234 802 306 1090
12348057139999
E-mail: customercare@loewe.ng
www.loewc.ng
PT
Gaplasa S.A.
Parcue Suècia
Avda. col Forte. 3
Shopping center "RYSGALLY"
74400C ASHGARAT
Moo. 993 65 68/740
Tel. +99360197-197
E-Mail: info@preslugechorne-lm.com
www.prestigehome.tm.com
TR
natural_image
Diagram of hands operating a mechanical device with arrows indicating motion (no text or symbols)natural_image
Technical line drawing of an electrical circuit board with no visible text or symbolsnatural_image
Pure electrical circuit lines without any symbolsPASO 2 - Conexión a Internet
Digital recorder (dr+)
natural_image
Line drawing of a table setup with cylindrical objects and directional arrows indicating movement or assembly (no text or symbols)
① ANT SAT - Antena de satélite
DVB-S/S2 HD
Toma F - 75 ohmios / 13/18 V / 500 mA
② ANT TV - Antena DVB-T/T2/C HD/terrestre/analogica con cable Toma IEC - 75 ohmios / 5 V / 80 mA
③ HDMI 3 - Entrada HDMI 3
HDMI – Digital Video IN/Audio IN
④ HDMI 2 - Entrada HDMI 2 cARC (con canal de retorno de audio mejorado) HDMI - Digital Video IN/Audio IN/OUT
⑤ COMMON INTERFACE - Ranura CI 1 (estándar V1.4)
⑥ HDMI 1 - Entrada HDMI 1
HDMI - Digital Video IN/Audio IN/OUT
⑦ SERVICIO
Dolby, Dolby Vision, Dolby Atmos, Dolby Audio, and the double-D symbol are registered trademarks of Dolby Laboratories Licensing Corporation. Manufactured under license from Dolby Laboratories.
Confidential unpublished works. Copyright © 2012-2020 Dolby Laboratories. All rights reserved.
dts HD.
For DTS patents, see http://patents.dts.com. Manufactured under license from DTS, Inc. (for companies headquartered in the U.S./Japan/Taiwan) or under license from DTS Licensing Limited (for all other companies). DTS, DTS-HD, and the DTS-HD logo are registered trademarks or trademarks of DTS, Inc. in the United States and other countries. © 2020 DTS, Inc. ALL RIGHTS RESERVED.

Bluetooth®
The Bluetooth® word mark and logos are registered trademarks of Bluetooth SIG Inc. and any use of such marks by Loewe Technology GmbH takes place under license. Other trademarks and trade names are those of their respective owners.
This set contains a software which is partly based on the work of the Independent JPEG Group.
I oewe Technology GmbH,
Customer Care Center
Industriestraße 12
96317 Kronacn
Germany
Tel: 49 9261 99 500
F-Mail: ccc@loewe.de
www.loewe.lv
AUS
INDIMPORTSP/L
142 Bell Street Preston
3072 Victoria
Australia
Tel+61394167037
E-Mail info@ndimports.com
BE NL LU
Loewe Opta Benelux NV/SA
Lilenbaan 84
2160 Wemmec gem
Belgium
Tel:32 3 2/09930
E-Mail: ccc@loewe.be
CH
Telon AG
Rutistrasse 26
8952 Schlieren
Switzerland
Tel: 41-447321511
E-Mail: infoKD@telcn.ch
CY
Hajkyiakes & Sons Ltd.
121 Prodromos Str.
2064 Strovolos/Nicosia
Cyprus
Tel+357-77777007
F-Mail: service@hadikyriakos.com.cy
CZ PL HU SK RO
HR LV LT EE
ASBIS POLAND SP Z O.O.
LI.M.SLOWKOWSKIEGO 810
IDEAL IDEA CITY PARK - BUDYNEK +4
05-090 RASZYN
POLAND
Tel: +48 507 607 506
E-mail: serwis@ccwc@asbispoland.com
DK NO SE FI
Nordio Agency ApS
Industrivej 2
I owe Technology UK limited
1 Langlands Cour. Glasgow
S/50YB
UK
Tel: 0808-1697926
E Mail: service.gb@loewe.de
GH
Hashcom Ghana Limited
Atlantic Tower,
Airport Accre.
Ghana
Tel:+233 24 408 8621
Tel.: 1233 50 133 9802
L Mail: ceo@hashcomsoftware.com
F-Mail info@hascomsoftware.com
GR
Issagog ki Frimbori Flados S.A.
321 Mesogion Av.
152 31 Chalandri-Athens
Greece
Tel 130 2106/21200
E-Mail: christina_argyrepoulou@isembelgr
ID
P.V2 INDONESIA
Greenlake City Ruko Wall Street RXORIO
J. Kresek Raya, Duri Kosambi - Jakarta Barat 11/50
Tel: +622129018127
IN
Savvy India
No.81 Prksha Building 2nd Floor
1st Temple Street. Between 10th &
11th Cross. Malleswaram,
Banga cre 560 003
560073
India
Tel +91-7760928674
E Mail: tech@savvyind a.in
www.savvyincia.in
IRL
Loewe Technology UK - railed
1 Langlands Court, Glasgow
C/50YB
UK
Tel.: 1800-849060
E Mail: service.ie@loewe.de
IT
InSpeedy
Via Finaudi 2
20832 Desio (MB)
Italy
Tel 00 800 69 30 8
E Mail: loewe@inspeedy.com
KZ
PROVISION Ltd
Aimaly, sl. Salpaev 90/1 Office 200
050046
Kazakhstan
Tel:+77004529046
E-mail: ocorul@gmail.com
www.loewety.kz
NG
Couteigh Investment Limited
3A Karimu Ko.un Street
VICTORIA ISLAN, LAGOS
Nigeria
Tel: +234 802 306 1090
12348057139999
E-mail: customercare@loewe.ng
www.loewc.ng
PT
Gaplasa S.A.
Parque Suècia
Avda. col Forte. 3
Shopping center "RYSGALLY"
74400C ASHGARAT
Moo. 993 65 68/740
Tel. +99360197-197
E-Mail: info@preslugechorne-lm.com
www.prestigehome.tm.com
TR
Common Interface (CI/CI Plus)....276
Conditional Access Module (CA-module)....276
VESA-norm 277
Hotelmodus 278
Local Loewe Service partner 286
Code list of Loewe Remote for SAT and CABLE STBs 287
Disclaimer
natural_image
Two identical rectangular diagrams with dimension arrows, enclosed in a dashed border (no text or symbols)Vreemde voorwerpen


natural_image
Diagram of a hand operating a device with arrows indicating motion (no text or symbols)natural_image
Technical line drawing of a mechanical assembly with no visible text or symbolsnatural_image
Pure electrical circuit lines without any symbolsSTAP 6 - Ingangsbron selecteren
Common Interface (CI/CI Plus)
natural_image
Line drawing of a table setup with cylindrical objects and directional arrows indicating movement or assembly (no text or symbols)
① ANT SAT - Satellietantenne
DVB-S/S2 HD
F-bus-75 Ohm / 13/18 V / 500 mA
② ANT TV - Antenne/kabel
analoog / DVB-T/T2/C HD
IEC-bus - 75 Ohm / 5 V / 80 mA
③ HDMI 3 - HDMI-ingang 3
HDMI - Digital Video IN/Audio IN
④ HDMI 2 - HDMI-ingang 2 (met enhanced Audio Return Channel) HDMI - Digital Video IN/Audio IN/OUT
⑤ COMMON INTERFACE -CI-sleuf 1 (standaard V1.4)
⑥ HDMI 1 - HDMI-ingang 1
HDMI - Digital Video IN/Audio IN/OUT
⑦ SERVICE
⑧ AUDIO OUT/TOSLINK - Audio-uitgang (analoog/digital) ^1 Stekkerbus 3,5 mm (analoog) L/R
Mini TOSLINK (digital)
⑨ LAN - Netwerkaansluiting
RJ-45 - Ethernet / Fast Ethernet
⑩ 2x USB 2.0 - USB-aansluiting
USB type A - USB 2.0 (max. 500M A)
⑪ klang bar i
⑫ HDMI 4 - HDMI-ingang 4
HDMI - Digital Video IN/Audio IN
⑬ USB 3.0 - USB-aansluiting
USB type A - USB 3.0 (max. 1000 mA)
⑭ USB 3.0 - USB-aansluiting
USB type A - USB 3.0 (max. 1000 mA)
⑮ AC IN - Netaansluiting
Stopcontact - 220-240 V - 50 / 60 Hz
Software-update
Local Loewe Service partner

Code list of Loewe Remote for SAT and CABLE STBs
| BRAND NAME 3 digit code | |||||||||||||
| ASSAT 166 169 | |||||||||||||
| ACCESS MEDIA 124 | |||||||||||||
| ADB 118 120 123 | |||||||||||||
| AEGIR 179 | |||||||||||||
| AWA 141 | |||||||||||||
| AKAI 033 104 | |||||||||||||
| ALBA | 060 | 017 | 067 | 104 | 180 | 201 | |||||||
| ALCATEL | 336 | ||||||||||||
| ALDES | 133 168 | 179 200 | |||||||||||
| ALLSAT | 033 | 048 | 059 | 077 | 201 | ||||||||
| ALLSONIC | 133 168 | 226 | |||||||||||
| ALLTECI | 060 137 | 225 | |||||||||||
| ALPHA | 033 | ||||||||||||
| ALTAI | 047 | ||||||||||||
| AMINO | 322 101 | ||||||||||||
| AMITRONICA | 060 | ||||||||||||
| AMPLRL | 047 196 | ||||||||||||
| AMSTRAD | 060 | 006 | 047 | 071 | 165 | 174 | 175 | 186 | 212 | 216 | 217 | 227 | 124 |
| 042 | |||||||||||||
| ANGLO | 060 | ||||||||||||
| ANKARO | 060 | 051 | 133 | 161 | 168 | 226 | |||||||
| ANTTRON | 017 | 077 | 180 | ||||||||||
| APOLLO | 017 | ||||||||||||
| ARCON | 051 161 | ||||||||||||
| ARMSTRONG | 033 | 175 | |||||||||||
| ARTIHUR MARTIN | 130 | ||||||||||||
| ASA | 009 | ||||||||||||
| ASAT | 033 | ||||||||||||
| ASI F | 060 | ||||||||||||
| AST | 127 | ||||||||||||
| ASTACOM | 171 | 172 | |||||||||||
| ASTON | 032 | 095 | 125 | ||||||||||
| ASTRA | 013 | 021 | 098 | 164 | 175 | 178 | 222 | 223 | |||||
| ASTRELL | 072 | ||||||||||||
| ASTRO | 006 | 091 | 094 | 176 | 179 | 180 | 183 | 226 | |||||
| AUDIOTON | 059 140 | ||||||||||||
| AUSTAR | 212 | 332 | |||||||||||
| AVALON | 047 | ||||||||||||
| AVANIT | 093 | ||||||||||||
| AXIS 054 210 223 226 | |||||||||||||
| BALMFT | 131 | 132 | |||||||||||
| BARCOM | 021 091 | ||||||||||||
| BEKO 067 | |||||||||||||
| BELGACOM | 111 | ||||||||||||
| BEST 051 226 | |||||||||||||
| BIRMINGHAM CABLE | 343 | ||||||||||||
| BLAUPUNKT | 090 176 | ||||||||||||
| BLUE SKY | 060 217 | ||||||||||||
| BOCA | 163 | 169 | 175 | 186 | 199 | 222 | |||||||
| BOXSAM | 026 | ||||||||||||
| BRAIN WAVE | 094 161 | ||||||||||||
| BRANDT | 069 | ||||||||||||
| BRITISH SKY BROADCASTING | 050 | 227 | |||||||||||
| BRITISH TELECOM | 341 | ||||||||||||
| BROADCAST | 013 | ||||||||||||
| BROCO | 060 | 223 | |||||||||||
| BRUNS | 133 | ||||||||||||
| BSKYB | 227 134 | ||||||||||||
| BT SATELLITE | 104 | 171 | 172 | 335 | |||||||||
| BT VIS/ON | 326 | ||||||||||||
| BJBU SAT | 060 | ||||||||||||
| BUSH | 048 | 077 | |||||||||||
| BVV | 161 | ||||||||||||
| CAMBRIDGE | 006 | 104 199 | |||||||||||
| CANAL 128 191 211 019 321 136 139 142 | |||||||||||||
| CANAL + 031 | |||||||||||||
| CANARY 137 | |||||||||||||
| CARAT.SOM 054 | |||||||||||||
| CGV 072 148 150 | |||||||||||||
| CHAPARRAL 012 | |||||||||||||
| CHFSS 197 | |||||||||||||
| CISCO 337 338 058 311 | |||||||||||||
| CITYCOM 135 164 203 204 230 | |||||||||||||
| CLARK 180 | |||||||||||||
| CLATRONIC 094 | |||||||||||||
| CLEMENS KAMPHUS | 133 210 | ||||||||||||
| CNT 179 | |||||||||||||
| COMCAST | 004 | ||||||||||||
| COMCRYPT | 321 | ||||||||||||
| COMMANDER | 161 | ||||||||||||
| COMMLINK | 168 | ||||||||||||
| COMMUNICADO | 054 | ||||||||||||
| COMTEC | 054 | 168 | |||||||||||
| CONDOR | 164 | 226 | |||||||||||
| CONNEXIONS | 047 | 226 231 | |||||||||||
| CONRAD | 006 0 | 0164 169 | 226 230 | ||||||||||
| CONTEC | 054 | 135 169 | |||||||||||
| COSAT 059 | |||||||||||||
| CROWN | 175 | ||||||||||||
| CRYPTOVISION | 067 | ||||||||||||
| CYBERMAXX | 116 | ||||||||||||
| CYRUS 037 | |||||||||||||
| DAERYUNG | 047 | ||||||||||||
| DAEWOO 060 017 | |||||||||||||
| DANSAT 048 077 | |||||||||||||
| DAUMLING | 163 | ||||||||||||
| D-BOX | 045 | 214 | |||||||||||
| DECCA 038 | |||||||||||||
| DECSAT 310 | |||||||||||||
| DELFA | 212 | ||||||||||||
| DEUTCHE TELEKOM | 056 | ||||||||||||
| DEW | 054 | ||||||||||||
| DIAMOND | 225 | ||||||||||||
| DIRECTV | 141 | ||||||||||||
| DISCOVERER | 197 | ||||||||||||
| DISEQC | 171 | 172 | |||||||||||
| DISK EXPRESS | 051 | ||||||||||||
| DISMOND | 225 | ||||||||||||
| DISTRATELL | 119 | 147 | 185 | 217 | |||||||||
| DISTRISAT | 033 059 | ||||||||||||
| DNR 161 | |||||||||||||
| DNT | 033 | 037 | 047 | 231 | |||||||||
| DST | 017 | ||||||||||||
| DUNE | 226 | ||||||||||||
| DYNASAT 195 | |||||||||||||
| LCHOSTAR | 060 | 021 | 047 | 128 | 211 | 213 | 035 | 039 | |||||
| EIF | 014 198 | ||||||||||||
| LINI ILLL | 060 | 006 | 017 | 163 | 168 | 169 | 175 | 186 | 222 | ||||
| FI EKTA | 179 | ||||||||||||
| ELAP | 155 132 | ||||||||||||
| FI SAT | 071 | ||||||||||||
| ELTA | 017 | 033 | 059 | 226 | |||||||||
| LLTASAT 059 | |||||||||||||
| FLTRONA | 126 | ||||||||||||
| LMANON | 017 | ||||||||||||
| FMMF ESSF 133 213 226 | |||||||||||||
| ENGEL 060 158 | |||||||||||||
| FP SAT | 067 | ||||||||||||
| ESSENTIELB | 075 | ||||||||||||
| LURILULT | 185 217 | ||||||||||||
| FUROCRYPT 021 067 | |||||||||||||
| EURODEC 110 232 | ||||||||||||||
| EUROPA 006 033 161 164 169 212 | ||||||||||||||
| EUROPEAN 163 | ||||||||||||||
| EUROSAT 175 225 | ||||||||||||||
| EUROSKY 164 175 186 226 | ||||||||||||||
| EUROSTAR 164 233 234 | ||||||||||||||
| FUTRA 137 203 | ||||||||||||||
| EXATOR 017 104 180 | ||||||||||||||
| FACOR 059 | ||||||||||||||
| FAVAL | 096 | |||||||||||||
| TERGUSON | 048 | 067 | 077 | |||||||||||
| FIDELITY | 006 071 | |||||||||||||
| FINLANDIA | 021 | 067 | ||||||||||||
| FINLUX | 009 | 010 | 021 | 067 | 220 | |||||||||
| FINNSAT 110 | ||||||||||||||
| FLAIR MATE | 060 | |||||||||||||
| FORCE 068 | ||||||||||||||
| FOXTEL | 235 | 022 | 319 | |||||||||||
| FRACARRO | 017 156 213 | |||||||||||||
| FRANCE TELECOM | 344 | |||||||||||||
| FREECOM | 017 | 193 | 201 | |||||||||||
| FREESAT | 137 160 | |||||||||||||
| FTE | 060 | 080 | 137 | 169 | 196 | 199 | 212 | 226 | ||||||
| FUBA | 010 | 014 | 017 | 021 | 047 | 051 | 135 | 176 | 220 | 226 | ||||
| FUJ ONKYO | 162 167 173 | |||||||||||||
| GSAT | 077 | 130 | ||||||||||||
| GALAXI | 051 | |||||||||||||
| GALAXIS | 054 | 059 | 133 | 161 | 168 | 210 | 211 | 212 | 223 | 226 | 236 | 237 | 238 | |
| GALAXISAT | 127 | |||||||||||||
| GARDINER 204 | ||||||||||||||
| GENIX | 024 | |||||||||||||
| GENERAL-INSTRUMENTS | 332 | |||||||||||||
| GMI | 175 | |||||||||||||
| GOLDBOX | 128 191 | 211 | ||||||||||||
| GOODMANS | 067 | |||||||||||||
| GRANADA | 021 | |||||||||||||
| GRANDIN 185 239 | ||||||||||||||
| GROTHUSEN | 017 | 193 | ||||||||||||
| GRUNDIG | 003 | 067 | 090 | 171 | 172 | 176 | 217 | 227 | 240 | 241 | 020 | |||
| HANSEATIC | 197 | |||||||||||||
| HANTOR 017 094 | ||||||||||||||
| HANURI | 179 | |||||||||||||
| HARTING UND HEI LING | 133 | |||||||||||||
| HASE & IGEL | 161 | |||||||||||||
| HID DIGBOX | 312 | |||||||||||||
| HELIOCOM | 164 | |||||||||||||
| HIGH PERFORMANCE | 122 | |||||||||||||
| HINARI 017 077 | ||||||||||||||
| HIRSCHMANCE | 090 | |||||||||||||
| HIRSCHMANN | 006 | 009 | 010 | 047 | 081 | 113 | 133 | 171 | 172 | 176 | 196 | 203 | 216 | 219 |
| 243 | ||||||||||||||
| HISAWA 094 | ||||||||||||||
| HITACHI | 067 | |||||||||||||
| IINL | 165 | |||||||||||||
| HOMECAST | 316 323 | |||||||||||||
| HOUSTON | 059 | 071 | 161 | 171 | ||||||||||
| HUMAX | 212 | 236 | 244 | 005 | 097 | 177 | 181 | 305 | 306 | 307 | 320 | 063 | ||
| HUTH | 013 | 054 | 059 | 094 | 133 | 161 | 163 | 164 | 168 | 169 | 175 | 186 | ||
| HIYPLRVISION | 345 | |||||||||||||
| ICX | 138 | |||||||||||||
| IKUSI | 082 | |||||||||||||
| IMFX | 185 | |||||||||||||
| INNOVATION | 116 | |||||||||||||
| INTERNATIONAL | 186 | |||||||||||||
| INTERTRONIC | 175 | |||||||||||||
| INTERVISION | 059 | 164 | 170 | |||||||||||
| INVIDFO | 213 | |||||||||||||
| ITALTEL 213 124 | ||||||||||||||
| ITT 021 067 | ||||||||||||||
| ITT NOKIA 009 000 021 067 214 | ||||||||||||||
| JEDMON 059 | ||||||||||||||
| JERROLD 138 332 341 343 | ||||||||||||||
| JOHANSSON 069 094 | ||||||||||||||
| JOK 171 172 | ||||||||||||||
| JSR 059 | ||||||||||||||
| JVC | 003 | 104 | ||||||||||||
| KAMM | 060 | |||||||||||||
| KATHREIN | 060 | 033 | 037 | 080 | 081 | 090 | 091 | 094 | 135 | 166 | 176 | 180 | 196 | 204 |
| 218 24 | 246 | 079 | ||||||||||||
| KCPI | 053 | |||||||||||||
| KEYWEST | 163 | |||||||||||||
| KOLON | 017 | |||||||||||||
| KONIC | 164 | |||||||||||||
| KOSCOM | 210 | |||||||||||||
| KOSMOS | 080 081 133 193 | |||||||||||||
| KPN | 327 | |||||||||||||
| KR | 059 | 137 | 180 | 203 | ||||||||||
| KREISFLMEYER | 176 | |||||||||||||
| K SAT | 060 | |||||||||||||
| KYOSTAR | 017 180 | |||||||||||||
| KYOTO GMI ATLAN | 243 | |||||||||||||
| L&S ELECTRONIC | 226 | |||||||||||||
| LASAT | 054 | 164 | 175 | 179 | 186 | 193 | 222 | 226 | ||||||
| LEMON | 161 247 | |||||||||||||
| LENCO | 060 | 017 | 161 | 164 | 193 | 223 | 226 | |||||||
| LENNOX | 059 | |||||||||||||
| LENSON | 006 | 028 | 182 | 023 | ||||||||||
| LEXUS | 033 | |||||||||||||
| LEYCO | 104 | |||||||||||||
| LG(GOLDSTAR) | 339 193 | |||||||||||||
| LIFESAT | 197 226 | |||||||||||||
| LIFETEX | 116 | |||||||||||||
| LORENZEN | 161 | 163 164 165 186 | ||||||||||||
| LORRAINE | 193 | |||||||||||||
| LUPUS | 226 | |||||||||||||
| LUXOR | 006 | 010 | 021 | 130 | 214 | |||||||||
| LYONNAISE | 110 | |||||||||||||
| M&BI | 197 | |||||||||||||
| MACAB | 225 | 232 | 248 | 329 | 096 | |||||||||
| MAGAI | 080 | |||||||||||||
| MANATA 060 171 172 | ||||||||||||||
| MANIATTAN | 059 | 067 | 151 | 171 | 172 | 179 | 210 | |||||||
| MARANTZ 033 037 | ||||||||||||||
| MASCOM 081 | ||||||||||||||
| MASPRO | 060 | 003 | 113 | 137 | 161 | 176 | ||||||||
| MASTER_S | 135 | |||||||||||||
| MATSUI | 003 | 171 | 172 | 176 | ||||||||||
| MAX | 164 | |||||||||||||
| MAXIMUM 109 102 099 | ||||||||||||||
| MR 197 | ||||||||||||||
| MLDIABOX | 191 | 211 | ||||||||||||
| MFDIAMARKT | 175 | |||||||||||||
| MEDIASAT | 006 | 128 191 211 223 | ||||||||||||
| MFDIA SYSTFM | 162 | |||||||||||||
| MEDION | 060 | 226 | ||||||||||||
| MLGA | 033 | |||||||||||||
| MFI FCTRONE | 204 | |||||||||||||
| MLMPIIIS | 054 | |||||||||||||
| METRONIC | 060 | 017 | 117 | 119 | 121 | 147 | 151 | 152 | 153 | 154 | 156 | 157 | 168 | 175 |
| 179 | 180 | 185 | 204 | 217 | 029 | 036 | 040 | 023 | ||||||
| MFTZ | 090 | 176 | ||||||||||||
| MICRO ELECTRONICS | 164 180 060 | |||||||||||||
| MICRO MAXX 116 | ||||||||||||||
| MICRO STAR | 116 | |||||||||||||
| MICRO TECHNOLOGY 060 223 | ||||||||||||||
| MICRONIK 249 | ||||||||||||||
| MINERVA 003 050 | ||||||||||||||
| MITSUBISHI 067 030 | ||||||||||||||
| MITSUMI 222 | ||||||||||||||
| MNET 321 | ||||||||||||||
| MORGAN 060 033 059 163 169 175 186 199 222 250 | ||||||||||||||
| MOTOROLA 340 338 351 | ||||||||||||||
| MR ZAPP 329 | ||||||||||||||
| MULTICHOICE | 100 235 | |||||||||||||
| MULTISTAR | 080 | |||||||||||||
| MURATTO | 127 | 193 | ||||||||||||
| MYRYAD | 037 | |||||||||||||
| MYSAT | 060 | |||||||||||||
| NAVEX | 094 | |||||||||||||
| NEC | 030 | |||||||||||||
| NETAP | 140 | |||||||||||||
| NETGEM | 041 | |||||||||||||
| NETWORK | 077 | |||||||||||||
| NEUHAUS | 060 | 006 | 059 | 161 | 164 | 168 | 210 | 223 | ||||||
| NEUSAT | 060 16 | 1210 | ||||||||||||
| NEXTWAVE | 138 | |||||||||||||
| NIKKO | 060 17 | 5201 | ||||||||||||
| NOKIA | 009 | 010 | 021 | 045 | 067 | 211 | 234 | 251 | ||||||
| NOOS | 329 | |||||||||||||
| NORDMENDE | 017 08 | 7179 | ||||||||||||
| NOVIS | 094 | |||||||||||||
| NTC | 133 203 | |||||||||||||
| NTL CABLETELL | 332 | |||||||||||||
| OCEANIC | 225 | |||||||||||||
| OCTAGON | 017 | 054 | 161 | 180 | ||||||||||
| OKANO | 080 133 | 175 | ||||||||||||
| OLYMPIC 133 | ||||||||||||||
| ONDIGITAL 187 188 189 | ||||||||||||||
| ONO | 301 | |||||||||||||
| OPTEX | 059 | 135 | 196 | 208 | 131 | 132 | 150 | |||||||
| OPTIMA | 133 | |||||||||||||
| OPTUS | 332 | |||||||||||||
| ORBITECH | 006 0 | 7 103 169 | ||||||||||||
| OTTO VLRSAND | 090 | |||||||||||||
| OXFORD | 104 | |||||||||||||
| PACE | 001 | 022 | 044 | 048 | 050 | 067 | 077 | 098 | 189 | 202 | 227 | 252 | 253 | 319 |
| 027 112 | 124 058 042 064 052 | |||||||||||||
| PACIFIC | 225 | |||||||||||||
| PACKSAT 1/1 1/2 | ||||||||||||||
| PALLADIUM | 003 | 006 | 017 | 175 | ||||||||||
| PALSAT | 006 | |||||||||||||
| PANASAT 235 | ||||||||||||||
| PANASONIC 067 227 055 | ||||||||||||||
| PANDA | 021 | 048 | 067 | 164 | 176 | 210 | ||||||||
| PATRIOT | 104 | |||||||||||||
| PHILIPS | 003 | 033 | 037 | 051 | 067 | 077 | 128 | 144 | 156 | 161 | 169 | 171 | 172 | 176 |
| 180 | 187 | 188 | 191 | 204 | 211 | 218 | 329 | 345 | 124 | 057 | 058 | 303 | ||
| PIKOLNIX | 054 077 | |||||||||||||
| PHONOTREND | 059 133 168 212 | |||||||||||||
| PIONEER 128 191 211 | ||||||||||||||
| PIXX | 255 | |||||||||||||
| PLANET | 213 | |||||||||||||
| POLSAT | 110 | |||||||||||||
| POLYTRON | 047 | 135 | ||||||||||||
| PRLDKI | 017 084 | |||||||||||||
| PRFISNER | 047 | 103 | 163 | 189 | 175 | 186 | 199 | 222 | ||||||
| PREMIERE | 191 | 211 | 214 | 007 | 059 | 133 | ||||||||
| PROMAX 067 | ||||||||||||||
| PROSAT | 168 170 | |||||||||||||
| PROSONIC | 165 | |||||||||||||
| PROTEK | 225 | |||||||||||||
| PROVISAT 201 | ||||||||||||||
| PROVISION 179 | ||||||||||||||
| PROXIMUS 330 334 | ||||||||||||||
| PSI 132 | ||||||||||||||
| PVP STEREO VISUAL MATRIX 341 | ||||||||||||||
| PYE 003 | ||||||||||||||
| PYXIS 208.210 | ||||||||||||||
| QUADRAL | 168 | 169 | 170 | 171 | 172 | 226 | ||||||||
| QUELLF 090 164 165 | ||||||||||||||
| QUEST 354 | ||||||||||||||
| QUIERO | 110 | |||||||||||||
| RADIOILA | 033 037 | |||||||||||||
| RADIX | 047 | 137 | 216 | |||||||||||
| RAINBOW | 137 | 180 | ||||||||||||
| RC | 138 104 | |||||||||||||
| RED STAR 226 | ||||||||||||||
| REDPOINT | 223 | |||||||||||||
| REDSTAR | 226 | |||||||||||||
| RFT 033 037/161 168 | ||||||||||||||
| ROADSTAR 060 | ||||||||||||||
| ROVER | 060 170 | |||||||||||||
| SABA | 077 | 161 | 164 | 171 | 172 | 179 | 201 | 217 | ||||||
| SABRE | 067 | |||||||||||||
| SAGEM | 205 | 323 | 108 | 105 | 061 | 062 | ||||||||
| SAGEMCOM | 106 | 105 | ||||||||||||
| SAKURA | 054 | |||||||||||||
| SALORA 021 130 | ||||||||||||||
| SAMSUNG | 017 | 080 | 127 | 211 | 243 | 043 | 313 | 124 | 064 | 062 | 308 | 309 | 311 | 052 |
| SAT | 006 | 071 | 127 | |||||||||||
| SAT PARTNER | 017 | 094 | 133 | 179 | 180 | 193 | 201 | |||||||
| SAT TEAM | 050 | |||||||||||||
| SATCOM | 013 | 164 | 197 | |||||||||||
| SATEC | 060 | 077 | ||||||||||||
| SATECO | 017 | |||||||||||||
| SATELCO | 226 | |||||||||||||
| SATFORD | 013 | |||||||||||||
| SATLINE | 170 | |||||||||||||
| SATMASTER | 013 | |||||||||||||
| SATPARTNER | 017 | 094 | 133 | 179 | 180 | 193 | 201 | |||||||
| SATISTATION | 151 | |||||||||||||
| SAVA | 077 | 161 | 164 | 171 | 172 | 179 | 201 | 217 | ||||||
| SCHACKE 180 | ||||||||||||||
| SCHNEIDER | 171 | 172 | 218 | |||||||||||
| SCHWAIGER | 077 | 135 | 161 | 164 | 169 | 197 | 217 | 255 | ||||||
| SCIENTIFIC ATLANTA | 352 | |||||||||||||
| SEDEA-ELECTRONIQUE | 017 | 162 | 055 | |||||||||||
| SELMANN | 047 | 104 | 175 | 223 | ||||||||||
| SEG | 017 | 094 | 165 | 178 | 197 | 226 | ||||||||
| SELECO 059 213 | ||||||||||||||
| SLPTIMO | 151 | 154 | ||||||||||||
| SERVIMAT | 066 | 070 | 072 | |||||||||||
| SERVI SAT | 059 | |||||||||||||
| SIEMENS | 090 | 176 | 199 | 073 | ||||||||||
| SILVA | 193 | |||||||||||||
| SINTRACK | 013 | |||||||||||||
| SKANTIN | 060 | |||||||||||||
| SKARDIN | 223 | |||||||||||||
| SKINSAT | 006 | |||||||||||||
| SKR | 060 | |||||||||||||
| SKY | 149 | 159 | 034 | 050 | 189 | 227 | 001 | 042 | 064 | 018 | 025 | |||
| SKY MASTER | 060 | 133 | 168 | 170 | 197 | |||||||||
| SKY PLUS | 002 | |||||||||||||
| SKYLAB | 051 | |||||||||||||
| SKYMAX | 033 | |||||||||||||
| SKYSAT | 197 | |||||||||||||
| SKYVISION | 059 | |||||||||||||
| SI | 161 | 165 | 175 | 186 | ||||||||||
| SM ELECTRONIC 060 | |||||||||||||
| SMART 186 | |||||||||||||
| SONY 067 211 227 | |||||||||||||
| SR 222 | |||||||||||||
| STARCOM 132 150 | |||||||||||||
| STARLAND 060 074 | |||||||||||||
| STARRING 094 | |||||||||||||
| STARSAT 080 | |||||||||||||
| STRONC | 017 | 179 | 180 | 186 | 196 | 211 | 226 | 235 | 075 | ||||
| STV | 014 | ||||||||||||
| STVI | 014 137 | ||||||||||||
| SUMIDA | 175 | ||||||||||||
| SUNNY SOUND | 226 | ||||||||||||
| SUNSAT 060 223 | |||||||||||||
| SUNSTAR | 163 | 175 | 186 | 222 | 226 | ||||||||
| SUFERCABLE | 343 | ||||||||||||
| SUPERNOVA | 189 | ||||||||||||
| SWISSCOM | 328 141 | ||||||||||||
| TAGRA | 059 | ||||||||||||
| TANDBERG | 008 | ||||||||||||
| TANDY | 122 | ||||||||||||
| TANTEC | 067 | ||||||||||||
| TATUNG | 067 | ||||||||||||
| TCM | 116 | ||||||||||||
| T-ENTERTAIN | 348 | ||||||||||||
| TECHNILAND | 013 | 053 | |||||||||||
| TECHNISAT | 006 | 033 | 047 | 103 | 184 | 231 | 076 | ||||||
| TECHNOWELT | 164 | ||||||||||||
| TEKCOMM | 075 | ||||||||||||
| TECO | 175 222 | ||||||||||||
| TECHWOOD | 082 | ||||||||||||
| TELASAT 164 197 | |||||||||||||
| TELECIEL | 180 | 201 | |||||||||||
| TELECOM | 060 | ||||||||||||
| TELEDIREKT | 077 | ||||||||||||
| TELEFUNKEN | 017 | 171 | 172 | 162 | |||||||||
| TELEKA | 006 | 047 | 081 | 103 | 180 | 161 | 164 | 175 | 203 | 210 | |||
| TELEMASTER | 179 | ||||||||||||
| TELENET | 312 | ||||||||||||
| TELLEPIU | 321 | ||||||||||||
| TELE PLUS ONE | 321 | ||||||||||||
| TELESAT | 164 197 | ||||||||||||
| TELESTAR 006 | |||||||||||||
| TELESYSTEM | 089 063 | ||||||||||||
| TELEVLS | 006 | 067 | |||||||||||
| TELEWIRE 059 | |||||||||||||
| TELNSAI | 094 | ||||||||||||
| TEVION | 116 | ||||||||||||
| THOMSON | 060 | 049 | 067 | 128 | 164 | 171 | 172 | 191 | 205 | 211 | 124 | 075 | 058 |
| 183 | 085 | 062 | |||||||||||
| THORENS | 225 | ||||||||||||
| THORN | 067 | ||||||||||||
| THORN-FERGUSON | 048 067 | ||||||||||||
| TIOKO | 135 175 | ||||||||||||
| TIVO | 325 | ||||||||||||
| TLEWIRE | 059 | ||||||||||||
| TOKAI | 033 | ||||||||||||
| TONNA | 060 | 006 | 013 | 059 | 067 | 171 | 210 | 132 | |||||
| TOPICILD | 011 | ||||||||||||
| TORX | 341 | ||||||||||||
| TOSI IIBA | 067 145 | ||||||||||||
| TPS | 129 | 205 | |||||||||||
| TRENDLINE | 222 | ||||||||||||
| TRFNDPLAN | 222 | ||||||||||||
| TRIAD | 127 193 | ||||||||||||
| TRIASAT | 006 | 220 | |||||||||||
| TRIAX | 060 | 006 | 033 | 047 | 211 | 220 | 230 | 028 | 086 | 023 | |||
| TSINGHWA 015 | |||||||||||||
| TWINNER 115 119 | |||||||||||||
| UNIDEN 071 080 208 | |||||||||||||
| UNISAT 033 054 175 | |||||||||||||
| UNITED CABLE 341 | |||||||||||||
| UNITOR 051 094 | |||||||||||||
| UNIVERSUM 003 009 071 164 165 176 | |||||||||||||
| UPC 107 | |||||||||||||
| VAIADIGITAL 078 | |||||||||||||
| VARIOSAT | 176 | ||||||||||||
| VECTOR | 178 | ||||||||||||
| VENTANA | 033 | 037 | |||||||||||
| VESTEL | 165 | ||||||||||||
| VIASAT | 016 | ||||||||||||
| VIDEOTRON | 331 | ||||||||||||
| VIDEOWAY | 331 | ||||||||||||
| VIPER | 054 | ||||||||||||
| VIRGIN MEDIA | 302 | 314 | 317 | ||||||||||
| VISIONETICS | 087 | ||||||||||||
| VISIOPASS | 329 | ||||||||||||
| VISIOSAT | 060 | 074 | 092 | ||||||||||
| VIVA | 161 | ||||||||||||
| VORTEC | 017 | ||||||||||||
| VTECH | 127 | 204 | |||||||||||
| WELA | 060 | 163 | 169 | 186 | |||||||||
| WESTMINSTER | 335 | ||||||||||||
| WETEKOM | 006 197 | ||||||||||||
| WEWA | 067 | ||||||||||||
| WIBO | 175 | ||||||||||||
| WINERSAT | 094 | ||||||||||||
| WINTERGARTEN | 168 | ||||||||||||
| WISI | 006 | 047 | 067 | 127 | 164 | 169 | 176 | 210 | 040 | 088 | |||
| WITTENBERG | 071 | ||||||||||||
| WOLSEY | 122 | ||||||||||||
| WOORISAT | 179 | ||||||||||||
| WORLD 094 | |||||||||||||
| WORLDSAT 171 172 | |||||||||||||
| XCOM | 169 | ||||||||||||
| XCOM MULTIMEDIA | 046 | ||||||||||||
| XRYPTON | 226 | ||||||||||||
| XSAT | 060 | 046 | 166 | 169 | |||||||||
| YES | 189 | ||||||||||||
| YOUSEE | 318 | ||||||||||||
| YOUVIEW | 324 | ||||||||||||
| ZAPTOR | 315 | . | |||||||||||
| ZAUNKONIG | 161 | ||||||||||||
| ZEIINDLR | 051 | 080 | 127 | 135 | 165 | 179 | 204 | 226 | 255 | ||||
| ZENITH 034 | |||||||||||||
| ZETA-TECHNOLOGY | 033 | ||||||||||||
| ZODIAC 180 083 | |||||||||||||
| ZWERGNASE | 163 175 |
Customer Care Center
Industriestraße 11
Subject to modifications



- Common Interface (CI/CI Plus)
- dts HD.
- Bluetooth®
- AUS
- BE NL LU
- CH
- CY
- CZ PL HU SK RO
- HR LV LT EE
- DK NO SE FI
- GH
- GR
- ID
- IN
- IRL
- IT
- KZ
- NG
- PT
- TR
- Disclaimer
- Many Thanks
- About this user manual
- Data Protection
- Safety/Warning
- Do not remove set rear panel
- Intended use and environmental conditions
- Transport
- Mains cable/power supply
- Air circulation and high temperatures
- Foreign bodies
- Installation
- Supervision
- Volume
- Thunderstorms
- Cleaning and care/chemicals
- Remote control
- Preparing the remote control
- Removing the battery protection
- Inserting or replacing batteries
- Remote control button mapping
- Pairing of the remote control / Bluetooth
- Programming various audio devices
- Connecting the TV set
- Connecting the soundbar klang bar i
- Connecting antennas
- Connecting an external device via HDMI cable
- Connecting to an audio system via HDMI eARC
- Connecting to an audio system via optical audio cable
- Connecting to an audio system via analogue audio cable
- Connecting to the mains supply
- Headphones
- Connecting wired headphones
- Connecting Bluetooth headphones
- To unpair Bluetooth headphones:
- Headphone settings
- Meaning of the LED colours
- External 4k players
- Getting started - first steps
- Home menu
- List of apps
- Additional rows
- Channel list menu
- Electronic Programme Guide – EPG
- Note:
- EPG Operation
- Programme preview
- Recording a programme via EPG
- Memorising a programme via the EPG
- Channel list
- Selecting a channel list
- Favourites list
- Adding channels to favourite list
- Entering favourite list
- Editing the Channel list
- To move selected channel to a new position:
- To delete selected channel:
- Group editing
- Channel list filter
- Adding channels to Home menu
- To remove channels from Home menu:
- Channel quick search
- Programming remote control to Set Top Box (STB)
- Automatic search
- Teaching the remote control
- Main menu
- Picture
- Sound
- Network
- Channel
- Tuning Antenna channels
- Tuning Cable channels
- Tuning Satellite channels
- Exporting / Importing channel list via USB
- Accessibility
- System
- Support
- VIDAA account
- Creating a new account
- Signing into an account
- Voice control with Alexa
- Setting up Alexa
- Notes:
- Recording to external HDD or USB
- Recording
- Digital recorder (dr+)
- Recording via Programme information
- Recording via Programme Guide
- [Schedule Recording] menu
- Standby recording
- Setting an additional recording start/end time
- Solving recording conflicts
- Recording control panel
- Recording list
- List of recordings
- Scheduled recordings menu
- TV viewing with time shift
- Teletext
- Teletext control panel
- Direct keys control
- HbbTV
- Controlling an HbbTV application
- Opening an HbbTV application
- Disabling/enabling HbbTV
- Software update for CI Plus capable CA modules
- Conditional Access module (CA module)
- Inserting the Smart Card into the CA module
- Inserting the CA module into the TV set's CI slot
- VESA standard
- Instructions on using third-party mounting options according to the VESA standard
- Technical Data).
- Hotel mode
- Software Update
- USB stick - requirements
- Software download via the Loewe website for update via USB
- Technical information
- Imprint
- Conformity / Manufacturer's declaration
- CE
- Environment
- Disposal
- Licences
- Dolby VISION·ATMOS
- AT DE
- Corpi estranei
- Common Interface (CI/CI+)
- Corps étranger
- Insérer ou changer
- les piles
- Désactiver/activer HbbTV
- Vreemde voorwerpen
- STAP 6 - Ingangsbron selecteren
- Software-update
Brand : LOEWE
Model : We. SEE
Category : Television