KE129RVS - Cooker ETNA - Free user manual and instructions
Find the device manual for free KE129RVS ETNA in PDF.

User questions about KE129RVS ETNA
0 question about this device. Answer the ones you know or ask your own.
Ask a new question about this device
Download the instructions for your Cooker in PDF format for free! Find your manual KE129RVS - ETNA and take your electronic device back in hand. On this page are published all the documents necessary for the use of your device. KE129RVS by ETNA.
USER MANUAL KE129RVS ETNA
natural_image
Illustration of two circular objects emitting steam, no text or symbols presentnatural_image
Illustration of a cooking pot with steam rising (no text or symbols)goed
fout
text_image
Technical diagram showing three mechanical assembly steps with annotations for thickness and spacing requirementstext_image
Prohibition sign with crossed-out trash bin and no text or symbolsnatural_image
Illustration of two circular objects emitting steam, no text or symbols presentnatural_image
Illustration of a steaming pot with steam rising (no text or symbols)Correct
Incorrect
text_image
Technical diagram showing three mechanical assembly steps with dimension annotations: cutting edge, cross-sectional view, and final assembly with t<25 mm and t>25 mm spacing.natural_image
Illustration of two circular objects emitting steam, no text or symbols presentnatural_image
Illustration of a cooking pot with steam rising (no text or symbols)Richtig
Falsch
text_image
Technical diagram showing three mechanical assembly states with annotations for thickness and spacing requirementstext_image
Prohibition sign with crossed-out trash bin and no text or symbolsWhat you need to consider 10
Mounting 13
Information according regulation (EU) 66/2014 13
Environmental aspects
Disposing of the appliance and the packaging 14
Introduction

This manual describes how you can make the best possible use of the hob. In addition to information about operation, you will also find background information that can assist you in using this product.
Read the separate safety instructions before using the device!
Read the manual thoroughly before using the appliance, and store these instructions in a safe place for future reference.
The manual also serves as reference material for service technicians. Please, therefore, stick the appliance identification card in the space provided, at the back of the manual. The appliance identification card contains all the information that the service technician will need in order to respond appropriately to your needs and questions.
You can find the most recent version of the instructions for use on our website.
Enjoy your cooking!
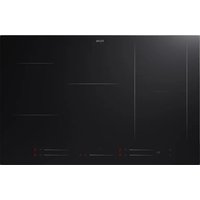
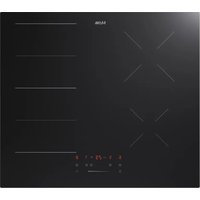
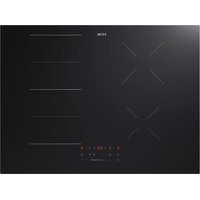
Description
KE158____
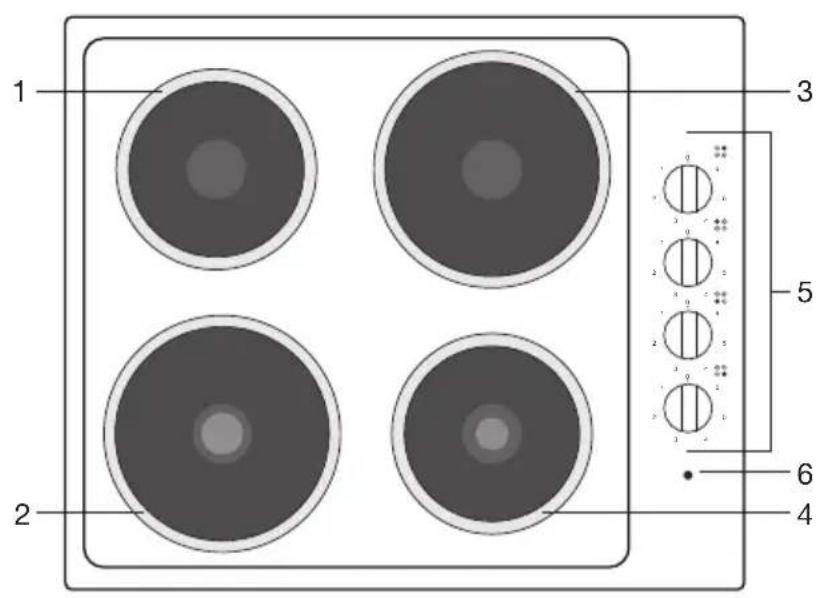
text_image
1 2 3 4 5 6 7 8 9 10 11 12 13 14 15 16 17 18 19 20 21 22 23 24 25 26 27 28 29 30 31 32 33 34 35 36 37 38 39 40KE129____
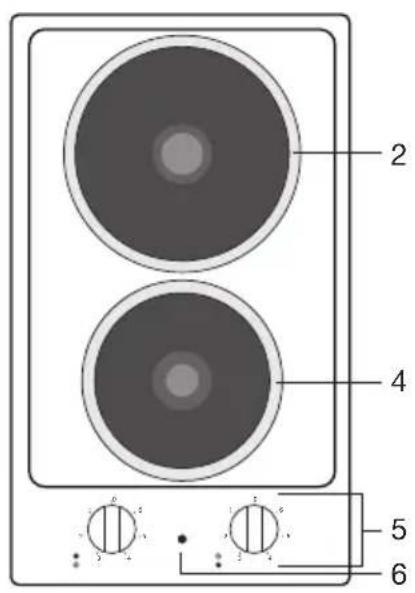
text_image
2 4 5 6- Cooking plate 145 mm / 1000 W
- Fast cooking plate ø 180 mm / 2000 W
- Cooking plate 180 mm / 1500 W
- Fast cooking plate ø 145 mm / 1500 W
- Control knobs
- Control light
Using the hob
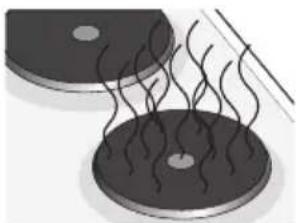
natural_image
Illustration of two circular objects emitting steam, no text or symbols presentSwitch on the hob
- Before using your hob for the first time, each element should be switched on to the highest setting for 3-4 minutes, without a pan.
- The manufacturer has applied a layer of rust-preventer to each element. When the hob is heated for the first time a burning smell will be noticeable. This is normal.
Appliance information
- The heating elements are made of cast iron. he heat is created by spiral filaments which lie in the element in rings.
- The heat is transmitted to the base of the pan by direct conduction. Each element is fitted in a stainless steel sealing rim.
- When one or more plates are in use the control light on the panel will go on.
- Never use the hob without a pan. The top part of the hob could otherwise deform.
Pans
- Use pans that are suitable for cooking by electricity. Use pans with a thick and flat base. If the base is concave or convex a lot of energy is lost. The cooking process will take very long. The element can become overheated and warp.
- Pans which have previously been used on gas hobs are no longer suitable for electric cooking.
- Only place pans with a dry base on the element. Moisture on the cooking elements can cause rust.
- The diameter of the base of the pan should cover the zone completely. Do not use pans that are smaller than the cooking zone. This will prevent food spills on the very hot cooking zone. Burnt-on food spills are difficult to remove.
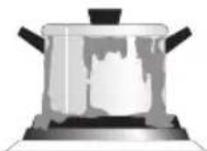
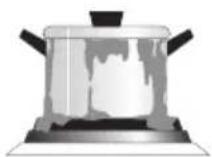
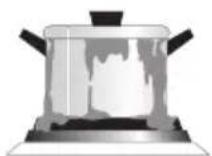
• Always use a lid during cooking to minimise the loss of energy.
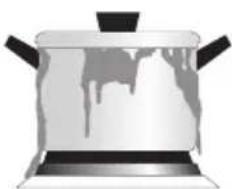
natural_image
Illustration of a steaming pot with steam rising from its side (no text or symbols)Good
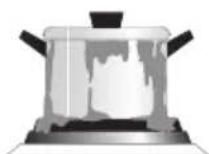
Wrong
Operating the hob
- A symbol next to the control knob indicates which element is being operated.
- You may turn the switch either to the left or the right.
- When you switch on the hob, the control light.
- The cooking zone can be switched off 5 to 10 minutes before the end of the cooking time. The dish will then finish cooking on the residual heat, provided you keep the lid on the pan.
The 7 settings control knob
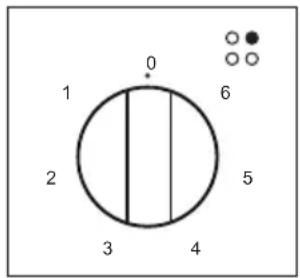
text_image
0 1 2 3 4 5 6Level 6
- Bringing all foods and liquids to the boil.
- Reducing leaf vegetables.
- Sealing meats.
• Frying steak, fish and potatoes.
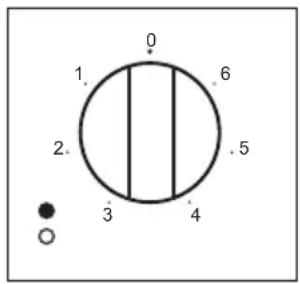
text_image
0 1. 6 2. 5 3 4Level 5
- Frying crêpes, French toast, deep frying.
Level 4
- Frying (Scotch) pancakes.
Level 3
- Frying fish and small cuts of meat.
- Braising large joints of meat, frying onions.
Level 2
- Simmering vegetables with a cooking time of more than 10 minutes.
- Braising vegetables.
- Thawing frozen leaf vegetables.
Level 1
- Stewing meats, keeping dishes warm, simmering small quantities.
Level 0
- In this setting the element is switched off.
- Simmering food with a cooking time shorter than 10 minutes, once it has first been brought to the boil at a higher setting.
Cleaning

Attention
Switch off the appliance and let it cool down completely before starting any cleaning work.
- The hobs are best cleaned with a damp cloth or kitchen paper.
- Remove all spillages as soon as possible. Red cabbage, rhubarb and apple sauce in particular will corrode the varnish or stainless steel.
- Never use scouring powders, aggressive cleaning agents, green scours.
- After cleaning, switch the plate on briefly to allow the moisture to evaporate.
Maintenance of the plates
Rub the plates with non-acidic oil (sewing machine oil) or with a protectant.
Troubleshooting table
If the appliance does not work properly, this does not always mean that it is defective. Try to deal with the problem yourself first by checking the points mentioned below or check for more information the website.
| Problem Possible cause Solution | ||
| The hob or cooking zones cannot be switched on. | There is no power supply. Check the fuse for the device. | |
| A slight smell is noticeable the first few times the hob is used. | The new appliance is heating up. | This is normal and will disappear once it has been used a few times. Heat a pan filled with water on each cooking zone for 30 minutes. Ventilate the kitchen. |
What you need to consider

Attention
This appliance should only be installed by authorized service personnel or a qualified electrician and in accordance with the instructions in this manual and in accordance with applicable local regulations.
- The power rating and required mains voltage are shown on the rating plate at the back of the oven. Connection should take place according to national and local regulations.
- When the appliance does not have a connecting cable and plug, then it may be connected to the mains only by an approved installer.
- The seal between the hob and the work surface must be moisture-proof. The work surface must be absolutely level, as must the hob of course!
- If the work surface is tiled it could be necessary to use liquid silicone rubber instead of the sealing strip.
- Panels and furniture lining of the kitchen cabinet receiving the hob must be treated with temperature resistant adhesives (105°C), otherwise they might be discoloured or deformed because of inadequate temperature resistance.
- The walls and the worktop surrounding the appliance must be heat resistant up to at least 105 °C.
- A hob should not be positioned immediately above a refrigerator or freezer built-in below the worktop and not above a dishwasher, washing machine or dryer. If the hob has to be fitted above a refrigerator or freezer, ensure that the hob is well insulated.
- Bottom kitchen element must not be equipped with a drawer. If the kitchen element has a built-in horizontal shelf, it must be at a distance of not less than 15 cm from the bottom surface of the worktop. The space between the shelf and the cooktop must be empty and may not be used for storage of utensils.
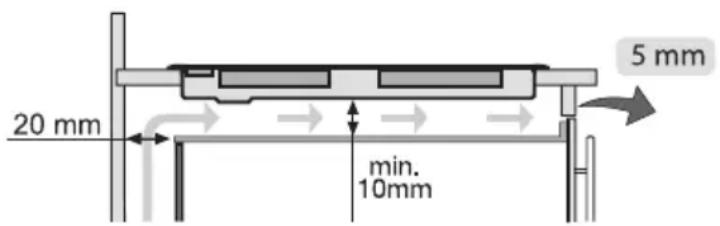
text_image
20 mm min. 10mm 5 mm- The domestic appliance is designed to be built into a worktop as illustrated in the specific figure.
Built-in dimensions

text_image
290 510 42,5 min. 50 270 490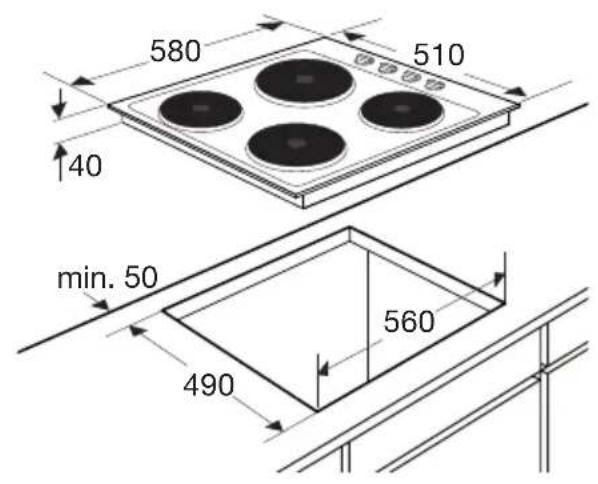
text_image
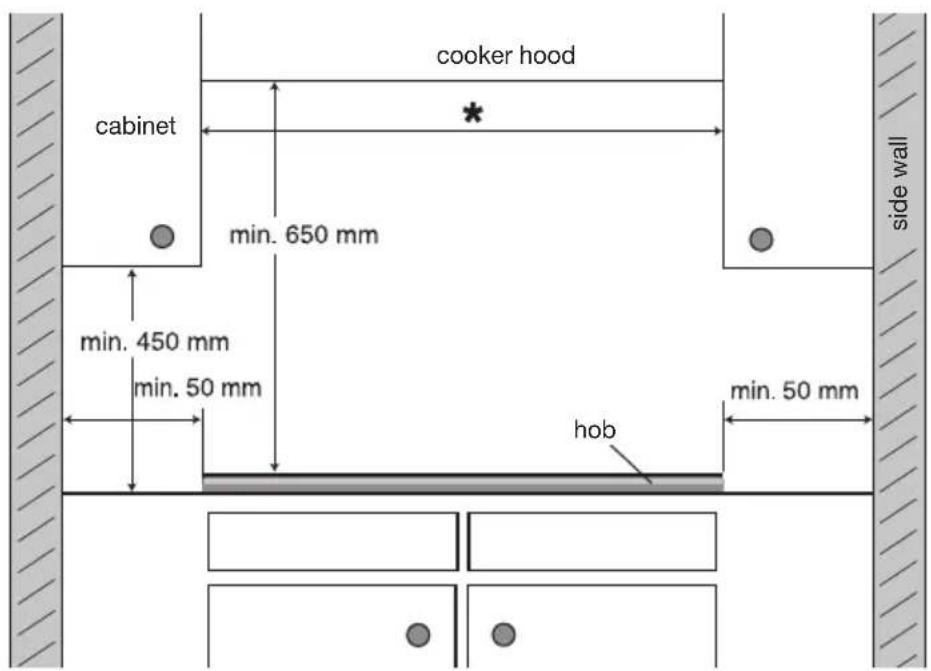
580 510 40 min. 50 560 490Clearance
Sufficient all-round clearance is essential to the safe use of the hob. Check that there is enough clearance.
* KE129: 290mm KE158: 580mm
text_image
cooker hood cabinet * min. 650 mm min. 450 mm min. 50 mm min. 50 mm hob side wallPower requirements
- 230 V - 50 Hz
• After installation the wall socket and plug must be accessible at all times. - The KE158RVS is provided with a connection cable without a plug. 220-240V / 380-415V 50/60Hz 6000W
- The KE129RVS is provided with a connection cable with a plug. 220-240V 50/60 Hz 3500W
- KE158RVS: The connection block in the hob is equipped with a 5 core cable 5 x 1.5 mm and connected according to 2L2N (2x 230V).
text_image
+ + + + + + 1 + 2 + 3 + 4 + L1 L2 N N PEH05VV-F 5x 1,5mm² 2L2N\~
text_image
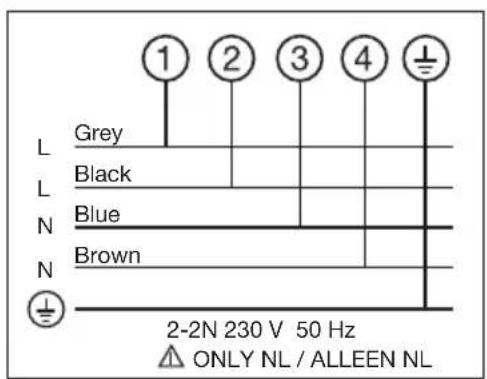
1 2 3 4 L Grey L Black L N Blue N Brown 2-2N 230 V 50 Hz △ ONLY NL / ALLEEN NL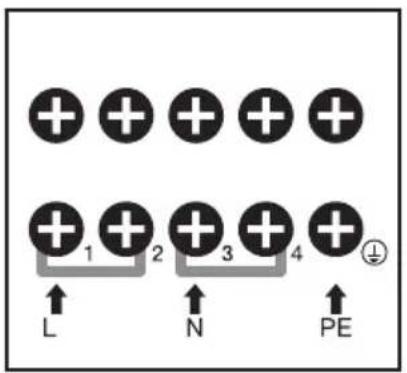
text_image
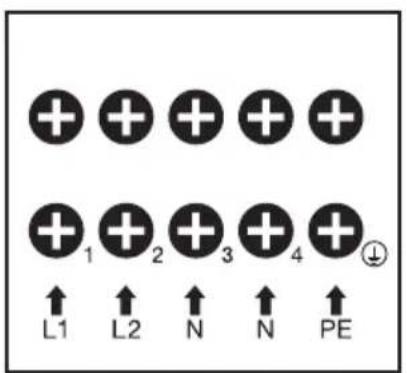
+ + + + + + 1 + 2 + 3 + 4 + ↑ L ↑ N ↑ PEH05VV-F 3x 2,5mm²\~
text_image
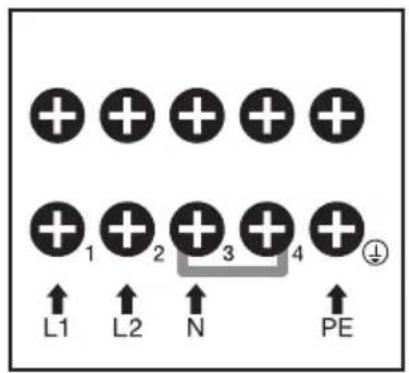
+ + + + + + 1 + 2 + 3 + 4 + ↑ ↑ ↑ ↑ L1 L2 N PEH05VV-F 4x 1,5mm² 2N\~
- In case another connection is made, please use a suitable cable, H05VV-f 3x2.5 mm² (1L 1N 230v \~) of H05VV-F 4x1.5 mm² (2N 380V \~).
- If wishing to make a direct connection to the mains, an omnipolar switch must be interposed with a minimum opening of 3 mm between the contacts and suited to the load indicated on the plate and conform to the regulations in force (the yellow/green ground conductor must not be interrupted by the switch). When the appliance has been installed, the omnipolar switch must be easily reachable.
Mounting
- Place the hob in the cut out. Mark the location of the hob on the cooktop.
- Remove the hob. Place the sealant on the line you marked. Make sure that the line centres the sealant. Ensure that the junctions overlap at the corners and no gap is left along the sealing material.
- Place the hob in the cut out and fix in position using the brackets and screws. Adjust the position of the brackets depending on the thickness of the worktop and tighten the screws evenly. Carefully trim away any excess sealing material from around the appliance.

text_image
Technical diagram showing three mechanical assembly states with annotations for thickness and spacing requirements-
Connect the appliance to the mains. The appliance is ready for use.
-
Check the operation.
-
Do not use adapters, multi-way plugs and/or extension cables.
• Earthing is obligatory by law.
Information according regulation (EU) 66/2014
Measurements according EN60350-2
| Model identification KE129 | --- | KE158--- | ||
| Type of hob Electric hob Electric hob | ||||
| Number of electric cooking zones and/or areas 2 4 | ||||
| Heating technology | Electric cooking zones | Electric cooking zones | ||
| For circular electric cooking zones: diameter of useful surface area per electric heated cooking zone in mm | ∅ 145 ∅ 180 | ∅ 145 ∅ 180 | ||
| ∅ 180 ∅ 145 | ||||
| Energy consumption per cooking zone or area calculated per kg (ECelectric hob) in Wh/kg | 194 194 | 193 193 | ||
| 194 194 | ||||
| Energy consumption for the hob calculated per kg (ECelectric hob) in Wh/kg | 194 194 | |||
Disposing of the appliance and the packaging
This appliance is made from sustainable materials. This appliance must be disposed of in a responsible manner at the end of its service life. Contact the local authorities for information about the method.
The packaging of the appliance is recyclable. The following materials may have been used:
- Cardboard.
• Polyethylene foil (PE).
• CFC-free polystyrene (hard PS foam).
These materials must be disposed of in a responsible manner and in accordance with government regulations.
text_image
Prohibition sign with crossed-out trash bin and no text or symbolsThe appliance is marked with a crossed out wheeled bin symbol to draw your attention to the requirement for the separate disposal of domestic electrical appliances. This means that the appliance may not be disposed of in unsorted household waste at the end of its service life. The appliance must be taken to a special municipal waste processing location for separated waste or to a dealer who provides this service.
Collecting and disposing of domestic appliances separately avoids detrimental consequences for humans and the environment. This ensures that the materials used to make the appliance can be recovered and that substantial savings in the use of energy and raw materials can be achieved.

Declaration of conformity
We hereby declare that our products comply with the relevant European directives, standards and regulations as well as all requirements referred to in the standards.
The appliance identification card is located on the bottom of the appliance.
Stick the appliance identification card here.
When contacting the service department, have the complete type number to hand.
You will find the addresses and phone numbers of the service organisation on the guarantee card.
www.etna.nl
www.etna.be

886429