
DESKJET 3000 J310A - Printer HP - Free user manual and instructions
Find the device manual for free DESKJET 3000 J310A HP in PDF.
| Product type | Multifunction inkjet printer (printing only) |
| Brand | HP |
| Model | Deskjet 3000 J310A |
| Dimensions (W x D x H) | Approximately 445 x 375 x 145 mm |
| Weight | Approximately 2.5 kg |
| Power | Power adapter 100-240 V AC, 50/60 Hz |
| Power consumption | Printing: approx. 10 W, Standby: approx. 3 W, Off: less than 0.5 W |
| Print technology | HP Thermal Inkjet |
| Maximum print resolution | Up to 4800 x 1200 optimized dpi (color) and 600 x 600 dpi (black) |
| Print speed | Up to 20 ppm black, 16 ppm color |
| Connectivity | USB 2.0, Wi-Fi 802.11b/g/n, WPS |
| Supported paper sizes | A4, A5, B5, envelopes, labels, cards, 10x15 cm photo paper |
| Input tray capacity | 60 sheets |
| Output tray capacity | 25 sheets |
| Ink cartridges | HP 122 Black, HP 123 Tri-color (or equivalent) |
| Key features | Wireless printing, WPS button, LCD screen, print head maintenance |
| Maintenance and cleaning | Print head cleaning via HP software, paper jam removal, use of genuine HP ink |
| Security | Network firewall, WPA/WEP configuration for Wi-Fi |
| Spare parts and repairability | Ink cartridges, replaceable print heads, power adapter |
| Warranty | 1 year for the printer, 90 days for software, until ink exhaustion for cartridges |
| General information | User manual included, HP online support, online help |
Frequently Asked Questions - DESKJET 3000 J310A HP
User questions about DESKJET 3000 J310A HP
0 question about this device. Answer the ones you know or ask your own.
Ask a new question about this device
Download the instructions for your Printer in PDF format for free! Find your manual DESKJET 3000 J310A - HP and take your electronic device back in hand. On this page are published all the documents necessary for the use of your device. DESKJET 3000 J310A by HP.
USER MANUAL DESKJET 3000 J310A HP
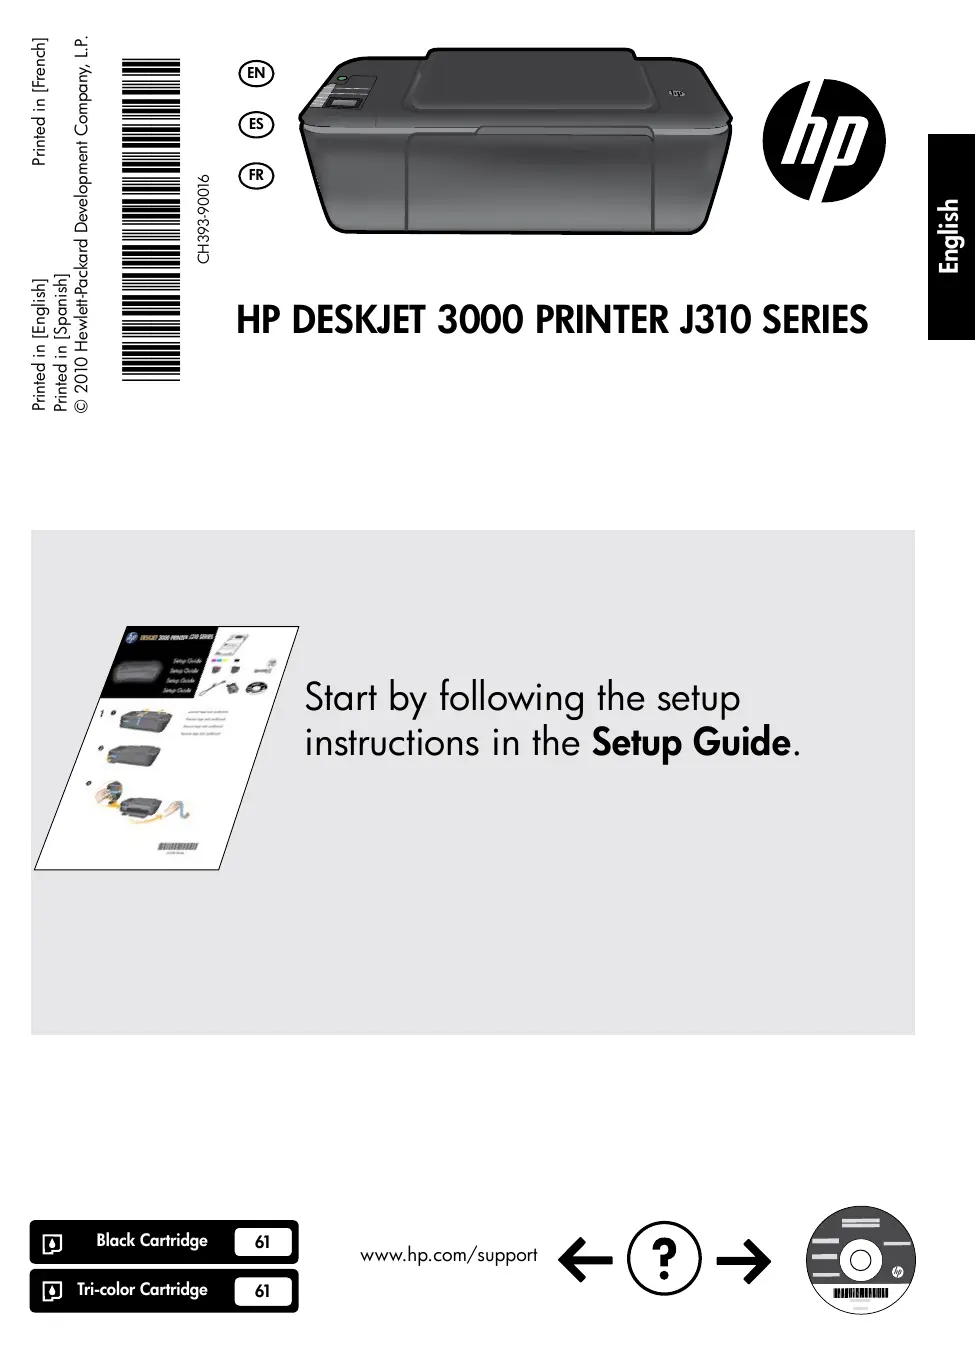
Start by following the setup instructions in the Setup Guide.


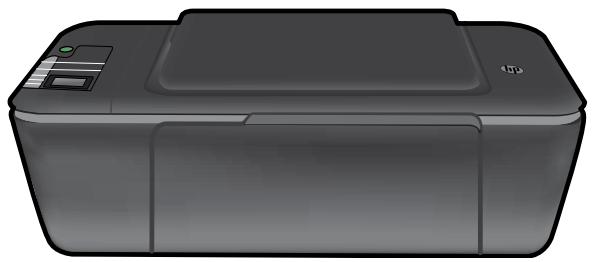
| 1 | On button and light: Turns the product on or off. When the product is off, a minimal amount of power is still used. To completely remove power, turn off the product, then unplug the power cord. |
| 2 | Cancel: Stops the current operation. Returns you to previous screen of printer display. |
| 3 | Quick Forms: Shows Quick Forms menu on printer display. Use Selection buttons to select the form that you want to print. |
| 4 | Wireless button: Shows wireless menu on printer display. |
| 5 | Wireless light: Signals if there is a wireless connection. The printer is wirelessly connected to a network when the blue light is steady on. |
| 6 | Selection buttons: Use buttons to select menu items on the printer display. |
| 7 | Printer display: Displays estimated ink levels for the cartridges. Press the Quick Forms button or the Wireless button to view menus for these options on the printer display. |
| 8 | Cartridge lights: Indicate low ink or a print cartridge problem. |
| 9 | Attention light: Indicates that there is a paper jam, the printer is out of paper, or some event that requires your attention. |
Change the HP Deskjet from a USB connection to a network connection
If you first install the HP Deskjet with a USB connection, you can later change it to a wireless network connection.
Windows
- Click Start > All Programs > HP > HP Deskjet 3000 J310 series, then select Connect new Printer.
- On the Connectivity Choice screen, click Network.
- When prompted to connect the USB cable, check the box for USB cable is already connected to continue.
- Use the wireless connection setup wizard. You need to know your wireless network name (SSID) and Wireless Password (WPA passphrase or WEP key) if you are using either of these wireless security methods. In some cases, the software may be able to find these for you.
Note: When finished, you have both a USB and network printer icon in the printer's folder. You can choose to keep or delete the USB printer icon.
Mac
- Insert the product CD in the computer CD/DVD drive.
- On the desktop, open the CD and then double-click HP Installer and follow the on-screen instructions.
Connect to additional computers on a network
You can share the HP Deskjet with other computers which are also connected to your home network. If the HP Deskjet is already connected to your home network and installed on a network computer, for each additional computer you only need to install the HP Deskjet software. During the software installation, the software will automatically discover the HP Deskjet over the network. Since the HP Deskjet is already connected to your network, you do not need to configure it again when installing the HP Deskjet software on additional computers.
Wireless setup tips
- If you have a wireless router with a WiFi Protected Setup (WPS) button, press the button during initial setup to connect wirelessly to your printer. See the router documentation to determine if your router has a WPS button.
- When a wireless connection between the HP Deskjet and the wireless router is successful, the blue wireless light on the printer will turn on and stay on. If your router does not support WiFi Protected Setup (WPS) or WPS does not successfully connect, the software installation will guide you through getting a wireless connection for the HP Deskjet.
For setup information, see the Setup Guide. All other product information can be found in the electronic Help and Readme. The electronic Help is automatically installed during printer software installation. Electronic Help includes instructions on product features and troubleshooting. It also provides product specifications, legal notices, environmental, regulatory, and support information.
C∈C∈①
To find the European Union Regulatory Notice statement and compliance information, go to the onscreen Help, click Appendix > Technical information > Regulatory notices > European Union Regulatory Notice or click Technical information > Regulatory notices > European Union Regulatory Notice. The Declaration of Conformity for this product is available at the following web address: www.hp.eu/certificates.
The Readme file contains HP support contact information, operating system requirements, and the most recent updates to your product information. For computers without a CD/DVD drive, please go to www.hp.com/support to download and install the printer software.
Install electronic Help
To install the electronic Help, insert the software CD in your computer and follow the on-screen instructions.
If you have installed the software as a web download, the electronic Help is already installed along with the software.
Windows:
Find electronic Help
After software installation, click Start > All Programs > HP > HP Deskjet 3000 J310 series > Help.
Find Readme
Insert software CD. On software CD locate ReadMe.chm. Click ReadMe.chm to open and then select ReadMe in your language.
Mac:
Find electronic Help
Mac OS X v10.5 and v10.6: From Help, choose Mac Help. In the Help Viewer, click and hold the Home button, and then choose the Help for your device.
Find Readme
Insert the software CD, and then double-click the Read Me folder located at the top-level of the software CD.
Register your HP Deskjet
Get quicker service and support alerts by registering at http://www.register HP.com.
Ink usage
Note: Ink from the cartridges is used in the printing process in a number of different ways, including in the initialization process, which prepares the device and cartridges for printing, and in printhead servicing, which keeps print nozzles clear and ink flowing smoothly. In addition, some residual ink is left in the cartridge after it is used. For more information see www.hp.com/go/inkusage.
Power specifications:
Power adapter: 0957-2286
Input voltage: 100-240Vac (+ / - 10%)
Input frequency: 50 / 60Hz(+ / - 3Hz)
Note: Use only with the power adapter supplied by HP.
Power adapter: 0957-2290
Input voltage: 200-240Vac (+ / - 10%)
Input frequency: 50 / 60Hz(+ / - 3Hz)
Windows:
If you are unable to print a test page:
- If your printer is connected directly to your computer with a USB cable, make sure the cable connections are secure.
Make sure the printer is powered on. The [On button] will be lit green.
Make sure the printer is set as your default printing device:
- Windows® 7: From the Windows Start menu, click Devices and Printers.
- Windows Vista®: On the Windows taskbar, click Start, click Control Panel, and then click Printer.
- Windows XP®: On the Windows taskbar, click Start, click Control Panel, and then click Printers and Faxes.
Make sure that your printer has a check mark in the circle next to it. If your printer is not selected as the default printer, right-click the printer icon and choose Set as Default Printer from the menu.
If your printer is connected directly to your computer with a USB cable and you are still unable to print, or the Windows software installation fails:
- Remove the CD from the computer's CD/DVD drive, and then disconnect the USB cable from the computer.
- Restart the computer.
- Insert the printer software CD in the computer's CD/DVD drive, then follow the on-screen instructions to install the printer software. Do not connect the USB cable until you are told to do so.
- After the installation finishes, restart the computer.
Windows XP, and Windows Vista are U.S. registered trademarks of Microsoft Corporation. Windows 7 is either a registered trademark or trademark of Microsoft Corporation in the United States and/or other countries.
Mac:
If you are unable to print a test page:
If your printer is connected to your computer with a USB cable, make sure the cable connections are secure.
Make sure the printer is powered on. The [On button] will be lit green.
If you are still unable to print, uninstall and reinstall the software:
Note: The uninstaller removes all of the HP software components that are specific to the device. The uninstaller does not remove components that are shared by other products or programs.
To uninstall the software:
- Disconnect the HP product from your computer.
- Open the Applications: Hewlett-Packard folder.
- Double-click HP Uninstaller. Follow the on-screen instructions.
To install the software:
- Connect the USB cable.
- Insert the HP software CD into your computer's CD/DVD drive.
- On the desktop, open the CD and then double-click HP Installer.
- Follow the on-screen and the printed setup instructions that came with the HP product.
The product cannot be found during software installation
If the HP software is unable to find your product on the network during software installation, try the following troubleshooting steps.
Wireless connections
1: Determine if the product is connected to the network by pressing the Wireless button. If the printer has been idle, you may need to press the wireless button twice to display the wireless menu.
If the printer is connected, you will see the IP address (for example, 192.168.0.3) on the printer display. If the printer is not connected, you will see Not Connected on the printer display. From the printer display, select Print Reports to print the network test page and the network information page.
2: If you determined in Step 1 that the product is not connected to a network and this is the first time you are installing the product, you will need to follow the on-screen instructions during software installation to connect the product to the network.
To connect the product to a network
- Insert the product Software CD in the computer CD/DVD drive.
- Follow the instructions on the computer screen. On the Connection Choice screen, choose Network. Then when prompted, temporarily connect a USB cable between your network connected computer and printer to establish a connection. If the connection fails, follow the prompts to correct the problem, and then try again.
- When the setup is finished, you will be prompted to disconnect the USB cable and test the wireless network connection. Once the product connects successfully to the network, install the software on each computer that will use the product over the network.
If the device is unable to join your network, check for these common issues:
- You might have picked the wrong network or typed in your network name (SSID) incorrectly. Check and make sure that you enter the same SSID as the computer is using.
- You might have typed in your wireless password (WPA passphrase or WEP key) incorrectly (if you are using encryption). Note: If the network name or the wireless password are not found automatically during installation, and if you don't know them, you can download an application from www.hp.com/go/networksetup that might help you locate them. This application works for only Windows Internet Explorer and is only available in English.
- You might have a router problem. Try restarting both the product and the router by turning off the power for each of them, and then on again.
3: Check for and resolve the following possible conditions:
- Your computer might not be connected to your network. Make sure that the computer is connected to the same network to which the HP Deskjet is connected. If you are connected wirelessly, for example, it is possible that your computer is connected to a neighbor's network by mistake.
- Your computer might be connected to a Virtual Private Network (VPN). Temporarily disable the VPN before proceeding with the installation. Being connected to a VPN is like being on a different network; you will need to disconnect the VPN to access the product over the home network.
- Security software might be causing problems. Security software installed on your computer is designed to protect your computer against threats that can come from outside your home network. A security software suite can contain different types of software such as an anti-virus, anti-spyware, firewall and child protection applications. Firewalls can block communication between devices connected on the home network and can cause problems when using devices like network printers and scanners.
Problems you might see includes:
- The printer cannot be found over the network when installing the printer software.
- You suddenly can't print to the printer even though you could the day before.
- The printer shows that it is OFFLINE in the printer and faxes folder.
- The software shows the printer status is "disconnected" even though the printer is connected to the network.
- If you have an All-in-One, some functions work, like print and others don't, like scan.
A quick troubleshooting technique is to disable your firewall and check if the problem goes away.
Here are some basic guidelines for using security software:
If your firewall has a setting called trusted zone, use it when your computer is connected to your home network.
- Keep your firewall up to date. Many security software vendors provide updates which correct known issues.
If your firewall has a setting to not show alert messages, you should disable it. When installing the HP software and using the HP printer, you may see alert messages from your firewall software. Your should allow any HP software which causes an alert. The alert message may provide options to allow, permit or unblock. Also, if the alert has a remember this action or create a rule for this selection, make sure and select it. This is how the firewall learns what can be trusted on your home network.
Windows only
Other network problems after software installation
If the HP Deskjet has been successfully installed, and you are experiencing problems such as not being able to print, try the following:
- Turn off the router, product, and computer, and then turn them back on in this order: router first, then the product, and finally the computer. Sometimes, cycling the power will recover a network communication issue.
- If the previous step does not solve the problem and you have successfully installed the HP Deskjet Software on your computer, run the Network Diagnostic Utility.
To locate the Network Diagnostic tool
Go to the electronic Help: Start > Programs or All Programs > HP > HP Deskjet 3000 J310 series > Help. In the electronic Help, search for Networking. Then click on the link provided to go online for the Network Diagnostics Tool.
| HP product | Duration of limited warranty |
| Software Media | 90 days |
| Printer | 1 year |
| Print or Ink cartridges | Until the HP ink is depleted or the "end of warranty" date printed on the cartridge has been reached, whichever occurs first. This warranty does not cover HP ink products that have been refilled, remanufactured, refurbished, misused, or tampered with. |
| Printheads (only applies to products with customer replaceable printheads) | 1 year |
| Accessories | 1 year unless otherwise stated |
A. Extent of limited warranty
- Hewlett-Packard (HP) warrants to the end-user customer that the HP products specified above will be free from defects in materials and workmanship for the duration specified above, which duration begins on the date of purchase by the customer.
- For software products, HP's limited warranty applies only to a failure to execute programming instructions. HP does not warrant that the operation of any product will be interrupted or error free.
- HP's limited warranty covers only those defects that arise as a result of normal use of the product, and does not cover any other problems, including those that arise as a result of:
a. Improper maintenance or modification;
b. Software, media, parts, or supplies not provided or supported by HP;
c. Operation outside the product's specifications;
d. Unauthorized modification or misuse.
- For HP printer products, the use of a non-HP cartridge or a refilled cartridge does not affect either the warranty to the customer or any HP support contract with the customer. However, if printer failure or damage is attributable to the use of a non-HP or refilled cartridge or an expired ink cartridge, HP will charge its standard time and materials charges to service the printer for the particular failure or damage.
- If HP receives, during the applicable warranty period, notice of a defect in any product which is covered by HP's warranty, HP shall either repair or replace the product, at HP's option.
- If HP is unable to repair or replace, as applicable, a defective product which is covered by HP's warranty, HP shall, within a reasonable time after being notified of the defect, refund the purchase price for the product.
- HP shall have no obligation to repair, replace, or refund until the customer returns the defective product to HP.
- Any replacement product may be either new or like-new, provided that it has functionality at least equal to that of the product being replaced.
- HP products may contain remanufactured parts, components, or materials equivalent to new in performance.
- HP's Limited Warranty Statement is valid in any country where the covered HP product is distributed by HP. Contracts for additional warranty services, such as on-site service, may be available from any authorized HP service facility in countries where the product is distributed by HP or by an authorized importer.
B. Limitations of warranty
TO THE EXTENT ALLOWED BY LOCAL LAW, NEITHER HP NOR ITS THIRD PARTY SUPPLIERS MAKES ANY OTHER WARRANTY OR CONDITION OF ANY KIND, WHETHER EXPRESS OR IMPLIED WARRANTYES OR
CONDITIONS OF MERCHANTABILITY, SATISFACTORY QUALITY, AND FITNESS FOR A PARTICULAR PURPOSE.
C. Limitations of liability
- To the extent allowed by local law, the remedies provided in this Warranty Statement are the customer's sole and exclusive remedies.
- TO THE EXTENT ALLOWED BY LOCAL LAW, EXCEPT FOR THE OBLIGATIONS SPECIFICALLY SET FORTH IN THIS WARRANTY STATEMENT, IN NO EVENT SHALL HP OR ITS THIRD PARTY SUPPLIERS BE LIABLE FOR DIRECT, INDIRECT, SPECIAL, INCIDENTAL, OR CONSEQUENTIAL DAMAGES, WHETHER BASED ON CONTRACT, TORT, OR ANY OTHER LEGAL THEORY AND WHETHER ADVISED OF THE POSSIBILITY OF SUCH DAMAGES.
D. Local law
- This Warranty Statement gives the customer specific legal rights. The customer may also have other rights which vary from state to state in the United States, from province to province in Canada, and from country to country elsewhere in the world.
- To the extent that this Warranty Statement is inconsistent with local law, this Warranty Statement shall be deemed modified to be consistent with such local law. Under such local law, certain disclaimers and limitations of this Warranty Statement may not apply to the customer. For example, some states in the United States, as well as some governments outside the United States (including provinces in Canada), may:
a. Preclude the disclaimers and limitations in this Warranty Statement from limiting the statutory rights of a consumer (e.g., the United Kingdom);
b. Otherwise restrict the ability of a manufacturer to enforce such disclaimers or limitations; or
c. Grant the customer additional warranty rights, specify the duration of implied warranties which the manufacturer cannot disclaim, or allow limitations on the duration of implied warranties.
- THE TERMS IN THIS WARRANTY STATEMENT, EXCEPT TO THE EXTENT LAWFULLY PERMITTED, DO NOT EXCLUDE, RESTRICT, OR MODIFY, AND ARE IN ADDITION TO, THE MANDATORY STATUTORY RIGHTS APPLICABLE TO THE SALE OF THE HP PRODUCTS TO SUCH CUSTOMERS.
HP Limited Warranty
Dear Customer,
You will find below the name and address of the HP entity responsible for the performance of the HP Limited Warranty in your country.
You may have additional statutory rights against the seller based on your purchase agreement. Those rights are not in any way affected by this HP Limited Warranty.
Ireland: Hewlett-Packard Ireland Limited, 63-74 Sir John Rogerson's Quay, Dublin 2
United Kingdom: Hewlett-Packard Ltd, Cain Road, Bracknell, GB-Berks RG12 1HN
Malta: Hewlett-Packard International Trade B.V., Malta Branch, 48, Amery Street, Sliema SLM 1701, MALTA
South Africa: Hewlett-Packard South Africa Ltd, 12 Autumn Street, Rivonia, Sandton, 2128, Republic of South Africa

HP DESKJET 3000 PRINTER J310 SERIES
