OL0013 - Motion detector IFM - Free user manual and instructions
Find the device manual for free OL0013 IFM in PDF.


| Product type | Photoelectric barrier (motion detector) |
| Brand | IFM |
| Model | OL0013 |
| Main function | Contactless detection of objects and materials with switching signal |
| Range | Variable depending on model (see label on device) |
| Power supply | 10-30 V DC (typical estimate for this category) |
| Electrical connection | Removable terminal block with screws (cable gland on some models) |
| LED indicators | Green (device operational), Yellow (switched output), Red (error or fault) |
| Sensitivity adjustment | Push-button programming for static or moving objects |
| Output function | Configurable NC (normally closed) or NO (normally open) by programming |
| Electrical protection | Miniature fuse recommended according to datasheet (if specified) |
| Mounting | On mounting bracket, precise alignment required for optimal range |
| Maintenance and cleaning | Clean lenses without solvents or aggressive products (plastic) |
| Lens material | Plastic |
| Operating mode | Plug and play by default, additional settings for transparent objects |
| Detection | Objects and materials without contact, with adjustable sensitivity threshold |
| Operating temperature | Not specified, but typical for industrial use: -25°C to +60°C (estimate) |
Frequently Asked Questions - OL0013 IFM
User questions about OL0013 IFM
0 question about this device. Answer the ones you know or ask your own.
Ask a new question about this device
Download the instructions for your Motion detector in PDF format for free! Find your manual OL0013 - IFM and take your electronic device back in hand. On this page are published all the documents necessary for the use of your device. OL0013 by IFM.
USER MANUAL OL0013 IFM
Through-beam sensor OL
natural_image
Technical line drawing of a mechanical component with bolted base and mounting bracket (no text or symbols)Function and features
The through-beam sensor detects objects and materials without contact and indicates their presence by a switched signal.
Range (r): see type label.
Electrical connection
Isolate power, then connect unit (see page 17 or type label). The units with cable gland have a removable terminal block with screw terminals (screws are at the base of the terminal block).
After connection of the wires the terminal block must be reinserted. Note: insert a miniature fuse according to the technical data sheet, if specified. Recommendation: check the unit for reliable function after a short circuit.
Installation
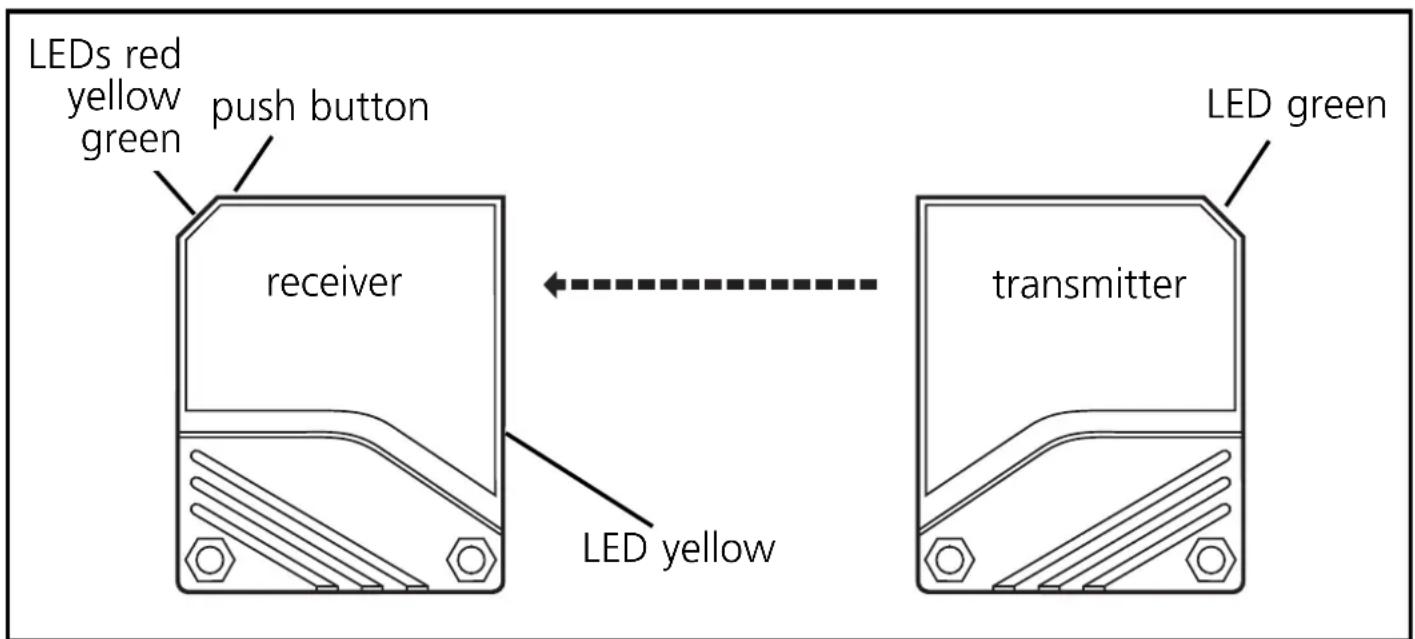
Fix the receiver (type OLE-...) in position.
Align the transmitter (type OLS-...) towards the receiver and tighten in the same way.
Maximum range is only possible with precise alignment.
NB: Commissioning
The through-beam sensor is supplied ready to operate (plug and play) set at the max. sensing range. This is sufficient if the through-beam sensor can operate with maximum excess gain (highest contrast). The following setting procedures should only be necessary in less straightforward applications, for example if partly transparent objects must be detected.
Setting of the sensitivity with stationary objects
| 1 | Activate the programming mode of the unit. Press for about 2s until the red LED flashes. Press for about 2s until the red LED flashes. |
| The red LED goes out; the yellow and green LEDs flash alternately.The unit is in the programming mode. |
| 2 | Set the sensitivitywithobject.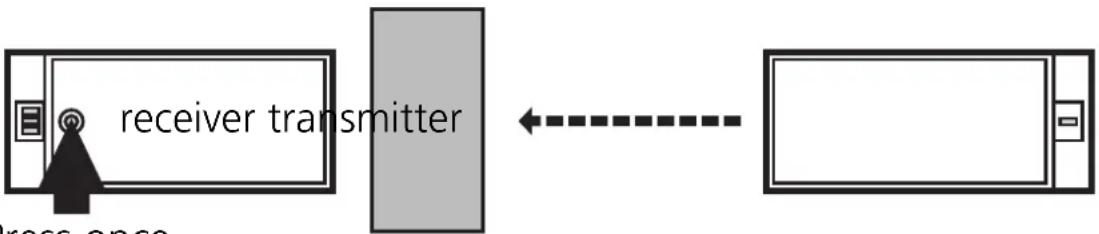 Press once. Press once. |
| The yellow and green LEDs go out for approx. 1s,then flash again alternately. | |
| 3 | Set the sensitivitywithoutobject. Press once. Press once. |
| The yellow and green LEDs go out for approx. 1s,after approx 3s the green LED is on.The unit is in the operating mode. |
You can also proceed in reverse order: first setting without the object, then with the object.

If the setting of the sensitivity is not possible (e.g. object signal and background signal are about the same), the red LED flashes after step 3 for approx. 2s. The unit then passes into the operating mode with the sensitivity being unchanged.
If the setting button is not activated for 15 minutes during the programming process, the unit passes automatically into the operating mode with the sensitivity being unchanged.
Setting of the sensitivity with moving objects
| 1 | Activate the programming mode of the unit. Press for about 2s until the red LED flashes. Press for about 2s until the red LED flashes. |
| The red LED goes out; the yellow and green LEDs flash alternately.The unit is in the programming mode. | |
| 2 | During the measurement (about 1s) allow at least two objects to move through the detection area. |
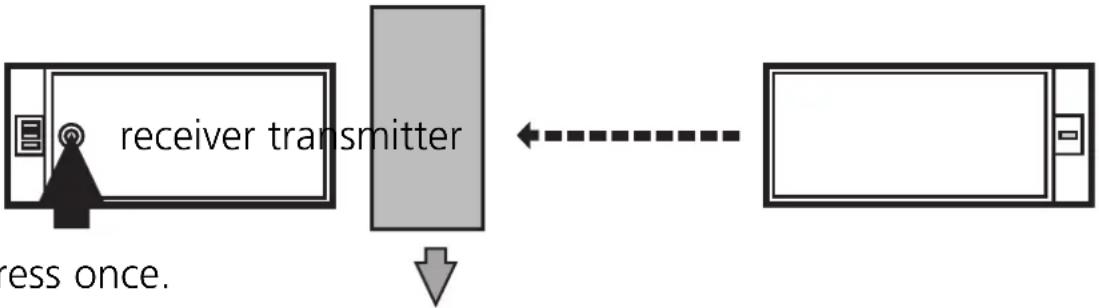 Pi Pi | |
| The yellow and green LEDs go out for approx. 1s, then flash again alternately. |
| 3 | During the measurement (about 1s) allow at least two objects to move through the detection area.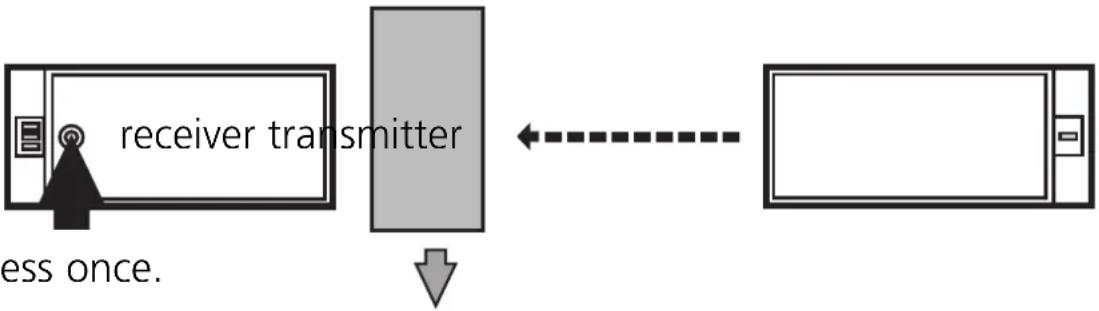 Pr Pr |
| The yellow and green LEDs go out for approx. 1s, after approx. 3s the green LED is on.The unit is in the operating mode. |

If the setting of the sensitivity is not possible (e.g. object signal and background signal are about the same), the red LED flashes after step 3 for approx. 2s. The unit then passes into the operating mode with the sensitivity being unchanged.
If the setting button is not activated for 15 minutes during the programming process, the unit passes automatically into the operating mode with the sensitivity being unchanged.
Setting of the maximum sensitivity
- Go into the programming mode (step 1).
- Interrupt the light beam.
- Press the setting button twice (see steps 2 and 3).
Programming the output function
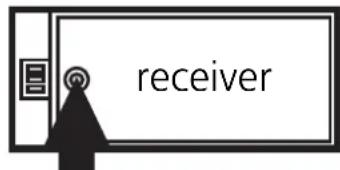
Press for 10s.

The red LED starts to flash fast after 2s. Then the yellow and green LEDs flash alternately. After 8s all LEDs go off, the output function has changed from light-on mode to dark-on mode (or vice versa).
Operation
Check the safe functioning of the unit. Display by LEDs.
| LED green is lit U | Unit is ready for operation. |
| LED yellow is lit Output is switched. | |
| LED red is lit | Error in object detection, e.g. maladjustment, soiling of the lenses. |
| LEDs yellow + red | Flash alternately, 2 Hz: output short-circuited. Flash alternately, 1 Hz: internal malfunction (output is not switched). |
Maintenance
Keep the plastic lenses of the sensor free from soiling.
For cleaning do not use any solvents or cleaning agents which could damage the plastic lenses.
Sensor with terminals
Sensor with terminals
Brand : IFM
Model : OL0013
Category : Motion detector