
Solar Charging Panel - Solar panel SWANN - Free user manual and instructions
Find the device manual for free Solar Charging Panel SWANN in PDF.
User questions about Solar Charging Panel SWANN
0 question about this device. Answer the ones you know or ask your own.
Ask a new question about this device
Download the instructions for your Solar panel in PDF format for free! Find your manual Solar Charging Panel - SWANN and take your electronic device back in hand. On this page are published all the documents necessary for the use of your device. Solar Charging Panel by SWANN.
USER MANUAL Solar Charging Panel SWANN
Solar Charging Panel
Panel de Carga Solar
text_image
SOLAR PANEL MOUNTING BRACKET (BLACK) Screws directly into the back of the solar panel. Fully adjustable to maximize sunlight exposure. Loosen knob to adjust solar panel angle MICRO USB OUTPUT Connects to the solar panel extension cableWATERPROOF CONNECTOR COVER
Protects the connection between the micro USB output and solar panel extension cable
SOLAR PANEL EXTENSION CABLE
Provides greater distance between the solar panel and camera

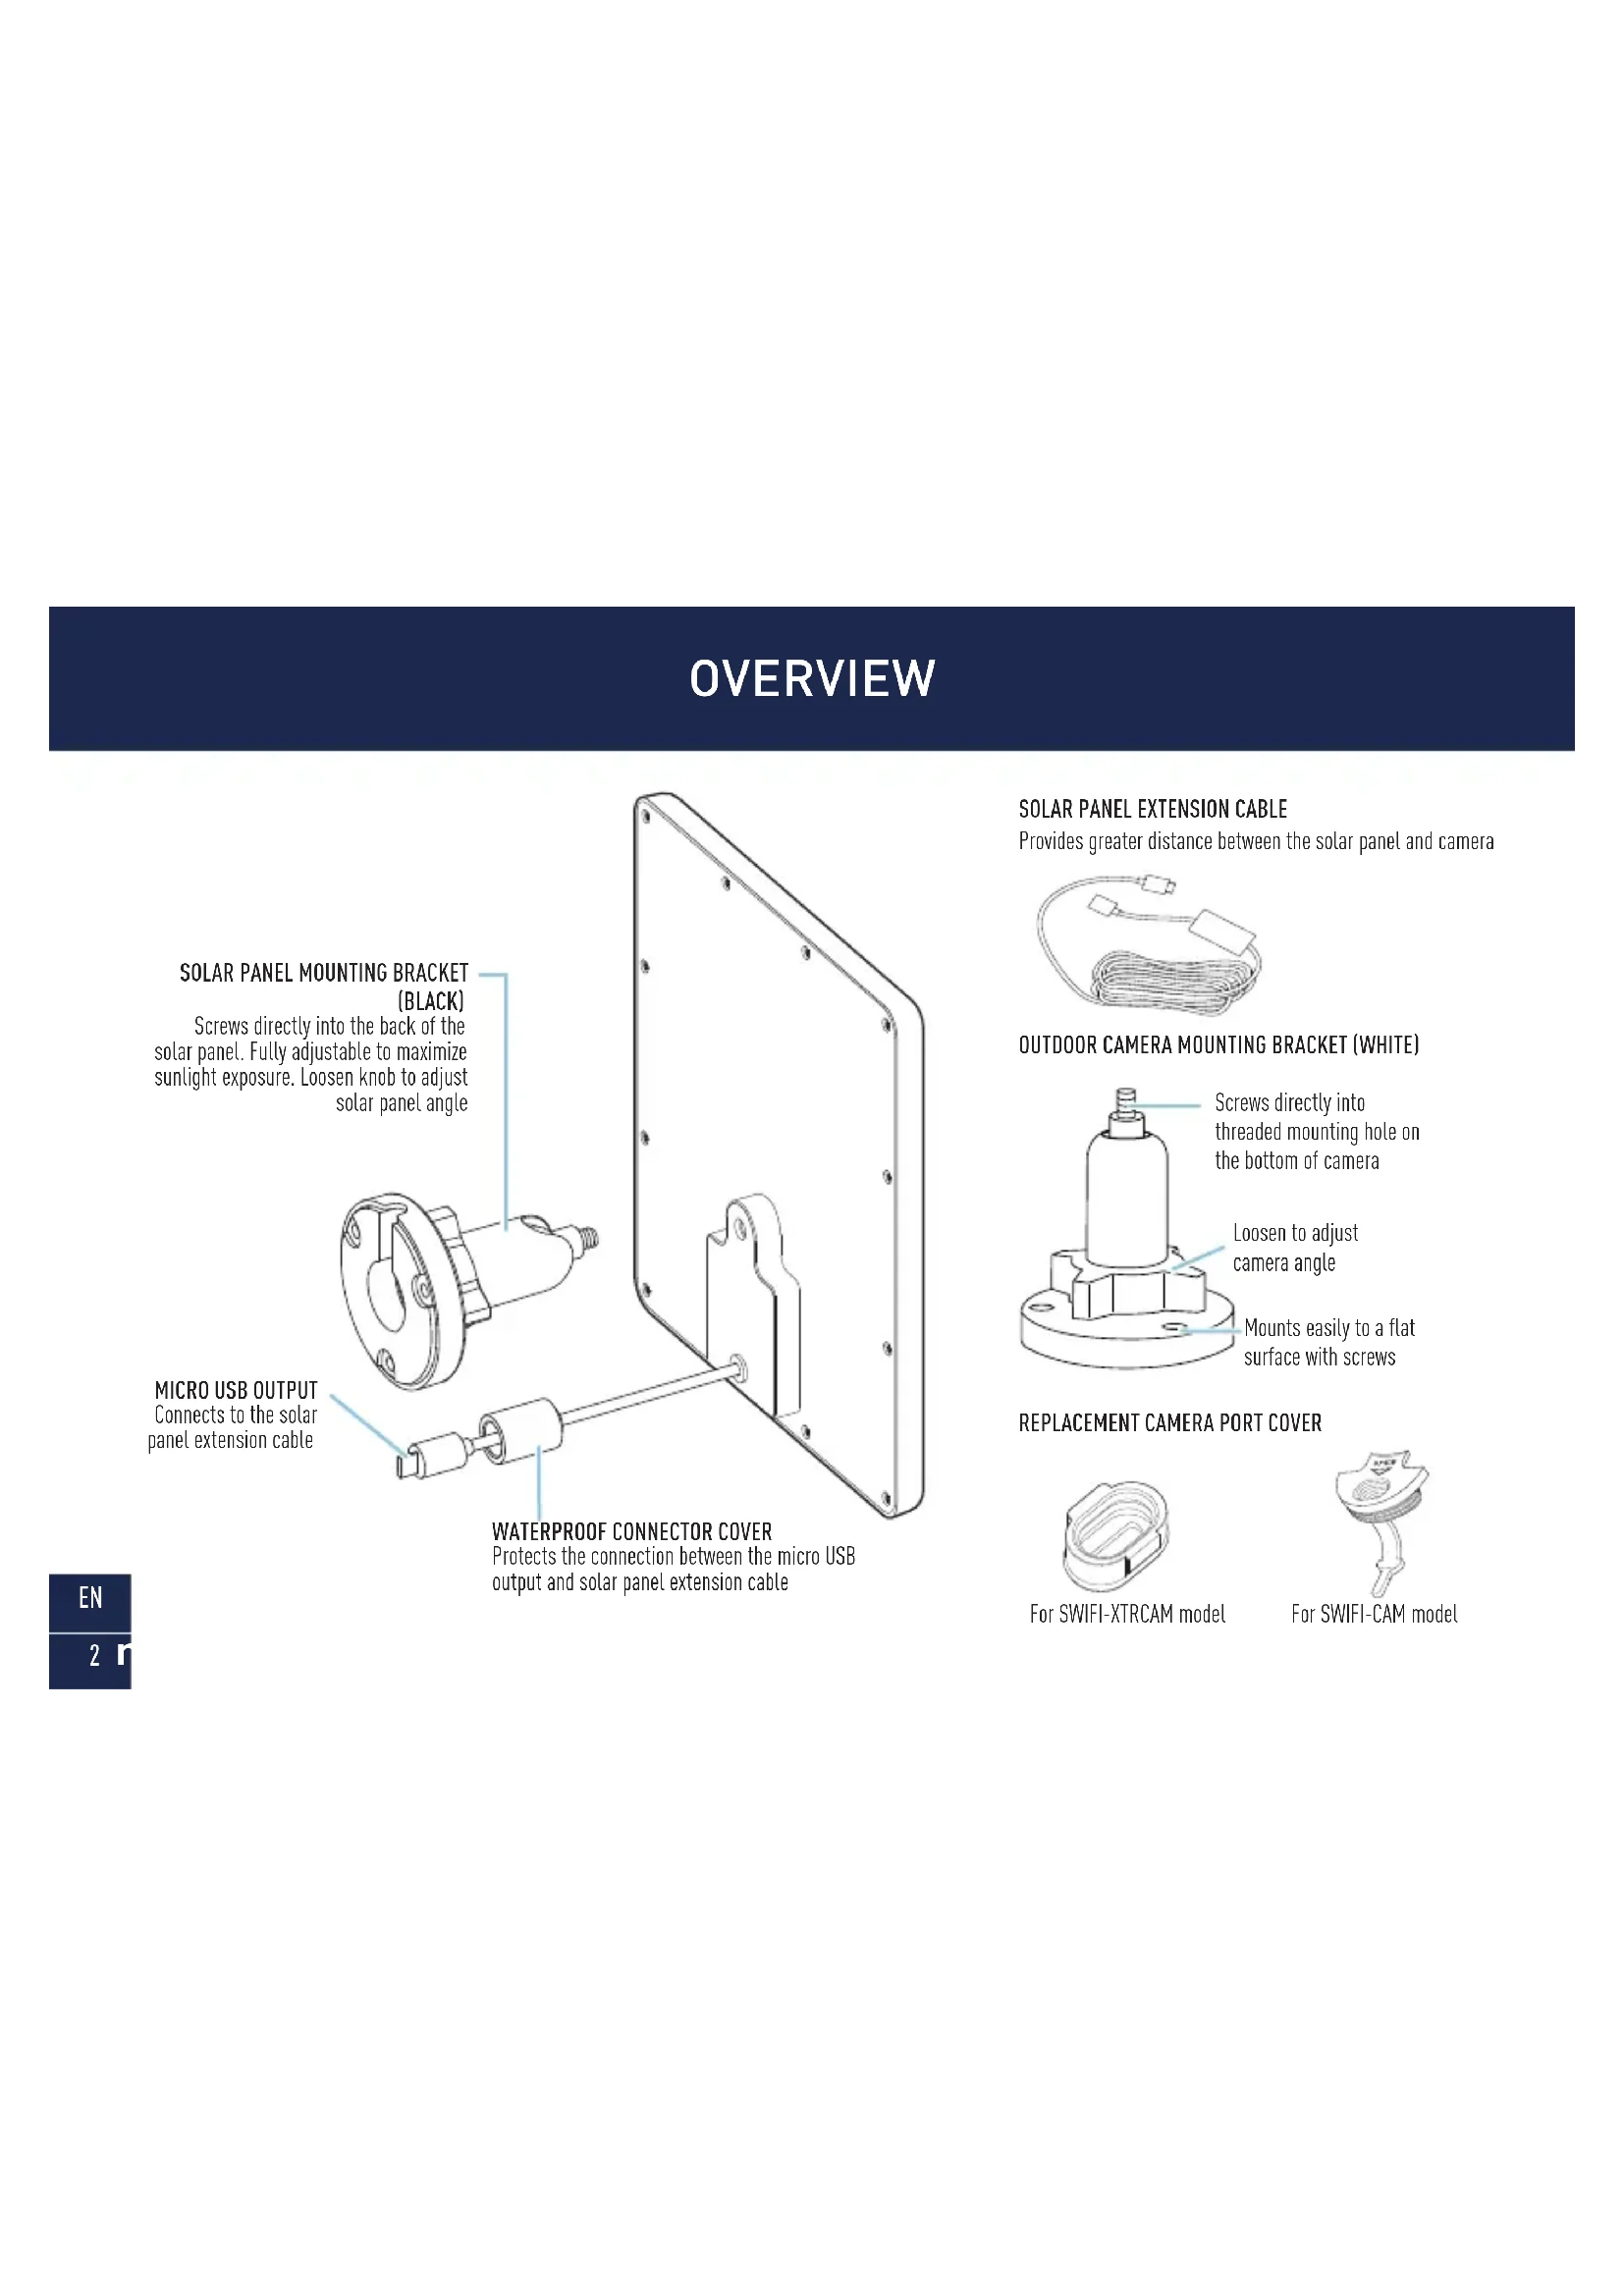
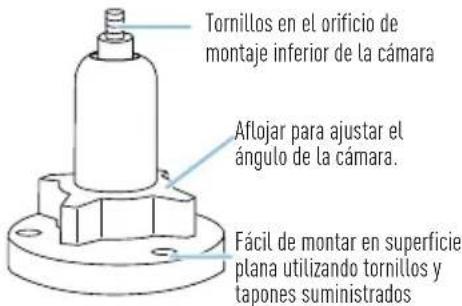
OUTDOOR CAMERA MOUNTING BRACKET (WHITE)
text_image
Scr thr the L oScrews directly into
threaded mounting hole on
the bottom of camera
Loosen to adjust camera angle
Mounts easily to a flat surface with screws
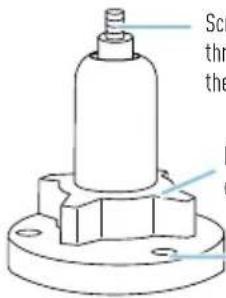
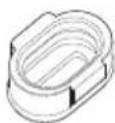
REPLACEMENT CAMERA PORT COVER
For SWIFI-XTRCAM model
For SWIFI-CAM model
BEFORE YOU BEGIN
- The solar panel requires full, direct sunlight to charge your camera. Grey skies, rainy days, and other inclement weather conditions may hinder the ability of the solar panel to generate power.
- For best results, the solar panel should be tilted in the direction that captures the most sunlight over the course of the day. The optimum angle varies throughout the year, depending on the season and your geographical location. As a general rule, in the northern hemisphere, the solar panel should face south; in the southern hemisphere, the solar panel should face north. Not sure which direction north or south sits? Download a free compass app to your phone.
- Avoid placing in a shady area where objects such as trees and buildings may block the sun. This will substantially reduce the power output of the solar panel.
- The solar panel is designed to provide a “trickle charge”, topping up and maintaining the camera’s battery charge level based upon the amount of sunlight received daily. If, during the day, the solar panel does not receive enough sunlight (e.g., cloudy weather), it may not sufficiently charge your camera and replenish any usage.
- Periodically clean the solar panel with a soft cloth and warm water. Keep the solar panel surface clear of leaves and debris for optimum performance.
INSTALLING THE SOLAR PANEL
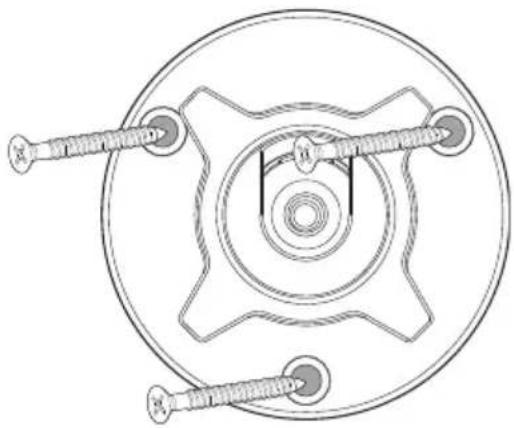
1 Attach the solar panel mounting bracket (black) to a solid surface with the supplied screws. Make sure to allow enough extension cable to reach your camera from the mounting location of the solar panel.
- If mounting to a wooden surface, screw the mounting bracket directly to the surface.
- If mounting to a masonry surface (bricks, concrete, or stucco), drill three holes and insert the supplied wall plugs into holes. Then secure the mounting bracket to the surface with supplied screws.
natural_image
Technical line drawing of a mechanical component with concentric circles and threaded fasteners (no text or symbols)INSTALLING THE SOLAR PANEL
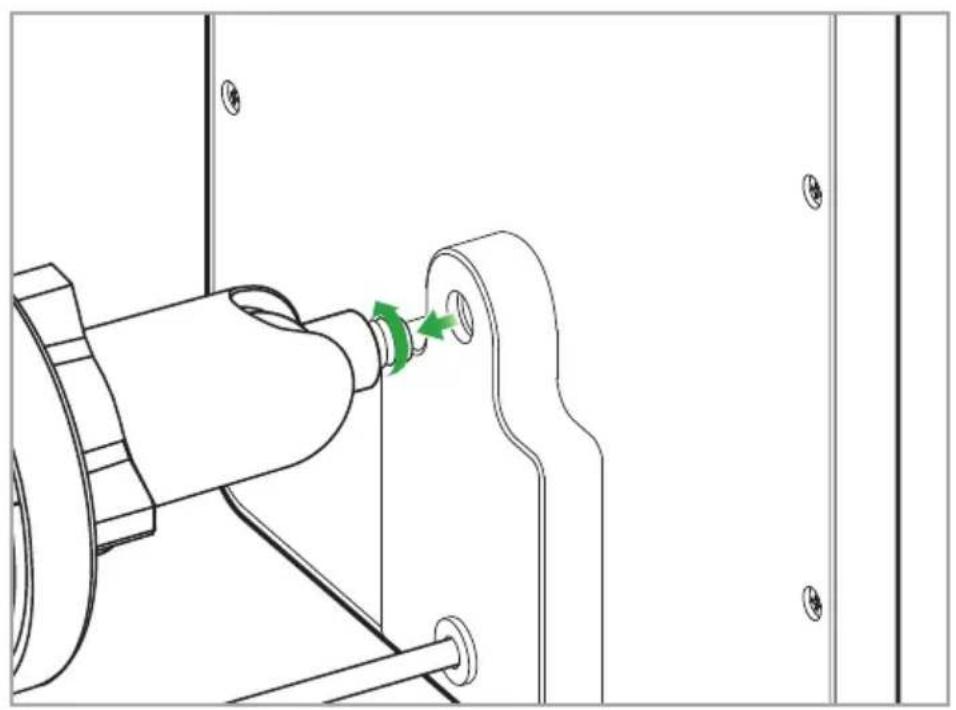
2 Screw the solar panel onto the mounting bracket until it is secured tightly, as shown below.
natural_image
Technical line drawing of a mechanical assembly with a green arrow indicating a joint or adjustment (no text or symbols present)EN
5
INSTALLING THE SOLAR PANEL
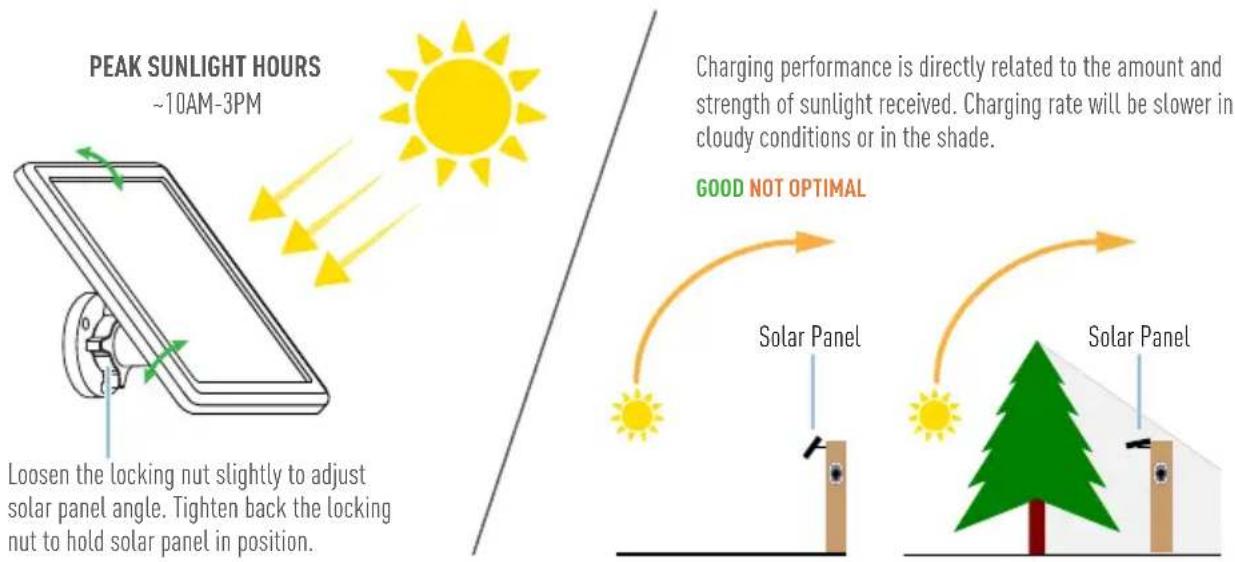
3 The solar panel produces power only when it is exposed to sunlight. To generate the most power and achieve best charging performance, tilt the solar panel in the direction that captures the most sunlight over the course of the day.
text_image
PEAK SUNLIGHT HOURS ~10AM-3PM Loosen the locking nut slightly to adjust solar panel angle. Tighten back the locking nut to hold solar panel in position. Charging performance is directly related to the amount and strength of sunlight received. Charging rate will be slower in cloudy conditions or in the shade. GOOD NOT OPTIMAL Solar Panel Solar PanelINSTALLING THE SOLAR PANEL
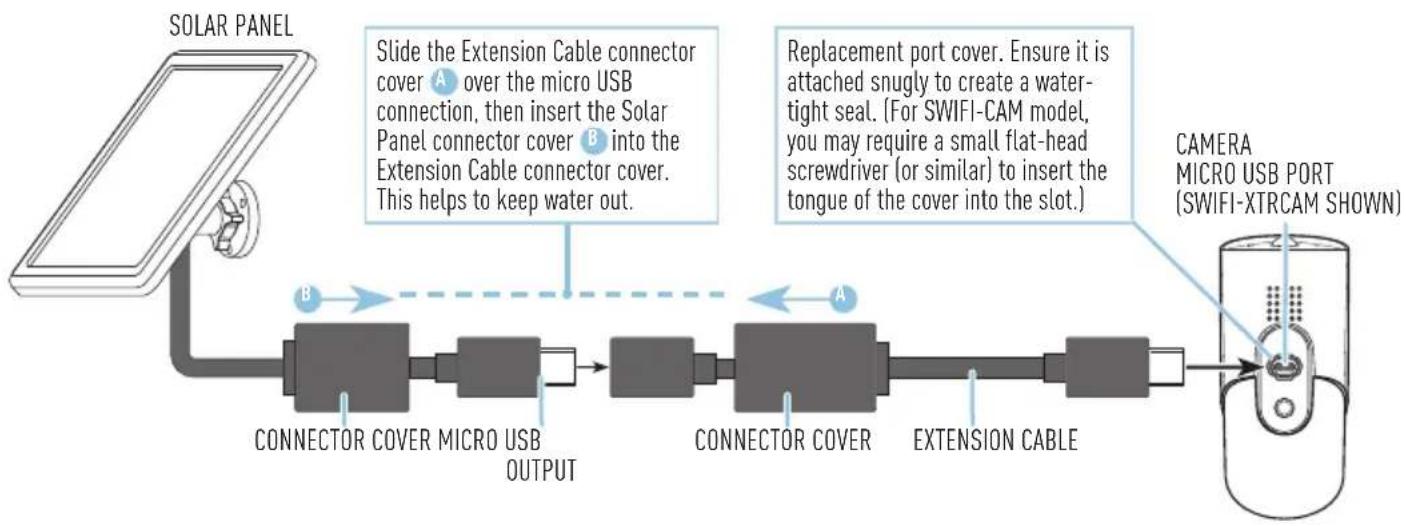
4 Connect the solar panel to your camera, as shown in the diagram below.
Connect one end of the extension cable to the solar panel's micro USB output and the other end to your camera's micro USB port.
flowchart
graph LR
    A["SOLAR PANEL"] --> B["CONNECTOR COVER MICRO USB OUTPUT"]
    B --> C["CONNECTOR COVER"]
    C --> D["EXTENSION CABLE"]
    D --> E["CAMERA MICRO USB PORT (SWIFI-XTRCAM SHOWN)"]
    style A fill:#f9f,stroke:#333
    style E fill:#bbf,stroke:#333
    note1["Slide the Extension Cable connector cover A over the micro USB connection, then insert the Solar Panel connector cover B into the Extension Cable connector cover. This helps to keep water out."] -.-> B
    note2["Replacement port cover. Ensure it is attached snugly to create a watertight seal. (For SWIFI-CAM model, you may require a small flat-head screwdriver (or similar) to insert the tongue of the cover into the slot.)"] -.-> C
All done! The solar panel is now ready to charge your camera when the sun is out! Use the Swann Security app to check your camera's charging status and battery level at any time via the camera's Settings screen.
RESUMEN

Provides greater distance between the solar panel and camera

SOPORTE DE LA CÁMARA AL AIRE LIBRE (BLANCO)
natural_image
Technical diagram of a mechanical component with concentric circles and threaded fasteners (no text or symbols)natural_image
Technical line drawing of a mechanical assembly with a green circular component and mounting holes (no text or symbols)natural_image
Technical diagram of a mechanical component with concentric circles and threaded fasteners (no text or symbols)INSTALLATION DU PANNEAU SOLAIRE
natural_image
Technical line drawing of a mechanical assembly with a green circular component and mounting holes (no text or symbols)FR
17
INSTALLATION DU PANNEAU SOLAIRE
natural_image
Technical line drawing of a mechanical component with flanged housing and threaded end (no text or symbols)COPERCHIO DEL CONNETTORE IMPERMEABILE
natural_image
Technical line drawing of a mechanical component with four screws and a central hub (no text or symbols)INSTALLAZIONE DEL PANNELLO SOLARE
natural_image
Technical line drawing of a mechanical assembly with a green circular component and mounting holes (no text or symbols)INSTALLAZIONE DEL PANNELLO SOLARE
natural_image
Technical diagram of a mechanical component with concentric circles and threaded fasteners (no text or symbols)INSTALLATION DES SOLARPANEL
natural_image
Technical line drawing of a mechanical assembly with a green circular component and mounting holes (no text or symbols)DE
29
INSTALLATION DES SOLARPANEL
© Swann Communications 2020