Mantis G - Drone YUNEEC - Free user manual and instructions
Find the device manual for free Mantis G YUNEEC in PDF.

| Product type | Foldable quadcopter drone |
| Brand | Yuneec |
| Model | Mantis G |
| Model number | YUNMGA |
| Remote controller | Model YUNMQRC |
| Flight battery | Rechargeable, charging time about 1 hour |
| Remote controller battery | Rechargeable, charging time about 2.5 hours |
| Charging port | USB Type-C (drone and remote controller) |
| Storage | Micro SD card slot |
| Camera | Built-in with gimbal and gimbal protector |
| App | Yuneec Pilot, compatible iOS 10.0+ / Android 5.0+ |
| Propellers | 4 propellers included |
| Battery lock | Yes |
| Phone holder | On remote controller |
| Flight functions | Automatic takeoff/landing, direction control, compass calibration, GPS |
| Safety | Dual-tone startup, motor stop, automatic landing |
| Maintenance | Clean with a soft cloth, avoid water |
| Spare parts | Propellers, batteries, cables (not included for smartphone) |
| Warranty | Refer to the manual for details |
Frequently Asked Questions - Mantis G YUNEEC
User questions about Mantis G YUNEEC
0 question about this device. Answer the ones you know or ask your own.
Ask a new question about this device
Download the instructions for your Drone in PDF format for free! Find your manual Mantis G - YUNEEC and take your electronic device back in hand. On this page are published all the documents necessary for the use of your device. Mantis G by YUNEEC.
USER MANUAL Mantis G YUNEEC
natural_image
Line drawing of a quadcopter drone with four propellers and four blades (no text or symbols)EN: Quick Start Guide
Product Name: Mantis Q Remote Controller Model: YUNMQRCP
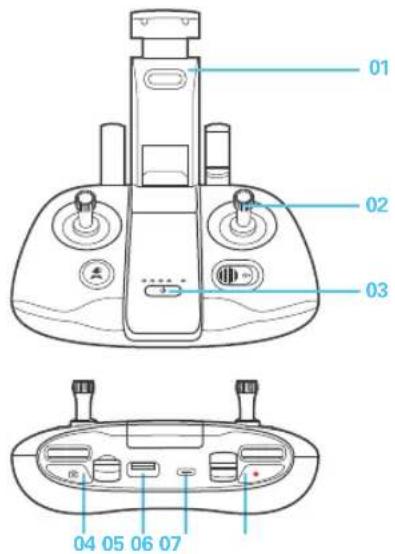
01 Phone Holder
02 Control Sticks
03 Power Button
04 Photo Button
05 Standard USB Port
06 USBType-C
07 Video Recording Button
Before Flight
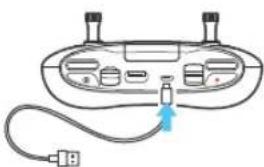
1. Charging the Remote Controller
- Use USB Type-C (only for charging) to charge, approx. 2.5 hours.
natural_image
Diagram of a device with ports and cables, no text or symbols present2.Preparing the Aircraft
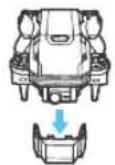
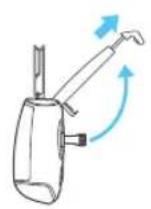
▶ Remove the gimbal protector
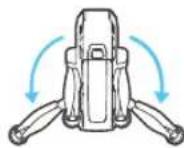
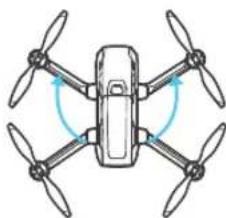
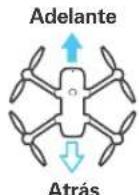
▶Unfold the rear arms
natural_image
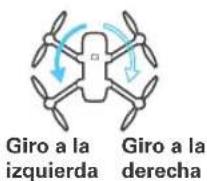
Diagram of a four-bladed drone with four propellers and four wings, showing angular rotation arrows (no text or symbols)▶Unfold the front arms
- Remove the gimbal protector. - All arms and propellers must be unfolded before powering on. - To fold the Mantis G, reverse the unfolding instructions.
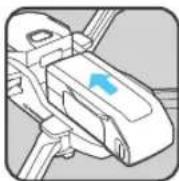
3. Charging the Flight Battery
- Press the lock button and remove the flight battery.
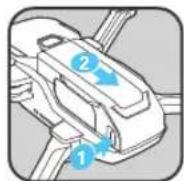
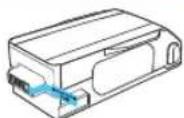
- Remove the insulation strip on the battery connector before use.
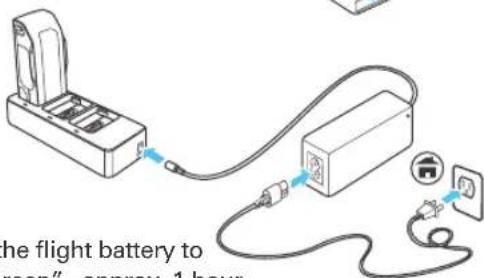
- Charge the flight battery to "Solid Green", approx. 1 hour.
- Push the flight battery into the aircraft until hearing a 'click'.
4.App Download
- Download Yuneec Pilot App. Mantis G supports iOS 10.0 (or later) or Android 5.0 (or later).

First Flight Part 1
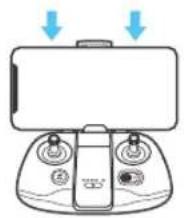
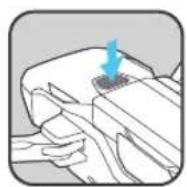
1. Installing the Smart Device
▶ Pull out the phone holder
natural_image
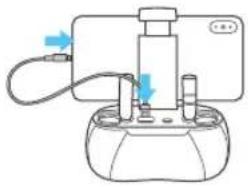
Diagram of a handheld device with control knobs and a monitor, showing blue arrows pointing to the screen (no text or symbols present)▶ Install the smart phone
natural_image
Simple line drawing of a mechanical device with no text or symbols▶ Connect the smart phone with the remote controller (Iphone and Android cable not included)
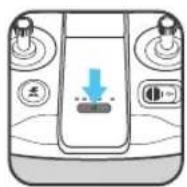
2.Power On
To power on the Mantis G and the remote controller, press and hold the power button for two seconds until you hear two rising tones.
▶ Power on the Mantis G Power on the controller
3. Connecting to Mantis G
- Launch Yuneec Pilot App.
- Tap the scan icon on the App screen and follow on-screen instructions to connect the aircraft with your control device (or manually select Mantis Wi-Fi in phone settings and enter the password to complete the connection. The password can be found on the aircraft QR Code sticker).
4.Take Off
- To ensure safe flight, step back approximately 9ft (3m) behind the Mantis G.
Option 1
Tap the icon [ ↑ ] on the app and then slide to take off.
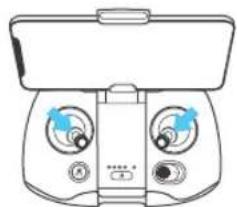
Option 2
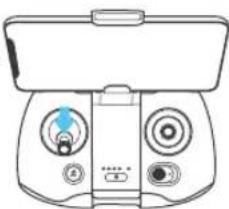
- Move the sticks for 1.5 seconds as shown below to start the motors.
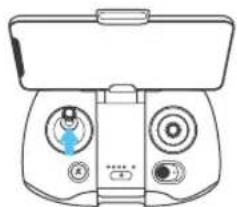
- Slowly raise Left Stick to take off.
natural_image
Line drawing of a handheld device with dual circular buttons and a top control panel (no text or symbols)▶ Start the motors
natural_image
Line drawing of a handheld device with dual switches and a control panel (no text or symbols)▶ Take off
First Flight Part 2
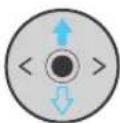
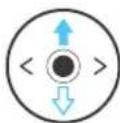
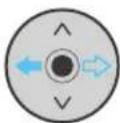
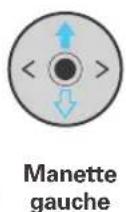
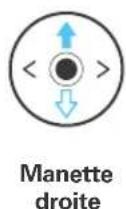
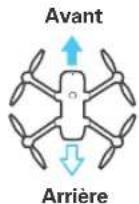
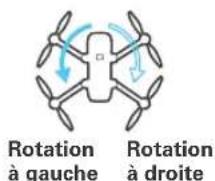
Move the control sticks as below to control the direction of the Mantis G.
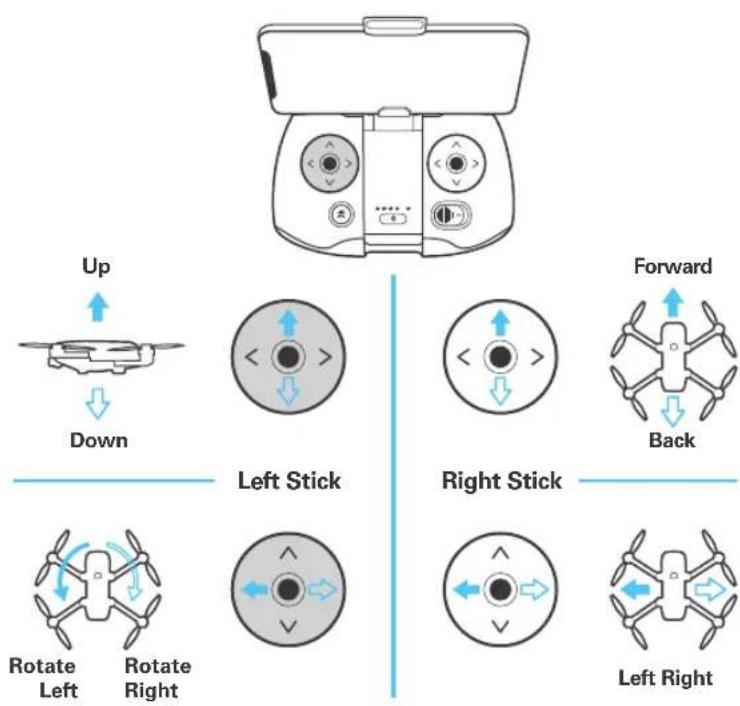
2. Landing1. Direction Control
Option 1
Tap the icon [ ↓ ] on the app and then slide to land.
Option 2
Slowly lower Left Stick to land. To land properly, ensure that the aircraft is away from any obstacles or obstructions as it will land directly below where it is hovering.
natural_image
Line drawing of a handheld device with control knobs and a display (no text or symbols)3.Power Off
• To power off the Mantis, press and hold the power button for two seconds.
- To power off the controller, press and hold the power button at the center of the controller for two seconds.
* If you experienced a slight drift during your first flight outdoor, it may be best to calibrate your compass and wait for GPS signal lock before take off. Please go to the Settings section within your app and follow the on-screen instructions to calibrate the compass.
natural_image
Diagram of a device with ports and cables, no text or symbols presentnatural_image
Diagram of a laboratory apparatus with tubing and a central component (no text or symbols)natural_image
Line drawing of a Djog� (Djog) controller with dual dials and control knobs (no text or symbols)
natural_image
Line drawing of a handheld device with dual circular buttons and a blue indicator light (no text or symbols)natural_image
Line drawing of a handheld device with dual control knobs and a scroll (no text or symbols)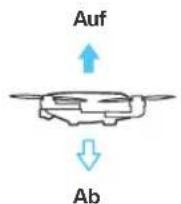
natural_image
Line drawing of a handheld device with dual control knobs and a scroll wheel (no text or symbols)3.Abschalten
natural_image
Diagram of a device with ports and a cable, no text or symbols presentnatural_image
Diagram of a laboratory apparatus with tubing and a central component (no text or symbols)natural_image
Line drawing of a handheld device with dual control knobs and a top-mounted screen (no text or symbols)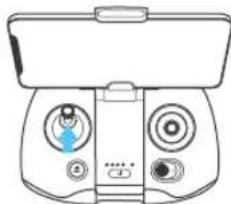
natural_image
Line drawing of a handheld device with dual circular buttons and a top control panel (no text or symbols)▶
natural_image
Line drawing of a handheld device with dual control knobs and a scroll (no text or symbols)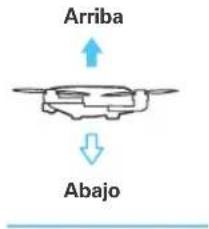
Mando izquierdo
Mando derecho
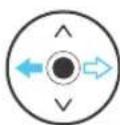

Izquierda Derecha
2.Aterrizaje
Opción 1
natural_image
Line drawing of a handheld device with control knobs and a top panel (no text or symbols)3.Apagado
natural_image
Diagram of a device with ports and a cable, no text or symbols presentnatural_image
Diagram of a four-bladed drone with four propellers and four wings, showing angular rotation arrows (no text or symbols)natural_image
Simple line drawing of a cable and plug connecting a rectangular device to a wall-mounted socket (no text or symbols)protège-cardan.
natural_image
Diagram of a laboratory apparatus with tubing and a central component (no text or symbols)natural_image
Line drawing of a handheld device with dual control knobs and a front-mounted head (no text or symbols)natural_image
Line drawing of a handheld device with dual circular buttons and a blue indicator light (no text or symbols)▶
Premier vol Partie 2
natural_image
Line drawing of a handheld device with control buttons and a top handle (no text or symbols)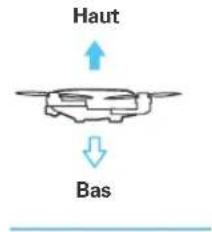
natural_image
Line drawing of a handheld device with control knobs and a top panel (no text or symbols)3. Éteindre
natural_image
Diagram of a device with ports and cables, no text or symbols presentnatural_image
Diagram of a laboratory apparatus with tubing and a central component (no text or symbols)natural_image
Line drawing of a handheld electronic device with dual dials and control knobs (no text or symbols)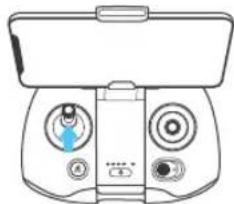
natural_image
Line drawing of a handheld device with dual circular buttons and a central control panel (no text or symbols)natural_image
Line drawing of a handheld device with control buttons and a central display (no text or symbols)3.Spegnimento
Any information might be changed due to the software update. For the latest documents, please check the official website: www.yuneec.com