
OM6160 - Blender OMEGA - Free user manual and instructions
Find the device manual for free OM6160 OMEGA in PDF.

| Brand | Omega |
| Model | OM6160 (also compatible with OM6560 series) |
| Appliance type | Blender / Mixer |
| Bowl material | BPA-free Eastman Tritan™ copolyester |
| Motor power | 3 HP peak |
| Rated voltage | 120 V, 50-60 Hz (international version 220 V/50-60 Hz available) |
| Amperage | 11.5 A |
| Weight | 5.5 kg (12.1 lb) |
| Dimensions (L × W × H) | 210 × 230 × 500 mm |
| Speeds | High and Low, with Pulse function (depending on model) |
| Control panel | On/Off switch, High/Low, Pulse |
| Safety | Automatic overload protection, reset button, thermal lock |
| Maintenance | Manual cleaning: wash the bowl, lid and plug with soapy water; wipe the base with a damp cloth |
| Included accessories | Tamper/spatula, inner lid, silicone seal |
| Usage | Household use only |
| Power cord | Long, with cord winder and plastic ties |
| Spare parts | Available on the Omega website (www.omegajuicers.com) |
| Recipes | Available online at www.omegajuicers.com/recipes |
| Warranty | Registration required at www.omegajuicers.com/omega-warranty-registration |
Frequently Asked Questions - OM6160 OMEGA
User questions about OM6160 OMEGA
0 question about this device. Answer the ones you know or ask your own.
Ask a new question about this device
Download the instructions for your Blender in PDF format for free! Find your manual OM6160 - OMEGA and take your electronic device back in hand. On this page are published all the documents necessary for the use of your device. OM6160 by OMEGA.
USER MANUAL OM6160 OMEGA
natural_image
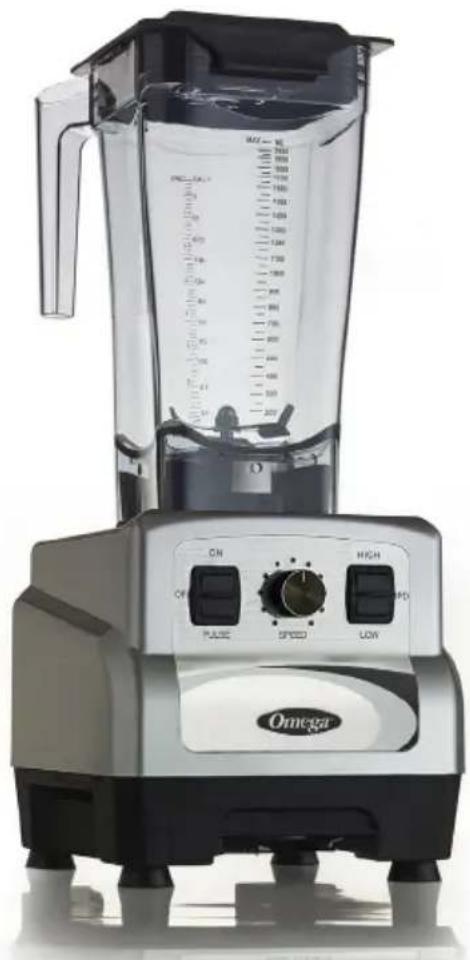
Front view of a BCAA blender with visible control knobs and a side blade (no text or symbols)OM6560 OM6160

natural_image
Front view of a white ceramic blender with clear liquid and control buttons (no visible text or symbols)MODEL OM6560, OM6160 Blender Series HIGH/LOW CONTROLS & VARIABLE SPEEDS
www.OmegaJuicers.com

Congratulations!
CONGRATULATIONS on the purchase of your new Omega product.
At Omega, we strive to develop technologically advanced machines that help deliver nutrition and flavor of the highest kind and closest to nature's purest form.
We are driven by you, our brand supporters. Your enthusiasm helps us continue to reinventandrenewourlineofjuicers,highspeedblendersandbeverageequipment.
Our team at Omega thanks you for supporting us for over 50 years!
www.omegajuicers.com/omega-warranty-registration
RECIPES, VISIT:
www.omegajuicers.com/recipes
CUSTOMER SERVICE:
Visit www.omegajuicers.com/contact-omega-juicers
After using your Omega, we kindly ask you to rate the machine on
www.OmegaJuicers.com
TABLE OF CONTENTS
02 Safety First
03 Know Your Omega
04 Operating Instructions
05 Using your Omega Blender
06 Easy Cleaning & Caring Tips
07 Additional Uses
07 Maintenance
08 Control Panel
08 Blade Agitator Assembly
09 Troubleshooting
10 Product Specifications
11-15 Recipes/Notes
16 French
32 Spanish
SAFETY FIRST
When using electrical appliances, basic safety precautions should always be followed including the following.
READ ALL INSTRUCTIONS BEFORE USING.
- To protect against electrical shock, do not immerse cord, plug or motor base in water or any other liquid.
- Always use the appliance on a dry, level surface.
- The use of attachments not sold or recommended by the manufacturer may cause fire, electric shock or injury.
- Do not remove the container from the motor base while blender is in operation.
- Do not place hands in container unless the unit is disconnected from the power outlet. A scraper may be used but must be used only when the blender is not running.
- Disconnect the blender from the power outlet before removing container from base. Blades are sharp - handle carefully.
- To reduce risk of injury, never place blade assembly on base without jar properly attached.
- Always operate the blender with cover in place.
- Do not use this blender for any purpose other than food or beverage preparation.
- Do not blend a dry, thick or heavy mixture for more than 10 seconds without turning the blender off. Then, stir ingredients before continuing to blend.
- Do not process boiling liquids. Let cool before placing in pitcher.
- Do not leave the appliance unattended when in use. Young children should be supervised when near the appliance.
- Do not place appliance on or near a hot gas or electric burner, or where it could touch any other source of heat.
- Unplug appliance from the power outlet when not is use, before putting on or taking off parts, and before cleaning.
- This appliance is for household use only. Do not use this appliance for anything other than its intended use. Do not use outdoors.
- Fully unwind the cord before use.
- To protect against electric shock, do not immerse the cord, plug or motor base in water or any other liquid.
- Do not allow the cord to hang over the edge of a table or counter, touch hot surfaces or become knotted.
- This appliance is not intended for use by young children or infirm persons unless they have been adequately supervised by a responsible person to ensure they can use the appliance safely.
- It is recommended to regularly inspect the appliance. Do not use the appliance if the power supply cord, plug or appliance becomes damaged in any way. Return the entire appliance to the nearest authorized Omega Service Center for examination and/or repair.
- Any maintenance other than cleaning should be performed at an authorized Omega Service Center.
- Do not use this appliance for anything other than its intended use. Do not use in moving vehicles or boats. Do not use outdoors.
SAVE THESE INSTRUCTIONS
KNOW YOUR OMEGA
This product uses a reset switch and thermal cutoff to protect the motor.
If the unit stops running during operation, press the reset switch on the bottom of the unit.
If the unit will still not operate, unplug, wait for 30 minutes, and try again.
Reset Switch
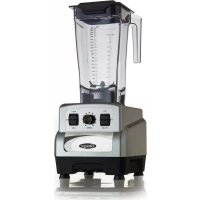
OM6560 / OM6562
natural_image
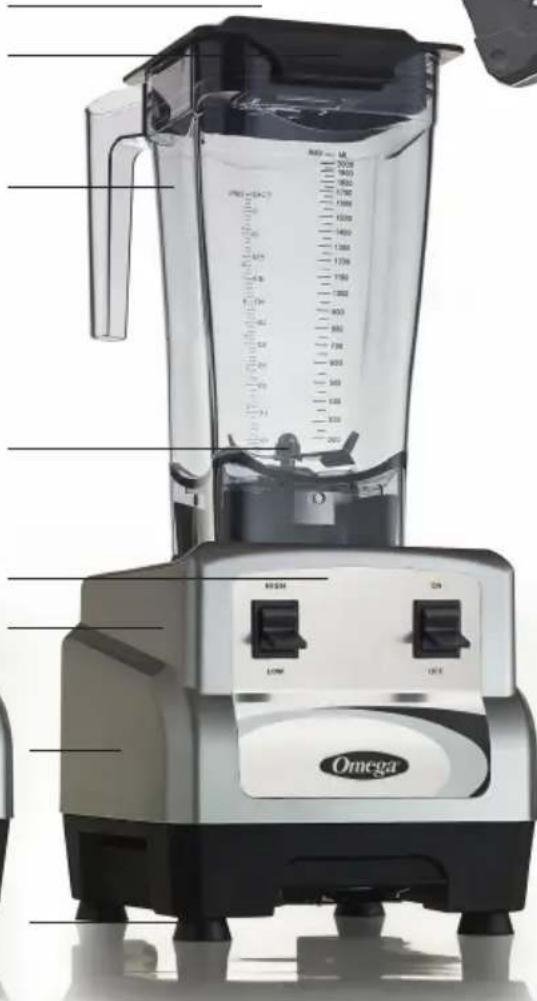
Front view of a Gamma blender with visible internal components and measurement markings (no text or symbols on the device itself)OM6160 / OM6162

natural_image
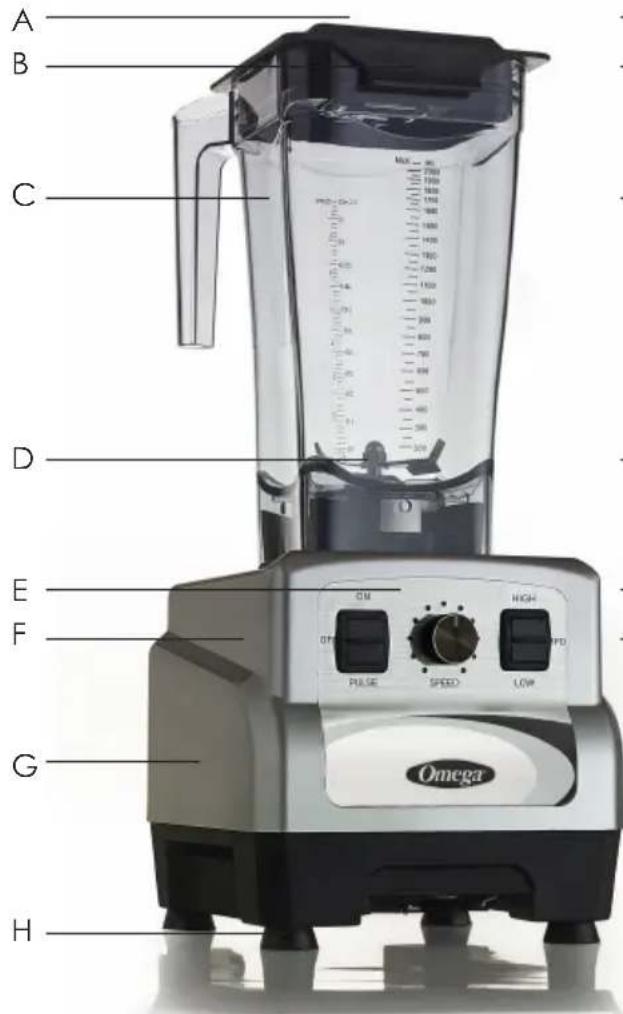
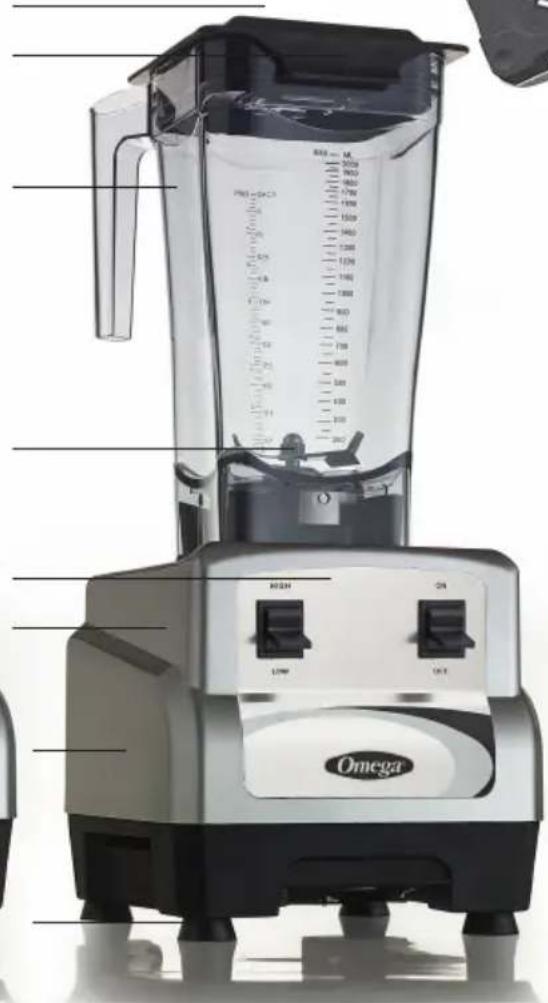
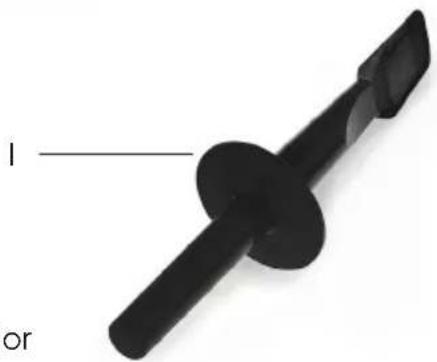
Close-up of a black mechanical component with a pointed tip and flanged end (no text or symbols visible)A Feeder Cap
B Lid
C BPA-Free Eastman Tritan™ Copolyester Container
D Blade Assembly
E Control Panel
F Blender Base
G High Performance Motor
H Sturdy Nonslip Feet
I Plunger/Spatula
OPERATING INSTRUCTIONS
BEFORE FIRST USE
Before using your Omega Blender for the first time, remove any packaging material and promotional labels. Ensure the appliance is switched off at the power outlet and the power cord is unplugged. Wash the lid, inner lid, Eastman Tritan™ Container and blade assembly in warm, soapy water with a soft cloth. Rinse and dry thoroughly. Do not place parts in the dishwasher (with the exception of the container, lid and inner lid). The container lid and inner lid may be washed in the dishwasher. Ensure the blade assembly has been removed from the container before placing the blender into the dishwasher. The motor base can be wiped with a damp cloth. Dry thoroughly.
ASSEMBLING THE BLENDER
- To assemble the container, place the silicon seal onto the blade assembly.
- Insert the blade assembly into the container base.
- Place the motor base on a flat, dry surface. Ensure that the motor base is switched off and the power cord is unplugged. Turn the blender container upright and insert on to the motor base.
- Plug the power cord into a power outlet. The handle of the container can be positioned to the left or right hand side of the appliance.
DISASSEMBLING THE BLENDER
- Always ensure your Omega Blender is switched off. Then unplug the power cord.
- Remove the container from the motor base by grasping the handle and lifting the container in an upward direction. Remove the blade assembly by upturning the container and twisting the blade removal clockwise, then lift upwards and away from the base of the blender.
- Remove the silicon seal from the blade assembly.
AUTOMATIC OVERLOAD PROTECTION
Your Omega motor is designed to protect itself from overheating. If the motor shuts OFF, turn OFF the power switch for up to 45 minutes to reset. To reduce reset time unplug the machine, remove the container and blow air into the center section. Press the reset button on bottom of blender.
POWERCORD
Your machine is equipped with a long power cord. Store the unused portion neatly underneath.
BOTTOM VIEW/CORD WRAP
Plastic cord retainers hold the cord securely. There is no need to unscrew the cord retainers to let out more cord. They are flexible and return to position after the cord lifted out.

natural_image
Close-up of a black CPU cooler with cooling fan and control knobs (no visible text or symbols)- To turn the Omega blender on, switch to ON position.
NOTE: When using your Omega Blender for the first time, you may notice an odor coming from the motor. This is normal and will dissipate with use. - Add food or liquid into the container ensuring not to exceed the 'MAX' mark.
- Place the blender lid firmly into position on the top of the container. If not already in place, insert the clear inner lid into the blender lid and turn clockwise or counterclockwise to lock into position.
- Turn your blender ON, or select a speed, depending on model. The blender will start to operate. The speed can be changed at any time during the blending process.
- To stop blending at any time, turn switch to OFF position or switch 'OFF'.
- At the end of use, always ensure your Omega Blender is turned off by pressing or switching 'OFF'. Then unplug the cord. Ensure the motor and blades have completely stopped before attempting to move. Disassemble, clean, and store the appliance.
NOTE: During the blending process, ingredients may stick to the sides of the container. To push the food back onto the blades, switch 'OFF' and remove the power cord. Remove the lid and use a rubber spatula to scrape down the sides of the container. Replace the lid before blending.
NOTE: If any moisture or liquid appears on top of the motor base during blending, switch 'OFF'. Remove the container. Wipe the motor base immediately with a dry cloth or paper towelling. Check that the container is correctly assembled.
HOW TO USE THE PLUNGER/SPATULA
The Plunger/Spatula helps mix very thick mixtures. While the machine is running, and only through the lid plug opening, use the Plunger/Spatula to push ingredients into the blades. We suggest using when making frozen ice creams and nut butters, or to purée fruits and vegetables.
- The round disk (near the top of the Plunger/Spatula) and lid prevents the Plunger/ Spatula from hitting the blades when the lid is secured properly in the locked position.
- The container should not be more than two-thirds full when the Plunger/Spatula is used during blending.
- Do not use the Plunger / Spatula for more than 30 consecutive seconds (to avoid overheating).
- If the food does not circulate, the blender may have a trapped air bubble. Carefully remove the inner lid while making sure the main lid stays firmly in place Release the air bubble by inserting the Plunger / Spatula through the inner lid opening.
- Hold the Plunger/Spatula straight down. If this does not help the ingredients circulate, point the Plunger / Spatula toward the side or corner of the container.
EASY CLEANING & CARING TIPS
CLEANING
Do not put the container assembly & blender base assembly in the dishwasher.
- Before first use and after every use, separate container parts from the base.
- Add cleaning solution to the container. Use water (less than 115^ F/ 46^ C) and a non-sudsing detergent.
- Scrub and flush out the container interior lid and feeder cap to remove food residue.
- Empty container.
- Fill container 1/4 full with fresh washing solution and place it on the base.
- Replace the lid on the container and run the blender on high speed for 2 minutes.
- Repeat step 5 using clean rinse water.
- Wipe down the container, feeder cap, and lid with a soft cloth or sponge.
- Wipe the exterior of the base with a damp cloth or sponge then dry thoroughly. The base contains electrical components: do not immerse, use a high-pressure washer, or use a dishwasher to clean the base.
- Wipe any excess food particles from the power cord.
CARING TIPS
To care for your blender, please read the tips as follows:
-
Periodically check all parts before reassembly, as use of damaged or non-recommended parts could result in a severe personal injury and/or damage to the blender.
-
Blades: If the processing blades are stuck or difficult to turn, DO NOT USE BLENDER. Unplug the blender. Check the blades by carefully turning in a counterclockwise direction, where the opposite edges are sharp. Blades should turn freely.
-
Container: If the Eastman Tritan™ Container is cracked, DO NOT USE BLENDER, further use could result in the container breakage during use.
-
Blender Base: Never immerse the blender base in water. Unplug unit. The housing can be cleaned with a damp cloth.
5.Motor: The motor is permanently lubricated and does not require any additional lubrication.
ADAPTERS
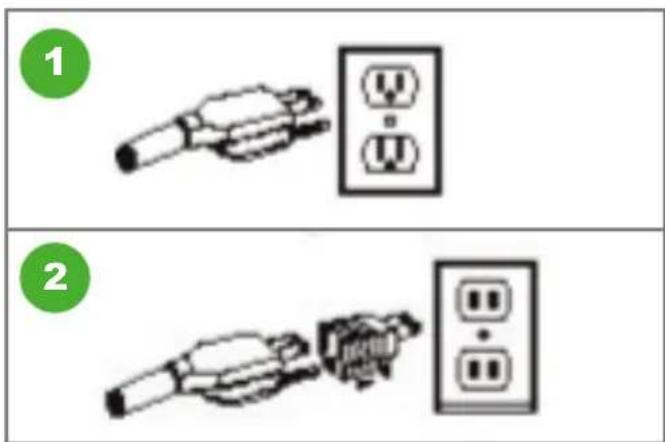
On most models, the power cord comes equipped with a three-prong (grounding) plug which connects to a standard three-prong wall outlet (Figure 1).
Please use approved 2 prong adapters (Figure 2) when a ground is not available. Do not cut or remove the round grounding prong from the power cord.
ADDITIONAL USES
- Use for drinks or cocktail making, emulsions such as mayonnaise, dressings, marinades and foods that require mixing until just combined, such as batters, also for pureeing soups and aerating liquids.
- Use to blend fruits, ice cream and yogurts into thick smoothies, whips and milkshakes.
- Use the Pulse function for foods that only require short bursts of power such as chopping nuts and crushing ice.
- Use the Pulse function with short bursts of power, when blending drinks containing ice cubes or frozen fruit.
- Ensure all foods are cut into cubes (approx. 1 inch square) where appropriate to achieve an even result.
- Do not put more than 2 cups of warm ingredients into the Omega Blender before blending commences. After the blending process has begun and the blades are turning you may slowly add another 1 12 cups of ingredients through the opening in the lid if desired.
- Thick mixtures puree more efficiently if the Omega Blender is 14 to 12 full.
- When using several ingredients, place liquid ingredients in the container before solid ingredients, unless specified in the recipe. When blending thick or dry mixtures it may be necessary to use the plunger/spatula to scrape down the sides of the container. Do not use metal utensils as they may damage the blades or blender.
MAINTENANCE
Inspect the blender and its various parts and replace as follows:
DAILY
- Unplug the blender and remove the container from the base.
- Inspect the container blades for wear, nicks, and broken or loose blades.
Replace if necessary.
WEEKLY
- Unplug the blender.
- Inspect the power cord insulation and power plug for cracks.
QUARTERLY
- Review the condition of the container assembly at least every 90 days.
- Replace if necessary.
REPLACEMENT PARTS
For replacement parts contact Customer Service:
www.omegajuicers.com/contact-omega-juicers
CONTROL PANELS
MODELS: OM6560
ON/OFF Switch – Variable Speed Knob – Pulse Switch

MODELS: OM6160
ON/OFF Switch – High/Low Switch

BLADE AGITATOR ASSEMBLY
Use caution when handling the blade; it is sharp. Use a soft cloth to grab the blade when inserting the blade assembly through the container.
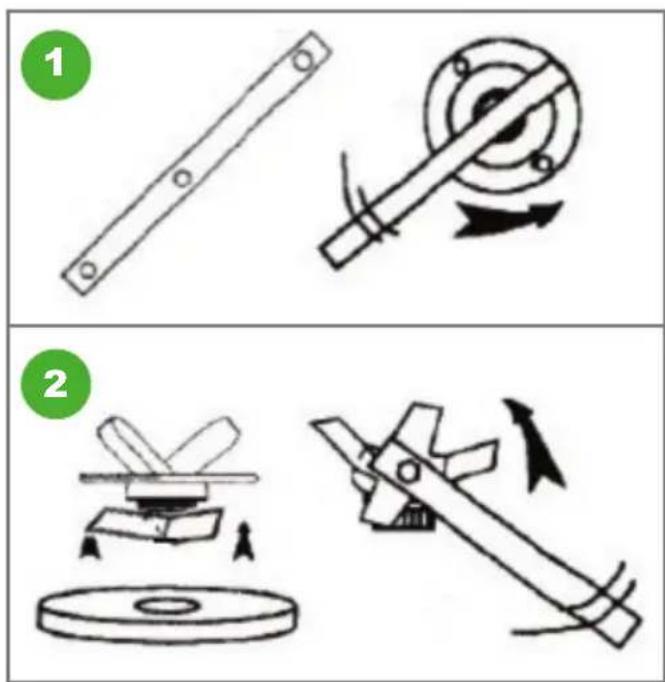
The retainer nut is easily removed using the disassembling tool (DT), sold seperatly. Turn container upside down and insert the disassembling tool on the holes of the nut. Push the tool counterclockwise to loosen nut (Step 1). Once loosened, remove by hand.
To release the blade use the other end of the DT while grabbing the gear backup pliers and turn counterclockwise (Step 2).
TROUBLESHOOTING
LOUD NOISE FROM THE CONTAINER
PROBLEM: Container blades do not spin.
SOLUTION: Broken or worn drive socket. Replace dive socket.
PROBLEM: Increased Vibration.
SOLUTION: Check blade assembly for damaged components and replace.
PROBLEM: Leaking from bottom of container.
SOLUTION: Tighten retainer nut on the bottom of the container.
MACHINE STARTS THEN SHUTS OFF
PROBLEM: Motor
SOLUTION: Depress reset button.
PROBLEM: Reset button.
SOLUTION: Contact Customer Service: www.omegajuicers.com/contact-omega-juicers
PROBLEM: Power Failure.
SOLUTION: Check to make sure there is power to the machine.
PROBLEM: Power supply cord damage.
SOLUTION: Check the power supply cord and the connection to the power outlet.
POSSIBLE PROBLEMS AND EASY SOLUTIONS
POSSIBLE PROBLEM: Motor doesn't start or blade doesn't rotate.
EASY SOLUTION:
- Check that the container and lid are securely locked into position.
- Check that the blade assembly is correctly attached to the base of the container.
- Check that the 'Power' switch and selected function or speed setting is 'ON'.
- Check that the power plug is securely inserted into the power outlet.
POSSIBLE PROBLEM: Food is unevenly chopped
EASY SOLUTION: Either too much food is being blended at one time or the pieces are too large. Try cutting food into smaller pieces of even size and processing a smaller amount per batch. For best results, the food should be chopped into pieces no larger than 34 inch.
POSSIBLE PROBLEM: Food is chopped too fine or is watery.
EASY SOLUTION: The food is over processed. Try using the Pulse function or process for a shorter time.
POSSIBLE PROBLEM: Food sticks to blades and container.
EASY SOLUTION: The mixture may be too thick. Try adding more liquid to the mixture and/or use another function.
PRODUCT SPECIFICATIONS
Product Name OM6560, OM6160 Series
Rated Voltage 120 V
Rated Frequency 50-60 Hz
Amps 11.5A
Motor 3 Peak Horsepower
Weight 12.1 lb. (5.5kg)
Product Dimension 8.25" Width (210 mm)
9" Depth (230 mm)
19.75" Height (500 mm)
Also Available International 220 V / 50-60 Hz
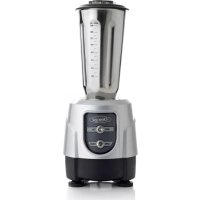
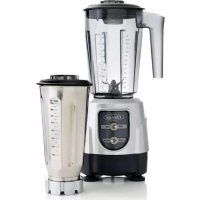
OM6562/OM6162
natural_image
Front view of a Gamma blender with visible control buttons and volume indicator (no text or symbols on body)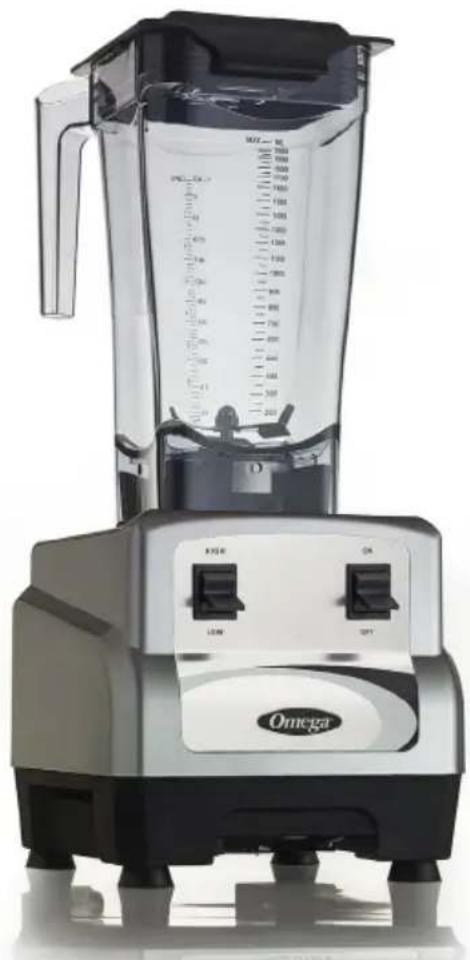
natural_image
Front view of a white plastic blender with black handle and control buttons (no visible text or symbols)OM6560 / OM6562 OM6160 / OM6162
Strawberry Daiquiri
What You'll Need:
5-10 strawberries (to taste)
2 oz light rum
1/2 oz triple sec
1 oz lime juice
1/2 tsp sugar
1 cup ice
How To Prepare:
1 Blend all ingredients in Omega Blender at speed 9, setting the timer for 2 minutes.
2 Pour into a chilled glass. Serve.

2 minutes 2 m BLENDS 2 minutes

Fruity Ice Cream
What You'll Need:
2 cups frozen fruit (bananas, strawberries, blueberries, etc.) 1/2 cup of sugar 1 cup heavy cream

5 minutes 5 mBLENDs 30 minutes

How To Prepare:
1 Start by adding the fruit to the blender. Add the sugar and 1/4 cup of the cream. Blend all ingredients at speed 7, setting the timer for 4 to 5 minutes
2 While blending, slowly add more of the cream through the removable cap on the lid. Add more cream if the mixture doesn't meet your desired consistency.
3 Freeze the mixture for at least 30 minutes.
HINT: For banana ice cream, use overripe bananas that are about to go bad, slice them, put them in the freezer and use them for banana ice cream!
Coco-Nilla Ice "Cream"
What You'll Need:
2 cups Coconut Milk (canned or fresh) 2 tbsp maple syrup, honey or agave 2 tsp vanilla extract Fruit (optional)
How To Prepare:
1 Blend all ingredients at speed 7, setting the timer for 4 to 6 minutes.
2 Freeze the mixture for at least 2 hours, stirring every 20 to 30 minutes.
Dairy-free recipe!
Cinnamon Apple Sauce
What You'll Need:
6 apples, cored, peeled, quartered 2 tbsp lemon juice 2 tbsp cinnamon
How To Prepare:
1 Blend all ingredients in the Omega blender until it meets your desired consistency.
2 Omega recommends setting the blender at speed 7 for 3 minutes.
Pumpkin Spice Soup
What You'll Need:
4 tbsp olive oil 2 medium yellow onions, (sliced in quarters) 2 tsp garlic 6 cups of sliced roasted pumpkin 5 cups chicken stock 2 cups milk 1/2 cup heavy (35%) cream 1/4 tsp cayenne pepper to taste 2 tsp curry powder 1/2 tsp ground coriander salt (if desired)
brown sugar (if desired for sweetness)

20 minutes 8-BLENDrules 15 minute PREP
How To Prepare:
1 Add oil, onions, garlic and salt to the Omega blender. Set the blender on speed 6 and the timer for 2 to 3 minutes, until they are finely chopped. Transfer to stovetop and cook on low until onions are soft.
2 In the meantime, blend pumpkin and chicken stock. Pour into pot with oil, onions, garlic and salt. Bring to a low boil. Simmer for 10 minutes.
3 Pour the mixture into the blender while warm. Set the blender on speed 7 for 5 minutes. Add the remaining ingredients through the removable cap on the lid. The mixture should be close to a puree texture.
Pour the mixture into the stovetop pot. Heat and allow to simmer for 5 minutes as flavors mix. Serve hot or cold.
Chocolate Mousse
What You'll Need:
1/2 cup milk 1 cup heavy cream 2 tps butter 1/2 tsp instant coffee 2 eggs 6 oz chocolate chips 2 tps rum, cognac or brandy 1 tsp powdered sugar

10 minutes 5 BLENDesPREP
How To Prepare:
1 Beat 1/2 cup milk and 1/2 cup cream on stove top until it bubbles. Do not let it burn.
2 In your Omega blender add butter, eggs, coffee, chocolate chips, and liquor. Blend until creamy. While blending, slowly add hot milk and cream.
Blend until smooth, setting the timer at
3 1 to 2 minutes and the speed at 4.
Pour into a pan. Chill for at least an hour.
Beat remaining cream and powdered
4 sugar into smooth mixture and chill. Serve on top.
Chili Salsa
What You'll Need:
1 (14.5 oz can) whole canned tomatoes 4 tsp jalapeños (diced, not pickled) 2 chili peppers 1/4 cup yellow onions (diced) 1/2-3/4 tsp garlic salt 1/2 tsp cumin 1/4 tsp sugar
How To Prepare:
In the Omega blender, place jalapeños, chili peppers and onions. Remember, the heat of chili peppers comes from the seeds, the veins where the seeds are attached, as well as, the parts nearest the veins. For milder dishes, the veins and seeds should be removed and discarded.
2 Blend for a few seconds on speed 6. Add both cans of tomatoes, salt, sugar, and cumin.
3 Blend all ingredients on speed 4 or 5, setting the timer for 1 to 2 minutes. Do not pure.
4 Place in covered container and chill for 1 hour and serve.
Honey Wheat Pancakes
What You'll Need:
1-1/3 cups buttermilk (low-fat) 2 eggs 2 tbsp honey 1-1/2 cups buttermilk baking mix 1/2 cup whole-wheat flour 1/4 cup honey-crunch wheat gem 1 tsp baking powder butter and syrup for serving
How To Prepare:
1 Place the buttermilk, eggs and honey in the Omega blender. Set the speed to 6, and the timer to 6 minutes. Then begin adding the remaining ingredients into the Omega blender in the order given through the removable cap on the container lid.
2 Once the mixture is blended to your desired consistency, shut off the blender.
3 For each pancake, pour about 1/4 cup batter onto a skillet.
NOTES
Omega®
Félicitations!
SERVICE À LA CLIENTÈLE : Visitez le www.omegajuicers.com/contact-omega-juicers
www.OmegaJuicers.com
TABLE DES MATIÈRES
natural_image
Black plastic tool with a pointed tip and flared end, isolated on white background (no text or symbols)natural_image
Close-up of a black and white industrial fan with cooling fins and control knobs (no visible text or symbols)UTILISATION DE VOTRE MÉLANGEUR OMEGA
www.omegajuicers.com/contact-omega-juicers
CARACTÉRISTIQUES DU PRODUIT
natural_image
Front view of a white portable blender with clear liquid, showing control buttons and speed slider (no text or symbols on body)
natural_image
Exterior view of a modern office building (no signage)OM6560 / OM6562 OM6160 / OM6162
Daiquiri aux fraises
5 minutes 5 m/LANGERS 30 minutes

Comment préparer :
20 minutes 8-ÉANGBnutes 15 minute CURE
Comment préparer :
PARA SERVICIO AL CLIENTE: Visite www.omegajuicers.com/contact-omega-juicers
www.OmegaJuicers.com
TABLA DE CONTENIDO

natural_image
Illustration of a hand holding a black device with a circular button and a ruler, no visible text or symbols.OM6560 / OM6562 OM6160 / OM6162
natural_image
3D rendered mechanical component with labeled section 'I' and partial label 'or' (no other text or symbols)A Tapa del alimentador
B Tapa
C Envase de copoliéster Eastman Tritan™ sin BPA
D Ensamblaje de cuchillas
E Panel de contro
natural_image
Close-up of a black and silver industrial fan with cooling fins and control knobs (no visible text or symbols)CÓMO USAR TU LICUADORA OMEGA
www.omegajuicers.com/contact-omega-juicers
PANEL DE CONTROL
MODELOS: OM6560
Peso 12.1 lb. (5.5 kg)
natural_image
Front view of a Gamma blender with visible control buttons and volume indicator (no text or symbols on body)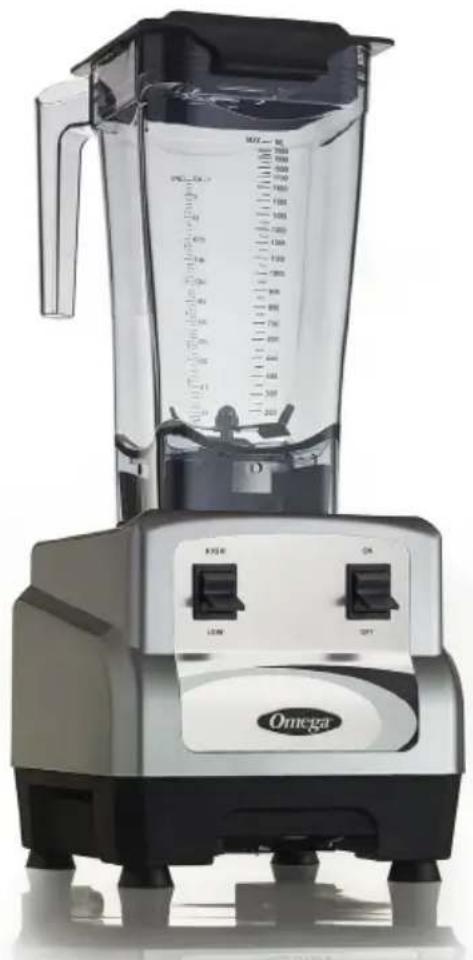
natural_image
Exterior view of a modern office building (no signage)OM6560 / OM6562 OM6160 / OM6162
Daiquirí de Fresa
Lo que necesitarás:
5 a 10 fresas (al gusto)
2 oz de ron claro
1/2 oz de triple seco
1 oz de zumo de lima
www.OmegaJuicers.com
The Legacy Companies, Weston, FL 33331 U.S.A
- Congratulations!
- TABLE OF CONTENTS
- SAFETY FIRST
- SAVE THESE INSTRUCTIONS
- KNOW YOUR OMEGA
- OPERATING INSTRUCTIONS
- BEFORE FIRST USE
- ASSEMBLING THE BLENDER
- DISASSEMBLING THE BLENDER
- AUTOMATIC OVERLOAD PROTECTION
- POWERCORD
- BOTTOM VIEW/CORD WRAP
- HOW TO USE THE PLUNGER/SPATULA
- EASY CLEANING & CARING TIPS
- CLEANING
- CARING TIPS
- ADAPTERS
- ADDITIONAL USES
- MAINTENANCE
- DAILY
- WEEKLY
- QUARTERLY
- REPLACEMENT PARTS
- CONTROL PANELS
- MODELS: OM6560
- MODELS: OM6160
- BLADE AGITATOR ASSEMBLY
- TROUBLESHOOTING
- LOUD NOISE FROM THE CONTAINER
- MACHINE STARTS THEN SHUTS OFF
- POSSIBLE PROBLEMS AND EASY SOLUTIONS
- EASY SOLUTION:
- PRODUCT SPECIFICATIONS
- Strawberry Daiquiri
- How To Prepare:
- Fruity Ice Cream
- Coco-Nilla Ice "Cream"
- Cinnamon Apple Sauce
- Pumpkin Spice Soup
- What You'll Need:
- Chocolate Mousse
- Chili Salsa
- Honey Wheat Pancakes
- NOTES
- Omega®
- Félicitations!
- TABLE DES MATIÈRES
- UTILISATION DE VOTRE MÉLANGEUR OMEGA
- CARACTÉRISTIQUES DU PRODUIT
- Daiquiri aux fraises
- Comment préparer :
- TABLA DE CONTENIDO
- CÓMO USAR TU LICUADORA OMEGA
- PANEL DE CONTROL
- MODELOS: OM6560
- Daiquirí de Fresa
Brand : OMEGA
Model : OM6160
Category : Blender