DABMAN i510 BT - Radio Imperial - Free user manual and instructions
Find the device manual for free DABMAN i510 BT Imperial in PDF.
Pick your language and provide your email: we'll send you a specifically translated version.
| Brand | Imperial |
| Model | DABMAN i510 BT |
| Category | DAB+/FM Radio |
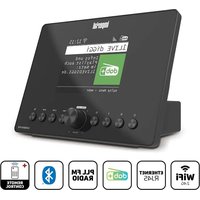
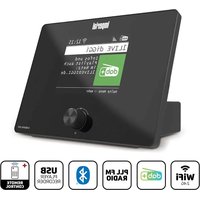
| Product Type | Portable Digital Radio |
| Reception | DAB+, FM |
| Connectivity | Bluetooth |
| Output Power | 2 x 3 W RMS |
| Speakers | 2 stereo speakers |
| Display | Backlit LCD Display |
| Power Supply | Mains (5V adapter) or 4 AA batteries |
| Dimensions (W x H x D) | Approx. 20 x 12 x 8 cm |
| Weight | Approx. 0.5 kg |
| Main Functions | DAB+, FM RDS, Bluetooth, alarm, sleep, 20 presets |
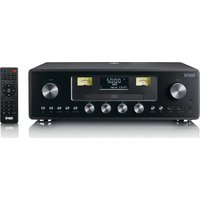
| Controls | Buttons on the device, remote control included |
| Headphone Jack | Yes, 3.5 mm jack |
| USB Port | Micro-USB port for updates |
| Battery Life | Approx. 10 hours |
| Maintenance and Cleaning | Clean with a soft dry cloth, avoid solvents |
| Safety | Do not expose to water, use supplied adapter |
| Spare Parts | Mains adapter, remote control available |
| Repairability | Repairability index not communicated |
| Box Contents | Radio, mains adapter, remote control, manual |
Frequently Asked Questions - DABMAN i510 BT Imperial
How to tune DAB stations on the DABMAN i510 BT radio?
Press the Scan button to start an automatic search for DAB stations. The radio saves all found stations. Use the Previous and Next buttons to navigate.
How to connect my phone via Bluetooth?
Enable Bluetooth on your phone, then press the Source button on the radio until Bluetooth is selected. The radio appears as 'DABMAN i510 BT' in the device list. Select it to pair.
How to set the alarm?
Press the Menu button and navigate to 'Alarm'. Choose 'Alarm setting' then set the time, source (radio or buzzer), and repeat. Confirm with OK.
Can I listen to the radio without plugging it in?
Yes, the radio works with 4 AA batteries (not included). Insert them into the battery compartment. Battery life is about 10 hours in normal use.
How to update the list of DAB stations?
Press the Scan button for 2 seconds to start a full scan. The radio automatically updates the list of available stations in your area.
What to do if DAB reception is poor?
Move the radio near a window or higher up. Avoid metallic interference. The telescopic antenna must be fully extended.
How to use the remote control?
Insert two AAA batteries (not included) into the remote control. Point it at the radio's sensor. The remote control keys replicate the same functions as the device buttons.
How to clean the radio?
Unplug the adapter and remove the batteries. Use a slightly damp soft cloth (no harsh liquids). Avoid water entering openings.
Where to find spare parts (adapter, remote control)?
Contact Imperial customer service or visit the official website. Part numbers are listed in the manual. Only use original accessories.
How to set the time manually?
Press Menu and select 'Time'. Choose 'Set time' and use the arrows to adjust hours and minutes. The radio automatically syncs via DAB.
User questions about DABMAN i510 BT Imperial
0 question about this device. Answer the ones you know or ask your own.
Ask a new question about this device
No questions yet. Be the first to ask one.
Download the instructions for your Radio in PDF format for free! Find your manual DABMAN i510 BT - Imperial and take your electronic device back in hand. On this page are published all the documents necessary for the use of your device. DABMAN i510 BT by Imperial.