
HOCE4T620EWK - Fridge HOOVER - Free user manual and instructions
Find the device manual for free HOCE4T620EWK HOOVER in PDF.
| Brand | HOOVER |
| Model | HOCE4T620EWK |
| Product type | Refrigerator with freezer |
| Minimum installation dimensions (W × D) | 920 mm × 1137 mm |
| Refrigerator temperature | 2 °C to 8 °C (default 4 °C) |
| Freezer temperature | Default -18 °C, up to -25 °C in Super freeze |
| Special functions | Super cool, Super freeze, Eco mode, Vacation mode |
| Fine temperature adjustment | Yes, 3 sub-levels per main level |
| Control panel | Touch with LED display (temperature, Wi-Fi icons, Super cool) |
| Connectivity | Built-in Wi-Fi, hOn app (compatible with iOS and Android) |
| Defrost | Automatic in both compartments |
| Vegetable crisper | Yes, with humidity control slider |
| Shelves | Adjustable glass shelves |
| Door bins | Yes |
| Freezer drawers | Yes |
| Reversible door | Yes (tools required) |
| Leveling feet | Yes |
| Error code | Flashing 6 °C LED = fan error |
| Demo mode | Yes (activation via key combination) |
Frequently Asked Questions - HOCE4T620EWK HOOVER
User questions about HOCE4T620EWK HOOVER
0 question about this device. Answer the ones you know or ask your own.
Ask a new question about this device
Download the instructions for your Fridge in PDF format for free! Find your manual HOCE4T620EWK - HOOVER and take your electronic device back in hand. On this page are published all the documents necessary for the use of your device. HOCE4T620EWK by HOOVER.
USER MANUAL HOCE4T620EWK HOOVER
PRODUCT DESCRIPTION....2
Space requirements....2
USE 3
Use....3
Customized temperature....3
Fine Tuning....4
Super Cool function .... 4
Super Freeze function....4
Eco mode....5
Holiday function....5
Defrosting....5
Demo mode....5
Error codes 5
APP CONNECTION (Content only) 6
IN APP PAIRING PROCEDURE 6
Step 1....6
Step 2....6
Step 3....6
WiFi Use 7
DOOR REVERSIBILITY 8
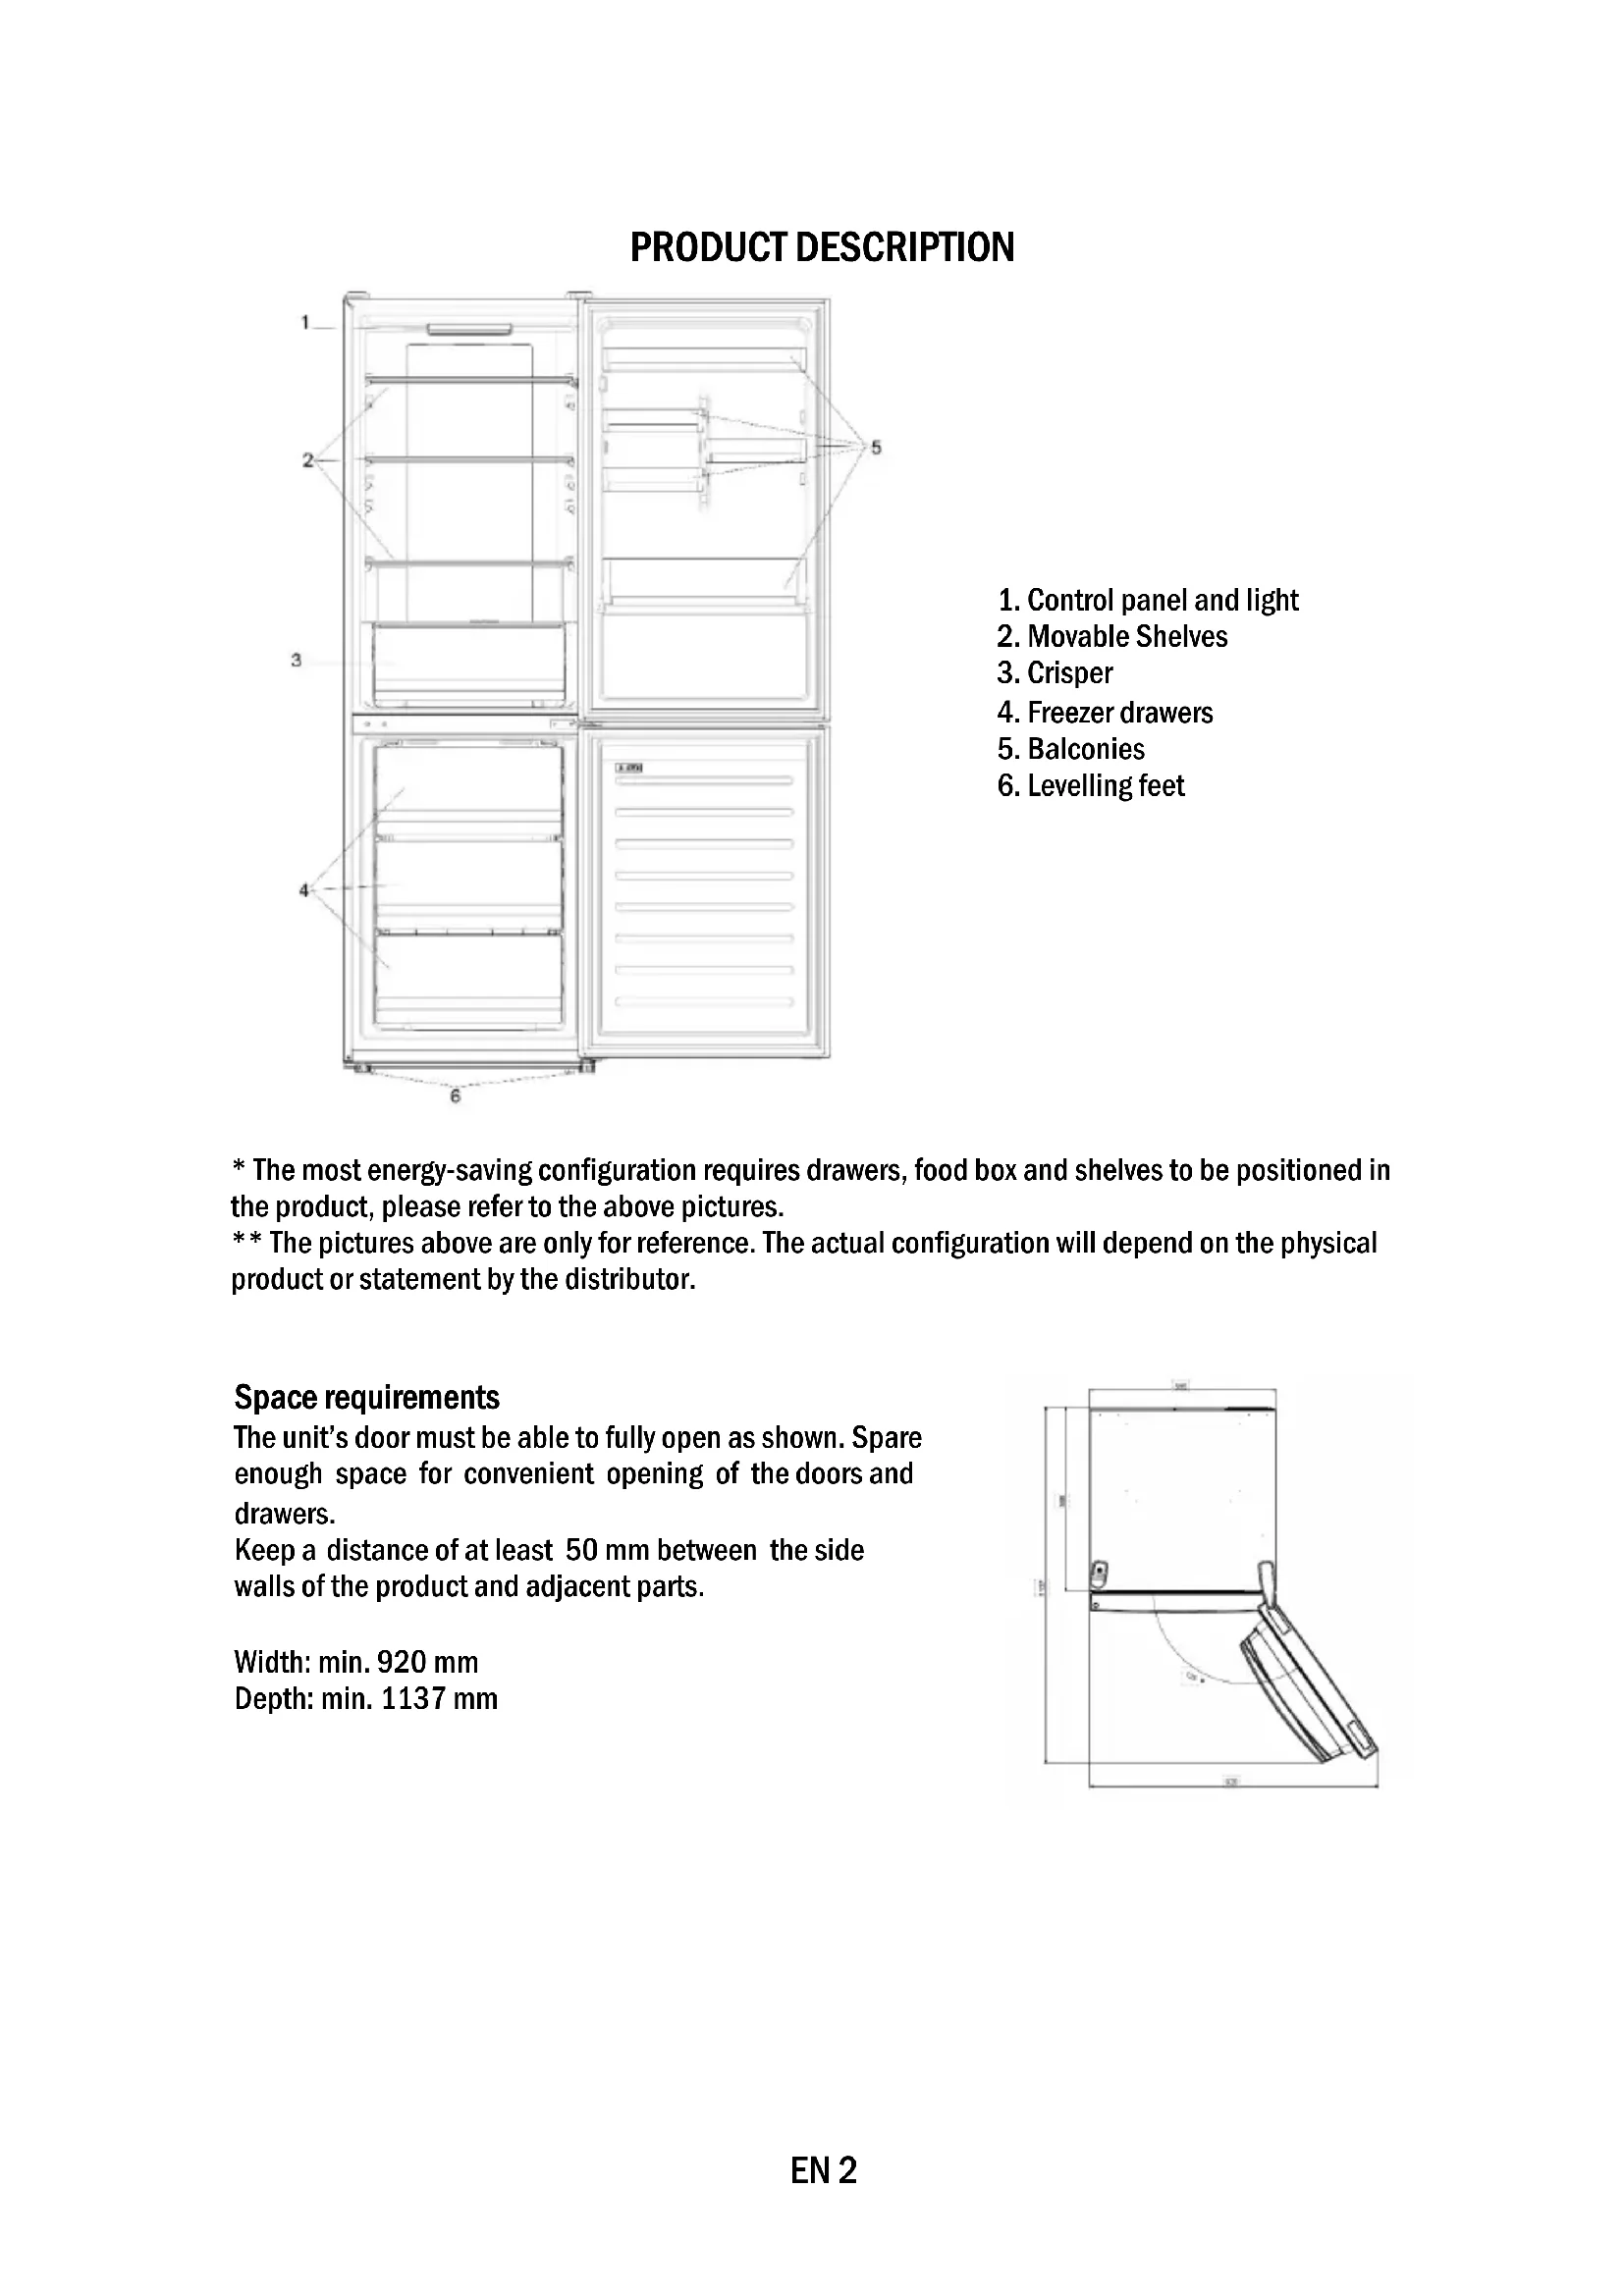
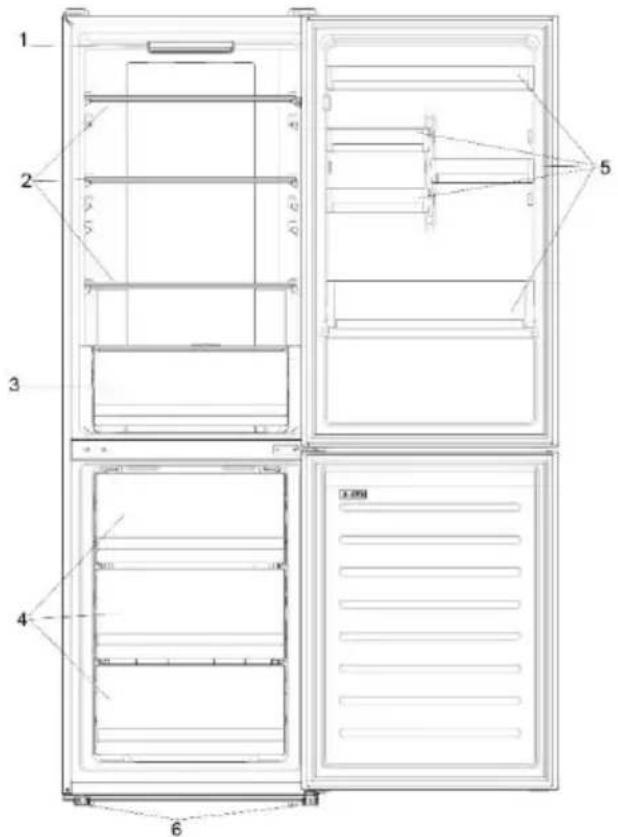
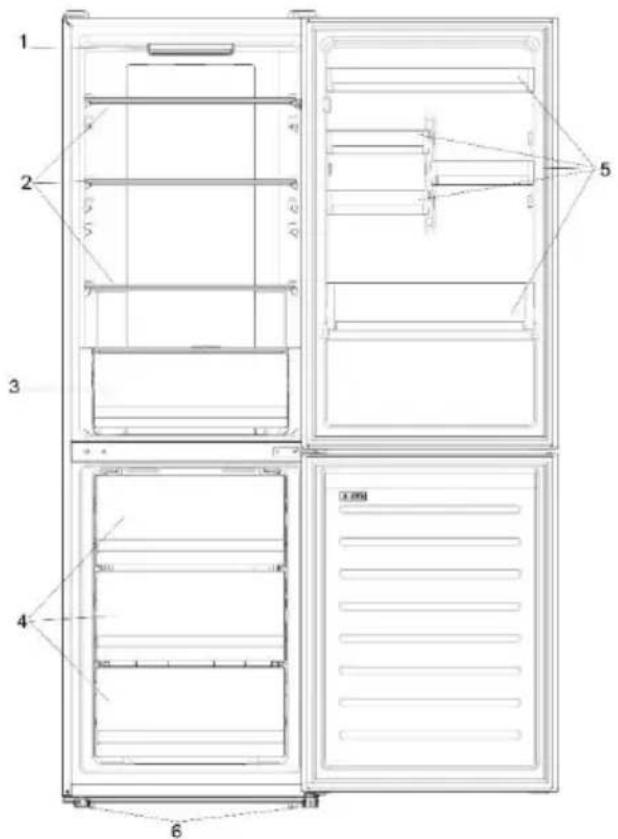
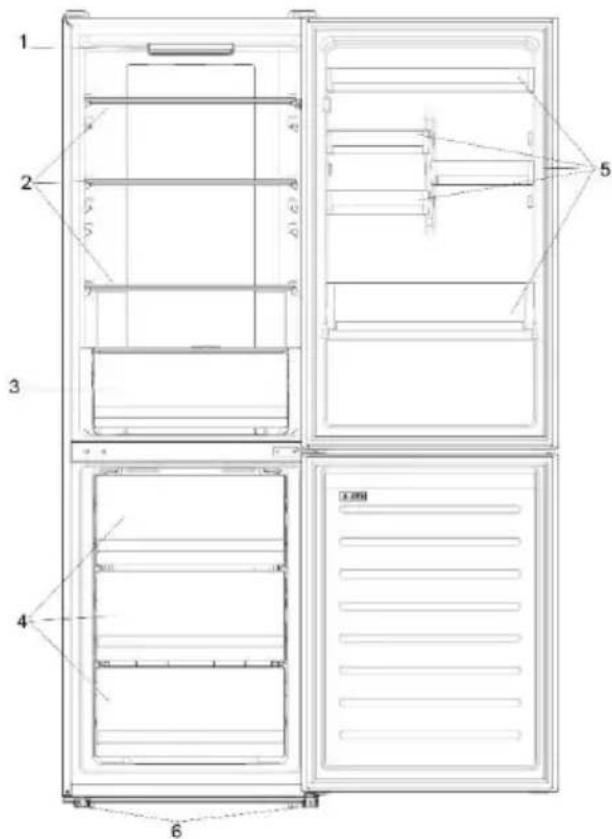
PRODUCT DESCRIPTION
- Control panel and light
- Movable Shelves
- Crisper
- Freezer drawers
- Balconies
- Levelling feet
* The most energy-saving configuration requires drawers, food box and shelves to be positioned in the product, please refer to the above pictures.
** The pictures above are only for reference. The actual configuration will depend on the physical product or statement by the distributor.
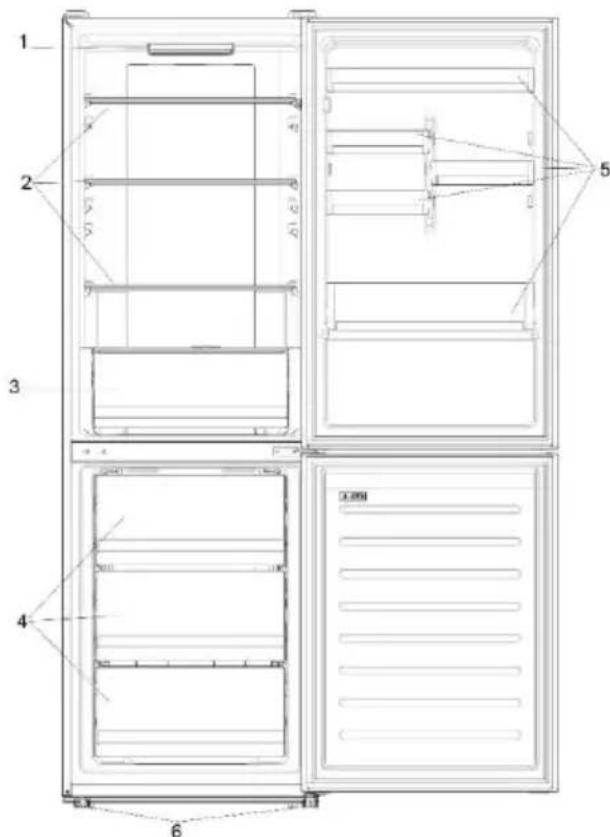
Space requirements
The unit's door must be able to fully open as shown. Spare enough space for convenient opening of the doors and drawers.
Keep a distance of at least 50 mm between the side walls of the product and adjacent parts.
Width: min. 920 mm
Depth: min. 1137 mm
USE

① ON/OFF key, used to switch on/off the appliance.
② SET key, used to select the fridge temperature or the special functions like.
③ WiFi Icon, shows if the appliance is connected to the app.
④ Super Cool Icon, shows if the function is activated.
⑤ Temperature levels, show which is the selected temperature.
Use
- Plug on the appliance. The appliance will turn on automatically.
- The temperature will automatically set at 4 °C in the fridge and -18 °C in the freezer.
- To change the temperature, with the fridge door open, press the SET key. When the setting increases, the corresponding LED light will turn on. An acoustic signal is made every time the SET key is pressed and the temperature is changed.
• In case of power loss, the last cooling level set will be restored. - To restore the default setting, at the screen lit, keep pressed the TEMP button, and then press ON/OFF button 5 times in 5 seconds.
- Under the normal operating condition (in spring and autumn), it is recommended to set the temperature at 4 °C. In summer when the ambient temperature is high, it is recommended to set temperature at 6\~8 °C, so as to guarantee the fridge and freezer temperatures and reduce the refrigerator continuous running time; and in winter when the ambient temperature is low, it is recommended to set temperature at 2\~4 °C to avoid frequent start/stop of the refrigerator.
Customized temperature
From the app, it is possible to customize the temperature of the fridge compartment. The temperature can be set with 1 °C sensitivity and it is possible to select a temperature from 2 °C to 8 °C in the fridge. An acoustic signal is made every time the temperature is changed. When the temperature is selected by the app, there is no indication on the control panel, all the temperature LED lights are turned off, while only the WiFi icon is turned on.
Fine Tuning
The fine tuning selection SET gives to possibility to set the temperatures by sublevels; each temperature level has three sublevels.
How to use the fine tuning function:
- Press the SET key for 8 seconds to enter fine tuning selection mode. When the appliance enters the mode, an acoustic signal is made and the LED of currently selected cooling level blinks.
- By short pressing the SET key within 5 seconds, the fine tuning setting increases and, at each pressing, an acoustic signal is made.
- During fine tuning, the LED of the selected cooling level is fixed, while the LED of the selected sublevel blinks.
- If no key is pressed for 5 seconds, the system automatically exits from fine tuning selection mode. The fine tuning setting is saved and the LED of the selected fridge temperature is fixed.
- If the fine tuning is activated again, the setting will start from the previously stored level.
Super Cool function
It is suggested to switch on the Super Cool function if a large quantity of food should be stored (for example after the purchase). The Super-Cool function accelerates the cooling of fresh food and protects the goods already stored from undesirable warming. When the function is activated, the temperature of the fridge is automatically set at 2 °C.
How to use the Super Cool function:
- The function can be activated by pressing many times the SET key until the Super Cool LED is turned ON or by selecting it from the app. If the function is activated, the corresponding icon on the control panel will be turned on.
• To exit the Super Cool function, press the SET key again.
• The Super Cool function automatically ends after 30 hours running. - When the Super Cool ends, the corresponding icon of the control panel turns off and the previously set cooling level is restored.
Super Freeze function
The super freezing function accelerates the freezing of fresh food and protects the goods already stored from undesirable warming. If a large amount of food has to be freeze, it is recommended to set the Super Freeze function on 24h before the usage. When the function is activated, the temperature is automatically set at -25 °C.
How to use the Super Freeze function:
- The function can be launched only by selecting it from the app. If the function is activated, it will be shown by the app; there is no indication on the control panel.
• To exit the Super Freeze function, turn it off from the app. - The Super Freeze function automatically ends when the function has lasted for more than 50 hours.
Eco mode
The Eco mode can be activated to optimize the performance of the appliance, whereas obtaining the best food storage. When the function is activated, the temperature is automatically set at 5 °C in the fridge, and at -18 °C in the freezer.
How to use the Eco mode:
- The function can be activated only by selecting it from the app. If the function is activated, it will be shown by the app; there is no indication on the control panel.
- To exit the Eco mode, turn it off from the app; the previously selected temperature will be restored.
- The Eco mode automatically ends when another function is chosen from the control panel.
Holiday function
The Holiday function can be used to reduce the energy consumption of the appliance, when it is not used regularly. When the function is on, the LED lights will be off (even if the door is open) and the fridge will work on low power consumption mode, whereas the freezer will keep working normally. How to use the Holiday function:
- The function can be activated only by selecting it from the app. If the function is activated, it will be shown by the app; there is no indication on the control panel.
- To exit the Holiday function, turn it off from the app; the previously selected temperature will be restored.
- The Holiday function automatically ends when another function is chosen from the control panel.
Defrosting
The defrosting of the refrigerator and freezer compartment are done automatically: no manual operation is needed.
Slider
Near the vegetable basket there is a slider that allows you to adjust the humidity inside it: moving it to the right decreases the humidity, moving it to the left increases the humidity.
Demo mode
Keep the refrigerated door open, press and hold the on / off key, and click the set key five times. The refrigerator will enter the Demo mode. To exit the mode, keep pressed the door switch and press again the mode key for 5s.
Error codes
If - 6 °C LED light is flashing, it means there has been a fan error. Please, contact the technical assistance to help solve the problem
APP CONNECTION (Content only)
IN APP PAIRING PROCEDURE
Step 1
• Download the hOn app on the stores


Step 2
- Create your account on the hOn App or log in if you already have an account

Step 3
• Follow pairing instructions in the hOn App
WiFi Use
To activate the Wi-Fi, long press the set key for 2 seconds, the Wi-Fi icon will turn on and an acoustic signal is made.
If the Wi-Fi has not been configured yet, when the refrigerator turns on, it will automatically enter the configuration mode and keep this status for 30 minutes. To use the configuration mode:
- Press the set key for 2s but less than 8s, the refrigerator enters the Wi-Fi configuration mode and an acoustic signal is made. The Wi-Fi icon starts blinking.
- Follow in app instructions to configure the Wi-Fi (see above).
- Once the Wi-Fi is configured and the connection established, the Wi-Fi icon is on and fixed.
- After 30 minutes without performing any operation, the Wi-Fi will automatically exit the configuration mode.
- If the Wi-Fi has already been configured, it will automatically reconnect according to the configuration information.
Radio-module - Technical data
| Frequency rate (OFR) | 2400 MHz-2843.5 MHz |
| Channel frequencies | 2412...2472 MHz(step size 5 MHz) |
| Maximum power(EIRP) | 100 mW |
Radio equipment type is in compliance with Directive 2014/53/EU.
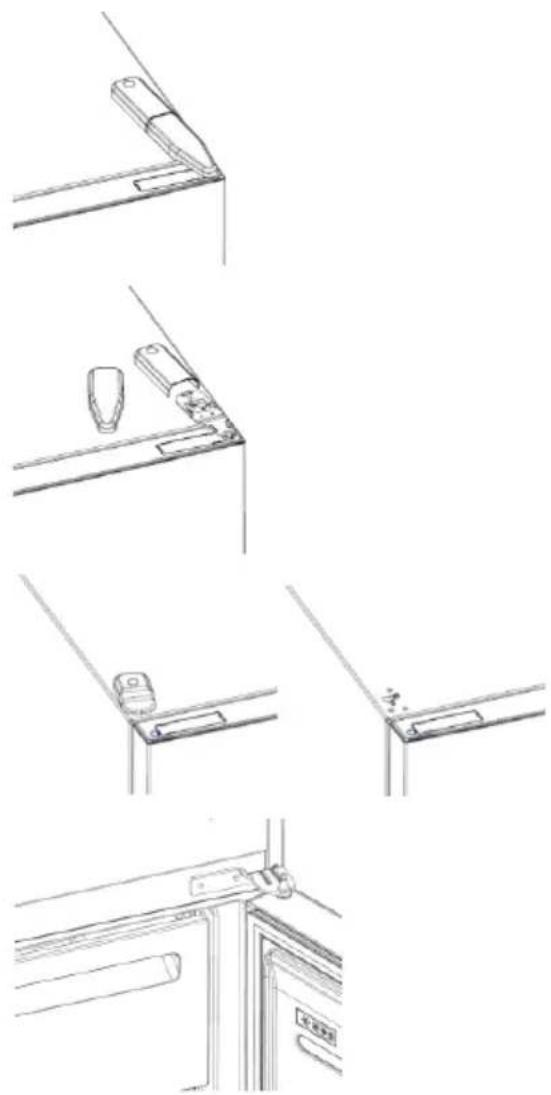
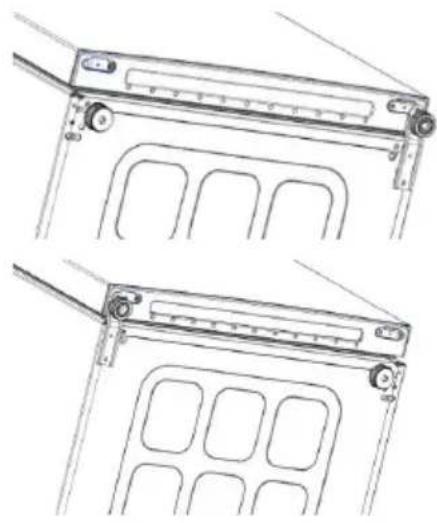
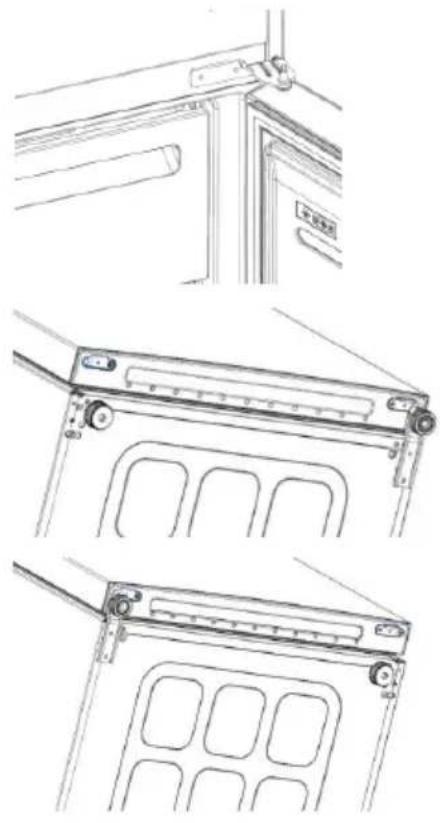
DOOR REVERSIBILITY
Tools needed: Electric screwdriver
- Remove the top hinge cover
- Unscrew the top hinge
- Remove the top hinge cover (left)
- Remove middle hinge
natural_image
Line drawings of kitchen appliances and fixtures in various orientations (no text or symbols)- Remove lower hinge
- Mount hinge foot
- Mount middle hinge
- Mount the upper hinge plate
- Mount the upper hinge cover
natural_image
Technical line drawing of a mechanical device with two views (top and side), showing internal compartments and mounting brackets (no text or symbols)
natural_image
Pure technical line drawing of a mechanical bracket or support structure without any text, numbers, or symbols
natural_image
Pure technical line drawing of a mechanical joint or bracket (no text or symbols)
natural_image
Pure technical line drawing of a corner joint or bracket (no text or symbols)Резюме
ОПИСАНИЕ НА ПРОДУКТА....11
Изисквания за пространство....11
УПОТРЕБА....12
Употреба....12
Персонализирана температура....12

Стъпка 2
Стъпка 3
natural_image
Line drawings of four different mechanical or electrical component configurations (no text or symbols)natural_image
Technical line drawings of three different mechanical or architectural components with no visible text or symbols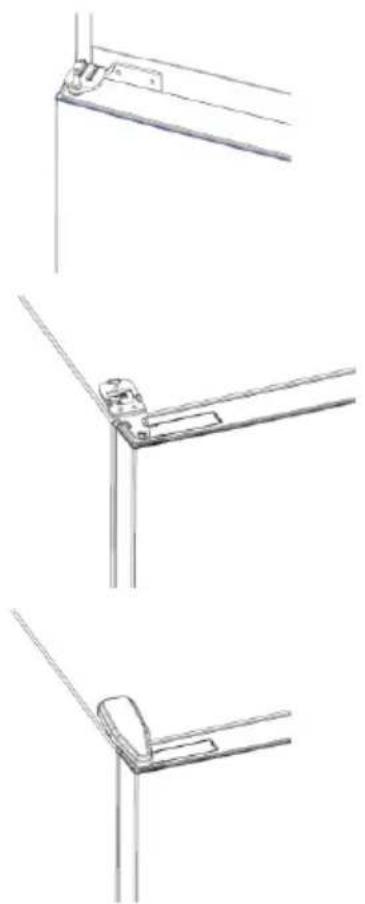
natural_image
Technical line drawings of three different metal bracket mounting configurations (no text or symbols)Shrnutí
POPIS VÝROBKU 21
POSTUP PÁROVÁNÍ S APLIKACÍ
Krok 1

Krok 2
Krok 3
natural_image
Line drawings of kitchen appliances and fixtures (no text or symbols)natural_image
Technical line drawing of a mechanical device with mounting brackets and internal compartments (no text or symbols)
natural_image
Pure technical line drawing of a mechanical bracket or mounting detail (no text or symbols)
natural_image
Pure technical line drawing of a mechanical joint or bracket (no text or symbols)
natural_image
Pure technical line drawing of a corner joint or bracket (no text or symbols)Oversigt
PRODUKTBESKRIVELSE....30
Arealkrav ....30
BRUG....31
Brug 31
Tilpasset temperatur 31
Finjustering....32
FREMGANGSMÅDE VED PARRING I APP 34
Trin 1....34
Trin 2....34
Trin 3....34
Wi-Fi-brug....35
SKIFT AF DØRENS HÄNGSELSSIDE 36
PRODUKTBESKRIVELSE
FREMGANGSMÅDE VED PARRING I APP
Trin 1
• Download hOn-appen i butikkerne


Trin 2
Trin 3
natural_image
Line drawings of kitchen appliances and fixtures (no text or symbols)natural_image
Technical line drawing of a mechanical device with multiple ports and mounting brackets (no text or symbols)
natural_image
Pure technical line drawing of a mechanical bracket or support structure without any text, numbers, or symbols
natural_image
Pure technical line drawing of a mechanical joint or bracket (no text or symbols)
natural_image
Simple line drawing of a corner bracket with diagonal lines (no text or symbols)Zusammenfassung

Schritt 2
Schritt 3
natural_image
Line drawings of kitchen appliances and fixtures (no text or symbols)natural_image
Technical line drawing of a mechanical device with two views (top and side), showing internal compartments and mounting brackets (no text or symbols)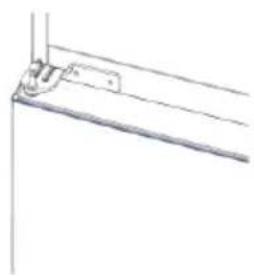
natural_image
Pure technical line drawing of a mechanical bracket or mounting detail (no text or symbols)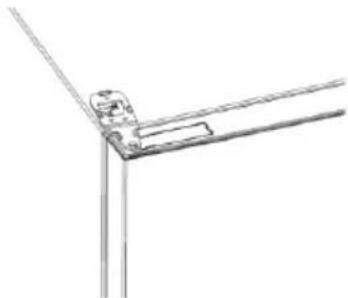
natural_image
Pure technical line drawing of a mechanical joint or bracket (no text or symbols)
natural_image
Pure technical line drawing of a corner joint or bracket (no text or symbols)Περίληψη
ΧΡΗΣΗ


Βήμα 2
Βήμα 3
natural_image
Line drawings of four different mechanical or electrical component configurations (no text or symbols)natural_image
Technical line drawings of three different mechanical or architectural components (no text or symbols)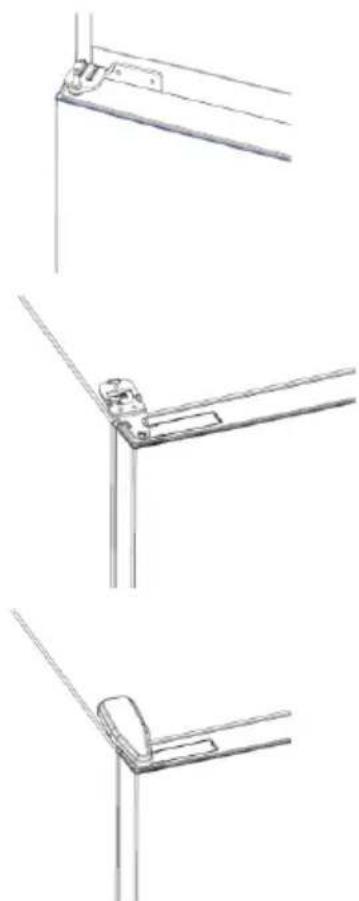
natural_image
Technical line drawings of three different metal bracket mounting configurations (no text or symbols)Resumen
USO


Paso 2
Paso 3
natural_image
Line drawings of kitchen appliances and fixtures (no text or symbols)natural_image
Technical line drawing of two mechanical components with mounting brackets and internal compartments (no text or symbols)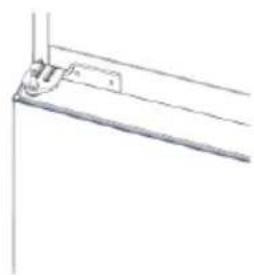
natural_image
Pure technical line drawing of a mechanical bracket or mounting detail (no text or symbols)
natural_image
Pure technical line drawing of a mechanical joint or bracket (no text or symbols)
natural_image
Pure technical line drawing of a corner joint or bracket (no text or symbols)Yhteenveto
TUOTEKUVAUS....66
Tilantarve....66
KÄYTTÖ....67
Käyttö....67

Vaihe 2
Vaihe 3
natural_image
Pure technical line drawing of a mechanical joint or bracket (no text or symbols)
natural_image
Simple line drawing of a kitchen counter with a lid and handle (no text or symbols)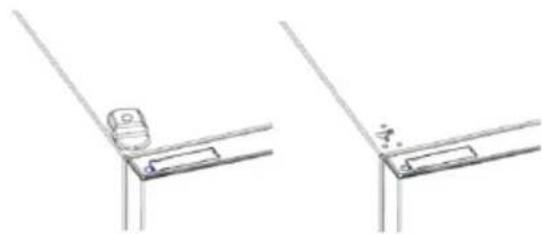
natural_image
Technical line drawing showing two views of a mechanical bracket or bracket assembly (no text or symbols)
natural_image
Line drawing of a door handle and door frame with no text or symbolsnatural_image
Technical line drawing of a mechanical device with mounting brackets and internal compartments (no text or symbols)
natural_image
Pure technical line drawing of a mechanical bracket or support structure without any text, numbers, or symbols
natural_image
Pure technical line drawing of a mechanical joint or bracket (no text or symbols)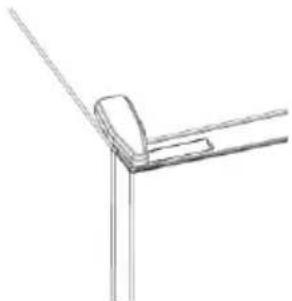
natural_image
Pure technical line drawing of a corner joint or bracket (no text or symbols)Sommaire
DESCRIPTION DU PRODUIT....75
Espace requis ....75
UTILISATION....76
Utilisation....76

Étape 2
Étape 3
natural_image
Line drawings of kitchen appliances and fixtures (no text or symbols)natural_image
Technical line drawing of two mechanical components with mounting brackets and internal compartments (no text or symbols)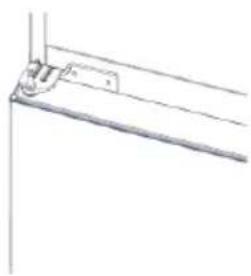
natural_image
Pure technical line drawing of a mechanical bracket or support structure without any text, numbers, or symbols
natural_image
Pure technical line drawing of a mechanical joint or bracket (no text or symbols)
natural_image
Pure technical line drawing of a corner joint or bracket (no text or symbols)Sažetak
OPIS PROIZVODA 84
Prostorni zahtjevi 84
UPORABA....85
Uporaba 85
Prilagodena temperatura 85
Fino namještanje 86
Funkcija super hlađenja 86
Funkcija super zamrzavanje....86
Način rada Eco....87
Funkcija praznici....87
Odmrzavanje....87
Demonstracijski način rada....87
Kôdovi grešaka 87
POVEZIVANJE PUTEM APLIKACIJE (samo sadržaj) 88
U POSTUPKU UPARIVANJA APLIKACIJE 88
1.korak 88
2.korak....88
3.korak 88
Uporaba mreže Wi-Fi....89
REVERZIBILNOST VRATA....90
OPIS PROIZVODA

2. korak
3. korak
- Pridržavajte se uputa za uparivanje u aplikaciji hOn
Uporaba mreže Wi-Fi
Da biste aktivirali mrežu Wi-Fi, dugo pritisnite tipku SET 2 sekunde i uključuje se ikona mreže Wi-Fi te odašilje zvučni signal.
Ako se mreža Wi-Fi još nije konfigurirala kada se hladnjak uključuje, automatski prelazi u način konfiguriranja i ostaje u tom statusu 30 minuta. Za uporabu načina konfiguriranja:
- Pritisnite tipku SET 2 s, ali ne kraće od 8 s, hladnjak prelazi u način konfiguriranja mreže Wi-Fi i odašilje se zvučni signal. Ikona mreže Wi-Fi počinje treperiti.
- Pridržavajte se uputa u aplikaciji za konfiguriranje mreže Wi-Fi (pogledajte gore).
- Nakon što se konfigurira mreža Wi-Fi i uspostavi veza, uključuje se ikona mreže Wi-Fi i fiksno ostaje uključena.
- Nakon 30 minuta bez izvođenja bilo kakve radnje, mrežom Wi-Fi automatski se izlazi iz načina konfiguriranja.
- Ako se mreža Wi-Fi već konfigurirala, automatski se ponovno povezuje u skladu s informacijama o konfiguriranju.
Radio-modul - Tehnički podaci
| Učestalost (OFR) | 2400 MHz-2843.5 MHz |
| Frekvencije kanala | 2412...2472 MHz(veličina koraka 5 MHz) |
| Maksimalna snaga(EIRP) | 100 mW |
natural_image
Line drawings of kitchen appliances and fixtures (no text or symbols)- Uklonite donju šarku
- Postavite postolje šarke
- Postavite srednju šarku
- Postavite ploču gornje šarke
- Postavite poklopac gornje šarke

natural_image
Technical line drawing of two mechanical components with mounting brackets and internal compartments (no text or symbols)
natural_image
Pure technical line drawing of a mechanical bracket or support structure without any text, numbers, or symbols
natural_image
Pure technical line drawing of a mechanical joint or bracket (no text or symbols)
natural_image
Pure technical line drawing of a corner joint or bracket (no text or symbols)Összegzés
TERMÉKLEÍRÁS....93
Helyigény 93
HASZNÁLAT....94
Használat 94

2. lépés
3. lépés
natural_image
Pure technical line drawing of a mechanical bracket or angle (no text or symbols)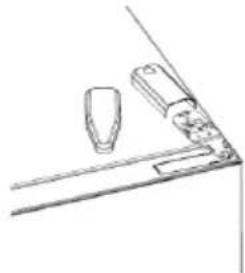
natural_image
Simple line drawing of a mechanical component or bracket with two cylindrical parts and a base (no text or symbols)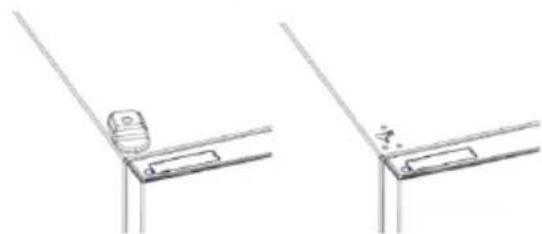
natural_image
Technical line drawing showing two views of a mechanical bracket or bracket assembly (no text or symbols)
natural_image
Line drawing of a door frame with handle and door, no text or symbols presentnatural_image
Technical line drawing of two mechanical components with mounting brackets and internal compartments (no text or symbols)
natural_image
Pure technical line drawing of a mechanical bracket or support structure without any text, numbers, or symbols
natural_image
Pure technical line drawing of a mechanical joint or bracket (no text or symbols)
natural_image
Pure technical line drawing of a corner joint or bracket (no text or symbols)Indice
UTILIZZO


Fase 2
Fase 3
natural_image
Line drawings of a door frame assembly with no text or symbolsnatural_image
Technical line drawing of a mechanical device with no visible text or symbols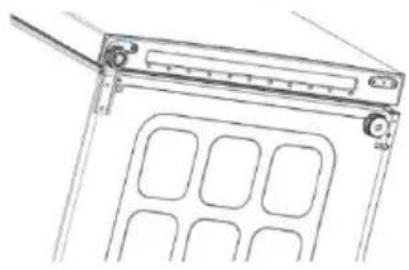
natural_image
Line drawing of a mechanical device with internal compartments and mounting bracket (no text or symbols)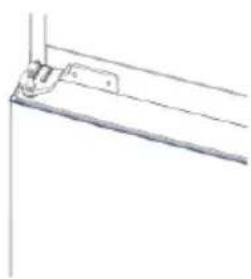
natural_image
Pure technical line drawing of a mechanical bracket or hinge (no text or symbols)
natural_image
Pure technical line drawing of a corner joint or bracket (no text or symbols)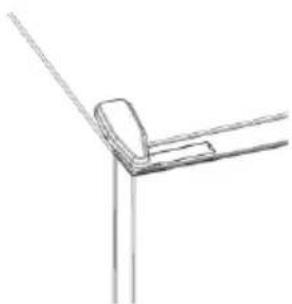
natural_image
Simple line drawing of a corner joint or bracket structure (no text or symbols)Samenvatting
PRODUCTBESCHRIJVING....111
GEBRUIK


Stap 2
Stap 3
natural_image
Pure technical line drawing of a mechanical clamp or bracket (no text or symbols)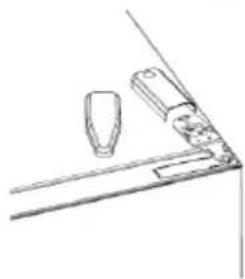
natural_image
Simple line drawing of a table with two items, one holding a cup and the other standing upright (no text or symbols)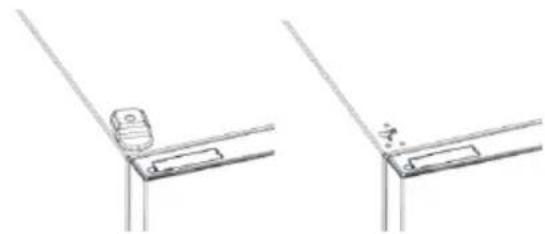
natural_image
Technical line drawing showing two corner joint configurations with no text or symbols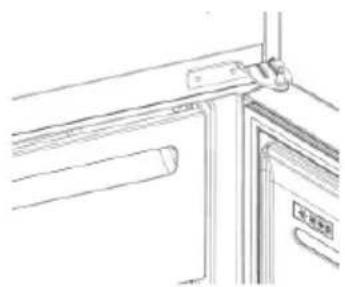
natural_image
Line drawing of a door frame with handle and door, no text or symbols presentnatural_image
Technical line drawing of two mechanical components with mounting brackets and internal compartments (no text or symbols)
natural_image
Pure technical line drawing of a mechanical bracket or support structure without any text, numbers, or symbols
natural_image
Pure technical line drawing of a mechanical joint or bracket (no text or symbols)
natural_image
Pure technical line drawing of a corner joint or bracket (no text or symbols)Sammendrag
PRODUKTBESKRIVELSE....120
Plassbehov....120
BRUK 121
Bruk 121
Tilpasset temperatur 121
Finjustering....122
BRUK


Trinn 2
- Opprett kontoen din på hOn-appen, eller logg på hvis du allerede har en konto

Trinn 3
natural_image
Pure technical line drawing of a mechanical joint or bracket (no text or symbols)
natural_image
Simple line drawing of a mechanical or architectural component with no text or symbols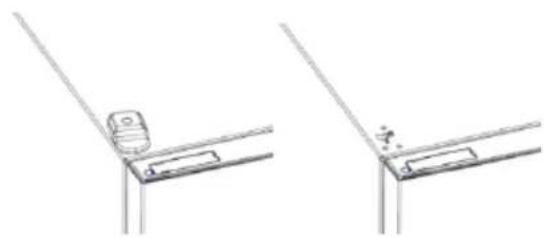
natural_image
Technical line drawing showing two views of a bracket or support structure with no text or symbols
natural_image
Line drawing of a door frame with handle and door, no text or symbols presentnatural_image
Technical line drawing of a mechanical device with multiple slots and mounting brackets (no text or symbols)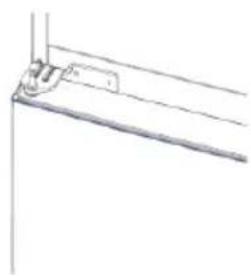
natural_image
Pure technical line drawing of a mechanical bracket or support structure without any text, numbers, or symbols
natural_image
Pure technical line drawing of a mechanical joint or bracket (no text or symbols)
natural_image
Simple line drawing of a corner bracket with diagonal lines (no text or symbols)Podsumowanie
OPIS PRODUKTU....129

Krok 2
Krok 3
natural_image
Line drawings of a door frame assembly with no text or symbolsnatural_image
Technical line drawing of two mechanical components with mounting brackets and internal compartments (no text or symbols)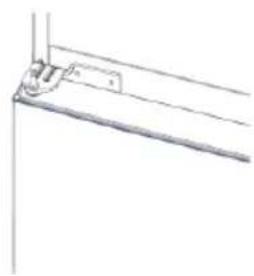
natural_image
Pure technical line drawing of a mechanical bracket or mounting bracket without any text, numbers, or symbols
natural_image
Pure technical line drawing of a mechanical joint or bracket (no text or symbols)
natural_image
Pure technical line drawing of a corner joint or bracket (no text or symbols)Resumo
UTILIZAÇÃO


Passo 2
Passo 3
natural_image
Line drawings of a door frame assembly with bracket, handle, and lock components (no text or symbols)natural_image
Technical line drawing of a mechanical device with two views (top and side), showing internal compartments and mounting brackets (no text or symbols)
natural_image
Pure technical line drawing of a mechanical bracket or support structure without any text, numbers, or symbols
natural_image
Pure technical line drawing of a mechanical joint or bracket (no text or symbols)
natural_image
Pure technical line drawing of a corner joint or bracket (no text or symbols)Cuprins
DESCRIEREA PRODUSULUI 147
UTILIZAREA


Pasul 2
Pasul 3
natural_image
Line drawings of five different door or cabinet components, showing front, side, top, and front views with no text or symbols.natural_image
Technical line drawing of a mechanical device with two views (top and side), showing internal compartments and mounting brackets (no text or symbols)
natural_image
Pure technical line drawing of a mechanical bracket or support structure without any text, numbers, or symbols
natural_image
Pure technical line drawing of a mechanical joint or bracket (no text or symbols)
natural_image
Pure technical line drawing of a corner joint or bracket (no text or symbols)Оглавление

War 2
War 3
natural_image
Line drawings of kitchen appliances and fixtures in various orientations (no text or symbols)natural_image
Technical line drawing of a mechanical device with two views (top and side), showing internal compartments and mounting brackets (no text or symbols)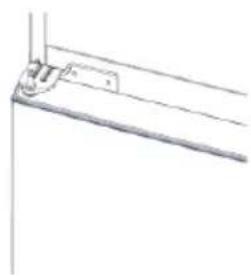
natural_image
Pure technical line drawing of a mechanical bracket or support structure without any text, numbers, or symbols
natural_image
Pure technical line drawing of a mechanical joint or bracket (no text or symbols)
natural_image
Pure technical line drawing of a corner joint or bracket (no text or symbols)Zhrnutie
POPIS PRODUKTU....166
POUŽITIE


Krok 2
Krok 3
natural_image
Pure technical line drawing of a mechanical joint or bracket (no text or symbols)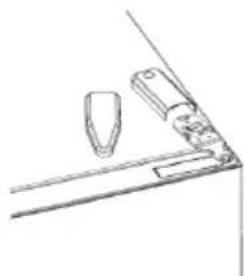
natural_image
Simple line drawing of a mechanical or architectural component with no text or symbols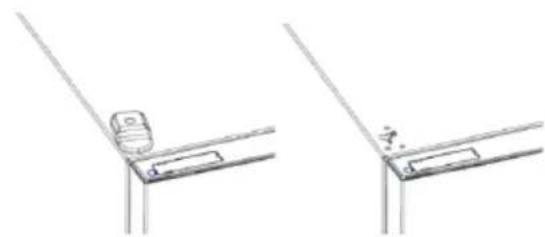
natural_image
Technical line drawing showing two views of a bracket or support structure with no visible text or symbols
natural_image
Line drawing of a door frame with handle and door, no text or symbols presentnatural_image
Technical line drawing of two mechanical components with mounting brackets and internal compartments (no text or symbols)
natural_image
Pure technical line drawing of a mechanical bracket or mounting detail (no text or symbols)
natural_image
Pure technical line drawing of a mechanical joint or bracket (no text or symbols)
natural_image
Pure technical line drawing of a corner joint or bracket (no text or symbols)Povzetek
OPIS IZDELKA 175
Prostorske zahteve....175
UPORABA....176
Uporaba 176
Temperatura po meri....176
Fina Nastavitev 177
Funkcija Super Cool 177
Funkcija Super Freeze 177
Način ECO 178
Funkcija počitnice....178
Odmrzovanje....178
Predstavitveni način....178
Kode napak 178
POVEZAVA Z APLIKACIJO (samo vsebina)....179
POSTOPEK SEZNANITVE V APLIKACIJI 179
1.korak....179
2.korak....179
3.korak....179
Uporaba Wi-Fi....180
REVERZIBILNA VRATA....181
OPIS IZDELKA
UPORABA


2. korak
3. korak
natural_image
Line drawings of a door frame assembly with no text or symbolsnatural_image
Technical line drawing of two mechanical components with mounting brackets and internal compartments (no text or symbols)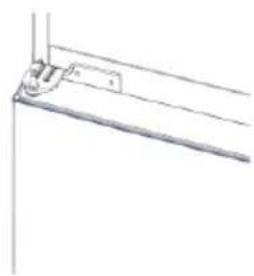
natural_image
Pure technical line drawing of a mechanical bracket or support structure without any text, numbers, or symbols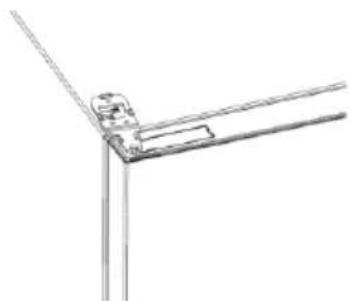
natural_image
Pure technical line drawing of a mechanical joint or bracket (no text or symbols)
natural_image
Pure technical line drawing of a corner joint or bracket (no text or symbols)Sažetak
OPIS PROIZVODA....184
Zahtevi prostora....184
UPOTREBA 185
Upotreba 185
Prilagodena temperatura ....185
UPOTREBA

① Taster ON/OFF se koristi za uključivanje/isključivanje aparata.
② Taster SET, koristi se za odabir temperature frižidera ili za posebne funkcije.
③ Ikonica Wi-Fi, pokazuje da li je aparat povezan sa aplikacijom.
④ Ikonica Super Cool pokazuje da li je funkcija aktivirana.
⑤ Nivoi temperature pokazuju koja je temperatura izabrana.
Upotreba
- Uključite aparat. Aparat će se automatski uključiti.
• Temperatura će se automatski postaviti na 4 °C u frižideru i -18 °C u zamrzivaču. - Da biste promenili temperaturu, sa otvorenim vratima frižidera pritisnite taster SET. Kada se podešavanje poveća, uključiće se odgovarajuće LED svetlo. Akustični signal se stvara svaki put kada se pritisne taster SET i kada se temperatura promeni.
- U slučaju nestanka struje, frižider će se vratiti na poslednji skup nivoa hlađenja.
- Da biste vratili standardno podešavanje, dok je ekran osvetljen, držite pritisnutim dugme TEMP i zatim pritisnite dugme ON/OFF 5 puta u 5 sekundi.
- U normalnom radnom stanju (u proleće i jesen), preporučuje se postavljanje temperature na 4 °C. Leti ili kada je ambijentalna temperatura visoka, preporučuje se postavljanje temperature na 6 – 8 °C, da bi se garantovale temperature frižidera i zamrzivača i smanjilo neprekidno vreme rada frižidera; a zimi ili kada je ambijentalna temperatura niska, preporučuje se postavljanje temperature na 2 – 4 °C kako bi se izbeglo često uključivanje/zaustavljanje frižidera.
Prilagodena temperatura
Iz aplikacije je moguće prilagoditi temperaturu odeljka frižidera. Temperatura se može podesiti sa osetljivošću od 1 °C, a u frižideru je moguće odabrati temperaturu od 2 °C do 8 °C. Pri svakoj promeni temperature emituje se zvučni signal. Kada aplikacija odabere temperaturu, na kontrolnoj tabli nema indikacije, sva LED svetla za temperaturu su isključena, dok je uključena samo ikonica Wi-Fi.

2. korak
3. korak
• Pratite uputstva za uparivanje u hOn aplikaciji
natural_image
Pure technical line drawing of a mechanical joint or bracket (no text or symbols)
natural_image
Simple line drawing of a mechanical component or bracket with two protruding parts (no text or symbols)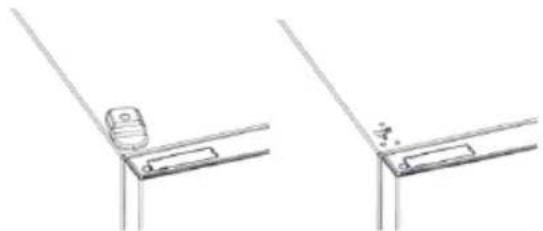
natural_image
Technical line drawing showing two views of a mechanical bracket or bracket with no visible text or symbols- Uklonite srednju š arku
- Uklonite donju š arku
- Postavite stopicu š arke
- Postavite srednju š arku
- Postavite pločicu gornje š arke
- Postavite poklopac gornje š arke
natural_image
Technical line drawings of three different mechanical or architectural components (no text or symbols)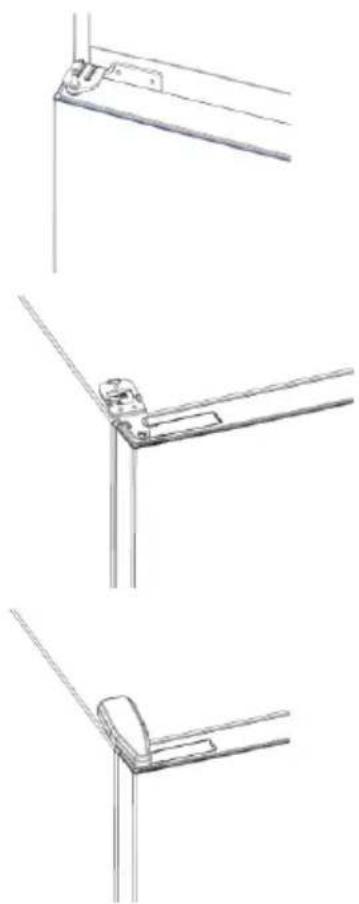
natural_image
Technical line drawings of three different metal bracket mounting configurations (no text or symbols)Sammanfattning
PRODUKTBESKRIVNING 193

Steg 2
Steg 3
natural_image
Pure technical line drawing of a mechanical joint or bracket (no text or symbols)
natural_image
Simple line drawing of a mechanical component or bracket with no text or symbols
natural_image
Technical line drawing showing two views of a mechanical bracket or bracket with no visible text or symbols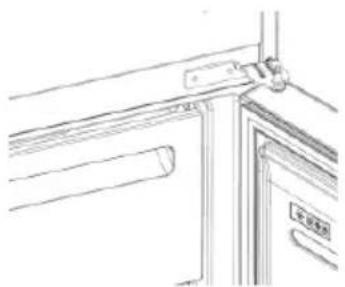
natural_image
Pure technical line drawing of a door or cabinet structure without any text, numbers, or symbolsnatural_image
Technical line drawing of a mechanical device with multiple slots and mounting brackets (no text or symbols)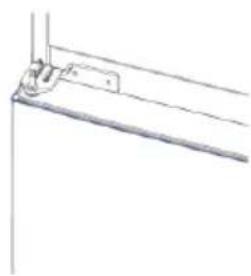
natural_image
Pure technical line drawing of a mechanical bracket or hinge (no text or symbols)
natural_image
Pure technical line drawing of a mechanical joint or bracket (no text or symbols)
natural_image
Simple line drawing of a corner bracket with diagonal lines (no text or symbols)Резюме
ОПИС ПРОДУКТУ....202

Крок 2
Крок 3
natural_image
Pure technical line drawing of a mechanical clamp or bracket (no text or symbols)
natural_image
Simple line drawing of a mechanical component with two cylindrical parts and a base (no text or symbols)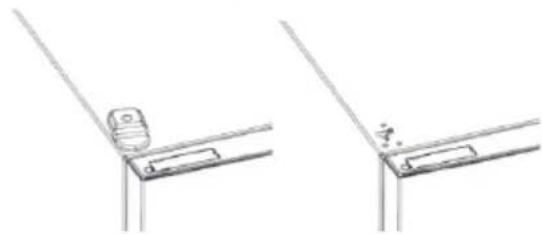
natural_image
Technical line drawing showing two views of a mechanical bracket or bracket assembly (no text or symbols)
natural_image
Line drawing of a door frame with handle and door, no text or symbols presentnatural_image
Technical line drawing of a mechanical device with two views (top and side), showing internal compartments and mounting brackets (no text or symbols)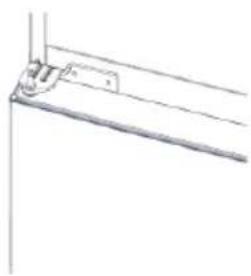
natural_image
Pure technical line drawing of a mechanical bracket or support structure without any text, numbers, or symbols
natural_image
Pure technical line drawing of a mechanical joint or bracket (no text or symbols)
natural_image
Pure technical line drawing of a corner joint or bracket (no text or symbols)- PRODUCT DESCRIPTION....2
- USE 3
- PRODUCT DESCRIPTION
- Space requirements
- Use
- Customized temperature
- Fine Tuning
- Super Cool function
- Super Freeze function
- Eco mode
- Holiday function
- Defrosting
- Slider
- Demo mode
- Error codes
- APP CONNECTION (Content only)
- IN APP PAIRING PROCEDURE
- Step 1
- Step 2
- Step 3
- WiFi Use
- DOOR REVERSIBILITY
- Резюме
- ОПИСАНИЕ НА ПРОДУКТА....11
- УПОТРЕБА....12
- Стъпка 2
- Стъпка 3
- Shrnutí
- POSTUP PÁROVÁNÍ S APLIKACÍ
- Krok 1
- Krok 2
- Krok 3
- Oversigt
- PRODUKTBESKRIVELSE....30
- BRUG....31
- PRODUKTBESKRIVELSE
- FREMGANGSMÅDE VED PARRING I APP
- Trin 1
- Trin 2
- Trin 3
- Zusammenfassung
- Schritt 2
- Schritt 3
- Περίληψη
- ΧΡΗΣΗ
- Βήμα 2
- Βήμα 3
- Resumen
- Paso 2
- Paso 3
- Yhteenveto
- TUOTEKUVAUS....66
- KÄYTTÖ....67
- Vaihe 2
- Vaihe 3
- Sommaire
- DESCRIPTION DU PRODUIT....75
- UTILISATION....76
- Étape 2
- Étape 3
- Sažetak
- OPIS PROIZVODA 84
- UPORABA....85
- U POSTUPKU UPARIVANJA APLIKACIJE 88
- OPIS PROIZVODA
- korak
- korak
- Uporaba mreže Wi-Fi
- Összegzés
- TERMÉKLEÍRÁS....93
- HASZNÁLAT....94
- lépés
- lépés
- Indice
- Fase 2
- Fase 3
- Samenvatting
- PRODUCTBESCHRIJVING....111
- Stap 2
- Stap 3
- Sammendrag
- PRODUKTBESKRIVELSE....120
- BRUK 121
- Trinn 2
- Trinn 3
- Podsumowanie
- OPIS PRODUKTU....129
- Resumo
- UTILIZAÇÃO
- Passo 2
- Passo 3
- Cuprins
- DESCRIEREA PRODUSULUI 147
- Pasul 2
- Pasul 3
- Оглавление
- War 2
- War 3
- Zhrnutie
- POUŽITIE
- Povzetek
- OPIS IZDELKA
- OPIS PROIZVODA....184
- UPOTREBA 185
- Upotreba
- Prilagodena temperatura
- Sammanfattning
- PRODUKTBESKRIVNING 193
- Steg 2
- Steg 3
- Крок 2
- Крок 3
Brand : HOOVER
Model : HOCE4T620EWK
Category : Fridge