TL32 - Lamp Genie - Free user manual and instructions
Find the device manual for free TL32 Genie in PDF.

| Product type | LED desk lamp |
| Brand | Genie |
| Model | TL32 |
| Intended use | Indoor, dry place, private use |
| Power supply | Built-in rechargeable battery (USB 5V) |
| Charging time | Up to 6 hours depending on USB source |
| Color temperature | 3 levels: 3000 K (warm white) to 6500 K (cool white) |
| Brightness | Continuously adjustable by long press |
| Functions | Touch on/off, color adjustment, brightness adjustment, timer |
| Timer | 40 minutes, activation by long press on ⏻ |
| Light source | Integrated non-replaceable LED |
| Package contents | Lamp, USB charging cable, instruction manual |
| Maintenance | Dry, soft cloth, without detergent or chemicals |
| Safety instructions | Do not look directly at the light source, do not expose to heat, repairs by qualified electrician |
| Manufacturer | GO Europe GmbH, Zum Kraftwerk 1, 45527 Hattingen, Germany |
| Warranty | Return to store with original packaging and receipt |
| Disposal | Recyclable, do not dispose of with household waste, built-in battery to be recycled |
| Certifications | CE, UKCA |
Frequently Asked Questions - TL32 Genie
User questions about TL32 Genie
0 question about this device. Answer the ones you know or ask your own.
Ask a new question about this device
Download the instructions for your Lamp in PDF format for free! Find your manual TL32 - Genie and take your electronic device back in hand. On this page are published all the documents necessary for the use of your device. TL32 by Genie.
USER MANUAL TL32 Genie
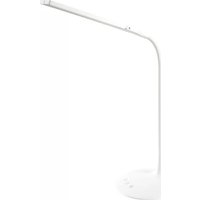
natural_image
White adjustable table lamp with curved arm and base (no text or symbols visible)EN Operating instruction 6 - 8
- Beweglich / Movable / Mobile / Móvil / Mobile / Movitý / Ruchome
- AN/AUS Schalter / ON/OFF switch / Interrupteur Interruttore ON / OFF / Interruptor Interruttore ON/OFF / Interruttore ON/OFF / Spinač ON / OFF / Przełącznik ON / OFF
- Klinken Buchse / 3.5 mm jack socket / jack de 3,5 mm / puerto de 3,5 mm / spinotto jack femmina 3,5 mm / Zásuvka 3,5 mm / Gniazdo 3,5 mm
- Lade Anzeige / Charge Indicator / Annonce de charge / Cargar anuncio ad anuncio / Carica annuncio pubblicitario ad // Indikátor nabíjení / Wskaźnik ładowania
- Lampenarm / Lamp arm / Bras de lampe / Brazo de la lámpara / Braccio lampada // Rameno lampy / Ramię lampy
- Standfuß / Stand / Pied / Pie / Base / Stát / Stand
- AN/AUS/Dimmer Touchfeld / ON/OFF/Dimmer Touch / ON/OFF/Variateur tactile / ON/OFF/Intensida táctil / ON/OFF/ oscuratore touch
- Timer / Timer / minuteur / temporizador / timer/ hodiny / godzin
- Farbtemperatur / Color temp. / Temp. de couleur / Temp. de color / Temp. di colore
UK Operating instruction
Introduction
- Before use, read the operating instructions completely and carefully and then store them.
- The operating instructions are an integral part of the product and contain important information for the correct use.
- The operating instructions must be available in case of uncertainty and transmission of the product.
Intended Use
- The product is intended for private indoor and dry use only.
Safety Instructions
- Secure packaging, small parts and insulating material against accidental use, especially against children.
- Never look directly into the light source or direct the light beam into other people's eyes, as this may damage the eyes.
- Place and install the product and accessories safely and use only when in perfect condition.
-
Avoid extreme loads such as heat and cold, wet and direct sunlight and mechanical pressure.
-
The built-in battery in the lamp base is not exchangeable!
- Improper use may damage the battery and cause it to leak.
- Do not deform, burn or short the battery; there is a risk of explosion or fire.
- Do not expose the battery to heat, heat or fire, extreme heat may cause the explosion and / or leakage of corrosive fluids.
- The lamp must not be opened, any repairs may only be carried out by trained electricians.
- For cleaning only use a dry and soft cloth, no detergents and chemicals.
- When not in use for a long time, charge the battery every 3 months to maintain the capacity.
• The bulb cannot be replaced.
Delivery
- LED desk lamp
- USB charging cable
- Operating manual
Technical specifications
See page 24
Initial commissioning / Charging
- Compare product and USB power source specifications as they must be identical.
- Use only the supplied USB charging cable.
-
Before initial operation, the battery must be fully charged. Depending on the USB power source used, this can take up to 6 hours.
-
Insert the 3.5 mm jack plug of the supplied charging cable into the 3.5 mm jack socket of the LED desk lamp.
-
Connect the USB 2.0 port of the charging cable to a USB power source. This can either be a 220/230 V USB charging adapter or the USB port of a PC.
-
The red indicator lights up during charging and goes off when the battery is fully charged.
- When the battery is charged, disconnect the charging cable from the LED desk lamp and from the USB power source.
- The lamp should be recharged at the latest when it starts to dim, or it cannot be turned on.
On / Off Switch
Place the lamp on a level and non-slip surface, slide the power switch to the ON position, the lamp is now on.
Briefly touch the sensor button "⏻" to switch the light on / off.
Set the light color
Briefly touch the "M" to change the light color from warm-white 3000K in 3 levels to cold-white 6500K.
When the lamp is switched on again, the last setting is accepted.
Brightness adjustment
When the lamp lights up touch and hold the sensor button "until the desired brightness is reached.
Timer function
Touch and hold the "④" button to start the countdown function. When the light flashes twice, the timer function starts. After 40 minutes, the light goes off automatically. If the "⑦" is touched again, the 40 minute countdown starts again.
Warranty
Dear customer,
We are delighted that you have chosen this equipment.
In the case of a defect, please return the device together with the receipt and original packing material to the point of sale.
Manufacturer
GO Europe GmbH
Zum Kraftwerk 1
45527 Hattingen
Germany
www.go-europe.com
Disposal
 | Packaging materials must be disposed of according to local regulations. | |
 | The Triman logo is only relevant for France. |  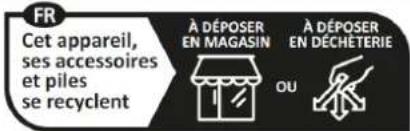 Points de collecte sur www.quefairedemesdechets.frPrivilégiez la réparation ou le don de votre appareil ! Points de collecte sur www.quefairedemesdechets.frPrivilégiez la réparation ou le don de votre appareil ! |
 | The packaging is made of environmentally friendly materials that you can dispose of at local recycling points. Advice on the options with which to dispose of your old device can be obtained from your municipal or local administration offices. | |
 | The adjacent symbol indicates laws dictate that electrical and electronic apparatus no longer required must be disposed of separate from domestic waste. Dispose of your device at a collection point provided by your local public waste authority. Packaging materials must be disposed of according to local regulations. | |
 | Defective or empty batteries must be recycled in accordance with Directive 2006/66/EC and its amendments. Return batteries and the device via the collection points provided. | |
 | Observe the identification on the packaging materials during the waste sorting process; they are identified by abbreviations (b) and numbers (a) which have the following significance: 1-7: plastic/20-22: paper and cardboard/80-98: composite materials. | |
 Segui le regole del tuo comune Segui le regole del tuo comune | The device and the packaging material can be recycled, so sort them prior to disposal for better waste management. Contact your local authorities for information on the various options available to ensure correct disposal. Observe the following identifications of the packaging materials: (a) numbers, (b) abbreviations and (c) materials which have the following significance: 1-7: plastics / 20-22: paper and cardboard / 80-98: composite materials and (d) type of packaging. The logo is only applicable to Italy. | |
Declaration of conformity

The CE Mark on the device confirms conformity.
The Declaration of Conformity can be read online at
www.go-europe.com

The UKCA mark on the device confirms its conformity.
The full UKCA Declaration of Conformity is available online at the following
website www.go-europe.com