Royal 552 - Safe Burg Wächter - Free user manual and instructions
Find the device manual for free Royal 552 Burg Wächter in PDF.
| Product Type | Safe |
| Brand | Burg Wächter |
| Model | Royal 552 |
| Power Supply | 4 AA 1.5V batteries (alkaline recommended) |
| User Code Capacity | 9 codes (6 digits) + 1 admin code |
| Fingerprint Capacity | 20 fingerprints maximum |
| Unlocking | PIN code, fingerprint or combination of both |
| Access Combinations | Single, double (2 codes), triple (3 codes) or code + fingerprint |
| Certification | EN 1300:2018 (Class C) |
| Blocking Time | 5 minutes after 15 erroneous attempts |
| Display | LCD screen with menu in 12 languages |
| Event History | 2000 entries |
| Firmware Update | Via microSD card (FAT-32) |
| Time Functions | Date/time setting, automatic summer/winter time change, time delay |
| Warranty | 2 years (excluding batteries) |
| Care and Cleaning | Clean the keypad with a microfiber cloth |
| Batteries Included | No (provide 4 AA batteries) |
| Repairability | Recycling at end of life via collection point |
Frequently Asked Questions - Royal 552 Burg Wächter
User questions about Royal 552 Burg Wächter
0 question about this device. Answer the ones you know or ask your own.
Ask a new question about this device
Download the instructions for your Safe in PDF format for free! Find your manual Royal 552 - Burg Wächter and take your electronic device back in hand. On this page are published all the documents necessary for the use of your device. Royal 552 by Burg Wächter.
USER MANUAL Royal 552 Burg Wächter
CcSting
Deutsch
English English
espanol
1 + u1 - 1 = ( 1 + u) u1 < 1 = u
1:2: FUNC:
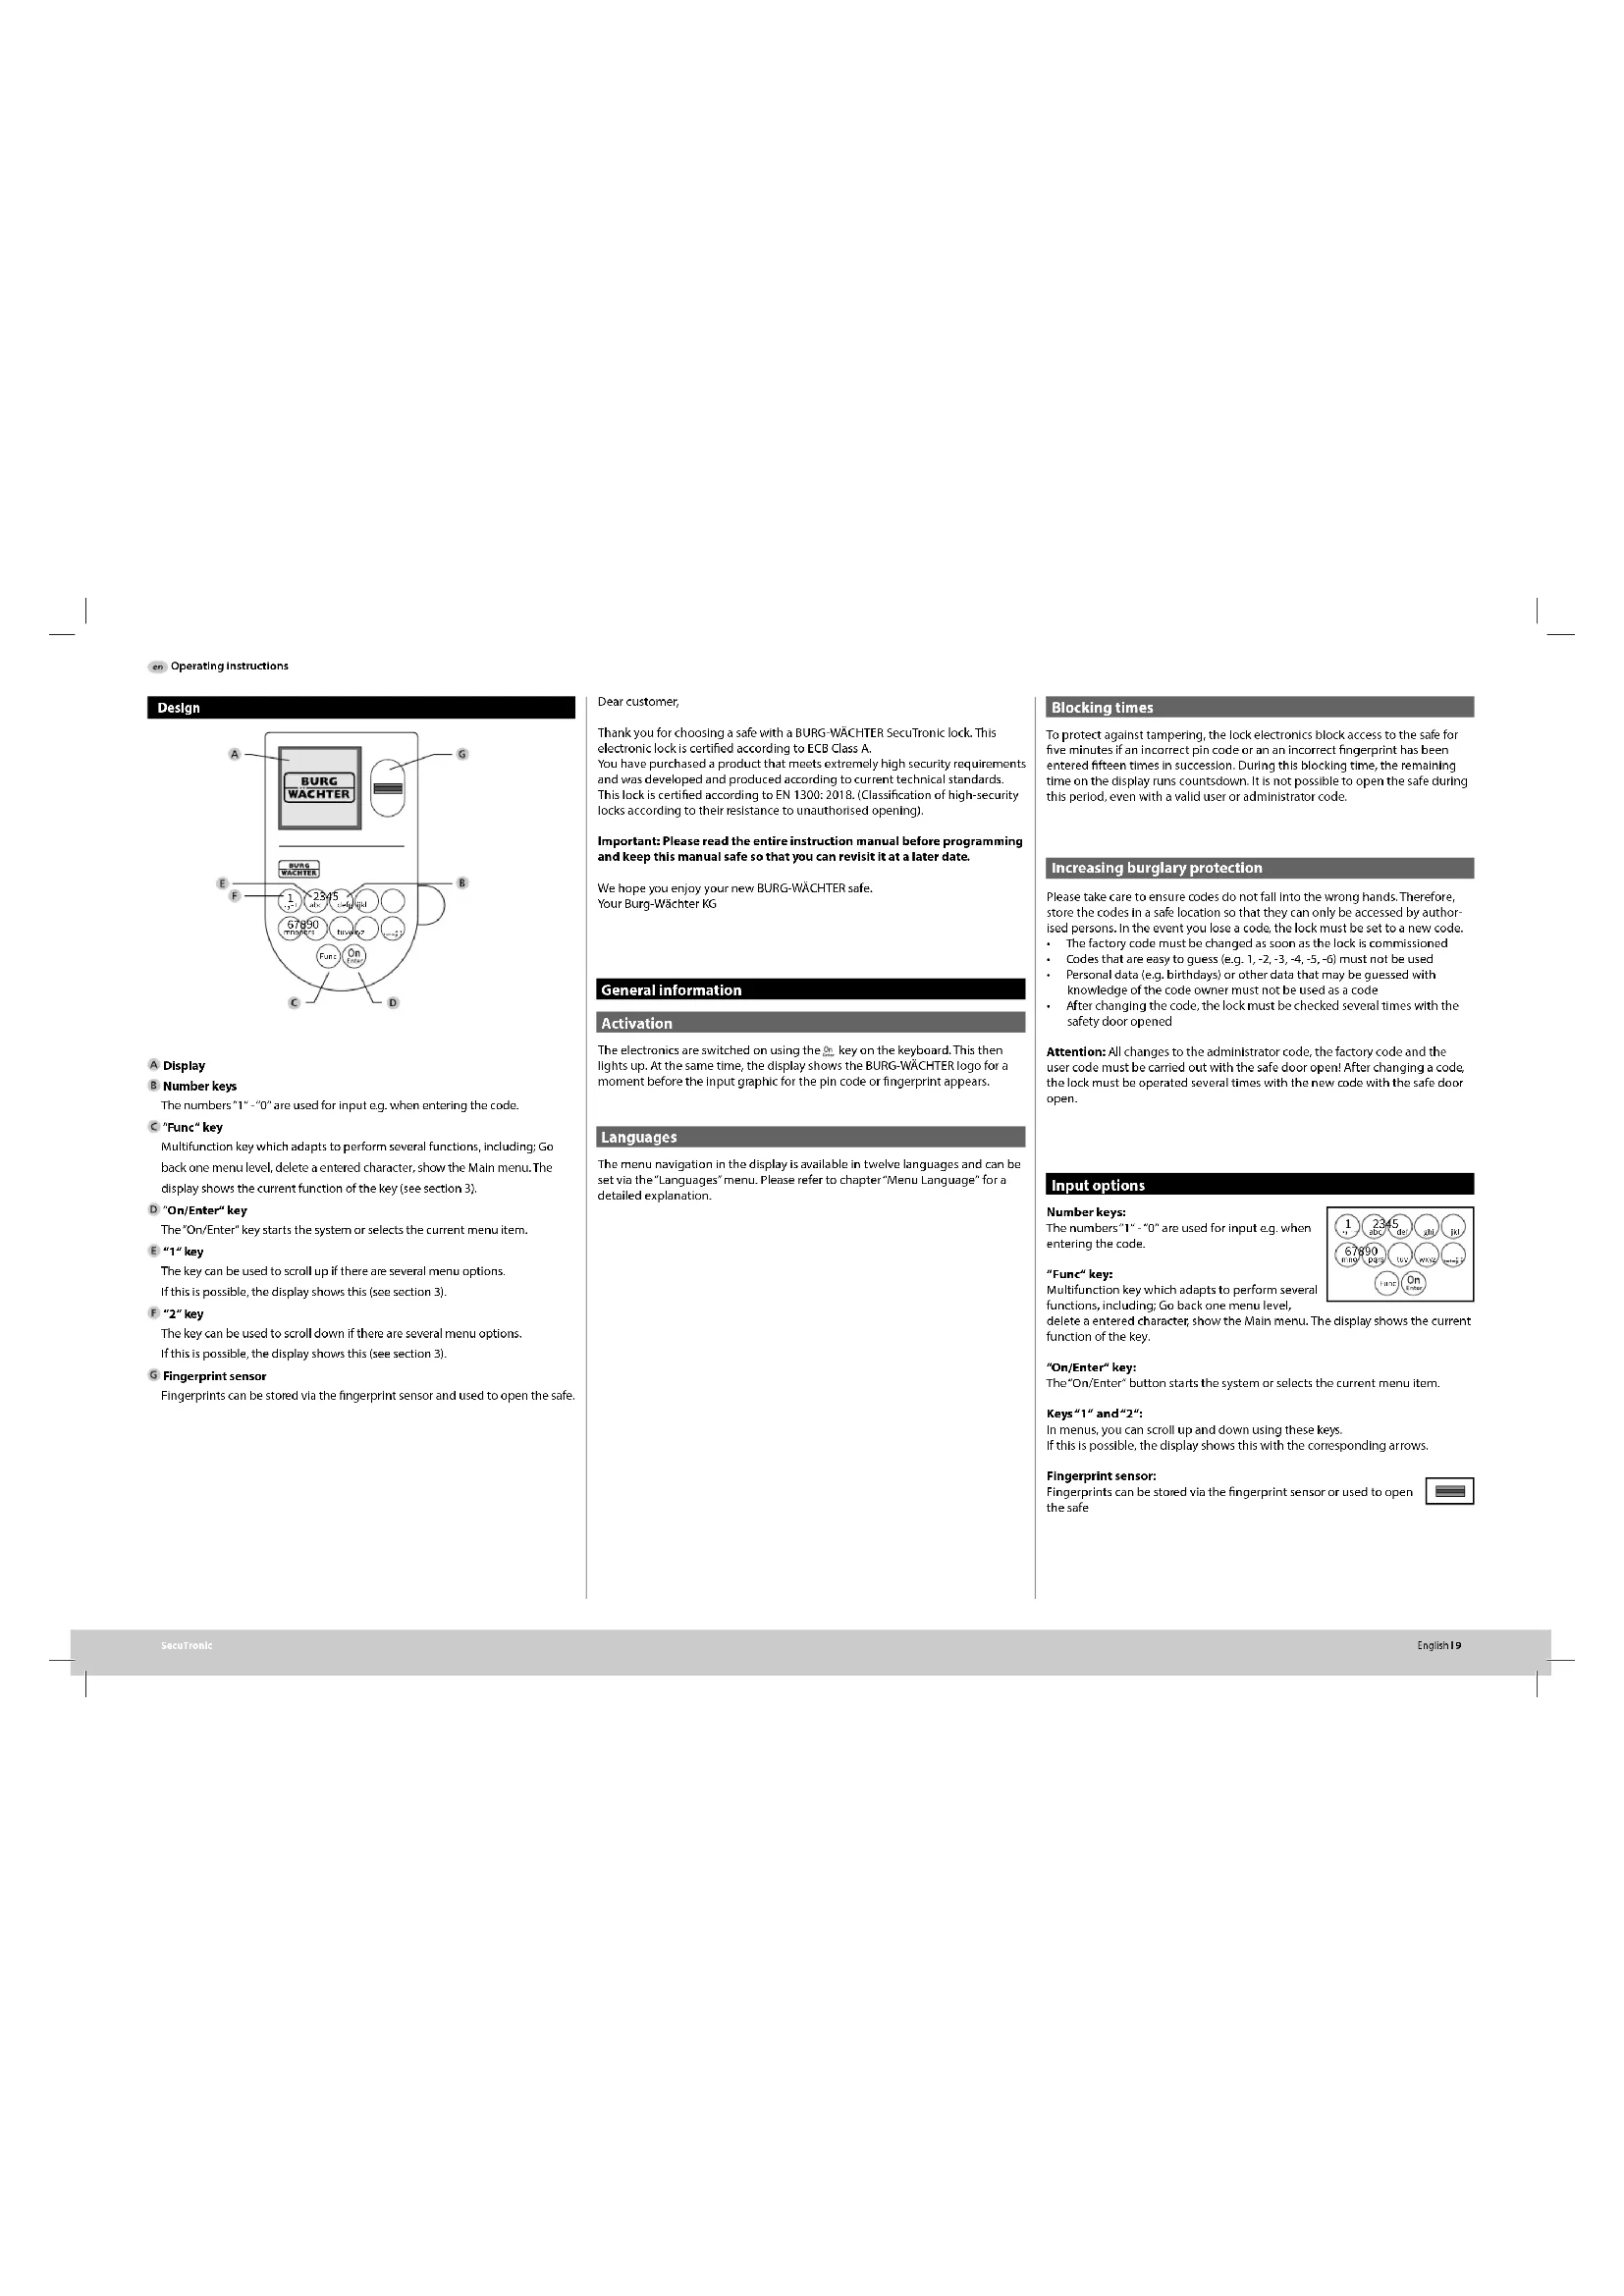
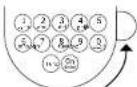
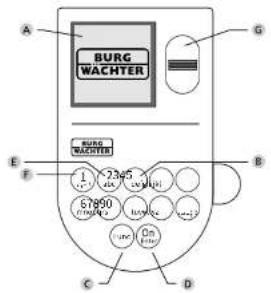
The numbers 1^ - 0^ are used for Input e.g. when entering the code.
C 'Func'key
Multifunction key which adapts to perform several functions, including: Go back one menu level, delete a entered character, show the Main menu. The display shows the current function of the key (see section 3).
D 'On/Enter'key
The 'On/Enter' key starts the system or selects the current menu item.
"1key
The key can be used to scroll up if there are several menu options. If this is possible, the display shows this (see section 3).
F"2"key
The key can be used to scroll down if there are several menu options. If this is possible, the display shows this (see section 3).
Fingerprint sensor
Fingerprints can be stored via the fingerprint sensor and used to open the safe.
Dear customer,
Thank you for choosing a safe with a BurgW-WACHTER SecuTronic lock. This electronic lock is certified according to ECB Class A. You have purchased a product that meets extremely high security requirements and was developed and produced according to current technical standards. This lock is certified according to EN 1300:2018. (Classification of high-security locks according to their resistance to unauthorized opening).
Important: Please read the entire Instruction manual before programming and keep this manual safe so that you can revisit it at a later date.
We hope you enjoy your new BURG-WACHTER safe. Your Burg-Wachter KG
General information
Activation
The electronics are switched on using the key on the keyboard. This then lights up. At the same time, the display shows the BURG WACHTER logo for a moment before the input graphic for the pin code or fingerprint appears.
Languages
The menu navigation In the display is available in twelve languages and can be set via the "Languages" menu. Please refer to chapter "Menu Language" for a detailed explanation.
Blocking times
To protect against tampering, the lock electronics block access to the safe for five minutes if an incorrect pin code or an incorrect fingerprint has been entered fifteen times in succession. During this blocking time, the remaining time on the display runs countdown. It is not possible to open the safe during this period, even with a valid user or administrator code.
Increasing burglary protection
Please take care to ensure codes do not fall into the wrong hands. Therefore, store the codes in a safe location so that they can only be accessed by authorised persons. In the event you lose a code, the lock must be set to a new code.
The factory code must be changed as soon as the lock is commissioned.
Code that are easy to guess (e.g. 1, -2, -3, -4, -5, -8) must not be used.
Personal data (e.g. birthdays) or other data that may be guessed with knowledge of the code owner must not be used as a code.
After changing the code, the lock must be checked several times with the safety door opened
Attention: All changes to the administrator code, the factory code and the user code must be carried out with the safe door open! After changing a code, the lock must be operated several times with the new code with the safe door open.
Input options
Number keys:
The numbers 1^ - 0^ are used for input e.g. when entering the code.
"Func" key:
Multifunction key which adapts to perform several functions, including: Go back one menu level,
delete a entered character show the Main menu. The display shows the current function of the key.
"On/Enter" key:
The "On/Enter" button starts the system or selects the current menu item.
Keys"1" and "2";
In menus, you can scroll up and down using these keys.
If this is possible, the display shows this with the corresponding arrows.
Fingerprint sensor:
Fingerprints can be stored via the fingerprint sensor or used to open the safe

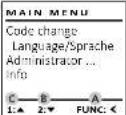
Display
A Specifies whether you can use the key to cancel the last entry ( 心 ) or switch to the main menu [M].
2 · w appears when you can scroll down using the "2" key.
C 11 appears when you can scroll up using the "11" key.
D ( )indicates the battery level.
E (^ / ) indicates whether the locking mechanism has released the lock and the safe can be opened.
Opening
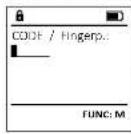
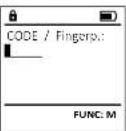
Opening with PIN code
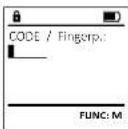
- Switch on the lock using the key.
- Enter the 6-digit PIN code (factory setting "1-2-3-4-5-6").
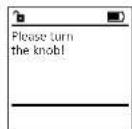
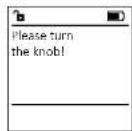
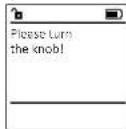
- Please turn the book" appears in the display
Opening with fingerprint (Convenient opening)
Switch on the lock using the key.
- Move a programmed finger from the top to bottom centrally over the sensor.
- Please run theADB appears in the display
- Turn the knob.
Opening with access combinations
- Switch on the lock using the key.
- Move a programmed finger from the sensor.
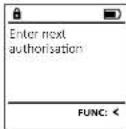
- If an additional authorisation request (code or fingerprint) has been set up, the message "interim authorisation" will appear on the display. Enter the requested additional authorisation (code or fingerprint).
If a threefold authorisation request (3 PIN codes) has been set up, the message 'Enter authorisation' will appear on the display. Enter the 6-digit PIN code. - Please hore the knot" appears in the display
- Turn the knot
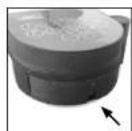
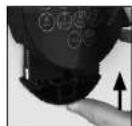
Closing
After the safe has been closed, it is essential that the rotary knob is moved manually to its initial position. Ensure that the rotary knob is in the same position as in the following illustration.
Menu structure
Setting up the menu structure
Change code
Language
- Administrator
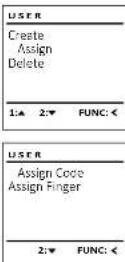
Create
Create code
Assign
Create fingerprint
Assignn code
Assign fingerprintDelete
Time function
Set time
Set date
Automatic ST/WT
Delay timeProgramming
Database update
Firmware update
ReorganiseProcesses
Display
SaveSetup
Register
FPreset
Generate AES key
+info
Systeminfo
System check
Description of the menu functions
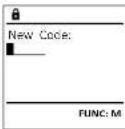
Code Change menu
Change the administrator code and the user codes. We would like to point out that, for security reasons, the factory set administrator code must be changed to an individually set code.
- Switch on the lock using the key.
Then press Foc.
The "Mannen" appears.
+ConfirmWith% - You can use the keys 1 or 2 to scroll until the administrator/user is displayed and you wish to change the code for.
Confirm with - Enter the old or factory code that was previously valid using the keyboard and press.
- Enter the new code using the keypad and confirm with:
Repeat your entry and confirm it again with
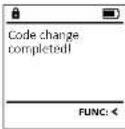
Code change complete! is displayed after a correct entry.
Press any key.
Note: When a safe lock is first started up, additional information on the current date and time are requested:
Enter the day (2 digits)
Enter the month (2 digits)
Enter the year (2 digits)
Enter the hour (2 digits)
Enter the minutes (2 digits)

Language menu
- Switch on the lock using the key.
- Then press Func.
The 'Attn menu' appears. - Scroll with the 1 or 2 key until the "Language" menu item is highlighted.
- Confirm with
- "yay menu / yayvee" appears.
- Use keys 1 or 2 to scroll until the desired language is marked.
- Confirm with
- "Data has been saved" appears in the display
- Press any key.
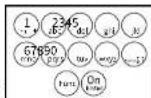
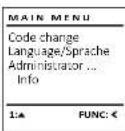
MAIN MENU
Code change language/Sprache Administrator...
infa
1:2 FUNC:
LANGUAGE
Cofing
Deutsch
English
E
C5p816
1:2:FUNC
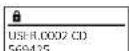
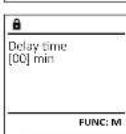
The next free memory entry is displayed (e.g., USER,0002 CD).
Enter the 6-digit code and confirm it with
- Use key 1 or 2 to scroll through the possible combinations.
The following options are available:
[1] No combination
1/2Combination of 2 codes
1/3Combination of 3 orders
[173] Combination of 5 codes [EB/OL].
[PP] Combination with one fingerphone. If you have not selected a combination,
- if you have not selected confirm 3x with
If you have selected the combination "FP", you will create your fingerprint as described in the sub-menu "Administator/User/Create/Create fingerprint".
Sub-menu Administrator / User / Create /
Create fingerprint
- Switch on the lock using the key.
- Then press Figs.
The "How many" appears.
-Scroll with the 1 or 2 key until the "Administered"
mou m is highestd - Confirm with
- A
Canfil With - "Mau menu/Adminsator/User"appears.
- Confirm with
- "Mav menu/Admnistrator/User/Create finger"appears
- Scroll with the 1 or 2 key until the "Create
fingerprint* menu item is highlighted.
: Confirm with
-Enter the administrator code to acquire the - Enter the administration code to activate the
aannnnae aae - "Mengni Hng" app
- Move the finger from the top to bottom
centrally and a number of times over the sensor.
The display will either prompt you to repeat
the process (for error messages, see page 15), or the message "ERROR/ERROR" will appear. - Use key 1 or 2 to scroll through the possible combinations.
The following options are available:
[-] No combination
[CD] Combination with one code
[EP] Combination with an additional
fingermot
Press any key.
12 × 12
Kombination:
[Tab]
( x - 2x) t - xy^2 = ( x - 2x) f^ t
1:40
1073-2001-05
USER.0001 CD
Created:
USE
Crate Code
Create Eng#
Sub-menubnistrator/User/Assign/
Create code
- Switch on the lock using the key.
Then press
The "You know" appears.
+Scrollwiththe1or3keyunlthefundstr
mne
-
Confirm with
-
Main Menu/Advanced Options appears.
- Confirm with
*u#m#n/Admn#b#r/Be"appeaes. - Scroll with the 1 or 2 key until the 'Assign'
menu item is highlighted.
+Confirm with
.
·Confirm wort
- Enter the administrator code to acquire the authorisation for programming.
- You can use the keys 1 or 2 to scroll until
the user is marked whose code is supposed.
to be assigned.
+ Confirm with 0
+Enter the 6-digit code and confirm it with
- 1. Link key 1 or 3 to scan through the possible
e
combinations.
The following options are available:
No combination
[1/2] Combination of 2 codes
[1/3] Combination of 3 codes
[FP] Combination with one fingerprint
If you have not selected a combination,
confirm 3x with
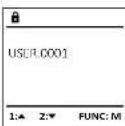
Sub-menubrator/User/Assign/Assign fingerprint
-
Switch on the lock using the key.
-
Then press Func.
The 'Moth menu' appears.
- Scroll with the 1 or 2 key until the menu
item"Adminstrator"is highlighted
-
Confirm with
-
"Mav memu/Attnmator" appears.
-
Confirm with
"Mac menu/Administatx/User appears.
- Scroll with the 1 or 2 key until the "assign" button.
menu item is highlighted
Confirm with 10:
- Scroll with the 1 or 2 key until the "AspenZiger" menu item is highlighted.
F
- Enter the administrator code to acquire the authorization for personnel.
the authorisation for programing. "Munenwur (Amplatz) / liger / (sagenfugen) aporers
- You can use the keys 1 or 2 to scroll until
the user is marked whose fingerprint is
supposed to be assigned.
- Confirm with
"Create fangy purl" appears.
- Move the finger from the top to bottom
centrally and a number of times over the sensor.
The display will either prompt you to repeat the
process (for error messages, see page 15), or the message "USE XXXXX" will appear.
- Use key 1 or 2 to scroll through the possible
combinations.
The following options are available:
No combination
[CD] Combination with one code
[FP] Combination with an additional
fingerprint
Press any key.
USER
Create
A
Delete
( x - 2x) t - xy^2 = ( x - 2x) f^ t
1:2: FUNC:
USR
Assign Code
Assign Finger
m = 311 ;
FUNC:
A
USER.0003 FP
created!
FUNC:
m - 1 0 ;
Menu Administrator / User / Delete
Deleted users no longer have access to the safe.
However, these remain in the history.
Sub-menubnistrator/User/Delete
- Switch on the lock
- Then press F.
The "the" does appear.
- Scroll with the 1 or 2 key until the menu
tem Adminstrator is highlighted. Confirm with
-You menu (alow) appears
·Confirm with
- -
- Confirm with
- "Main menu/Administrator/User/Delete" appears.
- Scroll with the 1 or 2 key until the menu
item "Delete" is highlighted
- Confirm with
- Enter the administrator code to acquire the authorisation for programming.
- You can use the keys 1 or 2 to scroll until the
user is marked whose code is supposed to
be deleted.
- Confirm with
- "data has been deleted" appears.
Press any key.
USE R
Fornta
Create Delete
Delete
( x - 2x) t - xy^2 = ( x - 2x) f^ t
1
FUNC:
。
USEB.0001.CD
1
1:2: FUNC:M
一
Dataset has
been deleted
m = 311
1
FUNC:
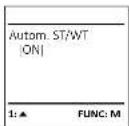
Menu Administrator / Time functions
Time and date can be set, as well as whether the
system should automatically switch between
Central European Summer/Winter Time, The delay
time prevents quick opening in the event of
a robbery.
ADMIN
Hans
User:
Ting: functions
Programmica
Proceses
1.2.FUNC:
Menu Administrator / Time functions / Set time
- Switch on the lock using the key.
Then press
The Main menu appears. - Scroll with the 1 or 2 key until the menu
item "Administer" is highlighted. - Confirm with
- Mai menu/Admbutator appears.
- Scroll with the 1 or 2 key until the menu
item "inner functions" is highlighted.
Confirm with on
*Admnistrator/Time entry appears.
Confirm with - Enter the administrator code to acquire
the authorisation for programming.
The time (24-hour format) can be set via the hour.
keypa.
·“() - Bauschow derivate appears.
TIMER FUN
Time spent
Date entry
Autom.ST/WT
Delay time
一
2: FUNC:
Time and way
HMMO
FUNC: M
Menu Administrator / Time functions / Set date Menu Adminis
- Switch on the lock using the key.
- Then press fun.
The "dot menu" appears. - Scroll with the 1 or 2 key until the menu
item "Administer" is highlighted. - Confirm with
"Max menu/AdmiNshato" appears. - Scroll with the 1 or 2 key until the menu
item "Time functions" is highlighted - Confirm with on
The functions appear. - Scroll with the 1 or 2 key until the "Date entry" menu item is highlighted.
- Confirm with
- Enter the administrator code to acquire the authorisation for programming.
The date can be set via the keypad. - Confirm with 20.
- "Dots has been saved!" appears.
Press any key.

Time entry Date entry
Autm. ST/WT
Delay time
Study time


·“中购安
- Scroll with the 1 or 2 key until the me
TIME functions is highlighted.
- Confirm with
Tine fndions appears.
-
Scroll with the 1 or 2 key until the
-
menu item "stay time" is highlighted.
-
Confirm with
Enter the administrator code to acquire the
authorisation for programming. Where a delay
m.STWT time has already been set, it must first
through
TIMERSUP - The delay time (0-99 minutes) can be set
TIPPER PON ... via the keyboard.
Date entry -Data has been saved appears. Autym ST/WT
Prrnnnne
Menu Administrator / Programming
A firmware update installs the latest software version. Reorganise sorts the database.

Firpently:
Date entry
Autom. ST/WT
Delay time:


Paly
[0]min
m = 311
1 + 2( 1 + u) 1 - 11 u =
Menu Administrator / Programming / Firmware update
Please ensure that the batteries are full before
updation the firmware
+Please copy the new firmware version to
a FAT-32 formatted microSD card and insert it
into the microSD card slot.
Switch on the lock using the key.
The press
The Mainly appears
- 500 with the 1 or 2 key until the menu
Item "Administer" is highlighted.
+ Confirm with On
+ "Administator" appear
- Scroll with the 1 or 2 key until the
"Programming" menu item is highlighted
Confirm with
- Programming appears.
- Scroll with the 1 or 2 key until the menu
item "famware" is highlighted.
- Confirm with on
- Enter the administrator code to acquire the
authorisation for programming.
The message Confirm current original manufacturer
mnnnne ernnn nucog nner appears.
Confirm with 0 Thereafter there is no
need to do anything further in the process.
The message "do not interrupt power" appears.
The message on the display disappears for
some time.
- When the update is complete, the message
Fwwwreepate complcted appears.

Database update
Firmwareupdate
Restructure


Menu Administrator / Time functions / Autom. ST/WT
Automatic update between Central European
Summer/Winter Time
- Switch on the lock using the key.
- Then press fuc.
The Main menu appears
- Scroll with the 1 or 2 key until the menu
item"Adminisrate" is highlighted.
·Confirm with
- /administrator appears.
- Scroll with the 1 or 2 key until the menu
itemTime functions
- Confirm with 2.
Time functions appears.
- Scroll with the 1 or 2 key until the
- menuitem*Autum.SI/W1 is highlighted
- Confirm with
- Enter the administrator code to acquire the
authorisation for programming.
The automatic time changeover can be
switched on or off via key 1 or 2.
- Confirm with
- "Beta has been served" appears.
- Press any key.
Menu Administrator / Programming / Databaseupdate
This function is not enabled at present.

User
Timer functions
Programming
Processes


update

Database:update
Firmwareupdate
Restructure

1
Reorg
order
( xt^2 + x) a + bt^2 = 7| 8y|

H
scoll with the 1 or 2 key until the menu
item "Administer" is highlighted
onfirm with
The "Koinmew" appears.
Scroll with the 1 or 2 key until the menu
item "Administer" is highlighted.
·Confirm with
中
- Scroll with
"Programming"menu Item is highlighted.
+Confirm with
- Programming"appears.
Scroll with the 1 or 2 key until the menu
item"retncting
·Confirm with
Enter the administrator code to acquire
the authorisation for programming.
+“fistrutngdiopnepes"appears.
- "Administrative" appror
- Scroll with the 1 or 2 key until the
"Programming" menu Item is highlighted.
+ Confirm with
Programming appears.
- Scroll with the 1 or 2 key until the menu
item 'Restructuring' is highlighted.
- Confirm with
- Enter the administrator code to acquire
the authorisation for programming.
Restructuring in progress appears.


Menu Administrator / Programming / Reorganise
Reorganisation must be carried out cyclically in
order to optimise the user database and restructure
the user data rec
- Switch on the lock using the key.
The press


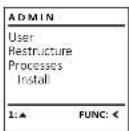
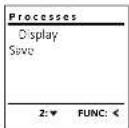
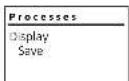
Menu Administrator / Processes
It is possible to store the history on an inserted microSD card or to output it directly on the display.

Menu Administrator / Setup
The system must be registered for communication within the device. FP-reset removes all fingerprints.
Menu Administrator / Processes / Displays
- Switch on the lock using the key.
The press
The Moin menu appears. - Scroll with the 1 or 2 key until the menu
item "Administer" is highlighted.
Confirm with - Administator appears.
- Scroll with the 1 or 2 key until the menu
item"Processes" is highlighted.
Confirm with 20 - Enter the administrator code to acquire
the authorisation for programming. - Scroll with the 1 or 2 key through the
data records - Confirm with
Menu Administrator / Setup / Install
In the event of a complete system failure, the electronic control panel may have to be registered again with the locking mechanism.
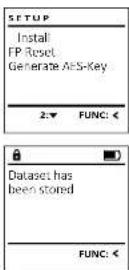
Menu Administrator / Processes / Save
- Please insert a FAT-32 formatted microSD card into the microSD card slot.
- Switch on the lock using the key.
The press
The Main menu appears. - Scroll with the 1 or 2 key until the menu
item "Administer" is highlighted. - Confirm with
- "Administer" appears.
- Scroll with the 1 or 2 key until the menu
Item Processes is highlighted. - Confirm with ^* .
"Pcses appears. - Scroll with the 1 or 2 key until the menu
Item "save" is highlighted - Confirm with
- Enter the administrator code to acquire
the authorisation for programming.
"Please wait" appears. - "Dataset has been stored!" appears.
- Press any key.
After registering, the administrator code must be changed as described in the Code Change menu.
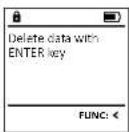
Menu Administrator / Setup / FP-reset
- Switch on the lock using the key.
The press
The "Mam menu" appears - Scroll with the 1 or 2 key until the menu
item "Administer" is highlighted. - Confirm with
- "Administrator" appears.
- Scroll with the 1 or 2 key until the menu
item"Setp - Confirm with
- Scroll with the 1 or 2 key until the menu
item RP Rost is highlighted. - Confirm with on
- Enter the administrator code to acquire
the authorisation for progr - "DeTe data with ENIN key" appears
- Confirm with
"Please wait" appears. - Press any key.
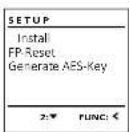
Menu Administrator / Setup /Generate AES key
This function is not enabled at present.
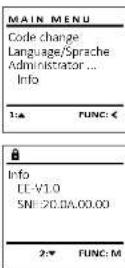
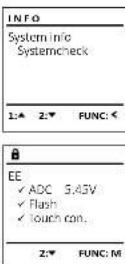
In this menu, you can have several pieces of information of the system displayed.
Menu info / System Info
- Switch on the lock using the key.
The press
The "Kaimen" appears. - Scroll with the 1 or 2 key until the menu
item*in is highlighted.
Confirm with 06
*n# appears - Confirm with 0
Enter the administrator code to acquire
the authorisation for programming.
The system information is displayed. - Scroll with key 1 or 2 to view the information.
Use the key to return.
Info/system check menu
Switch on the lock using the key.
The press
The "Mannwey" appears.
+ 50 rcl with the 1 or 2 key until the menu Item
"info" is highlighted
Confirm with
"mi appears
- Scroll with the 1 or 2 key until the menu item
Systemex is highlighted.
- Confirm with
- Enter the administrator code to acquire the
authorisation for programming.
The system check Information is displayed.
+ Scroll with key 1 or 2 to view the information.
Use the time key to return.
Error messages
The illustration below describes the error messages on the display when a fingerprint is created or when the safe is opened.
| Error message Solution | |
| Too fast! Please repeat | Move your finger slowly across the sensor. |
| Too tilted! Please repeat | Move your finger flat across the sensor. |
| Too short! Please repeat | Move your finger across the sensor so that more area of your fingerprint can be read. |
| Position in the middle and repeat! | Position your finger in the middle of the sensor. |
| Wrong code! Enter a valid code. | |
| No admittance! An unsaved fingerprint has been used. Repeat with a fingerprint that has already been created. | |
Technical details
| Number of administrator codes: | 1 |
| Number of user codes: 9 (max.) | |
| Number of fingerprint codes: | 20 (max.) |
| Blocking times: After an Internet attack, after the correct code/FP is entered 15x, 5 minutes | |
| Power supply: 4x AA MIGNON LR6 ALKALINE | |
| Date/time: | ✓ |
| Updatable (firmware): | ✓ |
| History number: 2,000 | |
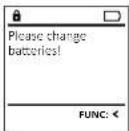
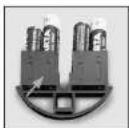
Battery replacement
You can see the battery status at any time using the battery level indicator at the top right of the display. If the battery capacity is running low, a corresponding message appears on the display. When this notice appears, change the batteries as soon as possible.
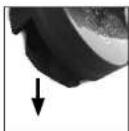
Remove the screw on the underside of the lock electronics. This will require a Tox T8 screwdriver. This is included in the scope of delivery.
Let the cover slide out together with the batteries.
Remove the old batteries and dispose of them according to the disposal instructions on page 15. Replace the batteries with four new 1.5V AA Mignon batteries and according to the correct polarity. For this purpose, illustrations are shown on the battery holder. Please use branded batteries and no rechargeable batteries.
Push the cover and batteries back into the locking electronics and screw them tight.
Warranty
BURG-WACHTER products comply with the technical standards at the time of production and adhere to our own quality standards. The guarantee only covers defects which can be proved to have resulted from production or material defects at the time of purchase. The warranty ends after two years, further claims are excluded. Defects and damage caused by e.g. transport, Incorrect operation, Improper use, wear etc. are excluded from the warranty. The batteries are not included in the guarantee. A short description of any defects identified must be made in writing and the device returned to the place it was purchased, together with the original packaging. After the device has been tested, and within a appropriate period of time, the guarantor will decide whether or not to repair or exchange the item.
Attention:
In order to deliver a flawless and high quality product to you and to better assist you in case of service or repair, it is necessary that faulty or defective devices along with the valid administrator code be presented to your dealer together with the original documentation.
For returns, all undamaged device parts must furthermore be in the factory setting due to your right of revocation. Failure to comply with this will invalidate the warranty.
Disposal of the device
Dear customer,
please help us avoid unnecessary waste. Should you intend to dispose of this device at any time, please remember that many components of this device contain valuable materials that can be recycled.

Please be aware that electrical and electronic equipment and batteries marked in this way must not be disposed of with house hold waste but collected separately. Please obtain information on the collecting points for electrical waste from the responsible authority of your city/municipality.

BURG-WACHTER KG hereby declares that this device complies with the Directives 2014/30/EU, (EMC) and 2011/65/EU (RoHS).
The complete text of the EU Declaration of Conformity is available at the following Internet address: www.burg.biz
Safety recommendation
Please clean the keyboard operating surface periodically with a microfibre cloth (e.g. glasses cleaning cloth for spectacles) to remove any fingerprints on the keyboard surface.
Printing and typesetting errors as well as technical changes reserved.
Mode d'emploi
Montage
A Ecran
| MAIN MENU | |
| Code change | |
| Language/Speech Administrator... | |
| Info |
| USER | |
| Create | |
| Assign | |
| Delete | |
| 2: FUNC: |
| USER.0001 CD |
| Combination: [F'P] |
| FUNC: M |
- 1.2.3.4.5.6.7.8.9.10.11.12.13.14.15.16.17.18.19.20.21.22.23.24.25.26.27.28.29.30.31.32.33.34.35.36.37.38.39.40.41.42.43.44.45.46.47.48.49.50.51.52.53.54.55.56.57.58.59.60.61.62.63.64.65.66.67.68.69.70.71.72.73.74.75.76.77.78.79.80.81.82.83.84.85.86.87.88.89.90.91.92.93.94.95.96.97.98.99.100
principal/Administrated/Unissued/Cheer) appearant
| USER.0003 FP created! |
| FUNC: < |
| USER |
| Create Assign Delete |
| 1.2 FUNC: |
| USER |
| Assign Code |
| Assign Finger |
| 2:▼ FUNC: < |
| USB/LOOO1 |
| 1.4 Z▼ FUNC:MI |
Time entry
Date entry
Autorn. ST/WT
Delay time
1:2: FUNC:
A
Date entry 2014-09-03
S.M. 100
FUNC:M
m : x = 1 或 3x + 4y + 1 = 0
Validez aeecc
m = 311 ;
M
| ADMIN | |
| User | |
| Timer functions | |
| Programming | |
| Processes | |
| 1 | 2 |
| Dataset has been stored! |
| FUNC: |
Menu Administrateur/Installation
| ADMIN | |
| User Restructure Processes Install | |
| 1.▲ FUNC: |

12 × 12
| SETUP |
| Install |
| FI-Reset |
| Generate AES Key |
| 2: FUNC: |
| Dataset has been stored |
| FUNC: |
| SETUP |
| Install IP-Reset Generate AES-Key |
| 2: FUNC: |
| Delete data with ENTER key |
| FUNC: |
Menu Administrateur/Installation/Generer cryptage AES.
| Info |
| EL-V1.0 |
| SNI:20,0A,00.00 |
| INFO |
| System Info |
| Systemcheck |
| 1.2 FUNC: |
Code change
code change language/Sprahe
Adn
info:


submenu "Administrator/User/Create/Create fingerprint"
[Administrator/ Gebra]
aannakenj.
Submenu Adminlstrator/Gebrulker/
1.1 Green combination
[EP] Cumbinatic met gen anders
vingerafdruk
[EP] Cumbinatic met gen anders
vingerafdruk
(Administator/1)Jrcnities,
Erverschijndemelding"Festnuiating in progress
m = 311 ;
:
1
120^
m - 1 0 ;
Menu Administrator/Handelingen
| ADMIN | |
| User | |
| Timer functions | |
| Programming Processes | |
| 1:2:2: FUNC: |
Menu Administrator / Setup
| Dataset has been stored! |
| FUNC: < |
Menu Administrator / Setup / FP-reset
| Delete data with ENTER key |
| FUNC: < |