
Tempco digital W - Thermostat RADSON - Free user manual and instructions
Find the device manual for free Tempco digital W RADSON in PDF.
| Product Type | Wired digital thermostat for hydronic heating/cooling floor |
| Brand | Radson |
| Model | Tempco digital W |
| Power supply | 230 VAC, 50 Hz, 3.5 W |
| Output | TRIAC 230 VAC, 75 W max (4 solenoid valves) |
| Setting range | 5 °C to 35 °C in 0.5 °C steps |
| Measurement accuracy | 0.1 °C |
| Operating temperature | 0 °C to 50 °C |
| Protection | Class II - IP30 |
| Control type | Hysteresis (ON/OFF) or adjustable proportional band (PWM) |
| Display | Digital with amber backlight |
| Operating modes | Off, Comfort, Reduced (ECO), Automatic, Temporary override (2 h) |
| Sensors | Built-in ambient sensor, input for optional external (floor) sensor 10K at 25 °C |
| Valve type | Configurable: normally closed (NC) or normally open (NO) |
| Cooling function | Yes, enable/disable |
| Keypad lock | Yes, child lock |
| Calibration | Calibration of ambient and/or external sensor possible |
| Dimensions (approx) | Flush-mount, 60 mm fixing (standard box type) |
| Weight (approx) | Approximately 150 g |
| Maintenance and cleaning | Clean with a dry, soft cloth. Do not use abrasive products. |
| Safety | Disconnect power before any intervention. Installation by a professional. |
| Spare parts and repairability | External sensor available as option. Repair by an approved workshop. |
| General information | Manual in multiple languages (FR, EN, DE, NL). Software version displayed at startup. |
Frequently Asked Questions - Tempco digital W RADSON
User questions about Tempco digital W RADSON
0 question about this device. Answer the ones you know or ask your own.
Ask a new question about this device
Download the instructions for your Thermostat in PDF format for free! Find your manual Tempco digital W - RADSON and take your electronic device back in hand. On this page are published all the documents necessary for the use of your device. Tempco digital W by RADSON.
USER MANUAL Tempco digital W RADSON
Installation and Operation Manual

IMPORTANT!
Before starting work the installer should carefully read this Installation & Operation Manual, and make sure all instructions contained therein are understood and observed.
-
The Main zone digital programmer should be mounted, operated and maintained by specially trained personnel only. Personnel in the course of training are only allowed to handle the product under the supervision of an experienced fitter. Subject to observation of the above terms, the manufacture shall assume the liability for the equipment as provided by legal stipulations.
-
All instructions in this Installation & Operation manual should be observed when working with the controller. Any other application shall not comply with the regulations. The manufacturer shall not be liable in case of incompetent use of the control. Any modifications and amendments are not allowed for safety reasons. The maintenance may be performed by service shops approved by the manufacturer only.
-
The functionality of the controller depends on the model and equipment. This installation leaflet is part of the product and has to be obtained.
APPLICATION
-
The Main zone digital programmer is developed to control and manage all installations of water floor heating and cooling equipped with our UFH range thermostat. The temperature in each room is managed the control of actuators mounting on the manifold.
-
The controller is normally used in conjunction with a complete connecting box TUFH-MASTER" with or without THeating & Cooling module" to connect all electrical & hydraulic components of the installation like a circulation pump, actuators...
-
The controllers have been designed for use in residential rooms, office spaces and industrial facilities.
Verify that the installation complies with existing regulations before operation to ensure proper use of the installation.

SAFETY INSTRUCTIONS
Before starting work disconnect power supply!
-
All installation and wiring work related to the controller must be carried out only when de-energized. The appliance should be connected and commissioned by qualified personnel only. Make sure to adhere to valid safety regulations.
-
The connecting boxes are neither splash- nor drip-proof. Therefore, they must be mounted at a dry place.
-
Do not interchange the connections of the thermostats and the 230V connections under any circumstances! Interchanging these connections may result in life endangering electrical hazards or the destruction of the appliance and the connected sensors and other appliances.
1 User Guide
UFH - 230VAC Digital thermostat
Wired Digital thermostat (230VAC) specially designed to control your Under Floor Heating and cooling managed by actuator.
- Flush Mounting version, standard fixing with 60mm axes.
- Pilot wire for NSB function (-2^)
- Possibility to regulate on:
Air sensor only
Floor sensor only
Air & Floor combined with different possibilities - Amber Backlight
- Temporary override function (2H)
- Silent (Triac output),
- Optional external sensor 10K at 25^
2 Technical characteristics
| Measured temperature precision | 0.1°C |
| Operating temperature | 0°C - 50°C |
| Setting temperature range | 5°C - 35°C by 0.5°C step |
| Regulation characteristics | hysteresis (ON/OFF) or adjustable Proportional Integral (PWM) |
| Electrical Protection | Class II - IP30 |
| Power Supply Consumption | 230VAC 50Hz ~ 3,5W |
| Output | TRIAC 230VAC 75W Max (4 actuators) |
| Software version | Displayed during the init (after power supplying) 1.x x |
3 Presentation
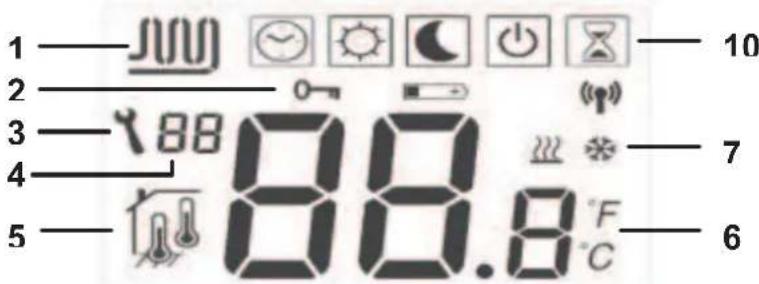

1: Water circulation in the room.
2: Key lock function.
3: Parameters menu.
4: Parameters number or sensor message indication.
5: Sensor used indication
6: Ambient, setting temperature or parameter if 3 displayed.
7: Heating or cooling mode indication.
10: Operating mode. (The active mode is framed)
A: Minus key. (-)
B: Validation key or Mode key. (OK)
C: Plus key. (+)
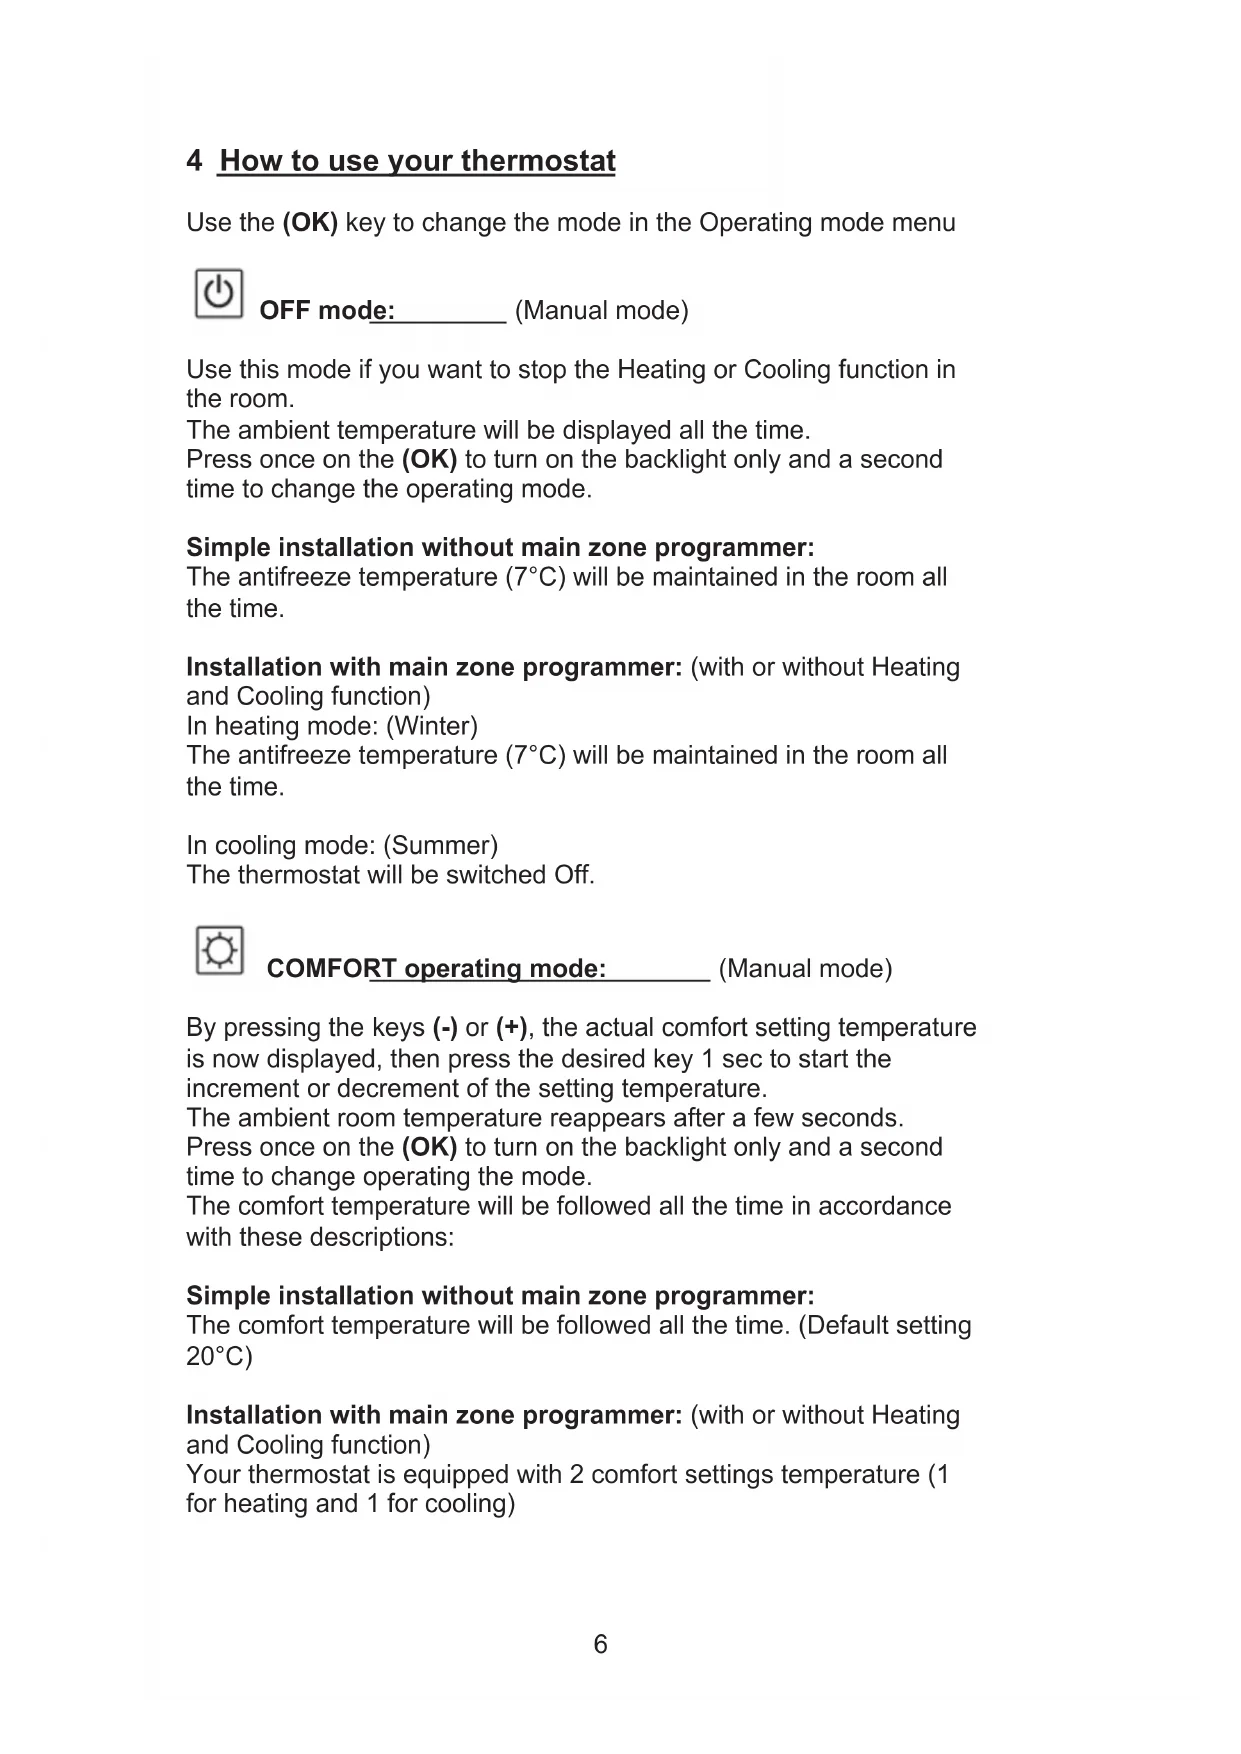
4 How to use your thermostat
Use the (OK) key to change the mode in the Operating mode menu.

OFF mode: (Manual mode)
Use this mode if you want to stop the Heating or Cooling function in the room.
The ambient temperature will be displayed all the time.
Press once on the (OK) to turn on the backlight only and a second time to change the operating mode.
Simple installation without main zone programmer:
The antifreeze temperature (7^) will be maintained in the room all the time.
Installation with main zone programmer: (with or without Heating and Cooling function)
In heating mode: (Winter)
The antifreeze temperature (7^) will be maintained in the room all the time.
In cooling mode: (Summer)
The thermostat will be switched Off.

COMFORT operating mode: (Manual mode)
By pressing the keys (-) or (+), the actual comfort setting temperature is now displayed, then press the desired key 1 sec to start the increment or decrement of the setting temperature.
The ambient room temperature reappears after a few seconds.
Press once on the (OK) to turn on the backlight only and a second time to change operating the mode.
The comfort temperature will be followed all the time in accordance with these descriptions:
Simple installation without main zone programmer:
The comfort temperature will be followed all the time. (Default setting 20^ )
Installation with main zone programmer: (with or without Heating and Cooling function)
Your thermostat is equipped with 2 comfort settings temperature (1 for heating and 1 for cooling)
In heating mode: (Winter)
The comfort temperature will be followed all the time. (Default setting 20^ )
You can adjust this setting only when the system will work in heating mode.
In cooling mode: (Summer)
The comfort temperature will be followed all the time. (Default setting 22^ )
You can adjust this setting only when the system will work in cooling mode.

REDUCED operating mode: (Manual mode)
By pressing the keys (-) or (+) , the actual reduced setting temperature is now displayed, then press the desired key 1 sec to start the increment or decrement of the setting temperature.
The ambient room temperature reappears after a few seconds.
Press once on the (OK) to turn on the backlight only and a second time to change operating the mode.
The reduced temperature will be followed all the time in accordance with these descriptions:
Simple installation without main zone programmer:
The reduced temperature will be followed all the time. (Default setting 18^ )
Installation with main zone programmer: (with or without Heating and Cooling function)
Your thermostat is equipped with 2 reduced settings temperature (1 for heating and 1 for cooling)
In heating mode: (Winter)
The reduced temperature will be followed all the time. (Default setting 18^ )
You can adjust this setting only when the system will work in heating mode.
In cooling mode: (Summer)
The reduced temperature will be followed all the time. (Default setting 24^ )
You can adjust this setting only when the system will work in cooling mode.
Simple installation without main zone programmer:
The comfort temperature will be maintained in the room all the time. Installation with main zone programmer: (with or without Heating and Cooling function)
In this mode your thermostat will follow the program (Comfort or reduced) and order (Heating, cooling, Anti freeze, holiday...) of the main zone programmer.
The ambient temperature will be displayed all the time.
Press once on the (OK) to turn on the backlight only and a second time to change the operating mode.

Override mode:
Use this mode to override the automatic mode during 2 hours.
You can choose another setting temperature for this duration.
By pressing the keys (-) or (+), the override setting temperature is now displayed, then press the desired key 1 sec to start the increment or decrement of the setting temperature.
When the duration is finished the thermostat will come back in
Automatic mode
The ambient temperature will be displayed all the time.
Press once on the (OK) to turn on the backlight only and a second time to change operating the mode.

Lock and unlock keypads:
Use this function to avoid change on your thermostat. (Available in all modes)
-
To lock the keypad, maintains the keys (-) & (+) pressed and press the (OK) key in the same time, then the symbol T 0-Tappears.
-
To unlock the key pads repeat this procedure, (the symbol T will disappear)
Sensor messages:
Main errors: (the regulation will be stopped)
Error on the internal sensor => Err in position T6" in the display with the logo blinks.
Error on the External (Floor) sensor
Err in position T6" in the
display with the logo blinks.
Indications:
Error on the limiter (floor) sensor display with the logo blinks.
Err in position T4" in the
Lower limitation (floor sensor) display with the logo blinks.
=> Lo in position T4" in the
Higher limitation (floor sensor) display with the logo blinks.
Hi in position T4" in the
Special display:
If your installation works with a main zone programmer, the residual humidity is monitored, to avoid risk of residual humidity in the house. If the residual humidity is detected in cooling mode the thermostat will be advised to active the dry function. During the dry function the thermostat will stop the water circulation on the room.
The cooling logo will be blink to show the function.
5 Installation parameters menu
Your thermostat has 1 advanced installer menus.
- In order to enter in this menu, use the (OK) key and go to the automatic mode, then press the (-) & (+) in the same time during 5 sec.
- The first parameter is displayed 01 "Deg".
How to change the value of a parameter:
- Once the parameter is displayed, press the (OK) key to start to blink the value, then you can adjust it with (-) or (+) keys. Press (OK) or wait few seconds to valid your adjustments.
To exit the parameter menu, go to the parameter number 09 "End" and press (OK).
| Parameters | ||||
| N° | Names | Description | Default setting | Other possibility |
| 00 | XXx | Software version | ||
| 01 | Deg | Type of degrees displayed | °C: Celsius degrees. °F: Fahrenheit degrees. | |
| 02 | Out | Actuator type | NC: Normally closed actuator. NO: Normally open actuator. | |
| 03 | Sen | Selection of the sensor which will be used for the regulation. The listing of the following parameters will be different in function of this parameter. | Air: ambient sensor only Flr: External (floor) sensor only. FL.1: ambient sensor with lower and upper floor limitation. FL.2: ambient sensor with intelligent lower floor limitation. | |
| 04 | AiC | Calibration of the internal sensor (The calibration must be done after 12Hours working with the same setting temperature) | - To check the temperature in the room, put a thermometer at 1.5M distance to the floor in the concerned room and wait 1 hour to be sure that the thermometer show the correct temperature. Then you can enter the value saw on the thermometer with (-) or (+) keys. - When a calibration is made the message Yes" will be displayed. - To erase the calibration press simultaneity (-) and (+) keys when Yes" is displayed. Now the message Tno" should be displayed. | |
| 05 | FIC | Calibration of the Floor sensor (The calibration must be done after 12Hours working with the same setting temperature) | The calibration must be done same as described above if the external sensor is connected and used like an external ambiance sensor. If the external sensor is used as floor sensor, the thermometer should be put on the floor. | |
| 06 | FLI | Lower limitation of the floor temperature. Only effective if the parameter 02 is adjusted on (FLr or FI.1) | Default: 18°C Adjustable: From 5°C to "FLh" | |
| FLo | Offset added or subtracted to the actual setting temperature, to define the value of the lower floor limitation. Only effective if the parameter 02 is adjusted on (FL.2) Example: Comfort (Day) setting: 20°C Reduced (Night) setting: 18°C Floor limitation offset: -1°C | Default: 0°C Adjustable: From - 5°C to + 5°C Example: Value of the lower limitation during the day: 19°C Value of the lower limitation during the Night: 17°C | ||
| 07 | FLh | Upper limit of the floor temperature. Only effective if the external sensor is connected and selected. (FLr or FL.1) | Default: 35°C Adjustable: From "FLI" to 50°C | |
| 08 | Cld | Cooling function in the room. Example: Cooling function should be deactivated for room with residual humidity (Bathroom, kitchen...) | Yes: Cooling function is activated no: Cooling function is deactivated | |
| 09 | End | Press (OK) on this parameter to exit the parameters menu end come back to the main display. | ||
6 Notes

IMPORTANT!
- IMPORTANT!
- APPLICATION
- SAFETY INSTRUCTIONS
- User Guide
- UFH - 230VAC Digital thermostat
- Technical characteristics
- Presentation
- How to use your thermostat
- Simple installation without main zone programmer:
- REDUCED operating mode: (Manual mode)
- Override mode:
- Lock and unlock keypads:
- Sensor messages:
- Indications:
- Special display:
- Installation parameters menu
- Notes
Brand : RADSON
Model : Tempco digital W
Category : Thermostat