B0930082E4UM - Server Tripp Lite - Free user manual and instructions
Find the device manual for free B0930082E4UM Tripp Lite in PDF.

| Product Type | Console Server |
| Model | B093-008-2E4U-M |
| Brand | Tripp Lite |
| Power Supply | 12 V DC, 1.25 A (power adapter with NEMA, Schuko, BS, AS plugs included) |
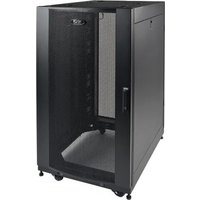
| Dimensions (approx.) | 43.2 x 32.5 x 4.4 cm (rack or desktop mounting) |
| Weight (approx.) | 2.5 kg |
| Network Ports | 2 RJ45 Ethernet ports (NET1, NET2) + 2 SFP ports (fiber optic) on M model |
| Serial Ports | 8 RJ45 serial ports |
| USB Ports | 2 USB ports (front) |
| Integrated Modem | V.92 RJ11 (on M model) |
| Main Functions | Console management, Out-of-Band (OOB) access, environmental monitoring, DHCP/static support, built-in firewall, SSH/HTTPS access |
| External Sensors | Support via I/O converter (terminal block) for sensors and DIO devices |
| Operating Temperature | 0 °C to 40 °C |
| Operating Humidity | 10% to 90% (non-condensing) |
| Security | Built-in firewall, password authentication, secure HTTPS/SSH access, automatic logout after 20 minutes of inactivity |
| Warranty | 4-year limited (repair or replacement) |
| Maintenance and Cleaning | Clean with a soft, dry cloth. Avoid liquids and abrasive products. |
| Spare Parts and Repairability | Contact Tripp Lite customer service for repairs and spare parts. |
| Included Accessories | External power supply, DB9 to RJ45 serial cable, digital I/O converter, rubber feet, mounting hardware, quick start guide |
| General Information | Compliant with WEEE standards (end-of-life recycling). Not recommended for life-support devices. |
Frequently Asked Questions - B0930082E4UM Tripp Lite
User questions about B0930082E4UM Tripp Lite
0 question about this device. Answer the ones you know or ask your own.
Ask a new question about this device
Download the instructions for your Server in PDF format for free! Find your manual B0930082E4UM - Tripp Lite and take your electronic device back in hand. On this page are published all the documents necessary for the use of your device. B0930082E4UM by Tripp Lite.
USER MANUAL B0930082E4UM Tripp Lite
Register your product for quicker service and ultimate peace of mind.
You could also win an ISOBAR6ULTRA surge protector—a $100 value!

www.triplite.com/warranty


1111 W. 35th Street, Chicago, IL 60609 USA • www.triplite.com/support
Copyright © 2017 Tripp Lite. All rights reserved.
Package Includes
- B093-004-2E4U, B093-008-2E4U, or B093-008-2E4U-M Console Server
- External Power Supply with NEMA 1-15P (North America), CEE 7/16 Schuko (Europe), BS1363 (UK) and AS2112 (Australia) plug adapters (Input: 100-240V, 50/60 Hz, 0.4A; Output: 12V 1.25A)
- Mounting Hardware
Rubber Feet
DB9-to-RJ45 Crossover Serial Adapter - Digital I/O Converter (Terminal Block)
- Quick Start Guide
Hardware Assembly
1 If free-standing: Attach the adhesive-backed rubber feet to the console server's base.
If rack-mounted: Attach the rack kit to the side of the console server to be fixed to the rack.
2 Connect the console server's NET1 port to your primary network.
3 Connect the console server's NET2 port to your Out-of-Band (OOB) management network.
Note: The B093-008-2E4U-M also includes Small Form-Factor Pluggable (SFP) ports for NET1 and NET2 fiber-optic connections. If an SFP module is plugged in and establishes a working link, the SFP port will activate and the paired RJ45 port will deactivate.
4 If you have a B093-008-2E4U-M, plug an RJ11 cable into the front-facing RJ11 port to connect to the built-in V.92 modem. Plug the other end of the RJ11 cable into a functioning landline port to allow the B093-008-2E4U-M's V.92 modem to dial-out
5 Connect additional devices to the console server's serial ports and USB ports.
If you have external sensors, plug them in to the terminal block and attach any sensors and DIO devices.
7 Plug in the 12V DC power supply and turn on the power to the console server.
Connect the Console Server
The B093-004-2E4U, B093-008-2E4U, and B093-008-2E4U-M Console Servers are addressable at one of two IP addresses:
It's built-in address (192.168.0.1/24).
2 The default address its DHCP client accepts from a DHCP server on your network.
3 Using a browser on the same network as the console server's NET1 port with an IP address in one of the network ranges (i.e. 192.168.0.x/24, or the range used by your DHCP server):
Enter https://192.168.0.1/ or https://[DHCP-supplied address]/ and press Return.
Note: The console server's self-signed SSL certificate "untrusted connection" error will be present.
4 Click through the error to load the console server login page.
5 Enter the default system username and passcode.
Username: root
Password: default
Press Submit or Return. The console interface welcome page will load.
Note: The console interface will log out after 20 minutes of inactivity. The current page will remain loaded, however, and clicking any UI element loads the login page. Logging back in will reload the requested page.
Configuration and management options present themselves in expanded-by-default menus along the left side of the interface. The top-level menus are Manage, Status, Serial & Network, Alerts & Logging, and System.
The remainder of the page lists configuration tasks required to turn the console server into a usable unit. Some of these tasks will be marked as completed due to the console server's factory settings. The procedures in the next section document initial configuration using the menus, rather than the task list.
Set a Strong, High-Entropy Passcode for the Root User
1 Click Serial & Network > Users & Groups.
2 Click Edit for the Root User.
3 Enter a strong, high-entropy passcode in the Password field.
4 Re-enter the passcode in the Confirm field.
5 Click Apply.
Set the NET1 Port's Network Configuration Method
1 Click System > IP.
2 Click Network Interface if it is not the front-most tab.
3 For Configuration Method, click either the DHCP or Static radio button.
4 If Static, enter an IP Address and Subnet Mask for the NET1 interface.
Set the NET2 Port's Network Configuration Method
The NET2 port is set to inactive by default. To activate:
1 Click System > IP.
2 Click Management LAN Interface to make it the front-most tab.
3 Click the Deactivate this network interface checkbox to de-select this option and activate NET2.
4 For Configuration Method, click either the DHCP or Static radio button.
5 If Static, enter an IP Address and Subnet Mask for the NET2 interface.
For out-of-band (OOB), set these for your management network.
For IP passthrough, set these to match an unused private IP range.
Note: The console server's firewall determines which protocols and services can access ports and devices. HTTPS and SSH are enabled to the console server by default. To change access settings for the console server and connected serial ports, click System > Services. Then click the Service Access tab and adjust, as required.
Configure Managed Devices
1 Click Serial & Network > Serial Port.
To configure a port:
2 Click Edit.
3 Set the Common Settings for Port x to match the device connected to serial port x.
4 To enable remote access to the device, check the Console Server Mode radio button in Console Server Settings and click the checkboxes for allowed protocols (e.g. Telnet, SSH and Web Terminal).
5 Click Apply.
Note: Configure user access policies for connecting to such ports in Serial & Network > Users & Groups. An AAA server can configure them remotely. See the Owner's Manual for more information.
Other Modes and Functions
Please refer to the Owner's Manual for details on advanced features, such as configuration, PDU and UPS power management, environmental monitoring, logging, and auto-response alerts.
Warranty and Product Registration
4-YEAR LIMITED WARRANTY
TRIPP LITE warrants its products to be free from defects in materials and workmanship for a period of four (4) years from the date of initial purchase. TRIPP LITE's obligation under this warranty is limited to repairing or replacing (at its sole option) any such defective products. To obtain service under this warranty, you must obtain a Returned Material Authorization (RMA) number from TRIPP LITE or an authorized TRIPP LITE service center. Products must be returned to TRIPP LITE or an authorized TRIPP LITE service center with transportation charges prepaid and must be accompanied by a brief description of the problem encountered and proof of date and place of purchase. This warranty does not apply to equipment, which has been damaged by accident, negligence or misapplication or has been altered or modified in any way.
EXCEPT AS PROVIDED HEREIN, TRIPP LITE MAKES NO WARRANTYES, EXPRESS OR IMPLIED, INCLUDING WARRANTY OF MERCHANTABILITY AND FITNESS FOR A PARTICULAR PURPOSE.
Some states do not permit limitation or exclusion of implied warranties; therefore, the aforesaid limitation(s) or exclusion(s) may not apply to the purchaser.
EXCEPT AS PROVIDED ABOVE, IN NO EVENT WILL TRIPP LITE BE LIABLE FOR DIRECT, INDIRECT, SPECIAL, INCIDENTAL OR CONSEQUENTIAL DAMAGES ARISING OUT OF THE USE OF THIS PRODUCT, EVEN IF ADVISED OF THE POSSIBILITY OF SUCH DAMAGE. Specifically, TRIPP LITE is not liable for any costs, such as lost profits or revenue, loss of equipment, loss of use of equipment, loss of software, loss of data, costs of substitutes, claims by third parties, or otherwise.
PRODUCT REGISTRATION
Visit www.triplite.com/warranty today to register your new Tripp Lite product. You'll be automatically entered into a drawing for a chance to win a FREE Tripp Lite product!*
- No purchase necessary. Void where prohibited. Some restrictions apply. See website for details.
WEEE Compliance Information for Tripp Lite Customers and Recyclers (European Union)

Under the Waste Electrical and Electronic Equipment (WEEE) Directive and implementing regulations, when customers buy new electrical and electronic equipment from Tripp Lite they are entitled to:
- Send old equipment for recycling on a one-for-one, like-for-like basis (this varies depending on the country)
- Send the new equipment back for recycling when this ultimately becomes waste
Use of this equipment in life support applications where failure of this equipment can reasonably be expected to cause the failure of the life support equipment or to significantly affect its safety or effectiveness is not recommended.
Tripp Lite has a policy of continuous improvement. Specifications are subject to change without notice.


Manufacturing Excellence.
1111 W. 35th Street, Chicago, IL 60609 USA • www.triplite.com/support
1111 W. 35th Street, Chicago, IL 60609 USA • www.triplite.com/support

Manufacturing Excellence.
1111 W. 35th Street, Chicago, IL 60609 USA · www.triplite.com/support
KpaTKoe pyKOBOdCTBO
Повытыеля
Moden:
B093-004-2E4U, B093-008-2E4U,
B093-008-2E4U-M
English 1 · Espanol 6 · Francais 11


Manufacturing Excellence.
1111 W. 35th Street, Chicago, IL 60609 USA · www.triplite.com/support
OxpaHaeTcA ABTopcKIM npaBOM © 2017 Tripp Lite. Npepeeta3a3npeaaetca.
KoMnJIeKT noCTaBKn
KoHcOJIbHbI cepBep MoI. B093-004-2E4U, B093-008-2E4U mII B093-008-2E4U-M
BHeuHn6Iok nHTaHnco 8TencelbHbIMn nepexoHnKaMn NEMA 1-15P (CeBepHaAmepka), CEE 7/16 Schuko (Ebpona), BS1363 (BeNko6pTaHn) u AS2112 (AbcTpaHn) (BXoD: 100-240 B; 50/60 T; 0,4 A; BbIXoD: 12 B / 1,25 A)
- MoHTaxKhbIe npCnOc6JIeHnIa
- Pe3HOBbIe HOXKN
- Последоватьно розклочаимь перхоннк DB9-RJ45 с перекстон pa3вогков.
- Ppeo6pa3oBaTeIb IuΦpOBoTo BBOda-BblBOda (6LOK 3aJIMMOB)
KpaTkoepykoBODCTBONoJb30BaTeNa
Poprajok c60pkn
1 Pn HanoBHOy cTaHOBKe: npKpeNte pe3HOBbIe HOKKI C KJIeKoI o6paTHO nOBepxHocTbIO K OCHOBaHIO KOHcOJIbHOr cEpBepa.
Ipn MOHTaKe B CToiKy: npKpeNte KOMnEKT IJIa MOHTaKa B CToiKy C 60KOBoI CTOpHbI KOHcOJbHOcePBepa, yCTaHaBnBaEMoR O CToiKy.
2 IopcoeHNHTe npT KOHcNbHOrO cepBepa NET1 K OCHOBHO cETN.
3 PooeHnHte npT KOhCohBHO cepBepa NET2 K pe3epBHO (OOB) cTe ynpabHeHna.
PpmeHne. MoBb B093-008-2E4U-M TaKke HMeet npToI dIy IIOKnIOueHn KOMNaKTHO npEmOnpeDaTHnka (MOyIA SFP) K BOLOKHO-ONTNUeCKM pa3bemAM NET1 n NET2. EcIM MOyNb SFP BKIOUeH n yCTaHaBnBaET pa6OuN KaHn, To AKTNBpyTc npT SFP cOHDOBpeMeHH OdeAKTBAuNe npota RJ45 noB BuTyNo napy.
4ПиуctaHOBKe moJIeN B093-008-2E4U-M BCTaBBTe Ka6eJb RJ11 B nopT RJ11 Ha nepeIHeI naneI nIPOKIIIOHEnK BCTpoEHOMy MoEmy V.92.BCTaBBTe BTOPOI KOHeI Ka6eJrJ11 B pa6OtaIOue rHe3do IINoIKIIIOHEn CTAIOHOAPHoro TelefoHa, YTO IO3BOUNT MoEmy V.92 yCTpOuCTBa B093-008-2E4U-M BbIXOHTb TENEoHHyo CETb
5 IopKnIOUHTe npyrte yctpoiCTBa K nocJeOBATeNbHbIM nopTaM N nopTaM USB KOhCoNbHoro cepBepa.
6 Ipn HnUHn BHeuHnx DaTtukOB nOdkIouHTe nx K 6noky 3aKmOB n 3aKePnte BCE daTtukn yctpoiCTBa cnΦpOBOr BOBda-BbIBoJa.
7 BkIIOUHTe NCTOUYHK IITAHN IIOCTOHHORo ToKa (12 B) IN BkIIOHTe IITAHNE KOHCOJIbHOrO cepBepa.
BBeDnTe https://192.168.0.1/ nIuN https://[DHCP-supplied address]/ nHaKmTe Return (Ha3a).
PpmeaHne. B 3OM cIyuee 6yET npCytCTBOBaT bOwN6ka "untrusted connection" ("HeHaJExKHOe coeHNHe") camoNoDncaHoro SSL-cePTuΦnKaTa KOHcOJIbHoro cepBepa.
4 HaxmnteMbIbIbHaOw6kyJn3aRpy3KnpeINCTpaunHOHOnCTpaHnCb KOHcOJIbHOr cepBepa.
5 BBeDnTe 3aHaHbIe No yMonuHaHIO IIMr NpIb3ObaTeJI r NapoJIb IINB XOJa B CnCTeMy.
mnaonb30BaTeTn: root
Papoi: default
HaKMTe Submit (OTnpaBntb) nIy Return (Ha3aI). 3arpykaetcstapTOBa cHTpAHua INHTpeEca KOHcON.
PpmeaHne. Ceanpa6oToI c HnTepeFcOM KOHcOnI 3aBep7aETcNo nCTeueHm 20 MMHT OTCYCTBna AKTNBHOCTn nonb3OBaTeNa. Ondako Tekyuaa CTpaHnca ocTaetc3aRpyxehno, n npnaHaxatn Ha IIO6oN eMeNT nOlb3OBaTeNbCKoro INTEpeFca 3arpyxaeTc perncTpaunOHnA CTpaHnca. Pn BO3BpaUeHN B CnCTeMy NOBTOHO 3arpyxaeTc 3apaaNBaemr CTpaHnca.
B pa3BepbIbAIOxXcR no yMonuHIO MeHIO Ha JeBOI CTOpOHe INTEppeCa npECTaBJeHbI ONmN HAcTpoKn I ynpabLeHn. MeHIO BepxHero yPobHr: Manage (UnpabLeHne), Status (Ctaryc), Serial & Network (PiocneDobatbHoe nokKnIOueHne i cetb), Alerts & Logging (PpeynpdeHTeNbIe CunHaJI bI pereCTpaun) n System (Cnstema).
Ha octabwec yactn ctpaHntbI nepeunncIOTc HacTpoeHbI 3aauH, Heo6xOIMbI dIy IpeBpaueHn KaBbIOJIHeHbE B COOTBETCTBm C3aBOckIMn HAcTpoKaMn KOHcONbHorO cepBepa. IpoceDpybI, OINCAHHbE B CTeNyUoIeM pa3dene, fKcnpuyt HaaylbHyO HAcTPOy Ky C NcONb30BaHNem MeHIO, a He cNcOK 3aau.
3aДанг He NaDEJXHOrO napOJIc BbICOKoI CTepeHbIO XaOTnUHOCHTI dJI npUBInJeRIpOBaHHORO PONb3OBaTeJIa
1 Haxmte Serial & Network > Users & Groups (Pocn. noKnoeHne n cetb > Pohb3oBaTeHn rpynnbl).
2 Haxmte Edit (PedaKtpoBaTb) nra Root User (PnBnIe npoBaHHb noJIb3OaTeJb).
3 BBeIe HaJeKbI npoB C BbICOKO CTeNeHbIO xAOTuHOCHT B NoIe npoB.
4 BBeIe 3ToT napoB nobTopHO B none Confirm (NoTBePKeJeHne).
5 HaxMnte Apply (PpMmHeNTb).
YCTaHOBJIeHHe cNoCo6a HaCTpoiKu cETn dIy nopTa NET1
1 Haxmte System > IP (CncTeMa > IP-aPec).
2 HaxmTe Network Interface (CetBoH INTEpfoec), cEn 3To He caMaJ nepeDnA BklaJaKa.
3 B MeHIO Configuration Method (Cnocob hacrpoiKn) noCTaBbTe KhoNky-apeKJIouaTeIb pAOM c onuuei DHCP nn Static (Ctunueckn).
4 B cnuyae bbybopa onuhi Static (Ctataueckn) BBeNTe 3auehen IA Address (IP-adpec) n Subnet Mask (Maoka nooctn) dny INTEpfeca NET1.
YCTaHOBJIeHHe cNoCo6a HacTpoiKn CetI nIy npTa NET2
IopT NET2 no ymoJuaHnIO yctAHOBnEH KAK HeaKTHBbI. JIe erO aKTbauin:
1 Haxmte System > IP (CucTeMa > IP-aPec).
2 Haxmte Ha BknaKy Management LAN Interface (HnTepc uynpablanuoe JBC), TTo6bI nepemecntb ee ha nepBOe MeCTO.
3 CHIMITE ranoKy B none Deactivate this network interface (DeakmbpoBaTb 3OT cTeBOHHTepcEic) dny OTMeHbBb6opa daHHoon onu nn akTBAu nn nopTa NET2.
4 B MeHIO Configuration Method (Cnocob HacTpoiKn) noCTaBbTe KhoNky-NepeKJIouaTeIb pAOM c onuueiDHCP nn Static (Ctauueckn).
5 B cnuyae bblopoa onuui Static (Ctataueckn) BBeinte 3naueHn IP Address (IP-adpec) n Subnet Mask (MaKa npocetn) dny nHTepfneca NET2.
IHaHacTpoiKPe3epBHOcTeNoB(0OB)(pe3epBHAOoB)ycTaHOBteyKa3aHHbIe 3HaueHnA DnB CBOE ynpabJIIOUe CEtN.
Ipy-tpaH3nTa yCTaHOBtne ux TaKIM 06pa3OM, YTO6bl OHn COOTBeTCTBOBaJIH HENCIOJIb3yeMOMy BHYTpEHHemy dana3OHy IP-aDpecoB.
PnmeHne. MexcTeBoJ 3KpaH KOHcBHOrO cepBepo onpeJeT, KaKne npToKoJIbI cepBncbl Moryt noLyuHaT DoCTyn K nopTaM u yctpoCTBaM. IpTOKOJIbHTPS n SSH no yMOUaHHIO pa3peWeHb IIN KOHcBHOrO cepBepa. TOb6bl N3MeHNTb HAcTpoiKn DocTyna IIN KOHcBHOrO cepBepa I NOKIIuOeHHbIX NoCleDObaTeBbIX NpOTOB, HaxMMte System > Services (CicTeMa > CepBncbl). 3aTEM HaxMMte Ha BknaKy Service Access (DocTyN K cepBncAM) IMBecHTe Heo6xOumble IN3MeHeHNA.
HactpoJa ynpaBnIeMbIX yCTpoIcTB
1 Haxmte Serial & Network > Serial Port (Pocn. noKIOUeHne n cetb > PocneObaTeIbHbI npT).
Дин actpoKn npota:
2 Haxmnte Edit (PeaKtnpoBaTb).
3 3aJaTe Common Settings for Port x (06uine hactpokn Ipa npTa x) Ipa cornaobahma yctpoCTBa, nodklueHHoro K nocJeObaTeIbHomy npTy x.
4ДЯ obecneueHn B03MOxHocTn ydaJIeHHoro DoCTyNa K yCTpoiCTBy npOBepbTe KhONKy-NepeKIOuataIb Console Server Mode (Pexm KOhCoNbHoro cepBepa) B MeHIO Console Server Settings (HaCtpoK KoHcNBo Horo cepBepa) n OTMeTbTe ranoUckamn POnJ, COOTBeTCTByUOUIne pa3peSeHHbIM IpOToKoJAM (HaNPmEp, Telnet, SSH u Web Terminal).
5 HaxMMTe Apply (PpIMeHntb).
PnmeaHne. HacpoTne npabina nonb3oBateNBCKOIO DOCTyNA IIN NOKIOUeHMA TAKNX NOPOB M MeHIO Serial & Network >Users & Groups (NoC. noKnIOUeHne n cetb > Nb3oBATEEN IN rpynnbl). CepBep AAA MoXET HAcTpaNBAtbN x ydaenHNO. Bonee noDpO6HyIO IHOpMaIcM. B PykoBOdCTBe NoB3oBaTeA.
Дрг nurse peximblnФункциN
Iopnp6hee o paacunpeHHbIX fynKcuaX, BkIIOUaHACTPOKY, ynpabHeHne nITaHnEM PDU u N5Pi, KOHTpObl ycNOBm cpebl, peNCTpaUNu IN BXoD B CNTeMy u ABToMaTHueCKNe npdUnpeINTeNbHbe CNHaJIb, CM. B PykoBoDCTBe IOnb30BaTeJIa.

Manufacturing Excellence.
1111 W. 35th Street, Chicago, IL 60609 USA • www.triplite.com/support