CERP1000GB - Food Processor CONTINENTAL EDISON - Free user manual and instructions
Find the device manual for free CERP1000GB CONTINENTAL EDISON in PDF.
| Brand | Continental Edison |
| Model | CERP1000GB |
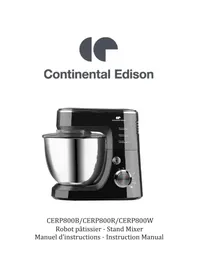
| Product type | Multifunction stand mixer |
| Power | 1000 W |
| Voltage / Frequency | 220-240 V~ 50-60 Hz |
| Bowl capacity | 5 liters |
| Speeds | 6 speeds (rotary knob) |
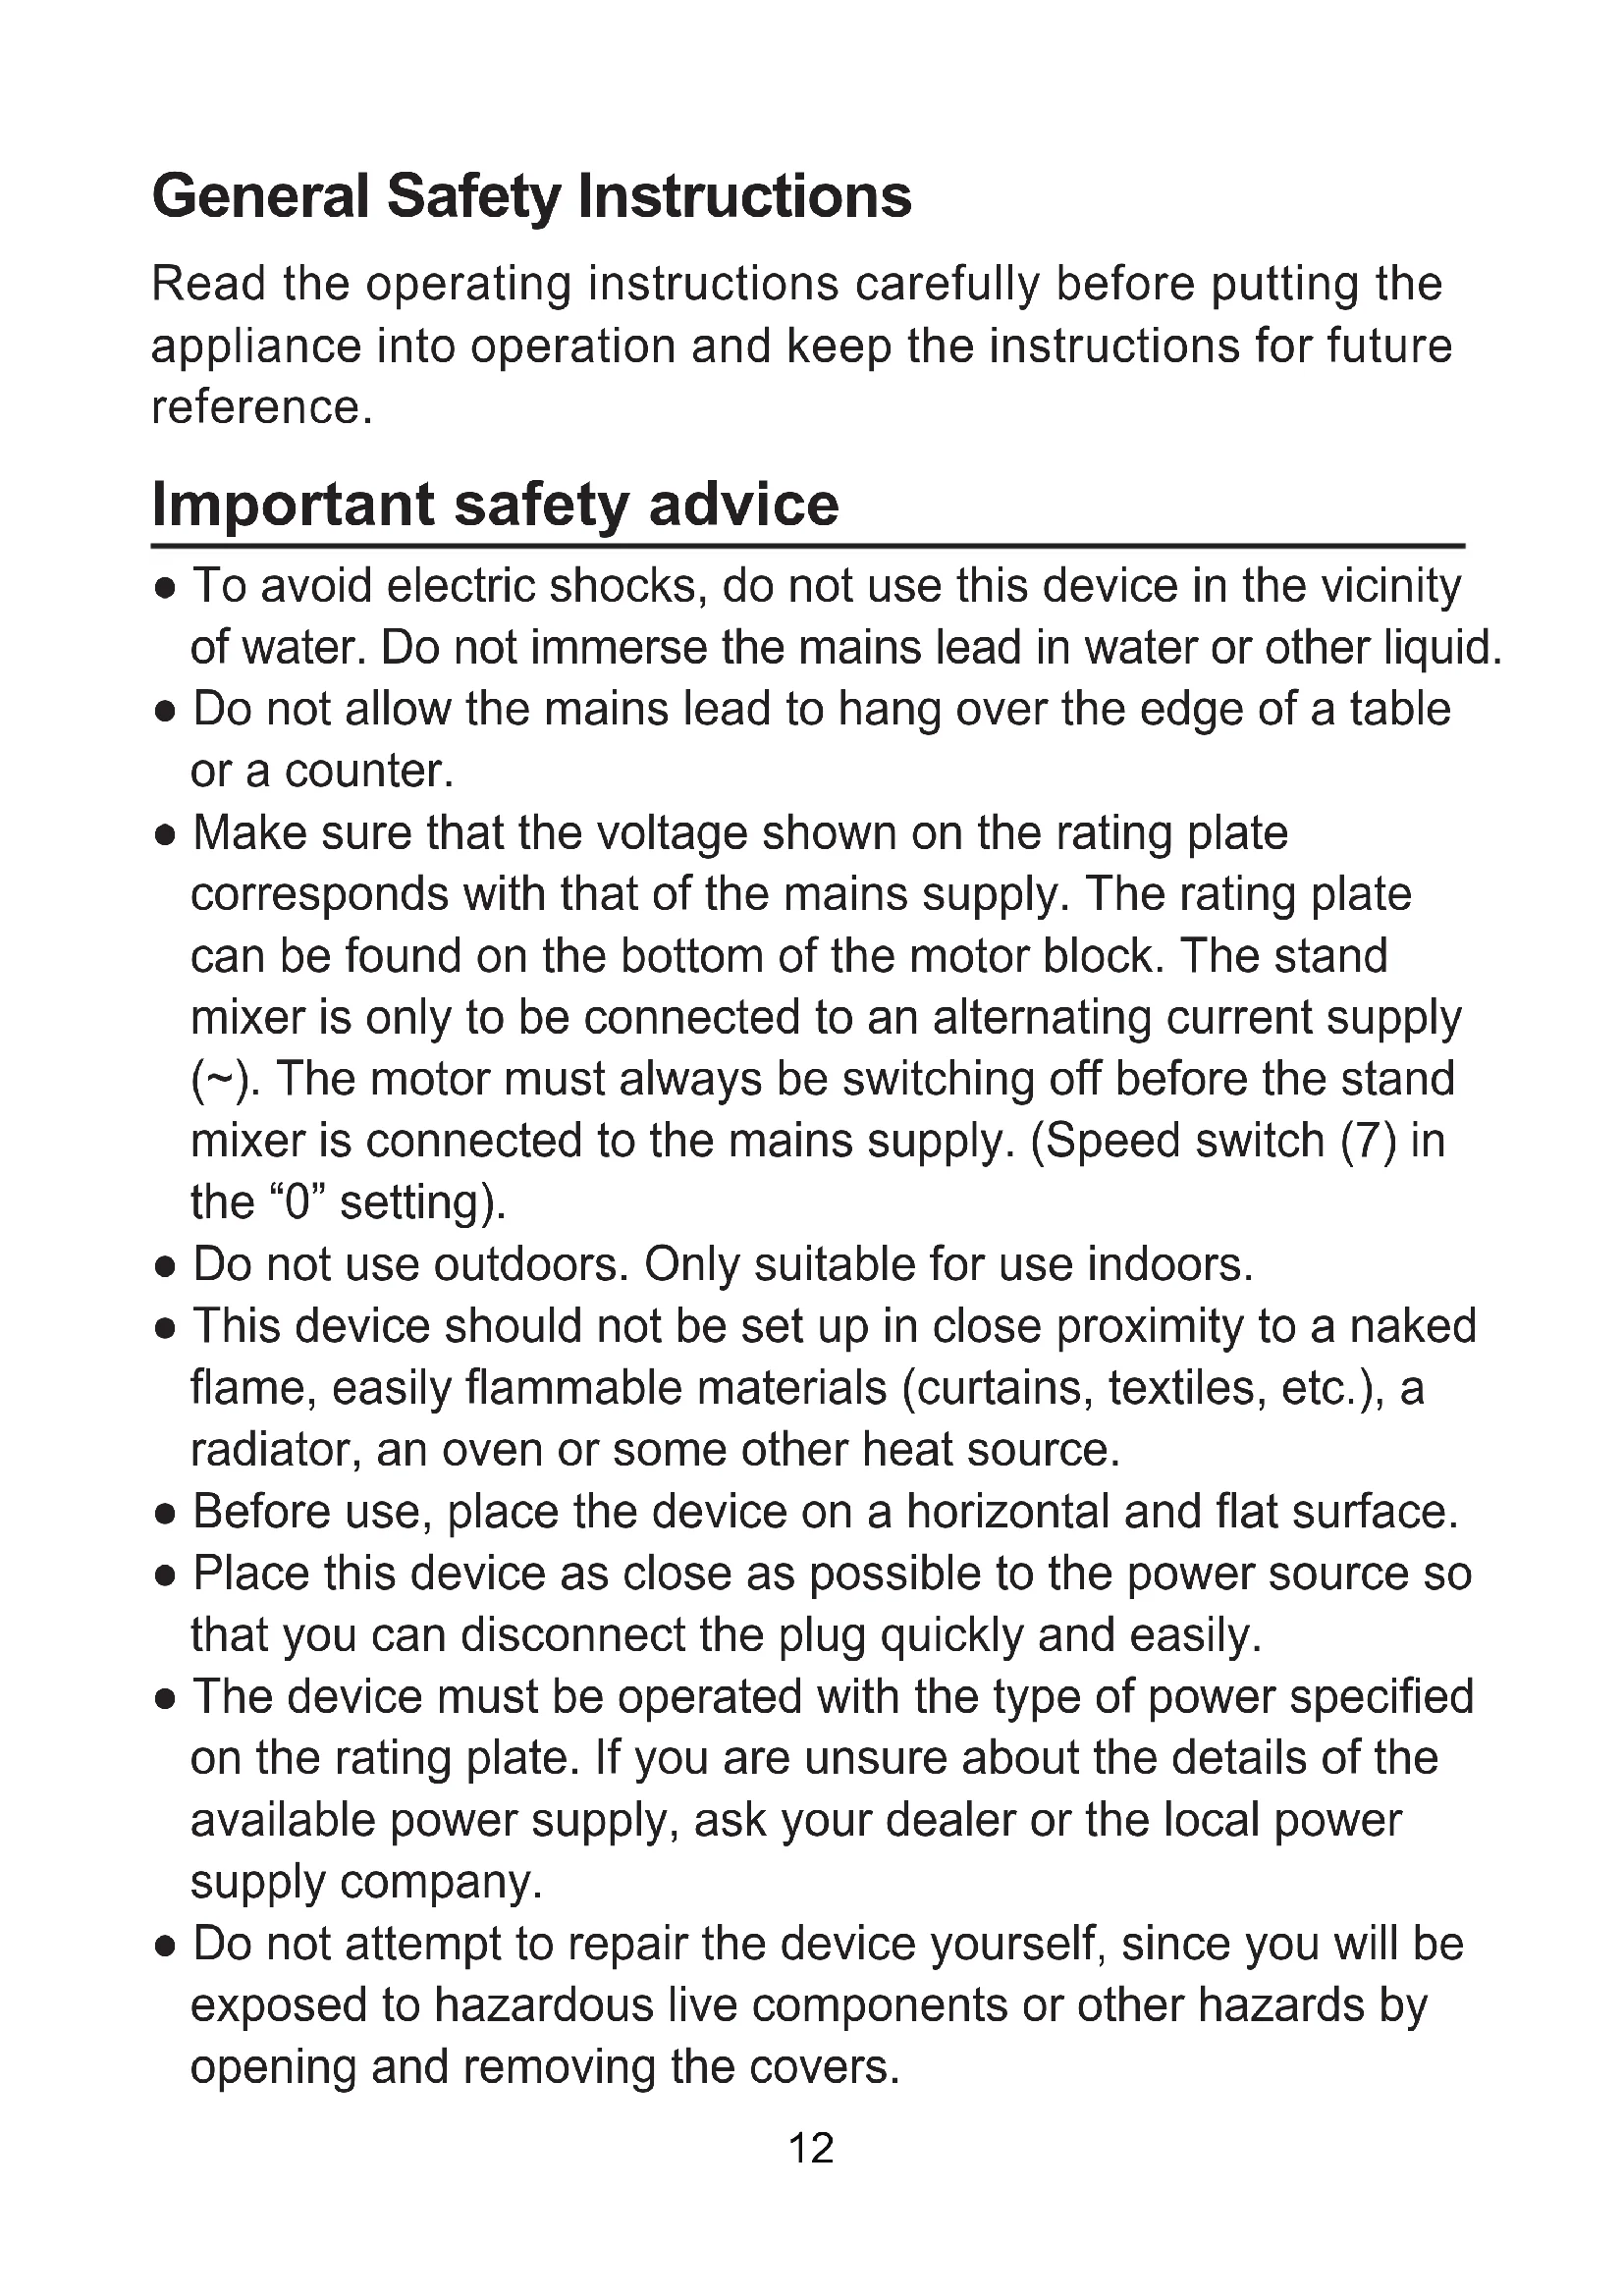
| Main functions | Knead, mix, whip, mince meat, make sausages, make pasta |
| Included accessories | Dough hook, flat beater, whisk, meat grinder (with auger, blade, 3 grinding discs, 3 pasta discs, sausage adapter, funnel), filling tray, bowl |
| Accessory material | Stainless steel (blades, discs), food-safe plastic (bowl, tray) |
| Safety | Arm lock, splash protection, protective cover, automatic shutdown in case of overload? |
| Cleaning | Whisk and bowl dishwasher safe; other accessories hand wash with hot water and dish soap |
| Body cleaning | Damp cloth and mild detergent, do not immerse |
| Non-slip feet | Yes |
| Repairability | Repairs by qualified workshop only |
| Maximum operating time (grinder) | 15 minutes |
| Maximum operating time (whisk/hook) | 5 minutes |
| Maximum flour quantity | 1000 g |
| Maximum egg quantity | 24 eggs |
| Maximum liquid cream quantity | 250 ml |
| Country of origin | China (likely, not specified) |
| Warranty | Not specified, generally 2 years |
Frequently Asked Questions - CERP1000GB CONTINENTAL EDISON
User questions about CERP1000GB CONTINENTAL EDISON
0 question about this device. Answer the ones you know or ask your own.
Ask a new question about this device
Download the instructions for your Food Processor in PDF format for free! Find your manual CERP1000GB - CONTINENTAL EDISON and take your electronic device back in hand. On this page are published all the documents necessary for the use of your device. CERP1000GB by CONTINENTAL EDISON.
USER MANUAL CERP1000GB CONTINENTAL EDISON
natural_image
Abstract geometric shapes resembling partial crescent and angular segments (no text or symbols)Continental Edison
natural_image
Black Continental Edison electric mixer with handle and control panel (no visible text or symbols on device body)CERP1000GB
natural_image
Close-up of a robotic hand mixer with a black handle and red circular arrow indicator (no text or symbols visible)natural_image
Symbol of a trash bin crossed with a diagonal line, representing waste or discharge (no text or labels)General Safety Instructions
Read the operating instructions carefully before putting the appliance into operation and keep the instructions for future reference.
Important safety advice
- To avoid electric shocks, do not use this device in the vicinity of water. Do not immerse the mains lead in water or other liquid.
- Do not allow the mains lead to hang over the edge of a table or a counter.
- Make sure that the voltage shown on the rating plate corresponds with that of the mains supply. The rating plate can be found on the bottom of the motor block. The stand mixer is only to be connected to an alternating current supply (\~). The motor must always be switching off before the stand mixer is connected to the mains supply. (Speed switch (7) in the “0” setting).
- Do not use outdoors. Only suitable for use indoors.
- This device should not be set up in close proximity to a naked flame, easily flammable materials (curtains, textiles, etc.), a radiator, an oven or some other heat source.
- Before use, place the device on a horizontal and flat surface.
- Place this device as close as possible to the power source so that you can disconnect the plug quickly and easily.
- The device must be operated with the type of power specified on the rating plate. If you are unsure about the details of the available power supply, ask your dealer or the local power supply company.
-
Do not attempt to repair the device yourself, since you will be exposed to hazardous live components or other hazards by opening and removing the covers.
-
Repairs should only be carried out in a qualified workshop.
- This is not a toy! Keep away from children. The device should be used and stored out of the reach of children.
- Careful supervision is required when the device is used in the vicinity of children.
- The device should only be used for its intended purpose.
- Never operate empty and without unattended.
- During use, do not touch moving parts with your fingers.
- No liability is accepted for damage due to improper use or the failure to observe our operating instructions / safety notes.
- Always disconnect the appliance from the supply if it is left unattended and before assembling or cleaning.
- If the supply cord is damaged, it must be replaced by the manufacturer or its service agent or a similarly qualified person in order to avoid a hazard.
- Switch off the appliance before changing accessories or approaching parts which move in use.
- Do not use the attachment is not supplied by the manufacturer.
- Care shall be taken when handling the sharp cutting blades, emptying the bowl and during cleaning.
- This appliance shall not be used by children. Keep the appliance and its cord out of reach of children.
- Appliances can be used by persons with reduced physical, sensory or mental capabilities or lack of experience and knowledge if they have been given supervision or instruction concerning use of the appliance in a safe way and if they understand the hazards involved.
- Children shall not play with the appliance.
- Switch off the appliance and disconnect from supply before changing accessories or approaching parts that move in use.
- About how to clean surfaces in contact with food, please refer to the section “CLEANING”.
- Instructions for operating times and speed setting for each accessory are described in the following pages.
Description:
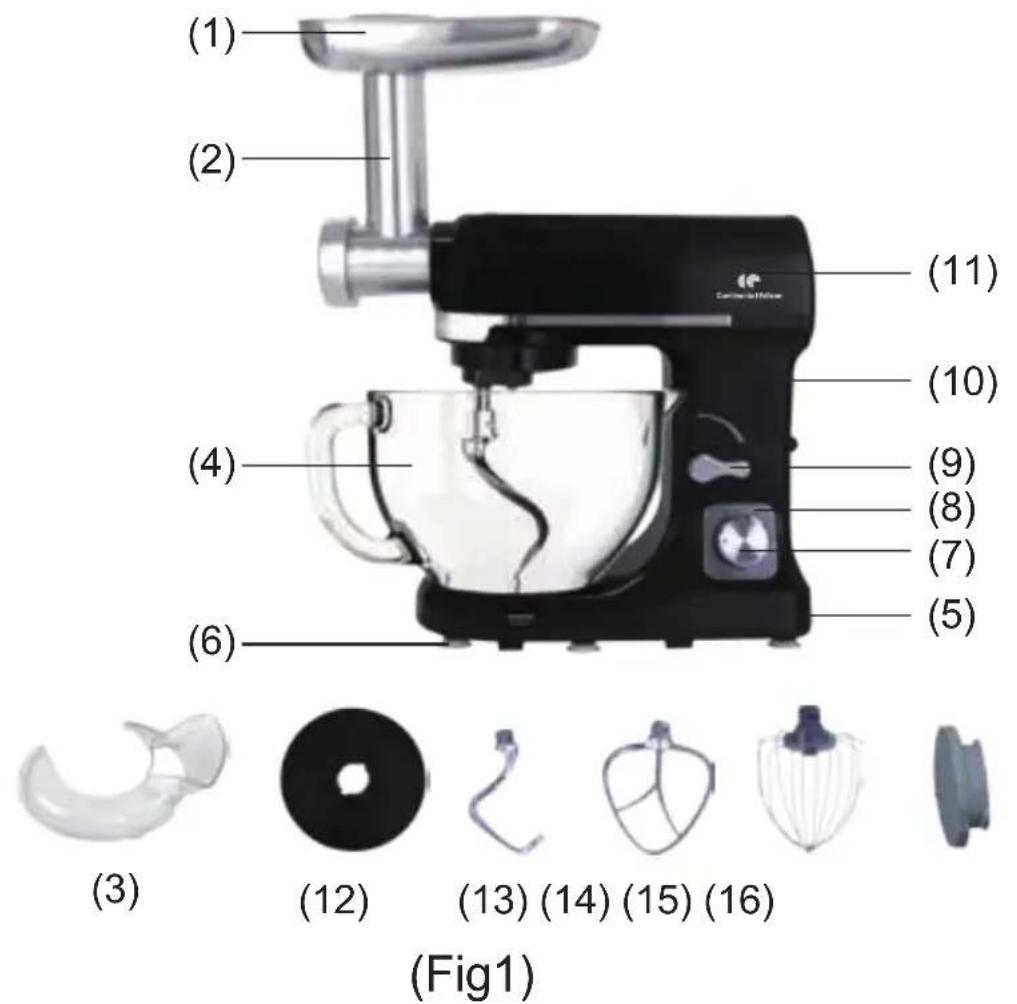
Configuration
(1) Filler tray
(2) Mincer
(3) Splash shield
(4) Mixing bowl
(5) Lower enclosure
(6) Anti-slip feet
(7) Speed switch
(8) Speed plate
(9) Rise knob
(10)Up enclosure
(11)Top cover
(12)Dusty cover
(13) Dough blade
(14) Mixing blade
(15) Egg whisk
(16) Front cover
text_image
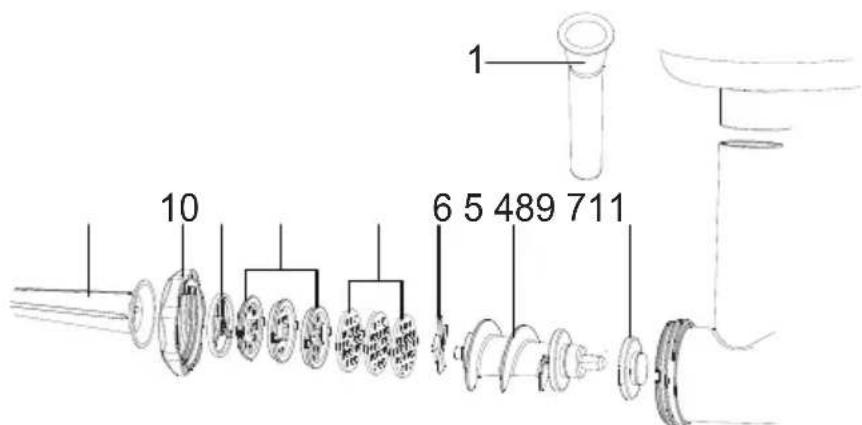
1 6 5 489 711 10(Fig.2)
MINCER
1 Food presser
2 Filler tray
3 Filling tube
4 Silicone ring
5 Worm shaft
6 Cross blade
7 3 grinding discs
8 3 pasta discs
9 Sausage adapter
10 Lock ring
11 Sausage horn
Before first use
- All parts of the multifunction stand mixer is to be thoroughly cleaned before being used for the first time. (See section: Cleaning).
- Take out the required length of cable from the base and connect the device to the mains supply.
Install Instructions
-
Assembly and operation of meat grinder.
-
Before placing the worm shaft, make sure the power cord is disconnected.
-
Remove the safety front cover of meat grinder (Fig 1, No. 16) clockwise.
-
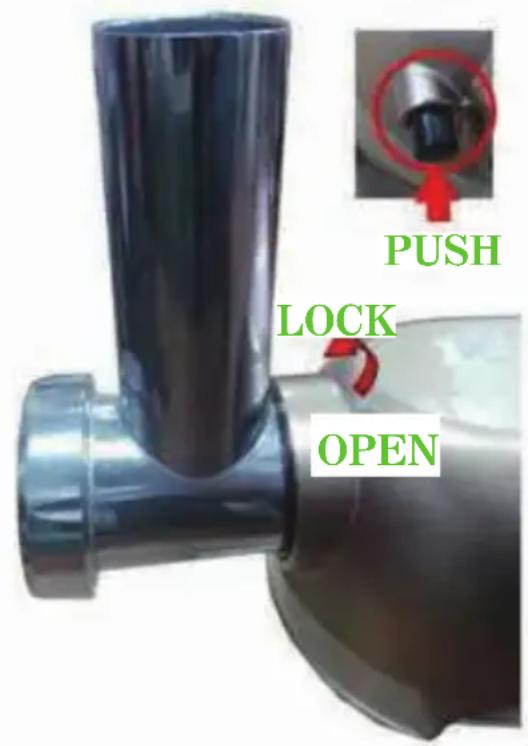
Put the filling tube (Fig. 2, No. 3) upwards into the housing hole and lock it clockwise.
- Place the filler tray (Fig.2, No.1) on the filling tube, which is used to locate the tray above the motor block.
- Press the rise knob (Fig. 1, No.9) so as to move the swiveling arm downwards.
(Fig.3)
text_image
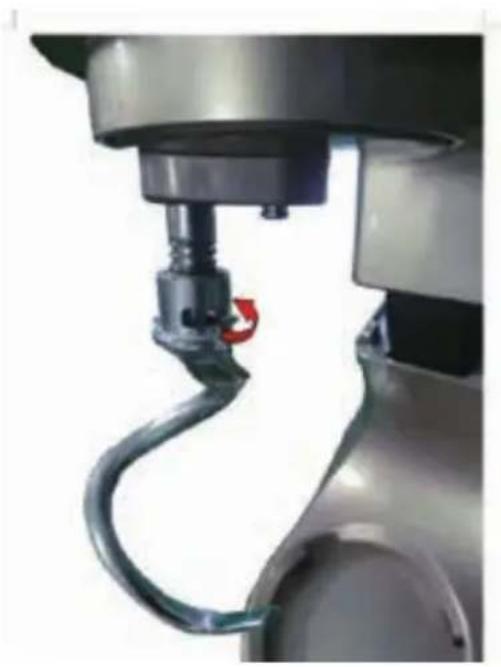
PUSH LOCK OPEN2. Assembly of dough blade, mixing blade or egg whisk
- Before attaching the dough blade, mixing blade and egg whisk, make sure the safety cover of grinder is placed on and the power cord is disconnected.
- Lift the rise knob up (Fig. 1, No.9) so as to move the swiveling arm upwards.
- Attach the dusty cover (Fig. 1, No.12).
- Insert the dough blade, mixing blade and egg whisk on the driving shaft and lock clockwise to the limit stop.
natural_image
Close-up of a robotic hand mixer with a black handle and red scroll wheel (no visible text or symbols)How to use the attachment:
- First mix up the food as what the manufacturer indicates, then rise knob (Fig.1, No.9) in anti-clockwise direction to open the housing head.
- Assemble the mixing bowl (Fig.1, No.4) filled with ingredients, then twist it on in clockwise direction.
- Insert the dough blade (Fig.1, No.13) or the egg whisk (Fig.1, No.15) or the mixing blade (Fig.1, No.14) in the blade connector then twist it on in clockwise direction.
- Press the top cover (Fig.1, No.11) down by turning the rise knob (Fig.1, No.9) in clockwise direction.
To mix or knead dough: Use dough hook attachment
- Suggestion flour and water at a ratio of 5 : 3.
- First speed 1 to mix 10 seconds, then speed 2 to mix 10 seconds, afterwards speed 3 for about max 3 minutes.
- When filling the mixing bowl, please ensure that the maximum quantity is not exceeded.
- Maximum quantity of flour is 1000 g.
- The dough blade or mixing beater should be used about max 2.5 min.
Whipping egg whites or cream: Use egg whisk attachment
- Switch on speed 4 to speed 6, whip the egg whites without stopping for max 5 minutes, according to the size of the eggs, until stiff.
- Maximum quantity is 24 eggs at speed 6 for max 5 minutes.
- For whipped cream, whip 250 ml fresh cream at speed 4 to 6 for about max 5 minutes.
- When filling the mixing bowl with fresh milk, cream or other ingredients, please ensure that the maximum quality is not exceeded.
- The egg whisk should be used.
Mixing shakes, cocktails or other liquids: Use mixing beater attachment
- Mix the ingredients according to the available recipe, from speed 1 to 6 for max 5 minutes.
- Do not exceed the maximum quantity for the agitator bowl.
- The mixing beater should be used.
Mincing meat: Use meat grinder attachment
-
Cut all foods into pieces (Sinewless, boneless and fatless beef or pork is recommended, approximately size :20 mm x 20 mm x 60mm) so that they fit easily into the hopper opening (Fig.2, No.2).
-
Plug the unit on and the speed switch to Speed 6 for MAX 15 minutes.
-
Feed foods into the food tray. Use for it with the food presser
-
After use, switch the unit off and unplug it from the power supply.
Make sausage:
- Make the meat into piece (No larger than the mincing tube socket), so that they can easily into the hopper opening (Fig.2, No.2).
-
Put the filling tube(Fig.2, No.3) into the socked and locked, put the worm shaft (Fig.2, No.4 & 5) into filling tube (Fig.2, No.3), assembly the cross blade (Fig.2, No.6) and Sausage adapter (Fig.2, No.9), then assembly sausage horn (Fig.2, No.11) and spin the lock ring (Fig.2, No.10) to the mincing tube. Place the filling tray (Fig.2, No.2) on the filling tube. Plug the device on and operated it.
-
Use speed 5-6 for MAX 15 minutes.
Make Pasta: Use meat grinder attachment
- Change meat blade accessories (Fig.2, No.7) into noodle accessories (Fig.2, No.8). other process completely same as mincing meat.
- Please note that the dough needs to be made into small pieces (about 5cm in length) so that it fit easily into the hopper opening.
- Use speed 5-6 for MAX 15 minutes.
Cleaning
- Before cleaning, please ensure that the Switch knob is at the "0" position and that the plug has been disconnected from the socket.
- After use, allow the device to cool down before you start to clean it.
-
To clean the exterior of the device, use a moist cloth and a mild detergent.
-
When cleaning the interior and exterior with Filling Tube (Fig.2 No.3), Dough blade(Fig.1, No.13), Mixing blade (Fig.1, No.14) do not use any abrasive detergents or alcohol.
- To clean the device, never submerge it in water.
- The dough blade and mixing beater are not dishwasher safe. The accessories can be cleaned in warm water and washing-up liquid.
- The egg whisk and mixing bowl are dishwasher safe. They can also be cleaned with warm water and washing-up liquid. Do not use any abrasive detergents.
Standard Accessories
| Main body | 1 set |
| Mixing bowl | 1 pc |
| Mixing blade | 1 set |
| Dough blade | 1 set |
| Egg whisk | 1 set |
| Meat grinder accessories | 1 set |
| Instruction manual | 1 pc |
Technical information
| Item reference: CERP1000GB |
| Model: MK-37G |
| Voltage/frequency: 220-240 V~ 50-60Hz |
| Power: 1000W |
| Capacity: 5 liters |

natural_image
Symbol of a trash bin crossed with a diagonal line, representing waste or discharge (no text or labels)This marking indicates that this product should not be disposed with other household wastes throughout the EU. To prevent possible harm to the environment or human health from uncontrolled waste disposal, recycle it responsibly to promote the sustainable reuse of material resources. To return your used device, please use the return and collection systems or contact the retailer where the product was purchased. They can take this product for environmental safe recycling
Continental Edison
120-126 Quai de Bacalan
CS 11584
33000 Bordeaux
France
IMPORT BY:
A.M.C.
123, QUAI JULES GUESDE
94400 VITRY SUR SEINE
France

natural_image
Abstract geometric shapes with no text or symbolsContinental Edison
www.continentaledison.fr