
AutoFit - Keyboard Zagg - Free user manual and instructions
Find the device manual for free AutoFit Zagg in PDF.
| Product Type | Bluetooth Keyboard with Spring Cover for Tablet |
| Brand | Zagg |
| Model | AutoFit |
| Dimensions | Fits tablets from 7 to 10 inches ("7", "8", "10" versions) |
| Weight | Approximately 300-400 g |
| Power Supply | Rechargeable lithium-polymer battery, battery life up to 1 year (normal use ~1 h/day), charges via micro-USB (2-4 h) |
| Compatible Operating Systems | Android and Windows |
| Connectivity | Bluetooth |
| Main Functions | Adjustable spring cover, built-in kickstand ("7" version), special function keys (back, home, lock, search, internet, calendar, email, music control, volume, etc.), easy switching between Android and Windows |
| Care and Cleaning | Clean with a soft dry cloth |
| Safety | Compliant with FCC Rules, Section 15 |
| Warranty | One-year manufacturer warranty (activation required by registration and receipt retention) |
Frequently Asked Questions - AutoFit Zagg
User questions about AutoFit Zagg
0 question about this device. Answer the ones you know or ask your own.
Ask a new question about this device
Download the instructions for your Keyboard in PDF format for free! Find your manual AutoFit - Zagg and take your electronic device back in hand. On this page are published all the documents necessary for the use of your device. AutoFit by Zagg.
USER MANUAL AutoFit Zagg
Keyboard Instructions
\*WARRANTY REGISTRATION
Your ZAGG® Auto-Fit keyboard comes with a one-year manufacturer's warranty. In order to activate the warranty, you must register your Auto-Fit as well as keep your purchase receipt. If you purchased your ZAGG Auto-Fit from ZAGG.com, ZAGG® has already registered it and has a copy of your proof of purchase.
NEED MORE HELP? PLEASE SEE OUR FAQ SECTION AT: www.ZAGG.com/faq
INTRODUCTION
Your ZAGG Auto-Fit Bluetooth® keyboard features a unique spring-loaded cover that allows it to work with small-form tablets that use Android™ and Windows® operating systems. Simply press your tablet into the cover and the springs automatically adjust to secure it. Now you can use one convenient Bluetooth keyboard for all your tablet needs.
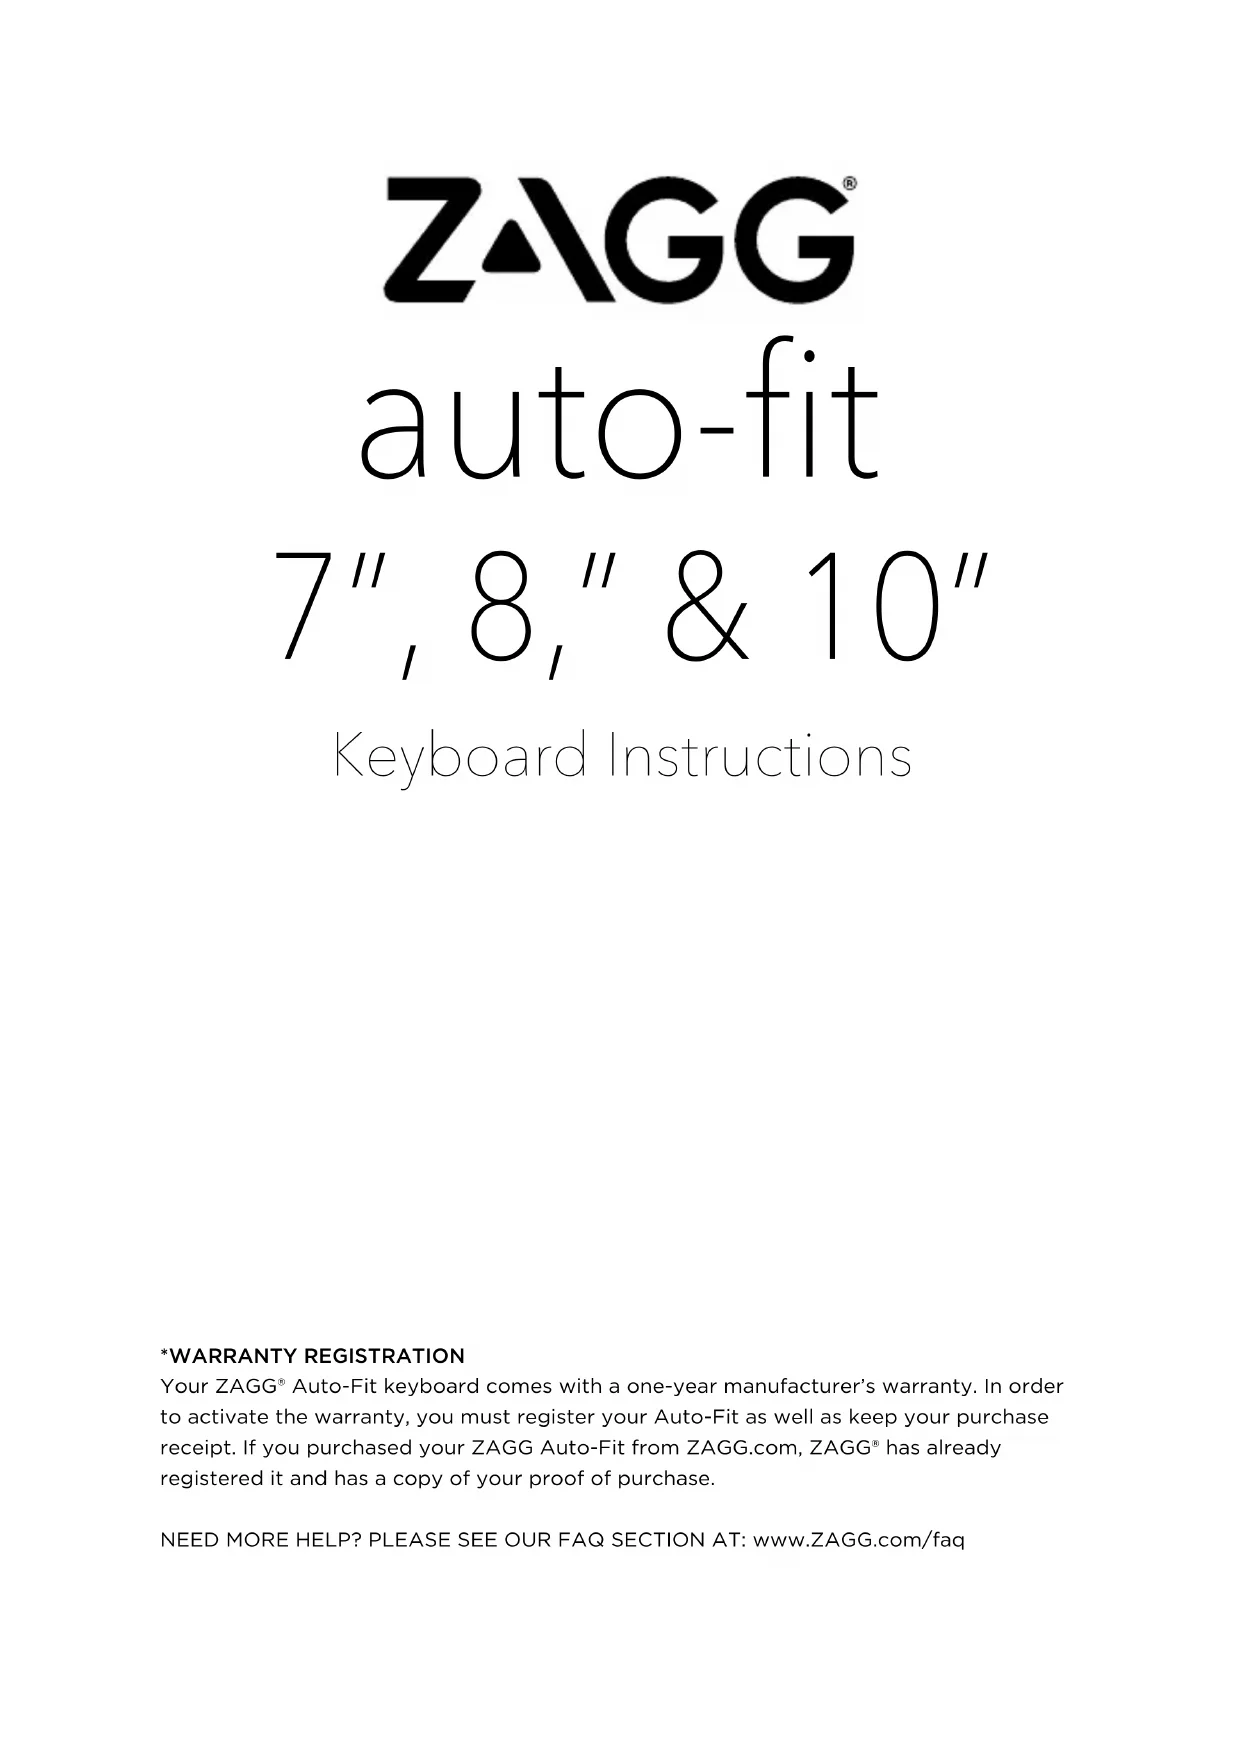
INSERTING/REMOVING YOUR TABLET
To insert your tablet into the Auto-Fit, start with the keyboard facing you.
Then, with your tablet in landscape mode, press it into the bottom of the spring-loaded cover. Lay your tablet against the back of the cover and let the springs push it to the top, securing the tablet in place.
- For larger tablets, you may have to press lightly to get your tablet to snap into place.
When your tablet is secure, you can close the Auto-Fit to protect it and your keyboard.
To easily remove your tablet, simply press it down into the springs on the bottom of the cover until you have enough space to lift it out of the cover.
- For larger tablets, press down on the tablet as described but then use your thumbs on the corners to separate your tablet from the Auto-Fit.

natural_image
Line drawing of a laptop keyboard with open lid (no text or symbols)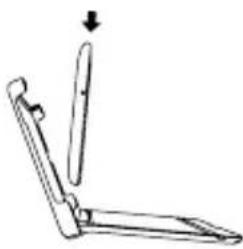
natural_image
Simple line drawing of a folding tool with an arrow indicating direction (no text or symbols)
natural_image
Blank rectangular frame with rounded corners (no text or symbols)
natural_image
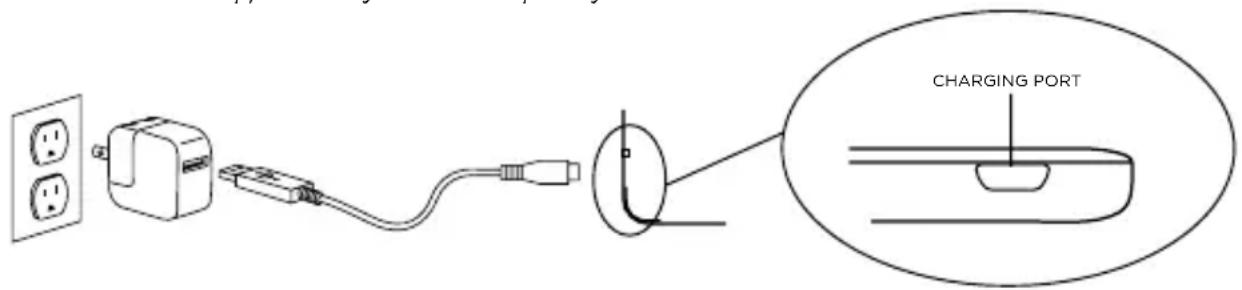
Line drawing of a laptop with a keyboard and an open top panel, no text or symbols presentUSING THE KICKSTAND: APPLIES TO 7" VERSION ONLY
The Auto-Fit features a convenient kickstand for added security. To use the kickstand, simply lift it out from the back of the Auto-Fit's cover.
When you're done using the kickstand, press it back into the Auto-Fit. A magnet will secure the kickstand in place until you are ready to use it again.

natural_image
Line drawing of a simple stand with a curved top and base, no text or symbols presentPOWERING ON AND OFF
To turn your Auto-Fit on, move the POWER switch to the ON position. A blue LED will illuminate briefly while the keyboard powers on. To turn your Auto-Fit off, slide the POWER switch to the OFF position.

text_image
On OffThe ZAGG Auto-Fit works with both Android and Windows operating systems and can easily alternate between the two. You must select the correct operating system before your Auto-Fit will pair with your device. To choose the appropriate operating system, follow the instructions below. The default keyboard operating system is Android, so if you have an Android tablet proceed to “Pairing Your ZAGG Auto-Fit”.
FOR WINDOWS
- Make sure your Auto-Fit keyboard is turned on.
- Press the PAIR button (a blue LED on the right of the keyboard will begin flashing).
- While the blue LED is flashing, press fn + W.
- Continue the pairing process as described in the "Pairing Your ZAGG Auto-Fit" section.
FOR ANDROID
- Make sure your Auto-Fit keyboard is turned on.
- Press the PAIR button (a blue LED on the right of the keyboard will begin flashing).
- While the blue LED is flashing, press fn + A.
- Continue the pairing process as described in the “Pairing Your ZAGG Auto-Fit” section.
PAIRING YOUR ZAGG Auto-Fit
With your operating system selected, you are now ready to pair your Auto-Fit keyboard to your device. Pairing your Auto-Fit with your tablet is easy; it should only need to be paired once, using the following directions. If the connection between your tablet and the Auto-Fit is ever lost, simply repeat these steps.
FOR ANDROID
-
On your device select: SETTINGS > BLUETOOTH > ON > SCAN.
-
Press the PAIR button on your Auto-Fit keyboard. A blue LED in the right of the keyboard will flash until your Auto-Fit and tablet are paired.
-
Your tablet will display the keyboard's serial number as an available device. Select this option to complete pairing. Once your Auto-Fit is paired you will see "ZAGG Auto-Fit" in your list of devices.
natural_image
Simple line drawing of a boat hull with two circular ovals and an arrow pointing to the hull (no text or symbols)FOR WINDOWS
- Access your device's charms.
- Select the Settings charm.
- In Settings, select: CHANGE PC SETTINGS > PC AND DEVICES > BLUETOOTH > ON. Your tablet will automatically begin searching for available devices
- Press the PAIR button on your Auto-Fit keyboard. A blue LED on the right of the keyboard will flash until your Auto-Fit and tablet are paired.
- When "ZAGG Auto-Fit" is displayed on your tablet as an available device, select it and touch PAIR.
Your ZAGG Auto-Fit can quickly and easily change between Android and Windows operating systems. To change your selected operating system, follow the directions below.
- Have your device forget the Auto-Fit keyboard by selecting: SETTINGS > BLUETOOTH. Locate “ZAGG Auto-Fit” in your list of devices and touch the gear icon to the right of it. Choose to have your device forget the keyboard.
- Press the PAIR button on your Auto-Fit keyboard. A blue LED on the right side of the keyboard will begin flashing.
- If your keyboard was previously paired to a Windows device, Press fn + A to switch to Android. If your device was previously paired to an Android device, press fn + W to switch to Windows.
- Complete the normal pairing process as described in Pairing Your ZAGG Auto-Fit.
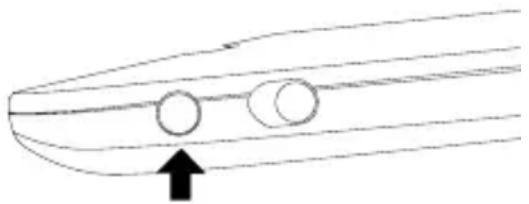
CHARGING
Your Auto-Fit features a powerful lithium polymer battery that lasts up to 1 year of normal use between charges*. It comes with a charging cable you can use to charge your keyboard quickly and conveniently. To charge your Auto-Fit, simply follow these steps:
- Plug the micro USB connector into the charging port.
- Plug the regular USB connector into any USB outlet.
- A red LED near the charging port on the left will illuminate to indicate the Auto-Fit is charging. Wait until this light turns off, indicating a full charge. It usually takes 2-4 hours to completely charge your keyboard.
- Remove the micro USB connector and enjoy your Auto-Fit for up to 1 year of normal use before you need to charge it again*.
* Normal use is approximately 1 hour of use per day.
text_image
CHARGING PORTBATTERY LIFE
As mentioned, the Auto-Fit features a powerful, rechargeable battery that lasts up to 1 year between charges. To check your Auto-Fit's remaining battery power, simply hold down the function (fn) key and press the battery key (also the alt key). The left LED indicator will flash one of three ways.
- Three green flashes indicate 50% or more battery life remaining.
- Three yellow flashes indicate between 25%-49% battery life remaining.
- Three red flashes indicate less than 25% battery life remaining. When your Auto-Fit reaches critical battery level, the red light will flash once every five minutes.
The Auto-Fit's battery has no memory and may be charged whenever you wish. For optimal battery life, we recommend turning your Auto-Fit off when it will sit unused for a prolonged time.
SPECIAL FUNCTION KEYS
Your Auto-Fit keyboard features a selection of special functions keys to give you more control over your tablet. Notice that not all functions work, or work the same across operating systems. Please refer to the correct operating system for a list of its special function keys.
FOR ANDROID
RETURN - Returns to the previous app or program that was last open.
HOME - Displays your tablet's home screen.
LOCK - Activates and deactivates your tablet's sleep mode.
SEARCH (AUTOFIT 10" ONLY) - Opens Google Search.
INTERNET - Opens your tablet's default internet browser.
CALENDAR (AUTOFIT 10" ONLY) - Opens your tablet's default calendar.
EMAIL - Opens your tablet's default email provider.
PREVIOUS TRACK - Skips to the previous track on your selected playlist.
PLAY/PAUSE - Starts or pauses your music.
NEXT TRACK - Skips to the next track on your selected playlist.
MUTE - Mutes your tablet's audio.
VOLUME DOWN - Decreases your tablet's volume.
VOLUME UP - Increases your tablet's volume.
del DELETE - Deletes text from left to right.
fn THE FUNCTION (FN) KEY - The fn key operates all functions printed in blue on a key that features multiple symbols. To activate these functions, hold the fn key while you press the desired function key.
Caps fn + CAPS - Activates the caps lock feature. When caps lock is on the LED on the right will illumine until caps lock is turned off. To turn caps lock off, hold the fn key and press caps again.
fn + BATTERY SYMBOL - Indicates remaining battery life.
MENU - Opens the menu for the app you are in.
fn + LANGUAGE - Toggles between available international keyboards (when activated in your tablet's settings).
Fn ▲ fn + PgUp - Moves your cursor up one page in a document, or to the top of the page if the document is less than one page.
Fn ▼ fn + PgDn - Moves your cursor down one page in a document, or to the bottom of the page if the document is less than one page.
Home fn + Home - Returns your cursor to the beginning of the line it is on in a document.
End fn + End - Moves your cursor to the end of the line it is on in a document.
FOR WINDOWS
Esc ESCAPE - Exits the program or app that is currently open.
WINDOWS - Displays your tablet's home screen.
fn + F1-F12 - Operates Window's specific shortcuts. Refer to your tablet's user manual for a description of each F Key.
LOCK - Locks your tablet such that you need to enter your password again to continue using it.
SEARCH (AUTOFIT 10" ONLY) - Opens Google Search.
INTERNET - Opens your tablet's default internet browser.
CALENDAR (AUTOFIT 10" ONLY) - Opens your tablet's default calendar.
EMAIL - Opens your tablet's default email provider.
PREVIOUS TRACK - Skips to the previous track on your selected playlist.
▶ II PLAY/PAUSE - Plays or pauses your music.
NEXT TRACK - Skips to the next track on your selected playlist.
MUTE - Mutes your tablet's audio.
VOLUME DOWN - Decreases your tablet's volume.
VOLUME UP - Increases your tablet's volume.
del DELETE - Deletes text from left to right.
Caps fn + CAPS - Activates the Caps Lock feature. When Caps Lock is on the LED light on the right will illuminate on most tablets until Caps Lock is turned off. To turn Caps Lock off, simply hold the fn key and press Caps again.
fn THE FUNCTION (FN) KEY - The fn key operates all functions printed in blue on a key that features multiple symbols. To activate these functions, hold the fn key while you press the desired function key.
fn + BATTERY SYMBOL - Indicates remaining battery life.
MENU - Opens the menu for the app you are in.
CHARMS - Opens the charms menu.
fn + LANGUAGE - Toggles between available international keyboards (when activated in your tablet's settings).
Fn ▲ fn + PgUp - Moves your cursor up one page in a document, or to the top of the page if the document is less than one page.
Fn ▼ fn + PgDn - Moves your cursor down one page in a document, or to the bottom of the page if the document is less than one page.
Home fn + Home - Returns your cursor to the beginning of the line it is on in a document.
End fn + End - Moves your cursor to the end of the line it is on in a document.
TROUBLESHOOTING
If your tablet does not respond to your Auto-Fit there may be a simple explanation such as a dead battery or an unsuccessful pairing. Please use the following to help troubleshoot your situation. If none of the information in this section solves your issue, please contact ZAGG Customer Service and one of our trained professionals will be happy to assist you.
- Restart your tablet.
- Turn your Auto-Fit off and back on. You should see the left LED status light illuminate briefly, if not, charge your Auto-Fit.
- After charging, turn your Auto-Fit on. If the left LED status light does not illuminate, and your keyboard doesn't operate correctly, please contact ZAGG's customer service.
- Forget and re-pair your Auto-Fit. On your tablet select: SETTINGS > BLUETOOTH > ON > SCAN. If you see “ZAGG Auto-Fit” listed as an
available device, touch the gear icon to the right of it and choose to have your tablet forget the device.
-
Push the PAIR button on your Auto-Fit and watch for the right LED status light to flash blue.
-
Your tablet should display "ZAGG Auto-Fit" or your keyboard's serial number as an available device. Select it.
-
If your tablet gives you an error message, repeat the pairing process*.
* If you continually receive the same error message during pairing, or the above steps don't work, please contact ZAGG's customer service for assistance.
For more help please see our FAQ at: www.ZAGG.com/faq
To reach a trained customer service representative, please use one of the following:
ZAGG.com/support/contact.php
questions@zagg.com
1-800-700-ZAGG [9244]
00-1-801-839-3906 for international customers
For unparalleled scratch protection for your tablet, we recommend ZAGG's invisibleSHIELD®.
©2005 - 2014 ZAGG Inc | All Rights Reserved.
PATENT PENDING | NASDAQ: ZAGG | MADE IN THE PHILIPPINES.
ZAGG ^® , invisibleSHIELD ^® , and ZAGG Auto-Fit are trademarks owned by ZAGG Intellectual Property Holding Co., Inc.
Bluetooth ^® is a registered trademark of Bluetooth SIG, Inc.
This device complies with part 15 of the FCC Rules. Operation is subject to the following two conditions:
1: This device may not cause harmful interference, and
2: This device must accept any interference received, including interference that may cause undesired operation.
ZAGG auto-fit 7", 8," & 10"
Keyboard Instructions
FRENCH
\*ENREGISTREMENT DE LA GARANTIE
natural_image
Line drawing of a laptop keyboard with open lid (no text or symbols)
natural_image
Simple line drawing of a folding tool with an arrow indicating direction (no text or symbols)
natural_image
Empty rectangular frame with rounded corners (no text or symbols)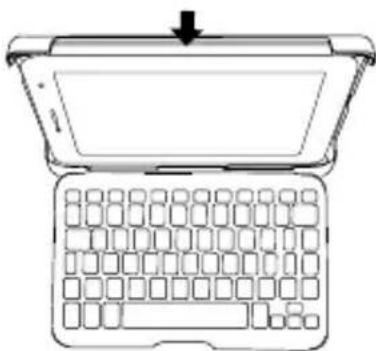
natural_image
Line drawing of a laptop with a blank screen and open keyboard, no text or symbols presentnatural_image
Line drawing of a folding stand with an arrow indicating direction (no text or symbols)MISE SOUS TENSION ET HORS TENSION
natural_image
Simple line drawing of a boat hull with two circular ovals and an arrow pointing to the hull (no text or symbols)POUR WINDOWS
ZAGG.com/support/contact.php questions@zagg.com
1-800-700-ZAGG [9244]
Keyboard Instructions
SPANISH
\*REGISTRO DE GARANTÍA
natural_image
Line drawing of a laptop keyboard with open lid (no text or symbols)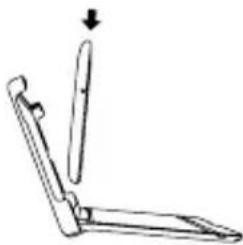
natural_image
Simple line drawing of a folding tool with an arrow indicating direction (no text or symbols)
natural_image
Empty rectangular frame with rounded corners (no text or symbols)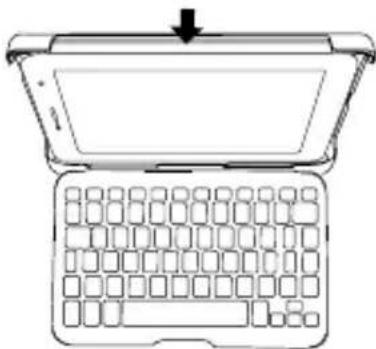
natural_image
Line drawing of a laptop keyboard with an open top panel and a downward arrow indicating compression (no text or symbols)natural_image
Line drawing of a simple stand with a curved top and base, no text or symbols presentENCENDIDO Y APAGADO
natural_image
Diagram of a curved structure with two circular holes and an arrow pointing to it (no text or symbols)ZAGG.com/support/contact.php
questions@zagg.com
1-800-700-ZAGG [9244]