
TotalClean APT30WTEU - Air purifier HOMEDICS - Free user manual and instructions
Find the device manual for free TotalClean APT30WTEU HOMEDICS in PDF.

User questions about TotalClean APT30WTEU HOMEDICS
0 question about this device. Answer the ones you know or ask your own.
Ask a new question about this device
Download the instructions for your Air purifier in PDF format for free! Find your manual TotalClean APT30WTEU - HOMEDICS and take your electronic device back in hand. On this page are published all the documents necessary for the use of your device. TotalClean APT30WTEU by HOMEDICS.
USER MANUAL TotalClean APT30WTEU HOMEDICS
LEADERS IN HEALTH & WELLBEING

Register your product today at www.homedics.co.uk/product-registration

text_image
Allergy-friendly Quality Tested ECARF www.ecarf-siegel.org5913
natural_image
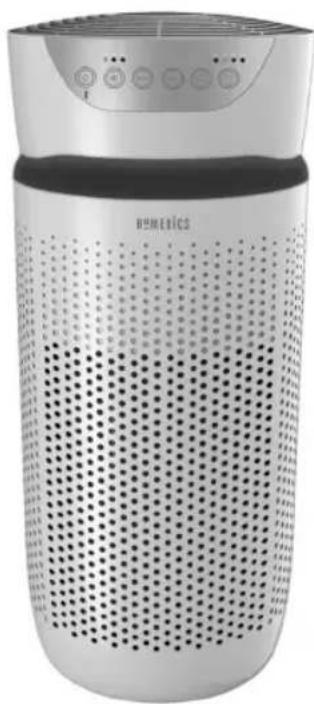
Exterior view of a modern Humetics air purifier with perforated grille and control panel (no visible text or symbols)TOTALCLEAN™
5IN1 AIRPURIFIER
instruction manual
3YEARGUARANTEE
PRODUCT FEATURES
text_image
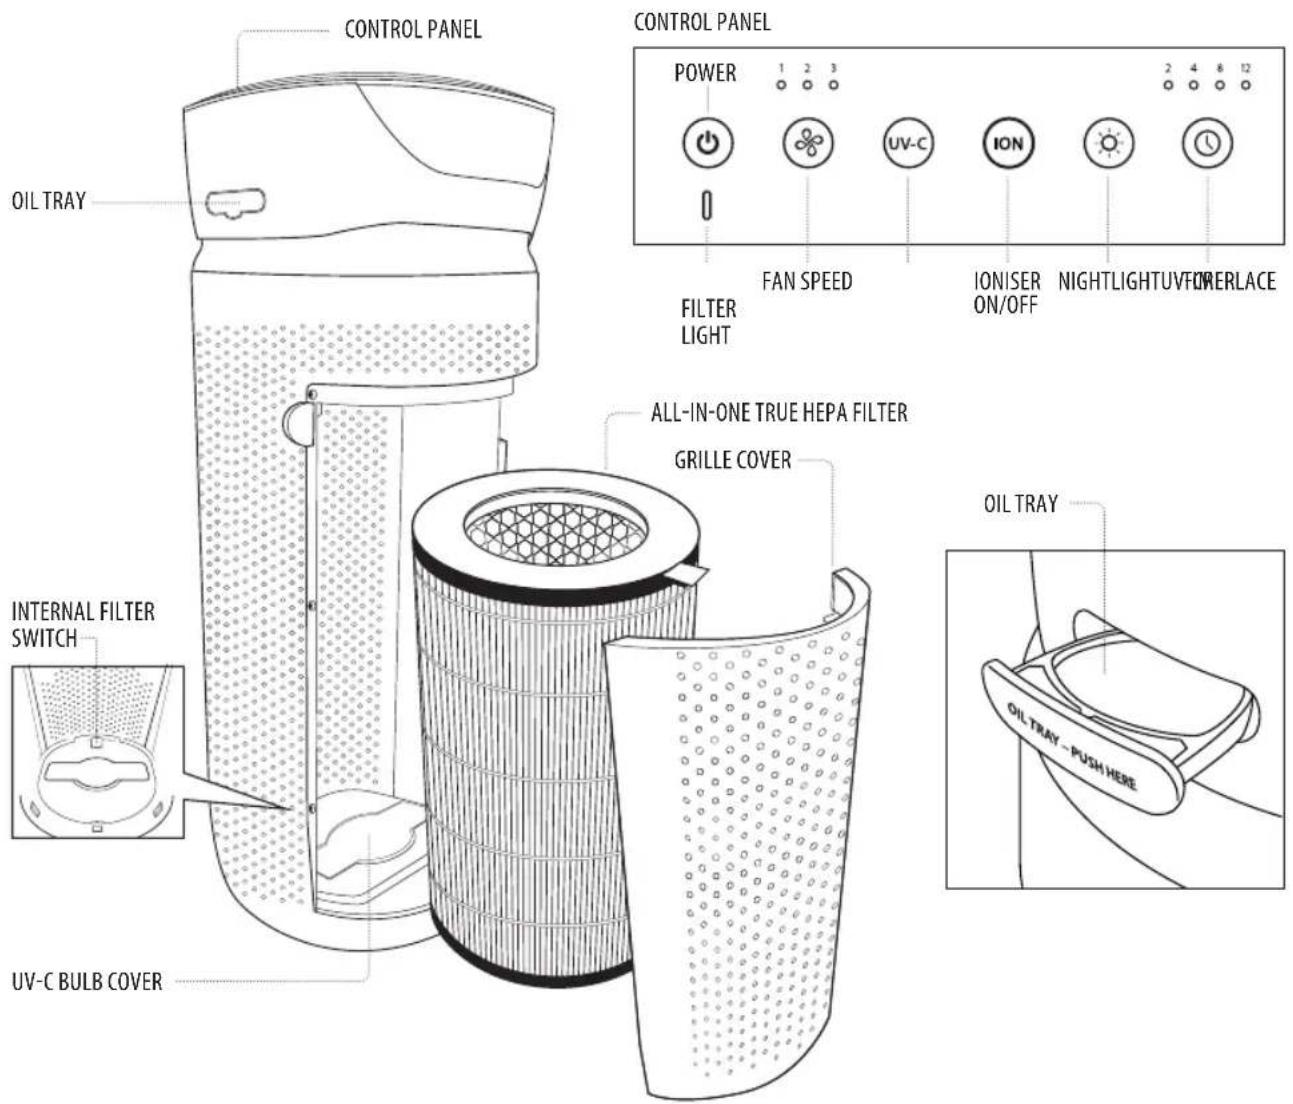
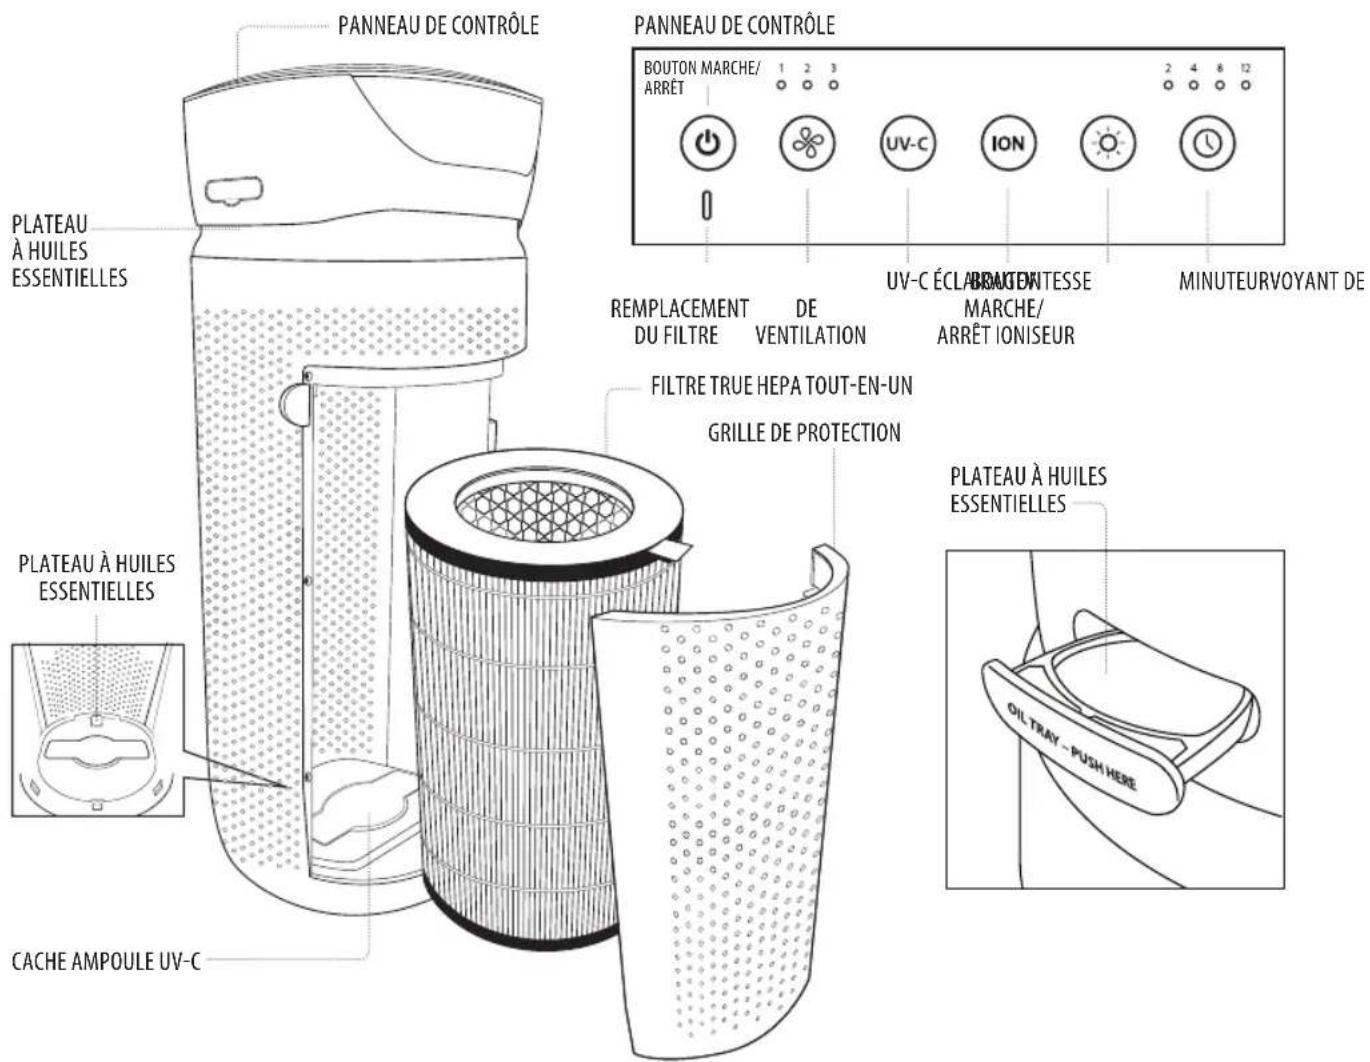
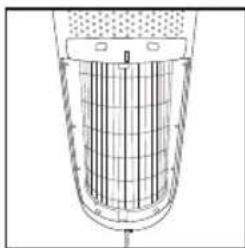
CONTROL PANEL OIL TRAY CONTROL PANEL POWER 1 2 3 2 4 6 12 FAN SPEED UV-C ION NIGHTLIGHTUV FLOWER LACE FILTER LIGHT ALL-IN-ONE TRUE HEPA FILTER GRILLE COVER INTERNAL FILTER SWITCH UV-C BULB COVER OIL TRAY OIL TRAY - PUSH HEREALL-IN-ONE TRUE HEPA FILTRATION SYSTEM
TRUE HEPA FILTRATION
Removes up to 99.97% of airborne particles as small as 0.3 microns, such as allergens, pollen, dust, germs, pet dander, odour, mould spores, and smoke from air that passes through the filter.
CARBON ODOUR FILTRATION
Reduces household odours and VOCs (volatile organic compounds)/gases as shown by independent laboratory testing.
PRE-FILTER
Captures large particles.
UV-C TECHNOLOGY WITH ON/OFF
When on, the UV-C technology light kills germs, viruses, and bacteria.
IONISER WITH ON/OFF
When on, the ioniser assists in the air purification process.
3 SPEEDS
Low, medium, and high.
BUILT-IN TIMER
Choose from 2, 4, 8, or 12 hours.
REPLACE FILTER INDICATOR
Illuminates when it is time to replace the filter.
SUGGESTED ROOM SIZE
84 M²/H / 888 FT²/H. Portable air purifiers will be more effective in rooms where all the doors and windows are closed.
AIR CHANGES PER HOUR
This air purifier will purify the air in a 84 M ^2 /888 FT ^2 room (assuming an 2.43 M/8 FT ceiling) once per hour on high speed in a closed room. The airflow rate is 204.1M ^3 /H / 7104FT ^3 /H.
OIL TRAY
Includes 3 essential oil pads. Use with essential oil (not included) to deliver scent into the air.
OPERATING INSTRUCTIONS
BEFORE TURNING THE UNIT ON
• Take the air purifier out of the box and remove the clear protective plastic bag.
- Place the air purifier on a firm, level surface.
- Plug the power cord into a standard AC outlet.
POWER BUTTON AND FAN SPEED SETTINGS
- To turn the air purifier on, press the power ⏻ button.
- This air purifier has 3 fan speed settings: low (1), medium (2), and high (3). The higher the fan speed setting, the faster the air will be purified. To select or change fan speed, press the fan speed ✿ button until the desired setting is reached.
UV-C TECHNOLOGY WITH ON/OFF
The optional UV-C technology kills germs, viruses, and bacteria by penetrating its DNA, resulting in the microorganism's death or the inability to reproduce. Press the UV-C button to turn the UV-C technology on. The blue LED will glow. Press the UV-C button again to turn the UV-C technology off.
IONISER SETTING WITH ON/OFF
Ion particles have a positive or negative charge that attach to airborne particles, making them easier to be captured by the filtration system. Press the ioniser ION button to turn the ioniser on. The blue light will glow to indicate the ioniser is in use. Press the ioniser ION button again to turn the ioniser off.
NOTE: Dust particles may accumulate on surfaces around the air purifier when the ioniser is in use. These dust particles can be vacuumed or wiped away with a soft, damp cloth.
NOTE: You may hear occasional popping sounds when the ioniser is used. This is normal.
NOTE: The ioniser produces less ozone than the UL-established limits of 0.05 ppm. Ozone may be harmful around birds and small pets. To prevent ozone buildup, use the ioniser feature in a well-ventilated area.
NIGHTLIGHT
The nightlight has 3 options. Press the nightlight ⚙ button once to turn the blue nightlight on. Press again to turn the blue nightlight ring and the display lights off. Press a third time to turn the display lights on.
TIMER
Press the timer ⏻ button until the desired timer setting is lit on the display. The timer ⏻ button will cycle through the following settings: 2 hours, 4 hours, 8 hours, 12 hours, and off. To cancel the timer at any time, press the timer ⏻ button until all timer LEDs are off. The air purifier will run continuously when the timer function is off.
OIL TRAY
Use essential oil (not included) to deliver scent into the air.
NOTE: For use with the included HoMedics essential oil pads only. Do not add essential oils anywhere else in the unit as it may cause damage.
NOTE: Do not leave a filled essential oil pad in the air purifier if it will be out of use for a long period of time.
ARE ESSENTIAL OILS SAFE TO USE AROUND PETS?
We should always exercise caution when using essential oils around our pets. Keep all essential oil and aromatherapy products (like diffusers) out of reach of pets. Keep open bottles away from pets to avoid internal consumption. We do not recommend the topical use of essential oils on pets, as they have a strong sense of smell and cannot get rid of the oil if they don't like it or it is disturbing them. When diffusing essential oils around pets, always diffuse in a well-ventilated area and leave an option for them to remove themselves from the space, such as leaving a door open. Every animal is different, so carefully observe how each animal responds when introducing an essential oil for the first time. If irritation occurs, discontinue the use of the essential oil. We recommend seeking medical attention if ingestion of essential oil occurs.
ADDING ESSENTIAL OILS
This air purifier has been certified by the European Centre for Allergy Research Foundation (ECARF) as an allergy-friendly product. Please note that allergy friendliness is no longer guaranteed if the Essential Oil Scent Tray function is used, since essential oils may lead to allergic reactions.
WARNING: Putting oil anywhere but the oil tray will damage the air purifier.
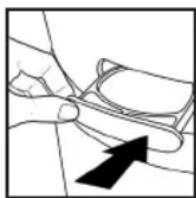
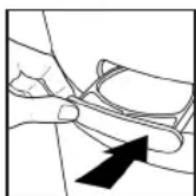
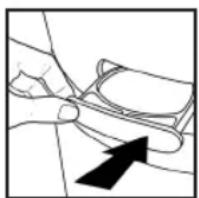
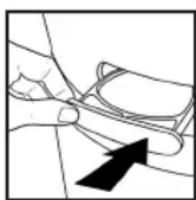
- The oil tray is located on the side of the air purifier above the nightlight ring.

text_image
1. The oil tray is loo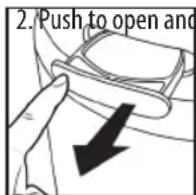
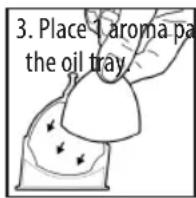
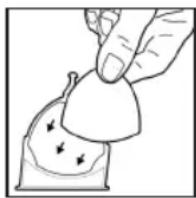
- Add 5–7 drops of essential oil to the pad. You may use more or less depending on personal preference.

- Place the oil tray back in its compartment and push to close. The scent will start automatically when the air purifier is turned on.
remove the tray.
WARNING: Only place essential oil directly into the tray.
back in its push to close. automatically er is turned on.
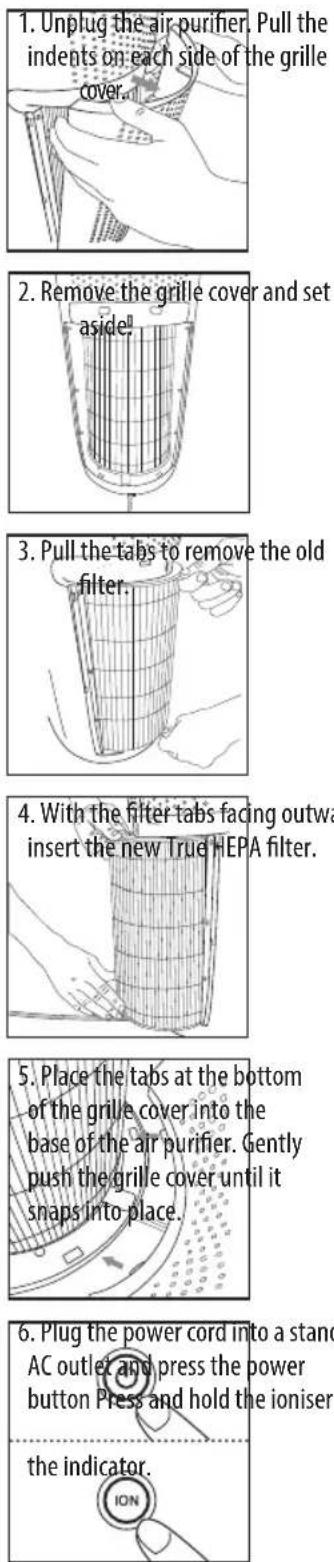
FILTER REPLACEMENT
REPLACE FILTER LIGHT
The replace filter light illuminates when it is time to replace the True HEPA filter based on the air purifier's hours of use.
REPLACING THE TRUE HEPA FILTER
For optimal performance, replace every 12 months under normal usage conditions.
6. Plug the power cord into a standard AC outlet and press the power button Press and hold the ioniser
UV-C BULB REPLACEMENT
REPLACING THE UV-C BULB
The UV-C bulb is designed to last for approximately 10,000 hours of use. The UV-C button on the control panel will flash RED when the UV-C bulb burns out and needs to be replaced. The UV-C button will change to blue once the bulb has been replaced.
NOTE: The air purifier will continue to operate without the UV-C function when the UV-C bulb burns out.
CAUTION: Do not operate the air purifier without the protective UV-C bulb cover.
CAUTION: Unplug the power cord before servicing or replacing the UV-C bulb.
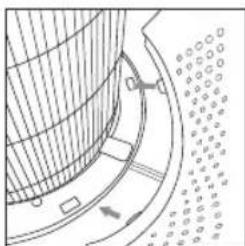
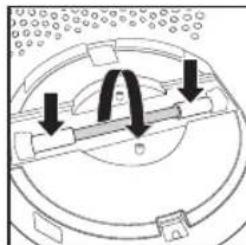
- Unplug the air purifier and remove the True HEPA filter. Using a Phillips-head screwdriver (not included), unscrew the 2 screws located on the UV-C bulb cover.
-
Remove the cover to expose the UV-C bulb.
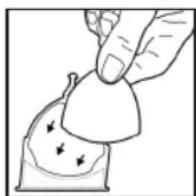
-
Gently push from the sides and rotate the UV-C bulb to remove.
natural_image
Technical diagram of a mechanical component with arrows indicating assembly or force direction (no text or symbols)- Remove and replace the UV-C bulb. Re-install the UV-C bulb cover, True HEPA filter, and grille cover.
NOTE: The UV-C bulb contains mercury (Hg).

ION button for 3 seconds to reset
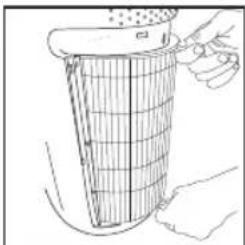
CLEANING THE PRE-FILTER
NOTE: For best performance, vacuum the pre-filter once a month under normal usage.
- Unplug the air purifier.
-
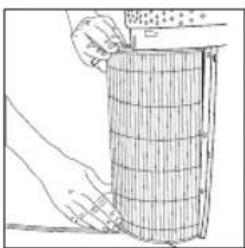
Remove the True HEPA-type filter as described in the Replacing the True HEPA filter section.
-
Vacuum the outside of the True HEPA filter using the brush attachment of your vacuum cleaner, cleaning it thoroughly.
-
Place the True HEPA filter back into the air purifier and close grille.
-
Plug the power cord into a standard AC outlet.
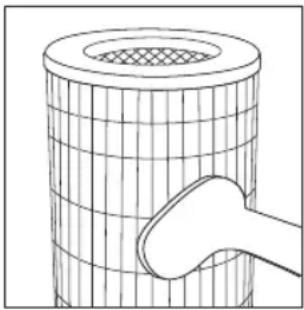
natural_image
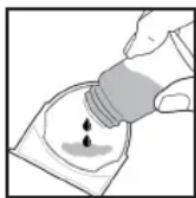
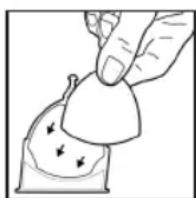
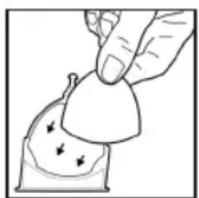
Diagram of a cylindrical object with a mesh top and a hand holding a tool, no text or symbols presentTO CLEAN THE OIL TRAY
Open the oil tray and remove the pad. Essential oil pads should be changed when switching to a different essential oil scent. If continuing to use the same scent, set the essential oil pad aside for reuse. Wipe down the inside of the oil tray with a soft cloth. Place tray and close.

natural_image
Line drawing of a hand cleaning a circular object with a cloth (no text or symbols)NOTE: Leave the essential oil pad out of the oil tray when storing.
FOR BEST PERFORMANCE
- NEVER use water or any household cleaners or detergents to clean the True HEPA filter.
- Clean off the outside of the unit with a dry cloth as needed.
- NEVER use water, wax, polish, or any chemical solution to clean the outside of the unit.
- Clean off the grille cover using a damp cloth or the brush attachment of your vacuum as needed.
• Vacuum the pre-filter monthly under normal usage conditions. - Replace the True HEPA filter every 12 months under normal usage conditions.
- Always use a genuine HoMedics replacement filter for optimal performance.
To purchase genuine HoMedics replacement/spare parts please visit www.homedics.co.uk
3 Pack of aroma pads - ARM-PAD3
Aroma tray - AP-T30WTARM
HEPA filter - AP-T30FL
UV-C Bulb - AP-UVC1
Cover & screws - APUVCCV
TROUBLESHOOTING
| PROBLEM POSSIBLE CAUSE SOLUTION | ||
| Unit will not operate · Unit is not plugged inPower button not pressedNo power to unitTrue HEPA filter is not installed correctlyGrille cover is not installed correctly | Plug unit inPress the power button to turn the power onCheck fuses, try a different outletReinstall the True HEPA filterReinstall the grille cover | |
| Reduced airflow · The back grille may be blockedPre-filter needs vacuumingThe True HEPA filter needs to be replaced | Check to make sure nothing is blocking the back grille and air outletVacuum the pre-filter with the brush attachment of your vacuum cleanerReplace the True HEPA filter | |
| Reduced odour removal | The True HEPA filter needs to be replaced | Replace the True HEPA filter |
| Excessive noise · The unit is not level | Place the unit on a flat, level surface | |
| Replace filter light remains lit after filter replacement | The replace filter indicator needs to be reset | Press and hold the ioniser button for 3 seconds until the replace filter light turns off |
| Display lights are off · Nightlight setting | Press the nightlight button until the desired lights are on/off | |
CARACTÉRISTIQUES DU PRODUIT
text_image
PANNEAU DE CONTRÔLE PANNEAU DE CONTRÔLE BOUTON MARCHE/ ARRÊT 1 2 3 2 4 8 12 UV-C ION UV-C ÉCLAR BRATEN TESSE MARCHÉ/ ARRÊT IONISEUR MINUTEURVOYANT DE REEMPLACEMENT DU FILTRE DE VENTILATION FILTRE TRUE HEPA TOUT-EN-UN GRILLE DE PROTECTION PLATEAU À HUILES ESSENTIELLES PLATEAU À HUILES ESSENTIELLES CACHE AMPOULE UV-C OIL TRAY - PUSH HERESYSTÈME DE FILTRATION TRUE HEPA TOUT-EN-UN
FILTRATION TRUE HEPA TOUT-EN-UN
natural_image
Abstract diagram with curved lines and a black arrow pointing upward (no text or symbols)natural_image
Simple line drawing of a hand holding a curved object with an arrow pointing to it (no text or symbols)REPLACEMENT DU FILTRE
VOYANT DE REMPLACEMENT DU FILTRE
natural_image
Line drawing of hands using a tool to adjust or install a component (no text or symbols visible)natural_image
Technical line drawing of a cylindrical container with internal grid structure (no text or symbols)natural_image
Line drawing of a hand holding a container with a mesh structure, no text or symbols presentnatural_image
Illustration of hands handling a cylindrical object with grid lines (no text or symbols)natural_image
Pure technical diagram of a curved mechanical component with no visible text, numbers, or symbolsREEMPLACER L'AMPOULE UV-C
natural_image
Technical line drawing of a mechanical assembly with a tool inserted into a circular component (no text or symbols)natural_image
Technical line drawing of a mechanical assembly with concentric circles and a central shaft (no text or symbols)natural_image
Diagram of a mechanical or electrical component with arrows indicating direction (no text or symbols present)natural_image
Line drawing of hands holding a tool over a circular object with measurement markings (no text or symbols)natural_image
Diagram of a cylindrical object with a mesh top and a handle, no text or symbols present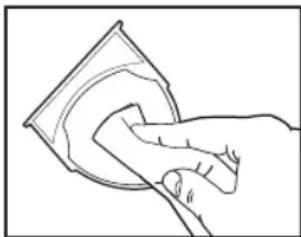
natural_image
Line drawing of a hand cleaning a circular object (no text or symbols)natural_image
Line drawing of hands using a tool to adjust or install a component, no text or symbols presentnatural_image
Technical line drawing of a cylindrical industrial vessel with internal grid structure (no text or symbols)natural_image
Line drawing of a hand holding a container with a mesh structure, no text or symbols presentnatural_image
Line drawing of hands handling a grid-patterned object (no text or symbols)natural_image
Pure technical diagram of a curved mechanical component with no visible text, numbers, or symbolsnatural_image
Technical line drawing of a mechanical component with a tool inserted, showing internal structure without any text or symbols.natural_image
Technical line drawing of a circular mechanical component with internal components and mounting holes (no text or symbols)natural_image
Diagram of a mechanical component with arrows indicating motion or force direction (no text or symbols)natural_image
Line drawing of hands holding a tool over a circular object with a ruler, no text or symbols presentnatural_image
Diagram of a cylindrical object with a mesh top and a hand holding a tool, no text or symbols present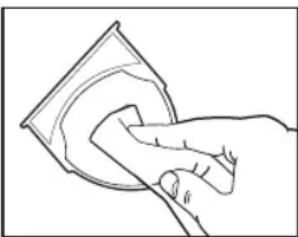
natural_image
Line drawing of a hand cleaning a circular object with a cloth (no text or symbols)True HEPA-Filter — AP-T30FL
UV-C-Lampe - AP-UVC1
natural_image
Abstract diagram with curved lines and a black arrow pointing upward (no text or symbols)natural_image
Illustration of a hand pouring liquid into a container with a droplet (no text or symbols)natural_image
Line drawing of hands using a tool to adjust or install a component (no text or symbols visible)natural_image
Technical line drawing of a cylindrical container with internal grid structure (no text or symbols)natural_image
Line drawing of a hand holding a container filled with material, no text or symbols presentnatural_image
Illustration of hands handling a cylindrical object with grid lines (no text or symbols)natural_image
Pure technical diagram of a mechanical component with no visible text, numbers, or symbolsnatural_image
Technical line drawing of a mechanical component with no visible text or symbolsnatural_image
Technical line drawing of a mechanical component with concentric circles and internal features (no text or symbols)natural_image
Diagram of a mechanical component with arrows indicating direction (no text or symbols)natural_image
Line drawing of hands holding a rectangular object over a circular base (no text or symbols)natural_image
Diagram of a cylindrical object with a mesh top and a hand holding a tool, no text or symbols presentLIMPIEZA DE LA BANDEJA PARA EL ACEITE
natural_image
Line drawing of a hand cleaning a circular object (no text or symbols)natural_image
Illustration of a hand holding a small object with arrows indicating motion or force (no text or symbols)natural_image
Illustration of a hand pouring liquid into a container with liquid droplets (no text or symbols)natural_image
Simple line drawing of a hand holding a small object with an arrow pointing to it (no text or symbols)natural_image
Line drawing of hands using a tool to adjust or install a component (no text or symbols visible)natural_image
Technical line drawing of a cylindrical container with internal grid structure (no text or symbols)natural_image
Line drawing of a hand holding a cylindrical container filled with granular material, no text or symbols presentnatural_image
Technical line drawing of a mechanical assembly with concentric circles and a central rod (no text or symbols)natural_image
Line drawing of hands handling a grid-patterned object (no text or symbols)natural_image
Diagram of a curved structure with internal components and directional arrows, no visible text or symbolsnatural_image
Diagram of a cylindrical object with a mesh top and a hand holding a tool, no text or symbols present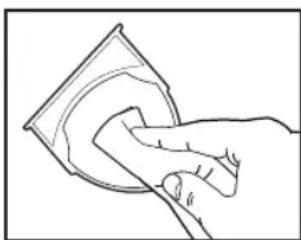
natural_image
Line drawing of a hand cleaning a circular object with a cloth (no text or symbols)natural_image
Abstract diagram with curved lines and a black arrow pointing upward (no text or symbols)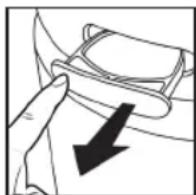
natural_image
Illustration of hands using a tool to adjust or install a component, no text or symbols visiblenatural_image
Technical line drawing of a cylindrical container with internal grid structure (no text or symbols)natural_image
Line drawing of a hand holding a container filled with material, no text or symbols presentnatural_image
Illustration of hands handling a cylindrical object with grid lines (no text or symbols)natural_image
Pure technical diagram of a curved mechanical component with no visible text, numbers, or symbolsnatural_image
Technical line drawing of a mechanical component with a central pin and circular base (no text or symbols)natural_image
Technical line drawing of a mechanical component with concentric circles and internal shafts (no text or symbols)natural_image
Diagram of a mechanical component with arrows indicating direction (no text or symbols)natural_image
Illustration of hands holding a rectangular object over a circular base, with no visible text or symbols.natural_image
Diagram of a cylindrical object with a mesh top and a hand holding a tool, no text or symbols presentnatural_image
Line drawing of a hand cleaning a circular object (no text or symbols)True HEPA-filter - AP-T30FL
UV-C lamp - AP-UVC1
Deksel en schroeven - APUVCCV
PROBLEMEN OPLOSSEN
natural_image
Abstract diagram with curved lines and a black arrow pointing upward (no text or symbols)natural_image
Illustration of a hand holding a small object with arrows indicating motion or force (no text or symbols)natural_image
Line drawing of a hand holding a small object with an arrow pointing to it (no text or symbols present)natural_image
Technical line drawing of a cylindrical device with internal grid structure (no text or symbols)natural_image
Line drawing of a hand holding a cylindrical container with a mesh structure (no text or symbols)natural_image
Illustration of hands handling a cylindrical object with a ruler above it (no text or symbols visible)natural_image
Pure technical diagram of a curved mechanical component with no visible text, numbers, or symbolsnatural_image
Technical line drawing of a mechanical component with a tool inserted, showing internal structure without any text or symbols.natural_image
Technical line drawing of a mechanical component with concentric circles and mounting holes (no text or symbols)natural_image
Diagram of a mechanical component with arrows indicating motion or force direction (no text or symbols)natural_image
Line drawing of hands using a tool to cut or adjust a circular component (no text or symbols visible)natural_image
Line drawing of a hand cleaning a circular object (no text or symbols)natural_image
Abstract diagram with curved lines and a black arrow pointing upward (no text or symbols)

natural_image
Technical line drawing of a cylindrical container with internal grid structure (no text or symbols)natural_image
Line drawing of a hand holding a container filled with granular material, no text or symbols presentnatural_image
Line drawing of hands handling a cylindrical object with grid pattern (no text or symbols)natural_image
Pure technical diagram of a curved mechanical component with no visible text, numbers, or symbolsnatural_image
Technical line drawing of a mechanical component with a tool inserted, showing internal structure without any text or symbols.natural_image
Technical line drawing of a mechanical component with concentric circles and mounting holes (no text or symbols)natural_image
Diagram of a mechanical component with arrows indicating motion or force direction (no text or symbols)natural_image
Line drawing of hands holding a circular object with a ruler, no text or symbols presentnatural_image
Diagram of a cylindrical object with a mesh top and a hand holding a tool, no text or symbols presentnatural_image
Line drawing of a hand cleaning a circular object (no text or symbols)natural_image
Abstract diagram with curved lines and a black arrow pointing upward (no text or symbols)

natural_image
Line drawing of hands using a tool to adjust or install a component (no text or symbols visible)natural_image
Technical line drawing of a cylindrical container with internal grid structure (no text or symbols)natural_image
Line drawing of a hand holding a container with a mesh structure, no text or symbols presentnatural_image
Illustration of hands handling a cylindrical object with a grid pattern (no text or symbols)natural_image
Pure technical diagram of a curved mechanical component with no visible text, numbers, or symbolsAZ UV-C IZZÓ CSERÉJE
natural_image
Technical line drawing of a mechanical component with a tool inserted, showing internal structure without any text or symbols.natural_image
Technical line drawing of a mechanical component with no visible text or symbolsnatural_image
Diagram of a mechanical component with arrows indicating direction (no text or symbols)natural_image
Line drawing of hands using a tool to adjust or install a circular component (no text or symbols visible)natural_image
Diagram of a cylindrical object with a mesh top and a hand holding a tool, no text or symbols present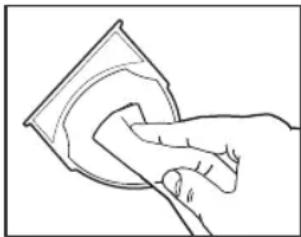
natural_image
Line drawing of a hand cleaning a circular object with a cloth (no text or symbols)natural_image
Abstract diagram with curved lines and a black arrow pointing upward (no text or symbols)natural_image
Line drawing of a hand holding a pair of eyeglasses with an arrow pointing to the pair (no text or symbols present)natural_image
Line drawing of hands using a tool to adjust or install a component (no text or symbols visible)natural_image
Technical line drawing of a cylindrical container with internal grid structure (no text or symbols)natural_image
Line drawing of a hand pouring liquid into a gridded container (no text or symbols)natural_image
Line drawing of hands handling a cylindrical object with grid lines (no text or symbols)natural_image
Pure technical diagram of a curved mechanical component with no visible text, numbers, or symbolsRESERVGLÖDLAMPA FÖR UV-C-LAMPA
BYTE AV UV-C-GLÖDLAMPAN
natural_image
Technical line drawing of a mechanical component with a tool inserted, no visible text or symbolsnatural_image
Technical line drawing of a mechanical assembly with concentric circles and a central shaft (no text or symbols)text_image
Diagram showing mechanical or electrical components with arrows indicating direction, possibly for motion or assembly.natural_image
Illustration of hands holding a mechanical component with a circular base and mounting bracket (no text or symbols)natural_image
Diagram of a cylindrical object with a mesh top and a hand holding a tool, no text or symbols presentnatural_image
Line drawing of a hand cleaning a circular object (no text or symbols)FÖR BÄSTA MÖJLIGA PRESTANDA
3-pack aromkuddar - ARM-PAD3
Aromfack - AP-T30WTARM
True HEPA-filter - AP-T30FL
UV-C-glödlampa - AP-UVC1
UV-C-TEKNOLOGI MED AV/PÅ-FUNKSJON
Når den er på, dreper UV-C-lyset mikroorganismer, virus og bakterier.
IONISERER MED AV/PÅ-FUNKSJON
F∅R APPARATET SLÅS PÅ
- Ta luftrenseren ut av esken og fjern den gjennomsiktige, beskyttende plastposen.
- Plasser luftrenser på en fast, jevn overflate.
- Koble strømledningen til en standard stikkontakt.
STR∅MKNAPP OG INNSTILLINGER FOR VIFTEHASTIGHET
UV-C-TEKNOLOGI MED AV/PÅ-FUNKSJON
IONISERER-INNSTILLING MED AV-PÅ-FUNKSJON
natural_image
Abstract diagram with curved lines and a black arrow pointing upward (no text or symbols)natural_image
Line drawing of hands using a tool to adjust or install a component (no text or symbols visible)natural_image
Technical line drawing of a cylindrical structure with internal grid pattern (no text or symbols)natural_image
Line drawing of a hand holding a container filled with granular material, no text or symbols presentnatural_image
Line drawing of hands handling a cylindrical object with grid pattern (no text or symbols)natural_image
Diagram of a curved mechanical component with directional arrows and dotted pattern (no text or symbols)natural_image
Technical line drawing of a mechanical component with a tool inserted, showing internal structure without any text or symbols.natural_image
Technical line drawing of a mechanical component with no visible text or symbolsnatural_image
Diagram of a mechanical component with arrows indicating direction (no text or symbols)natural_image
Line drawing of hands using a tool to adjust or install a circular component (no text or symbols visible)natural_image
Diagram of a cylindrical object with a mesh top and a hand holding a curved object (no text or symbols)SLIK RENGJ∅R DU OLJEBEHOLDEREN
natural_image
Line drawing of a hand cleaning a circular object with a cloth (no text or symbols)Aromabeholder - AP-T30WTARM
HEPA-filter - AP-T30FL
UV-C-pære - AP-UVC1
natural_image
Abstract diagram with curved lines and a black arrow pointing upward (no text or symbols)natural_image
Line drawing of hands using a tool to cut or adjust a textured object (no text or symbols visible)natural_image
Technical line drawing of a cylindrical container with internal grid structure (no text or symbols)natural_image
Line drawing of a hand holding a grater with a mesh net, no text or symbols presentnatural_image
Line drawing of hands handling a cylindrical object with grid pattern (no text or symbols)natural_image
Diagram of a curved mechanical component with directional arrows and dotted pattern (no text or symbols)natural_image
Technical line drawing of a mechanical component with a tool inserted, showing internal structure without any text or symbols.natural_image
Technical line drawing of a mechanical component with concentric circles and mounting holes (no text or symbols)natural_image
Diagram of a mechanical or electrical component with arrows indicating direction (no text or symbols)natural_image
Illustration of hands using a tool to adjust or install a circular component (no text or symbols visible)natural_image
Diagram of a cylindrical object with a mesh top and a curved handle, no text or symbols presentÖLJYLOKERON PUHDISTAMINEN
natural_image
Line drawing of a hand cleaning a circular object with a cloth (no text or symbols)HEPA-suodatin - AP-T30FL
UV-C-polttimo - AP-UVC1
CRONOMETRU INCORPORAT
natural_image
Abstract diagram with curved lines and a black arrow pointing upward (no text or symbols)

natural_image
Line drawing of a hand holding a small object with an arrow pointing to it (no text or symbols present)natural_image
Line drawing of hands using a tool to adjust or install a component, no text or symbols presentnatural_image
Technical line drawing of a cylindrical container with internal grid structure (no text or symbols)natural_image
Line drawing of a hand holding a cylindrical object with a mesh structure, possibly a filter or container (no text or symbols)natural_image
Line drawing of hands holding a cylindrical object with grid lines, no text or symbols presentnatural_image
Pure technical diagram of a curved mechanical component with no visible text, numbers, or symbolsnatural_image
Technical line drawing of a mechanical component with a central pin and circular base (no text or symbols)natural_image
Technical line drawing of a mechanical assembly with concentric circles and mounting brackets (no text or symbols)natural_image
Diagram of a mechanical or electrical component with arrows indicating direction (no text or symbols)natural_image
Illustration of hands holding a mechanical component with a circular base and adjustment knob (no text or symbols)natural_image
Diagram of a cylindrical object with a mesh top and a handle, no text or symbols present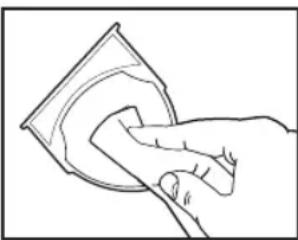
natural_image
Line drawing of a hand cleaning a circular object with a cloth (no text or symbols)PENTRU CEA MAI BUNĂ PERFORMANTĂ
natural_image
Line drawing of hands using a tool to adjust or install a component (no text or symbols visible)- Odpojte čistič vzduchu. Potiahnite zarážky na každej strane krytu mriežky.
natural_image
Technical line drawing of a cylindrical container with internal grid structure (no text or symbols)natural_image
Line drawing of a hand holding a nettinger over a grid-patterned container (no text or symbols)natural_image
Illustration of hands handling a cylindrical object with grid lines (no text or symbols)- Vložte nový filter True HEPA tak, aby úchytky filtra smerovali von.
natural_image
Pure technical diagram of a curved mechanical component with no visible text, numbers, or symbolsnatural_image
Technical line drawing of a mechanical component with a central pin and circular features (no text or symbols)natural_image
Technical line drawing of a mechanical assembly with circular components and mounting holes (no text or symbols)natural_image
Diagram of a mechanical component with arrows indicating motion or force direction (no text or symbols)natural_image
Line drawing of hands installing or adjusting a circular component with a ruler (no text or symbols)natural_image
Diagram of a cylindrical object with a mesh top and a handle inserted, no text or symbols presentČISTENIE ZÁSOBNÍKA NA OLEJ
natural_image
Line drawing of a hand cleaning a circular object with a cloth (no text or symbols)ABY SA DOSIAHOL NAJLEPŠÍ VÝKON
Filter HEPA -AP-DT10FL
Žiarovka UV-C – AP-UVC1
Kryt a skrutky – APUVCCV
RIEŠENIE PROBLÉMOV
natural_image
Diagram of a hand holding a small object with an arrow pointing to it (no text or symbols present)natural_image
Illustration of hands using a tool to adjust or install a component, no text or symbols visiblenatural_image
Technical line drawing of a cylindrical container with internal grid structure (no text or symbols)natural_image
Line drawing of a hand holding a container filled with granular material, no text or symbols presentnatural_image
Line drawing of hands handling a cylindrical object with grid pattern (no text or symbols)natural_image
Diagram of a curved mechanical component with internal structure and directional arrows (no text or symbols)natural_image
Technical line drawing of a mechanical component with a tool inserted, showing internal structure (no text or symbols)natural_image
Technical line drawing of a mechanical assembly with concentric circles and a central shaft (no text or symbols)natural_image
Diagram of a mechanical or electrical component with arrows indicating direction (no text or symbols)natural_image
Illustration of hands using a tool to adjust or install a circular component (no text or symbols visible)natural_image
Diagram of a cylindrical object with a mesh top and a curved handle, no text or symbols presentnatural_image
Line drawing of a hand cleaning a circular object with a cloth (no text or symbols)UV-C-TEKNOLOGI MED TÆND/SLUK
natural_image
Abstract diagram with curved lines and a black arrow pointing upward (no text or symbols)natural_image
Illustration of a hand holding a small object with an arrow pointing to it (no text or symbols present)natural_image
Line drawing of hands using a tool to cut or inspect a textured surface (no text or symbols)natural_image
Technical line drawing of a cylindrical device with internal grid structure (no text or symbols)natural_image
Line drawing of a hand holding a container filled with granular material, no text or symbols present- Træk i tapperne for at fjerne det gamle filter.
natural_image
Line drawing of hands handling a cylindrical object with grid pattern (no text or symbols)natural_image
Pure technical diagram of a curved mechanical component with no visible text, numbers, or symbolsUDSKIFTNING AF UV-C-PÆRE
UDSKIFTNING AF UV-C-PÆREN
natural_image
Technical line drawing of a mechanical component with a central pin and circular features (no text or symbols)natural_image
Technical line drawing of a mechanical component with concentric circles and internal shafts (no text or symbols)natural_image
Diagram of a mechanical component with arrows indicating motion or force direction (no text or symbols)natural_image
Line drawing of hands installing or adjusting a circular component on a surface (no text or symbols)natural_image
Diagram of a cylindrical object with a mesh top and a hand holding a tool, no text or symbols presentSÅDAN RENG∅RES OLIEBAKKEN
natural_image
Line drawing of a hand cleaning a circular object (no text or symbols)FEJLFINDING
HEPA-filter - AP-DT10FL
UV-C-pære - AP-UVC1
Dæksel og skruer – APUVCCV
natural_image
Illustration of hands using a tool to adjust or install a component (no text or symbols visible)natural_image
Technical line drawing of a cylindrical container with internal grid structure (no text or symbols)- Remova a tampa da grelha e coloque de parte.
natural_image
Line drawing of a hand holding a container filled with granular material, no text or symbols presentnatural_image
Illustration of hands handling a cylindrical object with a ruler above it (no text or symbols visible)natural_image
Pure technical diagram of a curved mechanical component with no visible text, numbers, or symbolsnatural_image
Technical line drawing of a mechanical assembly with a tool inserted into a circular component (no text or symbols)natural_image
Technical line drawing of a mechanical component with concentric circles and central shaft (no text or symbols)- Remova a tampa para expor a lâmpada UV-C.
natural_image
Diagram of a mechanical component with arrows indicating motion or force direction (no text or symbols)natural_image
Line drawing of hands operating a mechanical device with a circular component and adjustment knobs (no text or symbols)natural_image
Diagram of a cylindrical object with a mesh top and a hand holding a tool, no text or symbols present
natural_image
Line drawing of a hand cleaning a circular object with a cloth (no text or symbols)PARA MELHOR DESEMPENHO
HoMedics, visite www.homedics.co.uk
3 pacotes de almofadas de aroma — ARM-PAD3
Tabuleiro de aroma – AP-T30WTARM
Filtro HEPA - AP-T30FL
Lâmpada UV-C - AP-UVC1
Tampa e parafusos – APUVCCV