
PGF 1211 - Heating QLIMA - Free user manual and instructions
Find the device manual for free PGF 1211 QLIMA in PDF.
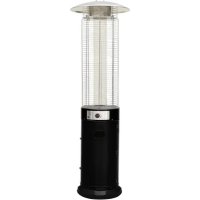


| Product type | Gas patio heater |
| Brand | Qlima |
| Model | PGF 1211 |
| Category | Heating |
| Use | Outdoor only |
| Energy source | Propane, butane or LPG gas |
| Gas pressure | 28-37 mbar (depends on country) |
| Gas consumption | Not specified (estimated 10-12 kW) |
| Ignition type | Piezo electric |
| Approximate height | 220 cm |
| Reflector diameter | Approximately 80 cm |
| Approximate weight | 15 kg |
| Main material | Steel, glass tube |
| Cylinder capacity | Max Ø32 cm x 59 cm |
| Main functions | Radiant heating, low/high setting, pilot light |
| Maintenance and cleaning | Clean with a soft cloth and soapy water; check for leaks regularly |
| Safety | Flame detection, automatic shutdown in case of leak, tip-over protection |
| Spare parts and repairability | Injector, thermocouple, gas hose, regulator (not included) |
| Warranty | 24 months |
| Standards | EN14543:2017 |
| Included accessories | Multi-country kit, floor fixer |
| General information | Manual available in multiple languages (FR, EN, ES, IT, NL, PT, SL) |
Frequently Asked Questions - PGF 1211 QLIMA
User questions about PGF 1211 QLIMA
0 question about this device. Answer the ones you know or ask your own.
Ask a new question about this device
Download the instructions for your Heating in PDF format for free! Find your manual PGF 1211 - QLIMA and take your electronic device back in hand. On this page are published all the documents necessary for the use of your device. PGF 1211 by QLIMA.
USER MANUAL PGF 1211 QLIMA
guarantee
2
YEARS
| E | INSTRUCCIONES DE USO | 8 |
| F | MANUEL D'UTILISATION | 22 |
| GB | OPERATING MANUAL | 36 |
| I | ISTRUZIONI D'USO | 48 |
| NL | GEBRUIKSAANWIJZING | 62 |
| P | MANUAL DE INSTRUÇÕES | 76 |
| SLO | NAVODILA ZA UPORABO | 90 |
PICTURES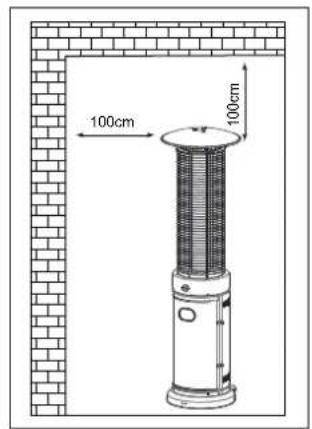
Pic. 1 Pic. 2 PARTS LIST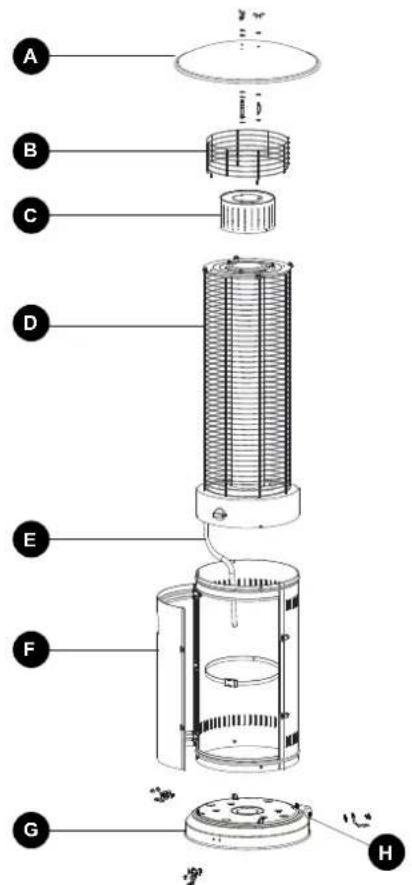
| Part No. | Part name QTY | |
| A ES: Reflector / FR: Réflecteur / GB: Reflector / IT: Riflettore / NL: Reflector / PT: Refletor / SL: Reflektor | 1 | |
| B ES: Malla protectora superior / FR: Maille de protection / GB: Upper Protective Mesh / IT: Rete metallica protettiva superiore / NL: Bovenste beveiligings-scherm / PT: Malha de proteção superior / SL: Zgornja zaščitna mreža | 1 | |
| C | ES: Malla / FR: Maille / GB: Mesh / IT: Rete metallica / NL: Scherm / PT: Rede / SL: Mreža | 1 |
| D | ES: Cuerpo calefactor / FR: Corps de chauffe / GB: Heating Body / IT: Corpo riscal-dante / NL: Verwarmingselement / PT: Estrutura de aquecimento / SL: Grelno telo | 1 |
| E ES: Manguera del gas / FR: Tuyau de gaz / GB: Gas Hose (not included) / IT: Tubo del gas / NL: Gasslang / PT: Mangueira de gás (não incluída) / SL: Plinska cev (ni priložena) | 1 | |
| F | ES: Carcasa del cilindro / FR: Bloc-cylindre / GB: Cylinder Housing / IT: Sede per bombola / NL: Gasflesbehuizing / PT: Compartimento do cilindro / SL: Ohišje valja | 1 |
| G ES: Base / FR: Base / GB: Base / IT: Base / NL: Voetsteun / PT: Base / SL: Baza 1 | ||
| H | ES: Rueda / FR: Roulette / GB: Wheel / IT: Ruota / NL: Wiel / PT: Roda / SL: Kolo | 1 |










| Part No. | Part name QTY | |
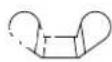
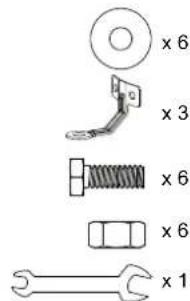
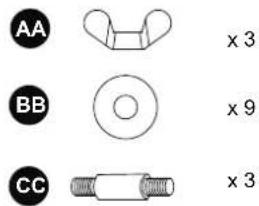
| AA ES: Tuerca mariposa / FR: Écrou papillon / GB: Wing nut / IT: Dado con perno di articolazione / NL: Vleugelmoer / PT: Porca de orelhas / SL: Krilata matica | 3 | |
| BB ES: Ara ndela ø6 / FR: Rondelle ø6 / GB: Washer Φ6 / IT: Rondella ø6 / NL: Ring ø6 / PT: Anilha Φ6 / SL: Podložka Φ6 | 15 | |
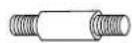
| CC ES: Perno / FR: Montant / GB: Stud / IT: A bottone / NL: Tapbout / PT: Pino roscado / SL: Veznik | 3 | |
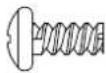
| DD ES: Tornillo M5x10 / FR: Vis M5x10 / GB: Screw M5 x 10 / IT: Vite M5x10 / NL: Schroef M5x10 / PT: Parafuso M5 x 10 / SL: Vijak s krožno glavo M5 x 10 | 11 | |
| EE ES: Fijador de suelo / FR: Fixation sol / GB: Ground Fixer / IT: Fissatore di terra / NL: Grondbevestiging / PT: Fixador de ligação à terra / SL: Element za pri-trditev na tla | 3 | |
| FF ES: Tornillo M6x10 / FR: Boulon M6x10 / GB: Bolt M6 x 10 / IT: Bullone M6x10 / NL: Bout M6x10 PT: Parafuso M6 x 10 / SL: Vijak s šestrobo glavo M6 x 10 | 6 | |
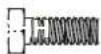
| GG ES: Tuerca / FR: Écrou M6 / GB: Nut M6 / IT: Dado M6 / NL: Moer M6 / PT: Porca M6 / SL: Matica M6 | 6 | |
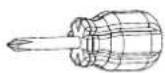
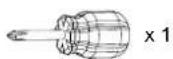
| HH | ES: Llave Philips / FR: Tournevis Philips / GB: Philips screwdriver / IT: Cacciavite a croce / NL: Philips schroevendraaier / PT: Chave de fendas Philips / SL: Križni izvijač | 1 |
| II ES: Llave / FR: Douille / GB: Wrench / IT: Chiave inglese / NL: Steeksleutel / PT: Chave / SL: Ključ | 1 |
Pic. 4
ASSEMBLY


Pic. 5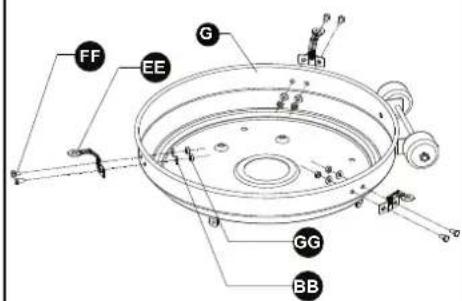
Pic. 6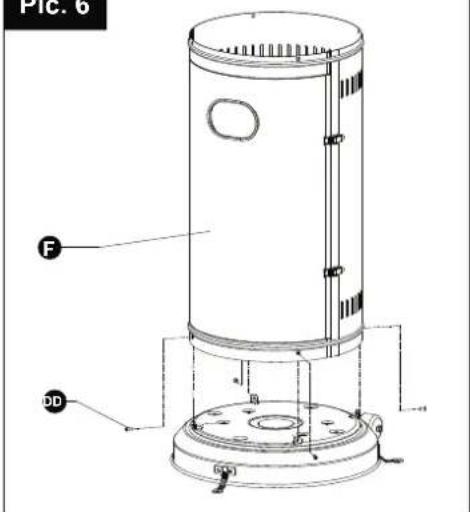


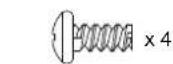
DD
× 4
HH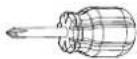
× 1
Pic. 7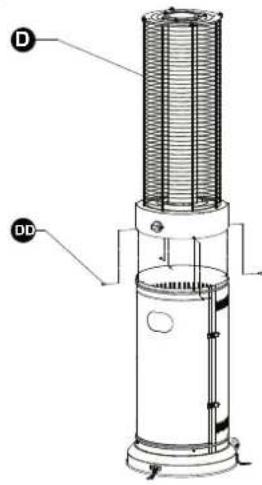
Pic. 8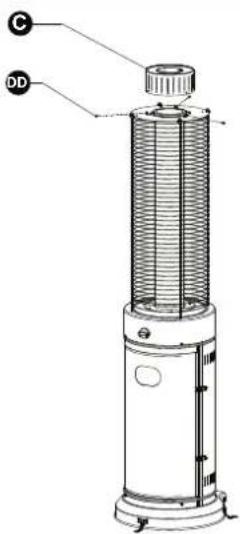
DD
x 3
HH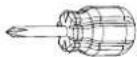
x 1
Pic. 9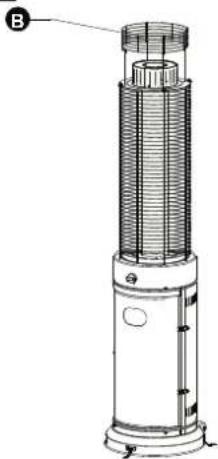
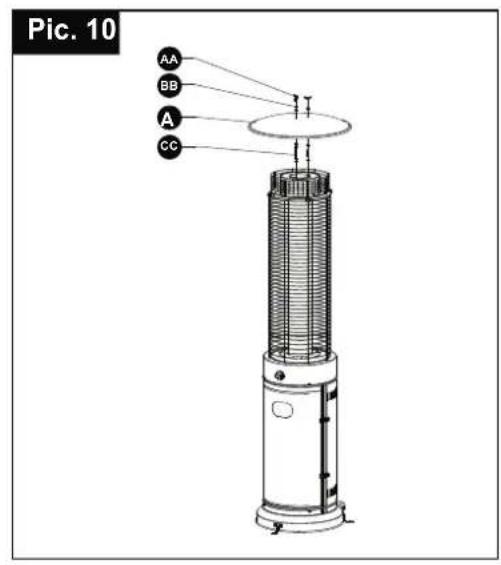
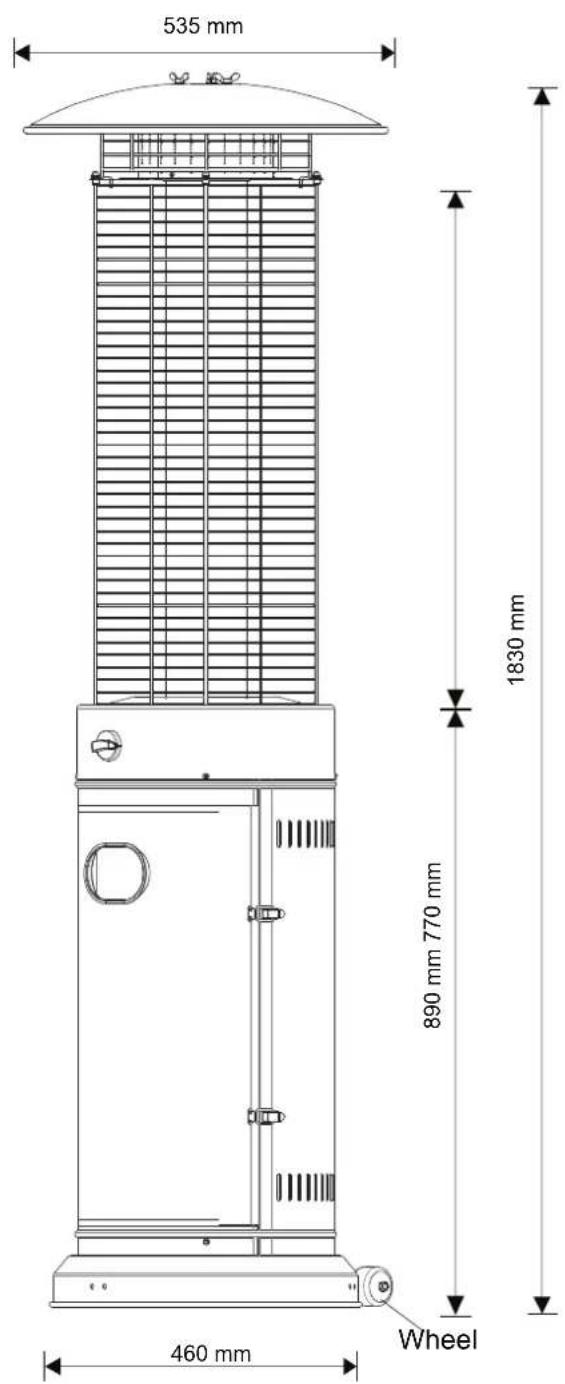
Pic. 13
Pic. 14 Pic. 12
| Model name / Type / Model | Model Modele : Modelo | Model | Model . | Model . | Model . | Model . | Model . | Model . | Model . | Model . | Model . | Model . | Model . | Model . | Model . | Model . | Model . | Model . | Model . | Model . | Model . | Model . | Model . | Model . | Model . | Model . | Model . | Model . | Model . | Model . | Model . | Model . | Model . | Model . | Model . | Model . | ||||||||||||||||||||||||||||||||||||||||||||||||||||||||||||||||||||||||||||||||||||||||||||||||||||||||
| Made in PRC | ||||||||||||||||||||||||||||||||||||||||||||||||||||||||||||||||||||||||||||||||||||||||||||||||||||||||||||||||||||||||||||||||||||||||||||
| .13/48(30) propane, bu- tanie tebr mirtures 2a 18-30 mbar/ G31: 30 mbas // 13+Propane at 37 mbar/Propane at 82-30 mbar/ G31: 37 mbas** | G31: 30 mbas // 13+Propane at 37 mbar/Propane at 82-30 mbar/ G31: 37 mbas** | G31: 30 mbas // 13+Propane at 82-30 mbar/ G31: 37 mbas** | G31: 30 mbas // 13+Propane at 37 mbar/Propane at 82-30 mbar/ G31: 37 mbas** | G31: 30 mbas // 13+Propane at 37 mbar/Propane at 82-30 mbar/ G31: 37 mbas** | G31: 30 mba* // 13+Propane at 37 mbar/Propane at 82-30 mbar/ G31: 37 mbas** | G31: 30 mba* // 13+Propane at 37 mbar/Propane at 82-30 mbar/ G31: 37 mbas** | G31: 30 mba* // 13+G31: 30 mba* // 13+Propane at 37 mbar/Propane at 82-30 mbar/ G31: 37 mbas** | G31: 30 mba* // 13+Propane at 37 mbar/Propane at 82-30 mbar/ G31: 37 mbas** | G31: 28-30 mbar/ G31: 37 mbas** | G31: 28-30 mbar/Propane at 37 mbar/Propane at 82-30 mbar/ G31: 37 mbas** | G31: 28-30 mbar/Propane at 37 mbar/Propane at 82-30 mbar/ G31: 37 mbas** | G31: 28-30 mbar/Propane at 37 mbar/Propane at 82-30 mbar/ G31; 37 mbas** | G31: 28-30 mbar/Propane at 37 mbar/Propane at 82-30 mbar/ G31: 37 mbas** | G31: 28-30 mbar/Propane at 37 mbar/Propane at 82-30 mbar/ G31: 37 mbas** | G30: 28-30 mbar/Propane at 37 mbar/Propane at 82-30 mbar/ G31: 37 mbas** | G30: 28-30 mbar/Propane at 37 mbar/Propane at 82-30 mbar/ G31: 37 mbas** | G30: 28-30 mbar, Propane at 37 mbar/Propane at 82-30 mbar/ G31: 37 mbas** | G30: 28-30 mbar, Propane at 37 mbar/Propane at 82-30 mbar/ G31: 37 mbas** | G30: 28-30 mbar, Propane at 37 mbar/Propano at 82-30 mbar/ G31: 37 mbas** | G30: 28-30 mbar, Propane at 37 mbar/Propano at 82-30 mbar/ G31: 37 mbas** | G30: 28-30 mbar, Propane at 37 mbar/Propano at 82-30mbar/ G31: 37 mbas** | G30: 28-30 mbar, Propane at 37 mbar/Propano at 82-30mbar/ G31: 37 mbas** | G30: 28-30 mbar, Propane at 37 mbar/Propano at 82-30mbar/ G31: 28 mbas** | G30: 28-30 mbar, Propane at 37 mbar/Propano at 82-30mbar/ G31: 28 mbas** | G30: 28-30 mbar, Propane at 37 mbar/Propano at 82-30mbar/ G31: 28 mbas** | G30. 28-30 mbar, Propane at 37 mbar/Propano at 82-30mbar/ G31: 28 mbas** | G30. 28-30 mbar, Propane at 37 mbar/Propano at 82-30mbar/ G31: 28 mbas** | G30. 28-30 mbam, Propane at 37 mbar/Propano at 82-30mbar/ G31: 28 mbas** | G30. 28-30 mbam, Propane at 37 mbar/Propano at 82-30mbar/ G31: 28 mbas** | G30. 28-30 mbam, Propane at 37mbam/Propano at 82-30mbar/ G31: 28 mbas** | G30. 28-30 mbam, Propane at 37mbam/Propano at 82-30mbar/ G31: 28mbas** | G30. 28-30 mbam, Propane at 37mbam/Propano at 82-30mbar/ G31: 28mbas** | G30. 28-30 mbam, Propane at 37mbam/Propano at 82-30mbar/ G31: 28mbas** | G30.28-30 mbam, Propane at 37mbam/Propano at 82-30mbar/ G31: 28mbas** | G30.28-30 mbam, Propane at 37mbam/Propano at 82-30mbar/ G31: 28mbas** | G30.28-30 mbam, Proane at 37mbam/Propano at 82-30mbar/ G31: 28mbas** | G30.28-30 mbam, Propane at 37mbam/Propano at 82-30mbar/ G31: 28mbas** | G30.28-30 mbam, Propane at 37mbam/Propanu at 82-30mbar/ G31: 28mbas** | G30.28-30 mbam, Propane at 37mbam/Propano at 82-30mbar/ G31: 28mbas** | G30.28-30 mbam, Propane at 37mbam/Propano at 82-30mbar, G31: 28mbas** | G30.28-30 mbam, Propane at 37mbam/Propano at 82-30mbar/ G31: 28mbas** | G30.28-30 mbam, Propane at 37mbam/Propano at 82-30mbar/ G31: 28mbas* | G30.28-30 mbam, Propane at 37mbam/Propano at 82-30mbar/ G31: 28mbas** | G30.28-30 mbam, Propane at 37mbam/Propano at 82-30mbar/ G31: 28mbas** | G30.28-31 mbam, Propane at 37mbam/Propano at 82-30mbar/ G31: 28mbas** | G30.28-31 mbam, Propane at 37mbam/Propano at 82-30mbar/ G31: 28mbas** | G30.28-31 mbam, Propane at 37 mbam/Propano at 82-30mbar/ G31: 28mbas** | G30.28-31 mbam, Propane at 37mbam/Propano at 82-30mbar/ G31: 28mbas** | G30.28-31 mbam, Propane at 37mbam/Propano at 82 -13-48 (400 mg) | G30.28-31 mbam, Propane at 37mbam/Propano at 82-30mbar/ G31: 28mbas** | G30.28-31 mbam, Propane at 37mbam/Propano at 82-30mbar/ G31: 28mbas** | G30.28-32 mbam, Propane at 37mbam/Propano at 82-30mbar/ G31: 28mbas** | G30.28-32 mbam, Propane at 37mbam/Propano at 82-30mbar/ G31: 28mbas** | G30.28-32 mbam, Propane at 37 mbam/Propano at 82-30mbar/ G31: 28mbas** | G30.28-32 mbam, Propane at 37mbam/Propano at 82-30mbar/ G31: 28mbas** | G30.28-32 mbam, Propane at 37mbam/Propano at 82 -13-48 (400 mg) | G30.28-32 mbam, Propane at 37mbam/Propano at 82-30mbar/ G31: 28mbas** | G30.28-32 mbam, Propane at 37mbam/Propano at 82-30mbar/ G31: 28mbas** | G30.28-33 mbam, Propane at 37mbam/Propano at 82-30mbar/ G31: 28mbas** | G30.28-33 mbam, Propane at 37mbam/Propano at 82 -13-48 (400 mg) | G30.28-33 mbam, Propane at 37mbam/Propano at 82 -10-48 (400 mg) | G30.28-33 mbam, Propane at 37mbam/Propano at 82 -10-48 (400 mg) | G30.28-34 mbam, Propane at 37mbam/Propano at 82 -10-48 (400 mg) | G30.28-34 mbam, Propane at 37mbam/Propano at 82 -10-48 (400 mg) | G30.28-34 mbam, Propane at 37mbam/Propano at 12 -13-48 (400 mg) | G30.28-34 mbam, Propane at 37mbam/Propano at 82 -10-48 (400 mg) | G30.28-35 mbam, Propane at 37mbam/Propano at 82 -10-48 (400 mg) | G30.28-35 mbam, Propane at 37mbam/Propano at 82 -10-48 (400 mg) | G30.28-35 mbam, Propane at 37mbam/Propano at 12 -13-48 (400 mg) | G30.28-35 mbam, Propane at 37mbam/Propano at 82 -10-48 (400 mg) | G30.28-36 mbam, Propane at 37mbam/Propano at 82 -10-48 (400 mg) | G30.28-36 mbam, Propane at 37mbam/Propano at 82 -10-48 (400 mg) | G30.28-36 mbam, Propane at 37mbam/Propano at 12 -13-48 (400 mg) | G30.28-36 mbam, Propane at 37mbam/Propano at 82 -10-48 (400 mg) | G30.28-37 mbam, Propane at 37mbam/Propano at 82 -10-48 (400 mg) | G30.28-37 mbam, Propane at 37mbam/Propano at 82 -10-48 (400 mg) | G30.28-37 mbam, Propane at 37mbam/Propano at 12 -13-48 (400 mg) | G30.28-37 mbam, Propane at 37mbam/Propano at 82 -10-48 (400 mg) | G30.28-38 mbam, Propane at 37mbam/Propano at 82 -10-48 (400 mg) | G30.28-38 mbam, Propane at 37mbam/Propano at 82 -10-48 (400 mg) | G30.28-38 mbam, Propane at 37mbam/Propano at 12 -13-48 (400 mg) | G30.28-38 mbam, Propane at 37mbam/Propano at 82 -10-48 (400 mg) | G30.28-39 mbam, Propane at 37mbam/Propano at 82 -10-48 (400 mg) | G30.28-39 mbam, Propane at 37mbam/Propano at 82 -10-48 (400 mg) | G30.28-39 mbam, Propane at 37mbam/Propano at 12 -13-48 (400 mg) | G30.28-40 mbam, Propane at 37mbam/Propano at 82 -10-48 (400 mg) | G30.28-40 mbam, Propane at 37mbam/Propano at 82 -10-48 (400 mg) | G30.28-41 mbam, Propane at 37mbam/Propano at 82 -10-48 (400 mg) | G30.28-41 mbam, Propane at 37mbam/Propano at 82 -10-48 (400 mg) | G30.28-42 mbam, Propane at 37mbam/Propano at 82 -10-48 (400 mg) | G30.28-42 mbam, Propane at 37mbam/Propano at 82 -10-48 (400 mg) | G30.28-43 mbam, Propane at 37mbam/Propano at 82 -10-48 (400 mg) | G30.28-44 mbam, Propane at 37mbam/Propano at 82 -10-48 (400 mg) | G30.28-45 mbam, Propane at 37mbam/Propano at 82 -10-48 (400 mg) | G30.28-46 mbam, Propane at 37mbam/Propano at 82 -10-48 (400 mg) | G30.28-47 mbam, Propane at 37mbam/Propano at 82 -10-48 (400 mg) | G30.28-48 mbam, Propane at 37mbam/Propano at 82 -10-48 (400 mg) | G30.28-49 mbam, Propane at 37mbam/Propano at 82 -10-48 (400 mg) | G30.28-50 mbam, Propane at 37mbam/Propano at 82 -10-48 (400 mg) | G30.28-51 mbam, Propane at 37mbam/Propano at 82 -10-48 (400 mg) | G30.28-52 mbam, Propane at 37mbam/Propano at 82 -10-48 (400 mg) | G30.28-53 mbam, Propane at 37mbam/Propano at 82 -10-48 (400 mg) | G30.28-54 mbam, Propane at 37mbam/Propano at 82 -10-48 (400 mg) | G30.28-55 mbam, Propane at 37mbam/Propano at 82 -10-48 (400 mg) | G30.28-56 mbam, Propane at 37mbam/Propano at 82 -10-48 (400 mg) | G30.28-58 mbam, Propane at 37mbam/Propano at 82 -10-48 (400 mg) | G30.28-60 mbam, Propane at 37mbam/Propano at 82 -10-48 (400 mg) | G30.28-62 mbam, Propane at 37mbam/Propano at 82 -10-48 (400 mg) | G30.28-64 mbam, Propane at 37mbam/Propano at 82 -10-48 (400 mg) | G30.28-66 mbam, Propane at 37mbam/Propano at 82 -10-48 (400 mg) | G30.28-69 mbam, Propane at 37mbam/Propano at 82 -10-48 (400 mg) | G30.28-71 mbam, Propane at 37mbam/Propano at 82 -10-48 (400 mg) | G30.28-74 mbam, Propane at 37mbam/Propano at 82 -10-48 (400 mg) | G30.28-77 mbam, Propane at 37mbam/Propano at 82 -10-48 (400 mg) | G30.28-80 mbam, Propane at 37mbam/Propano at 82 -10-48 (400 mg) | G30.28-84 mbam, Propane at 37mbam/Propano at 82 -10-48 (400 mg) | G30.28-87 mbam, Propane at 37mbam/Propano at 82 -10-48 (400 mg) | G30.28-91 mbam, Propane at 37mbam/Propano at 82 -10-48 (400 mg) | G30.28-96 mbam, Propane at 37mbam/Propano at 82 -10-48 (400 mg) | G30.28-99 mbam, Propane at 37mbam/Propano at 82 -10-48 (400 mg) | G30.28-101 mbam, Propane at 37mbam/ | |||||||||||||||||||
GB DK FI FR/BE IT NO NL/BE SE SL
Glima
E INDEX
Assembling the heater
Operation
Storage
Cleaning and care
Troubleshooting
End of life time
Warranty provisions
TABLE OF CONTENTS
Instructions for use
Assembling the heater
Operation
Storage
Cleaning and care
Troubleshooting
WARRANTY PROVISIONS
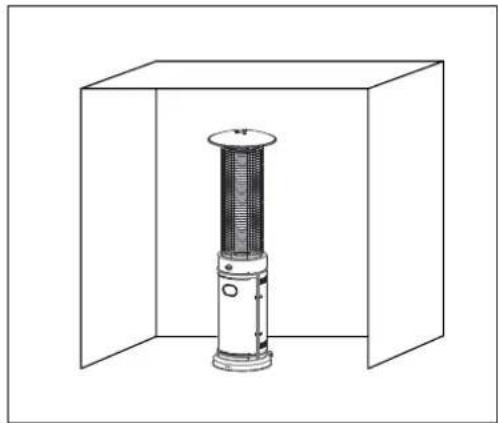
This heater is for outdoor use only. Indoor use is dangerous and strictly forbidden.
Always use in amply ventilated areas. An amply ventilated area must have a minimum of 25% of the surface area open. The surface area is the sum of the walls surface

- Read this user manual carefully before using the appliance and keep it for future reference. Install this device only when it complies with local/national legislation, ordinances and standards.
- The gas fired patio heater is designed for outdoor use only, it will provide radiant heat which warms people and objects rather than the air in between.
- This product is intended to be used as patio heater around residential houses in normal household conditions and environment.
- After unpacking, check the appliance for any damages. When in doubt, do not use the appliance, but contact customer service at your local dealer's. Keep the packaging materials (plastic bags, etc.) away from children, as they may cause hazardous situations to children.
- No modifications to the safety system are allowed.
- Do not remove the injector. This product cannot be converted from one gas to another. Removing or changing the injector is strictly forbidden. When the injector is marked with 1,9 this indicates that the
size of the injector is 1.9 mm.
- This heater is constructed in conformity with relevant texts in the EN14543:2017 standard
- Keep the instructions for future reference

Warnings
- Read the instructions before installation and use. This appliance must be installed and the gas cylinder stored in accordance with the regulations in force.
- Only use the device for its intended purpose. Other usage may lead to burns, fire, explosion, crash, etc. • Install the heater only if it complies with local regulations, laws and standards;
- Check if the information indicated on the type plate corresponds your situation before you connect the appliance.
- Install the heater according to the instructions as described in the installation section of the directions for use;
- This heater is manufactured according to CE safety standards. Nevertheless, as with any other heating device, care must be taken;
- RISK OF FIRE Never use the heater in places where inflammable and/or harmful Gases, products or fumes may be present (e.g. exhaust gases, paint fumes, curtains, paper, clothes);
- If the heater is positioned too close to inflammable materials you may risk fire;
- For safety reasons take care when children or animals are in the proximity of the heater, as with any other heating device, and
Make sure that children are always aware of the presence of a hot heater.
This appliance is not intended for use by persons (including children) with reduced physical, sensory or mental capabilities, or lack of experience and knowledge, unless they have been given supervision or instruction concerning use of the appliance by a person responsible for their safety.
If the heater is damaged, it shall be repaired by the manufacturer, its service agent or similarly qualified persons in order to avoid a hazard.
Children should be supervised to ensure that they do not play with the appliance.
In order to avoid overheating, do not cover the device.
The guard of this heater is intended to prevent direct access to heating elements and must be in place when the heater is in use.
Do not insert objects into the openings of the device.
The guard does not give full protection for young children and infirm persons.
This appliance can be used by children aged from 12 years and above and persons with reduced physical, sensory or mental capabilities or lack of experience and knowledge if they have been given supervision or instruction concerning use of the appliance in a safe way and understand the hazards involved.
Cleaning and user maintenance shall not be made by children without supervision.
Children of less than 3 years should be kept away unless continuously supervised.
Children aged from 3 years and less than 8 years shall only switch on/off the appliance provided that it has been placed or installed in its intended normal operating position and they have been given supervision or instruction concerning use of the appliance in a safe way and understand the hazards involved.
8 years shall only switch on/off the appliance provided that it has been placed or installed in its intended normal operating position and they have been given supervision or instruction concerning use of the appliance in a safe way and understand the hazards involved.
- Children aged from 3 years and less than 8 years shall not plug in, regulate and clean the appliance or perform user maintenance.
- CAUTION - some parts of this product can become very hot and cause burns. Particular attention has to be given where children and vulnerable people are present.
- During operation and just after operation the appliance will be extremely hot. NEVER touch it during operation or just after operation. NEVER move the appliance during this time.
- Switch off the appliance when it is unattended.
- Do not cover or obstruct the heater when in use.
If you fail to consult and/or follow up the rules, instructions and explanation, the warranty will no longer be valid, and the manufacturer will no longer deal with any damage to the appliance and/or your environment under the warranty.
- Read the instructions before installation and use. • This appliance must be installed and the
gas cylinder stored in accordance with the regulations in force.
- Do not obstruct the ventilation holes of the cylinder housing.
- Do not move the appliance when in operation.
- Shut off the valve at the gas cylinder and/or the regulator:
a. before moving the appliance b. after use
- The tubing or the flexible hose must be changed within the prescribed intervals
- Use only the type of gas and the type of cylinder specified by the manufacturer
- In case of violent wind particular attention must be taken against tilting of the appliance
- Have any repairs and/or maintenance carried out by a recognized service engineer only
- Make sure that the correct gas is used and that the gas containers are not exposed to heat or extreme temperature changes. Always store the gas containers in a cool, dry and dark place.
- Always use a suitable and approved low-pressure regulator. In case of any doubt, contact your local dealer.
- Use only the type of gas and the type of cylinder specified by the manufacturer.
- In case of violent wind, particular attention must be taken against tilting of the appliance.
- The tubing or the flexible hose must be changed within the prescribed intervals.
- Turn off the appliance immediately if smell of any gas is detected and extinguish any open flame.
ASSEMBLING THE HEATER
The manufacturer is not responsible for any harm or damage if attention is not paid to the points described above.
The use of this product and the elements required for that purpose is entirely at the end user's own risk.
HEATER LOCATION AND CLEARANCE
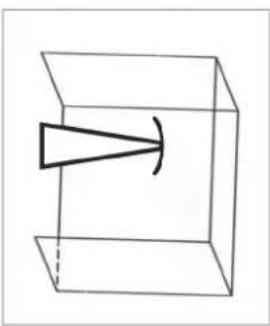
Always maintain: (Pic.1)
- 120 cm clearance from combustible materials,
- minimum 100 cm top clearance
- minimum 100 cm side clearance
- Heater must only be placed and used on a firm, level and stable underground.

WARNINGS
- Never use the heater while it is raining, as the glass tube could break if it suddenly comes into contact with water. Always turn off the heater during rain.
- Never splash any liquid onto the glass tube while the heater is in operation.
- The glass tube becomes extremely hot during operation. Never touch it and keep children away from the heater.
- Always ensure the heater stands firmly; the glass tube may break if the heater falls to the ground.
- Never use the heater if the glass tube has any cracks.
GAS REQUIREMENTS
Use only propane, butane, or LPG. See the rating label on the appliance.
The maximum cylinder size suitable for this appliance is 32 cm in diameter and 59 cm in height. The gas supply from the cylinder to the appliance requires an approved gas hose of 60-80 cm in length and a gas regulator. The hose and regulator assembly must comply with local standard codes.
The regulator's maximum inlet pressure must not exceed 690 kPa.
The regulator outlet pressure should be between 28 mbar (2.8 kPa) and 37 mbar (3.7 kPa), depending on the country.
Installation must conform to local codes, or in the absence of local codes, to the standard for the storage and handling of liquid petroleum gases.
A dented, rusted, or damaged gas cylinder may be hazardous and should be inspected by an authorized gas specialist.
Never use a gas cylinder with a damaged valve connection.
The gas cylinder must be positioned to allow vapor withdrawal from the operating cylinder.
Never twist the flexible tubes and hoses.
- Disconnect the gas cylinder when the heater is not in use.
- Do not connect the gas cylinder directly to the appliance without a regulator.
- Use only the type of gas and the type of cylinder specified in these instructions.
LEAK TESTING
Gas connections on the heater are leak tested at the factory prior to shipment.
A complete gas tightness check must be performed at the installation site due to possible mishandling in shipment and/or installation or because of excessive pressure being applied to the heater. The heater must be checked with a full cylinder.
- Make sure the safety control valve is in the OFF position.
- Make a soapy water solution of one part liquid detergent and one part water. The soapy water solution can be applied with a spray bottle, brush, or rag to all gas connections. Soap bubbles will appear in case of a leak.

WARNING: Never leak test while smoking!
WARNING: In the event of gas leakage, the appliance shall not be used; if alight, the gas supply shall be shut off and the appliance shall be investigated and rectified before it is used again.
- Turn the gas supply ON. And check all the connections with the soapy water solution. No bubbles may appear!
- In case of a leak, turn off the gas supply. Tighten any leaking fittings, then turn the gas supply ON and recheck. Contact your dealer or gas supplier for assistance if bubbles continue to appear.
DIAGRAMMATICAL REPRESENTATIONS OF OUTDOOR AREAS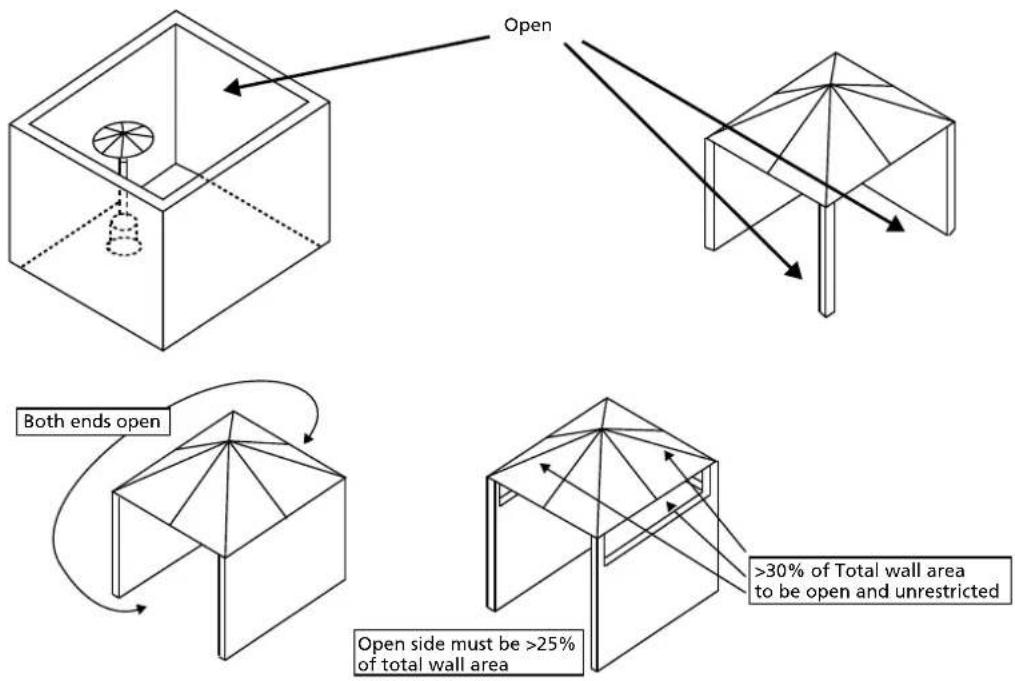
ASSEMBLY
Parts supplied
- Pic. 3 & Pic. 4
Step 1: Pic. 5
- To protect the heater from strong wind, anchor the base securely to the ground with screws. Use the 3 ground fixers as shown in the picture.
Step 2: Pic. 6
Step 3: Pic. 7
Step 4: Pic. 8
OPERATION
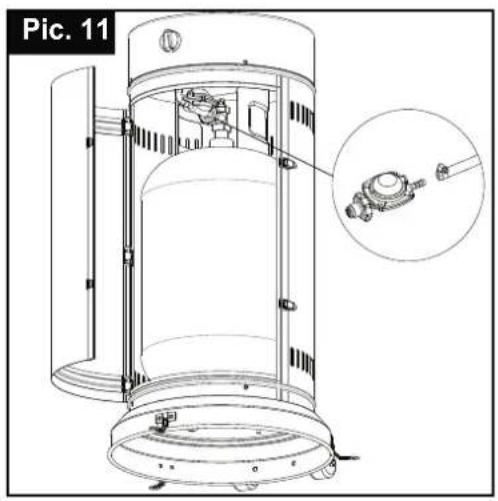
- Connect the gas hose to the gas connector.
Please note:
- The gas hose is NOT included with the heater. The hose must be purchased separately.
- Minimum / Maximum length of gas hose: 60-80 cm.
- Screw connection (France G1/2) is fitted as standard.
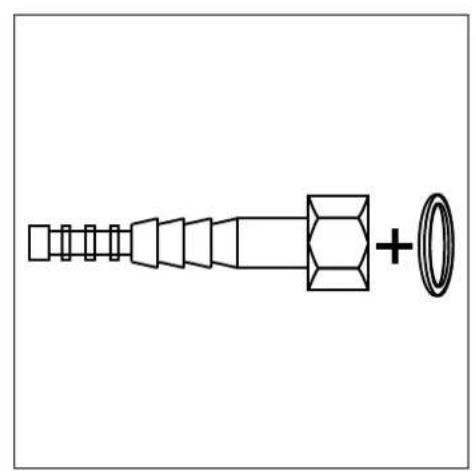
- Hoses 8-13 mm can be fitted as well. When required, use the multi-country connector (Pic. 13) supplied. Fitting of the multi-country connector is described in the separate manual supplied with the included multi-country kit. When using the multi-country connector, ALWAYS make sure to use hose clamps!
- For gas hose with threaded connectors: bind 2 or more rounds of plumbing tape around the gas pipe before connecting the gas hose for security.
- Bind 2 or more rounds of Teflon plumbing tape around the gas burner inlet connector and connect the gas pipe. Use a wrench to tighten the connection.
- Connect the other end of your gas hose according to the mounting instructions supplied with the gas hose and/or the gas regulator.
Note:
- The gas hose is NOT included with the heater.
- The gas regulator is not included with the heater.
- Connect the regulator to the gas cylinder (not included) according to the mounting instructions supplied with the gas regulator and/or the gas cylinder.
- Place the gas cylinder on the base.

WARNING! Ensure the hose does not contact any high temperature surfaces, or it may melt and leak causing a fire. After the cylinder is placed inside the heater, secure the cylinder with the block belt tightly.
TO TURN ON THE HEATER
Check that the regulator seal is correctly fitted and able to fulfil its function.
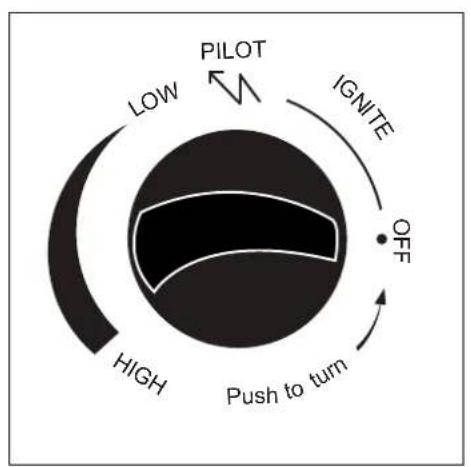
a) Depress and turn the control knob clockwise to the OFF position. b) Fully open the gas valve. c) Depress the control knob and turn it counter-clockwise to the IGNITE position, then to the PILOT position (you will hear 2 clicks). d) With the pilot light lit, keep the control knob depressed for 60 seconds.
Note:
- If a new tank has just been connected, allow at least one minute or more for the air in the gas pipeline to purge out through the pilot hole.
- If the pilot light has not ignited, turn the heater control knob to the OFF position,
fully close the gas valve, wait 5 minutes, then repeat steps b–d of the Lighting Instructions.
- If the pilot light ignites but does not stay lit, turn the heater control knob to the OFF position, fully close the propane gas valve, wait 5 minutes, then repeat steps b–c. Now, using a lighter, ignite the pilot light through the ignition hole on the emitter screen. Once the pilot light is lit, depress the control knob for 60 seconds.
e) After depressing the control knob for 60 seconds, turn the control knob to LOW. To increase the temperature, turn it towards HIGH.
If the burner flame goes out accidentally or is blown out by wind, turn off the heater and wait at least 5 minutes or more to let the gas dissipate before re-lighting to avoid possible gas explosion. Repeat steps c to d.
| ES FR GB IT | NL PT | SLO | |||||
| Apagado Off | Off Spenta | Uit Off | (Desligado) | Off | |||
| Posición de encendido | Position d'allumage | Ignite position | Posizione di accensione | Ontstekings positie | Posição para acender | Vžgite položaj | |
| Lo | Capacidad baja | Capacité faible | Low capacity | Bassa capacità | Laag vermogen | Baixa capacidade | Nizka kapaciteta |
| Hi | Alta capacidad | Capacité élevée | High capacity | Alta capacità | Hoog vermogen | Elevada capacidade | Velika kapaciteta |
Table 1
TO TURN OFF THE HEATER
a) Fully close the gas valve. b) Turn the control knob clockwise to the OFF position.
WARNINGS
- The whole gas system, including the hose, regulator, pilot, and burner, should be inspected for leaks before use, and at least once a month and each time the gas cylinder is changed. Check the hose assembly for signs of extreme abrasion, cuts, or wear. Suspected areas should be leak tested. If the hose leaks, it must be replaced with a new one that conforms to local standard codes. If it shows signs of cracking, splitting, or other deterioration, it shall be exchanged for a new hose of the same length and equivalent quality.
- Make sure the ventilation openings of the cylinder enclosure, control compartment, burner, and circulation air passageways of the heater are free and clear of debris. If debris, spider webs, or insect nests are found, clean the holes with a heavy-duty pipe cleaner or compressed air. Always keep a dry chemical fire extinguisher readily available.
- For safety, always allow a 5-minute complete shut-off period before re-lighting a hot heater.
- Replace the gas tube/hose within the interval described with the hose.
REPLACING THE GAS CYLINDER
- Shut off the heater.
- Close the valve of the gas cylinder.
- Disconnect the regulator from the cylinder following the instructions that came with your regulator.
- Replace the cylinder.
- Make sure there is no flame. Only when no flame: remove the plug or seal cap from the cylinder valve.
- Check for the presence and good state of the gasket before connecting the regulator to the new cylinder.
- Check that the regulator seal is correctly fitted and able to fulfil its function. Perform leak test using soapy water solution.
WARNING: only change the gas cylinder in a amply ventilated area, away from any ignition source (candle, cigarettes, other flame producing appliances, ...).
STORAGE
Make sure the heater is in off position. Always close the valve of the gas cylinder after use or in case of a disturbance. Disconnect the gas container from the gas heater. Store the gas container in a well-ventilated room. Position it far away from inflammable, explosive or hot materials and preferably not in the home. In addition it should never be stored in the basement or attic. Cylinder must be stored out of the reach of children. Disconnected cylinder must have threaded valve plugs tightly installed and must not be stored in garage or any other enclosed area. Only store in ventilated area! Storage of heater indoors is permissible only if the cylinder is disconnected and removed from the heater. Check the tightness of the connections of the gas line supply (gas cylinder valve / regulator, regulator/hose, hose/appliance inlet). If you suspect a damage, have it changed by your gas dealer. Never store liquid gas cylinder in a sub-terrain, or at places without adequate air ventilation.
CLEANING AND CARE
Warning: Make sure the heater is in off position and is cool!
Warning: Do not clean heater with cleaners that are combustible or corrosive.
- Wipe off powder coated surfaces with soft, moist rag and soap water.
- Remove debris, spider and insect nests from ventilation opening of the cylinder enclosure, control compartment, burner and circulation air passageways of the heater with heavy duty pipe cleaner or compressed air to keep appliance clean and safe for use.
- Never clear ports or other openings with toothpicks or other article that will break and block the ports.
- If carbon deposits develop, remove the reflector and flame screen and clean them with soap water.
- Do not paint the flame screen, control panel or reflector.
- Cover the burner unit with the optional supplied protective cover when the heater is not in use. Wait until the heater is cool before covering.
- In a salt-air environment, such as near an ocean, corrosion occurs more quickly than normal. Check frequently for corroded areas and repair them promptly.
TROUBLESHOOTING
Review these tips first and you may not need to call for service.
| Problem Probable cause Solution | ||
| Pilot will not light | Gas valve may be OFF T | Turn the gas valve ON. |
| Tank fuel empty Refill gas tank. | ||
| Pilot injector blocked C | lean or replace pilot injec-tor. | |
| Air in supply system Purge air from lines by pres-sing the control knob until you smell gas. | ||
| Loose connections Check all fittings. | ||
| Low gas pressure Replace cylinder with a new cylinder. | ||
| Pilot will not stay on | Lack of fuel pressure Keep the variable knob depressed for 10-20 seconds or more after the pilot light ignited.Tank near empty. Refill gas tank. | |
| Debris around pilot Clean dirty area. | ||
| Loose connections Tighten connections. | ||
| Thermocouple bad Replace thermocouple. | ||
| Gas leak in line Check connections. | ||
| Burner will not light | Pressure is low Tank near empty. Refill gas tank. | |
| Opening blocked | Remove and clean. | |
| Control is not ON Turn valve to ON. | ||
| Thermocouple bad Replace thermocouple. | ||
| Pilot light assembly bent | Place pilot properly. | |
| Not in correct location | Position properly and retry. | |
| Burner flame is low | Supply hose is bent or twisted | Straighten hose and per-form leak teston hose. |
| Blockage in burner injector | Clean or replace burner injector. | |
| Burner flame goes off immediately after ignition | Low gas pressure Let the pilot flame stay lit for 10 minutes before set-ting variable knob to LO. | |
| Emitter glows une-ven | Blockage in burner injector | Clean or replace burner injector |
| Base is not on a level surface | Place heater on a level surface | |
| Low gas pressure Replace cylinder with a new cylinder. | ||
| Thick black smoke | Blockage in burner | Turn off the heater and let it cool.Remove blockage and clear burnerinside and outside. |
| Carbon build-up | Dirt or film on reflec-tor and flame screen | Clean reflector and flame screen. |
END OF LIFE TIME
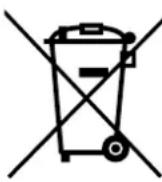
If it is decided that the gas heater is not to be used any more, it is recommended that it be disconnected from the gas container. Also cut the rubber hose. If children play with the heater, make sure that dangerous parts are removed.
Never dispose of non-biodegradable products in the environment, but dispose of them in accordance with current national legislation. At the end of its lifetime, the product must not be disposed of as urban waste. It must be taken to a special local authority differentiated waste collection center or to a dealer providing this service.
Disposing of a household appliance separately avoids possible negative consequences for the environment and health deriving from inappropriate disposal and enables the constituent materials to be recovered in order to make significant savings in energy and resources. As a reminder of the need to dispose of household appliances separately.
WARRANTY PROVISIONS
The appliance is supplied with a 24-month guarantee, commencing on the date of purchase. All material and manufacturing defects will be repaired or replaced free of charge within this period. The following rules apply:
- We expressly refuse all further damage claims, including claims for collateral and/or consequential damage.
- Repairs to or replacement of components within the guarantee period will not result in an extension of the guarantee.
- The guarantee is invalidated if any modifications have been made, non-genuine parts are fitted or repairs are carried out by third parties.
- Components subject to normal wear, such as filters, batteries, lamps and heating elements are not covered by the guarantee.
- The guarantee is valid only when you present the original, dated purchase invoice and if no modifications have been made to it.
- The guarantee is invalid for damage caused by neglect and/or by actions that deviate from those in this instruction booklet.
- Transportation costs and the risks involved during the transportation of the appliance or components of the appliance shall always be for the account of the purchaser.
- Damage caused by not using suitable spare parts is not covered by the guarantee.
To prevent unnecessary expense, we recommend that you always first carefully consult the instructions for use. Take the appliance to your dealer for repairs if these instructions do not provide a solution.
www.Qlima.com

ASSEMBLY
Parts supplied
- Fig. 3 and Fig. 4
Step 1: Fig. 5
ASSEMBLY
Parts supplied
- Fig. 3 and Fig. 4
Step 1: Fig. 5
Distributed in Europe by PVG Holding B.V.
If you need more information or encounter any problems, please visit our website at www.qlima.com or contact our customer service at (+31 (0)412 694 694). For any additional information or if you have any problems with the device, please refer to www.qlima.com or contact your local customer center at (+31 (0)412 694 694). (68) If you need information or if you have a problem, please visit our website at www.qlima.com or contact our customer service at (+34 916 113 113). If you would like additional information or if you encounter a problem, please visit our website (www.qlima.com) or contact our customer service at (+33 (0)232 960 770). FHN If you need service, more information, or if you have problems with the device, please visit our website at www.qlima.com or contact the PVG consumer service center at (+31 (0)412 694 694). (68) If you need information or if you have a problem, please visit our website (www.qlima.com) or contact our sales support at (+31 (0)412 694 694). For information and in case of problems, please visit the website www.qlima.com or contact the Customer Assistance Center at (+39 0571 628 500). If you need information, or if you have a problem with the product, you can visit the website www.qlima.com. Alternatively, you can contact the PVG consumer service at (+31 (0)412 694 694). HL If you need information or if you have a problem, please visit our website (www.qlima.com) or contact the sales support department at (+31 (0)412 694 694). P If you need information or if you have problems, please visit the website www.qlima.com or contact the Assistance Center at (+34 916 113 113). PL In case of problems and for detailed information, please visit the Qlima website at www.qlima.com or contact the Qlima contact center at (+31 (0)412 694 694). (5) If you need service or information or have problems with the device, you can visit www.qlima.com or contact Qlima customer service (you can find the phone number at +31 (0)412 694 694). SLO If you need additional information, please visit the company's website at www.qlima.com or call the phone number (+386 (0)41 674 139). TH If you need more information or if you encounter a problem, please visit the Qlima website at www.qlima.com or contact the Qlima customer center in your country at (+31 (0)412 694 694).




- ASSEMBLY
- GLIMA
- E INDEX
- TABLE OF CONTENTS
- WARRANTY PROVISIONS
- WARNINGS
- ASSEMBLING THE HEATER
- HEATER LOCATION AND CLEARANCE
- ALWAYS MAINTAIN: (PIC.1)
- GAS REQUIREMENTS
- LEAK TESTING
- PARTS SUPPLIED
- STEP 1: PIC
- OPERATION
- PLEASE NOTE
- NOTE
- TO TURN ON THE HEATER
- TO TURN OFF THE HEATER
- REPLACING THE GAS CYLINDER
- STORAGE
- CLEANING AND CARE
- TROUBLESHOOTING
- END OF LIFE TIME
- STEP 1: FIG
- DISTRIBUTED IN EUROPE BY PVG HOLDING B.V
Brand : QLIMA
Model : PGF 1211
Category : Heating