SS10540 - Oven Sogo - Free user manual and instructions
Find the device manual for free SS10540 Sogo in PDF.

| Product type | Electric oven with rotisserie and convection |
| Brand | Sogo |
| Model | SS-10540 |
| Power supply | 220-240 V ~ 50-60 Hz |
| Power | 1500 W |
| Capacity | 35 liters |
| External dimensions (W x D x H) | 511 x 406 x 333 mm |
| Internal dimensions (W x D x H) | 363 x 330 x 268 mm |
| Net weight | 8.4 kg |
| Temperature range | 90 °C to 230 °C |
| Timer | 0 to 60 minutes |
| Cooking functions | Upper and lower heat, grill, convection, rotisserie, toast |
| Interior light | Yes, interior lamp |
| Supplied accessories | Chrome wire rack, enamel tray, tray handle, rotisserie rod with 2 forks, rotisserie handle, user manual |
| Door material | Tempered glass |
| Heating elements | 4 stainless steel elements (top and bottom, some with convection) |
| Safety | Automatic shut-off at timer end, hot surfaces indicated, overheat protection |
| Cleaning and maintenance | Dishwasher-safe accessories; exterior cleaned with damp sponge; do not use abrasive cleaners |
| Repairability | Repairs only by an authorized center; power cord replaceable only by the manufacturer |
| Standards | Low Voltage Directive, EMC, RoHS, ecodesign |
| Country of origin | China |
| Importer | Sanysan Appliances S.L., C/ Barcas 2, 2, 46002 Valencia, Spain |
Frequently Asked Questions - SS10540 Sogo
User questions about SS10540 Sogo
0 question about this device. Answer the ones you know or ask your own.
Ask a new question about this device
Download the instructions for your Oven in PDF format for free! Find your manual SS10540 - Sogo and take your electronic device back in hand. On this page are published all the documents necessary for the use of your device. SS10540 by Sogo.
USER MANUAL SS10540 Sogo
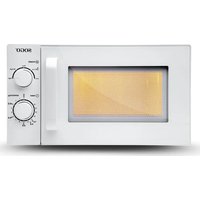
natural_image
Exterior view of a SOGO microwave oven with open lid and control knobs (no visible text or symbols on main body)
Horno eléctrico 35L Electric Oven 35L Four electrique 35L Forno elétrico 35L Elektrischer Ofen 35L Forno elettrico 35L
ANTES DE USAR SU NUEVO HORNO ELÉCTRICO:
• Always read the instruction book carefully before using.
- This manual can be downloaded from our web page www.sogo.es
- Keep these instructions for future reference.
2..Symbol definition
1


4
GENERAL PRECAUTIONS
1- Important information and useful hinds on use
2- Warning against dangerous situations in terms of life and property
3- Warning against fire risk
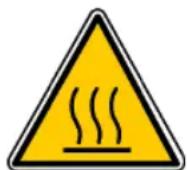
4- Warning against hot surfaces
5- Cautions while using electrical and electronic equipment.
3. Safety instructions for the user
1.
GENERAL
PRECAUTIONS
General precautions during the use of electrical equipment
- Do not use the appliance for any other purpose than described in this manual.
- Do not use or store the appliance outdoors.
• Always place the appliance on to the flat an even surface. - This product is intended for indoor, non-industrial, non-commercial and only for household use. Do not use the item outdoors
or for any other purpose. Misuse or improper handling may cause problems in the appliance and cause injury to the user.
- The unit must be used only for the intended purposes. No liability is accepted for damages arising from improper use or wrong handling.
- Ensure that the voltage indicated on the nameplate matches the mains voltage before plugging in the appliance.
• Always remove the plug from the power socket when the appliance is not in use. Do not leave the appliance unattended when switched on.
- Close supervision is necessary when any appliance is being used by or near children.
- Before cleaning or storing your appliance, always unplug the appliance from the power supply and let it cool down.
- The device is not completely disconnected from the power source, even after it has been turned off. To disconnect it completely, disconnect it from the mains plug.
- The appliances are not intended to be operated by means of an external timer or separate remote-control system.
- This appliance is intended to be used in household and similar applications such as
- Staff kitchen areas in shops, offices and ot working environments;
- Farm houses and by clients in hotels, motels and other residential type environments;
- Bed and breakfast type environments;
- Catering and similar non-retail applications.
- Avoid spillage on the connector
II. Restrictions on use to avoid personal injury
- Do not let the appliance operate unattended.
- Do not place or operate this appliance near water sources.
- Do not place or operate the appliance and its power cord on or near hot surfaces (e.g., stove plates) or open flames
- Do not leave the power cord hanging from sharp edges and keep away from hot objects and flames. Do not wind the cord around the appliance and do not bend it.
- Neither immerse the housing, which contains electrical components and the heating elements in water, nor rinse it under the tap.
- Never use accessories that are not recommended by the manufacturer.
- The use of accessories not recommended or sold by the appliance manufacturer may result in fire, electric shock or injury to persons
- When you want to remove the plug from the wall contact, please do this at the plug itself and not by pulling on the cable or the appliance itself.
- To avoid electric shock, make sure your hands are dry before plugging or unplugging.
- Do not use the device with wet hands, on damp floors or when the atmosphere is humid, there is a risk of electric shock.
- While using the appliance, make sure that the power cord must not be caught or crushed.
- Do not let the motor unit, cord or plug get wet to protect against risk of electric shock.
- Be careful, while handling electrical appliances,
as the surface of the heating element is subject to residual heat after use. Any misuse may cause potential injury to the user and may damage the appliance.
- Do not touch the outer surface of the appliance as it can get very hot during operation. Instead, use the handle or mitts.
III. Product use restrictions due to poor condition or breakdown
- Never immerse the appliance or the plug-in water or any other liquid. In the event of the appliance falling in water, disconnect immediately from the mains supply and take it to an authorized service agent for repair before reusing.
- Do not use the appliance if it has fallen on the floo, if there are visible signs of damage or if it has a leak.
- Do not use the appliance if the cable or plug is damaged. In case of the cord be damaged, it must be replaced only by the manufacturer, its service agent or similarly qualified persons i order to avoid Hazard.
- In case of appliance malfunction, or if it has been damaged in any manner, return the appliance to the nearest authorized service facility for examination, repair or adjustment.
- In case of hardware problems, do not attempt to repair the product yourself. Repairs should only be carried out by qualified technicians
IV. Restrictions on use when used with children and elders
- The appliance is not to be used by persons
(including children) with reduced physical, sensory or mental capabilities, or lack of experience and knowledge, unless they have been given supervision or instruction.
- This appliance can be used by children aged from 8 years and above and persons with reduced physical, sensory or mental capabilities or lack of experience and knowledge if they have been given supervision or instruction concerning use of the appliance in a safe way and understand the hazards involved.
• Children should be supervised to ensure that they do not play with the appliance. - Cleaning and user maintenance shall not be made by children unless they are older than 8 and supervised.
- Keep the appliance and its cord out of reach of children less than 8 years.
- Do not allow the children to use the appliance without supervision.
V. IMPORTANT WARNING
- To avoid a circuit overload when using this product, do not operate another high-wattage product on the same electrical circuit.
- A short power supply cord is provided with this product. An extension cord is not recommended for use with this product, but if one must be used:
- The marked electrical rating of the cord must be at least as great as that of the product.
- Arrange the extension cord so that it does not hang where it can be tripped over or pulled unintentionally.
VI. Instructions to follow when using Oven
- This appliance must be installed following the national regulations for electrical installations.
- The rear of the appliance should be against the wall.
- The oven gives off heat. You should therefore not place it close to combustible materials such as curtains or wood.
- The clearance above the oven should be at least 50 cm and at least 20 cm at the sides.
- Put the unit down on to a heat-resistant mat.
- Ensure that the timer is in the "0" position when you are not using the unit.
- Unplug from outlet when not in use and before cleaning. Allow to cool before putting on or taking off parts, and before cleaning.
- To disconnect, turn the time control to 0, then remove the plug. Always hold the plug, and never pull the cord.
- Extreme caution must be used when moving a drip pan containing hot oil or other hot liquids.
- Do not cover any part of the oven with metal foil. This may cause the oven to overheat.
- Use extreme caution when removing the tray, racks or disposing of hot grease or other hot liquids.
- Do not clean the inside of the oven with metal scouring pads, pieces can break off the pad and touch electrical parts, creating a risk of electric shock.
- Oversized foods or metal utensils must not be inserted in a electric oven as they may create a fire or risk of electric risk.
- A fire may occur if the oven is covered or touching flammable material, including the curtains, draperies, walls, and the like, when in operation. Do not store any item on top of the appliance when in operation.
- Extreme cautions should be exercised when using cooking or baking containers constructed of anything other than metal or ovenproof glass.
- Be sure that nothing touches the top or bottom elements of the oven.
- Do not place any of the following materials in the oven: cardboard, plastic, paper, or anything similar.
- Do not store any materials other than manufacturer's recommended accessories in this oven when not in use.
• Always wear protective, insulated oven gloves when inserting or removing items from the hot oven.
- This appliance has a tempered, safety glass door. The glass in stronger than ordinary glass and more resistant to breakage. Tempered glass can still break around edges. Avoid scratching door surface or nicking edges.
- ⚠️ WARNING: This equipment shall be used with CAUTION as this electrical appliance contains a heating function. Surface of this appliance is also different from other functional surfaces which can produce high temperatures. Since temperatures are differently perceived by different persons. The equipment must be touch only at intended handles and gripping surfaces with the help of heat protectors like gloves or similar type of clothing. Otherwise let it for sufficient time to cool down before touching the hot surfaces.
- WARNING: Do not touch hot surfaces.
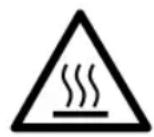
When this symbol is used it means
"CAUTION: Hot Surfaces! "The surfaces are liable to get hot during use.
CLEANING AND MAINTENANCE
Kindly refer to the cleaning and maintenance section for details on how to clean surfaces which comes in the contact of food.
TECHNICAL PARAMETERS
Model: SS-10540
Voltage / Frequency: 220-240V\~50-60Hz Power Consumption: 1500W
Cavity Capacity: 35 Litres
External dimensions:511x406x333mm(LxWxH)
Internal Dimension: 363x330x268mm(LxWxH)
Net Weight: 8.4 kg
Note: Illustrations may differ from actual product. Read all the sections of this booklet and follow all the instructions carefully.
INSTALLATION OF YOUR APPLIANCE:
Before Using Your Appliance
Remove the exterior and interior packing.
Check to be sure you have all of the following parts:
1 Bake/Broil/Drip Énamel Tray
1 Chrome Oven Wire Rack
1 Drip Tray Handle
1 Rotisserie Spit Handle
2 Rotisserie Meat Forks
1 Rotisserie Spit
1 Instruction Manual and warranty Card
Select a location for the appliance.
The location should be in an open area on a flat counter within reach of an outlet.
- When positioning the appliance, it should be set on a flat, steady surface
- Do not block air vents. If they are blocked during operation, the oven may overheat and eventually cause the appliance to fail.
- Choose a location away from hot air, steam or splashing liquids.
- Direct sunlight can damage the heat elements and may increase electrical consumption. Any questions concerning power should be directed toward a certified electrician
- Do not store anything on the top of the unit.
- Keep the appliance at least 20 CM away from rear wall to ensure proper ventilation. Keep a distance of 50 CM on top side and 20CM on the two sides.
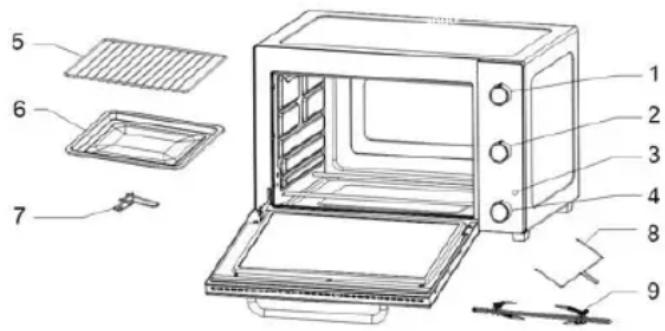
PARTS DIAGRAM AND NAMES:
- Temperature Control
- Function selector switch
- Pilot lamp
- Timer
- Bake rack
- Bake tray
- Chromed Tray handle
- Rotisserie Handle
- Rotisserie Fork
OPERATING INSTRUCTIONS FOR THE OVEN:
Four Knobs operation.
- Temperature control: from 90°C a 230°C
- Timer control: from 0 to 60 minutes
- Function & Temperature Selector 2 (for 4 pcs stainless steel heating elements inside):
Applicable for Baking, Broiling, Toasting, Convection and Rotisserie functions.

OFF

Enable both the upper and the lower heating elements (to toast) and the fan (for Convection Function)

Enable the upper heating element (to broil) and the fan (for Convection Function)

Enable both the upper and the lower heating elements (to toast)

Enable the upper heating element (to broil) and the rotisserie (for Rotisserie Function)

Enable both the upper and the lower heating elements (to toast) and enable the fan and the rotisserie (for Convection and Rotisserie functions combined)
- Inner Lamp: This oven has a lamp inside which lights up when the oven is turned on with the timer set in ON position and it will go into OFF when the timer turns OFF.
BEFORE USING YOUR NEW ELECTRIC OVEN:
Before using your toaster oven for the first time, be sure to:
- Read all of the instructions included in this manual.
- Make sure that the oven is unplugged and the Time control is in the "OFF" position.
- Wash all the accessories in hot, soapy water or in the dishwasher.
- Thoroughly dry all accessories (wire rack and bake tray, tray handle, rotisserie rod and screws) and re-assemble in oven (as per usage applicable), plug oven into outlet and you are ready to use your new toaster oven.
- After re-assembling your oven, we recommend that you run it at the highest temperature (230°C) on the toast function for approximately 15 minutes to eliminate any packing residue that may remain after shipping. This will also remove all traces of odor initially present.
Please Note: Initial start-up operation may result in minimal smell and smoke (about 15 minutes). This is normal and harmless. It is due to burning of the protective substance applied to the heating elements in the factory.
WARNING: TO AVOID RISK OF INJURY OR BURNS, DO NOT TOUCH HOT SURFACES WHEN OVEN IS IN USE. ALWAYS USE OVEN MITTS.
OVEN OPERATION:
- Place the wire rack on the unit support guide.
- Place food on the wire rack or in the bake tray.
- Brush food with sauces or oil, as desired.
- Place food item(s) on the food tray above the grill rack and then close the glass door. We recommend you wrap the food tray with tinfoil under the food item(s) to enable easy cleaning.
- unction Selecto: Choose the options of heating the upper, lower convection or rotisería, whichever is more suitable for your food
- Temperature Selector: Choose the desired temperature from 90°C to 230°C for toasting.
7.imer: Then turn the timer knob to the desired temperature. Kindly note that the heating elements will only be switched on after the timer has been activated. - Turn food over midway through the prescribed cooking time.
- When the food is ready, the timer will automatically give an acoustic signal and the cooking stops (the heating elements are switched off).
- In the event that you have to interrupt the cooking process, turn the timer switch first to OFF position and then open the door. BEWARE OF HOT AIR FLOWING OUT.
CAUTION: Always use extreme care when removing bake tray, wire rack or any hot container from a hot oven. Always use the rack handle, or an oven mitt when
removing hot items from the oven.
NOTE: You must set all three knobs before oven will operate.
Power Light: It will be lit up during the use.
Bell Signal: At the end of the cooking time a bell signal sounds and the oven will turn off automatically.
Preheating-The oven heats up quickly, so preheating is normally not necessary or desirable. If you wish to preheat, simply select the desired temperature, cooking function and time. Remember, you must set the timer; the oven will not turn on without all 3 settings selected.
a) Toast, Bake, Roast: To use the oven, first arrange food on the wire rack or in the drip/baking tray. Next, select from the function selector knob. Next set the desired temperature using the temperature knob. Finally, you must set the timer.
NOTE: Please note that none of the OVEN functions (BROIL, BAKE, TOAST) will operate without the TIMER knob turned to desired cooking time.
b) Convection - To use the convection function, first arrange food on the wire rack or in the drip/baking tray, select ☐ or ☑ from the function selector knob, set the desired temperature using the temperature knob and must set the timer.
The heating elements will cycle ON and OFF to maintain the selected temperature; at the same time the fan motor will operate circulating hot air around the food making baked food rise quickly and evenly. When convection baking is completed, turn the function selector, temperature control and timer selector knobs to the "OFF/0" position and open door fully and remove food carefully, using oven mitts or the rack handles provided.
c) Rotisserie. To use the oven for rotisserie, baking arrange food on the spit (see instructions below) and place the drip/baking tray at the bottom position. First select or from the function selector. Please note that the oven will not turn on without all 3 settings selected.
Guidelines to assemble the rotisserie spit and properly attach food:
After making sure the oven is unplugged, arrange food as follows:
- Place one meat fork on the end of the rotisserie spit opposite the point, with the forks sharp ends facing the center and tighten the screw slightly.
- Slide the other end of the rotisserie spit directly through the center of the meat.
- Place the other meat fork on the other end of the spit. Make sure the fork is securing the food on the spit and tighten the screws.
- Make sure the forks are not too close to the sidewalls of the oven as this could interfere with the rotation.
- When cooking poultry, legs and wings should be secured to the body with cooking string making the food as compact as possible. This is necessary for smooth movement of the rotisserie and to prevent dragging.
- Season or baste the food as desired.
- Place the drip/baking tray directly on the bottom of the oven.
- Insert the thick end of the spit in the drive socket on the right interior wall of the oven and put the other end of the spit in the bracket on the left interior wall. Note that the drive socket is extendable – you may need to slide it outward to hold the spit safely.
- With all selector knobs in the "OFF/0" position, plug the oven in.
- Follow "Rotisserie" function operation instructions at top of this section.
Rotisserie roasting is a healthy way to cook meats because the slow turning spit provides natural basting of meats while fats drip away. The rotisserie can be used to roast meats up to 4 pounds.
CAUTION: The rotisserie spit, meat forks and screws will be hot! Be careful when you try to take out the cooked food out of the oven. Use the rotisserie handle and oven mitts to be safe from high heat.
COOKING TIPS:
- Before putting food in the oven oil the grill shelf.
- Place the drip tray under the grill shelf to avoid oil dropping inside the oven.
- If the food is oily such as roast chicken etc, use two pieces of aluminium foils, put one piece on the drip tray and use another one to cover the food. This avoids oil splashing during operation.
CLEANING & MAINTENANCE:
Warning: Be sure to unplug the oven and allow it to cool before cleaning.
Caution: In order to avoid the risk of an electric shock, never try to repair the unit yourself. Take it to an authorized service station for examination and repair.
DO NOT USE STEEL WOOL SCOURING PADS, ABRASIVE CLEANERS OR SCRAPE THE WALLS WITH A METAL UTENSIL, AS ALL OF THESE METHODS MAY DAMAGE THE CONTINUOUS CLEAN COATING.
All detachable accessories should be washed in hot soapy water or can be cleaned in a dishwasher. The door can be wiped with a damp sponge and wiped dry with a paper or cloth towel. Clean the outside with a damp sponge and dry it with a soft cloth towel. DO NOT USE AN ABRASIVE CLEANER AS IT MAY DAMAGE THE EXTERIOR FINISH.
DO NOT USE AN ABRASIVE CLEANER OR STEEL WOOL SCOURING PAD ON THE DRIP PAN AS IT MAY DAMAGE THE PORCELAIN ENAMEL FINISH.
Ensure that all acidic materials (lemon or oil) are cleaned immediately.
LET ALL PARTS AND SURFACES DRY THOROUGHLY PRIOR TO PLUGGING OVEN IN AND USING.
TROUBLESHOOTING GUIDE:
You can solve many common appliance problems by yourself. Try the suggestions below to see if you can solve the problem before seeking professional assistance.
| PROBLEMS | POSSIBLE CAUSES AND SOLUTIONS |
| Appliance does not operate. | Unit not plugged in. Plug the unit into a AC 220-240V ~ 50-60Hz electrical outlet.Your home's circuit breaker tripped or a blown fuse.Be sure that the function, temperature and timer selectors are set. |
| Only one heating element is heating up. | Function setting selection determines which heating element will operate.When toasting, make sure the oven is not set to BROIL and other settings. |
| Heating elements are not heating up. | Heating elements will cycle ON and OFF to maintain proper heat. Make sure temperature selector is positioned to the desired cooking setting. |
| Overcooked/undercooked Food | Incorrect temperature setting. You may have to adjust the temperature to desired position.Rack placement. Rack may need to be adjusted to accommodate to desired position. |
| Burnt Smell | Food build-up inside appliance, on heating elements or in drip/baking pan. Refer to “Cleaning Your Appliance”. |
ABNORMAL CONDITION:
If abnormal condition occurs, unplug and send this appliance to the any authorized service facility for repair and/or electrical & mechanical adjustments.
STORING YOUR APPLIANCE:
- Allow the appliance to cool completely before storing.
- If storing the appliance for long periods of time, make sure that the appliance is clean and free of food particles.
- Store it in a dry location such as on a table or countertop or in a cupboard shelf.
POSITIONING OF THE WIRE RACKS
CORRECT
WRONG
1. IMPORTANT:
ISTRUZIONI PER L'USO DEL FORNO:
DECLARATION OF CONFORMITY
This device complies with EU Low Voltage Directive 2014/35/EC.
Electromagnetic Compatibility Directive 2014/30/EU. Directive 2015/863/EU on the restriction of the use of certain hazardous substances in electrical.
Directive 2009/125/EC on the eco-design requirements applicable to energy-related products.
This symbol on the product or on the packaging indicates that this product can't be disposed as normal rubbish or household waste. All the electrical, electronic equipment's and battery-operated units must recycle in proper manner and according to the local municipal laws. You can recycle them by taking them to government authorized disposal centres or specialized bins which you can find in any nearby big super markets, electronics or electro domestics products stores or malls who have these types of facilities available.
Designed by: SOGO based on European quality standards Imported by: Sanysan Appliances S.L, NIF: B98753056, C/ Barcas 2, 2, 46002 Valencia, Spain Product manufactured in CHINA After-sales service: www.sogosat.com sogosat@sogosat.com / 0034 902 222 161