
SKR 62 AB - Basket AMICA - Free user manual and instructions
Find the device manual for free SKR 62 AB AMICA in PDF.

| Brand | Amica |
| Model | SKR 62 AB |
| Product type | Range hood |
| Width | 62 cm |
| Installation | Wall mounting above the cooking surface |
| Operating modes | Exhaust to outside or recirculation with charcoal filter |
| Fan speeds | 3 speeds: low, medium, high + stop |
| Lighting | Halogen bulbs or LED modules (depending on version) |
| Grease filter | Aluminum filter, dishwasher safe or hand washable |
| Charcoal filter | Optional for recirculation mode, not washable, replace every 3-4 months |
| Power supply | 230 V / 50 Hz |
| Exhaust duct length | Max 4-5 m, diameter 120 or 150 mm |
| Minimum mounting height | According to technical sheet; for gas cooktop, respect the indicated distance |
| Regular maintenance | Clean exterior and interior at least once a month; grease filter monthly |
| Safety instructions | Never flambé under the hood; disconnect before maintenance; do not use without filter |
| Approximate weight | 12 kg |
| Warranty | According to warranty card; repairs by authorized service |
Frequently Asked Questions - SKR 62 AB AMICA
User questions about SKR 62 AB AMICA
0 question about this device. Answer the ones you know or ask your own.
Ask a new question about this device
Download the instructions for your Basket in PDF format for free! Find your manual SKR 62 AB - AMICA and take your electronic device back in hand. On this page are published all the documents necessary for the use of your device. SKR 62 AB by AMICA.
USER MANUAL SKR 62 AB AMICA
Kitchen extractor hood / kaminhaube /
natural_image
Simple line drawing of a kitchen chimney with steam rising (no text or symbols)OKC613RW / KH17272W / OKC613RB /
KH17271S / OKC6212RM / SKR 62 OW /
OKC6212RA / SKR 62 AB
EN- Table of contents
NOTES ON SAFETY 7
UNPACKING 10
DISPOSAL OF OLD APPLIANCE 10
OPERATION 11
KITCHEN HOOD CONTROLS 11
OTHER IMPORTANT INFORMATION CONCERNING THE OPERATION OF THE HOOD 12
CLEANING AND MAINTENANCE 13
MAINTENANCE 13
GREASE FILTER 13
ACTIVATED CHARCOAL FILTER 13
LIGHT 13
WARRANTY AND AFTER SALES SERVICE 14
WARRANTY 14
GARANTIE, NACHVERKAUF-SERVICE 24
GARANTIE 24
CS- Obsah
BEZPEČNOSTNÍ POKYNY 26
VYBALENI 29
LIKVIDACE OPOTŘEBOVANÝCH ZAŘÍZENÍ 29
OBSLUHA 30
OVLÁDÁNÍ ODSAVAČE 30
JINÉ DÜLEŽITÉ INFORMACE O OBSLUZE ODSAVAČE 31
ČISTĚNÍ A ÚDRŽBA 32
ÚDRŽBA 32
PROTITUKOVÝ FILTR 32
UHLÍKOVÝ FILTR 32
OSVĚTLENÍ 32
ZÁRUKA, POPRODEJNÍ SERVIS 33
ZÁRUKA 33
SK- Obsah
BEZPEČNOSTNÉ POKYNY POUŽÍVANIA 35
ROZBALENIE 39
LIKVIDÁCIA ZARIADENÍ 39
OBSLUHA
40
OVLÁDANIE ODSÁVAČA 40
INÉ DÔLEŽITÉ INFORMÁCIE TÝKAJÚCE SA POUŽÍVANIA ODSÁVAČA 41
ČISTENIE A ÚDRŽBA 42
KONZERVÁCIA
42
PROTITUKOVÝ FILTER 42
UHLÍKOVÝ FILTER 42
OSVETLENIE
42
ZÁRUKA, POPREDAJNÝ SERVIS 43
ZÁRUKA
43
From now on, your daily housework will be easier than ever before. Your appliance Air*optionally easy to use and extremely efficient. After reading these Operating Instructions, operating the appliance will be easy.
Before being packaged and leaving the manufacturer, the appliance was thoroughly checked with regard to safety and functionality.
Before using the appliance, please carefully read these Operating Instructions. By following these instructions carefully you will be able to avoid any problems in using the appliance. It is important to keep these Operating Instructions and store them in a safe place so that they can be consulted at any time.
Follow these instructions carefully in order to avoid possible accidents.
Sincerely,
Amica
NOTES ON SAFETY
- Before using the appliance, please carefully read this manual!
- The appliance is designed for household use only.
- The manufacturer reserves the right to introduce changes, which do not affect operation of the appliance.
- The manufacturer shall not be liable for any damage or fire caused by the appliance resulting from failure to follow instructions in this manual.
- Cooker hood is designed to remove cooking odours. Do not use cooker hood for other purposes.
- Connect the cooker hood operating in extraction mode to a suitable ventilation duct (do NOT connect the cooker to smoke or flue gas ducts, which are in use). It requires installation of the air extraction duct to the outside. The length of the duct (usually a pipe of ∅ 120 or 150 mm) should not be longer than 4-5 m. An air extraction duct is also required for telescopic and furniture hoods in absorption mode.
- Cooker hood operating in air recirculation mode requires the installation of an activated charcoal filter. In this case, installing an extractor duct is not required, however it is recommended to install an air guide vane (Mainly in chimney cooker hoods).
- The cooker hood features independent lighting and exhaust fan that can be operated at one of several speeds.
- Depending on the type, the hood is designed to be permanently attached to a vertical wall over a gas or electric stove (chimney and universal hoods); on the ceiling over a gas or electric stove (island hoods); on the vertical built in furniture over a gas or electric stove (telescopic and built-in hoods). Before installing, make sure that the
wall/ceiling structure is strong enough to suspend the hood. Some hoods are very heavy.
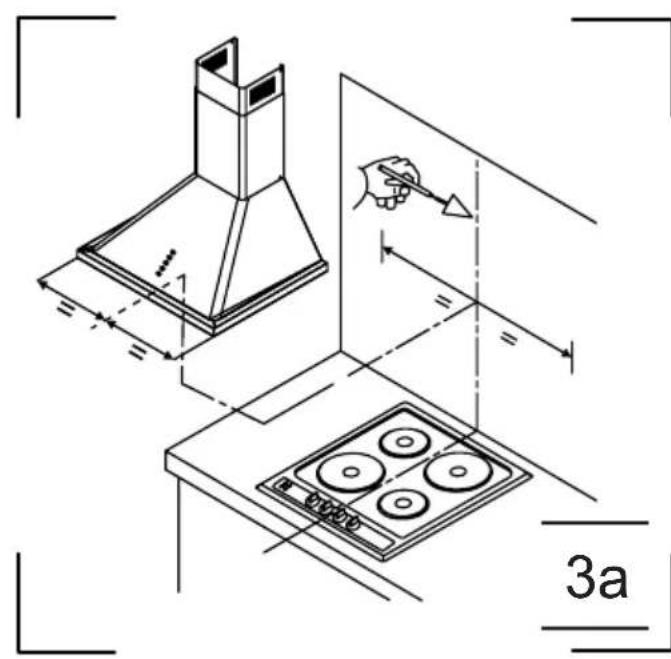
- For details of the installation distance above an electric hob please refer to product technical sheet. If the installation instructions of the gas cooker specify a greater distance, this must be taken into account (Fig. 1).
- Do not leave an open flame under the hood. When the pots are removed from the burner, set the minimum flame. Always make sure that the flame does not extend outside the pot, because it causes unwanted loss of energy and a dangerous concentration of heat.
- When cooking on fat, supervise the pans constantly, because overheated fat can ignite.
- Unplug the appliance before any cleaning, replacing the filter or repair work.
- Cooker hood grease filter should be cleaned at least once a month, because the filter saturated with fat is flammable.
- Ensure adequate ventilation (air flow) if other equipment such as liquid fuel stoves or heaters are operated in the room in addition the cooker hood. When the cooker hood is simultaneously operated with burning appliances requiring adequate fresh air from the room to work properly, their safe operation is possible if under pressure around these appliances is a maximum of 0.004 mbar (this does not apply when the cooker hood is used as an odour filter)
- Do not lean on the hood.
- The hood should be cleaned regularly both inside and out (AT LEAST ONCE A MONTH, following the indications concerning maintenance provided in this manual)..Failure to adhere to the rules concerning cleaning the hood and replacing filters results in a fire risk.
- If the power cord is damaged it should be replaced by a specialised service centre.
- Ensure that it is possible to disconnect the ap-
pliance from the mains by removing the plug or switching off the bi-polar switch.
- This appliance is not intended for use by persons (including children) with physical, mental or sensory handicaps, or by persons inexperienced or unfamiliar with the appliance, unless under supervision or in accordance with the instructions as communicated to them by persons responsible for their safety.
- Particular attention should be paid not to allow unaccompanied children to use the appliance.
- Make sure voltage indicated on the nameplate corresponds to the local mains supply voltage.
- Before use, extend and straighten the power cord.
- Packaging materials (bags, polyethylene, polystyrene, etc.) should be kept away from children during unpacking.
- Before connecting the hood to the mains power supply always check that the power cord is properly installed and is not trapped by the appliance. Do not connect the appliance to the mains until assembly is complete.
- Do not operate your kitchen hood without the aluminium grease filters.
- It is strictly forbidden to cook dishes under on an open flame (flambé) under your kitchen hood.
- Always strictly adhere to regulations issued by the competent local authorities regarding the technical and safety requirements for fume extraction.
- Failing to tighten bolts and fasteners in accordance with these instructions may endanger life and health.
- Hanging kitchen hoods operate only in air circulation / odour absorber mode
- WARNING! Failure to install the screws or fixing device in accordance with these instructions may result in electrical hazards.
UNPACKING

natural_image
Recycling symbol composed of three chasing arrows forming a triangle (no text or labels)During transportation, protective packaging was used to protect the appliance against any damage. After unpacking, please dispose of all elements of packaging in a way that will not cause damage to the environment.
All materials used for packaging the appliance are environmentally friendly; they are 100% recyclable and are marked with the appropriate symbol.
Important! Packaging materials (bags, polyethylene, polystyrene, etc.) should be kept away from children during unpacking.
DISPOSAL OF OLD APPLIANCE
natural_image
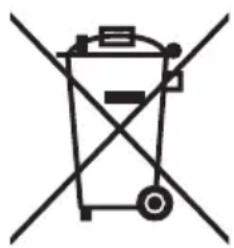
Symbol of a trash bin crossed out by two diagonal lines (no text or numbers present)In accordance with European Directive 2012/19/EU and local legislation regarding used electrical and electronic goods, this appliance is marked with the symbol of the crossed-out waste container. This marking indicates that the appliance must not be disposed of together with other household waste after it has been used.
The user is obliged to hand it over to waste collection centre collecting used electrical and electronic goods. The collectors, including local collection points, shops and local authority departments provide recycling schemes.
Proper handling of used electrical and electronic goods helps avoid environmental and health hazards resulting from the presence of dangerous components and the inappropriate storage and processing of such goods.
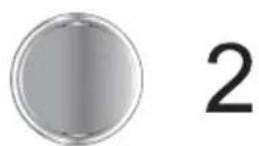
OPERATION
Kitchen hood controls
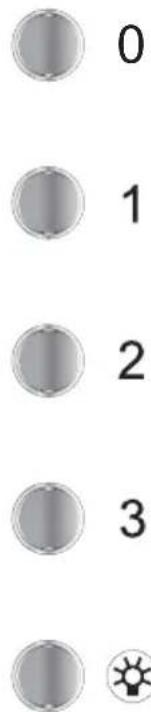
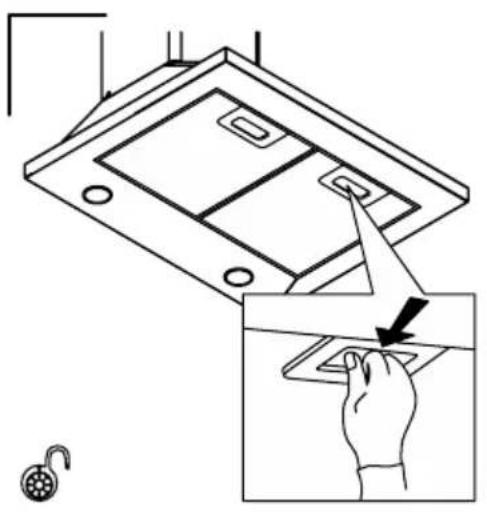
Control Panel is shown in Figure 4, for reference it is also shown below:
text_image
0 1 2 3The control panel is equipped with buttons (isostat switch).
To turn on the kitchen hood, press one of the button to select the desired speed:
1- Low speed. Use this speed when cooking a little food with hardly any fumes.
2- Medium speed. Use this speed when cooking multiple dishes at the same time with moderate amount of fumes.
3- High speed. Use this speed when frying or grilling, with large amount of fumes.
0- Turn off the appliance
Press 📂 to turn the lighting on/off. The lighting operates independently of hood fan.
Other important information concerning the operation of the hood
Operation in air circulation / odour filter mode. In this mode, the filtered air returns to the room through the outlets. Install activated charcoal filter in this setting. It is recommended to install the air guide (available depending on the model, mainly in chimney cooker hoods).
Air extraction operation: When cooker hood operates in extraction mode, air is discharged outside through an extraction duct. Remove activated charcoal filter in this setting. The cooker hood is connected to the air outlet opening using a rigid or flexible extraction duct with a diameter of 150 or 120 mm, and the appropriate clamps, which must be purchased at a hardware store. The appliance should be installed by a qualified installer.
Fan speed: Lowest and medium fan speed is used in normal conditions and less intense odours, while the highest speed is used only when cooking odours are very intense, such as during frying or grilling.
Note (applies to universal hoods only): Due to the design of universal hoods you need to manually change the mode of operation. See Figure 8 for instructions on how to change the mode.
Note (only applies to telescopic and in-built kitchen hoods): Furniture and telescopic cooker hoods operating in air recirculation mode require installation of the exhaust duct. The other end of the duct should be directed to the room as it will discharge filtered air.
Note: Hanging kitchen hoods operate only in air circulation / odour absorber mode
CLEANING AND MAINTENANCE
Maintenance
Regular maintenance and cleaning of the appliance will ensure trouble-free operation of the cooker hood and extend its life. Especially make sure that the grease filter and activated charcoal filter are replaced according to manufacturer's recommendations.
- Do not use a soaked cloth, sponge, or water jet.
- Do not use solvents or alcohol, as they may tarnish lacquered surfaces.
- Do not use caustic substances, especially for cleaning stainless steel.
- Do not use a rough or abrasive cloth.
- It is recommend to use a damp cloth and a neutral detergent.
Note: After several washes in the dishwasher, the colour of the aluminium filter may change. The change of colour does not indicate improprieties or the necessity to change it.
Grease filter
For normal hood operation, grease filter should be cleaned every month in the dishwasher or by hand using a mild detergent or liquid soap.
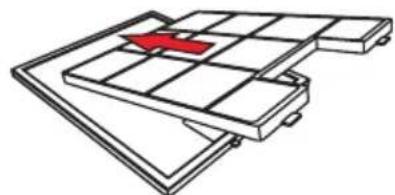
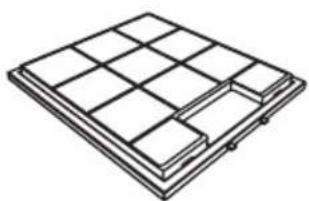
Dismantling of grease filter is shown on Figure 5.
Acrylic filter is used in some models. This filter should be replaced at least once every 2 months or more frequently if the appliance is used intensively.
Activated charcoal filter
Charcoal filter is used only when the cooker hood is not connected to the ventilation duct. Activated charcoal filter can absorb odours until saturated. Charcoal filter is not suitable for washing or regeneration and should be replaced at least once every 3-4 months or more frequently if the appliance is used intensively.
Dismantling of charcoal filter is shown on Figure 6.
Light
Use incandescent / halogen / LED modules of the same specification as those factory-installed in the appliance. See Figure 7 for details how to replace lights. If there is no such figure in this manual, please contact authorised service to replace the lighting module.
WARRANTY AND AFTER SALES SERVICE
Warranty
Warranty service as stated on the warranty card. The manufacturer shall not be held liable for any damage caused by improper use of the product.
Service
- The manufacturer recommends that all repairs and adjustments be carried out by the Factory Service Technician or the Manufacturer's Authorized Service Point. For safety reasons, repairs should be referred to professionals.
- Repairs carried out by unqualified persons may seriously endanger the appliance user.
- The minimum warranty period for the appliance offered by the manufacturer, importer or authorized representative is given in the warranty card.
- The warranty shall be void if you make any independent adaptations or alterations, tamper with seals or other appliance safety devices or its parts or interfere with the appliance contrary to operating instructions.
In the event of appliance malfunction, request assistance or repair.
If your appliance needs repair, please contact the service centre. Please see warranty card for address and contact details of our service centre. Before contacting us, please have ready the appliance serial number, which can be found on the identification sticker: For your convenience, please write it down below:
Manufacturer's Declaration
The manufacturer hereby declares that this product meets the requirements of the following European directives:
• Low Voltage Directive 2014/35/EC
• Electromagnetic Compatibility (EMC) Directive 2014/30/EC
• ErP Directive 2009/125/EC
• Directive RoHS 2011/65/EC
and has thus been marked with the symbol and been issued with a declaration of compliance made available to market regulators.
natural_image
Recycling symbol composed of three chasing arrows forming a triangle (no text or labels)natural_image
Simple line drawing of a trash bin with two crossed lines indicating no waste or discharge (no text or symbols)GARANTIE, NACHVERKAUFSERVICE
Garantie
natural_image
Recycling symbol composed of three chasing arrows forming a triangle (no text or labels)natural_image
Symbol of a trash bin crossed with no text or numbers, representing waste sorting or disposal (no text present)natural_image
Recycling symbol composed of three chasing arrows forming a triangle (no text or labels)natural_image
Symbol of a trash bin crossed with two diagonal lines, no text or labels presentnatural_image
Recycling symbol composed of three chasing arrows forming a triangle (no text or labels)natural_image
Symbol of a trash bin crossed with two crossed lines, representing waste or discharge (no text or labels)natural_image
Recycling symbol composed of three chasing arrows forming a triangle (no text or labels)natural_image
Symbol of a trash bin crossed with two crossed lines, representing waste or discharge (no text or labels)natural_image
Recycling symbol composed of three chasing arrows forming a triangle (no text or labels)natural_image
Symbol of a trash bin crossed with a diagonal line, representing waste sorting or disposal (no text or labels)natural_image
Recycling symbol composed of three chasing arrows forming a triangle (no text or labels)Uređaj je za vrijeme transporta za- štićen od oštećenja. Nakon vađenja uređaja iz pakiranja molimo Vas da elemente ambalaže uklonite na način koji ne ugrožava okoliš.
Svi materijali korišteni za pakiranje nisu štetni za okoliš, 100% materijala je prikladno za recikliranje, stoga su označeni odgovarajućim simbolom.
Pozor! Elemente pakiranja (polietilenske vrećice, komadići stiropora itd.) prilikom uklanjanja ambalaže držati daleko od djece.
ZBRINJAVANJE POTROŠENIH UREĐAJA

natural_image
Simple line drawing of a trash bin with two crossed lines indicating no waste or prohibition (no text or symbols)Ovaj uređaj je označen u skladu s europskom uredbom 2012/19/EU.
Oznaka na proizvodu pokazuje da ovaj proizvod nakon njegovog životnog vijeka ne može biti tretiran kao obični kućanski otpad.
Korisnik ima obvezu ovaj proizvod predati na odgovarajuće sabirno mjesto za recikliranje potrošenė električne i elektroničke opreme. Ustanove za prikupljanje ovakvog otpada, uključujući lokalne sabirne točke, kupovna mjesta, opcinske jedinice, stvaraju odgovarajući sustav koji omogućava zbrinjavanje ovakve opreme.
Pravilno odlaganje potrošene električne i elektroničke opreme sprečava potencijalne negativne posljedice za okoliš i ljudsko zdravlje, koje inače mogu biti uzrokovane neodgovarajućim odlaganjem i preradom ovog proizvoda.
UPORABA
Upravljanje napom
other
| Dimension | Value | | ----------------- | ----- | | Total Height | 600 | | Top Height | 500 | | Middle Height | 30 | | Bottom Height | 260 | | Top Height | 400 | | Middle Height | 210 | | Top Height | 180 |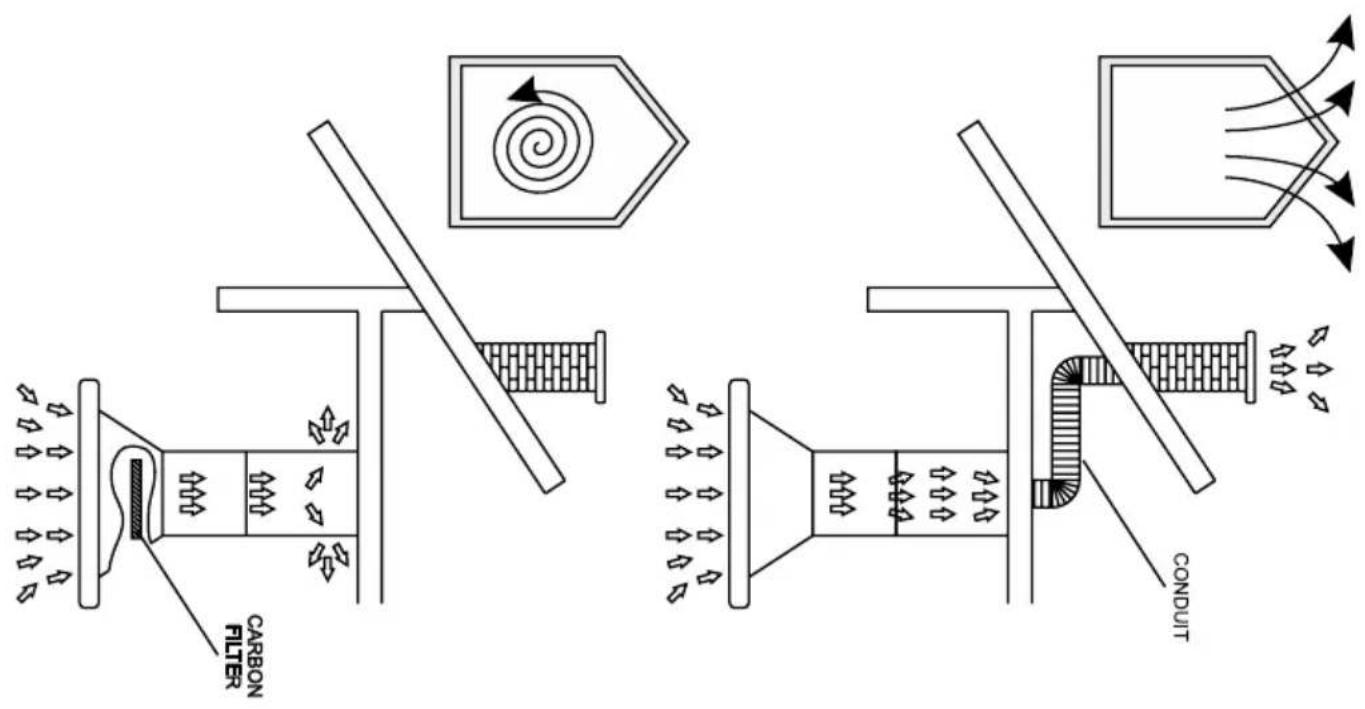
text_image
CONDUIT CARBON FILTER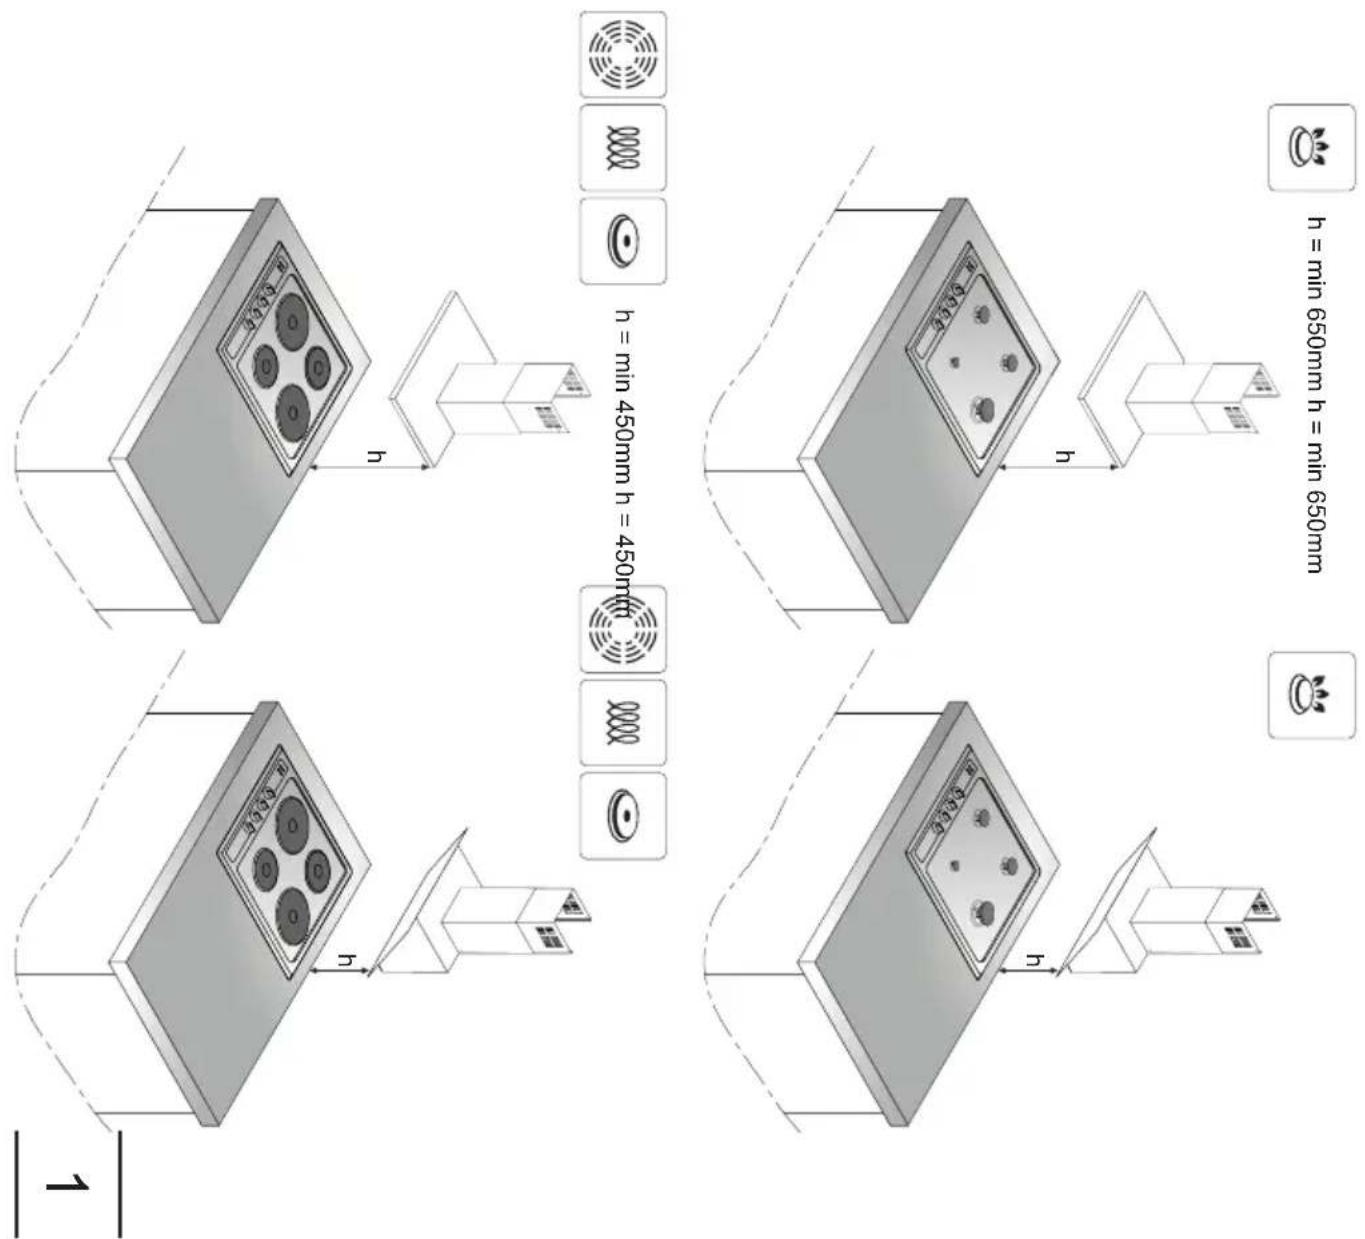
text_image
h = min 650mm h = min 650mm h = min 450mm h = 450mm h h 1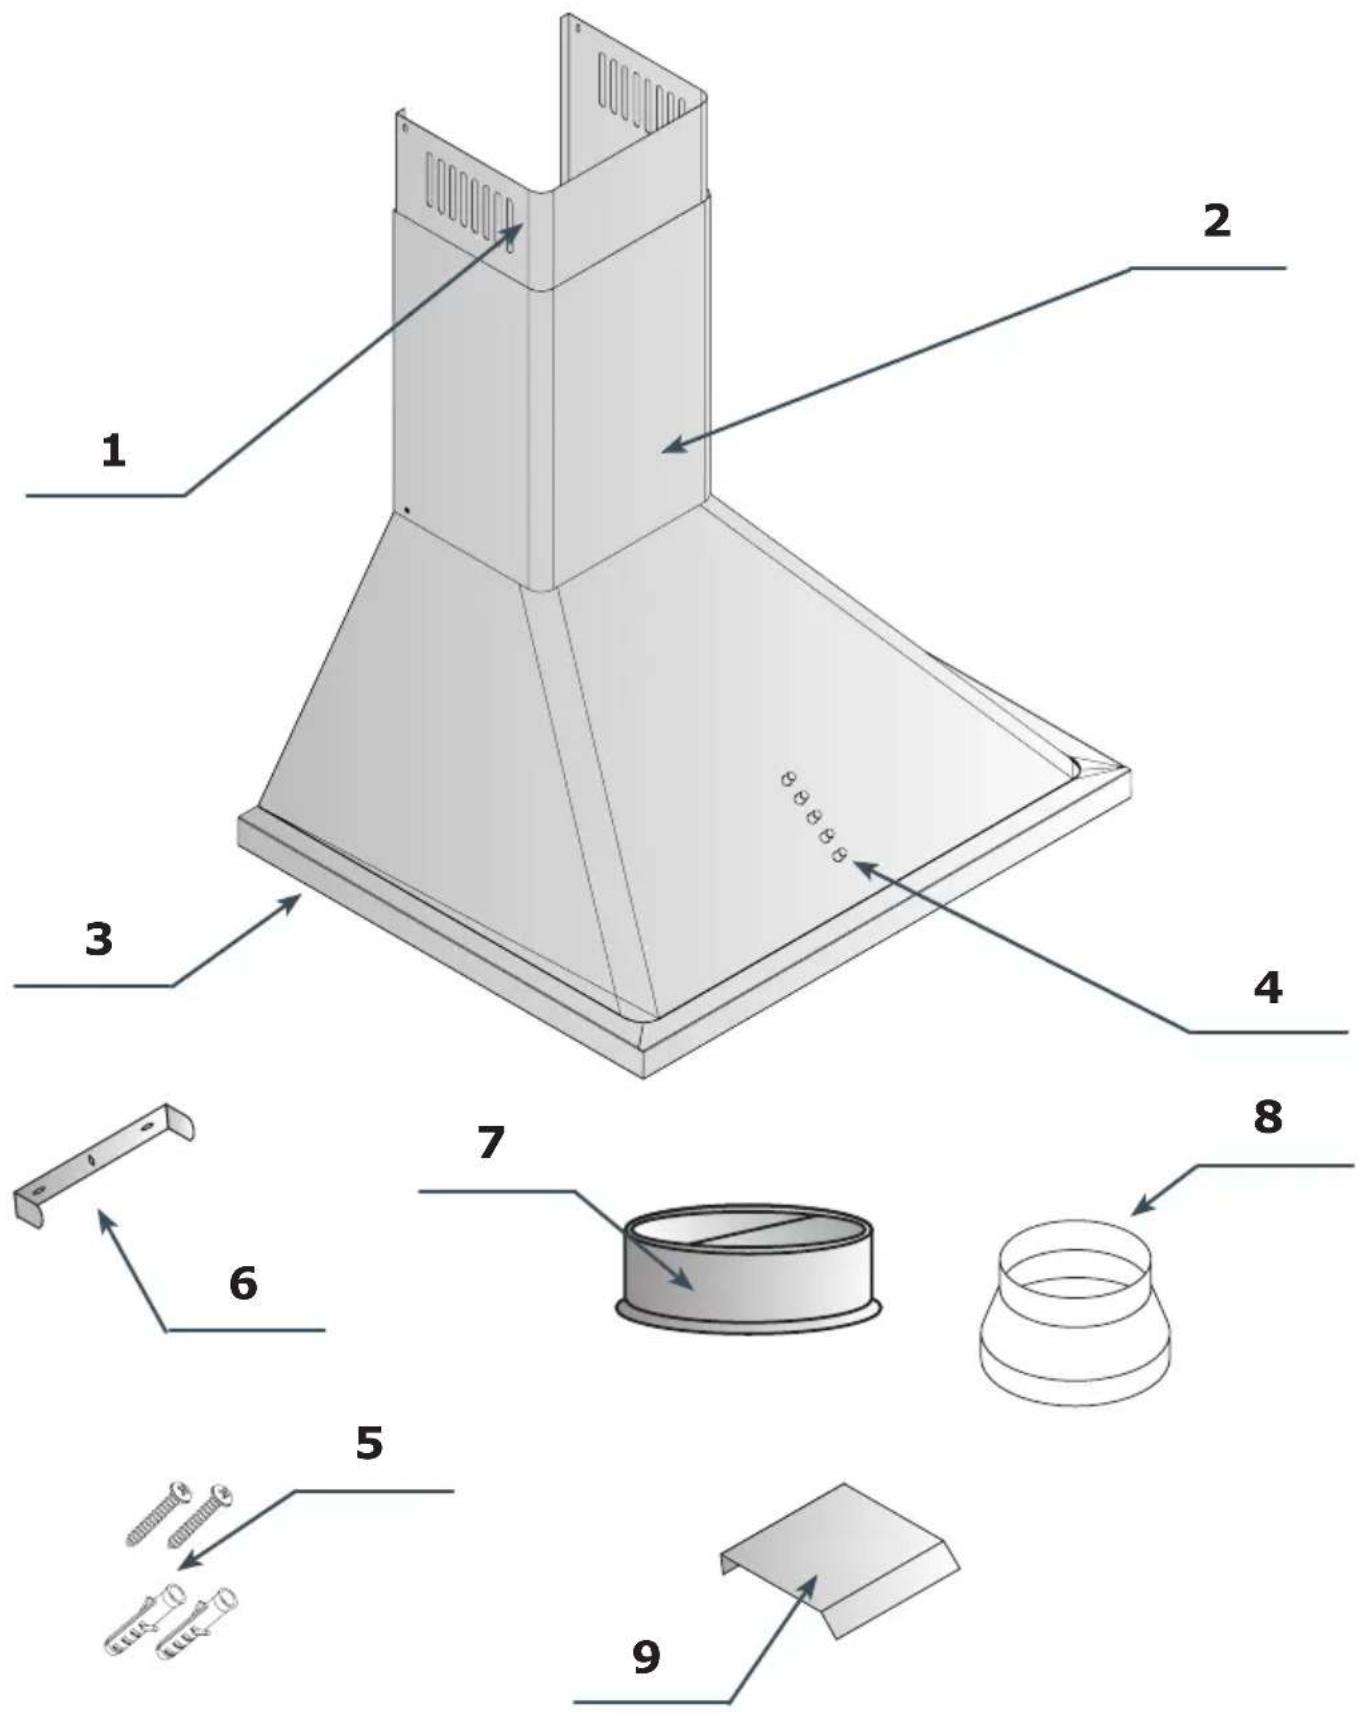
text_image
Technical diagram of a chimney structure with numbered components and labeled parts in English| EN DE CS SK FR NL PL HR | ||||||||
| 1 | Upper chimney cover | obere Abdeckung | Horní krycí lišta | Horná krycia lišta | Cheminée supérieure | Bovenste sierkap | Maskownica górna | Gornja letvica |
| 2 | Lower chimney cover | untere Abdeckung | Spodní krycí lišta | Dolná krycia lišta | Cheminée inférieure | Onderste sierkap | Maskownica dolna | Donja letvica |
| 3 | Lighting | Beleuchtung | Osvětlení | Osvetlenie | Éclairage | Verlichting | Oświetlenie | Rasvjeta |
| 4 | Control Panel | Bedienfeld | Ovládací panel | Ovládací panel | Panneau de commande | Bedieningspaneel Panel sterowania | Upravljačka ploča | |
| 5 | Screws and wall plugs | Schrauben und Spreizdúbel | Vruty a hmoždinky | Skrutky a rozperné kolíky | Vis et chevilles | Schroeven en pluggen | Wkręty i kolki rozporowe | Vijci i tiple |
| 6 | Upper chimney cover holder | Halterung der oberen Abdeckung | Úchyt horní krycí listy | Držiak hornej krycej listy | Fixation de la chemi- nee supérieure | Houder sierkap boven | Uchwyt maskownicy gornej | Nosač glavnog zaslona |
| 7 | Air flaps | Rückschlagklappen | Zpětné klapky | Spätné klapky | Clapets anti-retour | Terugslagkleppen | Klapki zwrotne | Povratne klapne |
| 8 | Connecting piece Anschlussstutzen Připojovać | Prípojné hrdlo | Prípojné hrdlo | Tubulure de raccordement | Aansluitstuk | Króciec przyłącze-niowy | Priključak | |
| 9 | Air guide | Luftumlenkblech | Ovládání vzduchu | Smerovač vzduchu | Guidage d'air | Luchtbesturing | Kierownica powietrza | Usmjerivač zraka |
text_image
3a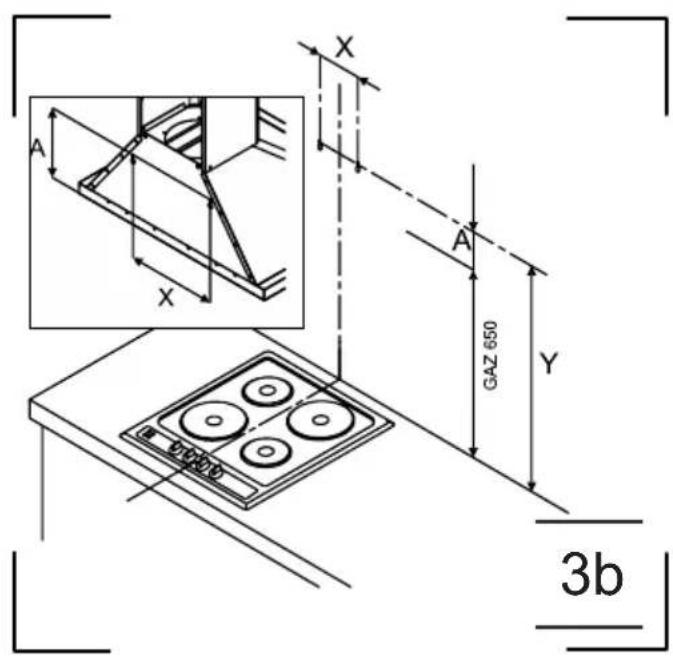
text_image
A X X A GAZ 650 Y 3b
text_image
2 x Ø8 3c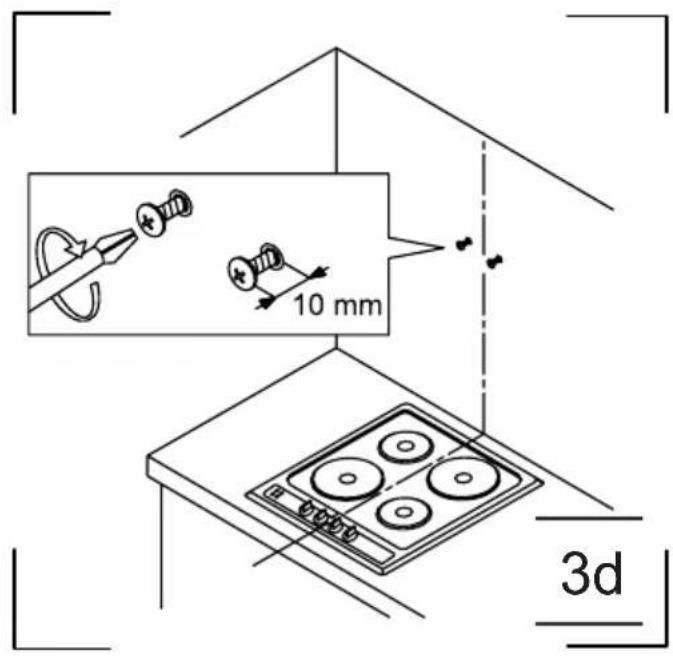
text_image
10 mm 3d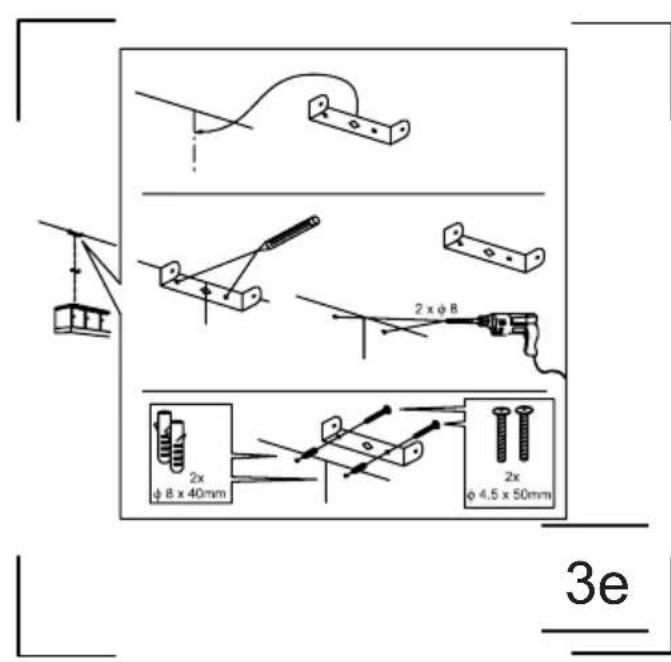
text_image
2 x φ 8 φ 8 x 40mm 2x φ 4.5 x 50mm 3e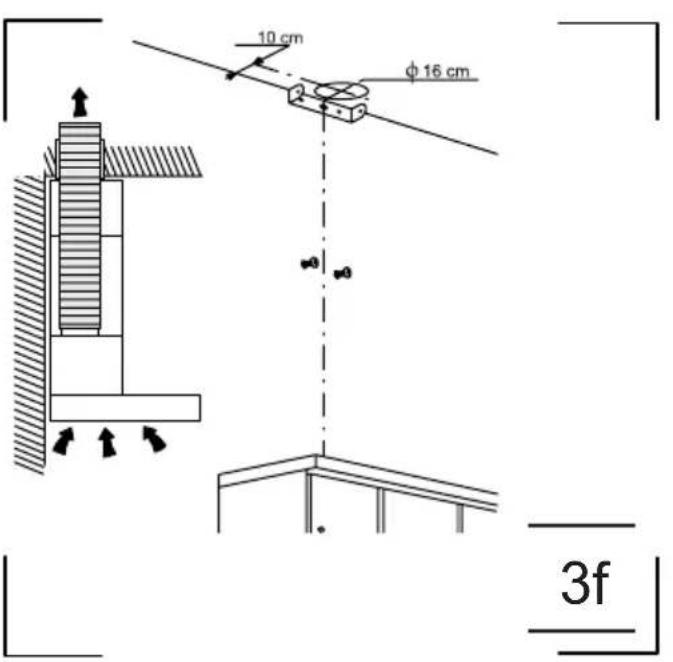
text_image
10 cm φ 16 cm 3f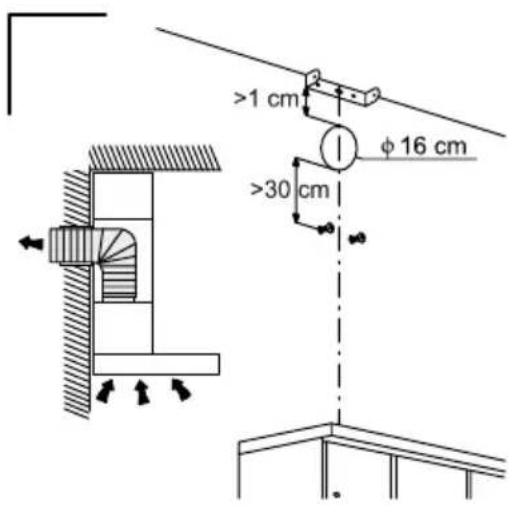
text_image
>1 cm φ 16 cm >30 cm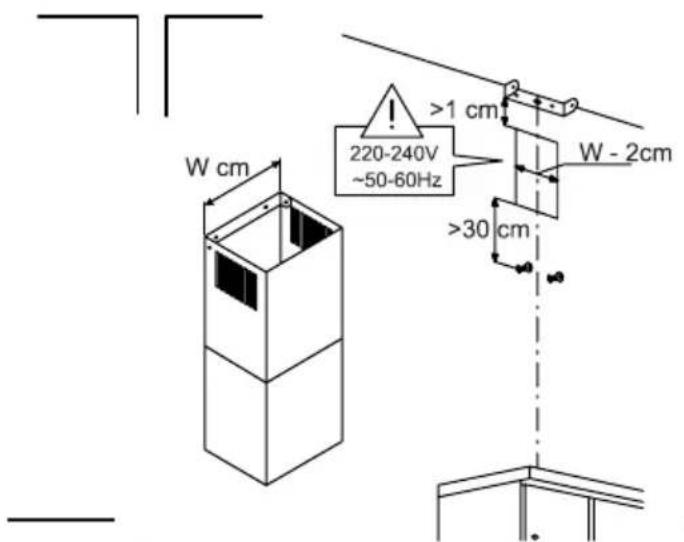
text_image
W cm 220-240V ~50-60Hz >1 cm W - 2cm >30 cm3h
natural_image
Diagram showing a hand pressing down on a device panel with a magnified view of the component (no text or symbols present)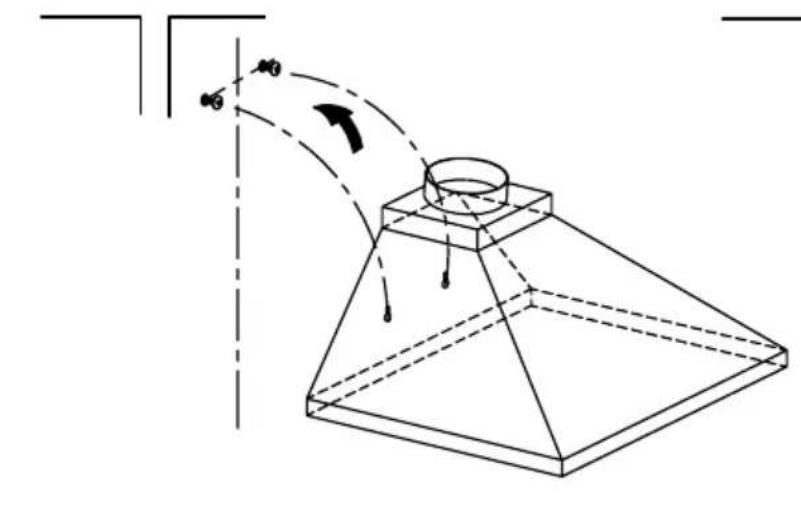
natural_image
Technical line drawing of a conical structure with directional arrows indicating motion (no text or symbols)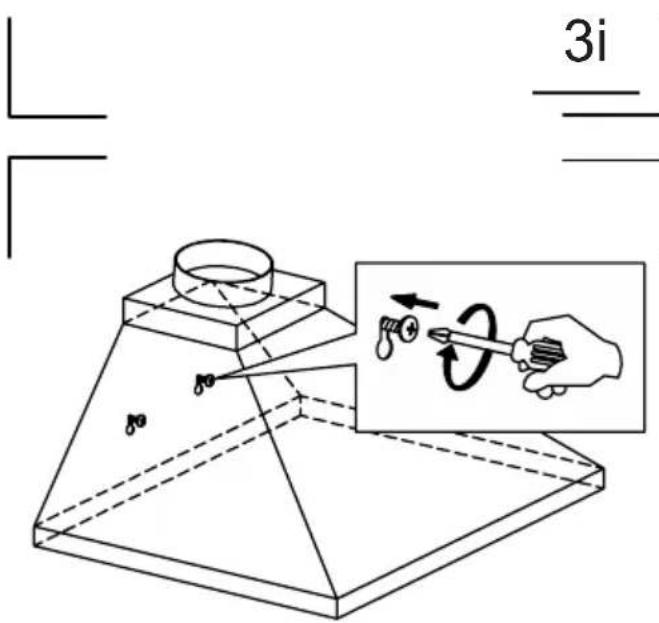
text_image
3i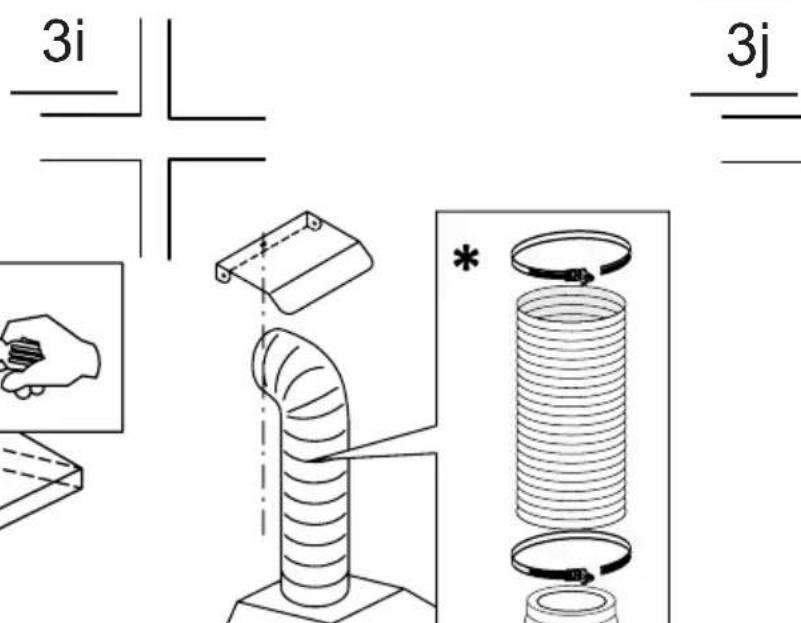
text_image
3i 3j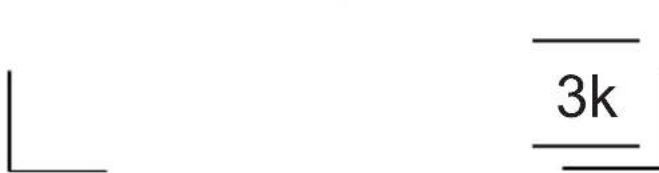
text_image
3k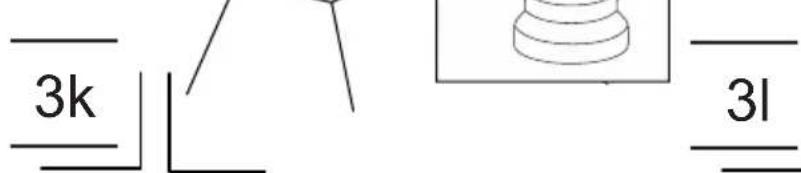
text_image
3k 3l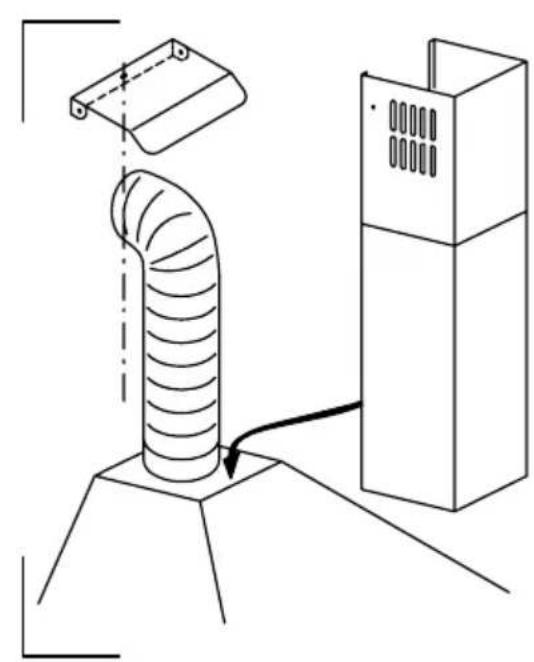
natural_image
Technical line drawing of a pipe installation with a tower and support structure (no text or symbols)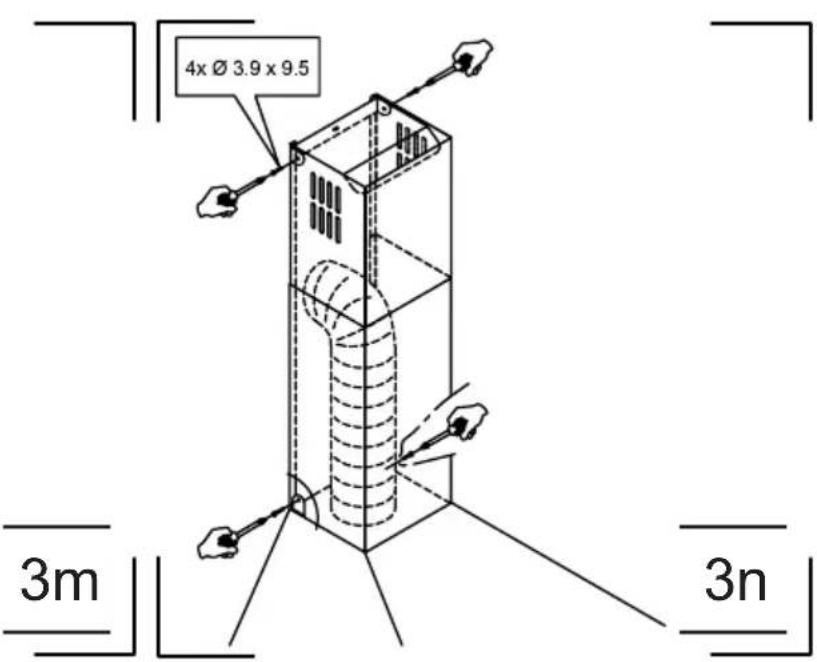
text_image
4x Ø 3.9 x 9.5 3m 3n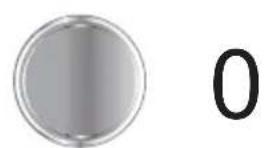
text_image
0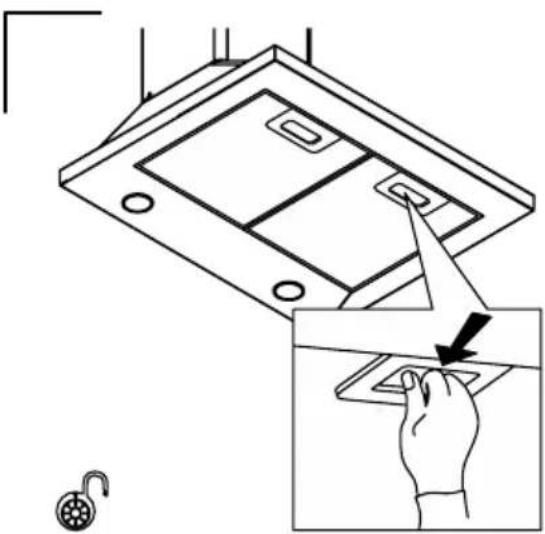
natural_image
Diagram showing a hand pressing down on a device panel with a lock icon, no text or symbols present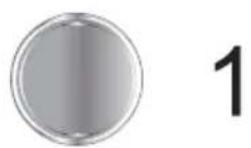

natural_image
Diagram of a multi-layered electronic device with a red component, no text or symbols present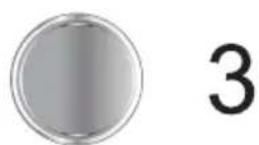
natural_image
Isometric line drawing of a grid-patterned panel or tray structure (no text or symbols)
natural_image
Diagram of a solar panel installation with a red arrow indicating direction (no text or symbols)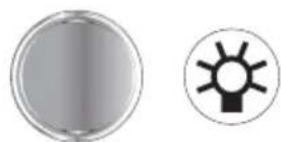
natural_image
Two circular icons: a gray gradient circle and a black-and-white gear-like symbol (no text or labels)4
6
Amica S.A.
ul . Mickiewicza 52 / 64-510 Wronki
tel. 67 25 46 100 / fax 67 25 40 320
www.amica.pl
Amica International GmbH
Lüdinghauser Str. 52
D-59387 Ascheberg
Tel: 0 25 93 - 95 67-0
www.amica-group.de