
25331 - Grill plate HAMILTON BEACH - Free user manual and instructions
Find the device manual for free 25331 HAMILTON BEACH in PDF.
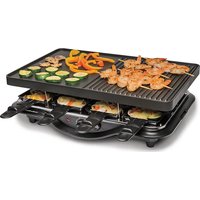
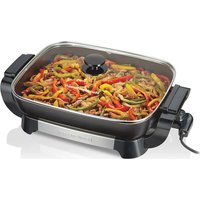
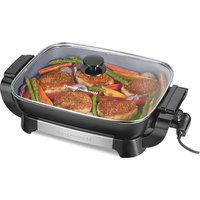
| Product Type | Grill Plate |
| Brand | Hamilton Beach |
| Model | 25331 |
| Power Supply | 120 V ~ 60 Hz |
| Power | 1500 W (estimated) |
| Dimensions (approx.) | 35 x 25 x 15 cm |
| Weight (approx.) | 2.5 kg |
| Material | Plastic and metal |
| Non-stick coating | Yes |
| Digital display | Yes, with temperature adjustment |
| Sear mode | Yes, up to 260 °C (500 °F) |
| Adjustable temperature | Yes, from 180 °C to 220 °C (350 °F to 425 °F) |
| Preheating with audible signal | Yes |
| Removable drip tray | Yes |
| Cord length (approx.) | 0.9 m |
| Polarized plug | Yes |
| Use | Household only, in closed position |
| Warranty | 5 years (Canada), 1 year (United States) |
| Cleaning | Wipe with damp paper towel on hot grid |
| Replacement parts | Available at hamiltonbeach.ca or at 1.800.267.2826 |
Frequently Asked Questions - 25331 HAMILTON BEACH
User questions about 25331 HAMILTON BEACH
0 question about this device. Answer the ones you know or ask your own.
Ask a new question about this device
Download the instructions for your Grill plate in PDF format for free! Find your manual 25331 - HAMILTON BEACH and take your electronic device back in hand. On this page are published all the documents necessary for the use of your device. 25331 by HAMILTON BEACH.
USER MANUAL 25331 HAMILTON BEACH
Visit www.hamiltonbeach.com for our complete line of products and Use and Care Guides - as well as delicious recipes, tips, and to register your product online.
For questions and other information:
USA
hamiltonbeach.com
1.800.851.8900
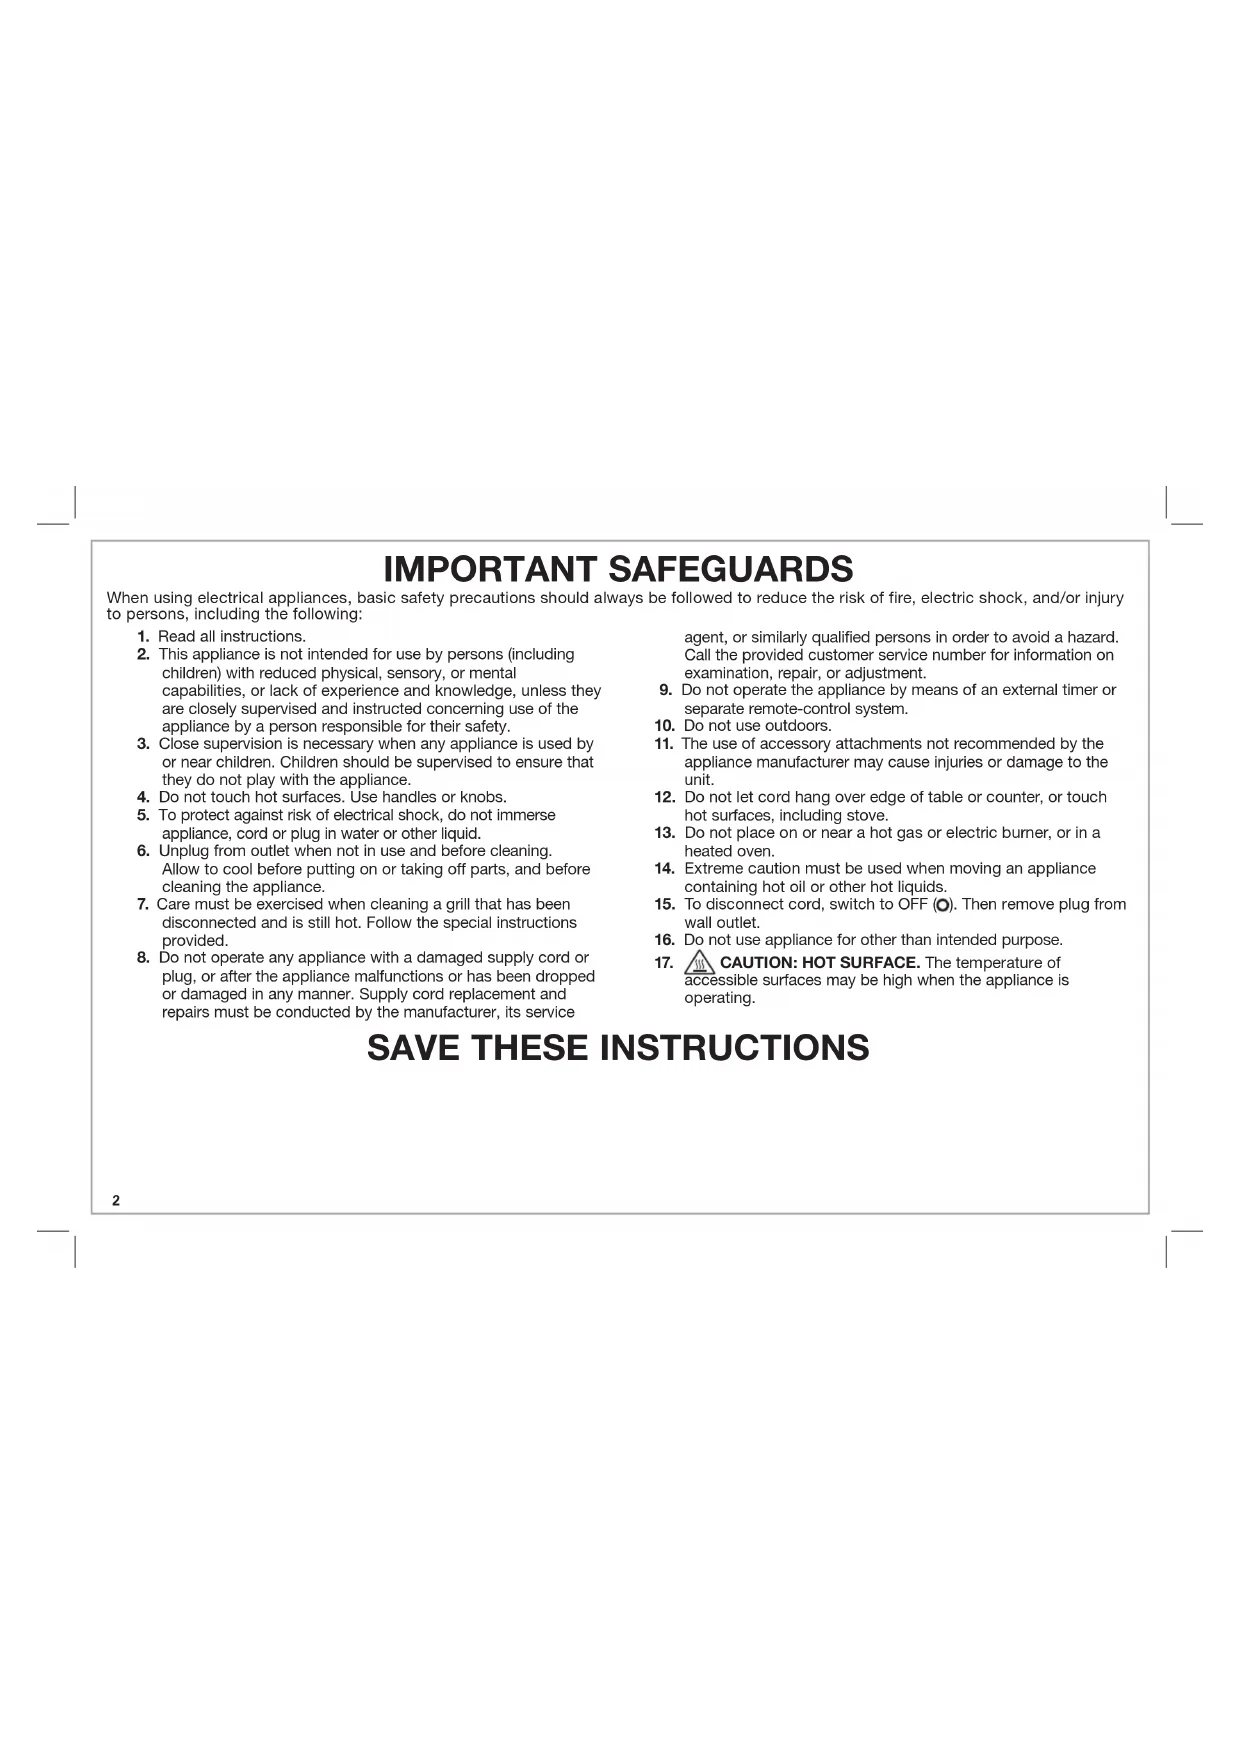
When using electrical appliances, basic safety precautions should always be followed to reduce the risk of fire, electric shock, and/or injury to persons, including the following:
- Read all instructions.
- This appliance is not intended for use by persons (including children) with reduced physical, sensory, or mental capabilities, or lack of experience and knowledge, unless they are closely supervised and instructed concerning use of the appliance by a person responsible for their safety.
- Close supervision is necessary when any appliance is used by or near children. Children should be supervised to ensure that they do not play with the appliance.
- Do not touch hot surfaces. Use handles or knobs.
- To protect against risk of electrical shock, do not immerse appliance, cord or plug in water or other liquid.
- Unplug from outlet when not in use and before cleaning. Allow to cool before putting on or taking off parts, and before cleaning the appliance.
- Care must be exercised when cleaning a grill that has been disconnected and is still hot. Follow the special instructions provided.
- Do not operate any appliance with a damaged supply cord or plug, or after the appliance malfunctions or has been dropped or damaged in any manner. Supply cord replacement and repairs must be conducted by the manufacturer, its service
agent, or similarly qualified persons in order to avoid a hazard. Call the provided customer service number for information on examination, repair, or adjustment.
9. Do not operate the appliance by means of an external timer or separate remote-control system.
10. Do not use outdoors.
11. The use of accessory attachments not recommended by the appliance manufacturer may cause injuries or damage to the unit.
12. Do not let cord hang over edge of table or counter, or touch hot surfaces, including stove.
13. Do not place on or near a hot gas or electric burner, or in a heated oven.
14. Extreme caution must be used when moving an appliance containing hot oil or other hot liquids.
15. To disconnect cord, switch to OFF (O). Then remove plug from wall outlet.
16. Do not use appliance for other than intended purpose.
17. CAUTION: HOT SURFACE. The temperature of accessible surfaces may be high when the appliance is operating.
SAVE THESE INSTRUCTIONS
Other Consumer Safety Information
This appliance is intended for household use only.
AWARNING Electrical Shock Hazard: This product is provided with either a polarized (one wide blade) or grounded (3-prong) plug to reduce the risk of electric shock. The plug fits only one way into a polarized or grounded outlet. Do not defeat the safety purpose of the plug by modifying the plug in any way or by using an adapter. If the plug does not fit fully into the outlet, reverse the plug. If it still does not fit, have an electrician replace the outlet.
The length of the cord used on this appliance was selected to reduce the hazards of becoming tangled in or tripping over a longer cord. If a longer cord is necessary, an approved extension cord may be used. The electrical rating of the extension cord must be equal to or greater than the rating of the appliance. If the appliance is of the grounded type, the extension cord should be a grounding-type, 3-wire cord.
Care must be taken to arrange the extension cord so that it will not drape over the countertop or tabletop where it can be pulled on by children or accidentally tripped over. An extension cord should be connected to the appliance first, before it is plugged into the outlet.
To avoid an electrical circuit overload, do not use another high-wattage appliance on the same circuit with your appliance.
Grill is intended to be used in the closed position ONLY.
Do not use Sear mode for sandwiches or equivalent food items.
Do not store grill vertically on side or back.
Always use an oven mitt or hot pad to protect hand when opening the grill.
Parts and Features

To order parts:
US: 1.800.851.8900
www.hamiltonbeach.com
Canada: 1.800.267.2826
Mexico: 01 800 71 16 100

Temperature Arrows

How to Use Grill
WARNING Burn Hazard. Always use an oven mitt or hot pad to protect hand (when checking food) during grilling.
NOTE: Do not use metal utensils when placing or removing food from Grill.
Before first use: See the "Care and Cleaning" section to clean cooking surfaces.

1. Plug into outlet.

NOTE: Display will show 3 dashes after being plugged in.

2. Slide Drip Cup into place. 3. With Cover closed, press Power Button.

th Cover closed, press Power Button.

NOTE: Default temperature setting is 425^ (220^)

4. Use Arrow Buttons to select desired cooking temperature. See "Grilling Chart" for more information.

5. Beep will sound when set cooking temperature is reached. When preheated, place food on Grill.

6. Cook until desired internal temperature is reached. See "Grilling Chart" for more information.
How to Use Grill (cont.)

7. When food is done, remove carefully with non-metal, heat-resistant tongs.

8. Unplug and cool completely.
How to Use SEAR Mode
WARNING Burn Hazard. Always use an oven mitt or hot pad to protect hand (when checking food) during grilling.
NOTE: Do not use metal utensils when placing or removing food from Grill.
Follow steps 1-3 in "How to Use Grill".
NOTE: SEAR must be pressed at the beginning of each cooking session.
Allow 5 minutes for Grill to return to cooking or searing temperature after each cooking session.

1. Use Arrow Buttons to select desired cooking temperature. Cooking temperature will flash in display.

2. When display stops flashing, press SEAR button.

3. Grill will beep when SEAR temperature (500^ / 260^) is reached.
How to Use SEAR Mode (cont.)

4. Place food on Grill. 5. Grill will sear food for about 90 seconds, then automatically switch to desired preset cooking temperature. Grill will beep when temperature is reached.


6. Continue cooking food until desired internal temperature is reached. See "Grilling Chart" for more information. When food is done, remove carefully with non-metal, heat-resistant tongs.

7. Unplug and cool completely.
Grilling Chart
Always preheat Grill before cooking.
All foods listed below are appropriate for SEAR mode grilling.
FOOD GRILL TEMPERATURE APPROXIMATE COOKING TIME INTERNAL TEMP/DONENESS
Chicken breast (boneless, skinless, frozen) 350^ (180^) 11-12 minutes 165^ (73^)
Chicken breast (boneless, skinless, fresh) 350^ (180^) 8-10 minutes 165^ (73^)
Beef steak, ribeye (1 inch (25 cm) thick) 425^ (220^) 6-7 minutes 160^ (71^) for medium
Beef burgers (4 oz/115 g) 350^ (180^) 7-8 minutes 165^ (73^)
Fish fillet squares (frozen) 425^ (220^) 6-8 minutes 145^ (63^) or opaque and flakes easily with a fork
Fish (fresh) 425^ (220^)
Depends on thickness of fish
145^ (63^) or opaque and flakes easily with a fork
Aparagus (fresh) 425^ (220^)
3-4 minutes or until tender crisp
Tender crisp
Green or red bell pepper (strips, fresh) 425^ (220^)
3-4 minutes or until tender crisp
Tender crisp
NOTES:
Length of cooking time and temperature may vary based on batch size and weight.
- When cooking meat, use meat thermometer to determine internal temperatures.
Always follow package directions.
- Visit foodsafety.gov for more information on safe internal cooking temperatures.
Care and Cleaning
WARNING Electrical Shock Hazard. Disconnect power before cleaning. Do not immerse cord, plug, or base in water or any other liquid.
WARNING
Burn Hazard. Always use an oven mitt or hot pad to protect hand during cleaning.
NOTE: Do not use metal utensils or abrasive cleansers when cleaning the Grill.
- Unplug Grill while still hot.
- Lay a wet paper towel on hot Grill. Close and allow to steam.
- When steam begins to subside (approximately 30 seconds), wipe grids with the still-wet paper towel held with tongs that will not scratch the nonstick coating.
NOTE: Do not let paper towel steam until dry or food will become more difficult to remove.
Troubleshooting
No display visible on Control Panel.
- Is Grill plugged in? Display will show 3 dashes when plugged in.
- Make sure electrical outlet is working. Test with a lamp known to be working.
- Check your electrical breaker box.
Can't program current time on Control Panel.
- There is no "clock" feature on Grill; only cooking temperature can be entered.
Food is undercooked.
- Food not cooked long enough. Time required will depend on temperature chosen. When grilling meats, use a thermometer to measure internal temperature. See "Grilling Chart" for more information.
- Select a higher temperature setting.
Always cook with Cover closed. - Allow Grill to preheat fully. A beep will sound when Grill reaches cooking temperature.
- Visit foodsafty.gov for more information on safe internal cooking temperatures.
- Grill will not remember previous settings after a power interruption. Reset.
Food is overcooked.
- Food cooked too long. Time required will depend on cooking temperature chosen. When grilling meats, use a meat thermometer to measure internal temperature. See "Grilling Chart" for more information.
- Select a lower temperature setting (especially for vegetables).
- Use SEAR mode
Meats not seared adequately.
- Press SEAR button AFTER setting desired cooking temperature.
- Allow Grill to preheat fully. A beep will sound when Grill reaches SEAR temperature.
Limited Warranty
This warranty applies to products purchased and used in the U.S. and Canada. This is the only express warranty for this product and is in lieu of any other warranty or condition.
This product is warranted to be free from defects in material and workmanship for a period of five (5) years from the date of original purchase in Canada and one (1) year from the date of original purchase in the U.S. During this period, your exclusive remedy is repair or replacement of this product or any component found to be defective, at our option; however, you are responsible for all costs associated with returning the product to us and our returning a product or component under this warranty to you. If the product or component is no longer available, we will replace with a similar one of equal or greater value.
This warranty does not cover glass, filters, wear from normal use, use not in conformity with the printed directions, or damage to the product resulting from accident, alteration, abuse, or misuse. This warranty extends only to the original consumer purchaser or gift recipient. Keep the original sales receipt, as proof of purchase is required to make a warranty claim. This warranty is void if the product is used for other than single-family household use or subjected to any voltage and waveform other than as specified on the rating label (e.g., 120V 60Hz ).
We exclude all claims for special, incidental, and consequential damages caused by breach of express or implied warranty. All liability is limited to the amount of the purchase price. Every implied warranty, including any statutory warranty or condition of merchantability or fitness for a particular purpose, is disclaimed except to the extent prohibited by law, in which case such warranty or condition is limited to the duration of this written warranty. This warranty gives you specific legal rights. You may have other legal rights that vary depending on where you live. Some states or provinces do not allow limitations on implied warranties or special, incidental, or consequential damages, so the foregoing limitations may not apply to you.
To make a warranty claim, do not return this appliance to the store. Please call 1.800.851.8900 in the U.S. or 1.800.267.2826 in Canada or visit hamiltonbeach.com in the U.S. or hamiltonbeach.ca in Canada. For faster service, locate the model, type, and series numbers on your appliance.
PRECAUTIONS IMPORTANTES
Col. Polanco V Seccion,
Miguel Hidalgo
- SAVE THESE INSTRUCTIONS
- Other Consumer Safety Information
- Parts and Features
- How to Use Grill
- How to Use Grill (cont.)
- How to Use SEAR Mode
- Follow steps 1-3 in "How to Use Grill".
- How to Use SEAR Mode (cont.)
- Grilling Chart
- FOOD GRILL TEMPERATURE APPROXIMATE COOKING TIME INTERNAL TEMP/DONENESS
- NOTES:
- Care and Cleaning
- WARNING
- Troubleshooting
- No display visible on Control Panel.
- Can't program current time on Control Panel.
- Food is undercooked.
- Food is overcooked.
- Meats not seared adequately.
- Limited Warranty
- PRECAUTIONS IMPORTANTES
Brand : HAMILTON BEACH
Model : 25331
Category : Grill plate