GoMAX BLSTGFPM20000 - Blender OSTER - Free user manual and instructions
Find the device manual for free GoMAX BLSTGFPM20000 OSTER in PDF.



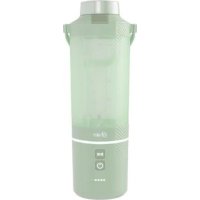
| Product Type | Rechargeable portable blender |
| Bowl capacity | 20 oz (600 ml) |
| Bowl material | BPA-free plastic |
| Blade type | 4-prong ice-crushing blades, reversible anti-jam technology |
| Power source | Removable rechargeable lithium-ion battery |
| Charging | USB-C to USB-A, certified 5V/2A to 3A adapter |
| Charging time | Up to 2.5 hours for full charge |
| Battery life | Up to 15 blending cycles per charge |
| Main functions | Blending, ice crushing, automatic blade reversal |
| LED indicators | 4 battery LEDs, power LED, On/Off LED, ring LEDs |
| Safety | Safety lock, automatic stop if jammed, bowl misalignment detection |
| Maintenance and cleaning | Bowl and flat lid dishwasher safe (top rack); motor base wipe clean; do not immerse |
| Spare parts and repairability | User-replaceable battery (see manual); other parts not user-serviceable |
| Included accessories | 20 oz bowl, push-button leak-proof lid, flat lid, USB-C cable, silicone seal |
| Recommended uses | Smoothies, shakes, protein drinks, frozen cocktails, purees, dips, sauces |
| Warranty | See Oster website (www.oster.com) |
Frequently Asked Questions - GoMAX BLSTGFPM20000 OSTER
User questions about GoMAX BLSTGFPM20000 OSTER
0 question about this device. Answer the ones you know or ask your own.
Ask a new question about this device
Download the instructions for your Blender in PDF format for free! Find your manual GoMAX BLSTGFPM20000 - OSTER and take your electronic device back in hand. On this page are published all the documents necessary for the use of your device. GoMAX BLSTGFPM20000 by OSTER.
USER MANUAL GoMAX BLSTGFPM20000 OSTER
When using electrical appliances, basic safety precautions should always be followed to reduce the risk of fire, electric shock, and/or injury to persons including the following:
- Read all instructions before using this product.
- To protect against electric shock, do not place or immerse cord, plugs, or appliance in water or other liquid.
- This appliance is not intended for use by children or by persons with reduced physical, sensory, or mental capabilities, or lack of experience and knowledge. Close supervision is necessary when any appliance is used near children. Children should be supervised to ensure that they do not play with the appliance. Keep the appliance and its cord out of reach of children.
- Never leave appliance unattended when in use.
- Switch off the appliance and disconnect from the charging cable before changing accessories, cleaning or approaching parts that move in use.
- Avoid contacting moving parts. Do not attempt to defeat any safety interlock mechanisms.
- Flashing light indicates ready to operate (models with stand-by mode). Avoid any contact with blades or moveable parts.
- Do not operate any appliance with a damaged cord or plug or after the appliance malfunctions, or has been damaged in any manner. Do not attempt to replace or splice a damaged cord. Return appliance to the manufacturer (see warranty) for examination, repair or adjustment.
- The use of attachments, including canning jars, not recommended or sold by the manufacturer may cause fire, electric shock or injury.
- Do not use outdoors or for commercial purposes.
- Do not let cord hang over edge of table or counter, or touch hot surfaces, including the stove.
- Keep hands and utensils out of container while blending to reduce the risk of severe injury to persons or damage to the blender. A scraper may be used but must be used only when the blender is not running.
- Blades are sharp. Handle carefully, especially when emptying the container and during cleaning.
- To reduce the risk of injury while using the blender, ensure that the jar is securely attached to the motor base by turning it clockwise to tighten. Additionally, check that the graphic arrow on the jar is aligned with the arrow on the motor base.
- Always hold container while operating the appliance. If the container should turn when the motor is turned ON, switch appliance OFF immediately and tighten the container in the threaded bottom.
- Always operate blender with cover in place. Always wait until all moving parts have stopped before removing any lid or cover.
- Do not blend hot liquids or effervescent ingredients. Risk of thermal burn injury due to excessive pressure in the container.
- Do not incinerate this appliance even if it is severely damaged. The batteries can explode in a fire.
- Do not refrigerate blender.
- Do not use appliance for other than intended use. Misuse can cause injuries. Always use appliance on a dry, stable, level surface. Never fill beyond the MAX LIQUID line.
- This appliance must only be supplied at safety extra low voltage corresponding to the marking on the appliance.
ENGLISH-1
ABOUT CHARGING THE BATTERY
WARNING: Do not lay metal objects across positive (+) and negative (-) battery terminals or charger terminals.
Use only the battery or battery pack supplied by the manufacturer.
Do not charge, place or leave the appliance where it is expected to be subject to damage by animals, small children, or exposed to weather.
Do not discard exhausted battery packs into fire.
Store the charger, battery and blender at room temperature.
Exhausted batteries/ rechargeable batteries should not be disposed of in the household waste. Dispos of them in a completely discharged state in accordance with local legal regulations.
Your blender comes with a USB-C to USB-A charging cable. You can charge your blender through the charging port (located on the back of the motor base).
Do not pull, twist, or otherwise abuse the charging cable.
Using a 5V/2A to 3A certified power adaptor, charging from completely discharged to fully charged can take up to 2.5 hours.
NOTE: Ensure you detach the charging cable before using the blender as the blender is not intended to be able to operate while the charging cable is plugged in. Though the blender is not intended to operate while charging, exercise caution with the blades at all times.
The 4 white battery indicator LED lights at the bottom of the blender's motor show the battery level or charging status. See the table below.
If the battery is completely depleted, no LED lights will display, indicating that it needs to be fully charged (up to 2.5 hours) before using it without the charging cable.
Battery LEDs Show Current Status Chart
| Battery LEDs Illuminated | Charge Level | Number of Cycles Per Status | |
| 4 White LEDs Solidly ON | Full Charge (75%-100%) | More than 15 | ○○○○ |
| 3 White LEDs Solidly ON | Partial Charge (50%-74%) | More than 10 | ○○○● |
| 2 White LEDs Solidly ON | Partial Charge (25%-49%) | 3 or more | ○○●● |
| 1 White LED Solidly ON | Low Charge (1%-24%) | Less than 3 | ○●●● |
| 1 White LED Flashing or All LEDs OFF | No charge (0%) 0 | ●●●● |
CHARGING YOUR BATTERY
To charge the blender, do one of the following:
- Connect the blender to an electrical outlet using a 5V/3A max certified power adaptor. Use only with Listed/Certified ITE Power Supply. Use the proper USB supply connection and do not use unapproved sources.

WARNING: IF YOU SUSPECT THERE MAY BE LIQUID IN THE CHARGING PORT OF THE BLENDER, DO NOT PLUG THE CHARGING CABLE INTO IT.
Battery LEDs During Charging Chart
The current charge level LED flashes continuously and progresses during charging. The battery is fully charged when all 4 white LEDs are solidly ON.
| Battery LEDs Illuminated | Charge Level | Number of Cycles Per Status | |
| 4 White LEDs Solidly ON | Full Charge (100%) | More than 15 | ○○○○ |
| 3 White LEDs Solidly ON; 4thWhite LED Flashing | Charging from 75% to 100% | More than 10 | ○○○○ |
| 2 White LEDs Solidly ON; 3rdWhite LED Flashing | Charging from 50% to 75% | 3 or more | ○○○● |
| 1 White LED Solidly ON; 2ndWhite LED Flashing | Charging from 25% to 50% | Less than 3 | ○○●● |
| 1 White LED Flashing | Charging from 0% to 25% | 0 | ○●●● |
INSTRUCTIONS FOR REPLACING THE BATTERY:
DISCLAIMER: This appliance is powered by a removable rechargeable lithium-ion battery. Please follow the provided charging instructions and safety guidelines to ensure safe use and optimal performance. Only use a 5V/3A max certified power adaptor, avoid exposing the battery to extreme temperatures or moisture, and never attempt to puncture or disassemble it. Improper use or handling of the battery may result in fire, explosion, or injury. Exhausted batteries and rechargeable batteries should not be disposed of in household waste. They should be disposed of in a completely discharged state in accordance with local legal regulations. Always dispose of the battery responsibly at an authorized recycling facility. Warranty may be voided by misuse.
- Obtain correct battery from authorized retailer.
- IMPORTANT: Before replacing the battery, unplug the charging cord from the appliance. Do not attempt to change the battery while the unit is connected to a power source, as this may cause electric shock or damage to the device.
ENGLISH-3
- IMPORTANT: To avoid injury to your fingers or hands from the blender blades, ensure Jar is installed on base.
- Turn unit over to access bottom of unit.
- Remove 4 screws with a Phillips tip screwdriver (Do not use an electric or battery powered screwdriver). Take note of the locations of the screws.
- Remove bottom cover, take note of orientation. Take note of orientation and routing of the battery wires.
- Remove the larger 2 pin connector first, then remove the smaller 3 pin connector.

Figure 2
- Carefully remove battery.
DISCLAIMER: Always dispose of the battery responsibly at an authorized recycling facility. - Carefully install new battery in identical orientation as prior one.
- Reconnect 3 pin connector, reconnect larger 2 pin connector. See Figure 2.
IMPORTANT: Please ensure that you reconnect the 3 pin connector before connecting the 2 pin connector. - Ensure wires are routed per original orientation.
- Replace bottom cover in original orientation.
- Replace 4 screws and torque to 42 in.oz/ 3kgf.cm/0.3 Nm.
- Turn unit over.
- Ensure sip lid is in place.
- Verify unit operates as normal by pressing the power button, LED lights should illuminate per (led chart).
- Fully Charge before first use.
SAVE THESE INSTRUCTIONS HOUSEHOLD USE ONLY
This appliance is intended for household use and similar environments such as:
- Shops, offices, and other similar working environments.
Ranches and farmhouses.
Guests in hotels, motels, and other residential environments.
In bed-and-breakfast-type environments.
ENGLISH-4
DESCRIPTION


- Leakproof Push Button Sip Lid, with Plastic Handle
- 20 oz/600 ml Jar
- Ice-Crushing 4 Points Blade
- Angled Motor and Blade System
- Start/Stop Blend Button
- Power Button
-
Blender Motor Base (IP54 water and dust resistance)
-
Removable Rechargeable Lithium-ion Battery (See disclaimer in "Instructions for Replacing the Battery" section)
- USB-C to USB-A Charging Cable
- Silicone Seal
- Plastic Flat Bottom Lid
ENGLISH-5
GETTING TO KNOW YOUR OSTER® GOMAX BLENDER
Your appliance includes the following technology and features:
- Leakproof sip lid for better portability
20 oz/600 ml portable BPA-free jar - Anti-jam reversible blade technology to blast through tough ingredients
Angled motor and blade system - Removable rechargeable lithium-ion battery (See disclaimer in "Instructions for Replacing the Battery" section)
Before you use the appliance for the first time, separate the sip lid and jar from the motor base. Handwash the sip lid, flat lid, and jar in warm, soapy water. Rinse and dry well.
CAUTION: TO AVOID ACCIDENTALLY PRESSING THE POWER AND START BUTTONS DURING CLEANING, DO NOT CLEAN THE INSIDE OF JAR WHEN IT IS FIXED ON THE MOTOR BASE. CLEANING THE JAR WHILE IT IS ON THE BASE COULD RESULT IN INJURIES FROM THE SHARP BLADES.
NOTE: The jar and flat lid are dishwasher safe (on the top rack), but the sip lid is NOT dishwasher safe.
CAUTION: THE BLADES ARE SHARP. HANDLE CAREFULLY, ESPECIALLY WHEN CLEANING.
NOTE: For easy cleaning, add 3-5 drops soap and 4-8 oz/120-240 ml cool water to the jar and run a blending cycle immediately after use to prevent food particles from drying and sticking.
CAUTION: DO NOT BLEND DRY HARD INGREDIENTS LIKE DRY CORN KERNELS, AS IT MAY DAMAGE THE BLADES.
USING YOUR GOMAX BLENDER
- For stability, place the GOMAX blender on a level surface.
- Ensure the blender's motor base is charged (Figure 3). For battery charge levels, see "Battery LEDs Show Current Status Chart."

Figure 3
- Secure the jar onto the motor base. Turn to the right to tighten (Figure 4). Ensure that the graphic arrow on the jar is aligned with the arrow on the motor base (Figure 5).


Figure 4 Figure 5
- Starting with liquids, fill the jar with your favorite ingredients. Make sure that your liquids reach at least the MIN LIQUID line. Do not fill the jar past the MAX LIQUID line.
NOTE: For optimal performance, place the desired ingredients in the jar in the following order: liquids first, frozen fruit or ice second, and fresh ingredients last. - Secure the leakproof sip lid onto the jar. Turn to the right to tighten.
- Press the Power button to turn the blender ON. The power icon illuminates when the blender has power.
NOTE: For additional details on LED light animation, see "Animated LED State". - Press the Start/Stop button once to begin blending your ingredients. The Start/ Stop button illuminates when the blender is in use. The blades will stop and reverse periodically to avoid jamming and increase blending. The Ring LEDs illuminate and rotate in the direction of the blade.
NOTE: You can cancel the blend mode anytime by pressing the Start/Stop button again. - Now, your nutritious beverage is ready to be taken on the go.
- Press the Power button (to turn the blender OFF. It is recommended that you switch off the motor base when drinking from the sip lid or when the blender is not in use.
- Open the sip lid to take a sip. You can also remove the lid to pour the beverage into another jar.
ENGLISH 7
NOTE: If you want to crush ice cubes only (max 4 pieces), it is recommended to press the Start/Stop button shortly and repeat to achieve better results.
Removing Your Beverage from the Blender's Motor Base
Before you remove your beverage from the blender's motor base.
- Ensure the sip lid is tightly secured on the jar.
- Turn the blender upside down.
- Twist the motor base counterclockwise to release the jar.
NOTE: The blades are securely attached to the motor base.
CAUTION: THE BLADES ARE SHARP. HANDLE CAREFULLY.
- Install the plastic flat lid on the bottom of the jar by turning it clockwise.
NOTE: Ensure the silicone seal is inserted in the bottom of the flat cap (Figure 6).

Figure 6
- Once the flat lid is securely screwed onto the bottom of the jar, you can turn the jar right side up to open the sip lid and take a sip.
TIP: After you've consumed your blended beverage, wash out the jar and reuse it throughout the day for water or other liquids.
USEFUL BLENDING TIPS
- If the motor stalls, turn the blender off immediately and let it cool for at least 15 minutes. Then, remove a portion of the ingredients and continue.
- Put liquids in the jar first unless a recipe specifies a different order.
- Cut all firm fruits and vegetables into pieces no larger than 3/4 inch (1.8 cm) to 1 inch (2.5 cm).
CLEANING AND MAINTAINING YOUR BLENDER

IMPORTANT: DO NOT IMMERSE THE BLENDER'S MOTOR BASE IN WATER OR ANY OTHER LIQUID. ALWAYS TURN THE BLENDER OFF WHEN CLEANING WITHOUT THE LID ON.
CAUTION: THE BLADES ARE SHARP. HANDLE CAREFULLY, ESPECIALLY WHEN CLEANING.
HAND WASHING
Motor Base
Wipe the outside of the blender's motor base with a damp, soft sponge with mild detergent. Do not submerge the motor base in water. Make sure the USB-C charger is removed before cleaning.
Jar, Sip Lid, and Bottom Lid
Clean the jar, sip lid, and bottom lid with a damp, soft sponge with mild detergent.
Blades
Clean the motor base with a dishwashing utensil or cloth. The blades on the motor base are sharp, so handle them with caution.
Ensure that all appropriate parts are thoroughly rinsed and air-dried. Additionally, after cleaning, it is recommended that the USB-C charging port be allowed to air-dry for 30 minutes before charging the blender.
CAUTION: TO AVOID ACCIDENTALLY PRESSING THE POWER AND START BUTTONS DURING CLEANING, DO NOT CLEAN THE INSIDE OF JAR AND BLADES WHEN IT IS FIXED ON THE MOTOR BASE.
QUICK AND EASY CLEAN
Rinse the jar with water to remove excess contents. Pour 8 oz/240 ml of water into the jar and add 3-5 drops of dish soap. Secure the sip lid back on and press the Start/Stop button.
DISHWASHER
The jar and flat lid are dishwasher safe. Remove them from the motor base and place them on the top rack of the dishwasher.
NOTE: To ensure the longevity of these dishwasher-safe parts, you should avoid using a heated cycle during the cleaning process.
Aside from a replaceable battery, this appliance has no user-serviceable parts. Any servicing beyond that described in the Cleaning Section should be performed by an Authorized Service Representative only. See warranty available online.
ENGLISH-9
STORING YOUR BLENDER
After cleaning, reassemble the sip lid, jar, and motor base (or plastic flat lid on the bottom of the jar) to prevent blade exposure. Store the blender upright in a dry area.
Do not store ingredients in the jar for extended periods of time.
Do not stack items on top of the jar.
For Brazil models:
To dispose of your appliance or electronic device and its packaging in an environmentally friendly way, locate a reception point closer to you in the website ABREE: http://abree.org.br
ABREE is the management entity of which we are associated, which manages the reverse logistics of your product, and packaging.
FREQUENTLY ASKED QUESTIONS
Why doesn't my blender turn on?
- Ensure the blender's motor base is charged, and charge cord is NOT plugged into the unit.
- Make sure your jar is tightened to the proper position.
How can I prevent liquids from leaking out?
Make sure the sip lid is securely screwed onto the jar.
- Ensure the silicone seal is inserted on the motor base (Figure 7), and the flat surface of the silicone seal should be facing upward.

Figure 7
If you have removed the jar from the motor base, make sure the flat lid is securely screwed onto the bottom of the jar.
NOTE: Ensure the silicone seal is inserted in the bottom of the flat cap (Figure 8), and the flat surface of the silicone seal should be facing upward.

Figure 8
Can I put the blender jar in the microwave oven?
- No! Never put the jar or any other blender parts in the microwave oven.
How do I charge the battery?
- Your blender comes with a USB-C to USB-A charging cable. You can charge your blender through the charging port (located on the back of the motor base). For more details, see "About Charging the Battery".
Can I blend while the blender is charging?
- No! The blender will NOT operate/turn ON during charging. Please detach the charging cable before use.
ENGLISH-II
How long does it take to recharge my blender fully?
- Using a 5V/2A to 3A certified power adaptor, charging from completely dead to fully charged can take up to 2.5 hours.
How many blending cycles are in a full charge?
- The blender can complete up to 15 blending cycles before requiring a recharge.
Can the battery be replaced?
- Yes! See the "Parts and Accessories".
Can I use this blender without the motor base?
- Yes! This blender is designed for use on the go, with or without the motor base attached. See the "Removing the Jar from the Blender's Motor Base" instructions.
Why are ingredients not mixing properly?
- Place the desired ingredients in the jar in the following order: liquids, frozen fruit or ice, and fresh ingredients.
If the ingredients are still not mixing properly,
o Add more liquid as needed.
o Shake the blender while it is blending.
o Turn OFF the blender, remove any jammed ingredients with a long utensil, then restart blending.
Can I crush ice and frozen fruit?
- Yes! However, when blending frozen ingredients or ice, we recommend adding liquid first!
What can I make in this blender?
- You can easily blend frozen smoothies, shakes, protein drinks, frozen cocktails, purees, dips, sauces, and more.
Can I blend hot liquids in my blender?
- Do not blend carbonated, hot, or boiling liquids and ingredients, as this may create pressure buildup. Only blend non-carbonated liquids and ingredients that are at room temperature or cooler. If the jar is warm to the touch, allow it to cool before opening.
Can I get the motor base wet?
- While the blender's motor base and USB-C charging port can tolerate a little water (some drips and spills), it is NOT waterproof, so do not submerge in water or put it in the dishwasher.
ENGLISH-12
ANIMATED LED STATE
| State LED Animation | |
| Power ON (Power button pressed once) | The Power LED illuminates steady ON, the Start/Stop LED is OFF, the Ring LEDs illuminate and fade in from 0% to 100% and stay ON for approximately 4 seconds, and the Battery LEDs show current charge status for approximately 4 seconds. After approximately 4 seconds: The Power LED illuminates steady ON, the Start/Stop LED pulses slowly continuously, the Battery LEDs are OFF, and the Ring LEDs fade out from 100% to 0%. |
| Motor/Blades Running (Start/Stop button ×× pressed once) | The Power LED illuminates steady ON, the Start/Stop LED is ON, the Ring LEDs illuminate and fade in and out from 0% to 100% in a smooth, fast, and continuous motion in the direction of the blades (clockwise while blending and counterclockwise when the blades reverse), and the Battery LEDs show current charge status. After approximately 48 seconds: The blending cycle is complete. The motor and blades stop running, the Power LED illuminates steady ON, the Start/Stop LED pulses slowly continuously, the Ring LEDs are OFF, and the Battery LEDs are OFF. |
| Motor/Blades OFF NOTE: This occurs when the blending cycle is complete, or the Start/Stop button ×is pressed while the motor and blade is running. | The Power LED illuminates steady ON, the Start/Stop LED pulses slowly continuously, the Ring LEDs are OFF, and the Battery LEDs are OFF. |
| Error (Blade Jam) | The Power LED blinks quickly continuously, the Start/Stop LED blinks quickly continuously, the Ring LEDs blink quickly continuously, and the Battery LEDs blink quickly continuously. |
| Error (Jar not fully attached to the motor base) | The Power LED blinks quickly continuously, Start/Stop LED blinks quickly continuously, the Ring LEDs are OFF, the Battery LEDs blink quickly continuously. |
ENGLISH-13
WARRANTY
In the U.S.A.
Please visit www.oster.com for warranty information for your Oster® brand product. If you have any questions regarding this warranty or would like to obtain warranty service, please visit the Oster® brand website or write our Customer Service Department at the address listed here. In the U.S.A, this warranty is offered by Sunbeam Products, Inc. located at 5 Concourse Parkway, 8th Floor, Atlanta, GA 30328.
In Canada
Please visit www.oster.ca for warranty information for your Oster® brand product. If you have any questions regarding this warranty or would like to obtain warranty service, please visit the Oster® brand website or write our Customer Service Department at the address listed here. In Canada, this warranty is offered by Newell Brands Canada ULC, located at 20 B Hereford Street, Brampton, Ontario L6Y OM1.
If you would like a physical copy of the warranty for your Oster® brand product, feel free to print the warranty available on website listed above, or write our Customer Service Department at the address listed above, and we'd be happy to send you a copy.
www.oster.com.br
ENGLISH-14
MESURES DE SECURITE IMPORTANTES
The following information is intended for Mexico only.
BLVD. MANUEL AVILA CAMACHO NO. 32 PISO 14,
COL. LOMAS DE CHAPULTEPEC III SECCION, ALC. MIGUEL HIDALGO,
© 2025 Sunbeam Products, Inc. All rights reserved.
One year limited warranty - please see insert for details.
www.oster.com
www.oster.com www.oster.ca
P.N. NWL0001756637 Rev. A
COOK1989 Oster GOMAX Portable Blender BLSTGFP
Series_25SEFPM2(LA)GCDS-JC
- ENGLISH-1
- ABOUT CHARGING THE BATTERY
- CHARGING YOUR BATTERY
- WARNING: IF YOU SUSPECT THERE MAY BE LIQUID IN THE CHARGING PORT OF THE BLENDER, DO NOT PLUG THE CHARGING CABLE INTO IT.
- Battery LEDs During Charging Chart
- INSTRUCTIONS FOR REPLACING THE BATTERY:
- SAVE THESE INSTRUCTIONS HOUSEHOLD USE ONLY
- This appliance is intended for household use and similar environments such as:
- ENGLISH-4
- DESCRIPTION
- GETTING TO KNOW YOUR OSTER® GOMAX BLENDER
- USING YOUR GOMAX BLENDER
- Removing Your Beverage from the Blender's Motor Base
- USEFUL BLENDING TIPS
- CLEANING AND MAINTAINING YOUR BLENDER
- HAND WASHING
- Motor Base
- Blades
- QUICK AND EASY CLEAN
- DISHWASHER
- ENGLISH-9
- STORING YOUR BLENDER
- For Brazil models:
- FREQUENTLY ASKED QUESTIONS
- Why doesn't my blender turn on?
- How can I prevent liquids from leaking out?
- Can I put the blender jar in the microwave oven?
- How do I charge the battery?
- Can I blend while the blender is charging?
- ENGLISH-12
- ANIMATED LED STATE
- WARRANTY
- In the U.S.A.
- In Canada
- MESURES DE SECURITE IMPORTANTES
- www.oster.com
Brand : OSTER
Model : GoMAX BLSTGFPM20000
Category : Blender