Vitasaveur Vitamin+ VC4003 - Steamer TEFAL - Free user manual and instructions
Find the device manual for free Vitasaveur Vitamin+ VC4003 TEFAL in PDF.
User questions about Vitasaveur Vitamin+ VC4003 TEFAL
0 question about this device. Answer the ones you know or ask your own.
Ask a new question about this device
Download the instructions for your Steamer in PDF format for free! Find your manual Vitasaveur Vitamin+ VC4003 - TEFAL and take your electronic device back in hand. On this page are published all the documents necessary for the use of your device. Vitasaveur Vitamin+ VC4003 by TEFAL.
USER MANUAL Vitasaveur Vitamin+ VC4003 TEFAL
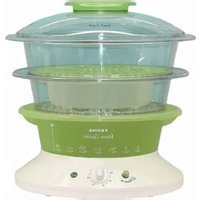
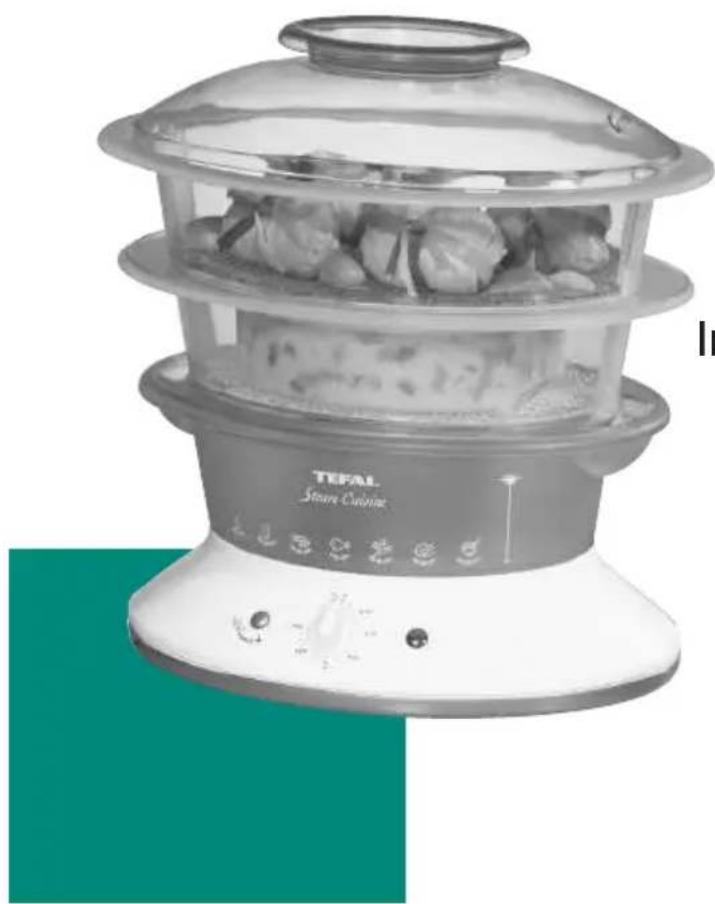
Steam Cuisine Vitamin +
natural_image
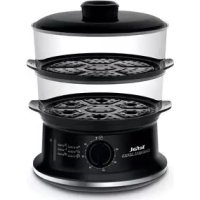
TEFAL Stear Steamer with three-tiered steamer (no visible text or symbols on the device body)User Instructions
Gebrauchsanleitung
Mode d'emploi
natural_image
Illustration of a hand pressing down on a steaming hot pot (no text or symbols)
natural_image
Line drawing of a mechanical component with a handle and base, no visible text or symbols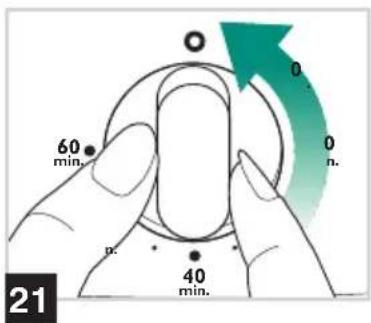
natural_image
Illustration of hands holding a steaming bowl with food, placed on a plate with a green arrow pointing downward (no text or symbols)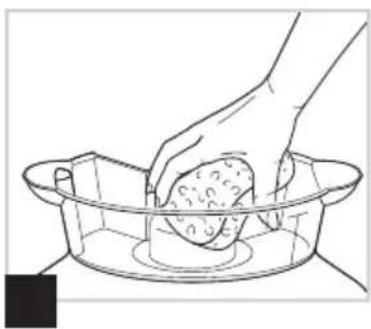
natural_image
Line drawing of a hand washing a textured object into a circular basin (no text or symbols)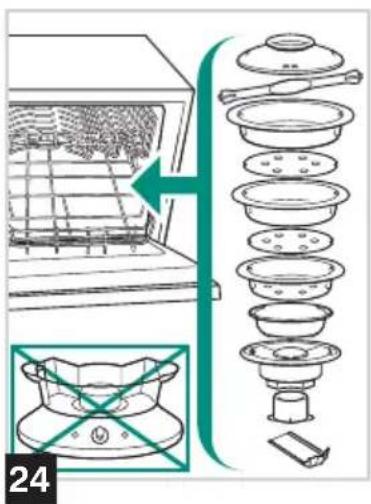
text_image
24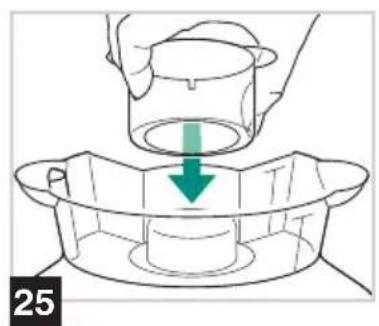
natural_image
Illustration of a hand pouring liquid into a container with a green arrow indicating downward motion (no text or symbols)
text_image
VinegarWater 26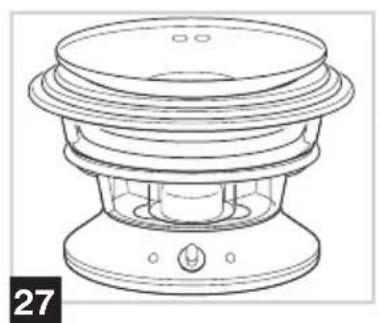
natural_image
Line drawing of a multi-tiered industrial fan or vessel with a base and top, no text or symbols present.ENGLISH
Protection of the environment
- Your appliance is designed for many years use. However, when you decide to replace your appliance, do not forget that you can contribute towards protecting the environment by disposing of it at your local waste disposal centre (for appliances fitted with an electronic programmer).

Please follow the instructions for use carefully.
This appliance produces boiling hot steam.
Safety instructions
- This appliance complies with the safety regulations and conditions in effect, and with the following:
- EMC directive 89/336/CEE modified by directive 93/68/CEE - Low Voltage Directive 72/23/CEE modified by directive 93/68/CEE.
- Check that the power supply voltage corresponds to that shown on the appliance (alternating current).
- Given the diverse standards in effect, if the appliance is used in a country other than that in which it is purchased, have it checked by an approved service centre.
- Do not place the appliance near a heat source or in a hot oven, as serious damage could result.
- Use a flat, stable and heat resistant work surface, away from any water splashes.
- Never leave the appliance in operation unattended. Keep away from children.
- Do not leave the cord hanging.
• Always plug the appliance into an earthed socket.
- Do not unplug the appliance by pulling on the cord.
- Do not use the appliance if: - the appliance or the cord is damaged.
- the appliance has fallen or shows visible damage or does not work properly. In the event of the above, the appliance must be sent to an approved Service Centre.
- If the power supply cable is damaged, it must be replaced by the manufacturer, the after-sales service or a similarly qualified person in order to avoid any danger.
- Burns can occur by touching the hot surface of the appliance, the hot water, the steam or the food.
• Always unplug the appliance:
- immediately after use, - when moving it, - prior to any cleaning or maintenance.
- Never immerse the appliance in water!
- Do not place the appliance near a wall or a cupboard - the steam produced by the appliance can cause damage.
- Do not move the appliance when it is full of liquids or hot foods.
- This appliance is designed for domestic use only. In case of professional use, inappropriate use or failure to comply with the instructions, the manufacturer accepts no responsibility and the guarantee does not apply.
- Do not touch the appliance while it is producing steam and use a cloth to remove the lid, rice bowl and steam bowl.
ENGLISH
Description
1 Lid handle
2 Lid
3 Clip-on handle
4 Steam basket (2 or 3 depending on the model)
5 Removable base with built-in egg holder (only on upper basket(s))
6 Rice bowl
7 Steam conduit
8 Juice collector
9 Water inlet
10 Removable turbo ring scale remover
11 Interior maximum water level
12 Exterior maximum water level
13 Heating element
14 Water tank (capacity 1.1 l)
15 On/off light
16 60-minute timer
17 “VITAMIN+” touchpad: for extra fast cooking and more vitamins
18 Steam vent
19 Condensation tray
Preparation
Prior to use
Using warm soapy water, wash all the removable parts and the inside of the water tank. Rinse and dry - Fig. 1
Do not immerse the water tank in water when cleaning.
Preparing the steam cooker
Place the cooker on a stable surface. Place the turbo ring around the heating element, in the direction indicated in the diagram - Fig. 2
Keep away from any objects which could be damaged by the steam.
The turbo ring must always be in place before filling the tank with water.
Filling the water tank
Pour the water directly into the water tank, up to the maximum level as well as into the turbo ring - Fig. 3
Place the juice collector on the tank until firmly in place - Fig. 4
If the juice collector does not fit into place, check the position of the turbo ring. It may be the wrong way up.
Use fresh water with each use.
Do not put water into the steam conduit.
Do not use seasoning or any other liquid other than water in the water tank.
Make sure there is water in the tank prior to use.
Fit the condensation tray to the rear of the appliance - Fig. 5
Make sure that the condensation tray is empty before each use.
Positioning the removable bases
The upper basket(s) have bases which can be removed to obtain a larger cooking space or to cook larger foods.
To position the bases:
Place the basket on the table.
Hold the base right side up (hooks toward the bottom).
Centre the base inside the basket.
Press on the hooks until the base is locked into place - Fig. 6
To remove the bases, push up from underneath - Fig. 7
Your steam cooker comes with a clip-on handle which makes it easy to remove the cooked food from the basket without damaging it (fish, asparagus tips, etc.)
Clip the tip of the clip-on handle on the base - Fig. 8
Squeeze the tip of the handle to unclip it.
The lower basket is fitted with a fixed base.
Only use the clip-on handle on the top basket.
When you use the clip-on handle with a basket, do not clip the base into that basket, simply lay the base, in order to remove it more easily.
Make sure that the handle hooks are properly in place.
Positioning the baskets
Place the food in the basket. Always place the smallest basket on the juice collector. Then place them from smallest to biggest, fitting them correctly into each other - Fig. 9 Put the lid on (the lid fits on all the baskets) - Fig. 10
To cook rice
Put the rice and the water in the rice bowl - Fig. 11 (see the table of cooking times). Place the rice bowl in the steam basket - Fig. 12
To cook eggs
Place the eggs in the built-in egg holders - Fig. 13
To cook a whole fish
Place the fish in the upper basket and the vegetables in the lower basket(s) - Fig. 14
If steam is coming out of the appliance, check that the baskets are correctly fixed in place and in the right order.
For best results, do not put too much food in the baskets.
So as not to scald yourself with the steam from the lid, preferably place the steam holes towards the back.
Steam cooking with the timer
Choose the cooking time
Plug the appliance in. Set the timer for the recommended cooking times (see table of cooking times). When the red light is on, the steam cooking has begun - Fig. 15
In order to set the timer, the appliance must be plugged in.
Reduce your cooking time with the "VITAMIN+" touchpad
Exclusive: your appliance is fitted with a "VITAMIN+" touchpad which reduces cooking time up to 50% compared with classic steamers for a better preservation of vitamins - Fig. 16
At the start of cooking, press the “VITAMIN+” touchpad, the light comes on automatically - Fig. 17 this allows a faster start to cooking, thanks to a bigger steam outlet.
Once the ideal temperature is reached, the "VITAMIN+" touchpad light goes out automatically - Fig. 18
After opening the lid (e.g.: if adding more food) you can press the “VITAMIN+” touchpad again to quickly return the steamer to the ideal temperature - Fig. 19 In some cases, it is normal, when you press the “VITAMIN+” touchpad for the light to stay off or turn off very quickly. This means that the ideal temperature has been reached in the baskets.
It is normal to see a small amount of steam coming from the steam vent at the rear of your appliance.
Once the “VITAMIN+” touchpad light has come on, you cannot switch it off manually. The light goes out automatically.
It is not advisable to press the "VITAMIN+" button more than once during cooking.
During cooking
Check the water level during cooking using the external water level indicator. If necessary, add more cold water through the water inlets - Fig. 20
Do not touch the appliance or foods during cooking as they will be hot.
At the end of cooking
A signal sounds. The red in-use light goes out. To stop the appliance ahead of time, turn the timer to the O position - Fig. 21
Re-heating
You can reheat food (see the table of cooking times).

If there is no more water, the appliance stops producing steam.
Removing the food from the steam baskets
Lift the lid by the handle.
Remove the steam basket.
Place the steam basket on a plate - Fig. 22

Use oven gloves to handle the
baskets and the lid.
Afterwards
Unplug the appliance.
Let it cool completely before cleaning it.

Check that the juice collector has cooled sufficiently before removing it.
Cleaning and maintenance
Cleaning the appliance
Empty the water tank and clean it with a damp cloth and warm soapy water.
Rinse and dry - Fig. 23
All the other removable parts can be put in the dishwasher - Fig. 24

Do not use abrasive cleaning products.

Do not immerse the water tank in water.

Clean the turbo ring regularly.

Always use a prewash or lowest heat setting.

Do not forget to empty and wash your condensation tray.
Removing scale build-up from the appliance
Position the turbo ring upside down on the heating element - Fig. 25
Fill the inside of the turbo ring with white vinegar up to the max mark.
Fill the water tank with cold water up to the same level - Fig. 26
Do not heat up (to avoid any descaling odour). Leave overnight to descale.
Rinse out the inside of the water tank with warm water several times.

Descale the appliance after approximately every 8 uses.

Do not use other scale-removing products.

Over time the strong coloured natural juices from foods such as carrots and beetroot may stain the juice collector.
This is normal. It may be cleaned by soaking in mild bleach (not abrasive) straight after cooking.
Storing the baskets
To take up as little space as possible, your baskets can be stored inside each other - Fig. 27
Table of cooking times

Cooking times are approximate and may vary depending on the size of the food, the space between the food, the amount of food, individual preferences, and the mains voltage.
For food with different cooking times: place the largest or the food which takes the longest cooking time in the lowest basket, during cooking, add the second or third basket with food that need a shorter cooking time. At the start of cooking, press the "VITAMIN+" touchpad for extra fast cooking and for more vitamins.
| Fish • Shellfish Type Amount Cooking Time Recommendations | ||||
| Thin fillet of fish Fresh 450 g 5 -10 min. Do not lay pieces of fish on top of Frozen 450 g 10 - 15 min. each other. | ||||
| Thick fillets or steaks Fresh 400 g 10 - 15 min. | ||||
| Whole fish Fresh 600 g 20 - 25 min. | ||||
| Mussels Fresh 1 kg 10 - 15 min. Discard any that have not opened. | ||||
| Prawns | Fresh 200 g 2 - 5 min. | According to your taste. | ||
| Scallops | Fresh 100 g 2 - 5 min. | According to your taste. | ||
| Meat • Poultry | ||||
| Chicken breast (boneless) | Strips 500 g | 10 - 15 min. | ||
| Whole 450 g 15 - 20 min. | ||||
| Chicken drumsticks | Fresh 4 | 30 - 35 min. | ||
| Turkey escalope Fresh | 600 g 15 - 20 min. | |||
| Pork fillet | Fresh 700 g 10 - 15 min. Cut in 1 cm slices. | |||
| Lamb steaks | Fresh 500 g 10 - 15 min. | |||
| Sausages | Knackwurst 10 | 5 min. | ||
| Frankfurter 10 | 10 - 15 min. Pierce before cooking. | |||
| Vegetables | ||||
| Asparagus | Fresh 600 g 10 - 15 min. Cut the base off. | |||
| Broccoli Fresh 400 g 19 min. | Cut in small florets. | |||
| Frozen 400 g 13 min. | ||||
| Celeriac | Fresh 350 g 15 - 18 min. In cubes or slices. | |||
| Mushrooms | Fresh 500 g 11 min. | Cut the base off and wash well. | ||
| Cauliflower florets | Fresh 1 average | 20 - 25 min. | Cut in small florets. | |
| (Red - Green) cabbage | Fresh 600 g 15 - 18 min. Sliced or shredded. | |||
| Courgettes | Fresh 600 g 7 - 10 min. | Sliced. | ||
| Spinach | Fresh 300 g | 8 - 10 min. | Toss half way through cooking. | |
| Frozen 300 g 15 - 20 min. | ||||
| Fine greens beans | Fresh 500 g 20 - 25 min. | |||
| Frozen 500 g 25 - 30 min. | ||||
| Peas | Fresh 400 g 20 min. | |||
| Frozen 400 g 25 min. | ||||
| Carrots | Fresh 500 g 10 min. | Sliced thin. | ||
| Corn on the cob | Fresh 500 g 30 min. | |||
| Leeks | Fresh 500 g 8 min. | Sliced thin. | ||
| Mange tout | Fresh 500 g 10 - 15 min. | |||
| Peppers | Fresh 300 g 10 - 15 min. Cut into wide strips. | |||
| Old potatoes | Fresh 600 g 20 - 25 min. Sliced or cut into cubes. | |||
| New potatoes | Fresh 600 g 35 - 40 min. Depends on size and variety. | |||
| small whole | ||||
| Onions small whole | Fresh 400 g 8 min. | |||
| Rice • Grains • Pasta | ||||
| White Rice American Long Grain | 150 g | 300 ml | 25 - 30 min. | Wash the rice before cooking. |
| White Rice Basmati Rice | 150 g | 300 ml | 25 min. | Use boiling water in the rice |
| White Rice Easy Cook White Rice | 150 g | 300 ml | 18 - 20 min. | bowl. |
| Brown Rice | 150 g 300 ml | 35 min. | ||
| Couscous | 200 g | 350 ml | 10 min. | Soak the couscous 5 min. in boiling water before cooking. |
| Bulgar Wheat | 150 g | 300 ml | 15 min. | Use boiling water. |
| Pasta (spaghetti) | 200 g | 400 ml | 20 - 25 min. | Use boiling water. |
| Other Foods | ||||
| Eggs | Hard-boiled | 6 | 15 min. | Well grease the ramekins. |
| Solf-boiled | 6 | 8 - 10 min. | ||
| Fruits | Fresh | 10 - 15 min. | ||
| Re-heating | ||||
| Meat | Pieces | 10 - 15 min. | ||
| Pasta | 10 - 15 min. | |||
| Vegetables | 5 - 10 min. | |||