
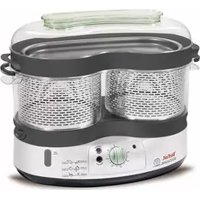
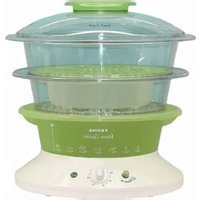
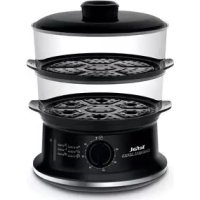
Vitacuisine Compact VS4003 - Steamer TEFAL - Free user manual and instructions
Find the device manual for free Vitacuisine Compact VS4003 TEFAL in PDF.


| Product Type | Electric Steamer |
| Brand | Tefal |
| Model | Vitacuisine Compact VS4003 |
| Dimensions (L x W x H) | Approx. 30 x 25 x 25 cm |
| Weight | Approx. 2.5 kg |
| Power Supply | 220-240 V, 50-60 Hz |
| Power Consumption | 800 W |
| Capacity | 2 tiers, approx. 8 L total |
| Material | Plastic, stainless steel (heating element) |
| Timer | Analog dial, up to 60 minutes |
| Water Level Indicator | Yes, transparent window |
| Automatic Shut-off | Yes, when water runs out |
| Overheat Protection | Yes |
| Dishwasher Safe Parts | Yes, steaming bowls and lid |
| Cleaning | Descaling recommended every 3 months |
| Spare Parts Available | Yes, bowl, lid, heating base |
| Repairability Index | Rating: 8.0/10 |
| Warranty | 1 year (standard) |
| Included Accessories | 2 steaming tiers, rice bowl, recipe booklet |
Frequently Asked Questions - Vitacuisine Compact VS4003 TEFAL
User questions about Vitacuisine Compact VS4003 TEFAL
0 question about this device. Answer the ones you know or ask your own.
Ask a new question about this device
Download the instructions for your Steamer in PDF format for free! Find your manual Vitacuisine Compact VS4003 - TEFAL and take your electronic device back in hand. On this page are published all the documents necessary for the use of your device. Vitacuisine Compact VS4003 by TEFAL.
USER MANUAL Vitacuisine Compact VS4003 TEFAL
natural_image
Exterior view of a Tefal Vitacuisine Direct steamer with three stacked dish units (no text or symbols on the main body)

Important safeguards
Safety instructions
- Read and follow the instructions for use. Keep them safe. This appliance is not intended to be operated using an external timer or separate remote control system. For your safety, this appliance complies with the safety regulations and directives in effect at the time of manufacture (Low-voltage Directive, Electromagnetic Compatibility, Food Contact Materials Regulations, Environment...).
- Check that the power supply voltage corresponds to that shown on the appliance (alternating current).
- Given the diverse standards in effect, if the appliance is used in a country other than that in which it is purchased, have it checked by an approved service centre.
- Do not place the appliance near a heat source or in a hot oven, as serious damage could result.
- Use a flat, stable, heat-resistant work surface away from any water splashes.
- Never leave the appliance in operation unattended. Keep away from children.
- This appliance is not intended for use by persons (including children) with reduced physical, sensory or mental capabilities, or lack of experience and knowledge, unless they have been given supervision or instruction concerning use of the appliance by a person responsible for their safety.
- Children should be supervised to ensure that they do not play with the appliance.
- Do not leave the cord hanging.
• Always plug the appliance into an earthed socket. - Do not use an extension lead. If you accept liability for doing so, only use an extension lead which is in good condition, has an earthed plug and is suited to the power of the appliance.
- Do not unplug the appliance by pulling on the cord.
- Do not use the appliance if:
- the appliance or the cord is damaged.
- the appliance has fallen or shows visible damage or does not work properly.
In the event of the above, the appliance must be sent to an approved Service Centre. Do not take the appliance apart yourself.
- If the power supply cord is damaged, it must be replaced by the manufacturer, an authorised service centre or a similarly qualified person in order to avoid any danger.
-
Burns can occur by touching the hot surface of the appliance, the hot water, steam or the food.
• Always unplug the appliance: -
immediately after use,
- when moving it,
- prior to any cleaning or maintenance.
- Never immerse the appliance in water!
- Do not place the appliance near a wall or a cupboard: the steam produced by the appliance can cause damage.
- Do not move the appliance when it is full of liquids or hot foods.
- This appliance is designed for domestic use only. In case of professional use, inappropriate use or failure to comply with the instructions, the manufacturer accepts no responsibility and the guarantee does not apply.
-
It is not intended to be used in the following applications, and the guarantee will not apply for:
-
staff kitchen areas in shops, offices and other working environments;
- farm houses;
- by clients in hotels, motels and other residential type environments;
- bed and breakfast type environments.
• Cooking times are given as a guide only.
- Do not touch the appliance when it is steaming and use oven gloves to remove the lid and steam baskets.
- If one of the steaming cups is damaged do not use it anymore.
- For any problems or queries please contact our Customer Relations Team or consult our web site:
Helpline: UK 0845 602 1454 www.tefal.co.uk
Ireland (01) 677 4003
Australia 02 9748 7944 www.tefal.com.au
NZ 0800 700711 www.tefal.co.nz
- If your appliance is fitted with a removable power cord: if the power cord is damaged, it must be replaced by a special cord or unit available from a Tefal authorised service centre.
- If your appliance is fitted with a fixed power cord: if the power supply cord is damaged, it must be replaced by a Tefal authorised service centre or a similarly qualified person in order to avoid any danger.
Protect the environment
- Your appliance has been designed to run for many years. However, when you decide to replace it, remember to think about how you can contribute to protecting the environment.
- Before discarding your appliance you should remove the battery from the timer and dispose of it at a local civic waste collection centre (according to model).

Environment protection first!
i Your appliance contains valuable materials which can be recovered or recycled.
Leave it at a local civic waste collection point.
Description
- Lid
- Cooking trays
- Steam baskets – numbered 1, 2 & 3
- Removable base
- Juice collector
- Interior water level indicator
- Heating element
- Water tank
- Power supply base
- Steaming cups and lids
-
Steaming cups holder
-
On/off touchpad
- Programme touchpad
-
- Touchpad
-
- Touchpad
- LCD screen
a. Cooking level indicator
b. Clock
c. Low water level indicator
d. Timer
Instructions for Use
Before first use
- Clean the water tank using a damp, non-abrasive sponge - fig. 1.
- Wash all removable parts using warm water and washing up liquid, rinse and dry.
Do not immerse the power supply base in water.
Fill the water tank
Do not use seasoning, herbs or any liquid other than water in the water tank. Ensure that the water tank (8) is filled with water to the maximum level before using the steamer.
- Pour cold water directly into the water tank up to the maximum level (1.5 litre) - fig. 2.
- Position the juice collector on the water tank - fig. 3.
- Place the removable base (4) in basket 1 and the cooking trays in baskets 2 and 3, if required - fig. 4.
- Put baskets 1, 2 and 3 with their bases in position and then the lid - fig. 5.
- Use fresh water with each use and check that the water tank is filled to the maximum level.
Cooking
Choose the cooking time
- Plug the steamer in and switch on: a beep sounds and is displayed - fig. 6.
- If no other action is taken, the screen goes blank and the steamer switches to standby mode after 2 minutes.
- Set the cooking time using the + and - touchpads (max. 60 min) - fig. 7.
- 20 sec. later (or on a short press of the on/off touchpad) steam cooking begins. The « vitamin + » touchpad lights up and the cooking symbol is displayed - fig. 8.
- You can alter the cooking time at any point after cooking has started by pressing the + or - touchpad - fig. 7.
- During cooking, the time displayed reduces by minutes and then by seconds in the last minute.
A long press on the + or – touchpad allows you to increase or decrease the cooking time more quickly.
After a few minutes cooking, you can manually stop the « vitamin + » programme by pressing the illuminated touchpad - fig. 9.
- Your steamer is fitted with a « vitamin + » touchpad which reduces cooking time and preserves the full vitamin content.
- The touchpad lights up when cooking starts. This allows a faster start to the cooking process owing to a higher steam output.
- The « vitamin + » touchpad light goes out automatically when the quantity of steam is sufficient for the cooking process.
- If the « vitamin + » touchpad is not illuminated and you intervene during the cooking process (such as inserting a basket, removing the lid to check the cooking progress, etc.), press the « vitamin + » touchpad to replace the lost steam - fig. 9.
During cooking
- If 📋 is displayed (+ sound alarm) - fig. 10 carefully remove the baskets and juice collector using oven gloves, add water up to the maximum level. The steamer will automatically continue the cooking process.
Do not touch hot surfaces or hot food during cooking. Use oven gloves. If the water tank is empty, the steamer stops heating.
Delayed start
The delayed start time can be changed at any point.
A beep then sounds for a few seconds indicating cooking has been set.
- Set the cooking time using the + and - touchpads (max. 60) - fig. 7.
- Press the Prog touchpad - fig. 14. The programming symbol is displayed and the clock flashes.
- Select the time period at the end of which you want the cooking to start - fig. 7. When selecting the time you can increase it by 15 minute periods and then by the hour. If for example, you need your appliance to start in 2 and a half hour's time, select 2h because your food will automatically be kept warm until your meal. Once the delayed start time has been programmed, the appliance will automatically run a short cycle to test and detect that water is in the tank, steaming will commence and then stop after approximately 10 seconds. The appliance will automatically start the cooking cycle when the delayed start time is reached.
- 20 sec. later the delayed start is operational and the clock disappears.
- At the end of the delay period, the steamer automatically switches to cooking mode.

Keep warm function
While the keep warm function is in operation, no other action is possible, except stop when required.
- A beep sounds twice at the end of the cooking time.
- The keep warm function starts automatically at the end of the cooking process, and the keep warm symbol is displayed - fig. 11.
- The keep warm time elapsed (since the end of cooking) is displayed.
Removing the food
- Remove the lid by the handle.
- Remove the cooking trays and steaming baskets using the handles - fig. 12 and 13.
- Serve the food.
Use oven gloves when handling the baskets, handles and lid.
If you want to switch off your appliance when it is showing the alert status « low water level », you need to press twice on the on/off button.
To stop the steamer
- One press on the on :off touchpad stops the keep warm function - fig. 15.
- A second press puts the steamer on standby.
- After 1 hour in keep warm mode, the steamer switches to standby mode. The light goes out.
- Unplug the steamer.
Table of cooking times
Cooking times are approximate and may vary depending on the size of the food, the space between the food, the amount of food, individual preferences, and the mains voltage.
Use oven gloves when handling the baskets during the cooking time.
Meat - Poultry
| Preparation | Type | Quantity | Cooking time | Recommendations |
| Chicken breast (boneless) | Fresh Whole | 350 g | 20 min | 2 chicken breast in a steam basket |
| Small pieces | 450 g | 17 min | ||
| Chicken drumsticks | Fresh Whole | 2 | 36 min | |
| Turkey escalope | Thin | 600 g | 24 min | |
| Pork fillet | Fresh | 700 g | 38 min | Cut in 1 cm thickness slice |
| Lamb steak | Fresh | 500 g | 14 min | |
| Frankfurters | Fresh | 10 | 10 min |
Fish - Shellfish
| Preparation | Type | Quantity | Cooking time | Recommendations |
| Thin fish fillets (cod, haddock, plaice, sole, salmon...) | Fresh | 450 g | 15 min | |
| Frozen | 370 g | 18 min | ||
| Fish steaks (cod, haddock, plaice, sole, salmon...) | Fresh | 400 g | 15 min | |
| Whole fish (trout, salmon trout, sea bass) | Fresh | 600 g | 25 min | |
| Mussels | Fresh | 1 kg | 20 min | |
| Prawns | Fresh | 200 g | 5 min | |
| Scallops | Fresh | 100 g | 5 min | |
| Food | Type | Quantity | Cooking time | Recommendations |
| Artichoke | Fresh | 2 | 55 min | Whole in steam basket 1 and 2 (without cooking trays) |
| Potatoes | Fresh | 600 g | 20 min | Sliced or cubed. Small new potatoes can be cooked whole |
| Asparagus | Fresh | 600 g 17 | min | |
| Broccoli | Fresh | 500 g | 18 min | Small florets |
| Frozen | 500 g | 18 min | ||
| Celeriac | Fresh | 350 g | 22 min | In cubes |
| Mushrooms | Fresh | 500 g | 22 min | Whole |
| Cauliflower | Fresh | 1 medium | 19 min | Small florets |
| Cabbage (red-green) | Fresh | 600 g | 22 min | Sliced |
| Courgette | Fresh | 600 g | 12 min | Sliced |
| Spinach | Fresh | 300 g | 13 min | Toss halfway through cooking |
| Frozen | 300 g | 15 min | ||
| Fine green beans | Fresh | 500 g | 35 min | |
| Frozen | 500 g | 35 min | ||
| Carotts | Fresh | 500 g | 15 min | Thinly sliced |
| Corn on the cob | Fresh | 500 g | 45 min | |
| Green beans | Fresh | 500 g | 35 min | Whole |
| Leeks | Fresh | 500 g | 30 min | Sliced |
| Sweet peppers | Fresh | 300 g | 20 min | Cut in wide strips |
| Peas | Fresh | 400 g | 20 min Shelled | |
| Frozen | 400 g | 20 min |
Rice
| Food | Weight | Quantity | Cooking time | Recommendations |
| For one cup of white long grain or basmati | 30 g 70 ml | 20 min | Wash rice well before cooking.Place rice and cold water in the steaming cup without the lid on.Use steam basket n° 3 | |
| Food | Type | Quantity | Cooking time | Recommendations |
| Pears Fresh 4 25 min | With steam basket 1 and 2 (without cooking trays).Steam whole or halved | |||
| Bananas Fresh 4 15 min | Whole | |||
| Apples Fresh 5 20 min | Quartered |
Steaming Tips and Techniques
- Do not pack food too tightly in the steam baskets. Leave some space for steam to circulate as much as possible.
- For best results, use pieces of food of approximately the same size (such as potatoes, vegetables and chicken breasts) so that they cook at the same time. The size and thickness of the food will alter the cooking time.
- Avoid lifting the lid to check on the cooking progress too often, as this allows loss of steam and can lengthen the cooking time.
- If recipes require the use of cling film, always use the all purpose type suitable for use in microwave ovens. Cling film is often used to prevent condensation forming and spoiling delicates foods such as egg custards. Avoid using foil as this tends to increase the steaming time.
- When choosing food for steaming, select suitable size food to fit the steaming basket, especially if it is cooked whole such as fish.
- Subtle flavour can be given to steamed food with the addition of fresh herbs, slices of lemon or orange, garlic and onion. These may be placed either directly underneath or on top of the food in the steaming basket.
- To give meat, poultry and fish a delicious flavour plus make then moist and tender, marinade for a few hours before steaming. The marinade can be as simple as a blend of wine and fresh herbs, or it can be a spicy barbecue or tandoori mix.
- Frozen vegetables can be steamed from frozen. All shellfish, poultry and meat must be completely thawed before steaming.
- For some recipes with a long cooking time, such as steamed sponge pudding, you will need to top up with more cold water during steaming.
• Always use oven gloves when handling the baskets or steaming cups during or after cooking.
Steaming Cup Recipes
Preparing steaming cup recipes
You can cook recipes in the steaming cups, either from the steamer recipe book or from your own recipes. Put the prepared mixture into the cups, taking care not to overfill them to prevent spillages as some recipes may rise during cooking. Cover the cups if necessary, using the lids. Place the four cups in the holder - fig. 16. Take the holder by the handle and place it in the basket - fig. 17.
The cups must always be placed in the top basket (basket no. 3) immediately under the lid.
Removing the steaming cups
Use oven gloves. Remove the lid by the handle. Remove the cups using the holder handle. Take the cups out of the holder and remove the lids (if your recipe uses lids). If necessary you can cool the cups by standing them in cold water. Do this using the holder. Wait until the cups are at room temperature before placing them in the refrigerator. Serve the recipe in the cups.
Maintenance and cleaning
Cleaning the steamer
- Unplug the steamer after use.
- Allow it to cool completely before cleaning.
- Check that the steamer has cooled completely before emptying the juice collector and water tank.
- Wash all removable parts using warm water and washing up liquid, rinse and dry.
- All parts except the power supply base are dishwasher safe.
Do no immerse the power supply base in water. Do not use abrasive cleaning products.
Descaling your steamer
It is essential to descale your appliance regularly in order for it to function correctly.
For best results, descale the steamer after every 8 uses. To do this:
- Remove the juice collector.
- Pour 1 litre of cold water into the water tank.
- Add 1 glass (about 150 ml) of white vinegar (available from hardware stores).
- Leave it to descale overnight.
- Rinse out the inside of the water tank several times using warm water.
- Do not use other scale removing products.
Storage
- Store the steaming cups with the lids inside the juice collector.
- Turn basket 1 upside down on to the base.
- Put the two cooking trays on top of bowl 1 - fig. 18.
- Put bowl 2 inside bowl 3, then turn them both upside down and place them on the base. Put the cups holder on top and then the lid - fig. 19.
All parts can be stored inside the steamer.
Technical troubleshooting guide
| Problem Cause Solution | ||
| There is steam escaping from the sides of the appliance. | Bowls poorly interlocked between each other. | Check that the bowls are placed and fitted in the correct order. Fit bowl 1 first, next fit bowl 2 and then bowl 3. |
| The cooking starts and then stops straight afterwards. | The appliance is checking that there is water in the tank. | Do not change the program, the appliance will actually start cooking after about a minute. |
| The cooking won’t start, you hear a beeping sound. | Not enough water in the tank. | Fill the tank with water up to the maximum level. |
| Even though you’ve programmed your appliance to start later on, it starts heating up. | The noise of the appliance heating up indicates that it is testing for water in the tank. | Wait for at least one minute, the heating will stop automatically and steaming will begin at the requested time programmed for the delayed start. |
| A « no water »alert comes on even though there is water in the tank. | Heating element needs descaling. | Start descaling the heating element (please refer to maintenance and cleaning paragraph). |
| I plugged in my appliance but it switched itself off. | You switched the appliance on less than 2 minutes ago and it has gone into standby mode. | Press on the on/off button once to come out of standby mode. |
| The vitamin button + won’t go off even if I press on it. | The cooking started less than 13 minutes ago. | This button light will go out automatically. |
| Water is coming out of the base. | There might be a leak around the heating element. | Take the appliance to an approved Service Centre. |


- Important safeguards
- Safety instructions
- Protect the environment
- Environment protection first!
- Description
- Instructions for Use
- Before first use
- Fill the water tank
- Cooking
- Choose the cooking time
- During cooking
- Delayed start
- Keep warm function
- Removing the food
- To stop the steamer
- Table of cooking times
- Steaming Tips and Techniques
- Steaming Cup Recipes
- Preparing steaming cup recipes
- Removing the steaming cups
- Maintenance and cleaning
- Cleaning the steamer
- Descaling your steamer
- Storage
Brand : TEFAL
Model : Vitacuisine Compact VS4003
Category : Steamer