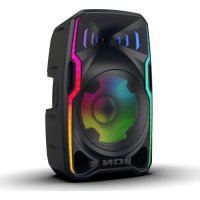
Total PA Apex - Speaker ION - Free user manual and instructions
Find the device manual for free Total PA Apex ION in PDF.



| Product Type | Portable amplified speaker with wireless microphone |
| Brand | ION |
| Model | Total PA Apex |
| Dimensions (W x D x H) | 411.7 x 317.5 x 651 mm |
| Weight | 13.2 kg |
| Power Supply | 100-240 V AC, 50/60 Hz, 320 W |
| Battery | Lithium-ion 11.1 V, 6000 mAh, battery life 6-8 h (50% volume, lights off), charge ≤5 h |
| Speakers | Woofer 305 mm (12"), tweeter 25.4 mm (1") |
| Frequency Response | 50 Hz - 20 kHz |
| Bluetooth Connectivity | Classic Bluetooth audio, range ≤30.5 m, version 5.0 |
| Wireless Microphone | Included, range ≤30.5 m, AA batteries (not included) |
| Audio Inputs | AUX 3.5 mm, AUX XLR, MIC 2 (6.35 mm and XLR), USB (MP3 playback, max 512 GB) |
| Audio Output | XLR Mix Output |
| USB Charging Port | 5 V, 1 A for external devices |
| Additional Features | Stereo-Link (stereo linking between two speakers), adjustable echo, equalizer (Outdoor/Indoor/Vocal/Flat), 12 light modes, ION Sound Control app |
| Saturation LED | Indicates signal distortion |
| Standby Mode | Auto standby after 20 min without signal, energy saving |
| Maintenance and Cleaning | Clean with a soft dry cloth; avoid liquids and aerosols |
| Spare Parts and Repairability | Contact ION Audio via ionaudio.com for after-sales service |
| Package Contents | Total PA Apex, power cable (1.5 m), wireless microphone, speaker stand, quick start guide |
Frequently Asked Questions - Total PA Apex ION
User questions about Total PA Apex ION
0 question about this device. Answer the ones you know or ask your own.
Ask a new question about this device
Download the instructions for your Speaker in PDF format for free! Find your manual Total PA Apex - ION and take your electronic device back in hand. On this page are published all the documents necessary for the use of your device. Total PA Apex by ION.
USER MANUAL Total PA Apex ION
natural_image
Technical line drawing of a device casing with internal components and a central circular element (no text or symbols)
ionaudio.com/support
IMPORTANT: RETAIN FOR FUTURE REFERENCE: READ CAREFULLY
IMPORTANT : À CONSERVER POUR RÉFÉRENCE. LISEZ ATTENTIVEMENT
IMPORTANTE::CONSERVE LAS INSTRUCCIONES PARA CONSULTAS FUTURAS: LÉALAS DETENIDAMENTE
VIKTIGT: SPARA FÖR FRAMTIDA REFERENS: LÄS NOGGRANT
Charging and Battery Information....5
Quick Start....6
Balancing Your Levels....7
SETUP 8
Speaker Stand Installation....8
Connection Diagram 9
FEATURES 10
Rear Panel....10
OPERATION....14
Battery Care 14
Installing Batteries Into the Wireless Mic.... 14
Using the Wireless Mic....15
Using the Main Volume Knob....16
Pairing a Bluetooth ^® Device....17
Linking Two Speakers....18
Light Modes....19
USB Mode....21
App Control 22
TROUBLESHOOTING 23
APPENDIX.... 25
Technical Specifications....25
Trademarks & Licenses 26
INTRODUCTION
Thank you for purchasing the Total PA™ Apex. At ION, your entertainment is as important to us as it is to you. That's why we design our products with one thing in mind—to make your life more fun and more convenient.
Note: Before you first use the product, please fully charge the batteries. Your unit was purposely shipped with a reduced battery charge to ensure safe transit. For optimal charging, power off the speaker while charging.
Use the included power cable to connect the unit to a power outlet and let it charge for up to 5 hours. This helps ensure the longest life for your battery.
Box Contents
Total PA ^TM Apex
Power Cable (150 cm / 5.0 ft.) (see Technical Specifications for more details)
Wireless Microphone
Speaker Stand
Quickstart Guide
Support
For the latest information about this product (documentation, technical specifications, system requirements, compatibility information, etc.) and product registration, visit ionaudio.com.
For additional product support, visit ionaudio.com/support.
Charging and Battery Information
natural_image
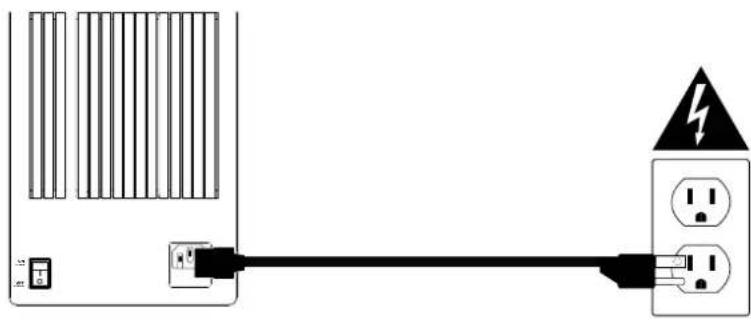
Pure electrical circuit lines without any symbolsFor the quickest charging time, power off Total PA ^™ Apex and use the included power cable to connect the speaker to a power outlet. A full charge can take up to 5 hours.
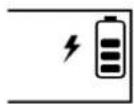
The lightning bolt icon on the display will light up when Total PA™ Apex is connected to a power source and charging. The battery icon will fill to display the battery life percentage. When charging is complete, the lightning bolt icon will disappear, and the battery icon will be completely filled.
If no audio is played through Total PA™ Apex for 20 minutes, the unit will enter a standby mode to conserve battery life. This may mean the Bluetooth signal is paused, no audio is coming through a device connected to the aux port, or the volume is set to 0. To wake the unit, simply resume audio signal or press any button.
Here are some other recommendations for getting the longest life from the internal battery.
General Usage
Fully charge the battery before using it.
Avoid full discharge of the battery if possible. Li-Ion batteries are maintenance-free, and the battery will last longest when operating between 30 and 80 percent charged.
Do not use the product while charging the battery.
Do not charge the battery in exceedingly hot (greater than 90^ F/ 32^ C) or exceedingly cold (less than 32^ F/ 0^ C) temperatures.
Storage For best product longevity, do not store at exceedingly hot (greater than 90^ F/ 32^ C) or exceedingly cold (less than 32^ F/ 0^ C) temperatures.
For best product longevity, store product with a 50% battery charge.
If you leave the battery level low and do not charge it for 6 months, it may permanently lose capacity.
Repair
If the battery fails to charge, contact ION Audio at ionaudio.com.
Disposal
Bring the unit to a recycling center or dispose of in accordance with local ordinances.
Quick Start
- Make sure all items listed in the Box Contents are included in the box. Look in the box under the foam sheet for the power cable and microphone.
- Study the Connection Diagram.
- Make sure all input devices (such as microphones, CD players, or digital media players) are turned off with their volume settings set to "zero."
-
Connect all devices as shown in the Connection Diagram.
-
Switch everything on in the following order:
a. Audio input devices (e.g. microphones, instruments, CD players)
b. Total PA ^TM Apex
-
Adjust the level of your connected devices. Turn audio source (microphone, instruments, Bluetooth devices) volume all the way up. Then, adjust the SSource Volume knob for the selected channel on Total PA™ Apex to an appropriate level. Finally, adjust the Main Volume on Total PA™ Apex to an appropriate level. For a detailed step-by-step process for setting your levels, please refer to the Balancing Your Levels section on the following page.
-
When you are finished using Total PA ^™ Apex, switch everything off in the following order:
a. Total PA ^TM Apex
b. Audio input devices
Balancing Your Levels
This process shows how you can quickly balance your microphone signal(s) and the signal from your Source Device (Bluetooth, Aux, USB). Levels for the microphones, source, and main volume can be set anywhere between 0 to 30.
- Power on Total PA ^™ Apex and the wireless microphone. Connect your preferred Bluetooth, Aux device, or USB drive.
- Using the MMain Volume on the speaker, set the volume to around 10 or lower while balancing your levels. This will allow you to set your levels to a clear and audible level without being overpowering. You can adjust it again later once a balance has been achieved.
- Adjust the Source Volume Knob down to 0. We'll turn this up in a later step.
- Set the MIC 1 Volume using either the +/- volume control on the microphone or the MIC 1 Volume Knob on the speaker. Setting the level to 25 is a good starting point if you're unsure. If using a second, wired microphone, use the MIC 2 Volume Knob to set the levels the same way until both microphones are clearly audible.
- Now, set the volume on your Aux or Bluetooth source device (phone, tablet, etc.) to 100%. This will guarantee a strong signal.
- With the SSource Volume Knob still set to 0, start playback on your device and slowly turn up the Source Volume knob on the speaker until it reaches a clear and audible level. If you are using a microphone, set the source volume level to where you can still hear the microphone above the music.
- Once the microphone and audio source are clearly audible and balanced, use the Main Volume knob to set the overall output level of the speaker to your desired volume.
For specific troubleshooting steps, please see the Troubleshooting section.


SETUP
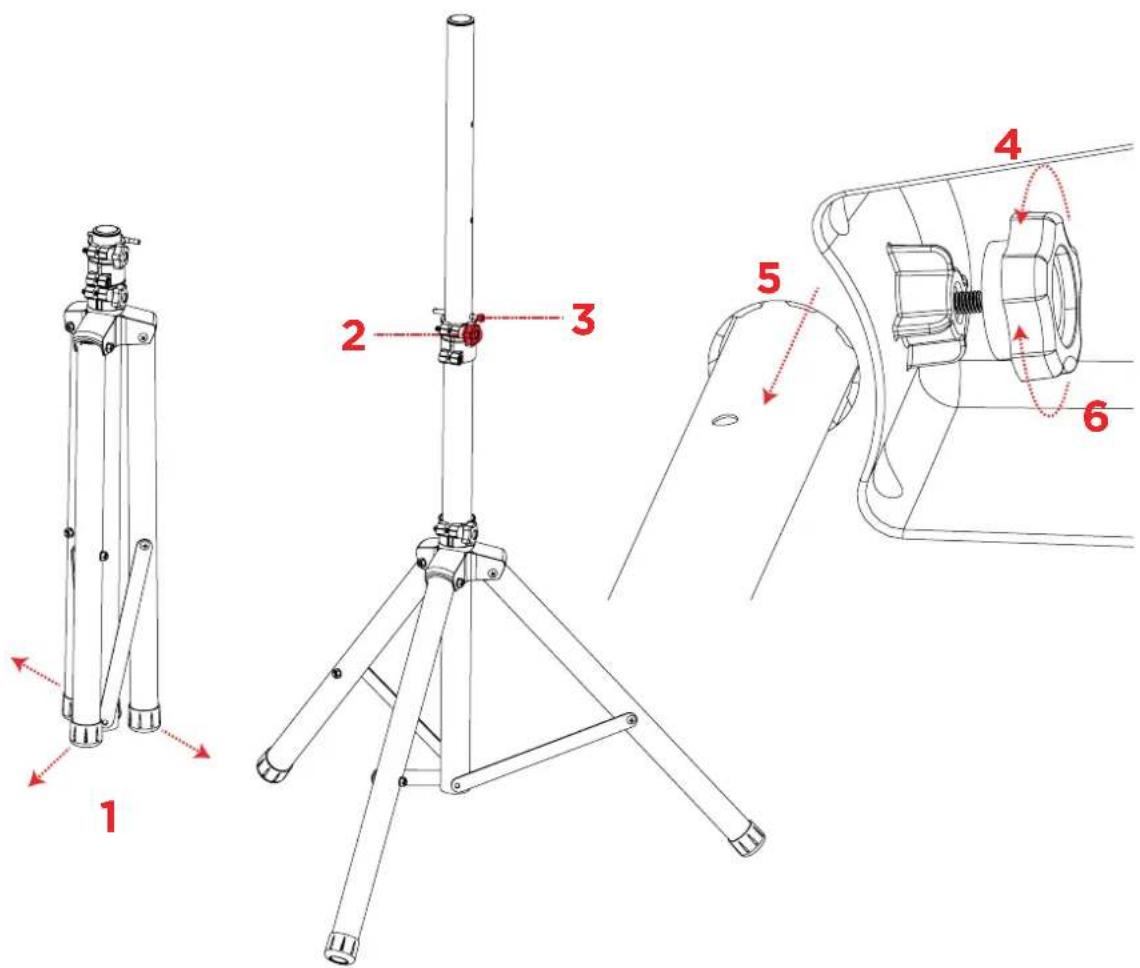
Speaker Stand Installation
- Fully extend the speaker stand tripod legs on a flat, stable surface.
- Raise the mounting pole up to the appropriate height needed and tighten the side adjustment knob.
- Insert the pin into the bottom pin-hole so the mounting pole stays at your set height.
- On the Total PA™ Apex, adjust the bottom knob counter-clockwise so the screw is not blocking the opening.
- Line up the Total PA™ Apex mounting hole with the speaker stand pole and place on the pole.
- Tighten the mounting knob clockwise on Total PA™ Apex to secure it to the pole.
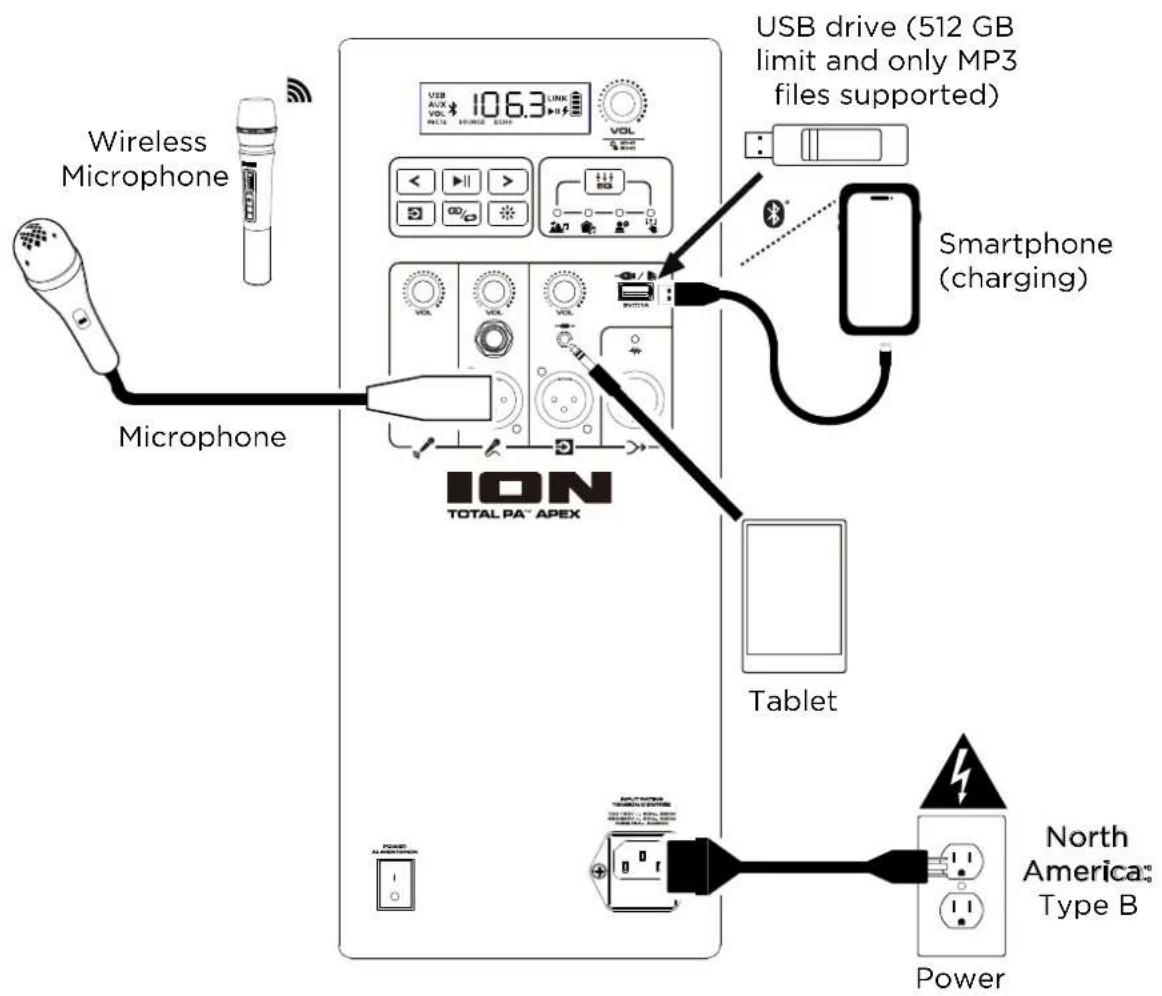
Connection Diagram
Items not listed under the Box Contents are sold separately.
| Region Plug Type Power Plug Type | Power | |
| Europe, Korea Type F | 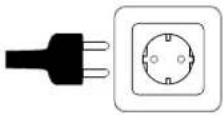 | |
| United Kingdom Type G | 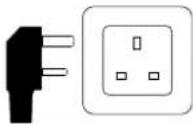 | |
| Australia / New Zealand | Type I | 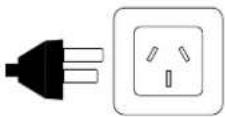 |
| Japan Type A | 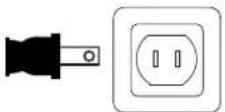 | |
Rear Panel
Click a control below to jump to that section.
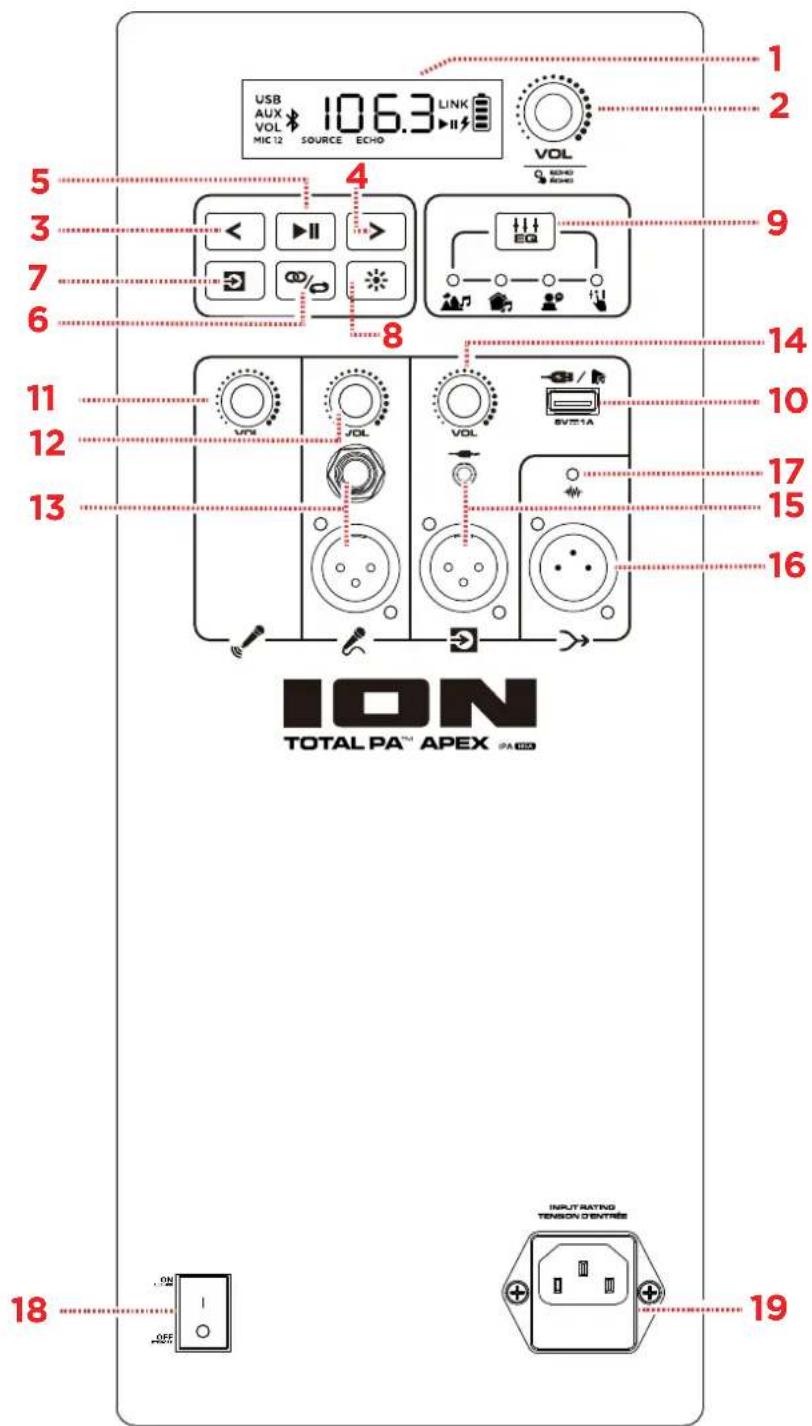
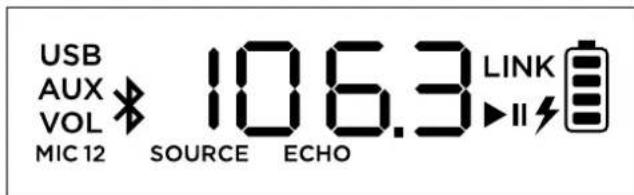
1. Disiplaty
This screen shows information relevant to Total PA™ Apex's current operation.
Note: The Display comes with a plastic protector on it. Remove this for optimal viewing.
2. Vol (Main Volume) / Echo Knob
Turn this knob to adjust the Main Volume (overall output) of the loudspeaker. Press the knob and turn to cycle through to select the Echo effect. See the section U Using the Main Volume Knob for more details.
3. PreviousTrack
When USB or Bluetooth is selected as the audio source, press this button to go to the previous track in the playlist. Press the button again within one second to skip to the previous track.
4. NextTrack
When USB or Bluetooth is selected as the audio source, press this button to go to the next track in the playlist.
5. Play/Pause
When USB is selected as the audio source, press this button to play/pause the currently selected track. Double-press this button to stop playback and return to the beginning of the track list.
When Bluetooth is selected as the audio source, press this button to play/pause the currently selected track.
Press and hold this button for three seconds to turn voice prompts on or off.
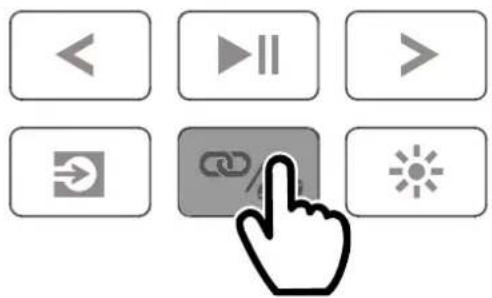
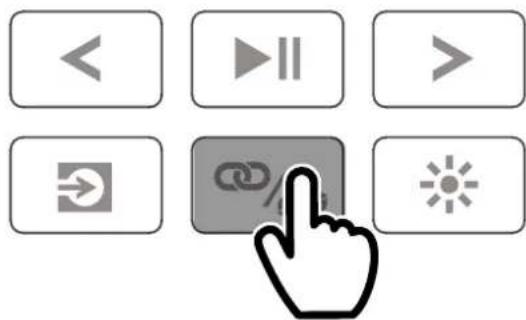
6. StereoLink™/Repeat
Press and hold this button to start stereo linking to another Total PA™ Apex. See the section Linking Two Speakers for more details.
In USB mode, press this button to repeat a single track, folder, or all tracks. See the section USB Mode for more details.
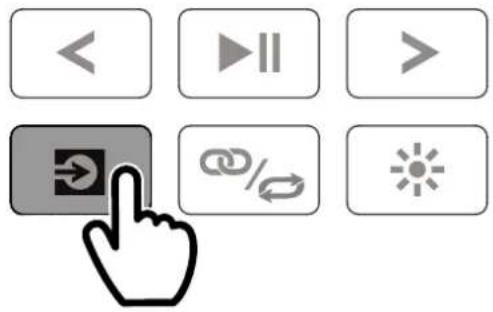
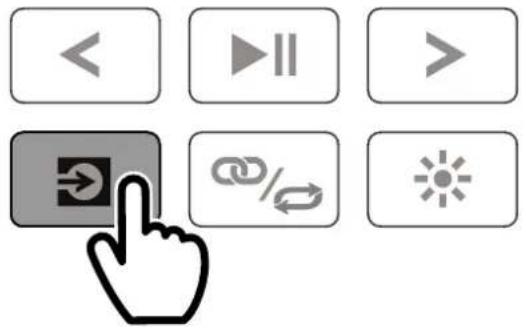
7. Source
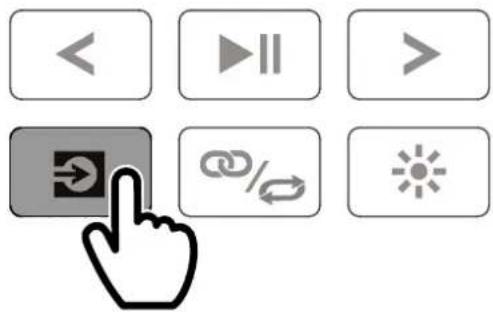
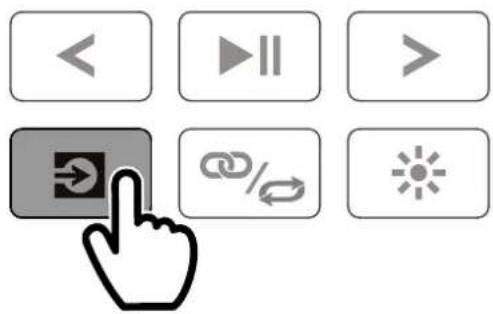
Press this button to select the audio source to use: USB, AUX, or Bluetooth. The default source when powering on Total PA ^™ Apex is Bluetooth. The USB source is only selectable if a USB drive is plugged into Total PA ^™ Apex; otherwise, the Source button will toggle between Bluetooth and Aux.
To disconnect a connected Bluetooth device, double-press this button.
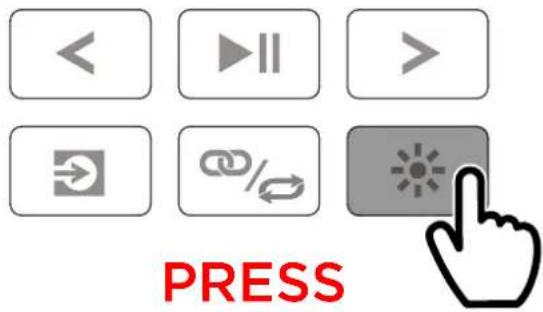
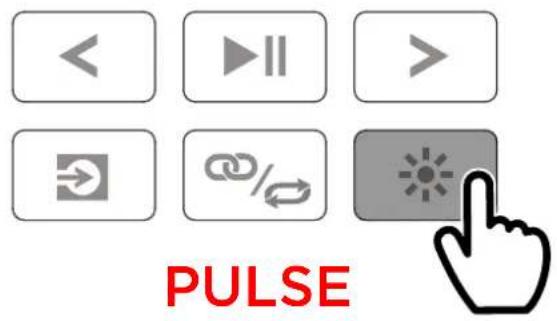
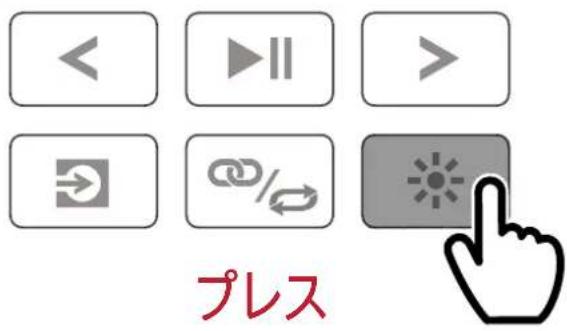
8. Lights
Press this button to select how the lights on the front panel function. See the section Light Modes for more details.
Note: For the best lighting effect, you may need to adjust the volume of your device and/or the Source volume.
9. EQ
Press this button to cycle through these EQ presets:
- O Outdoor: enhanced bass and high frequencies.
- Indoor: slight bass boost and flat high frequencies.
•V Vocal bass is rolled off with an enhanced midrange.
•F Flat: a flat frequency response (custom EQ setting is adjustable and can be uploaded from the App).
10. USB Charge/Playback Port
You can use this port for charging a USB device, such as a tablet or smartphone. To charge a device that is streaming music via Bluetooth, pause the music first and then wait for it to reconnect after the USB cable is inserted.
Connect your USB flash drive here to play music. Use the SOURCE Volume knob to adjust the volume. Press the S Stereo-Link™ // Repeat button to cycle through the five repeat/shuffle options. See the section USB Mode for more details.
Note: Your USB drive cannot be more than 512 GB and it must contain playable MP3 files in order for its data to appear properly in the Display. When you connect a USB drive with MP3 files, Total PA™ Apex will order the files alphabetically by folder on the root directory and then by track name in the folder.
11. M101 Wireless MicroVolume
Adjust the volume of the included wireless mic using this knob. See the section Using the Wireless Mic for more details on setting up and turning on the microphone.
12. MIC 2 Volume
Adjust the volume of the microphone or mic-level source connected to the MIC 2 Inputs using this knob.
TIP: For proper audio level mixing tips for MIC 1, MIC 2, and other Source volumes, see the section Balancing Your Levels.
- MIC 2 Inputs (6.35 mm/1/4" & XLR)
Connect a microphone or mic-level source to these inputs.
- Source Volume
Adjust the volume of devices connected to the Aux Inputs or a Bluetooth source.
- Aux Inputs (3.5mm/1/8" & XLR)
Connect a CD player, MP3 player, or other audio source to these line-level inputs.
- Mix Out (XLLR)
Connect this output to a speaker, mixer, or recorder. All sound from the speaker (including the echo effect but excluding volume and EQ adjustments) will be what is heard on the connected device.
- Clip LED
The Clip LED will flash red if the signal from the input jacks or Media Panell audio source is clipping (distortion from an overly loud signal). If this happens, decrease the setting of the Main Volume or the volume for the Aux/Mic Input (if a loud device is plugged into either).
- Power Switch
Flip this switch to toggle the speaker's power on or off.
Note: If no input signal is played from any source (including the mic input) for 20 minutes, the speaker will go into Low Power Mode. In Low Power Mode the display will go dark. After 50 minutes of inactivity, the speaker will go into sleep mode and you will need to turn the speaker off and back on again to wake it up. The speaker will return to normal operation once an input receives a signal.
- Power Cable Input (IHE)
Insert the included power cable here to power the unit.
OPERATION
Battery Care
Follow the instructions below for best results when replacing the wireless mic batteries:
- Clean the battery contacts and also those in the wireless mic battery compartment prior to battery installation.
- Replace both batteries at the same time.
- Remove batteries from the wireless mic if it will not be used for an extended period of time.
- Promptly remove depleted batteries.
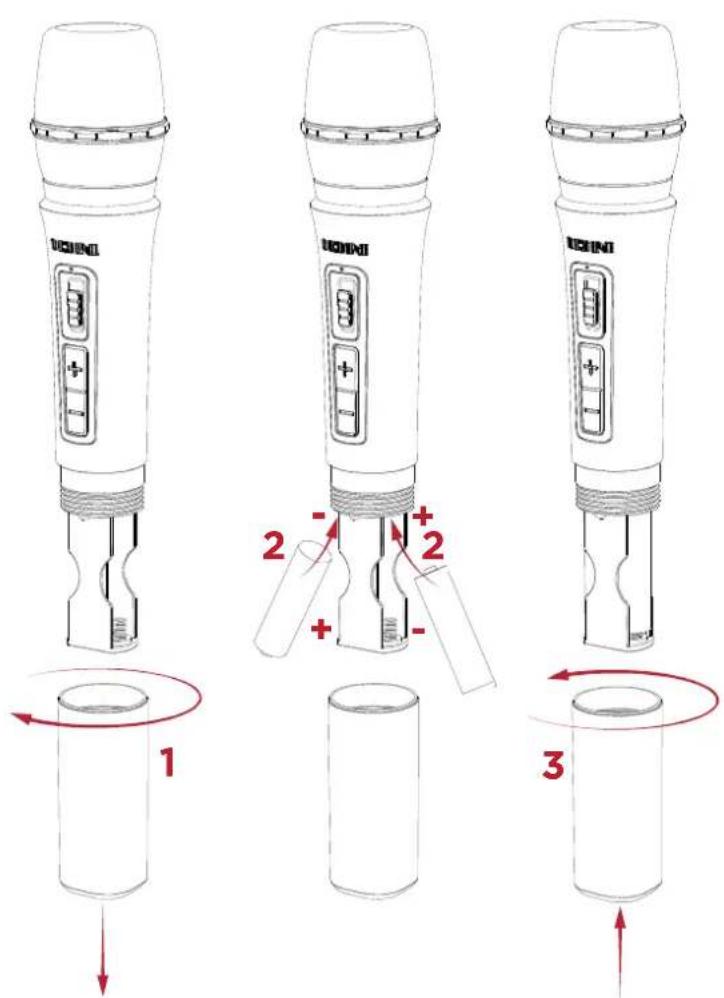
Installing Batteries Into the Wireless Mic
- Remove the battery compartment cover by turning it clockwise.
- Install two fresh AA alkaline batteries (not included) in the orientation indicated in the compartment.
- Reattach the battery cover by turning it counterclockwise.
Using the Wireless Mic
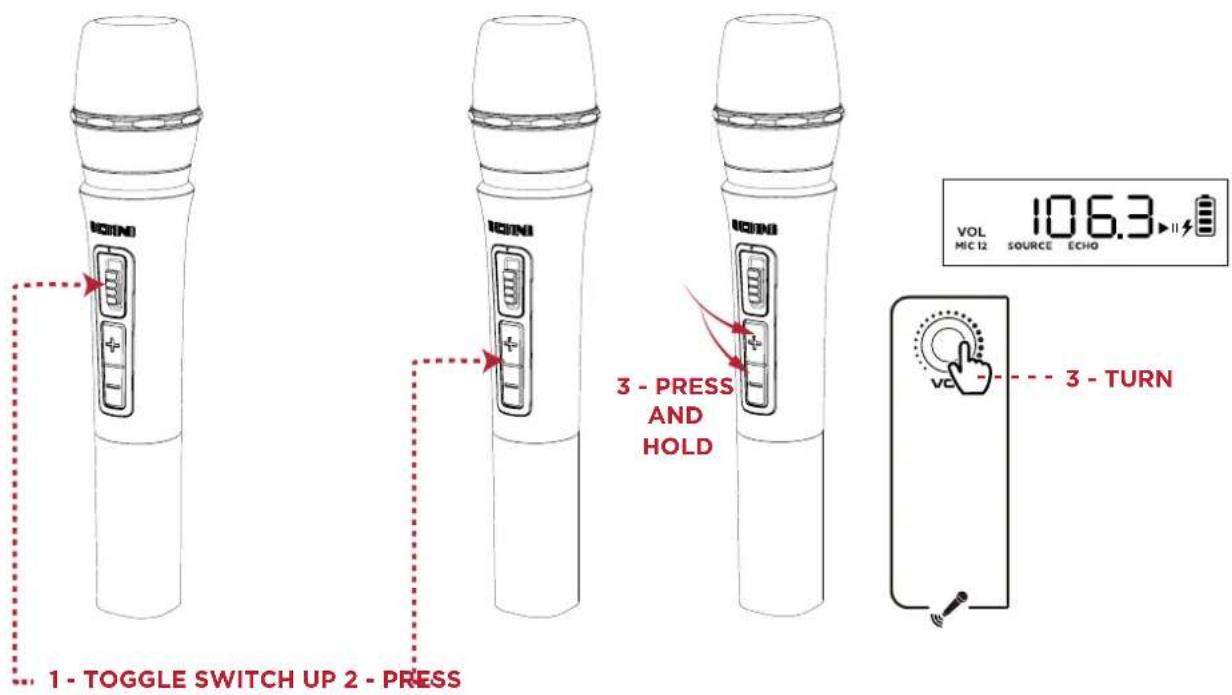
- Power on the wireless microphone by toggling the mic's on/off switch up. The power indicator LED will flash blue if pairing to the speaker and will be solid blue when connected to the speaker.
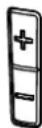
- The microphone should pair automatically if Total PA™ Apex is powered on. If it does not, press and hold the + and - buttons simultaneously for three seconds to reset mic pairing.
- Press the +/- controls on the microphone or turn the MIC 1 Volume knob to adjust the mic level. If you cannot hear the microphone over your audio source, you may need to decrease the SOURCE Volume level or increase the microphone volume.
Note: The wireless microphone will only connect to one Stereo-Linked™ speaker (the closest speaker). If using two Total PA™ Apex speakers you will need to connect the first speaker's Mix Out to the second speaker's XLR Source input.
TIP: For more details on balancing your volume levels, see the section Balancing Your Levels.
Note: A blue and red indicator will appear on the wireless mic when the battery is low and will flash red when it is almost empty.
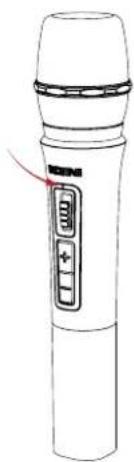
Wireless Mic LED Indicator:
Slow flashing blue LED: The wireless mic is powered on and not in pairing mode.
Quick flashing blue LED. The wireless mic is attempting to pair with the speaker.
Solid blue LED: The wireless mic is paired with the speaker.
Quick flashing red LED: This indicates the battery level is low for the wireless mic.
natural_image
Line drawing of a handheld device with a control panel and indicator lights (no text or symbols)Using the Main Volume Knob
The Main Volume knob defaults to controlling the Main Volume for all channels. Press the knob to toggle to the Echo function and rotate the knob to change the setting.
If there is no activity on the Main Volume knob for five seconds, the function will go back to Main Volume.
To factory reset the speaker to default settings, hold down the Main Volume knob for five seconds. The speaker will power cycle and the reset will be successful.
Pairing a Bluetooth®Device
PRESS
- Power on the Total PA ^™ Apex by flipping the power switch on.
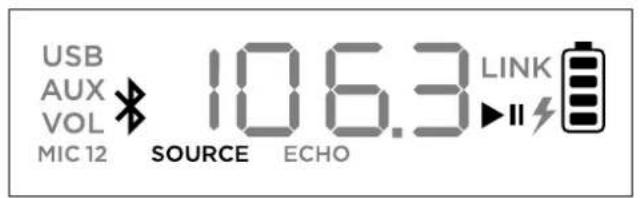
- When the unit is first turned on, it will automatically enter Bluetooth pairing mode. If necessary, press the Source button to select Bluetooth mode. If voice prompts are enabled, you will hear "Bluetooth Pairing."
- Navigate to your device's Bluetooth setup screen, find T Total PA Apex and connect. Do not connect to iPA185A_BLE this is reserved exclusively for connecting to the ION Sound Control™ app. When connected, the Bluetooth icon on the display will flash and you will hear "Bluetooth Connected".
Note: If you experience trouble in connecting, select "Forget this Device" on your Bluetooth device and try to connect again.
Note: The volume of Total PA™ Apex does not affect your Bluetooth device volume. For the best sound quality, set your input source volume to 100% and use the Source and Main Volume control of the speaker to adjust the volume.
To disconnect, double press the Source button on Total PA ^™ Apex.
Linking Two Speakers
DOUBLE-PRESS
- Power on both Total PA™ Apex speakers by flipping the power switches on. Make sure they are in Bluetooth pairing mode and not connected to a device.
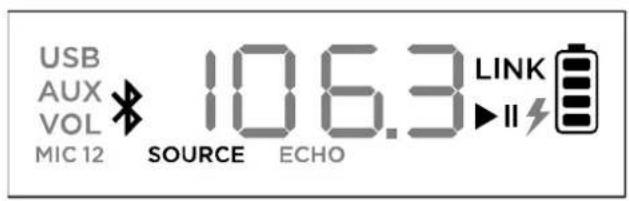
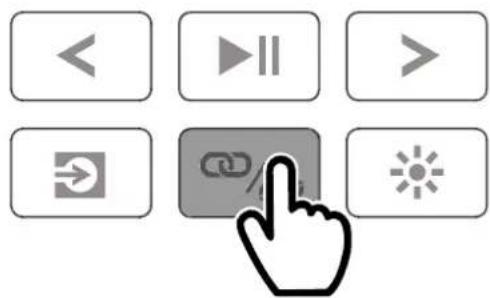
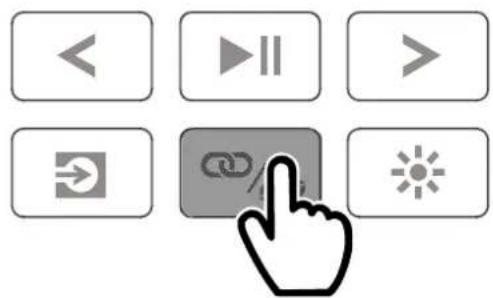
- Double-press the Stereo-Link™ / Repeat button on one speaker (the primary speaker which will control both) and then the Stereo-Link™ / Repeat button on the secondary speaker to enter Stereo-Link™ mode. Once a link has been established, the word LINK will appear on both speaker displays.
- Connect to the primary speaker via Bluetooth.
To disconnect, double press the Stereo-Link™ / Repeat button.
Note: The speakers should be within 26 m (85') of each other to properly link.
Note: The wireless microphone will only connect to one Stereo-Linked™ speaker (the closest speaker). If using two Total PA™ Apex speakers you will need to connect the first speaker's Mix Out to the second speaker's XLR Source input.
Note: Total PA ^™ Apex is not compatible with previous ION PA models. To link to a previous model, you will need to use an XLR cable (not included). Connect the XLR cable to the MIX Out XLR port on the Total PA ^™ Apex to the XLR In port on the previous model.
Light Modes
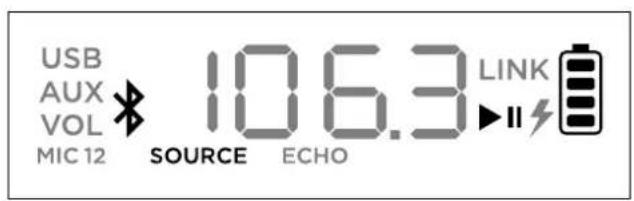
Total PA™ Apex has two side lights, six tweeter lights, and four woofer lights. All LEDs are individually controllable.
When the speaker is first powered on, a red light will move from the bottom of the speaker toward the top, lighting up all LEDs. Once all LEDs are lit up, the lights will hold for two seconds before fading out.
After the power on light effect, all LEDs will fade in and out blue until a Bluetooth device is connected to the speaker. When paired, all LEDs will flash blue two times before going back to the last selected light mode.
Press the Lights button to toggle between twelve modes for the LEDs on Total PA™ Apex.
Note: For the best lighting effect, you may need to increase the volume of your connected device or input source.
- RRainbow Chase - Beat Sync: A rainbow of colors will spin around the speaker LEDs counterclockwise. The more bass in the music, the faster the speed of the spinning rainbow pattern.
- SStarlight: All LEDs will flash a random color light and slowly fade away. The more bass in the music, the faster the speed of the flashing lights.
- FFire Pit: The lights will flicker red, yellow, and orange and the side lights rise up and down. The level of the "fire" is based on the amount of bass in the music.
- RRain Drops: The tweeter and side LEDs will drop a color from top to bottom. Once the color hits the bottom LED, the woofer lights splash like water with the same raindrop color, repeating side to side. Four raindrops streaks will fall at the same time.
- Crossfade: The woofer and tweeter lights will crossfade left and right while the side lights will crossfade up and down.
- Bouncing Stars: Light streaks will flow down the sides. When they meet at the middle bottom part of the speaker, they will bounce back up to the top in the next color in the spectrum and flow downward again. Woofer lights will pulse with the new color when the light streaks bounce in the middle areas, repeating down the color spectrum.
-
HHorizontal Waves—Beat Sync: Three waves of one color will pass by and after they have gone from the top left side to the bottom right side new waves in the next color with appear. Waves will speed up or slow based on the amount of bass in the music.
-
Beat Sync: All LEDs will move up and down in speed based on the bass level in the music. The color will fade throughout the color spectrum.
- TTwo-Tone Cycle: One side of the LEDs (including two from the tweeter light and one from the side light) will show one color while the other side will light up with a nearby color from the color spectrum.
- Color Cycle: All LEDs will hold the same color while cycling through the color spectrum.
- SStatic Color: All LEDs will stay the same color (the color can be adjusted from the ION Sound Control™ app). By default the color is blue. There are the 15 colors that can be selected from the ION Sound Control™ app.
- RRandom: The LEDs will cycle through all light modes randomly (except Static Color), changing every ten seconds.
- Off: All LEDs are off.
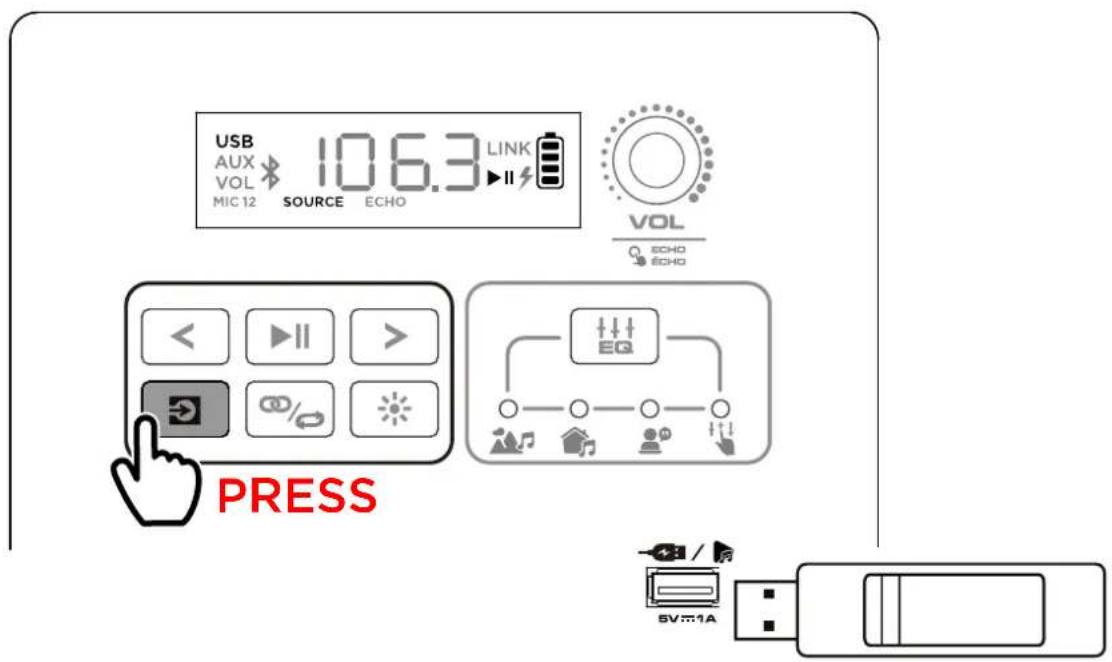
When a USB drive with compatible files is inserted into the USB Charge/Playback Port, Total PA™ Apex will automatically switch to USB mode. If the USB drive has already been inserted and you are using another mode, press the SSource button until USB mode is selected. Total PA™ Apex will automatically play the first compatible MP3 file. Files are played in alphabetical order of what is on the root level, then alphabetical by folder, and then alphabetical by track name. Media playback will stop when all media has been played on the USB drive. Press and hold the Next and Previous buttons to fast forward or rewind within the song.
Note: The USB drive must have playable MP3 files for it to appear on the media panel's display.
Press the Repeat button to cycle through the repeat shuffle options (abbreviations will show on the display):
- Play the current USB track on repeat (OOnE). This is the default mode when powered on.
- Play t he tracks in random order (rAn).
- Play all the tracks on the USB drive on repeat (A ALL).
- Play the current folder's tracklist on repeat (FFOLd). The folder used is based on what song is playing when it is activated. For instance, if a song playing is on the root level, selecting FOLd will repeat only songs at the root level. If a song is in folder "A", then only songs in folder "A" will be repeated.
App Control
IMPORTANT: To ensure the best possible experience with the app, use the most current Android OS or iOS on your device.
Follow these steps to download the free app on your device:
- Open the Apple App Store or Google Play on your device. Then, search for the IION Sound Control™ app.
- Follow the on-screen instructions to download and install the app. Once downloaded, the ION Sound Control™ app will appear on your device's home screen.
- Connect your device to Total PA™ Apex via Bluetooth. See the Pairing a Bluetooth® Device section to learn how to do this.
- Open the ION Sound Control™ app. If prompted, allow the app to access your device's Bluetooth and Location Services.
- Select the Total PA™ Apex icon to go to the next screen, where you can use the app to control various functions of the speaker such as:
•M Main Volume: Adjust the main speaker output volume.
- S Source Selection: Select the source to use: Bluetooth, USB, or Aux.
- S Source Volume: Adjust the incoming volume for Bluetooth, USB, and Aux sources.
•M Mic 1 Volume: Adjust the volume for the wireless mic.
•M Mic 2 Volume: Adjust the volume for the 6.35 mm / 1/4" and XLR microphone inputs.
•E EQ: Adjust the speaker's equalization.
•M Mic Echo: Turn the mic echo effect on/off.
•V Voice Prompts: Enable or disable the voice prompts.
•S Support: Visit iDNAudio.com, contact Technical Support, and view Warranty information and Frequently Asked Questions.
•L Light Effect: Choose the lighting effect.
•O Over-The-Air Firmware Updates: Stay up to date with the latest firmware installation.
TROUBLESHOOTING
If the sound is distorted. You may need to adjust the levels of your sources and Total PA™ Apex for proper mixing.
i. First, turn your source volume all the way up.
ii. Then, adjust the selected Channel Volume (VOL) knob on Total PA ^™ Apex to an appropriate level.
iii. Finall y, adjust the Main Volume to an appropriate level.
If the sound is still distorted, try lowering the volume control of your sound source, then lowering the Channel Volume (VOLI) knob on Total PA™ Apex of the channel in use.
I hear a hum when cables are connected:
- Disconnect cables from the input jacks to see if it's a faulty cable.
- Make sure the signal cables are not placed near power cables.
- Connect all audio equipment power cables to outlets which share a common ground.
If there is too much bass: Try adjusting the EQ control on your sound source or on Total PA™ Apex to lower the bass level. This will allow you to play the music louder before clipping (distortion) occurs.
What do I do if the wireless media is not working??:
- Check to see that the batteries are properly installed.
• Install two fresh AA batteries (not included) in the orientation indicated in the compartment. The microphone should pair automatically if Total PA™ Apex is powered on. If it does not, press and hold the + and - buttons on the microphone for 3 seconds to reset mic pairing.
If there is a high-pitched whistling noise when using microphones. This is probably feedback. Point the microphone away from the speaker.
If you can't hear the microphone over the music volume:
i. First, turn down the volume from your source using the appropriate C Channel Volume (VOL) knob on Total PA™ Apex.
ii. Then, make sure your microphone volume is turned all the way up (if applicable), and then turn up the appropriate Channel Volume (VOL) knob on Total PA™ Apex where the microphone is connected.
If you cannot connect your audio device to Total PA™ Apex via Bluetooth:
- Have your audio device (e.g., smartphone or tablet) and Total PA™ Apex as close together as possible while trying to connect. Make sure both the audio device and Total PA™ Ap ex are unobstructed by walls, furniture, etc.
- Reset the Bluetooth connection on Total PA™ Apex to disconnect Total PA™ Apex from any other audio device and restart the search process. If this does not work right away, power off Total PA™ Apex and then power it back on. See Pairing a Bluetooth®Device for more information.
- Reset the Bluetooth connection on your audio device by turning Bluetooth off and back on. You can find this under the Bluetooth menu in the Settings for your phone or other audio device.
If this does not work, and you have connected to Total PA™ Apex before, find Total PA™ Apex in the list of available or previously connected devices in your audio device's Bluetooth menu, tap the "gear" or "i" icon located next to it and then select Unpair or Forget. Turn Total PA™ Apex off and back on and try pairing again once it reappears in your available devices list.
Note: If Total PA™ Apex has been paired to another audio device recently that is still within range, you may need to repeat this process with that audio device to fully disconnect.
If you experience audio dropouts while playing music from a Bluetooth device, this may be happening because your unit is trying to link to another speaker. This can occur if you power off a speaker that was linked to your unit or if you have just turned on your unit and it is in Stereo-Link™ mode. To stop the audio dropouts, exit Stereo-Link™ mode by double-pressing the Stereo-Link™ / Repeat button. Alternatively, you can wait for your unit to link to another speaker if there is one within range.
Technical Specifications
| Speakers Low Frequency: 305 mm / 12.0"High Frequency: 25.4 mm / 1.0" | |||
| Frequency Response 50 Hz - 20 kHz | |||
| Wireless Technology Bluetooth®- Classic Audio | |||
| Speaker Bluetooth® * Bluetooth® Range: Up to 30.5 m / 100 ft.TWS Range: Up to 23 m / 75 ft.Transmitter Frequency Range: 2402 MHz - 2480 MHzTransmitter Power: 8 dBmTransmitter Modulation: GFSK, π/4 DQPSK, 8DPSK | |||
| Wireless Microphone * Range: 30.5 m / 100 ft.Transmitter Frequency Range: 2402 MHz - 2480 MHzBluetooth Transmitter Power: 9.4 dBm | |||
| USB | Audio: Music playback from USB driveSupported File System: FAT32Supported File Type: MP3Maximum File Size: 4 GBMaximum USB Drive Size: 512 GB | ||
| Battery | Battery Capacity: 11.1 V, 6000 mAhBattery Life: 6-8 hours (50% volume, lights off) **Charge Time: Up to 5 hours | ||
| Power(seeConnection Diagramforchart) | Region | Plug Type | Power Cable Length |
| North America: | Type B | 150 cm / 5.0 ft. | |
| United Kingdom: | Type G | 150 cm / 5.0 ft. | |
| Australia / New Zealand: | Type I | 150 cm / 5.0 ft. | |
| Europe, Korea: | Type F | 150 cm / 5.0 ft. | |
| Japan: | Type A | 240 cm / 7.9 ft. | |
| Input Voltage: 100-240 VAC, 50/60 Hz, 320 WFuse: F5AL AC250V | |||
| Dimensions(width x depth x height) | 16.21" x 12.50" x 25.63" / 411.7 x 317.5 x 651 mm | ||
| Weight 13.2 kg / 29.15 lbs. | |||
Specifications are subject to change without notice.
* Bluetooth and wireless reception and range are affected by walls, obstructions, and movement. For optimal performance, place the product in the center of the room so it is unobstructed by walls, furniture, etc.
** Battery life may vary based on temperature, age, and volume usage of product.
Trademarks & Licenses
ION Audio is a trademark of inMusic Brands, Inc., registered in the U.S. and other countries. App Store is a trademark of Apple Inc., registered in the U.S. and other countries.
Android and Google Play are registered trademarks of Google Inc.
The Bluetooth word mark and logos are owned by the Bluetooth SIG, Inc. and any use of such marks by ION Audio is under license.
All other product names, company names, trademarks, or trade names are those of their respective owners.
| Distributed by:Costco Wholesale CorporationP.O. Box 34535Seattle, WA 98124-1535USA1-800-774-2678www.costco.com | Costco Wholesale Canada Ltd.*415 W. Hunt Club RoadOttawa, OntarioK2E 1C5, Canada1-800-463-3783www.costco.ca* faisant affaire au Québecsousle nom les Entrepôts Costco | Importado por:Importadora Primex S.A. de C.V.Blvd. Magnocentro No. 4San Fernando La HerraduraHuixquilucan, Estado de MéxicoC.P. 52765RFC: IPR-930907-S70(55)-5246-5500www.costco.com.mx | Costco Wholesale Australia Pty Ltd17-21 Parramatta RoadLidcombe NSW 2141Australiawww.costco.com.au |
| Costco Wholesale UK Ltd /Costco Online UK LtdHartspring LaneWatford, HertsWD25 8JSUnited Kingdom01923 213113www.costco.co.uk | Costco Wholesale Spain S.L.U.Polígono Empresarial Los GavilanesC/ Agustin de Betancourt, 1728906 Getafe (Madrid) EspañaNIF: B86509460900 111 155www.costco.es | Costco Wholesale Iceland ehf.Kauptún 3-7, 210 GardabaerIcelandwww.costco.is | Costco France1 avenue de Bréhat91140 Villebon-sur-YvetteFrance01 80 45 01 10www.costco.fr |
| Costco Wholesale Japan Ltd.2 Kakuchi, 2 Gaiku, Kaneda-Nishi361 Urikura, Kisarazu shiChiba, 292-0007 Japan0570-200-800www.costco.co.jp | Costco Wholesale Korea, Ltd.40, Iljik-roGwangmyeong-siGyeonggi-do, 14347, Korea1899-9900www.costco.co.kr | Costco Wholesale New Zealand Limited2 Gunton DriveWestgate Auckland 0814New Zealandwww.costco.co.nz | Costco (China) Investment Co., Ltd.Room 01 MezzanineNo. 5178, Kang Xin HighwayPudong New DistrictShanghaiChina 201315+86-21-6257-7065 |
| Costco Wholesale Sweden ABBox 614114 11 StockholmSwedenwww.costco.se |
MADE IN CHINA
ÍNDICE
INTRODUCCIÓN 29
natural_image
Pure electrical circuit lines without any symbols2. Vób(volumen principal) | Perillal Echo

PULSE
PULSAR DOS VECES
Costco Wholesale Sweden AB
Box 614
114 11 Stockholm
Sweden
www.costco.se
HECHO EN CHINA
TABLE DES MATIÈRES
INTRODUCTION 54
natural_image
Pure electrical circuit lines without any symbolsSchéma de connexion
2. Vol (volume principal) / Molette Echo
natural_image
Line drawing of a handheld device with a control panel and indicator lights (no text or symbols)
APPUYEZ
APPUYEZ DEUX FOIS
Costco Wholesale Sweden AB
Box 614
114 11 Stockholm
Sweden
www.costco.se
FABRIQUÉ EN CHINE
INNEHÅLLSFÖRTECKNING
INTRODUKTION 79
natural_image
Pure electrical circuit lines without any symbolsAnslutningsschema
2. Vób(Hévudvolym)/ Echó-rattt
Connect a microphone or mic-level source to these inputs.
- Källans volym

DUBBELTRYCK
Costco Wholesale Sweden AB
Box 614
114 11 Stockholm
Sweden
www.costco.se
TILLVERKAD IIKINA
目次
はじめに....104
同梱物....104
サポート情報....104
充電とバッテリーについて....105
クイックスタート....106
音量の調整....107
セットアップ....108
natural_image
Pure electrical circuit lines without any symbols接続図

プレス
2回押す
| Costco Wholesale Korea, Ltd.40, Iljik-roGwangmyeong-siGyeonggi-do, 14347, Korea1899-9900www.costco.co.kr |
| Costco Wholesale New Zealand Limited2 Gunton DriveWestgate Auckland 0814New Zealandwww.costco.co.nz |
| Costco (China) Investment Co., Ltd.Room 01 MezzanineNo. 5178, Kang Xin HighwayPudong New DistrictShanghaiChina 201315+86-21-6257-7065 |
| Costco Wholesale Sweden ABBox 614114 11 StockholmSwedenwww.costco.se |
MADE IN CHINA
ION®
ionaudio.com
- SETUP 8
- FEATURES 10
- OPERATION....14
- TROUBLESHOOTING 23
- APPENDIX.... 25
- INTRODUCTION
- Box Contents
- Support
- Charging and Battery Information
- General Usage
- Repair
- Disposal
- Quick Start
- Balancing Your Levels
- SETUP
- Speaker Stand Installation
- Connection Diagram
- Rear Panel
- Disiplaty
- Vol (Main Volume) / Echo Knob
- PreviousTrack
- NextTrack
- Play/Pause
- StereoLink™/Repeat
- Source
- Lights
- EQ
- USB Charge/Playback Port
- M101 Wireless MicroVolume
- MIC 2 Volume
- OPERATION
- Battery Care
- Installing Batteries Into the Wireless Mic
- Using the Wireless Mic
- Using the Main Volume Knob
- Pairing a Bluetooth®Device
- Linking Two Speakers
- Light Modes
- App Control
- TROUBLESHOOTING
- Trademarks & Licenses
- ÍNDICE
- INTRODUCCIÓN 29
- Vób(volumen principal) | Perillal Echo
- PULSAR DOS VECES
- TABLE DES MATIÈRES
- INTRODUCTION 54
- Schéma de connexion
- Vol (volume principal) / Molette Echo
- APPUYEZ
- APPUYEZ DEUX FOIS
- INNEHÅLLSFÖRTECKNING
- INTRODUKTION 79
- Anslutningsschema
- Vób(Hévudvolym)/ Echó-rattt
- DUBBELTRYCK
- /
- 目次
- はじめに....104
- セットアップ....108
- 接続図
- ION®
Brand : ION
Model : Total PA Apex
Category : Speaker