
DMPBDT210 - Blu-ray player PANASONIC - Free user manual and instructions
Find the device manual for free DMPBDT210 PANASONIC in PDF.
Download the instructions for your Blu-ray player in PDF format for free! Find your manual DMPBDT210 - PANASONIC and take your electronic device back in hand. On this page are published all the documents necessary for the use of your device. DMPBDT210 by PANASONIC.
USER MANUAL DMPBDT210 PANASONIC
Model No. DMP-BDT310 DMP-BDT310 DMP-BDT210 DMP-BDT111 DMP-BDT110 Basic Operating Instructions Blu-ray DiscTM Player Reading the Operating Instructions (PDF format) Thank you for purchasing this product. For optimum performance and safety, please read these instructions carefully. Before connecting, operating or adjusting this product, please read the instructions completely. Please keep this manual for future reference. ∫ For Windows
Turn the PC on and insert the CD-ROM containing the Operating Instructions (supplied). 2 Select the desired language and then click [Operating Instructions] to install. 3 Double click the “BDT310_210_111_110EG Operating Instructions” shortcut icon on the desktop. When the Operating Instructions (PDF format) will not open You will need Adobe Acrobat Reader 5.0 or later or Adobe Reader 7.0 or later to browse or print the Operating Instructions (PDF format). Download and install a version of Adobe Reader that you can use with your OS from the following Web Site. http://get.adobe.com/reader/otherversions
If using the following OS – Windows 2000 SP4 – Windows XP SP3 – Windows Vista SP2 – Windows 7 Insert the CD-ROM containing the Operating Instructions (supplied), click [Adobe(R) Reader(R)] and then follow the messages on the screen to install. Connections and settings STEP 1 : Connecting to a TV ... STEP 2 : Connecting to an amplifier/receiver ... STEP 3 : Connecting to a broadband network ... STEP 4 : Settings ... To uninstall the Operating Instructions (PDF format) Delete the PDF file from the “Program Files\Panasonic\DMP\” folder. ≥ When the contents in the Program Files folder cannot be displayed, click the [Show the contents of this folder] to display them. Please also refer to Operating Instructions (PDF format) recorded on the CD-ROM containing the Operating Instructions (supplied). Operating Instructions (PDF format) cannot be played back on the player itself. You can learn about advanced operation methods and check the Troubleshooting. Getting started About descriptions in these operating instructions ≥ Instructions for operations are generally described using the remote control. ≥ These operating instructions are applicable to models DMP-BDT310, DMP-BDT210, DMP-BDT111 and DMP-BDT110. Unless otherwise indicated, illustrations in these operating instructions are of DMP-BDT310. [BDT310] [BDT210] [BDT111] [BDT110] : indicates features applicable to DMP-BDT310, DMP-BDT210, DMP-BDT111 and DMP-BDT110, respectively.
Turn the PC on and insert the CD-ROM containing the Operating Instructions (supplied). Open the “Manual” folder in “VFF0706” and then copy the PDF file with the desired language inside the folder. Double click the PDF file to open it.
Safety precautions WARNING Unit ≥ To reduce the risk of fire, electric shock or product damage, – Do not expose this unit to rain, moisture, dripping or splashing. – Do not place objects filled with liquids, such as vases, on this unit. – Use only the recommended accessories. – Do not remove covers. – Do not repair this unit by yourself. Refer servicing to qualified service personnel. – Do not let metal objects fall inside this unit. – Do not place heavy items on this unit.
Accessories Check the supplied accessories before using this unit.
Remote control (N2QAYB000576) Batteries for remote control AC mains lead CD-ROM ≥ Product numbers provided in these operating instructions correct as of December 2010. These may be subject to change. ≥ Do not use AC mains lead with other equipment. AC mains lead ≥ To reduce the risk of fire, electric shock or product damage, – Ensure that the power supply voltage corresponds to the voltage printed on this unit. – Insert the mains plug fully into the socket outlet. – Do not pull, bend, or place heavy items on the lead. – Do not handle the plug with wet hands. – Hold onto the mains plug body when disconnecting the plug. – Do not use a damaged mains plug or socket outlet. ≥ Install this unit so that the AC mains lead can be unplugged from the socket outlet immediately if any problem occurs. Using the remote control Insert so the poles (i and j) match those in the remote control.
≥ Keep the Memory Card out of reach of children to prevent swallowing. CAUTION Unit ≥ This unit utilizes a laser. Use of controls or adjustments or performance of procedures other than those specified herein may result in hazardous radiation exposure. ≥ Do not place sources of naked flames, such as lighted candles, on this unit. ≥ This unit may receive radio interference caused by mobile telephones during use. If such interference occurs, please increase separation between this unit and the mobile telephone. ≥ This unit is intended for use in moderate climates. R6/LR6, AA (Alkaline or manganese batteries) Point it at remote control signal sensor on this unit. Placement ≥ Place this unit on an even surface. ≥ To reduce the risk of fire, electric shock or product damage, – Do not install or place this unit in a bookcase, built-in cabinet or in another confined space. Ensure this unit is well ventilated. – Do not obstruct this unit’s ventilation openings with newspapers, tablecloths, curtains, and similar items. – Do not expose this unit to direct sunlight, high temperatures, high humidity, and excessive vibration. Batteries ≥ Danger of explosion if battery is incorrectly replaced. Replace only with the type recommended by the manufacturer. ≥ Mishandling of batteries can cause electrolyte leakage and may cause a fire. – Do not mix old and new batteries or different types at the same time. – Do not heat or expose to flame. – Do not leave the battery(ies) in a car exposed to direct sunlight for a long period of time with doors and windows closed. – Do not take apart or short circuit. – Do not recharge alkaline or manganese batteries. – Do not use batteries if the covering has been peeled off. – Remove batteries if you do not intend to use the remote control for a long period of time. Store in a cool, dark place. ≥ When disposing the batteries, please contact your local authorities or dealer and ask for the correct method of disposal. VQT3B62 (3)
English Playable discs/Cards/USB devices Device Disc markings Video AVCHD DivX® MKV MP3 JPEG/ MPO (3D still picture) Video AVCHD +R/+RW/+R DL Music CD
Video JPEG/ MPO (3D still picture) Video DivX® MKV DVD
Contents format CD-R CD-RW Music [CD-DA] DivX® MKV Music [CD-DA] MP3 JPEG/ MPO (3D still picture)
SD Memory Card (from 8 MB to 2 GB) MPEG2 SDHC Memory Card (from 4 GB to 32 GB) AVCHD JPEG/ SDXC Memory Card (48 GB, 64 GB) (Compatible with both mini and micro types) MPO (3D still picture) USB DivX® MKV MP3 JPEG/ MPO (3D still picture) VQT3B62
USB devices (up to 2 TB)
∫ Discs that cannot be played by this unit ≥ DVD-RAM ≥ Super Audio CD ≥ Photo CD ≥ DVD-Audio ≥ Video CD and Super Video CD ≥ WMA discs ≥ DivX Plus HD discs ≥ HD DVD ∫ Region management information BD-Video This unit plays BD-Video marked with labels containing the region code “B”. Example: DVD-Video This unit plays DVD-Video marked with labels containing the region number “2” or “ALL”. Example:
∫ Finalize DVD-R/RW/R DL, +R/+RW/+R DL and CD-R/RW recorded by a recorder, etc. needs to be finalized by the recorder to play on this unit. Please refer to the recorder’s instructions. ∫ BD-Video ≥ This unit supports high bit rate audio (Dolby Digital Plus, Dolby TrueHD, DTS-HD High Resolution Audio and DTS-HD Master Audio) adopted in BD-Video. – [BDT111] [BDT110] : If “Dolby D/Dolby D +/Dolby TrueHD” is set to “PCM”, the maximum possible number of Dolby sound is 5.1ch PCM. ([HOME]>“Setup”>“Player Settings”>“Sound”>“Digital Audio Output”)
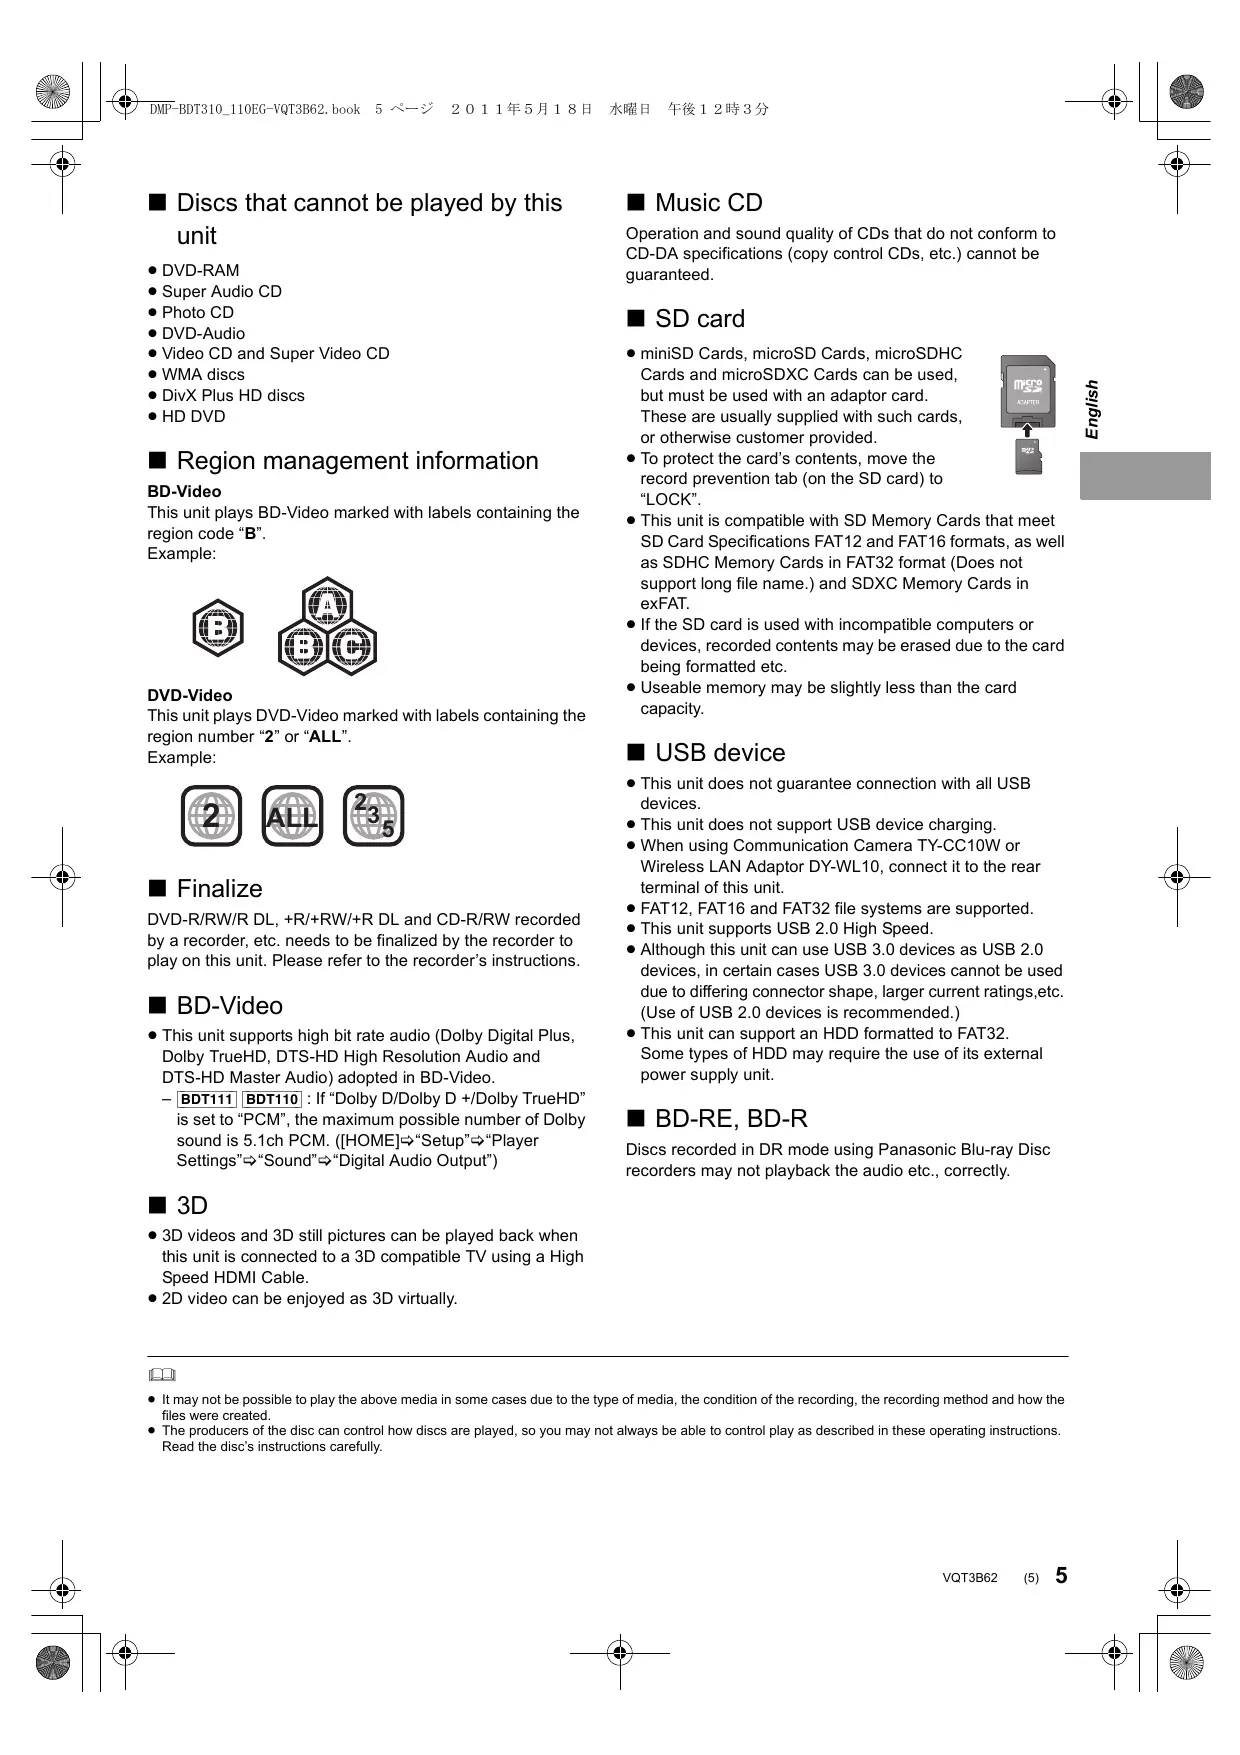
∫ Music CD Operation and sound quality of CDs that do not conform to CD-DA specifications (copy control CDs, etc.) cannot be guaranteed. ∫ SD card ≥ miniSD Cards, microSD Cards, microSDHC Cards and microSDXC Cards can be used, but must be used with an adaptor card. These are usually supplied with such cards, or otherwise customer provided. ≥ To protect the card’s contents, move the record prevention tab (on the SD card) to “LOCK”. ≥ This unit is compatible with SD Memory Cards that meet SD Card Specifications FAT12 and FAT16 formats, as well as SDHC Memory Cards in FAT32 format (Does not support long file name.) and SDXC Memory Cards in exFAT. ≥ If the SD card is used with incompatible computers or devices, recorded contents may be erased due to the card being formatted etc. ≥ Useable memory may be slightly less than the card capacity. ∫ USB device ≥ This unit does not guarantee connection with all USB devices. ≥ This unit does not support USB device charging. ≥ When using Communication Camera TY-CC10W or Wireless LAN Adaptor DY-WL10, connect it to the rear terminal of this unit. ≥ FAT12, FAT16 and FAT32 file systems are supported. ≥ This unit supports USB 2.0 High Speed. ≥ Although this unit can use USB 3.0 devices as USB 2.0 devices, in certain cases USB 3.0 devices cannot be used due to differing connector shape, larger current ratings,etc. (Use of USB 2.0 devices is recommended.) ≥ This unit can support an HDD formatted to FAT32. Some types of HDD may require the use of its external power supply unit. ∫ BD-RE, BD-R Discs recorded in DR mode using Panasonic Blu-ray Disc recorders may not playback the audio etc., correctly. ∫ 3D ≥ 3D videos and 3D still pictures can be played back when this unit is connected to a 3D compatible TV using a High Speed HDMI Cable. ≥ 2D video can be enjoyed as 3D virtually. ≥ It may not be possible to play the above media in some cases due to the type of media, the condition of the recording, the recording method and how the files were created. ≥ The producers of the disc can control how discs are played, so you may not always be able to control play as described in these operating instructions. Read the disc’s instructions carefully. VQT3B62 (5)
English STEP 1 : Connecting to a TV Connections and settings ≥ Do not place the unit on amplifiers/receivers or equipment that may become hot. The heat can damage the unit. ≥ Before making any connections we suggest you temporarily disconnect all the units from AC power. ≥ Do not connect video signals through a video recorder. Due to copy guard protection the picture may not be displayed properly. ≥ Please use High Speed HDMI Cables that have the HDMI logo (as shown on the cover). It is recommended that you use Panasonic’s HDMI cable. When outputting 1080p signal, please use HDMI cables 5.0 meters or less.
STEP 2 : Connecting to an amplifier/receiver ∫ Via an HDMI AV OUT terminal – [BDT310] : Use HDMI AV OUT MAIN terminal. – It is possible to playback 3D videos and 3D still pictures when the connected TV and amplifier/ receiver are 3D compatible. HDMI IN (ARC) ∫ Via an HDMI AV OUT terminal (High quality) – [BDT310] : Use HDMI AV OUT MAIN terminal. – It is possible to play back 3D videos and 3D still pictures by connecting this unit with a 3D compatible TV. Multi channel speakers HDMI OUT (ARC) Amplifier/receiver HDMI IN HDMI IN ≥ Set “HDMI Audio Output” to “On” ([HOME]>“Setup”>“Player Settings”>“TV / Device Connection”>“HDMI Connection”). ≥ The HDMI connection supports VIERA Link “HDAVI Control” (> 11).
AV OUT MAIN
AV OUT S
≥ Set “HDMI Audio Output” to “On” ([HOME]>“Setup”>“Player Settings”>“TV / Device Connection”>“HDMI Connection”). ≥ Set “Digital Audio Output” depending on the connected amplifier/receiver ([HOME]>“Setup”>“Player Settings”>“Sound”). ≥ The HDMI connection supports VIERA Link “HDAVI Control” (> 11). ≥ When connecting to a non-3D compatible amplifier/ receiver, connect this unit to a TV via HDMI AV OUT, then connect the TV and the amplifier/receiver, using HDMI cables for the respective connections. – Please note, however, that the audio can only be up to 5.1ch. ≥ When using the TV or amplifier/receiver that does not have the indication of “(ARC)” (non-ARC-compatible) on the HDMI terminal, in order to enjoy TV’s sound by amplifier/receiver it is also required to connect the amplifier/receiver and TV using an optical digital cable.
∫ [BDT310] : Via an HDMI AV OUT SUB terminal – You can enjoy richer sound by using the HDMI AV OUT SUB terminal. – It is possible to playback 3D videos and 3D still pictures when the connected TV is 3D compatible, even if the amplifier/receiver is not 3D compatible.
STEP 3 : Connecting to a broadband network The following services can be used when this unit is connected to broadband. – Firmware can be updated – You can enjoy BD-Live – You can enjoy VIERA CAST – You can access other devices (Home Network) English For details about connection method, refer to the instructions supplied with the connected equipment. HDMI IN HDMI cable Multi channel speakers Broadband router, etc. HDMI IN Amplifier/receiver ≥ Set “HDMI Audio Output” to “On” ([HOME]>“Setup”>“Player Settings”>“TV / Device Connection”>“HDMI Connection”). ≥ Set “HDMI(SUB) Output Mode” to “V.OFF(Video Off)”. ([HOME]>“Setup”>“Player Settings”>“TV / Device Connection”>“HDMI Connection”) – Audio is output in high resolution regardless of compatibility of the amplifier/receiver with 3D. ≥ The HDMI connection using HDMI AV OUT MAIN supports VIERA Link “HDAVI Control” (> 11). The HDMI AV OUT SUB terminal is not compatible with the VIERA Link “HDAVI Control”. Internet DLNA Certified media server ≥ Use category 5 or above straight LAN cables (STP) when connecting to peripheral devices. ≥ Inserting any cable other than a LAN cable in the LAN terminal can damage the unit. VQT3B62 (7)
∫ Wireless LAN connection – [BDT310] [BDT210] : Wireless LAN is built in. (There is no need to connect a Wireless LAN Adaptor.) – [BDT111] [BDT110] : Connect the Wireless LAN Adaptor DY-WL10 (optional).
STEP 4 : Settings Easy Setting After connecting your new player for the first time and pressing [Í], a screen for the basic settings will appear. [BDT111] [BDT110]
COMMUNICATION 10BASE-T/100BASE-TX
CAMERA Preparation Turn on the television and select the appropriate video input on the television.
Wireless LAN Adaptor Press [Í]. Setup screen appears. If this unit is connected to a Panasonic TV (VIERA) supporting HDAVI Control 2 or later via an HDMI cable, then setting information on the TV such as “On-Screen Language” is acquired by this unit. Wireless router, etc. Standby/on switch (Í/I) Press to switch the unit from on to standby mode or vice versa. In standby mode, the unit is still consuming a small amount of power. LAN Cable
Follow the on-screen instructions and make the settings with [3, 4] and press [OK]. After completing “Easy Setting”, you can perform “Network Easy Setting”. Internet DLNA Certified media server ≥ For up to date compatibility information on your Wireless router refer to http://panasonic.jp/support/global/cs/ (This site is in English only.) ≥ The unit is not compatible with public wireless LAN services (Hotspot etc.) provided in airports, stations, cafes etc. ≥ [BDT111] [BDT110] : – Only the Wireless LAN Adaptor DY-WL10 (optional) can be used. – Read the operating instructions for the Wireless LAN Adaptor DY-WL10 (optional) thoroughly when using it. – To simultaneously connect the Wireless LAN Adaptor DY-WL10 (optional) and a LAN cable, use the extension cable supplied with the DY-WL10. Precautions of Wireless LAN connection The following limits are in place regarding the usage of this unit or Wireless LAN adaptor. You must be aware of these limits before using these devices. Panasonic will in no way be responsible for any incidental damage which may arise due to a failure to obey these limits, or to any condition of use or disuse of these devices. ≥ Data transmitted and received over radio waves may be intercepted and monitored. ≥ This unit or Wireless LAN adaptor contain delicate electronic components. Please use these devices in the manner in which it was intended and follow the following points: –Do not expose these devices to high temperatures or direct sunlight. –Do not bend, or subject these devices to strong impacts. –Keep these devices away from moisture. –Do not disassemble or alter the device in any way.
(8) VQT3B62 ≥ You can perform this setup anytime by selecting “Easy Setting” in the Setup menu. ([HOME]>“Setup”>“Player Settings”>“Others”) Touch Free Sensor [BDT310] [BDT210] By setting “Sensor” in “Touch Free Sensor” to “On”, you can open or close the tray just by waving your hand over the TOUCH-FREE SENSOR on the upper side of the unit. (This will also work when in stand-by.) ≥ Be aware that the TOUCH-FREE SENSOR may function unintentionally in the following cases: –When your hand or arm, an object, a small child, or a small animal comes close to the upper part of the unit –When an object is placed on top of the unit and vibration is applied –When connecting a cable etc. to the rear of the unit ≥ Reactive distance of the sensor is automatically set in accordance with the installation conditions at the time of power supply connection and when the open/close button is pressed. To prevent an incorrect setting, do not place your hands or objects above the unit at these times. ≥ Depending on the usage conditions, the TOUCH-FREE SENSOR may stop working or the reactive distance may become shorter. In such cases, press the tray open/close button once.
Network Easy Setting After completing “Easy Setting”, you can continue with “Network Easy Setting”. Select “Wired” or “Wireless” and press [OK]. ∫ “Wired” connection
HOME menu Major functions of this unit can be operated from the HOME menu. Preparation Turn on the television and select the appropriate video input on the television. Follow the on-screen instructions to make your connection settings. English ∫ “Wireless” connection ≥ [BDT111] [BDT110] : If “Wireless LAN Adaptor is not connected.” is displayed, check that the Wireless LAN Adaptor is fully inserted. Alternatively, disconnect and reconnect it. If there is still no change in the display, consult your dealerr for advice. Select “WPS (PUSH button)” or “Search for Wireless network” and then follow the on-screen instructions and make the settings.
Press [Í] to turn on the unit. Press [OK] or [3, 4, 2, 1] to select the item. HOME Inserting or removing media Network Blu-ray Disc Player Playback CALL SD CARD [BDT310] [BDT210] ≥ When inserting a media item, ensure that it is facing the right way up. ≥ When removing the SD card, press on the centre of the card and pull it straight out. ≥ If you connect a Panasonic product with a USB connection cable, the setup screen may be displayed on the connected equipment. For details, refer to the instructions for the connected equipment. Photos Setup Music Videos ≥ When a media is inserted, contents selection screen for that media is displayed. ≥ If there are any other items, repeat this step. ≥ To return to HOME menu, select “HOME” or press [RETURN] several times. To show the HOME menu Press [HOME]. ≥ Items to be displayed may vary with the media. VQT3B62 (9)
Playing video contents
BD DVD CD
USB Press [3, 4] to select the title and press [OK]. When a message screen is displayed while playing back 3D compatible video software, play back in accordance with the instructions. ≥ Signal from PAL discs is output as PAL. Signal from NTSC discs is output as “NTSC” or “PAL60”. You can select “NTSC” or “PAL60” in “NTSC Contents Output” for NTSC discs. ([HOME]>“Setup”>“Player Settings”>“Picture”) ≥ DISCS CONTINUE TO ROTATE WHILE MENUS ARE DISPLAYED. Press [∫STOP] when you have finished playback to protect the unit’s motor, your television screen and so on. ≥ Depending on media and contents, the display may change or may not appear. ≥ DivX and MKV: Successive play is not possible. ≥ It is not possible to playback AVCHD and MPEG2 video which have been dragged and dropped, copied and pasted to the media. ≥ To save on electricity, the unit is turned off automatically if there is no button operation for about 30 minutes when not playing back (such as when paused, displaying the menu, displaying still pictures, etc.).
Other operations during play These functions may not work depending on the media and contents. Stop Press [∫STOP]. The stopped position is memorized. Resume play function Press [1PLAY] to restart from this position. ≥ The position is cleared if the tray is opened or you press [∫STOP] several times to display “STOP” on the unit’s display. ≥ On BD-Video discs including BD-J, the resume play function does not work. Pause Press [;PAUSE]. ≥ Press [;PAUSE] again or [1PLAY] to restart play. Search/Slow-motion Search While playing, press [SEARCH6] or [SEARCH5]. ≥ Music and MP3: The speed is fixed to a single step. Slow-motion While paused, press [SEARCH6] or [SEARCH5]. ≥ BD-Video and AVCHD: Forward direction [SEARCH5] only. The speed increases up to 5 steps. ≥ Press [1PLAY] to revert to normal playback speed. Skip While playing or paused, press [:] or [9]. Skip to the title, chapter or track you want to play. ≥ Each press increases the number of skips. Frame-by-frame While paused, press [2] (2;) or [1] (;1). ≥ Press and hold to change in succession forward or backward. ≥ Press [1PLAY] to revert to normal playback speed. ≥ BD-Video and AVCHD: Forward direction [1] (;1) only. Changing audio Press [AUDIO]. You can change the audio channel number or soundtrack language, etc. 10 (10) VQT3B62 Linked operations with the TV (VIERA Link “HDAVI Control ”)
What is VIERA Link “HDAVI Control”? VIERA Link “HDAVI Control” is a convenient function that offers linked operations of this unit, and a Panasonic TV (VIERA) or other device under “HDAVI Control”. You can use this function by connecting the equipment with an HDMI cable*. See the operating instructions for connected equipment for operational details.
- [BDT310] : Only when connecting via an HDMI AV OUT MAIN terminal on this unit. Preparation 1 Set “VIERA Link” to “On” ([HOME]>“Setup”>“Player Settings”>“TV / Device Connection”>“HDMI Connection”). (The default setting is “On”.) 2 Set the “HDAVI Control” operations on the connected equipment (e.g., TV). 3 Turn on all “HDAVI Control” compatible equipment and select this unit’s input channel on the connected TV so that the “HDAVI Control” function works properly. Also when the connection or settings are changed, repeat this procedure. Automatic input switching Power on link When the following operations are performed, the television will automatically switch the input channel and display the corresponding action. When the television is off, the television will automatically turn on. – When play starts on the unit – When an action that uses the display screen is performed (e.g., DIRECT NAVIGATOR screen) – BD-Video, DVD-Video: When playback stops, the TV will automatically return to TV tuner mode. ≥ [BDT310] : When “HDMI(SUB) Output Mode” ([HOME]>“Setup”>“Player Settings”>“TV / Device Connection”>“HDMI Connection”) is set to “Normal” and the power of the device connected to the HDMI AV OUT SUB is turned on, the Power on link to the device connected to the HDMI AV OUT MAIN will not work.
Power off link All connected equipment compatible with “HDAVI Control”, including this unit, automatically turns off when you switch the television off. Playing music continuously even after turning off power to the television When the unit is connected to a Panasonic TV (VIERA) that supports HDAVI Control 2 or later and an amplifier/receiver supports VIERA Link. 1 While playing music Press [OPTION]. 2 Press [3, 4] to select “TV Power” and press [OK]. Easy control only with VIERA remote control Only TV supports “HDAVI Control 2” or later By using the TV remote control, you can play discs using the “Control Panel” and display the Top Menu or Pop-up Menu, etc.
Press [OPTION]. Control Panel Screen Aspect Top Menu Pop-up Menu RETURN OPTION ≥ The OPTION menu may not appear while the Top Menu for BD-Video or DVD-Video is displayed. ≥ The buttons that you can use for this unit vary depending on the TV. For details, refer to the operating instructions of the TV. ≥ The operation of this unit may be interrupted when you press incompatible buttons on the TV remote control. ≥ This unit supports “HDAVI Control 5” function. “HDAVI Control 5” is the newest standard (current as of December, 2010) for Panasonic’s HDAVI Control compatible equipment. This standard is compatible with Panasonic’s conventional HDAVI equipment. ≥ VIERA Link “HDAVI Control”, based on the control functions provided by HDMI which is an industry standard known as HDMI CEC (Consumer Electronics Control), is a unique function that we have developed and added. As such, its operation with other manufacturers’ equipment that supports HDMI CEC cannot be guaranteed. ≥ Please refer to individual manuals for other manufacturers’ equipment supporting VIERA Link function. VQT3B62 (11)
English Specifications Signal system: Operating temperature range: PAL/NTSC i5 oC to i35 oC Operating humidity range: 10 % to 80 % RH (no condensation) Video output:
1.0 Vp-p (75 ≠)/Pin jack:1 system
Audio output: 2 Vrms (1 kHz, 0 dB)/Pin jack Number of connectors : 2 channel:1 system Digital audio output: Optical digital output (Optical terminal) HDMI AV output: Type A (19 pin) [BDT310] : 2 system [BDT210] [BDT111] [BDT110] : 1 system This unit supports “HDAVI Control 5” function. SD card slot: Connector : 1 system USB slot: USB2.0 : 2 system Ethernet: 10BASE-T/100BASE-TX : 1 system
WLAN [BDT310] [BDT210]
Standard Compliance: IEEE802.11n / IEEE802.11a / IEEE802.11g / IEEE802.11b Transmission system: OFDM system, DSSS system Frequency range: IEEE802.11n / IEEE802.11a :
5.15 GHz to 5.35 GHz
5.47 GHz to 5.725 GHz
IEEE802.11g / IEEE802.11b / IEEE802.11n :
2.4 GHz to 2.4835 GHz
Access Mode: Infrastructure mode Security: WPA2-PSK (TKIP/AES) WPA-PSK (TKIP/AES) WEP (64 bit / 128 bit) (This unit supports WPA and WPA2 encryption.) LASER Specification Class 1 LASER Product: 790 nm (CDs)/655 nm (DVDs)/405 nm (BDs) Wave length: Laser power:No hazardous radiation is emitted with the safety protection Power supply: AC 220 to 240 V, 50 Hz Power consumption: [BDT310] : Approx. 13 W [BDT210] [BDT111] [BDT110] : Approx. 11 W Approx. 0.2 W Power consumption in standby mode: Power consumption in quick start standby mode: [BDT310] : Approx. 4.3 W [BDT210] [BDT111] [BDT110] : Approx. 3.3 W Dimensions (WkDkH) Including the projecting parts: 430 mmk185 mmk35 mm Mass: Approx. 1.6 kg Specifications are subject to change without notice. 12 (12) VQT3B62
Information for Users on Collection and Disposal of Old Equipment and used Batteries These symbols on the products, packaging, and/or accompanying documents mean that used electrical and electronic products and batteries should not be mixed with general household waste. For proper treatment, recovery and recycling of old products and used batteries, please take them to applicable collection points, in accordance with your national legislation and the Directives 2002/96/EC and 2006/66/EC. By disposing of these products and batteries correctly, you will help to save valuable resources and prevent any potential negative effects on human health and the environment which could otherwise arise from inappropriate waste handling. For more information about collection and recycling of old products and batteries, please contact your local municipality, your waste disposal service or the point of sale where you purchased the items. Penalties may be applicable for incorrect disposal of this waste, in accordance with national legislation. For business users in the European Union If you wish to discard electrical and electronic equipment, please contact your dealer or supplier for further information. [Information on Disposal in other Countries outside the European Union] These symbols are only valid in the European Union. If you wish to discard these items, please contact your local authorities or dealer and ask for the correct method of disposal.
Note for the battery symbol (bottom two symbol examples): This symbol might be used in combination with a chemical symbol. In this case it complies with the requirement set by the Directive for the chemical involved. To dispose or transfer this unit The unit may keep the user settings information in the unit. If you discard this unit either by disposal or transfer, then follow the procedure to return all the settings to the factory presets to delete the user settings. ≥ The operation history may be recorded in the memory of this unit. Java and all Java-based trademarks and logos are trademarks or registered trademarks of Sun Microsystems, Inc. in the United States and other countries.
DLNA, the DLNA Logo and DLNA CERTIFIED are trademarks, service marks, or certification marks of the Digital Living Network Alliance. Manufactured under license under U.S. Patent #’s: 5,451,942; 5,956,674; 5,974,380; 5,978,762; 6,226,616; 6,487,535; 7,392,195; 7,272,567; 7,333,929; 7,212,872 & other U.S. and worldwide patents issued & pending. DTS and the Symbol are registered trademarks, & DTS-HD, DTS-HD Master Audio | Essential and the DTS logos are trademarks of DTS, Inc. Product includes software. © DTS, Inc. All Rights Reserved. This item incorporates copy protection technology that is protected by U.S. patents and other intellectual property rights of Rovi Corporation. Reverse engineering and disassembly are prohibited. HDMI, the HDMI Logo, and High-Definition Multimedia Interface are trademarks or registered trademarks of HDMI Licensing LLC in the United States and other countries. This product is licensed under the AVC patent portfolio license and VC-1 patent portfolio license for the personal and non-commercial use of a consumer to (i) encode video in compliance with the AVC Standard and VC-1 Standard (“AVC/VC-1 Video”) and/or (ii) decode AVC/VC-1 Video that was encoded by a consumer engaged in a personal and non-commercial activity and/or was obtained from a video provider licensed to provide AVC/VC-1 Video. No license is granted or shall be implied for any other use. Additional information may be obtained from MPEG LA, LLC. See http://www.mpegla.com. Declaration of Conformity (DoC) Hereby, “Panasonic Corporation” declares that this product is in compliance with the essential requirements and other relevant provisions of Directive 1999/5/EC. Customers can download a copy of the original DoC to our R&TTE products from our DoC server: http://www.doc.panasonic.de Contact in the EU: Panasonic Services Europe, a Division of Panasonic Marketing Europe GmbH, Panasonic Testing Centre, Winsbergring 15, 22525 Hamburg, Germany This product is intended to be used in the following countries. Austria, Belgium, Bulgaria, Cyprus, Czech Republic, Denmark, Finland, France, Germany, Greece, Hungary, Ireland, Italy, Iceland, Liechtenstein, Luxembourg, Malta, Netherlands, Norway, Poland, Portugal, Romania, Slovakia, Slovenia, Spain, Sweden, United Kingdom, Switzerland This product is intended for general consumer. (Category 3) The WLAN feature of this product shall exclusively be used inside buildings. This product on purpose to connect to access point of 2.4 GHz or 5 GHz WLAN. HDAVI Control™ is a trademark of Panasonic Corporation. VIERA CAST is a trademark of Panasonic Corporation. “AVCHD” and the “AVCHD” logo are trademarks of Panasonic Corporation and Sony Corporation. SDXC Logo is a trademark of SD-3C, LLC. “DVD Logo” is a trademark of DVD Format/Logo Licensing Corporation. YouTube and Picasa are trademarks of Google, Inc. MPEG Layer-3 audio coding technology licensed from Fraunhofer IIS and Thomson. DivX®, DivX Certified® and associated logos are trademarks of DivX, Inc. and are used under license. The Wi-Fi CERTIFIED Logo is a certification mark of the Wi-Fi Alliance. Windows is a trademark or a registered trademark of Microsoft Corporation in the United States and other countries. Skype, associated trade marks and logos and the “ marks of Skype Limited. ” logo are trade VQT3B62 (13)
English Manufactured under license from Dolby Laboratories. Dolby and the double-D symbol are trademarks of Dolby Laboratories. DLNA, the DLNA Logo and DLNA CERTIFIED are trademarks, service marks, or certification marks of the Digital Living Network Alliance. Internet Media server certificato DLNA Router Wireless, ecc.
DLNA, the DLNA Logo and DLNA CERTIFIED are trademarks, service marks, or certification marks of the Digital Living Network Alliance. DLNA, the DLNA Logo and DLNA CERTIFIED are trademarks, service marks, or certification marks of the Digital Living Network Alliance. DLNA, the DLNA Logo and DLNA CERTIFIED are trademarks, service marks, or certification marks of the Digital Living Network Alliance. DLNA, the DLNA Logo and DLNA CERTIFIED are trademarks, service marks, or certification marks of the Digital Living Network Alliance. Blu-ray Disc Player Screen Aspect Top Menu Pop-up Menu RETURN OPTION DLNA, the DLNA Logo and DLNA CERTIFIED are trademarks, service marks, or certification marks of the Digital Living Network Alliance. Blu-ray Disc Player Přehrávání CALL SD CARD [BDT310] [BDT210] Screen Aspect Top Menu Česky DLNA, the DLNA Logo and DLNA CERTIFIED are trademarks, service marks, or certification marks of the Digital Living Network Alliance. [BDT111] [BDT110]
COMMUNICATION 10BASE-T/100BASE-TX
CAMERA Wireless router stb. Wireless LAN Adaptor
Blu-ray Disc Player Control Panel Screen Aspect Top Menu Pop-up Menu OPTION
RETURN DLNA, the DLNA Logo and DLNA CERTIFIED are trademarks, service marks, or certification marks of the Digital Living Network Alliance. DLNA, the DLNA Logo and DLNA CERTIFIED are trademarks, service marks, or certification marks of the Digital Living Network Alliance. Blu-ray Disc Player Photos Setup Music Videos [BDT310] [BDT210] Screen Aspect Top Menu Pop-up Menu OPTION
RETURN DLNA, the DLNA Logo and DLNA CERTIFIED are trademarks, service marks, or certification marks of the Digital Living Network Alliance. This product incorporates the following software: (1) the software developed independently by or for Panasonic Corporation, (2) the software owned by third party and licensed to Panasonic Corporation, (3) the software licensed under the GNU General Public License, Version 2 (GPL v2), (4) the software licensed under the GNU LESSER General Public License, Version 2.1 (LGPL v2.1) and/or, (5) open sourced software other than the software licensed under the GPL v2 and/or LGPL v2.1, (6) Windows Media digital right management technology (WM-DRM) licensed by Microsoft Corporation or its affiliates. For the software categorized as (3) and (4), please refer to the terms and conditions of GPL v2 and LGPL v2.1, as the case may be at http://www.gnu.org/licenses/old-licenses/gpl-2.0.html and http://www.gnu.org/licenses/old-licenses/lgpl-2.1.html. In addition, the software categorized as (3) and (4) are copyrighted by several individuals. Please refer to the copyright notice of those individuals at http://www.am-linux.jp/dl/AWBPP11 The GPL/LGPL software is distributed in the hope that it will be useful, but WITHOUT ANY WARRANTY, without even the implied warranty of MERCHANTABILITY or FITNESS FOR A PARTICULAR PURPOSE. At least three (3) years from delivery of products, Panasonic will give to any third party who contacts us at the contact information provided below, for a charge no more than our cost of physically performing source code distribution, a complete machine-readable copy of the corresponding source code covered under GPL v2/LGPL v2.1. Contact Information cdrequest@am-linux.jp Source code is also freely available to you and any other member of the public via our website below. http://www.am-linux.jp/dl/AWBPP11 For the software categorized as (5) includes as follows.
1. This product includes software developed by the OpenSSL Project
for use in the OpenSSL Toolkit. (http://www.openssl.org/)
2. This product includes software developed by the University of
California, Berkeley and its contributors.
3. FreeType code.
4. The Independent JPEG Group's JPEG software.
Further, for WM-DRM categorized as (6), please be aware of the following. (a) This product is protected by certain intellectual property rights of Microsoft. Use or distribution of this technology outside of this product is prohibited without a license from Microsoft or an authorized Microsoft subsidiary. (b) Content providers are using the digital rights management technology for Windows Media contained in this device (“WM-DRM”) to protect the integrity of their content (“Secure Content”) so that their intellectual property, including copyright, in such content is not misappropriated. This device uses WM-DRM software to play Secure Content (“WM-DRM Software”). If the security of the WM-DRM Software in this device has been compromised, owners of Secure Content (“Secure Content Owners”) may request that Microsoft revoke the WM-DRM Software’s right to acquire new licenses to copy, display and/or play Secure Content. Revocation does not alter the WM-DRM Software’s ability to play unprotected content. A list of revoked WM-DRM Software is sent to your device whenever you download a license for Secure Content from the Internet or from a PC. Microsoft may, in conjunction with such license, also download revocation lists onto your device on behalf of Secure Content Owners. VQT3B62 (135)
[BDT210] [BDT111] [BDT110]
Environment friendly printed on chlorine free bleached paper. Pursuant to at the directive 2004/108/EC, article 9(2) Panasonic Testing Centre Panasonic Marketing Europe GmbH Winsbergring 15, 22525 Hamburg, Germany pvurw sxz { Fi