58770 - Blender HAMILTON BEACH - Free user manual and instructions
Find the device manual for free 58770 HAMILTON BEACH in PDF.

| Product Type | Blender (juicer-mixer-grinder) |
| Brand | Hamilton Beach |
| Model | 58770 |
| Power Supply | 120 V ~ 60 Hz |
| Container Capacity | 1.5 L (multi-purpose), 1.0 L (multi-purpose), 0.5 L (dry ingredients) |
| Material | Plastic (containers, lids, base) |
| Main Functions | Mix, grind, chop, soup, puree, blend |
| Operating Modes | Manual (variable speed) and preset (Dry, Wet Hard, Wet Soft, Soup, Blend) |
| Timer | Countdown up to 3 minutes in manual mode; preprogrammed cycles in preset mode |
| Speeds | Adjustable via speed selection dial |
| Pulse Function | Yes, PULSE button |
| Safety Features | Electric lid lock, motor overload protection (reset), motor temperature indicator |
| Care and Cleaning | Containers, lids, cap, spatula, and tamper are dishwasher safe (no SANI cycle); wipe base with damp cloth |
| Replacement Parts Available | Filler cap, lid, sealing gaskets, containers, tamper, spatula (order at hamiltonbeach.ca) |
| Warranty | 5 years (Canada and United States) |
| Dimensions and Weight | Not specified |
Frequently Asked Questions - 58770 HAMILTON BEACH
User questions about 58770 HAMILTON BEACH
0 question about this device. Answer the ones you know or ask your own.
Ask a new question about this device
Download the instructions for your Blender in PDF format for free! Find your manual 58770 - HAMILTON BEACH and take your electronic device back in hand. On this page are published all the documents necessary for the use of your device. 58770 by HAMILTON BEACH.
USER MANUAL 58770 HAMILTON BEACH
Visit www.hamiltonbeach.com for our complete line of products and Use and Care Guides – as well as delicious recipes, tips, and other helpful information. Questions? Please call us – our friendly associates are ready to help: 1800-572-8766
natural_image
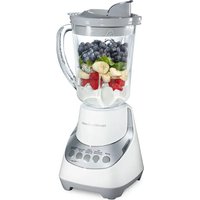
Product display of a blender with food items including a bowl of sauce and a plate of sauce, alongside other kitchen appliances (no visible text or symbols on main objects)Juicer Mixer Grinder
English (original language) 2
Français 15
Español.... 28
हिंदी 40
中文 53
IMPORTANT SAFEGUARDS
When using electrical appliances, basic safety precautions should always be followed to reduce the risk of fire, electric shock, and/or injury to persons, including the following:
-
Read all instructions.
-
This appliance is not intended for use by persons with reduced physical, sensory, or mental capabilities, or lack of experience and knowledge, unless they are closely supervised and instructed concerning use of the appliance by a person responsible for their safety.
-
This appliance shall not be used by children. Keep the appliance and its cord out of reach of children.
-
Close supervision is necessary when any appliance is used near children. Children should be supervised to ensure that they do not play with the appliance.
-
To protect against risk of electrical shock, do not put cord, plug, base, or motor in water or other liquid.
-
Turn the appliance OFF (☐) then unplug from outlet when not in use, before putting on or taking off parts, and before cleaning. To unplug, grasp the plug and pull from the outlet. Never pull from the power cord.
-
Normal operating cycle of blender/mill cycle is 2 minutes of on time. Allow 1 minute off period between each maximum cycle.
-
Avoid contact with moving parts
-
Do not operate any appliance with a damaged supply cord or plug, or after the appliance malfunctions or has been dropped or damaged in any manner. Supply cord replacement and repairs must be conducted by the manufacturer, its service agent, or similarly qualified persons in order to avoid a hazard. Call the provided customer service number for information on examination, repair, or adjustment.
-
The use of attachments, including canning jars, not recommended or sold by the appliance manufacturer may cause a risk of injury to persons.
-
Do not use outdoors.
-
Do not let cord hang over edge of table or counter or touch hot surfaces, including stove.
-
Do not place on or near a hot gas or electric burner, or in a heated oven.
-
Keep hands and utensils, other than the tamper provided, out of container while blending to reduce the risk of severe injury to persons or damage to the blender. The cover must remain in place when using the tamper through the cover opening. A scraper may be used but must be used only when the blender is not running.
-
Blades are sharp; handle carefully—especially when assembling, disassembling, emptying or cleaning blender jar.
-
Do not use a broken, chipped, or cracked jar.
-
Do not use broken, cracked, or loose cutting blade assembly.
-
Always operate appliance with lid in place. Remove filler cap only for adding ingredients.
-
Do not run a soup cycle unless blender/mill has fully cooled to room temperature.
-
When blending hot liquids in the open top blender jar, remove center filler cap and close any edge lid opening intended for pouring. To prevent possible burns: Do not exceed the 2-cup (473-ml) level. Hot liquids may push off lid during blending; therefore, with the protection of an oven mitt or thick towel, place one hand on top of the lid, keep exposed skin away from the lid, and start blending at lowest speed.
-
Be careful if hot liquid is poured into the jar as it can be ejected out of the appliance due to sudden steaming.
-
Do not leave appliance unattended while it is operating.
-
Check that the appliance is OFF ( before plugging cord into wall outlet. To disconnect, turn the control to OFF ( then remove plug from wall outlet. To unplug, grasp the plug and pull from the outlet. Never pull from the power cord.
-
Do not use appliance for other than intended purpose.
-
CAUTION! In order to avoid a hazard due to inadvertent resetting of the thermal cut-off, this appliance must not be supplied through an external switching device, such as a timer, or connected to a circuit that is regularly switched on and off by the utility.
SAVE THESE INSTRUCTIONS
Other Consumer Safety Information
This appliance is intended for household use only.
⚠ WARNING Electrical Shock Hazard: The length of the cord used on this appliance was selected to reduce the hazards of becoming tangled in or tripping over a longer cord. If a longer cord is necessary, an approved extension cord may be used. The electrical rating of the extension cord must be equal to or greater than the rating of the appliance. Care must be taken to arrange the extension cord so that it will not drape over the countertop or tabletop where it can be pulled on by children or accidentally tripped over.
If the cutting blade assembly locks and will not move, it will damage the motor.
Do not use. Call the toll-free customer service number for information.
Do not place blender jar in the freezer filled with food or liquid. This can result in damage to the cutting blade assembly, jar, blender, and possibly result in personal injury
NOTE: This machine is equipped with motor overload protection. If the motor stops during operation due to overheating, unplug and allow it to cool down for approximately 15 minutes. Plug machine back in to resume normal operation.
WARNING

Electrical Shock Hazard
Disconnect power before cleaning blender base.
Do not immerse cord, plug, or base in water or any other liquid.
Failure to follow these instructions can result in death or electrical shock.

Electrical Shock Hazard
Plug into a grounded outlet.
Do not remove ground.
Do not use an adapter.
Do not use an extension cord.
Failure to follow these instructions can result in death, fire, or electrical shock.
WARNING

Cut Hazard
The blending blade is sharp.
Always place lid on container when blending.
Do not put hands, spoons, or other utensils in container when blending.
Failure to follow these instructions can result in broken bones, cuts, or other injuries.

Burn Hazard
Always use caution when blending hot contents.
Failure to follow these instructions can result in burns.
Other Consumer Safety Information - Continued
Recycling the Product at the End of Its Service Life
The wheeled bin symbol marked on this appliance signifies that it must be taken over by a selective collection system conforming to the WEEE Directive so that it can be either recycled or dismantled in order to reduce any impact to the environment. The user is responsible for returning the product to the appropriate collection facility, as specified by your local code. For additional information regarding applicable local laws, please contact the municipal facility and/or local distributor.
Parts and Features
Before first use: After unpacking appliance, wash everything except Base in hot, soapy water. Dry thoroughly. Wipe Base with a damp cloth or sponge. DO NOT IMMERSE BASE IN WATER. Care should be taken when cleaning inside of Jar as the cutting blade assembly is very sharp.
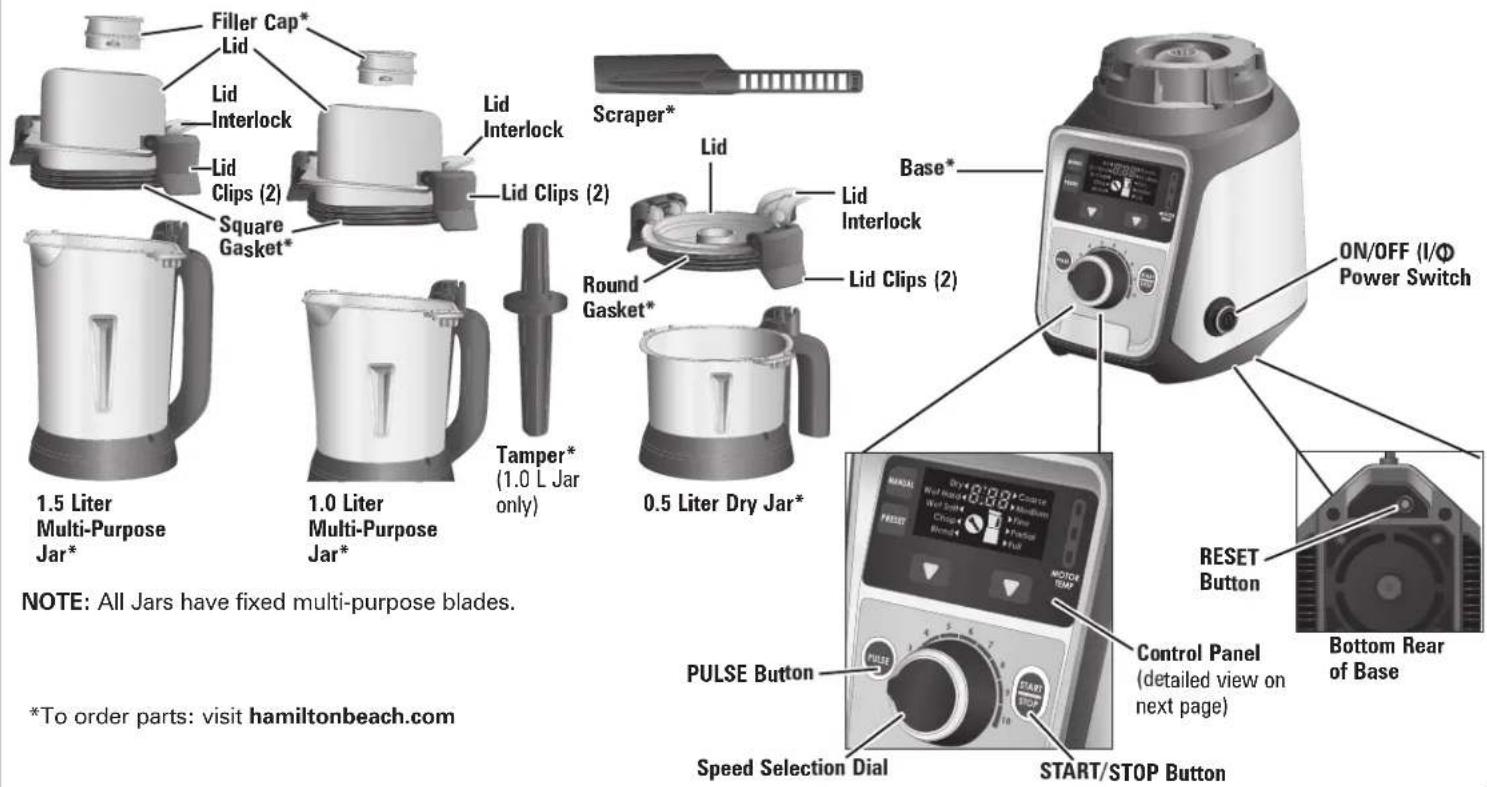
*To order parts: visit hamiltonbeach.com
Parts and Features (cont.)
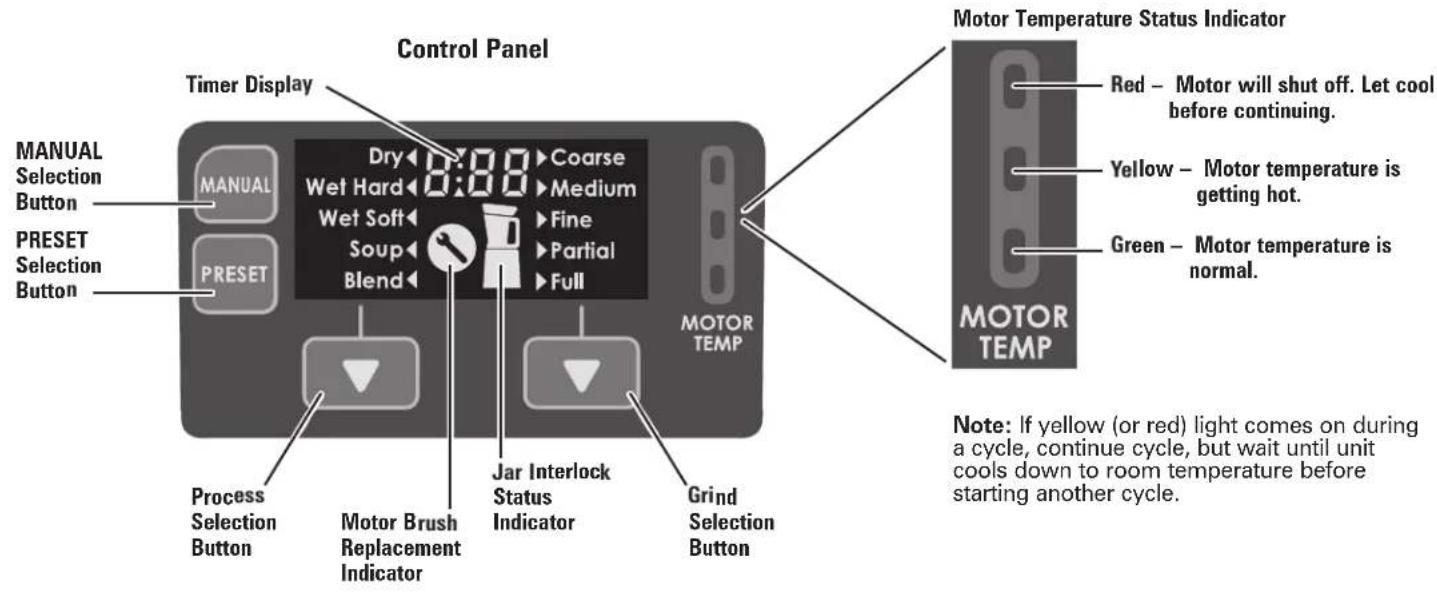
Using Your Juicer-Mixer-Grinder: Reference Table
| Food Examples Recommended Jar Size | Recommended Process Selection | Recommended Max Volume (mL) | |
| Cereal grains | 0.5L (pre-cut large pieces to 2.5cm or less) | Dry MAX Fill LineRoasted red chilis | |
| Jeera | |||
| Idli batter | 1.0L / 1.5L Wet Hard | 900 | |
| Dal (lentils, beans, peas) 900 | |||
| Coconut chutney 900 | |||
| Nut butters | 1.0L / 1.5L Wet Soft | 600 | |
| Tomato and onion chutney 900 | |||
| Curry paste 600 | |||
| Soups (longer cycle provides heating) | 1.0L | Soup | MAX Fill Line |
| Purees | 1.0L/1.5L | Blend | MAX Fill Line |
| Blending | |||
| Juicing | |||
Assembly

natural_image
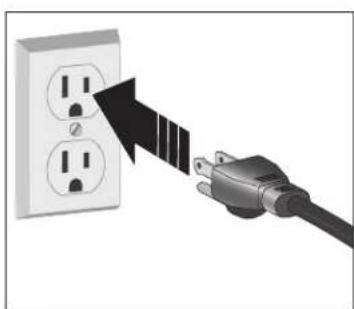
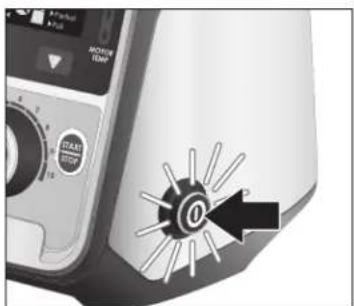
Illustration of a hand inserting a plug into an electrical outlet (no text or symbols)- Plug into outlet.
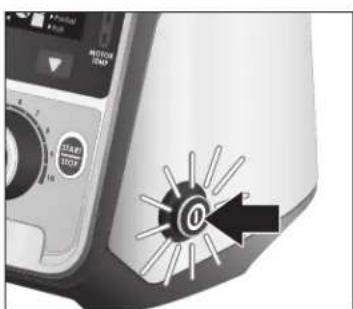
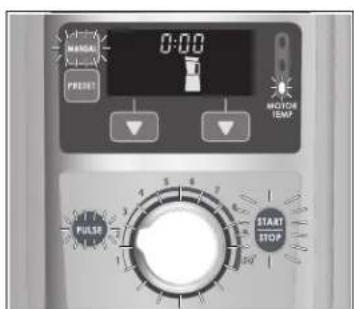
- Press ON/OFF (I/O) Button. Button will illuminate blue.
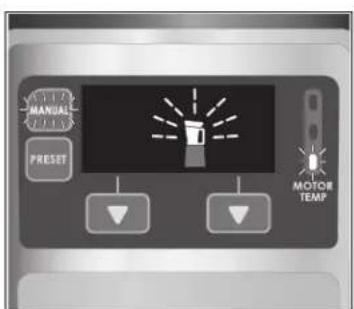
- Blender Base, Jar, and Lid will be on Control Panel; Jar and Lid will be flashing. Manual Button will illuminate blue and MOTOR TEMP indicator will show one green bar illuminated.
natural_image
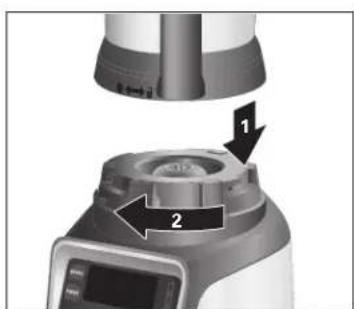
Close-up of a kitchen appliance with labeled parts (1 and 2), no visible text or symbols beyond labels- Place desired Jar on Base, aligning arrow on Base with unlock icon ( ) on Jar. Turn clockwise to lock.
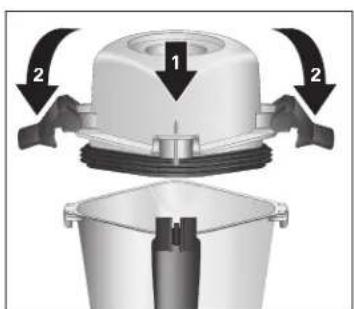
- Align Lid Interlock to front of Jar. Push Lid straight down onto Jar and push down on Lid Clips to lock into place.
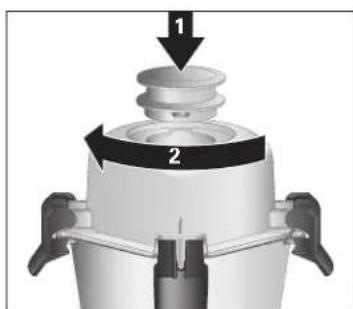
- Place Filler Cap in opening of Lid and turn clockwise to lock.
- Blender is ready to use.
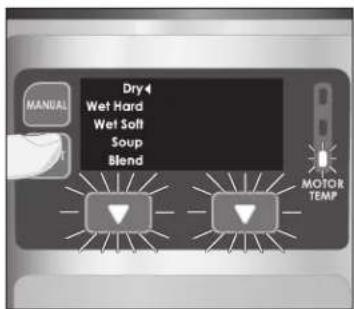
Operation – MANUAL
- If in PRESET operation, press MANUAL Button. MANUAL operation is the default setting when ON/OFF Button is pressed.

- Press START/STOP Button to begin blending or press and pulse the PULSE Button.

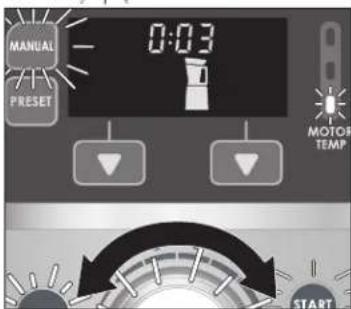
- Turn Speed Selection Dial to increase or decrease to desired speed.


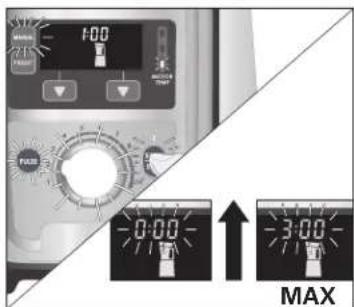
- Blender running time will count up to 3:00 minutes MAX and will automatically turn off. Or, press START/STOP Button at any time to stop Blender.
natural_image
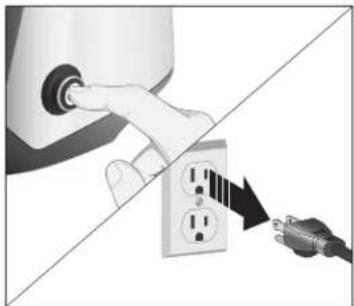
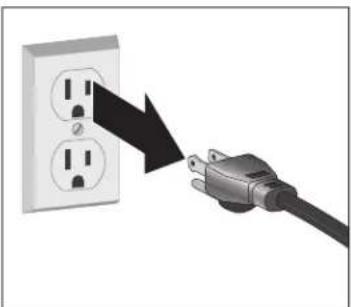
Illustration of a hand inserting a plug into an electrical socket connected to a power plug (no text or symbols)- Press ON/OFF Button. Unplug from outlet.
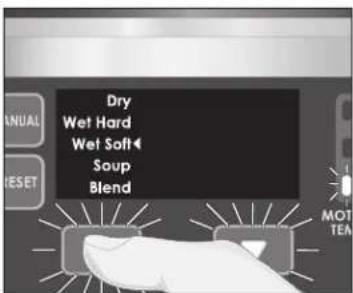
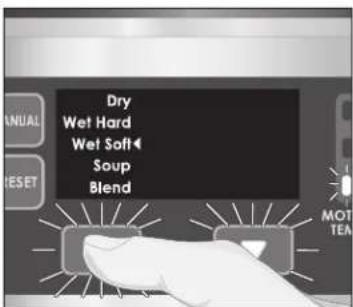
Operation – PRESET

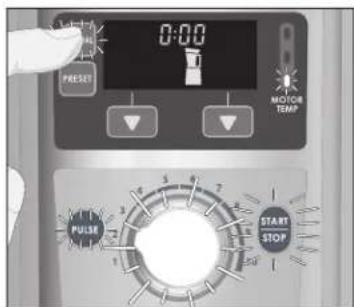
- Press PRESET Button.

- Press Process Selection Button until arrow reaches desired operation. Each operation has a set blending time.

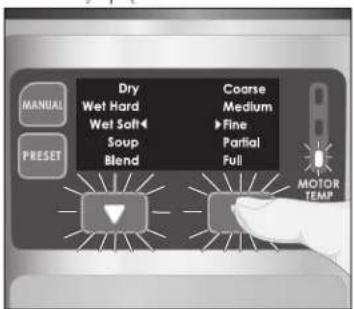
- Press Grind Selection Button until arrow reaches desired texture, or if operation is in Soup or Blend, select Partial or Full Blender Jar.


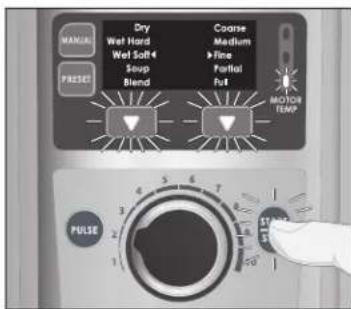
- Press START/STOP Button to start blending.

- Blender will count down to 0:00 and will automatically turn off.

natural_image
Illustration of a hand inserting a plug into an electrical socket connected to a power plug (no text or symbols)- Press ON/OFF (I/O) Button to turn Blender off. Unplug from outlet.
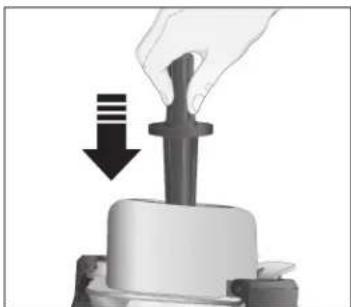
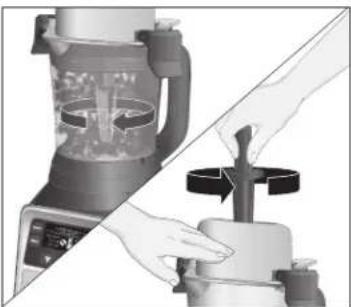
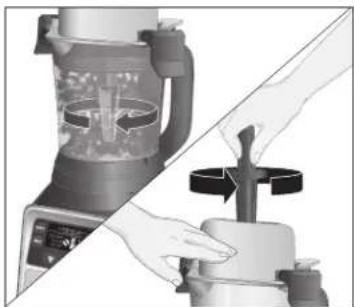
Using the Tamper
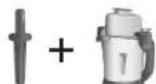
1.0 L ONLY


natural_image
3D mechanical assembly diagram showing a piston-like component with an upward arrow (no text or symbols)- Only use Tamper with 1.0 Liter Multi-Purpose Jar. Turn Filler Cap counterclockwise and pull up to remove.
natural_image
Close-up of a mechanical press or lever mechanism with a downward arrow indicating motion (no text or symbols present)- Add Tamper through opening in Lid.
natural_image
Two-step illustration of a blender being processed, showing blade and handle mechanism (no text or symbols)- Turn Tamper in a circular motion to help move mixture.
Cleaning
natural_image
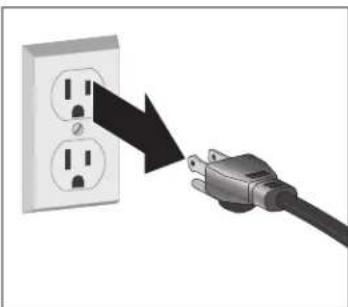
Illustration of a plug inserted into an electrical outlet with two outlets, showing a black arrow pointing to the outlet (no text or symbols present)- Unplug from outlet.
natural_image
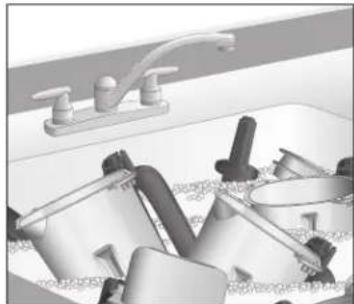
Interior view of a bathroom sink with faucet and shower fixtures (no text or symbols visible)- Wash Multi-Purpose Jars, Lids, Filler Caps, Scraper, and Tamper in hot, soapy water. Rinse and dry.

natural_image
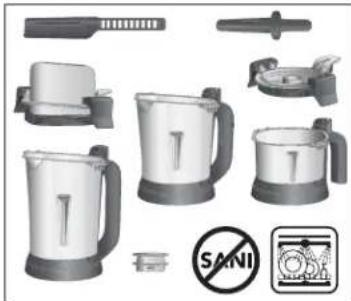
Product catalog illustration of kitchen utensils including a blender, keyboard, and no-smoking symbol (no text or labels)- Multi-Purpose Jars, Lids, Filler Caps, Scraper, and Tamper are dishwasher safe. DO NOT use the "SANI" setting when washing in the dishwasher. "SANI" cycle temperatures could damage your product.
natural_image
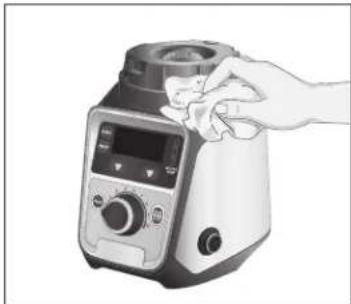
Illustration of a hand holding a kitchen blender with control panel and display (no text or symbols)- Wipe Base with a damp cloth and dry. If necessary, use a mild nonabrasive cleaner. Wipe with a damp cloth and dry.
Troubleshooting
Display shows Error Codes E01.
- Blade is jammed with food. Remove Jar and Lid. Use Scraper to stir food. Repeat blending.
- If problem persists, call Customer Service.
Appliance fails to start or stops while it is running.
- Make sure that the Power Switch Button is ON (I) and that it is illuminated blue.
- Check to see if unit is securely plugged into an electrical outlet of the proper voltage and frequency.
- Check to see if the fuse for the electrical outlet has blown or if the Reset Button on the bottom rear of Base has switched to OFF (Φ)
- This appliance is equipped with an interlock feature — the appliance will fail to start or will stop when either Lid or Jar are not locked properly in place.
- Press Reset Button on bottom of Base.
Red light on Motor Temperature Status Indicator starts to flash and appliance stops running.
- Motor overload protection has engaged. Unplug and let cool for 15 minutes. Press Reset button on bottom of Base and plug back in to restart blending.
Unit does not respond to button commands.
- Turn unit power off and back on using the Power Switch to reset the controls.
- If problem persists, the unit will need to be serviced.
Ingredients will not mix properly.
- Check to see if enough liquid has been added to the ingredients. Mixture should be fluid and free-flowing at all times.
• Solid pieces are too large. - Container is too full. Do not fill past MAX marking.
- Cutter assembly blades are not sharp or are damaged.
- Select speed to create a fluid blend.
All three MOTOR TEMP lights are flashing.
- Call Customer Service.
Maintenance Icon is illuminated.
- Call Customer Service.
Limited Warranty
This warranty applies to products purchased and used in the U.S. and Canada. This is the only express warranty for this product and is in lieu of any other warranty or condition.
This product is warranted to be free from defects in material and workmanship for a period of five (5) years from the date of original purchase in the U.S. and Canada. During this period, your exclusive remedy is repair or replacement of this product or any component found to be defective, at our option; however, you are responsible for all costs associated with returning the product to us and our returning a product or component under this warranty to you. If the product or component is no longer available, we will replace with a similar one of equal or greater value.
This warranty does not cover glass, filters, wear from normal use, use not in conformity with the printed directions, or damage to the product resulting from accident, alteration, abuse, or misuse. This warranty extends only to the original consumer purchaser or gift recipient. Keep the original sales receipt, as proof of purchase is required to make a warranty claim. This warranty is void if the product is used for other than single-family household use or subjected to any voltage and waveform other than as specified on the rating label (e.g., 120 V \~ 60 Hz).
We exclude all claims for special, incidental, and consequential damages caused by breach of express or implied warranty. All liability is limited to the amount of the purchase price. Every implied warranty, including any statutory warranty or condition of merchantability or fitness for a particular purpose, is disclaimed except to the extent prohibited by law, in which case such warranty or condition is limited to the duration of this written warranty. This warranty gives you specific legal rights. You may have other legal rights that vary depending on where you live. Some states or provinces do not allow limitations on implied warranties or special, incidental, or consequential damages, so the foregoing limitations may not apply to you.
To make a warranty claim, do not return this appliance to the store. Please call 1.800.851.8900 in the U.S. or 1.800.267.2826 in Canada or visit hamiltonbeach.com in the U.S. or hamiltonbeach.ca in Canada. For faster service, locate the model, type, and series numbers on your appliance.
PRÉCAUTIONS IMPORTANTES
natural_image
Illustration of a plug inserted into an electrical outlet with a black arrow indicating the direction (no text or symbols present)natural_image
Close-up of a medical device control panel with a circular button and arrow icon (no readable text or symbols)natural_image
Close-up of a mechanical component with two arrows indicating parts of a base (no text or symbols visible)natural_image
Diagram showing a hand inserting a plug into an electrical outlet with a cable inserted (no text or symbols)natural_image
Illustration of a hand inserting a plug into an electrical outlet with a cable (no text or symbols)natural_image
3D mechanical component diagram showing a piston-like structure with an upward arrow (no text or symbols)natural_image
Close-up of a mechanical component with a downward arrow indicating compression or disassembly (no text or symbols visible)natural_image
Illustration of a blender being processed with hands using a tool (no text or symbols visible)natural_image
Illustration of a plug inserted into an electrical outlet with two outlets, showing a black arrow pointing to the outlet (no text or symbols present)natural_image
Interior view of a kitchen sink with faucet and bathroom fixtures (no text or symbols visible)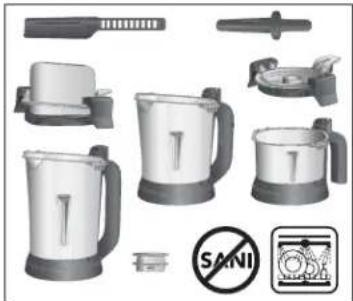
natural_image
Product catalog image showing various kitchen utensils and a no-smoking symbol (no readable text or labels)natural_image
Hand holding a kitchen blender with a digital display and control panel (no visible text or symbols)natural_image
Illustration of a plug inserted into an electrical outlet with a black arrow indicating the direction (no text or symbols present)natural_image
Close-up of a kitchen appliance with labeled parts (1 and 2), no visible text or symbols beyond labelsnatural_image
Diagram showing a hand inserting a plug into an electrical outlet with a cable inserted (no text or symbols)natural_image
Illustration of a hand inserting a plug into an electrical outlet, with a cable inserted (no text or symbols)natural_image
3D mechanical assembly diagram showing a piston-like component with an upward arrow (no text or symbols)natural_image
Close-up of a mechanical press or clamping device with a downward arrow indicating compression (no text or symbols visible)natural_image
Two-step illustration of a blender being processed, showing blade and handle mechanism (no text or symbols)
natural_image
Illustration of a plug inserted into an electrical outlet with two outlets, showing a black arrow pointing to the outlet (no text or symbols present)natural_image
Interior view of a bathroom sink with faucet and fixtures (no text or symbols visible)natural_image
Product catalog image showing various kitchen utensils and a no-smoking symbol (no readable text or labels)natural_image
Illustration of a hand holding a kitchen blender with control panel (no text or symbols visible)natural_image
Illustration of a plug inserted into an electrical outlet with a magnifying glass arrow indicating power discharge (no text or symbols)natural_image
Close-up of a kitchen appliance with a circular button labeled '0' and a black arrow pointing to it (no readable text or symbols beyond basic design)natural_image
Illustration of a hand inserting a plug into an electrical socket, with a cable inserted (no text or symbols)- प्रिसेट बटन दबाएँ।
natural_image
Illustration of a hand inserting a plug into an electrical outlet, with a black arrow indicating the power connection (no text or symbols present)natural_image
3D mechanical assembly diagram showing a piston-like component with an upward arrow (no text or symbols)natural_image
Close-up of a mechanical component with a downward arrow indicating compression or disassembly (no text or symbols visible)natural_image
Illustration of a kitchen blender being processed with a hand using a tool (no text or symbols visible)
natural_image
Illustration of a plug inserted into an electrical outlet with two outlets, showing a black arrow pointing to the outlet (no text or symbols present)natural_image
Interior view of a kitchen sink with faucet and bathroom fixtures (no text or symbols visible)- बह
natural_image
Product catalog image showing various kitchenware and tools including a blender, blender, and stander (no readable text or symbols)natural_image
Illustration of a hand holding a kitchen blender with control panel and display (no text or symbols)natural_image
Illustration of a plug inserted into an electrical outlet with a black arrow indicating the direction (no text or symbols present)- 插入电源插座。
natural_image
Close-up of a kitchen appliance with a lid and two arrows indicating parts of the lid (no text or symbols visible)natural_image
Illustration of a hand inserting a plug into an electrical socket connected to a power outlet (no text or symbols)- 按开/关按钮。从插座上拔下电源线。
操作-预设模式
- 按下预设模式按钮。
natural_image
Illustration of a hand inserting a plug into an electrical socket connected to a power plug (no text or symbols)natural_image
3D mechanical component diagram showing a piston-like structure with an upward arrow (no text or symbols)natural_image
Close-up of a mechanical component with a downward arrow indicating compression or disassembly (no text or symbols visible)- 从盖子的开口伸入搅拌棒。
natural_image
Illustration of a kitchen blender being processed with a tool, showing blade and handle (no text or symbols)- 旋转搅拌棒以移动混合物。
清洁
natural_image
Illustration of a plug inserted into an electrical outlet with two outlets, showing a black arrow pointing to the outlet (no text or symbols present)natural_image
Interior view of a bathroom sink with faucet and shower fixtures (no text or symbols visible)