38546 - Grill plate HAMILTON BEACH - Free user manual and instructions
Find the device manual for free 38546 HAMILTON BEACH in PDF.

User questions about 38546 HAMILTON BEACH
0 question about this device. Answer the ones you know or ask your own.
Ask a new question about this device
Download the instructions for your Grill plate in PDF format for free! Find your manual 38546 - HAMILTON BEACH and take your electronic device back in hand. On this page are published all the documents necessary for the use of your device. 38546 by HAMILTON BEACH.
USER MANUAL 38546 HAMILTON BEACH
Visit www.hamiltonbeach.com for our complete line of products and Use and Care Guides – as well as delicious recipes, tips, and to register your product online!
Please call us – our friendly associates are ready to help. USA: 1.800.851.8900
Questions?
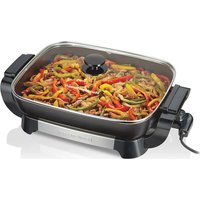
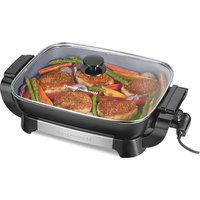
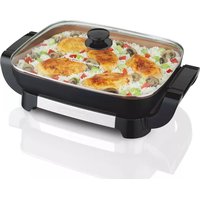
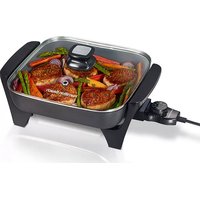
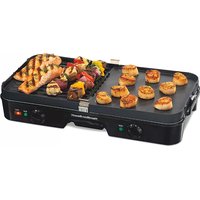
3-in-1 Grill/Griddle
Gril/plaque chauffante 3 en 1 Parrilla/Plancha 3 en 1
natural_image
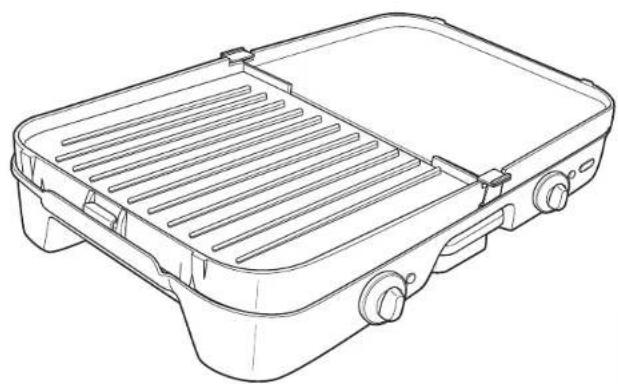
Line drawing of a portable electric cooker with grating and side-mounted fans (no text or symbols)English 2
Français 9
Español 17
IMPORTANT SAFEGUARDS
When using electrical appliances, basic safety precautions should always be followed to reduce the risk of fire, electric shock, and/or injury to persons, including the following:
- Read all instructions.
- Do not touch hot surfaces. Use handles or knobs, which may be warm. Use oven mitts.
- To protect against electric shock, do not immerse cord, plug, or base in water or other liquid.
- Close supervision is necessary when any appliance is used by or near children.
- Unplug from outlet when not in use and before cleaning. Allow to cool before putting on or taking off parts, and before cleaning the appliance.
-
Do not operate any appliance with a damaged cord or plug, or after the appliance malfunctions, or has been dropped or damaged in any manner. Call our toll-free customer service number for examination, repair, or adjustment.
-
The use of accessory attachments not recommended by the appliance manufacturer may cause injuries.
- Do not use outdoors.
- Do not let cord hang over edge of table or counter or touch hot surfaces, including stove.
- Do not place on or near a hot gas or electric burner, or in a heated oven.
- Extreme caution must be used when moving an appliance containing hot oil or other hot liquids.
- To disconnect, turn all controls to MIN and then remove plug from wall outlet.
- Do not use appliance for other than intended use.
- Never leave appliance unattended while in use.
SAVE THESE INSTRUCTIONS!
OTHER CONSUMER SAFETY INFORMATION
This appliance is intended for household use only.
WARNING! Shock Hazard: This appliance has a polarized plug (one wide blade) that reduces the risk of electric shock. The plug fits only one way into a polarized outlet. Do not defeat the safety purpose of the plug by modifying the plug in any way or by using an adapter. If the plug does not fit fully into the outlet, reverse the plug. If it still does not fit, have an electrician replace the outlet.
The length of the cord used on this appliance was selected to reduce the hazards of becoming tangled in or tripping over a longer cord. If a longer cord is necessary, an approved extension cord may be used. The electrical rating of the extension cord must be equal to or greater than the rating of the appliance. Care must be taken to arrange the extension cord so that it will not drape over the counter-top or tabletop where it can be pulled on by children or accidentally tripped over.
To avoid an electrical circuit overload, do not use another high-wattage appliance on the same circuit with this appliance.
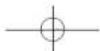
Parts and Features
BEFORE FIRST USE: Wash nonstick grill/griddle and drip tray in hot, soapy water before use. Rinse and dry thoroughly.
text_image
Nonstick Grill/Griddle Grids (Griddle side shown. Flip unit over to use grill side.) Base Temperature Controls Drip Tray
text_image
MIN 450/100 350 / 250 / 200 000 1 240 / 200 Left Knob READY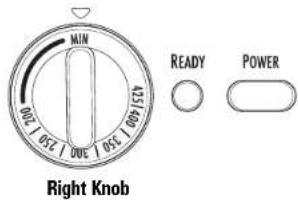
text_image
MIN 100 250 300 350 400 READY POWER Right KnobHow to Use the Grill/Griddle

text_image
Griddle Side Grill Side 1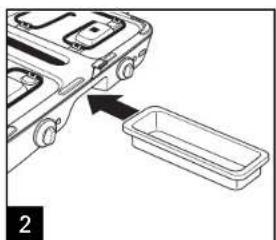
natural_image
Diagram showing a car being inserted into a plastic container (no text or symbols present)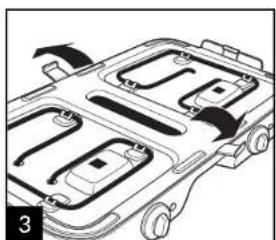
natural_image
Technical line drawing of a vehicle chassis frame with no visible text or symbols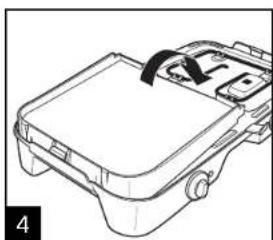
natural_image
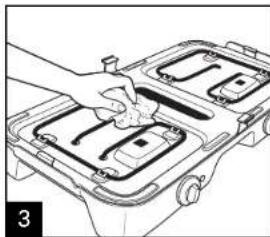
Line drawing of a mechanical component with a handle and mounting bracket (no text or symbols)To insert and remove grids, pull clips away from the unit to release.
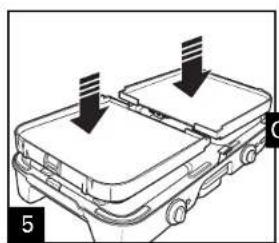
Insert end of grid into fixed latch, and rest grid on center latches. Spread center latches to allow grids to fall into place.
natural_image
Line drawing of a vehicle front view with two downward-pointing arrows indicating top-down positions (no text or symbols)
natural_image
Diagram of a vehicle roof structure with heat exchangers and ventilation grilles (no text or labels)
natural_image
Diagram of a vehicle chassis with ventilation grilles and exhaust heat arrows (no text or symbols)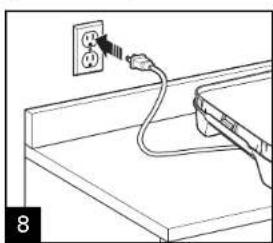
natural_image
Line drawing of a cable being inserted into an electrical outlet (no text or symbols)
How to Use the Grill/Griddle (cont.)
text_image
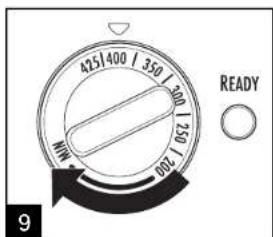
425/400 / 350 / 300 052 022 READY 9Use nonstick cooking spray before heating. Power ON light will turn on as soon as the unit is plugged in. The READY light (one per cooking surface) will turn on as soon as the desired temperature is reached on each side.
natural_image
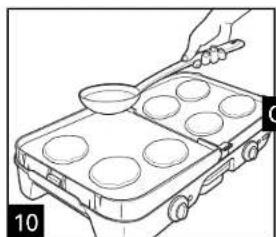
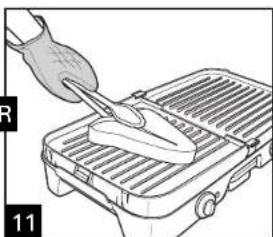
Line drawing of a hand using a pan to press four round plates on a grater (no text or symbols)Use only utensils which are high-heat resistant ( -450^/232^ ) and safe for nonstick surfaces. This will help prolong the life of the nonstick coating.
natural_image
Line drawing of a hand using a tool to clean or prepare food on a grater (no text or symbols)In grill mode, grease will drain in center into the drip tray. Make sure the drip tray is in place.
natural_image
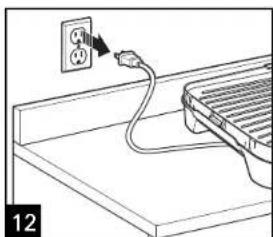
Line drawing of a cable with an outlet plug inserted into a rack (no text or symbols)When finished, turn all controls to "MIN" before unplugging unit from the outlet.
Cooking Charts
GRILL FOOD TEMPERATURE INTERNAL TEMP.* APPROX. COOKING TIME**
Chicken Breasts, Boneless (6 oz. [170 g] each) 375°F (190°C) 170°F (77°C) 20 to 30 minutes
Hamburgers (1/4 lb [113.4 g] each) 350°F (180°C) 145°F (63°C) 15 to 20 minutes
Pork Chops (3/4"-1" [1.9-2.5 cm] thick) 350°F (180°C) 145°F (63°C) 20 to 30 minutes
Sausage Links and Patties (1/2" [1.3 cm] thick) 350°F (180°C) 160°F (72°C) 8 to 12 minutes
Turkey Burgers (1/4 lb [113.4 g] each) 350°F (180°C) 165°F (74°C) 10 to 15 minutes
GRIDDLE FOOD TEMPERATURE INTERNAL TEMP.*
APPROX. COOKING TIME**
| Fried Eggs | 350°F (180°C) | 160°F (72°C) | 10 minutes (no turning) |
| French Toast | 350°F (180°C) | —— | 8 to 10 minutes |
| Grilled Cheese Sandwiches | 375°F (190°C) —— | 4 to 5 minutes | |
| Pancakes | 375°F (190°C) —— | 4 to 5 minutes |
| GRILL/GRIDDLE FOOD | TEMPERATURE | INTERNAL TEMP.* | APPROX. COOKING TIME** |
| Bacon | 350°F (180°C) | crisp | 10 to 15 minutes |
| Hot Dogs | 350°F (180°C) | — | 15 minutes |
*Visit foodsafety.gov for more information on safe internal cooking temperatures.
**All temperatures are based on fresh, NOT frozen foods.
IF YOU LIVE IN A HIGH-ALTITUDE AREA:
The Extension service will have detailed information about cooking for your area. To locate the Cooperative Extension service in your county, please visit: http://www.csrees.usda.gov/Extension/.
Care and Cleaning
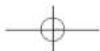
Turn all controls to "MIN" before unplugging unit. Unplug; allow to cool completely. Remove and empty drip tray. Do not use metal scouring pads or abrasive cleansers.
natural_image
Line drawing of a cable being inserted into an electrical outlet (no text or symbols)WARNING
Electrical Shock Hazard.
Disconnect power before cleaning.
Do not immerse cord, plug, or base in any liquid.
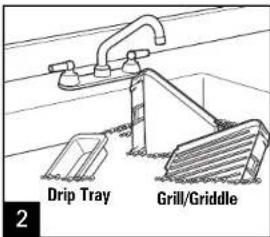
text_image
Drip Tray Grill/Griddle 2Wash all parts EXCEPT base in hot, soapy water or place in dishwasher. Dry thoroughly.
natural_image
Illustration of a hand using a tool to clean or install a multi-compartment device (no text or symbols visible)To clean base, allow base to cool completely. Clean with damp, soapy cloth and dry thoroughly.
Troubleshooting
PROBLEM
| Low, poor, or slow heating. | • Allow grill/griddle to heat for 10 to 15 minutes before use. |
| Cooking too slow. | • Ensure grids are fully installed. |
| Grease not draining properly from grill grid. | • Ensure grids are fully installed. |
| Food sticks to the grill grids. | • Use nonstick cooking spray before heating. |
Limited Warranty
This warranty applies to products purchased and used in the U.S. and Canada. This is the only express warranty for this product and is in lieu of any other warranty or condition.
This product is warranted to be free from defects in material and workmanship for a period of one (1) year from the date of original purchase. During this period, your exclusive remedy is repair or replacement of this product or any component found to be defective, at our option; however, you are responsible for all costs associated with returning the product to us and our returning a product or component under this warranty to you. If the product or component is no longer available, we will replace with a similar one of equal or greater value.
This warranty does not cover glass, filters, wear from normal use, use not in conformity with the printed directions, or damage to the product resulting from accident, alteration, abuse, or misuse. This warranty extends only to the original consumer purchaser or gift recipient. Keep the original sales receipt, as proof of purchase is required to make a warranty claim. This warranty is void if the product is used for other than single-family household use or subjected to any voltage and waveform other than as specified on the rating label (e.g., 120V \~ 60 Hz).
We exclude all claims for special, incidental, and consequential damages caused by breach of express or implied warranty. All liability is limited to the amount of the purchase price. Every implied warranty, including any statutory warranty or condition of merchantability or fitness for a particular purpose, is disclaimed except to the extent prohibited by law, in which case such warranty or condition is limited to the duration of this written warranty. This warranty gives you specific legal rights. You may have other legal rights that vary depending on where you live. Some states or provinces do not allow limitations on implied warranties or special, incidental, or consequential damages, so the foregoing limitations may not apply to you.
To make a warranty claim, do not return this appliance to the store. Please call 1.800.851.8900 in the U.S. or 1.800.267.2826 in Canada or visit hamiltonbeach.com in the U.S. or hamiltonbeach.ca in Canada. For faster service, locate the model, type, and series numbers on your appliance.
PRÉCAUTIONS IMPORTANTES
natural_image
Diagram showing a car interior with a rectangular tray and an arrow pointing to the front panel (no text or symbols present)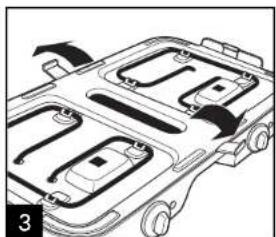
natural_image
Technical line drawing of a vehicle chassis frame with no visible text or symbolsnatural_image
Line drawing of a mechanical component with a handle and mounting bracket (no text or symbols)natural_image
Diagram of a vehicle chassis with two compartments and directional arrows indicating movement (no text or symbols)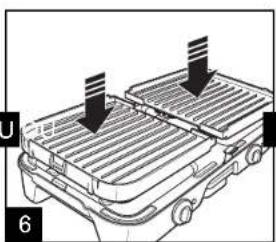
natural_image
Diagram of a vehicle chassis with heat exchangers and ventilation grilles (no text or symbols)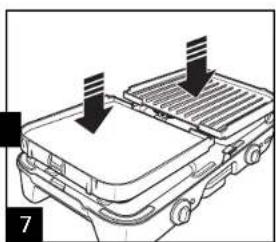
natural_image
Diagram of a vehicle roof structure with ventilation grilles and exhaust arrows (no text or symbols)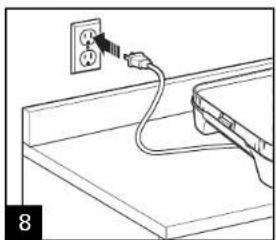
natural_image
Line drawing of a cable being inserted into an electrical outlet (no text or symbols)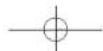
Utilisation de la gril/plaque chauffante (suite)
text_image
125/400 / 350 200 150 100 MINT READY 9natural_image
Line drawing of a cooking pan with multiple round cavities and a handle (no text or symbols)natural_image
Line drawing of a hand using a tool to clean or prepare food on a grater (no text or symbols)natural_image
Line drawing of a cable with an outlet plug inserted into a rack (no text or symbols)natural_image
Line drawing of a wall-mounted electrical outlet connected to a grid socket (no text or symbols)natural_image
Line drawing of a hand inserting a component into a device housing (no text or symbols)natural_image
Diagram showing a vehicle's front view with a rectangular tray and an arrow pointing to the side panel (no text or symbols)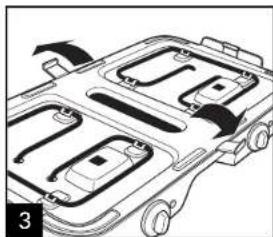
natural_image
Diagram of a vehicle's internal structure with arrows indicating motion or movement (no text or symbols)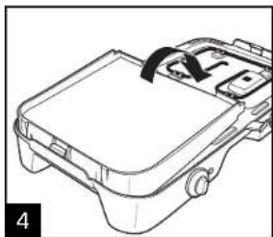
natural_image
Line drawing of a mechanical component with a handle and mounting bracket (no text or symbols)natural_image
Diagram of a vehicle front panel with two side panels and directional arrows indicating movement (no text or symbols)
natural_image
Diagram of a vehicle roof structure with heat exchangers and ventilation grilles (no text or symbols)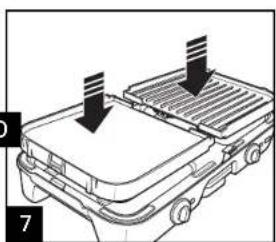
natural_image
Diagram of a vehicle's roof structure with ventilation grilles and exhaust heat arrows (no text or symbols)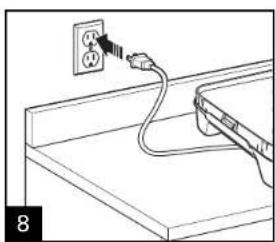
natural_image
Line drawing of a cable being inserted into an electrical outlet (no text or symbols)
natural_image
Line drawing of a cooking pan with multiple round cavities and a hand holding a bowl (no text or symbols)natural_image
Line drawing of a hand using a spatula to clean or prepare food on a grater (no text or symbols)natural_image
Line drawing of a cable plugged into an electrical outlet on a tray (no text or symbols)natural_image
Line drawing of a cable being inserted into an electrical outlet (no text or symbols)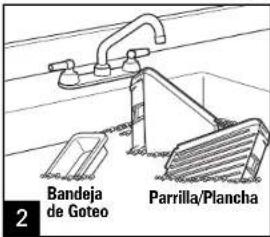
text_image
Bandeja de Goteo Parrilla/Plancha 2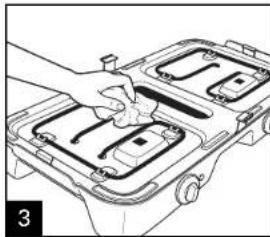
natural_image
Line drawing of a hand using a tool to adjust or install a vehicle chassis (no text or symbols visible)Col. Palmitas Polanco
Mixcoac MEXICO 03910 D.F.
Tel: 01 55 5563 8723 • Fax: 01 55 5615 1856