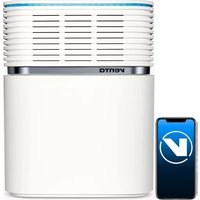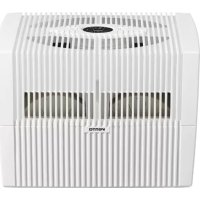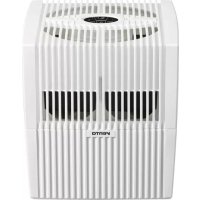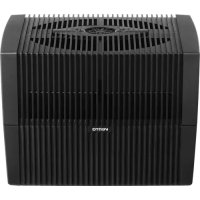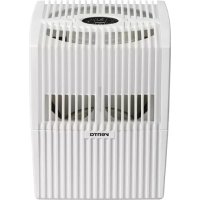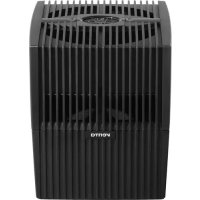
AH515 - Humidifier Venta - Free user manual and instructions
Find the device manual for free AH515 Venta in PDF.


User questions about AH515 Venta
0 question about this device. Answer the ones you know or ask your own.
Ask a new question about this device
Download the instructions for your Humidifier in PDF format for free! Find your manual AH515 - Venta and take your electronic device back in hand. On this page are published all the documents necessary for the use of your device. AH515 by Venta.
USER MANUAL AH515 Venta
natural_image
Three white rectangular electronic devices with ventilation grilles and ventilation ducts, connected by curved lines against a blue sky (no visible text or symbols)VENTA AIR HUMIDIFIER USER MANUAL
FOR MODELS
AH510 / AH515 / AH530 / AH535 / AH550 / AH555
READ AND SAVE THESE INSTRUCTIONS
CONTENTS
Important safeguards 3
Easy Setup Guide 4
Dear Customer, 9
Main Components 10
Displays, Functions & Settings 11
Cleaning & Maintenance 15
Venta Water Treatment Additive 17
Venta Cleaner 18
Venta Aromatherapy----18
Additional Information 19
Frequently Asked Questions----21
Servicing Your humidifier----23
Two-Year Limited Warranty 26
IMPORTANT SAFEGUARDS
WARNING
It is important that you read, fully understand, and observe the following safety precautions and warnings. Read these instructions periodically. Careless or improper use of your Venta Humidifier may cause serious or even fatal injury. Keep this User Manual with your humidifier. Be sure anyone using your humidifier understands the information contained in this manual.
- Children should not operate the humidifier.
• Always switch the motor off and unplug the power supply from the AC outlet before filling it with water, adding Venta Water Treatment Additive, Venta Cleaner, Venta Aromatherapy, or before moving/handling the unit. - Plug into 110-120 V AC outlet only. Do not use your humidifier if the power supply or plug is damaged. Do not replace a damaged power supply or plug. Only Venta may replace the power supply or plug.
- The humidifier can only be operated with the Model No. BI13-240050-Cd / FJ-SW1982400500 power supply (included).
- Do not attempt any repair work. Maintenance or servicing the Venta Humidifier, other than described in this use manual, should only be done by Venta. Any modification to your humidifier is extremely dangerous and voids your warranty.
- Do not insert any objects into the air intake of the unit. It may damage the fan blades or cause injuries. After the motor is switched off, the fan continues to rotate for a short period of time.
- Do not use or store where it can fall or be pulled into a bathtub, sink, water, or other liquid. Do not reach for a unit that has fallen into water or other liquid. Do not immerse in water or other liquid, even when the unit is unplugged or off. Moisture can cause an electric shock hazard when the unit is again plugged into the AC outlet. Wipe moisture off the unit with a dry cloth. Do not handle the power supply or the unit with wet hands.
- Use only genuine Venta Aromatherapy. Using non-Venta Aromatherapy will void the warranty.
Read and follow separate instructions and Warnings for Venta Water Treatment Additive, Venta Cleaner, and Venta Aromatherapy.
Please contact Venta Air Technologies Inc. at 888-333-8218 or www.venta-air.com/en_us/service/contact/ for additional information.
EASY SETUP GUIDE
WELCOME TO THE VENTA COMMUNITY!
Setting up your humidifier is much simpler than you would expect. Just follow these 7 steps and your humidifier will be up-and-running in less than 10 minutes!
1. UNPACKING
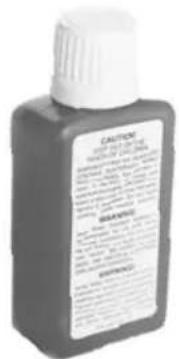
First things first, remove bottle(s) of Water Treatment Additive from the corner of your packaging (Only the AH550/AH555 models come with two sample sized bottles). Keep these handy as you'll need them in a bit. Unpack your humidifier setting the Styrofoam aside. You may want to return the Styrofoam to the box and keep the box for any future humidifier storage needs.
text_image
CAUTION FOR FUTTER TO THE HAPPYER'S EQUITY OF BUTTER HEARTLE MANNER FOR FUTTER TO THE HAPPYER'S EQUITY OF BUTTER HEARTLE MANNER FOR FUTTER TO THE HAPPYER'S EQUITY OF BUTTER2. EXAMINE YOUR HUMIDIFIER (PART 1)
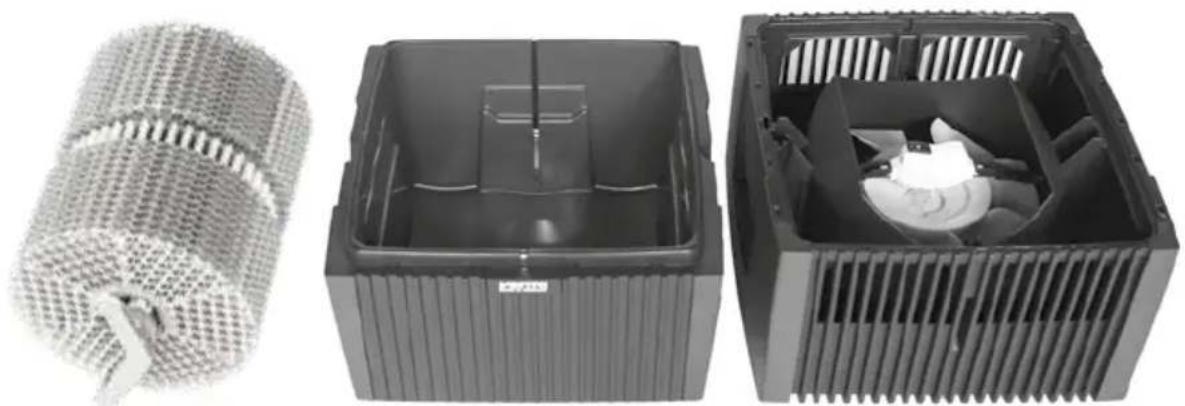
Check both the upper housing and the motor for any cracks or damages. If both are fine, place the motor back inside its housing, making sure to plug it back in as you do so. Close the upper housing, starting with the vented panels, and clip the tabs. Set the upper housing upside down.
natural_image
Three views of a black industrial fan or housing unit with internal compartments and ventilation grilles (no visible text or symbols)3. EXAMINE YOUR HUMIDIFIER (PART 2)
natural_image
Black plastic container with mesh filter and handle, no visible text or symbols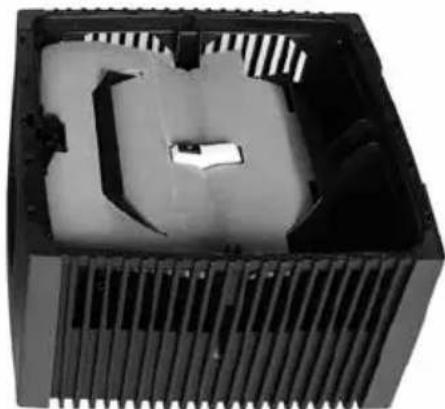
natural_image
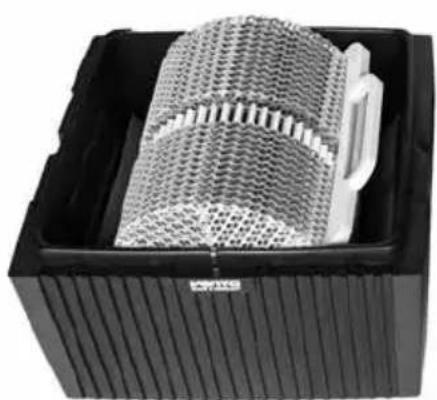
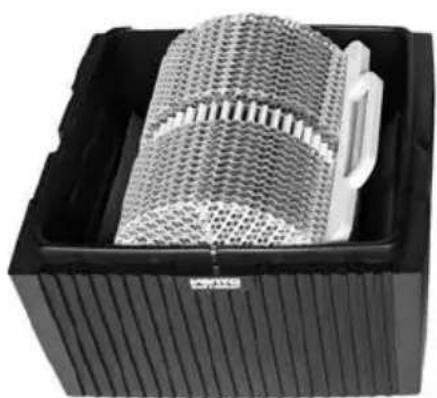
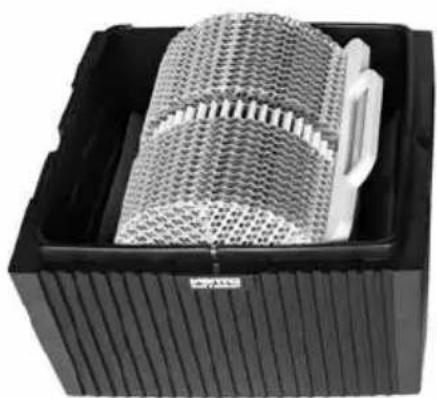
Interior view of a black plastic enclosure with internal components and ventilation slots (no text or symbols visible)Remove the disc stack(s) from the lower housing and set them aside. Remove the protective cardboard from the upper and lower housings. Check the lower housing and the disc stack(s) for any cracks or damages. If everything is fine, put the disc stack(s) back in the lower housing.
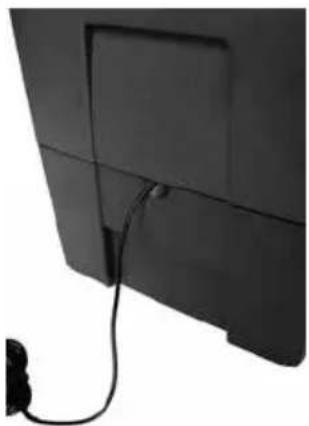
Remove the tie holding the power cord and place the upper housing on the lower housing, guiding the power cord out through the slot provided.
natural_image
Close-up of a black flat-screen monitor with visible screen and cable, no text or symbols presentPlease contact Venta Air Technologies Inc. at 888-333-8218 or info-us@venta-air.com if there is any damage to your unit.
4. OPENING THE HUMIDIFIER
natural_image
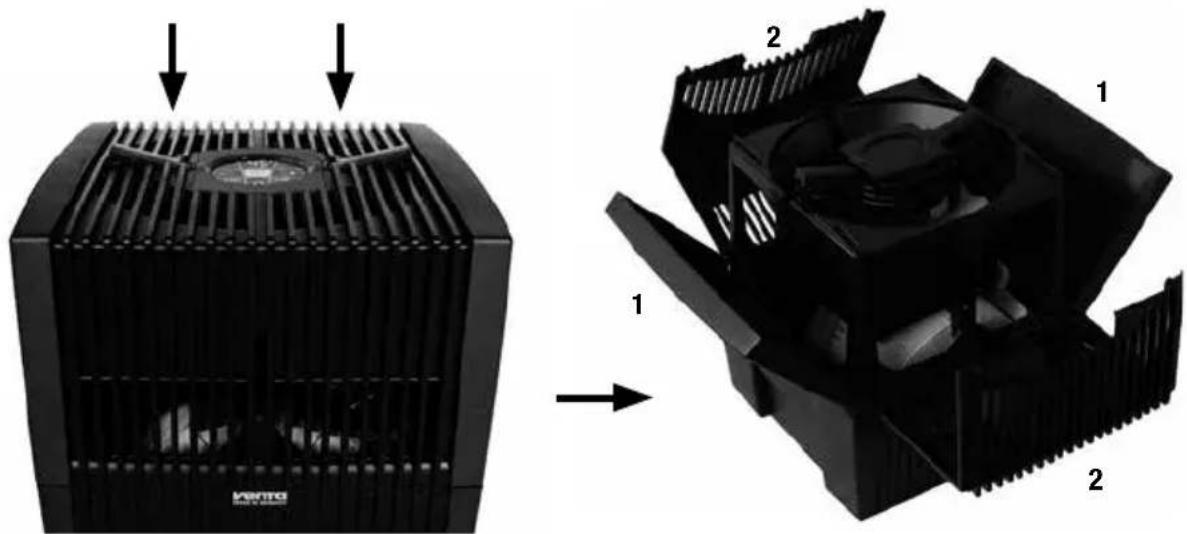
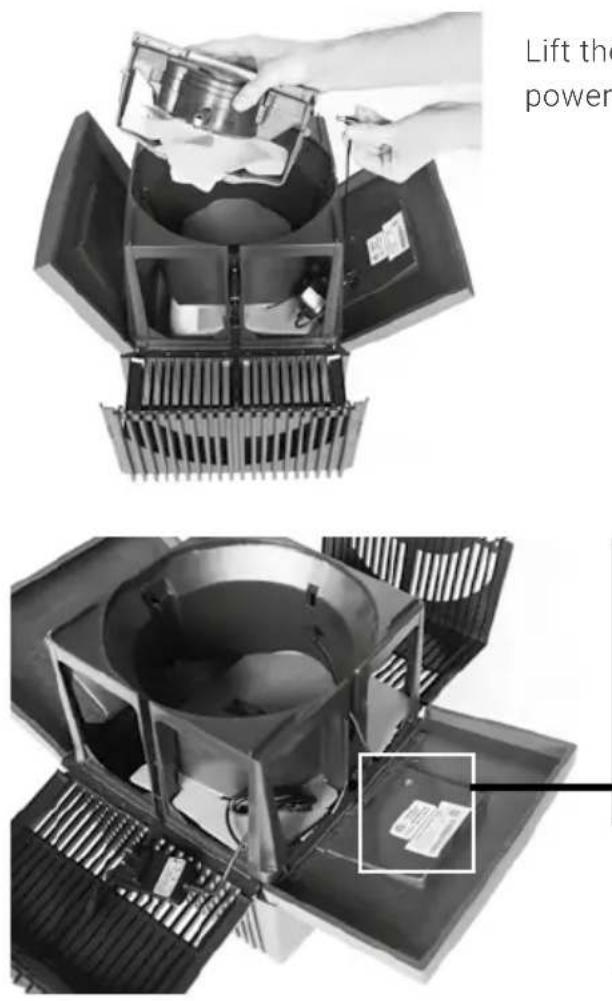
Diagram showing a heat exchanger with cooling fins and a computer monitor, both before and after assembly (no text or symbols present)Open the top of your humidifier by releasing the tabs on the control panel and opening the four panels, starting with the non-vented panels.
text_image
Lift the powerLift the motor out of the housing, remove the power cable, and set it aside for a moment.
natural_image
Close-up of a mechanical device with a central bowl and surrounding components, no visible text or symbols.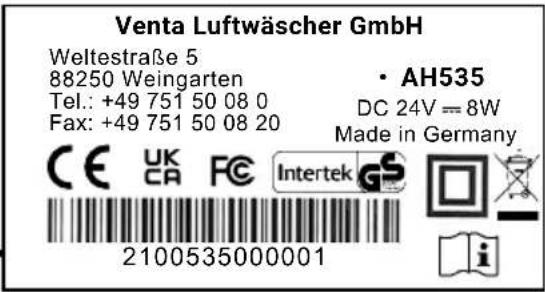
text_image
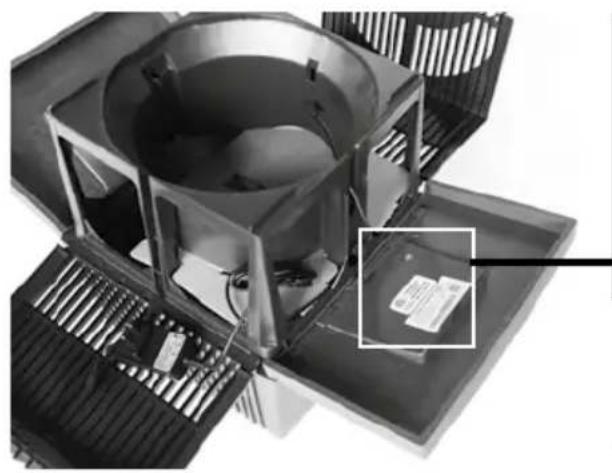
Venta Luftwäscher GmbH Weltestraße 5 88250 Weingarten Tel.: +49 751 50 08 0 Fax: +49 751 50 08 20 • AH535 DC 24V = 8W Made in Germany CE UK FC Intertek GS 2100535000001On the inside of one of the panels is a sticker with the serial number on it. Write this number down as you'll need it later!
5. SET IT UP

text_image
Correct Placement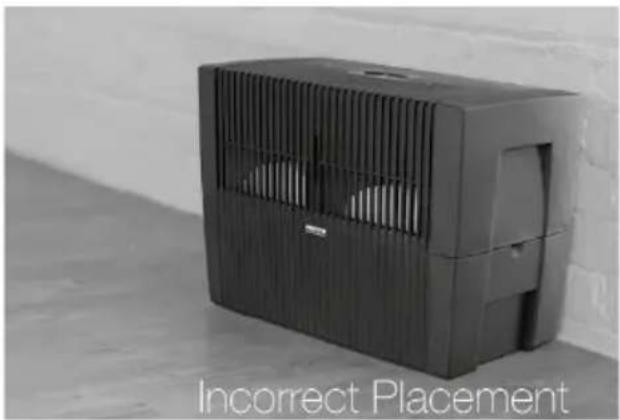
text_image
Incorrect Placement

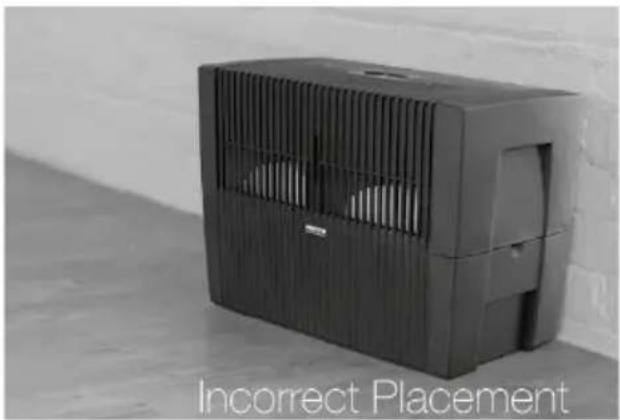
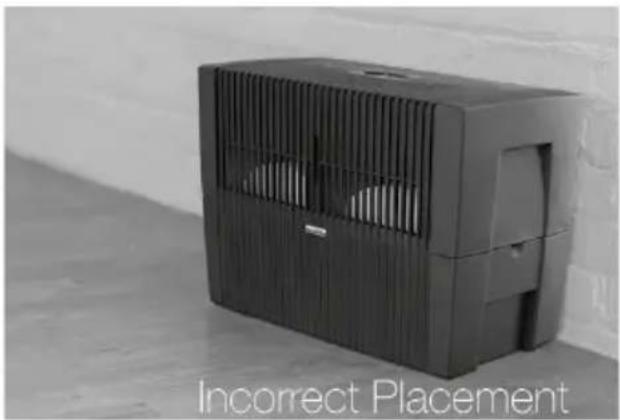
Now it's time to set up the humidifier. Find the place where you'd like your humidifier to live, making sure to place it properly for best results! Humidifier should be placed in a location with a minimum clearance of 18-20 inches, including above. Set the humidifier there, but don't yet plug the unit in.
text_image
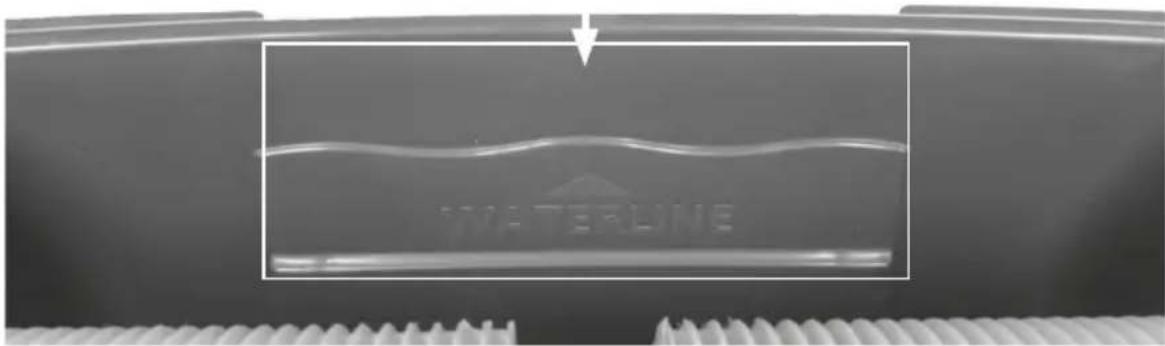
WATERLINERemove the upper housing from the lower housing and set it aside for a moment. Take the lower housing over to your sink/bathtub/water source and fill it with regular tap water up to the water line. Remember the bottle(s) of Water Treatment Additive? Go grab those and pour them into the water in the lower housing. Once it's filled, carry it back over to the upper housing.
Place the upper housing back onto the lower housing.
natural_image
Exterior view of a black heating fan unit with visible power cord and control panel (no text or symbols)6. TURN IT ON
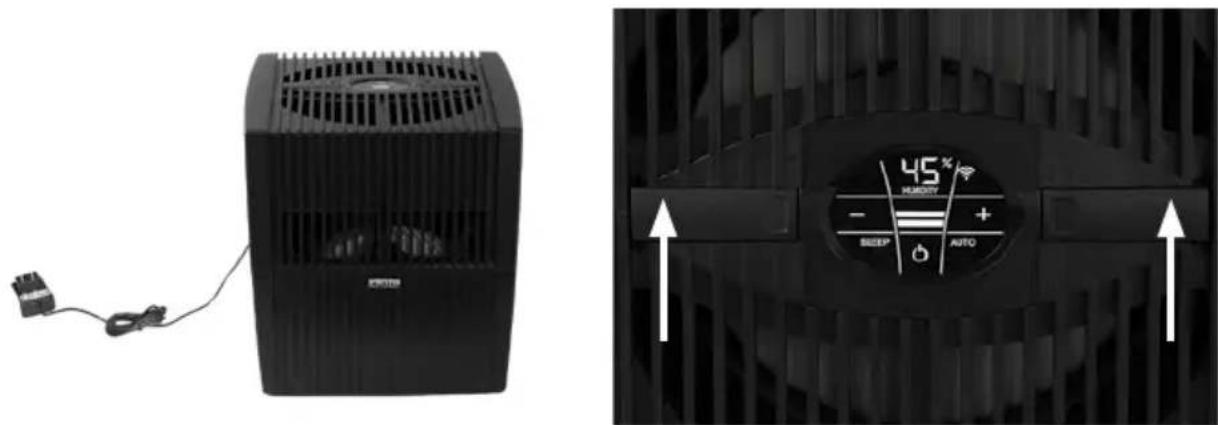
Plug the humidifier in, switch on device by briefly touching the power button in the display, set the power setting to the highest speed, and enjoy the fresh air! At the highest setting, the humidifier will need to run continuously for about 7–10 days to properly condition the room it is in. After that, you will notice the full impact of the humidifier upon the air in your home!

Only once the device is connected to the mains will the power button ⏻ glow to switch the device on and off.
7. ACTIVATE YOUR WARRANTY
Remember that serial number you wrote down earlier? Use that serial number to complete the registration card here in the manual to register your unit and activate your 2-year warranty!
Congratulations! Your humidifier is now fully functioning!
HELPFUL HINTS
- Dishwashers: The Venta Humidifier's lower housing, disc stack(s), and upper housing (first removing the motor assembly from the upper housing) can go into a dishwasher on the cool or rinse cycle. It is recommended that it not be washed with dishes. The motor assembly cannot be submerged in water or placed in the dishwasher. DO NOT USE detergent, mild soap, bleach, or household cleaners.
- Cleaning of disc stack(s): If a dishwasher isn't an option, cleaning the disc stack(s) can be done by soaking disc stack(s) in hot water with Venta Cleaner or white vinegar for approx. 30 minutes. This will help loosen any buildup of calcium or lime that may have accrued. Always rinse with warm water after cleaning.
- Vinegar and Water Solution: Should be either 50:50 or 3:1 ratio of white vinegar and water used instead of Venta Cleaner.
- Do not use the appliance in an environment with temperatures consistently over 95 degrees Fahrenheit.
Please contact Venta Air Technologies Inc. at
888-333-8218 or info-us@venta-air.com
DEAR CUSTOMER,
With the Original Connect series, you have purchased a high-performance humidifier, which gives you even more convenient operation with the addition of a touch display and Venta AirConnect compatibility.
The Smart Life App allows you to operate your appliances remotely as well as to access information. The Original Connect supports healthy humidity and the natural reduction of pollutants in the air.
Here's how the Venta principle works
A fan directs the ambient air into the water-filled humidifier, where it flows through specially arrayed disk stacks. Hygienically clean air evaporates from their surfaces into the room. Simultaneously, the disks trap harmful substances such as dust or pollen, which are then washed off in the water and collected in the humidifier.
Over half of all Venta Humidifiers are sold on the basis of recommendation by satisfied customers. Our goal is that you are completely satisfied and that you recommend the Venta Humidifier to your family and friends. If you have any questions or concerns, please contact us at 888-333-8218 or info-us@venta-air.com
MAIN COMPONENTS
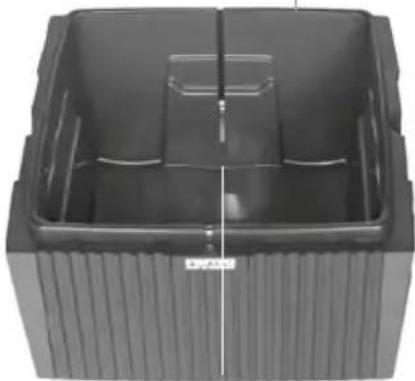
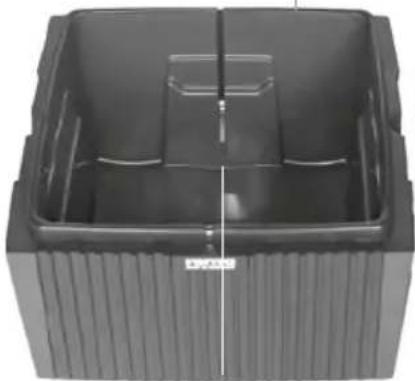
Disc Stack Handle

natural_image
Close-up of a textured cylindrical object with a pointed tip, possibly a mechanical or electronic component (no visible text or symbols)Disc Stack
natural_image
Black plastic container with ribbed side and central slot (no text or symbols visible)Water Level Sensor Strip
Upper HousingLower Housing

natural_image
Interior view of a black CPU fan with visible cooling fins and ventilation slots (no text or symbols)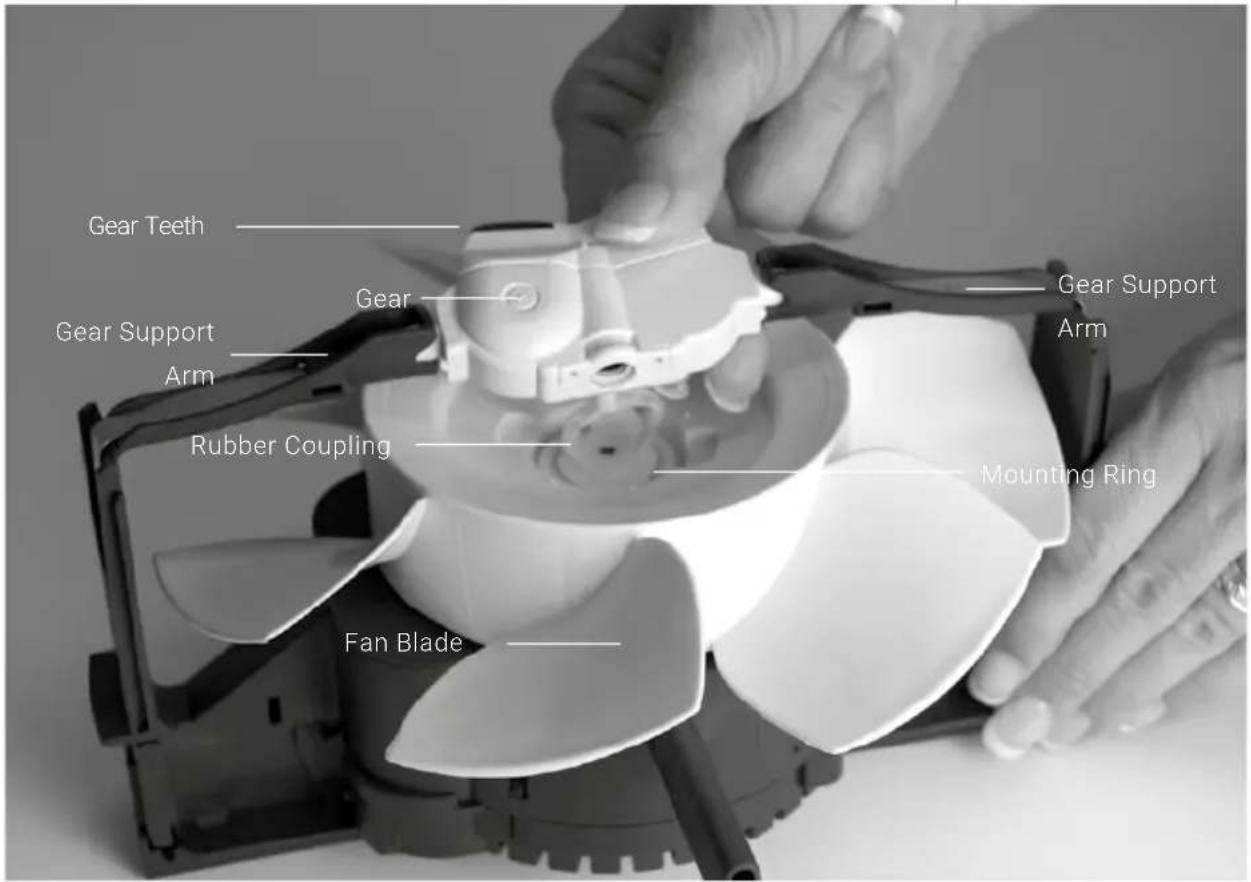
text_image
Gear Teeth Gear Support Arm Gear Gear Support Arm Rubber Coupling Mounting Ring Fan BladeDISPLAYS, FUNCTIONS & SETTINGS
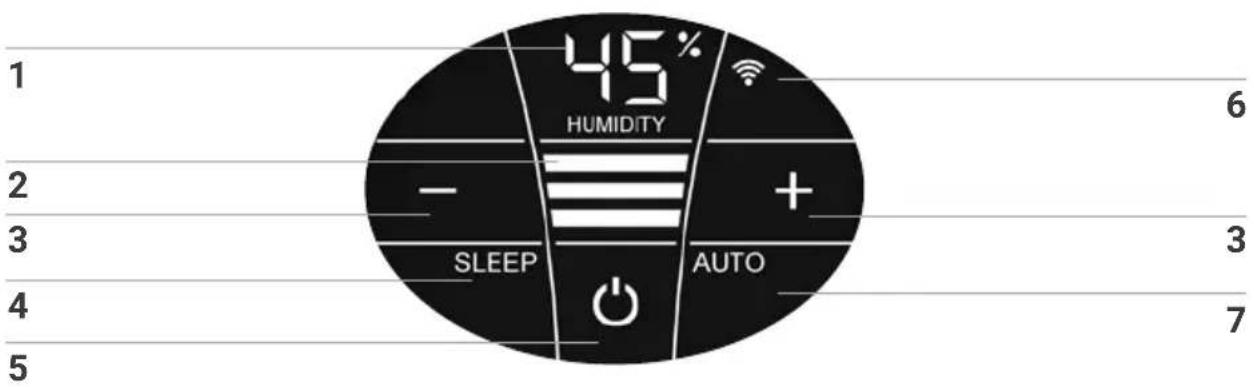
text_image
45% HUMIDITY SLEEP AUTO 1 2 3 4 5 6 + - 3 7Display Function
| 1 | Humidity | Display the humidity in the room (0 - 99 %).i If "UP" is displayed instead of humidity, the appliance is performing a firmware update. If the water level is low, the humidity display can be inaccurate.. |
| 2 | fan speed | Display fan speed 1 - 2 - 3. |
| 3 | - and + Set the | fan speed by tapping:- reduces and + increases the speed. |
| 4 | SLEEP | The Sleep mode switched on by a short touch and switched off again by touching for 3 seconds.On: The unit switches to speed level 1. Only the Sleep mode button and the on/off button lights up, with reduced brightness.By briefly touching the Sleep mode button, the following displays/functions are available for approx. 5 seconds:+ and - buttons for changing the speed level 1• WiFi can be switched on/offOff: To exit Sleep mode, press and hold the Sleep mode button for approx. 3 seconds. All displays/functions light up in normal brightness and are available. |
| 5 | Switch the device on or off by tapping the power button. |
Display Function
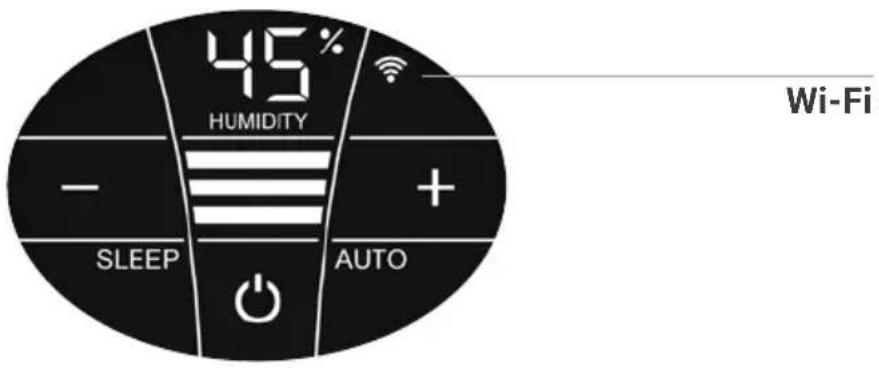
| 6 WIFI | Switch the WiFi connection on and off by tapping.Activate the HOTSPOT mode by touching and holding for 3-5 seconds. You will find a detailed description in the section "WiFi / hotspot". |
| 7 AUTO | Switch Automatic mode on or off by tapping the AUTO button.ON: In the display, AUTO flashes continuously and the appliance automatically regulates the power level according to the humidity in the room.When switching on AUTO, the desired humidity (50 % pre-set) flashes twice and then the measured humidity in the room is shown in the HUMIDITY display 1.When the preset humidity is exceeded by more than 5 %, the fan shuts off after approx. 60 sec. and no power level appears in the speed reading 2. No humidification occurs.OFF: AUTO in the display is continuously illuminated and the appliance operates with the power level set at 1 - 3.Set desired humidity 30 - 70 %:Hold AUTO button for 3-5 seconds. The HUMIDITY 1 display flashes continuously. Set the desired humidity (in 5 % increments) using the - or + buttons 3. Hold AUTO button for 3-5 seconds again until the flashing in display HUMIDITY 1 stops and the humidity measured in the room is shown again. Please make sure that automatic mode is switched on: AUTO flashes continuously in the display! |
WIFI / HOTSPOT
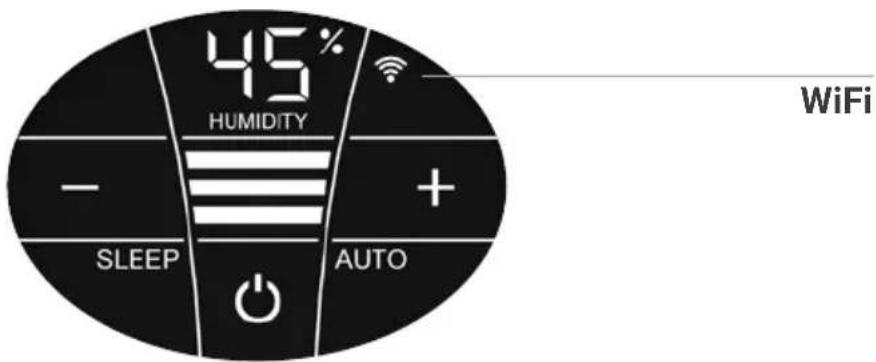
text_image
45% HUMIDITY - SLEEP AUTO WiFiDisplay Functions & settings
| Switch the WiFi connection on and off or (de)activate it by tapping the WiFi symbol. | |
| WiFi connection ON or activated. | |
| Illuminated | WiFi connection to the Venta server established. |
| Flashes slowly | WiFi connection to the local network established. |
| Flashes rapidly | WiFi connection disabled or waiting for WiFi connection. |
| Illuminated | The WiFi connection is OFF or deactivated. |
| The WiFi module does not send or receive any data and is not connected to any network or appliance. | |
| ... | The Venta appliance is in hotspot mode and is ready for the configuration or network setup. |
| The four individual segments of the WiFi symbol consecutively light up from the bottom to the top. | |
| The hotspot mode can be activated at any time during device operation by touching the WiFi symbol and holding it for 3-5 sec. |
CONFIGURATION & SMART LIFE APP
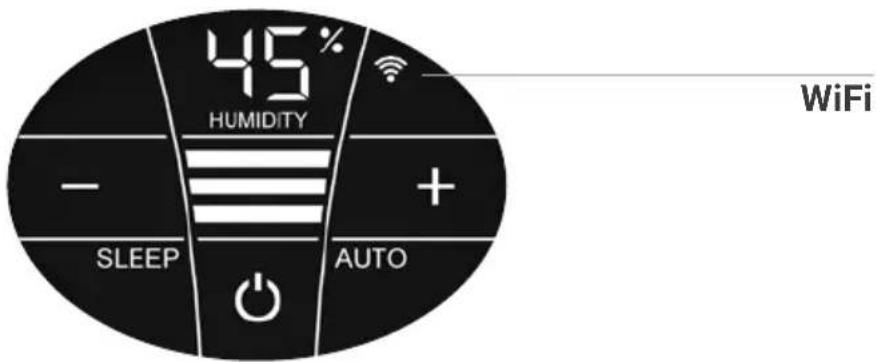
text_image
45% HUMIDITY - SLEEP AUTO WiFi1. Activate the hotspot mode on the Venta appliance
To do this, the four individual segments of the WiFi symbol in the appliance display must light up consecutively from bottom to top .

This mode is automatically activated the first time the appliance is operated.

The hotspot mode can be activated any time by touching and holding the WiFi symbol for 3-5 sec.
2. Activate WLAN on smartphone or tablet
Make sure that your smartphone or tablet is connected to your WLAN home network.
3. Set up WiFi
After you have downloaded and installed the "Smart Life – Smart Living" app, please open the app.
- Create a user account and log in.
- Tap "Add device" if your device appears in the app. Otherwise, tap +, "Add device", "Small
home appliance", "Humidifier (BLE +Wi-Fi)". Select your WiFi and enter the WiFi password.




Please make sure that ...
- the device is assigned a radio network in the 2.4 GHz band by your router.
• Unfortunately, radio networks in the 5 GHz band are not supported. - Your router supports 802.11b/g/n.
- iOS version 11.0 or higher or Android version 6.0 or higher is installed. If necessary, update the operating system of your smartphone or tablet.
CLEANING & MAINTENANCE
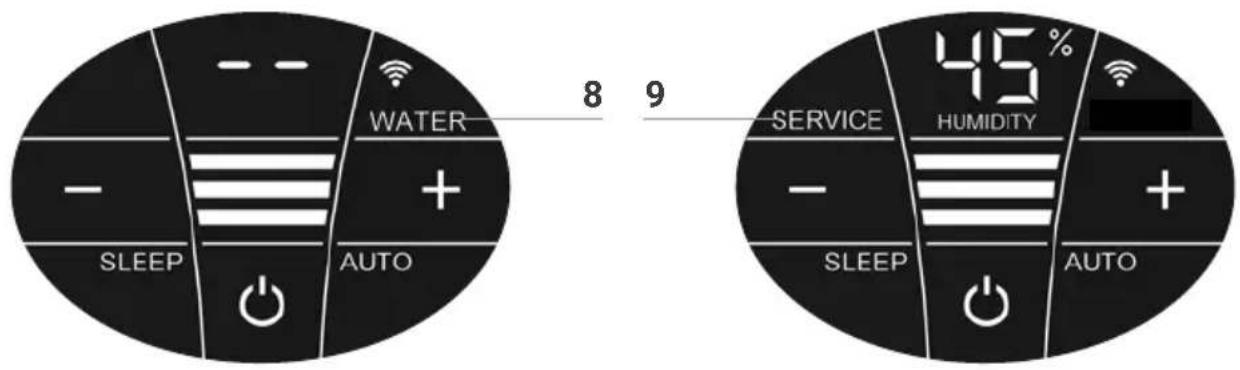
text_image
WATER 8 9 SERVICE 45% HUMIDITY SLEEP SLEEP AUTOAttention! Ensure that the device is switched off during any troubleshooting and the power supply is disconnected from the outlet!
Display Troubleshooting
8 WATER
Remove upper housing. Fill lower housing with tap water up to the WATERLINE marking. Place upper housing on lower housing and put device in operation again.

As soon as there is not enough water in the lower housing, the device is switched off automatically and the WATER display appears. In the HUMIDITY display 1, two lines will flash and the humidity in the room is not shown.

To humidify the room air continuously, we recommend refilling the water in a timely manner.
9 SERVICE
Remove upper housing. Drain residual water from lower housing. Rinse lower housing and disk stack. Fill lower housing with tap water up to the WATERLINE marking maximum and add the Venta Water Treatment Additive (WTA) (for dosage see scale on rear of bottle). Re-assemble the device. Touch SERVICE display 9 in the display and hold it for 3-5 seconds until it goes off.

For flawlessly hygienic continuous operation, the SERVICE display indicates a reminder every 14 days that it is time to clean your humidifier.

You may clean the humidifier even if the SERVICE message is not shown. Afterwards, simply touch SERVICE display 9 and hold for 3-5 seconds. The next reminder will now be shown again in 14 days with the SERVICE message
Any remaining liquid in the water tray and on the disk stack (white, green-yellow or brown deposits or discolorations) do NOT impair the function of the device.
TWICE A YEAR
Use the Venta Cleaner periodically to thoroughly clean the Venta Humidifier. See page 18 for instructions. Or if you prefer, Venta Air Technologies Inc. offers a professional cleaning through our Ultrasonic Cleaning Program.
Book online at https://www.venta-air.com/en_us/product/ultrasonic-cleaning/or call us toll free at 888-333-8218 for pricing and details.
ANYTIME
Add 2-4 capfuls of our specially formulated Venta Aromatherapy.
TRANSPORTATION
Warning! Always switch off the motor and unplug the power supply from the A/C outlet before moving the Venta Humidifier.
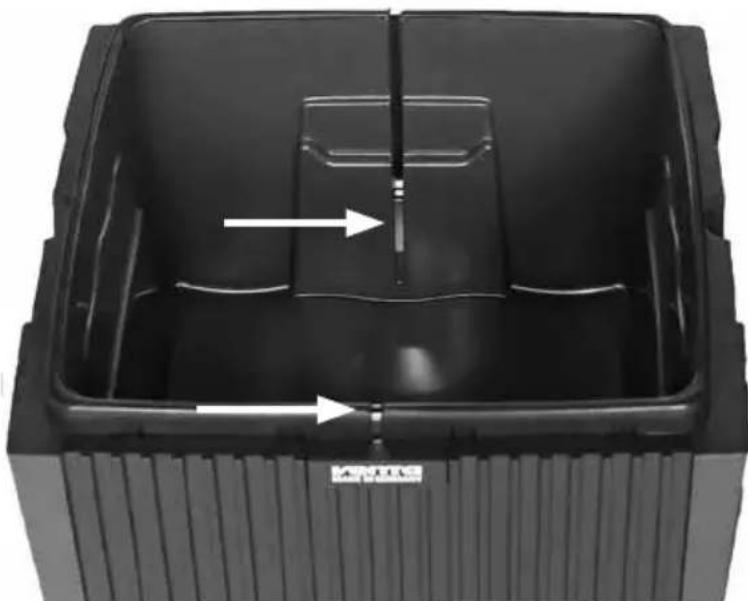
CLEANING THE METAL STRIPS
Periodically remove and scrub the thin metal contact strips that run down the inside of the lower housing unit of any visible deposits or buildup. Use a kitchen scrubbing pad or old toothbrush during the normal cleaning cycle to keep the unit running as designed.
natural_image
Interior view of a black plastic waste bin with internal compartments and directional arrows indicating flow or movement (no text or symbols)VENTA WATER TREATMENT ADDITIVE
APPLICATIONS
Venta Water Treatment Additive (WTA) is designed to maintain hygienic conditions in the lower housing and to keep the evaporation process functioning at the highest level. The use of WTA is recommended for the best performance and efficiency of your Venta Humidifier. Proper usage will prevent the formation of hard calcium deposits. Simply rinse and wipe out any sediment when changing the water. WTA serves three (3) purposes:
- It improves the performance of the humidifier by creating sheeting action on the disk(s) with the effect of increasing the amount surface area it covers.
- It helps remove calcium and lime buildup.
• It kills bacteria and mold.
DIRECTIONS
Fill lower housing with water daily or as needed. Every 10-14 days add a dose of WTA. The lower housing should be periodically rinsed and cleaned every 10-14 days. One dose of WTA is 3.5 fl. oz. which is equal to one black marking on the left side of the label.
CAUTION!
KEEP OUT OF REACH OF CHILDREN
EMERGENCY FIRST AID TREATMENT: Contains Quaternary Ammonium Chlorides. Eye and skin irritant. In the event of contact with eyes flush thoroughly with water. In the event of skin contact, rinse with water. Harmful if swallowed. Do not induce vomiting. Seek medical attention. Venta WTA is recommended for use with the Venta Humidifier only. Shelf life when stored in a cool location away from sunlight: 30 months. After opening, use within 12 months. WTA is not suitable for ultrasonic, heat vaporizing, or atomizing-type vaporizer humidifiers. Not suitable for Venta models with Hygiene Disc. CONTAINS: Water, wetting agents, softening agents, and preservatives.
WARNING! Venta WTA is not intended to be used with detergents, cleaning agents, or other chemicals. This will deactivate the additive. In cases when all water has evaporated, Venta WTA remains in the lower housing – it does not evaporate (like salt in sea water). Simply add more tap water and the WTA will activate. Venta Air Technologies Inc. is not responsible for damages caused by noncompliance with above directions and warnings.
To purchase products directly from Venta please shop online at www.venta-air.com/en_us/products/ or call toll-free 888-333-8218.
You can also contact us by email: info-us@venta-air.com
VENTA CLEANER
Use every six months or more frequently if needed.
- For thorough cleaning, fill lower housing with water before adding the entire contents of the bottle. Run the appliance on the lowest setting for approximately two hours.
- Empty lower housing and rinse disc stack(s) and lower housing with warm water.
- Fill lower housing with water and add one dose of WTA.
CAUTION! KEEP OUT OF REACH OF CHILDREN
EMERGENCY FIRST AID TREATMENT: In the event of contact with eyes flush thoroughly with water. In the event of skin contact, rinse with water. Contains: Water and citric acid.
WARNING! Venta Cleaner is recommended for use with the Venta Humidifiers and Airwashers only. Shelf life when stored in a cool location away from sunlight: 30 months. After opening, use within 12 months. Venta Cleaner is not suitable for ultrasonic, heat vaporizing, or atomizing-type vaporizer humidifiers.
Venta Cleaner is not intended to be used with detergents, cleaning agents, or other chemicals. Venta Air Technologies Inc. is not responsible for damages caused by noncompliance with above directions and warnings.
VENTA AROMATHERAPY
Distinctive aromatherapy blends are specially formulated for your Venta humidifier and are water soluble. Not suitable for Venta models with Hygiene Disc.
DIRECTIONS
Add 2-4 capfuls of aromatherapy oil directly to the water in the lower housing.
Effectiveness: Depending on room size, about 2-4 hours.
CAUTION! KEEP OUT OF REACH OF CHILDREN
COMBUSTIBLE: Keep away from flame and heat.
EYE AND SKIN IRRITANT: Avoid contact with eyes, skin, and clothing.
Prolonged contact with skin may cause allergic reaction.
DO NOT ingest.
FIRST AID TREATMENT: If in eyes, immediately flush eyes with water and seek medical attention. If on skin, wash with soap and water. If swallowed,
DO NOT: induce vomiting. Rinse mouth with water and call a physician or poison control center immediately.
CONTAINS: Fragrance oils. Wash hands after handling.
ADDITIONAL INFORMATION
| Model | AH510 / AH515 | AH530 / AH535 | AH550 / AH555 |
| Coverage* ≤ 375 sq.ft. ≤ 485 sq.ft. ≤ 645 sq.ft. | |||
| Interactive touch display Standard | |||
| App control Standard WiFi | |||
| Colors brilliant white / brilliant black | |||
| Speeds 3 + Automatic | |||
| Sound level (speeds 1-3) | 24/34/44 dB(A) | 24/34/44 dB(A) | 24/35/45 dB(A) |
| Energy consumption (speeds 1-3) | ~3 - 5 - 8 watts | ||
| Mains voltage | 100-240 V, 50 / 60 Hz | ||
| Water reservoir (max.) | 1.1 gallons | 1.5 gallons | 2.2 gallons |
| Dimensions (L × W × H) | 10.2 × 11 × 12.2 in | 11.8 × 11.8 × 13 in | 17.7 × 11.8 × 13 in |
| Weight (empty) | ~6.6 lb. | ~7.7 lb. | ~11.5 lb. |
| WLAN frequency range | 2.4 GHz | ||
| WLAN transmission power | maximum 20 dBm | ||
* based on standard 8-foot ceilings. May be subject to modifications and errors
TROUBLESHOOTING
WHAT HAPPENS IF...?

Ensure that the device is switched off during any measures and the power supply is disconnected from the outlet!
... the appliance does not function?
- Power supply not connected.
- Cable connector not plugged in and latched into drive unit.

- Connect power supply to main socket, switch on appliance.
- Plug main cable connector into drive unit until it latches.
... the motor does not start?
The thin metal contact strips that run down the inside of the lower housing unit have a buildup of mineral deposits.

- Clean metal strips.
- Wipe dry (see also "Maintenance and Cleaning").
... there is clicking noise?
- Mineral deposit contamination.
- Rubber coupling is not inserted all the way into the gear.

-
Clean black gear prongs with toothbrush.
-
Remove gear and reinsert securely.
- Call Customer Service: 888-333-8218
... there is wetness around the appliance?
Water has overflowed in between the double moldings of the lower housing.

Turn the empty lower housing upside down to dry. Allow 24 hours to dry.
... the disc stack(s) does/do not turn?
The rubber coupling is not securely inserted into the gear.

Check that the rubber coupling is properly inserted into the bottom of the gear.
... E1 is shown in the display?
The device has switched off automatically because the locking buttons on the upper housing are not closed properly.

Close upper housing properly again by pushing on the outer ends of locking buttons. Switch device on and off with the power button ⏻.
... E2 is shown in the display?
The device has switched off automatically, because the motor is overstrained (e.g. through the intrusion of foreign objects or similar).

Measure: Remove upper housing. Check whether the disk stack in the lower housing as well as fan blades in the upper housing are freely movable. Next, place the device in operation.
... white spots appear in the background when you touch the display?
In dry rooms, electrostatic charging can cause white areas to appear in the background on the display. These do not affect the functioning or ability to control the appliance and do not constitute a defect.
... the power button ⏻ to switch on the device does not appear in the display?
Please check whether the power supply is connected to the mains.
... the power button ⏻ to switch on the device does not appear in the display, even though the power supply is plugged in?
Please check whether the power supply is firmly plugged into the drive unit

Measure: Remove upper housing. Check correct seating. Next, place the device back in operation.
... WATER is shown in the display, even though there is water in the lower housing?
Please check whether there is sufficient water in the lower housing and/or whether the upper housing is placed correctly on the lower housing.

Measure: Remove upper housing. Fill lower housing with tap water to the WATERLINE marking. Place upper housing correctly on lower housing. The power supply may not
be jammed between the upper and lower housings. Next, place the device back in operation.
FREQUENTLY ASKED QUESTIONS
HOW DOES THE VENTA DEVICE HUMIDIFY?
The Venta Humidifier operates by the process of cold evaporation, so you will not see any residue, vapors, or mists. The disc stack(s) rotate(s) in the water creating a very large evaporation surface area. When dry air meets the surface area of the disc stack(s), the water evaporates and is sent out into the room. By using the cold evaporation process, any excess humidity can be virtually ruled out.
WHAT LEVEL OF HUMIDITY CAN BE EXPECTED AND HOW OFTEN SHOULD THE LOWER HOUSING BE FILLED?
Under ideal conditions, a humidity level of 40–60 % can be expected. Some factors affecting humidity level are: heating/cooling, home insulation, layout of the home, air circulation, and the amount of water in the appliance. For severely dry areas or during the first days of use, you may notice the water evaporates more quickly and/or a lower humidity level will be reached. The water level of the lower housing should be checked and topped off daily.
WHEN IS THE BEST TIME TO RUN THE VENTA HUMIDIFIER?
Always! The Venta Humidifier is designed to be a year-round, 24/7 product. Because we wanted it to run year-round, we made the humidifier's power consumption as minimal as possible. For the best results, your humidifier should never be turned off or stored for long periods of time.
WHERE IS THE BEST PLACE FOR THE VENTA HUMIDIFIER?
If possible, the Venta Humidifier should be placed in the center of the room, or along a wall away from windows and a heat source. When using your Venta Humidifier for multiple rooms (larger model Venta Humidifiers) it should be placed centrally between rooms. Allow 18-20 inches above and on either side of the Venta Humidifier to allow air circulation.
WILL OPENING OUTSIDE DOORS AND WINDOWS AFFECT THE EFFICIENCY OF THE VENTA HUMIDIFIER?
The appliance works best in closed rooms to maintain a consistent level of humidity. Just as windows and doors are closed when air conditioning is running, doors between rooms may be left open to allow for air circulation.
IS IT NECESSARY TO USE THE VENTA WATER TREATMENT ADDITIVE?
The WTA helps prevent mineral deposits from becoming too difficult to remove so that any sediment can be rinsed out. In addition, the WTA helps improve the efficiency of the humidifier by allowing the water to sheet on the disk stack(s) instead of "beading" up, allowing maximum use of every square inch of the disk stack(s). The WTA also helps prevent odors and improves the performance of the Venta Humidifier. Not suitable for VENTA models with Hygiene Disc.
SHOULD MORE WATER TREATMENT ADDITIVE BE ADDED WHEN THE APPLIANCE HAS SWITCHED OFF AUTOMATICALLY AND THE WATER DISPLAY APPEARS?
No, because the ingredients of the WTA do not evaporate. Simply add fresh water to reactivate the WTA. One dose will help keep the humidifier from scaling up with mineral deposits up to 14 days.
WHAT HAPPENS WHEN THE VENTA HUMIDIFIER HAS NOT BEEN RUN FOR AN EXTENDED PERIOD OF TIME?
Simply give the appliance a general cleaning with the Venta Cleaner before using it again. Tip: Use of the Venta Cleaner is recommended before storing the appliance for an extended period of time to remove any mineral deposits that can harden over time. Or take advantage of Venta Air Technologies' Ultrasonic Cleaning service. Book online at https://www.venta-air.com/en_us/product/ultrasonic-cleaning/ or call us toll free at 888-333-8218 for pricing and details.
MY VENTA HUMIDIFIER APPEARS TO NOT BE HUMIDIFYING MY ROOM AS DESIRED
Our goal is to achieve 100% customer satisfaction. Initial product performance is largely based on the total coverage area including hallways, stairways, and other spaces that cannot be closed off, as well as the overall humidity level of the contents of the room. Dry furnishings (textiles, leather, wood, books, etc.) will require a longer period of time to absorb moisture until their humidity level is increased to a satisfactory level. Therefore, we highly recommend that you take this into consideration when evaluating the performance of your product. Dry rooms can take 7-10 days of continuous humidification to achieve an optimal humidity level. It's important that you are adding water to your unit regularly. In the event that you are dissatisfied with the performance of your product, please call us.
Did we not answer your question? Contact us at www.venta-air.com/en_us/service/contact/ or call toll-free 888-333-8218. You can also contact us by email: info-us@venta-air.com
SERVICING YOUR HUMIDIFIER
CLEANING THE GEAR
DO NOT submerge the gear in water. To clean any buildup of calcium or lime from the gear "teeth," brush with a soft bristled brush. The gear teeth should be pointed toward the floor while brushing, otherwise deposits will fall into the gear and cause it to malfunction.
REMOVAL OF THE GEAR AND COUPLING
- Switch the unit off.
- Unplug the power cord from the outlet.
- Remove the motor from the upper housing.
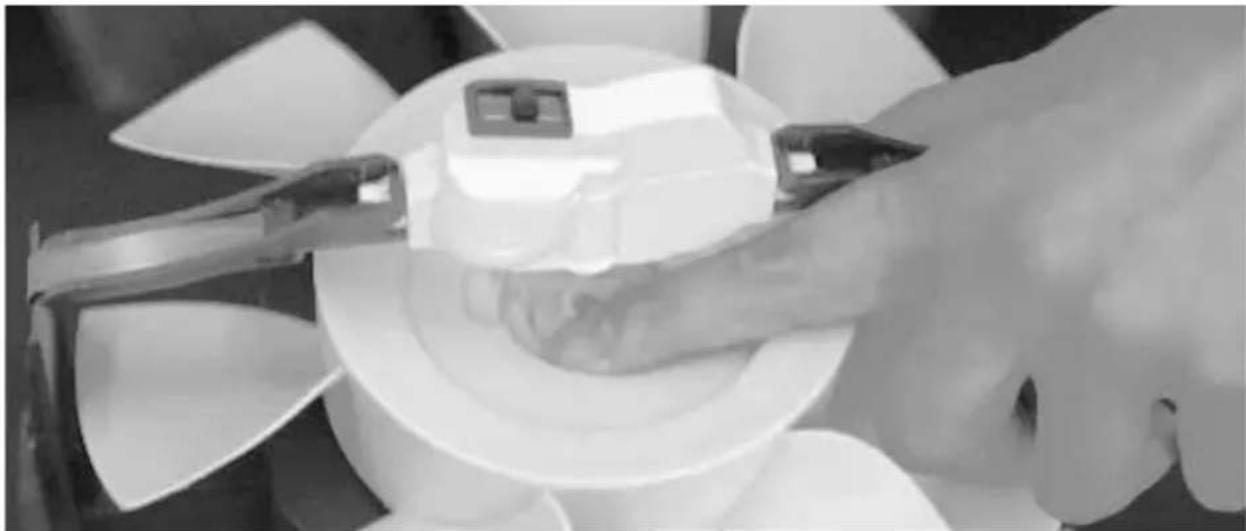
- Remove the coupling from the gear by pushing the coupling down toward the fan and away from the gear
-
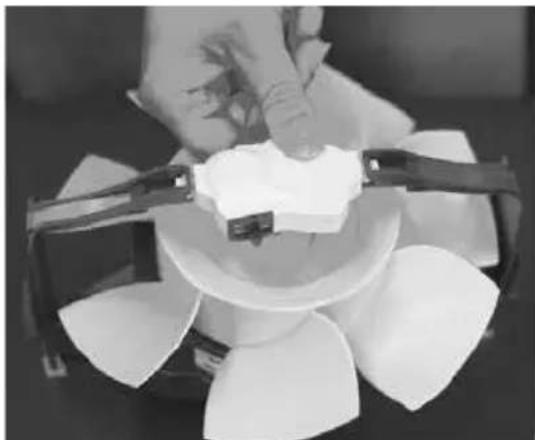
Pivot turn the gear 90 degrees, so that it is laying on its side.
-
Gently pull one of the two motor assembly arms approximately 1/8 of an inch away from the gear and remove the gear from the motor assembly.
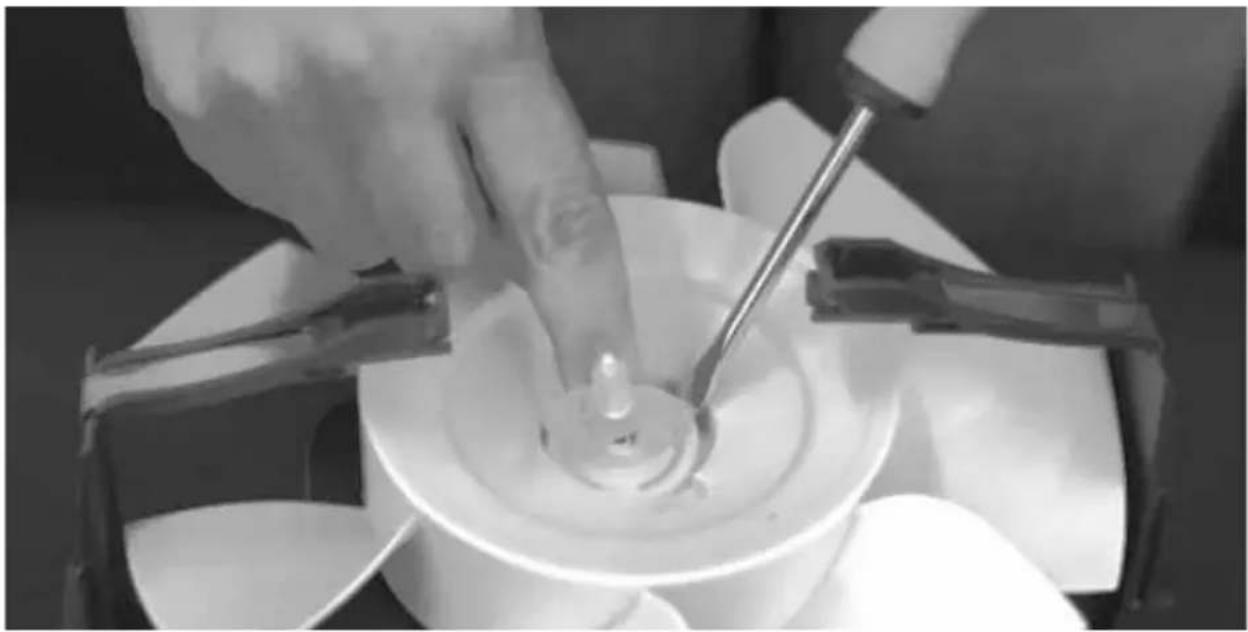
- Remove the locking ring from the center shaft of the fan by prying it up using a small screwdriver.
natural_image
Close-up of a hand using a tool to adjust or install a propeller component (no visible text or symbols)Fig 4. ... Push the coupling down ...
natural_image
Close-up of a hand holding a white object over a multi-colored fan-shaped object (no text or symbols visible)
natural_image
Close-up of hands assembling a white plastic turbine fan component (no visible text or symbols)Fig 5. ... turn the gear 90 degrees ... Fig 6. ... gently pull one of the motor assembly arm 1/8 inch ...
Fig 7. Remove the locking ring ... prying it up using a small screwdriver ...
natural_image
Close-up of hands using a tool to generate a circular object in a white bowl (no visible text or symbols)REPLACING THE GEAR AND COUPLING
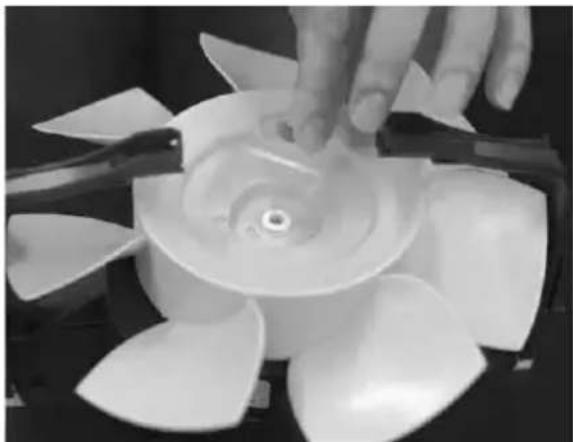
A. Place the rubber coupling into the locking ring so the rubber feet from the coupling hang below the ring. When placing the coupling and ring on the center shaft of the fan, the rubber feet should line up with the notch marks on the fan. Snap the ring and coupling into place.
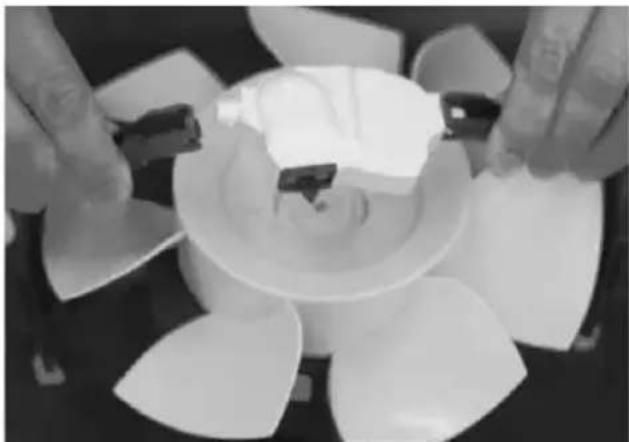
B. With the gear laying on its side, place it between the motor housing arms that suspend it above the fan.
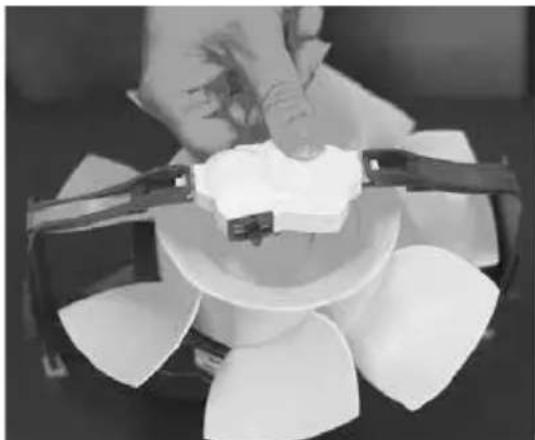
C. While placing the palms of your hands against the motor assembly arms, apply slight pressure, and pivot the gear to the upright position. Check that the locking knob is properly seated in the support arm.
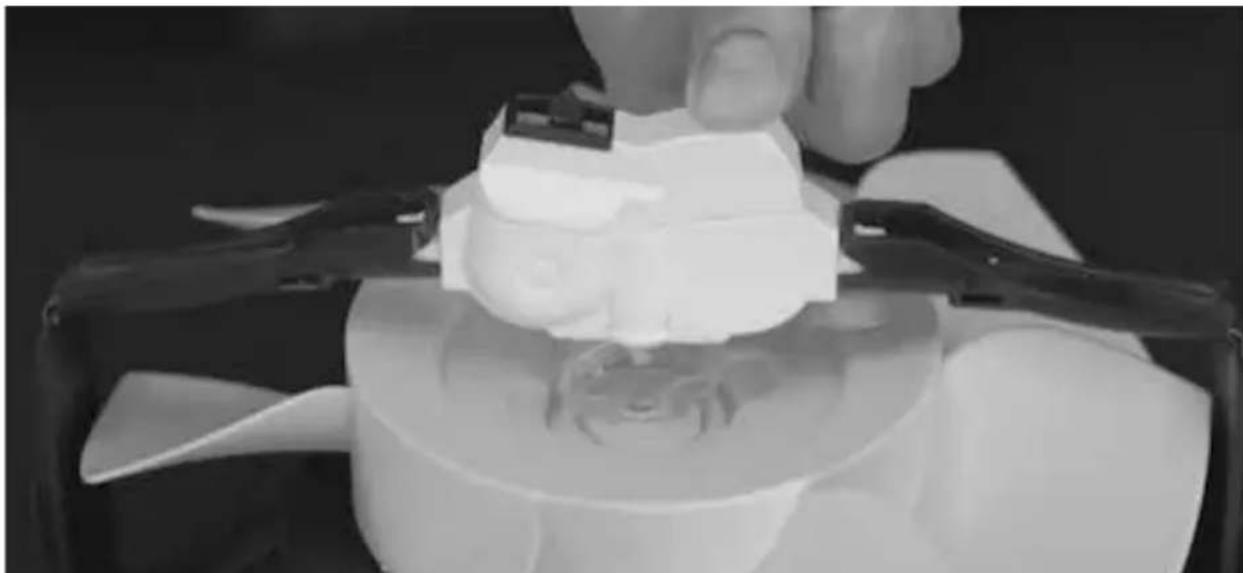
D. Insert the rubber coupling into the bottom of the gear and push it up into the gear until it fits tight. On models with a small white pin, first insert the pin through the rubber coupling and then push both up into the gear until it fits tight. Check that this is properly seated by spinning the fan with your hand. The teeth in the gear should slowly move in and out.
natural_image
Close-up of a hand using a propeller to lift a turbine impeller (no text or symbols visible)A.... Place the rubber coupling into the locking ring ...
natural_image
Close-up of hands assembling white plastic components on a circular surface (no text or symbols visible)B.... place it between the motor housing arms...
natural_image
Close-up of a gloved hand using a 3D-printed robotic device to press or inspect a transparent container (no visible text or symbols)Fig D. ... and push it up into the gear until it fits tight ... models with a small white pin, first insert the pin through the rubber coupling and then push both up into the gear until it fits. Step-by-step video tutorials of this process can be found at https://www.venta-air.com/en_us/service/tutorials/.
ADDITIONAL SERVICE OPTIONS
If you prefer Venta to handle your concern, warranty repair, or if you wish to utilize the Ultrasonic Cleaning service for your Venta Humidifier, please call our customer service department toll-free at 888-333-8218 to obtain a Return Merchandise Authorization (RMA) number and pricing.
For products purchased in the United States, carefully package the product in its original packaging and send it using the shipping label provided by Venta support.
ULTRASONIC CLEANING
- This optional service removes the buildup of dirt, lime, and calcium that may have accrued over time. We will replace the gear box and rubber coupling. The result is a clean, sanitized Venta Humidifier that will continue to humidify and cleanse your air. The cost of this optional service includes the cleaning itself as well as the roundtrip shipping fees.
- Using adequate packing material, pack the unit inside a suitable shipping box.
• We will email you a prepaid mailing label. You can then print out the label on your home printer or we can mail you a prepaid label.
- Drop the package off at any licensed UPS facility or you can have your shipment picked up from your home or office by contacting UPS customer service directly. Please note there may be an additional fee implemented by UPS for this service.
TWO-YEAR LIMITED WARRANTY
CALL VENTA CUSTOMER SERVICE TO TROUBLESHOOT ANY ISSUES, BEFORE ATTEMPTING TO RETURN PRODUCT TO RETAILER.
If you have any questions regarding this warranty, please call 888-333-8218 or write to:
Venta Air Technologies, Inc.
North America Headquarters
1952 McDowell Rd, Suite 204
Naperville IL 60563
For product registration, please submit your information online at www.venta-air.com/en_us/service/product-registration/
Venta warrants that for a period of 2 years from the date of purchase, this product will be free from defects in material and workmanship. Venta, at its option will repair or replace this product or any mechanical parts of the product to be defective during the warranty period. Replacement will be made with a new or remanufactured product or component. If the product is no longer available, replacement may be made with a similar product of equal or greater value. This is your exclusive warranty. This warranty is valid for the original retail purchaser from the date of initial retail purchase and is not transferable.
Please submit online at www.venta-air.com/en_us/service/product-registration/to activate your warranty. Also keep the original sales receipt, as proof of purchase is required to obtain warranty.
This warranty does not cover normal wear of parts or damage resulting from any of the following: Negligent use or misuse of the product, use on improper voltage or current, use contrary to the operating instructions, disassembly, repair, or alteration by anyone other than Venta Air Technologies Inc. Further, the warranty does not cover Acts of God, such as fire, flood, hurricanes, or tornadoes.
Venta shall not be liable for any incidental or consequential damages caused by the breach of any express or implied warranty. Except to the extent prohibited by applicable law, any implied warranty of merchantability, or fitness for a particular purpose is limited in duration to the duration of the above warranty. Some states, provinces, or jurisdictions do not allow the exclusion or limitation of incidental or consequential damages or limitations on how long an implied warranty lasts, so the above limitations or exclusions may not apply to you. This warranty gives you specific legal rights, and you may also have other rights that vary from state to state.
HUMIDIFICATEUR VENTA MODE D'EMPLOI
POUR LES MODÈLES
AH510 / AH515 / AH530 / AH535 / AH550 / AH555
LIRE ET CONSERVER CES INSTRUCTIONS
TABLE DES MATIÈRES
natural_image
Three views of a black industrial fan or compressor unit with internal components, shown from top, front, and side (no text or symbols visible)3. CONTRÔLE DE L'HUMIDIFICATEUR (PARTIE 2)
natural_image
Black plastic container with mesh filter and a white handle, no visible text or symbols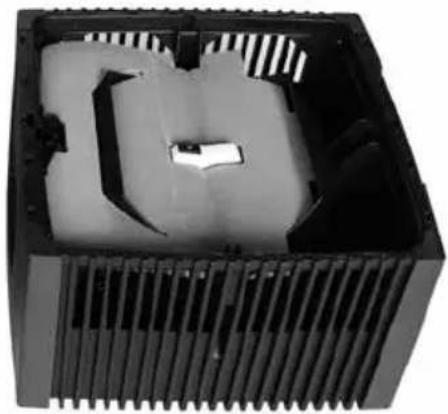
natural_image
Interior view of a black plastic electronic device with internal components and ventilation slots (no visible text or symbols)natural_image
Close-up of a black flat-screen monitor with a cable inserted, showing no text or symbols on the screen or side.natural_image
Diagram showing a heat exchanger with cooling fins and a computer monitor, both before and after assembly (no text or symbols present)text_image
Correct Placement
text_image
Incorrect Placement
natural_image
Exterior view of a black heating fan unit with visible air vent, power cord, and digital display (no text or symbols on main body)6. MISE EN MARCHE
natural_image
Close-up of a textured cylindrical object with a central slot and patterned surface (no visible text or symbols)Pile de disques
natural_image
Black plastic container with ribbed side and central slot (no text or symbols visible)natural_image
Interior view of a black CPU fan with visible cooling fins and ventilation slots (no text or symbols)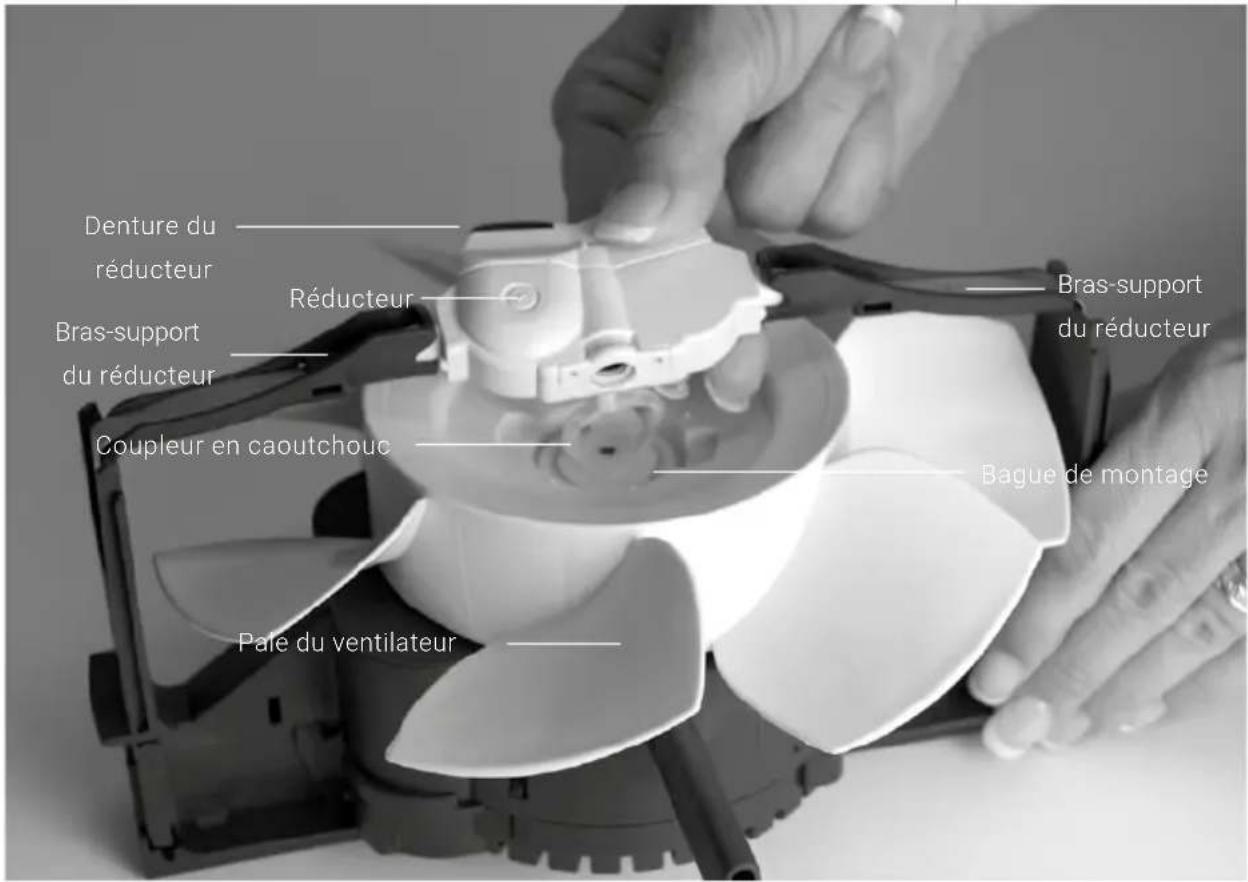
INDICATIONS, FONCTIONS & RÉGLAGES

text_image
1 2 3 4 5 45% HUMIDITY - SLEEP AUTO + - 6 3 7Indication Fonction
WI-FI / POINT D'ACCÈS
text_image
45% HUMIDITY Wi-Fi - + - SLEEP AUTOtext_image
WATER 8 9 SERVICE 45% HUMIDITY SLEEP SLEEP AUTO
natural_image
Interior view of a black plastic waste bin with internal compartments and directional arrows indicating flow or movement (no text or symbols)ADDITIF DE TRAITEMENT DE L'É AU V E N TA
APPLICATIONS
natural_image
Close-up of hands operating a white fan-shaped device with a small inset showing a component (no visible text or symbols)Fig 4. ... Enfoncez le coupleur ...
natural_image
Close-up of a hand holding a white object over a multi-colored fan-shaped object, possibly a mechanical or electronic component (no visible text or symbols)natural_image
Close-up of hands assembling a mechanical component with a fan-like structure (no visible text or symbols)natural_image
Close-up of hands using a tool to generate a small object in a white bowl (no visible text or symbols)REMPLACEMENT DU RÉDUCTEUR ET DU COUPLEUR
natural_image
Close-up of a hand operating a large propeller with multiple blades (no visible text or symbols)natural_image
Close-up of hands holding a white plastic cup with metal clips, surrounded by scattered paper fragments (no text or symbols visible)natural_image
Close-up of a gloved hand using a 3D-printed robotic device to press or inspect a transparent container (no visible text or symbols)North America Headquarters
1952 McDowell Rd, Suite 204
Naperville IL 60563
text_image
CAUTION FOR ALL OF THE WATERMICALS, 100% PROFESSIONAL AND OTHER WARNING: Please note that you want to use the BUTTERMICALS. Please note that you want to use the BUTTERMICALS. Please note that you want to use the BUTTERMICALS. Please note that you want to use the BUTTERMICALS. Please note that you want to use the BUTTERMICALS. Please note that you want to use the BUTTERMICALS. Please note that you want to use the BUTTERMICALS. Please note that your bottle is used in the BUTTERMICALS. Please note that your bottle is used in the BUTTERMICALS. Please note that your bottle is used in the BUTTERMICALS. Please note that your bottle is used in the BUTTERMICALS. Please note that your bottle is used in the BUTTERMICALS. Please note that your bottle is used in the BUTTERMICALS. Please note that your bottle's usage is used in the BUTTERMICALS. Please note that your bottle's usage is used in the BUTTERMICALS. Please note that your bottle's usage is used in the BUTTERMICALS. Please note that your bottle's usage is used in the BUTTERMICALS. Please note that your bottle's usage is used in the BUTTERMICALS. Please note that your bottle's usage is used in thenatural_image
Three views of a black industrial fan or compressor unit with internal components, shown from top, side, and front angles (no text or symbols visible)3. EXAMINE EL HUMIDIFICADOR (2. ^a PARTE)
natural_image
Black plastic tray holding a mesh filter device with a handle, no visible text or symbols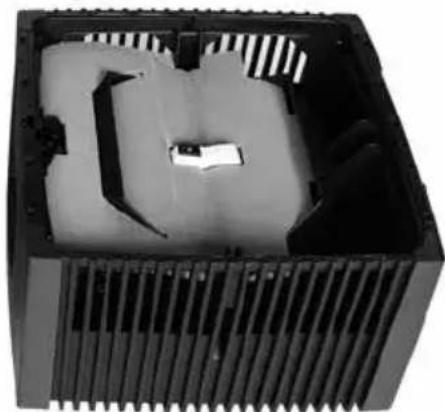
natural_image
Interior view of a black plastic heat exchanger housing with cooling fins and internal slots (no text or symbols visible)natural_image
Close-up of a black flat-screen monitor with cable inserted, no visible text or symbolsnatural_image
Diagram showing a heat exchanger with cooling fins and a computer tower, both before and after assembly (no text or symbols present)text_image
Correct Placement
text_image
Incorrect Placement
natural_image
Exterior view of a black heating fan unit with visible power cord and control panel (no text or symbols)6. CONÉCTELO
natural_image
Close-up of a textured cylindrical object with a pointed tip, possibly a mechanical or electronic component (no visible text or symbols)Bloque de placas circulares
natural_image
Black plastic container with ribbed side and central slot (no text or symbols visible)natural_image
Interior view of a black CPU fan with visible cooling fins and ventilation slots (no text or symbols)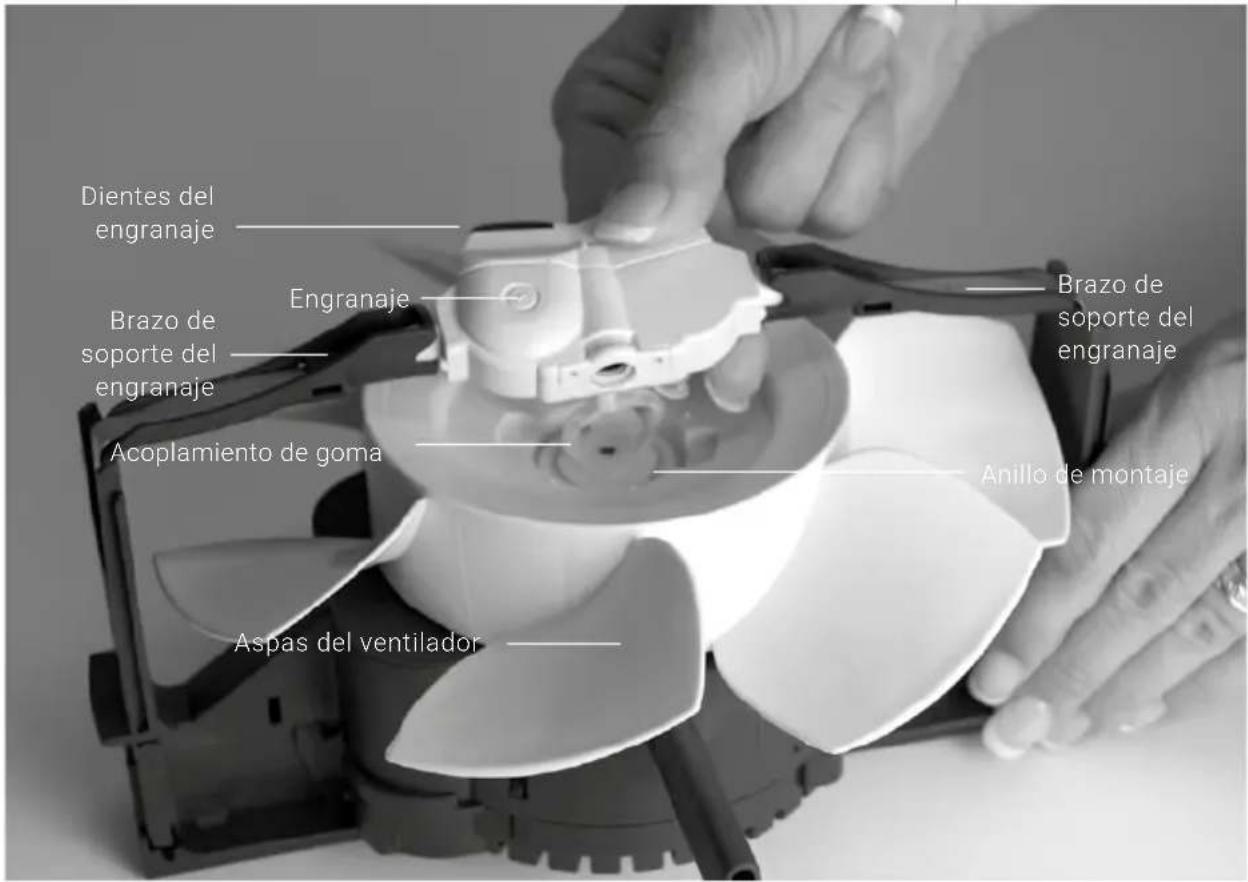
pie
| Category | Value (%) | |---|---| | HUMIDITY | 45 | | SLEEP | - | | AUTO | + | | Other (implied) | 6, 3, 7 |Indicador Función
natural_image
Interior view of a black plastic waste bin with internal compartments and directional arrows indicating flow or movement (no text or symbols)natural_image
Close-up of a hand holding a white plastic fan or mechanical component, with no visible text or symbols.natural_image
Close-up of a hand holding a small white object over a multi-colored fan-shaped object (no text or symbols visible)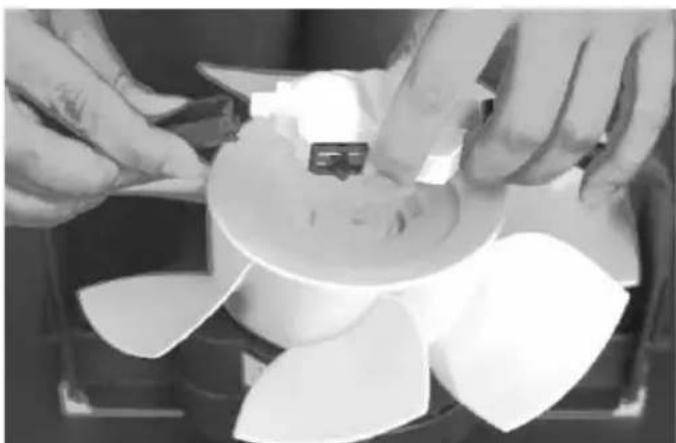
natural_image
Close-up of hands assembling a mechanical component with a circular base (no visible text or symbols)natural_image
Close-up of hands operating a mechanical device with a central component and tool (no visible text or symbols)natural_image
Close-up of a hand holding a white propeller with multiple blades, no visible text or symbolsnatural_image
Close-up of hands holding a white ceramic cup with cutouts and a small object, no visible text or symbolsnatural_image
Close-up of a gloved hand using a 3D-printed robotic device to press or inspect a transparent container (no visible text or symbols)North America Headquarters
1952 McDowell Rd, Suite 204
Naperville IL 60563
North America Headquarters
1952 McDowell Rd, Suite 204
Naperville IL 60563
Toll Free: +1-888-333-8218
info-us@venta-air.com
www.venta-air.com/en_us