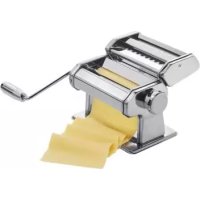
IAN 351930 - Pasta machine Ernesto - Free user manual and instructions
Find the device manual for free IAN 351930 Ernesto in PDF.


| Brand | Ernesto |
| Model | IAN 351930 |
| Product type | Manual pasta machine |
| Housing material | Stainless steel |
| Roller material | Stainless steel and aluminum |
| Main functions | Pasta sheeter and cutter (spaghetti, tagliatelle, etc.) |
| Drive mechanism | Manual crank |
| Thickness adjustment | Adjustment knob with numbered positions (1 to 7, 7 being thickest) |
| Number of rollers | 3 pairs (sheeting + 2 cutting) |
| Worktop attachment | Clamp included |
| Usage | Domestic use only |
| Care and cleaning | Clean with a damp cloth and a brush or wooden stick; do not immerse in water or put in dishwasher |
| Safety | Risk of finger entrapment; do not leave children unsupervised; wear fitted clothing |
| Spare parts and repairability | Crank, clamp, adjustment knob, upper rollers; repair after warranty for a fee |
| Warranty | 3 years from date of purchase |
| Package contents | Pasta machine, crank, clamp, instruction manual |
| Dimensions (estimated) | Approx. 30 x 20 x 15 cm |
Frequently Asked Questions - IAN 351930 Ernesto
User questions about IAN 351930 Ernesto
0 question about this device. Answer the ones you know or ask your own.
Ask a new question about this device
Download the instructions for your Pasta machine in PDF format for free! Find your manual IAN 351930 - Ernesto and take your electronic device back in hand. On this page are published all the documents necessary for the use of your device. IAN 351930 by Ernesto.
USER MANUAL IAN 351930 Ernesto
Operation and safety notes
FR
Machine à Pâtes
GB/IE/NI Operation and safety notes Page 5
Congratulations! You have chosen to purchase a high-quality product. Make sure you are familiar with the product before you use it for the first time. With this in mind, read the following instructions and safety information carefully. Only ever use the product in the manner described here and in accordance with the specified range of use. Please keep this manual in such a way that it is protected from loss or damage. If you choose to hand this product over to a third party, make sure you also provide them with all documentation.
Intended use
The device is not intended for commercial use.
Description des pieces
Pasta maker
2 Crank handle
3 Screw clamp
4 Roller adjusting wheel
5 Roller attachment
Technical data
Material: housing: stainless steel
Pasta roller: stainless steel, aluminium

Safety instructions
SAVE ALL INSTRUCTIONS AND SAFETY INFORMATION FOR FUTURE USE!
RISK OF INJURY!
WARNING! DANGER TO LIFE AND RISK OF ACCIDENT FOR INFANTS AND CHILDREN!
- Never leave children unsupervised with the packaging material and product. There is a risk of suffocation due to the packaging material and a danger to life due to cutting injuries. Children often underestimate the dangers.
After use, keep this device in a safe place out of the reach of children. - This device is not intended to be used by persons (including children) with limited physical, sensory or mental capabilities or a lack of experience and/or knowledge, unless they are supervised by a person responsible for their safety or receive instructions from them on how to use the device.
- Check that all parts are properly assembled. Improper assembly can result in injury.
Always be alert and always pay attention to what you are doing. Carry out the work in a concentrated and sensible way.
There is a risk of crushing and entrapment on the moving parts of the machine. - Food-safe! Taste and odour properties are not affected by this product.
- Do not wear long necklaces or clothes with hanging cords when working with the machine. Risk of strangulation!
Preparation
Basic recipe for a pasta dough
Ingredients
200g pasta flour
200g durum wheat semolina
4 eggs
1 pinch of salt
- Mix flour and durum wheat semolina at a ratio of 1:1 and pour the mixture onto a clean kitchen work surface in the form of a mound.
- Form a hollow in the centre of the mound.
- Beat the eggs and add the egg yolks and whites with salt to the hollow.
- Using a fork, gradually stir the eggs into the flour from the inside out.
- Knead the crumbly dough with your hands for about 10 minutes until a smooth, even mass is formed.
- If the dough is too soft, add flour and knead in, if too hard, add a little water.
- Now shape the resulting dough into a ball and cover it with a damp cloth or cling film. Allow the covered dough to rest for 30 minutes at room temperature.
Commissioning
- Place the pasta maker (1) on a firm work surface to which it can be attached.
- Insert the screw clamp ③ into the opening of the pasta maker ① and tighten the wing screw to ensure the pasta maker is stable (see fig. A).
- Place the roller attachment (5) along the two mounts of the pasta maker (1) on the machine (see overview).
- Insert the crank ② into the opening of the pasta maker ① (see fig. A).
- Before using the pasta maker (1) for the first time, clean it as described in the "Cleaning and maintenance" section. Clean all parts that come into contact with food with a damp cloth to remove any dirt and dry the parts completely.
- The three pairs of rollers must first be cleaned before use. To do this, roll a small portion of
dough through the rollers. This dough must not be eaten and must be disposed of.
- The dough is processed in portions. Remove a small amount of the dough from the prepared dough and cover the remainder again to prevent it drying out (see fig. C, D).
To adjust the distance between the rollers, pull out the adjusting wheel 4 a little and turn it to one of the positions marked by numbers. Start with position 7, the largest possible roller spacing (see fig. E). - Let the dough portion run through the rollers by turning the crank (2) clockwise (see fig. F). Fold up the flat dough and repeat this process 6-7 times.
- You can now reduce the distance between the rollers by pulling out and turning the adjusting wheel (4) and roll the dough again until the desired thickness is reached.
- Use a knife to cut the sheet of dough to the desired length.
Depending on the type of pasta you want, insert the crank ② into one of the two openings in the roller attachment ⑤ and let the dough run through the cutting tool. To do this, turn the crank clockwise (see fig. H, I). - Let the finished pasta dry in the air for at least 60 minutes.
Tip: If the dough is not being drawn in properly by the rollers, the dough needs to be moistened. Add a little water to the dough and roll it again several times with the smooth pair of rollers (see fig. F). If the cutting rollers of the attachment 5 cut the dough poorly, the dough may be too soft. Increase the firmness of the dough by adding a little flour (see fig. G) and rolling again on the smooth rollers (see fig. F).
- Put the pasta in plenty of water that has been lightly salted.
The cooking time of the pasta produced varies depending on the duration of the drying time. Freshly made, it is cooked in just a few minutes (2-5 minutes). - Stir the pasta carefully until it is cooked and then pour the pasta over a kitchen sieve.
- Cleaning and maintenance
(see fig.J-L)
- Never use petrol, solvents, or chemical cleaners.
- During use, clean the scrapers beneath the rollers with a dry cloth from time to time.
- Use a soft, clean cloth to clean the pasta maker (see fig. J).
- Use a brush or a wooden stick to clean the pasta maker after use (see fig. L).
- Remove heavy soiling with a damp cloth and then dry the parts completely.
- Do not rinse the pasta maker in water or clean it in the dishwasher (see fig. K).
- Never immerse the product in water or other liquids. This can damage the product (see fig. K).
Disposal
The packaging is made from environmentally friendly materials that you can dispose of at your local recycling centre.
You can find out how to dispose of the old product from your local authority.
Warranty
The product was manufactured with great care and under constant supervision. This product comes with a 3 year warranty starting from the date of purchase. Please store your receipt in a safe place. The warranty is only valid for material and production faults. If the product is misused or handled improperly, the warranty will be invalidated. Your statutory rights, especially the warranty rights, shall not be limited by this warranty. If you would like to make a complaint, please contact the service hotline on the telephone number provided below or send us an email. Our service employees will coordinate the further procedure with you as soon as possible. We will always advise you on a one-to-one basis. The warranty period will not be extended on account of any repairs carried out on the basis of the warranty, statutory warranty or goodwill. This shall also apply to replaced and repaired parts. Any repairs that need to be carried out after the warranty period has elapsed shall be subject to charge.
This QR code will take you directly to the Lidl service page (www.lidl-service.com) and you can open your operating instructions by entering the item number (IAN) 351930.


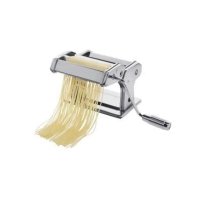
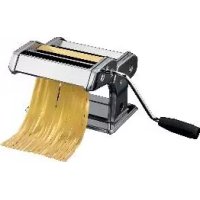
Brand : Ernesto
Model : IAN 351930
Category : Pasta machine