MT00521 - Wall mount MAGNAVOX - Free user manual and instructions
Find the device manual for free MT00521 MAGNAVOX in PDF.
| Type of product | Wall mount for TV |
| Brand | Magnavox |
| Model | MT00521 |
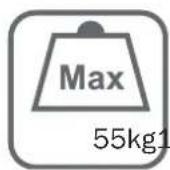
| Maximum load capacity | 55 kg |
| Material | Steel |
| VESA compatibility | Standard (up to 400x400 mm) |
| Approximate dimensions | 500 x 300 x 100 mm |
| Approximate weight | 2.5 kg |
| Installation type | Wall-mounted, on wood studs or concrete |
| Recommended number of people | 2 minimum |
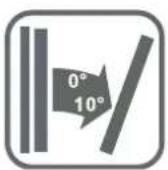
| Angle adjustment | Adjustable vertical tilt |
| Warranty | 5 years |
| Usage | Indoor only |
| Necessary tools | Phillips screwdriver, adjustable wrench, drill, masonry bit (depending on wall), spirit level, pencil |
| Included mounting hardware | Screws, wall plugs, spacers for different wall thicknesses |
| Care and cleaning | Wipe with a soft, dry cloth |
| Recommended check | Every two months, tighten the fasteners |
| Safety standards | Do not exceed 55 kg, professional installation recommended, choking hazard due to small parts |
Frequently Asked Questions - MT00521 MAGNAVOX
User questions about MT00521 MAGNAVOX
0 question about this device. Answer the ones you know or ask your own.
Ask a new question about this device
Download the instructions for your Wall mount in PDF format for free! Find your manual MT00521 - MAGNAVOX and take your electronic device back in hand. On this page are published all the documents necessary for the use of your device. MT00521 by MAGNAVOX.
USER MANUAL MT00521 MAGNAVOX
natural_image
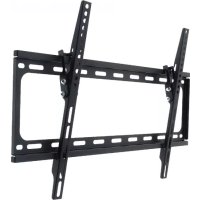
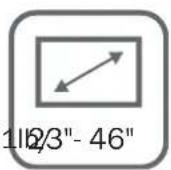
Black metal-framed wall-mounted frame with mounting holes and mounting screws (no text or symbols visible)23"- 46"
LED AND LCD TILTING
TV WALL MOUNT
SOPORTE DE PARED INCLINABLE
PARA TV LED Ó LCD
SUPPORT MURALE INCLINABLE
POUR TV LED OU LCD
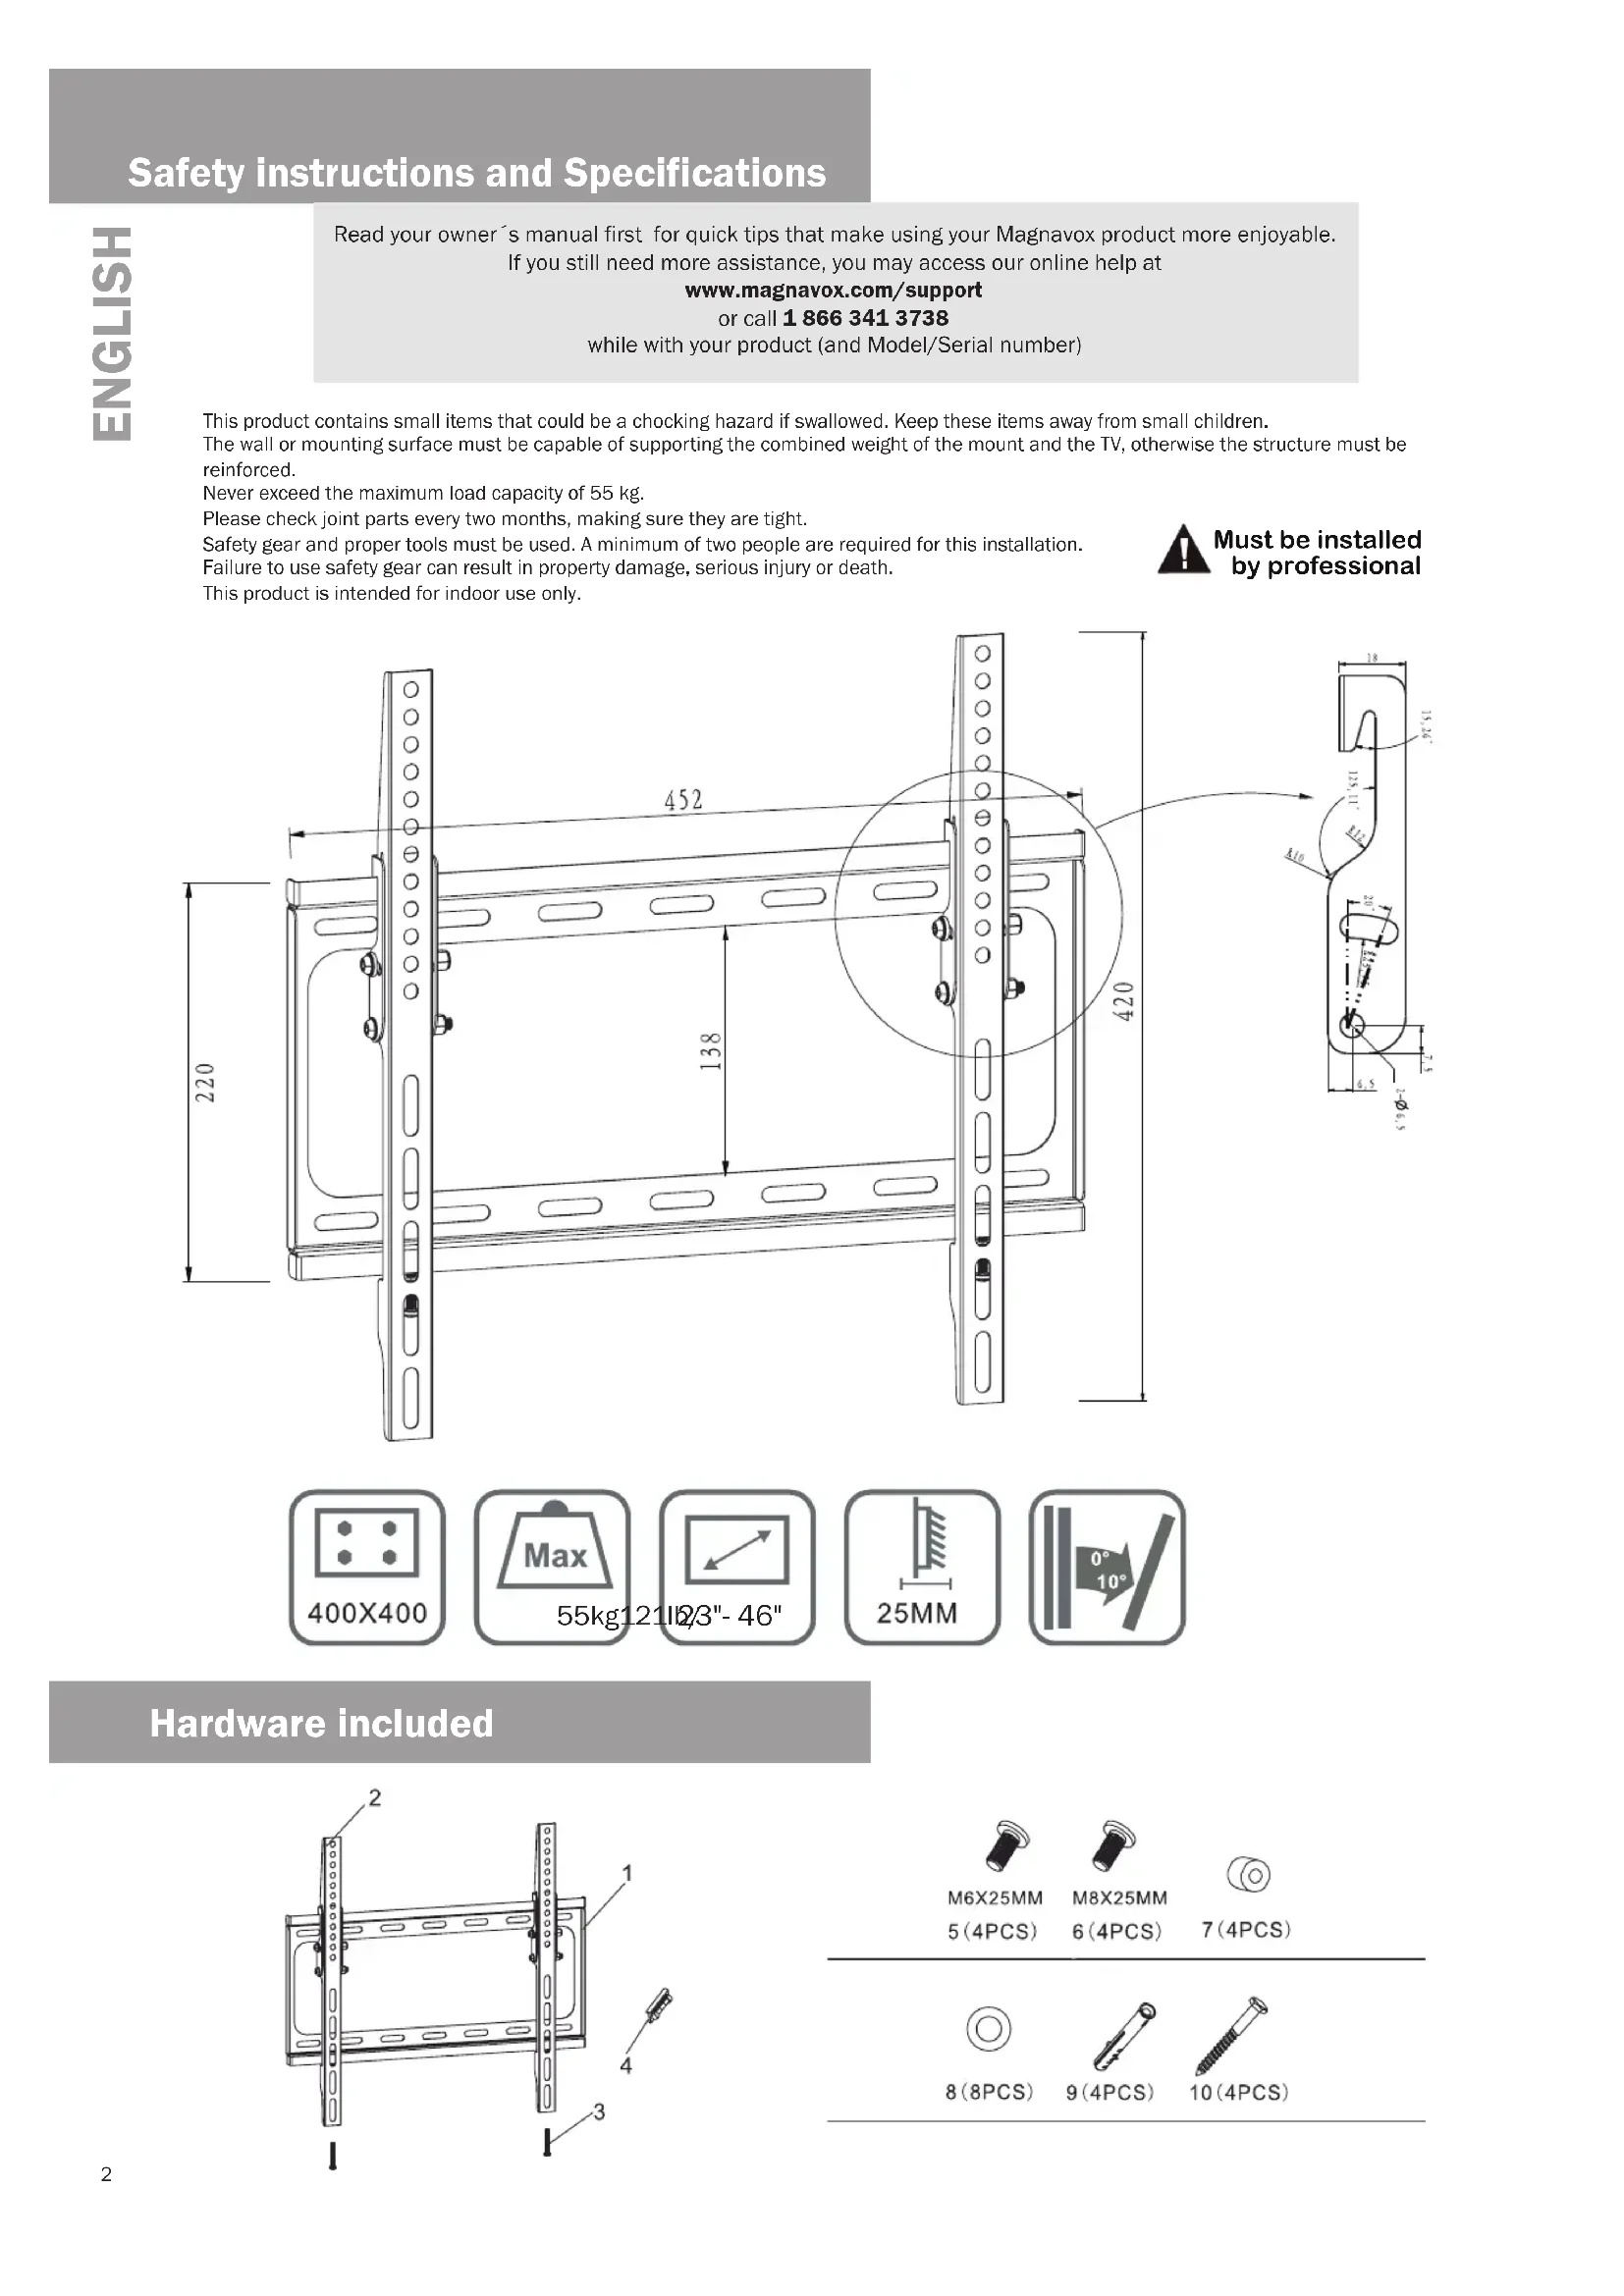
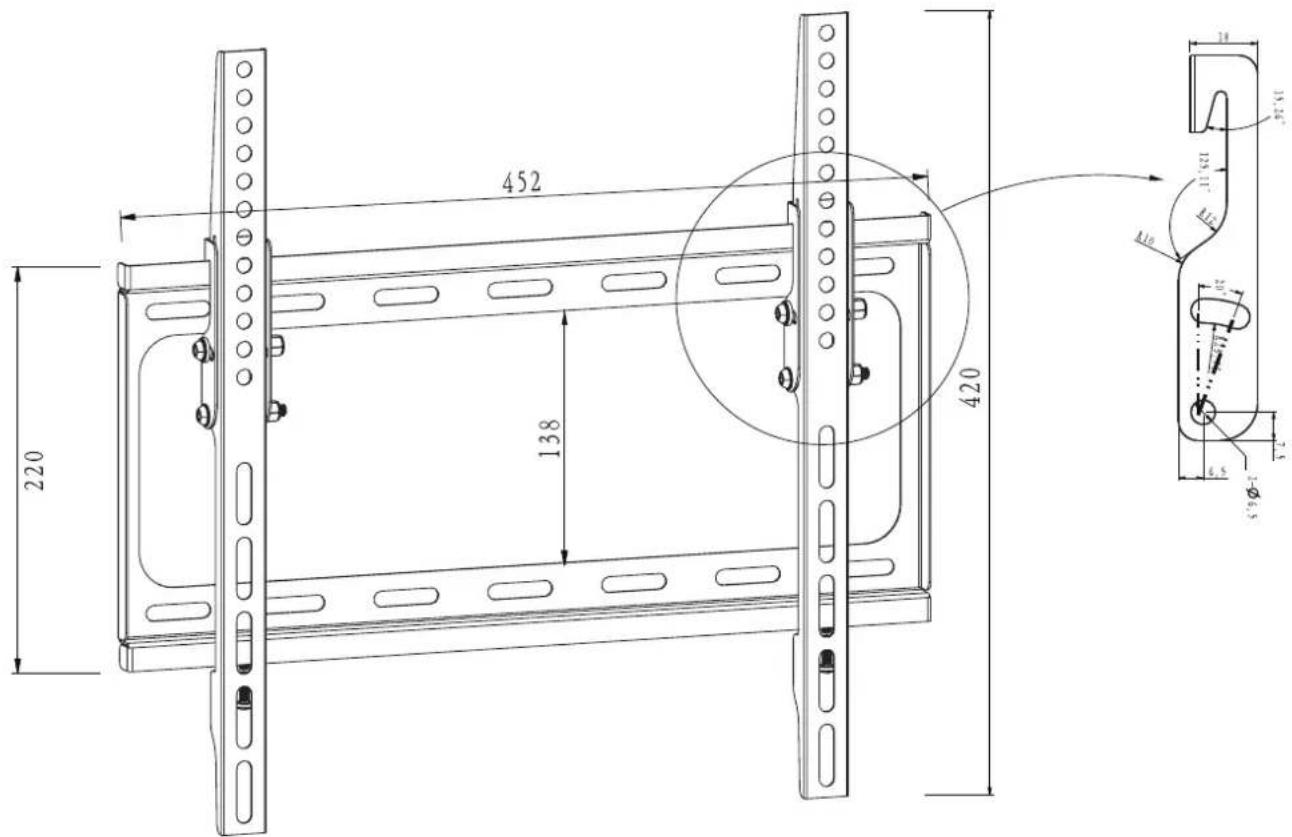
Safety instructions and Specifications
Read your owner's manual first for quick tips that make using your Magnavox product more enjoyable. If you still need more assistance, you may access our online help at
www.magnavox.com/support
or call 1 866 341 3738
while with your product (and Model/Serial number)
This product contains small items that could be a chocking hazard if swallowed. Keep these items away from small children.
The wall or mounting surface must be capable of supporting the combined weight of the mount and the TV, otherwise the structure must be reinforced.
Never exceed the maximum load capacity of 55 kg.
Please check joint parts every two months, making sure they are tight.
Safety gear and proper tools must be used. A minimum of two people are required for this installation.
Failure to use safety gear can result in property damage, serious injury or death.
This product is intended for indoor use only.

Must be installed by professional
text_image
452 220 138 420 138 125 117 10 10 10 10 10 10 10 10 10 10
Hardware included
text_image
Technical diagram of a mechanical assembly with numbered components and a close-up detail view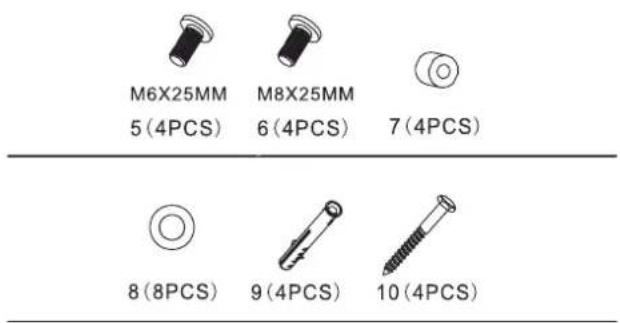
text_image
M6X25MM 5 (4PCS) M8X25MM 6 (4PCS) 7 (4PCS) 8 (8PCS) 9 (4PCS) 10 (4PCS)
DRY WALL INSTALLATION MASONRY INSTALLATION
- Adjustable spanner/socket set
• Philips head screwdriver - Power drill
• High speed drill bit -
Pencil
-
Adjustable spanner/socket set
• Philips head screwdriver
• Power drill with hammer function - Masonry drill bit
- Pencil
- Hammer
RY WALL & MASONRY Installation steps
1
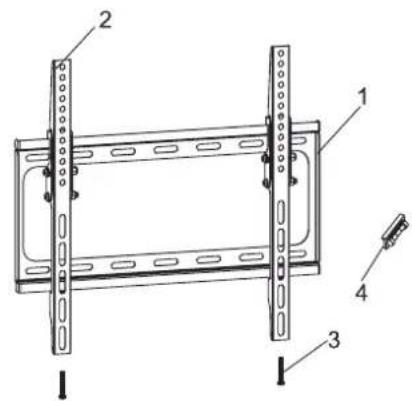
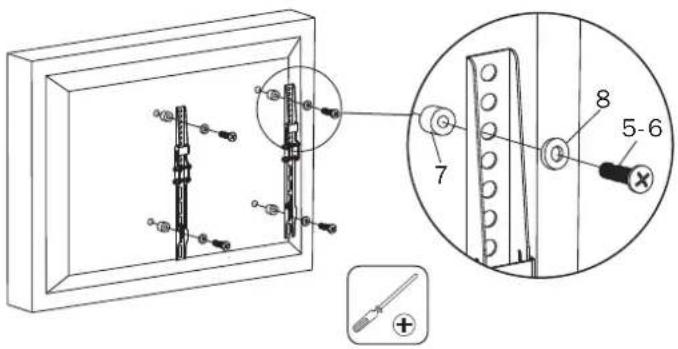
Check the back of your TV to find the appropriate mounting pattern.
Sort through the provided bolts until you find the correct size that easily fits into the back of your TV and fits snugly.
Install TV mount brackets to the back of the tv and use the hole spacer in case of non flat surfaces.
To avoid damaging TV, do not overtighten bolts.
text_image
Technical diagram showing a mechanical assembly with labeled parts and a magnified inset view of a component detail.2
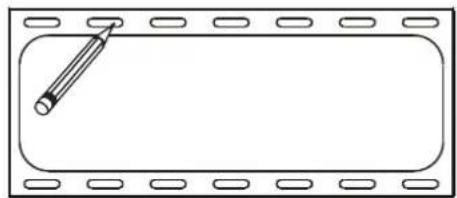
Use the template to determine the proper location to drill holes for the wall plate.
natural_image
Simple line drawing of a rectangular frame with evenly spaced oval indentations and a pencil inserted into the center (no text or symbols)3
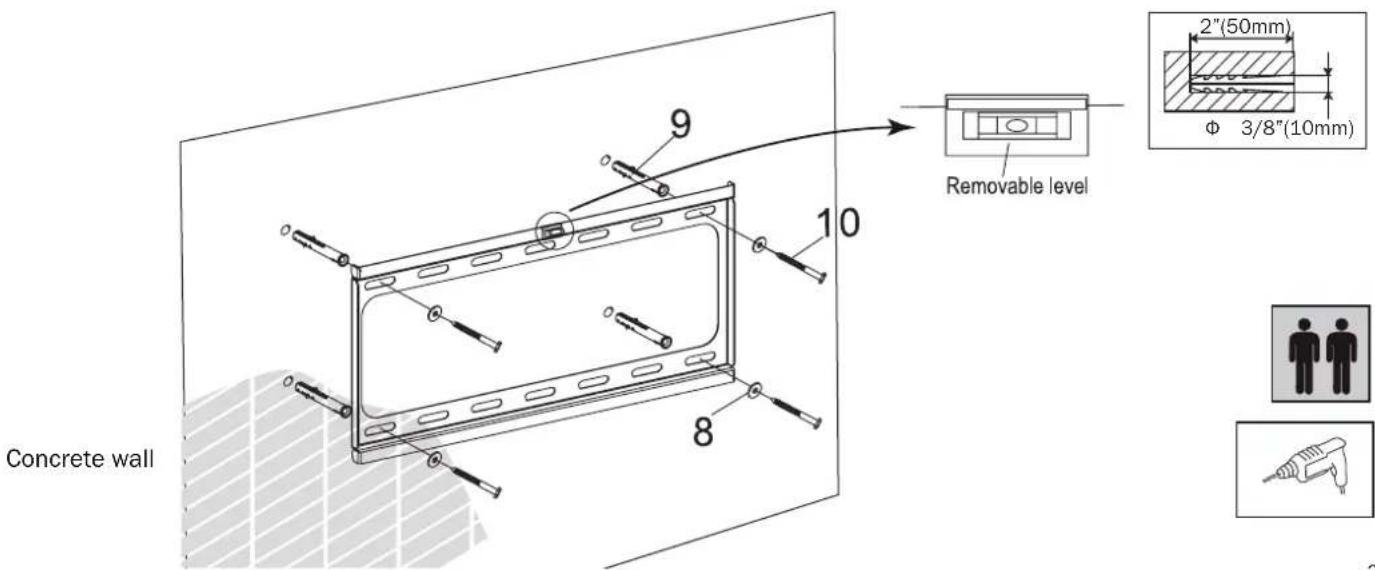
Drill 4 holes according to the provided template. Screw the base plate into the concrete wall (make sure base plate is level).
text_image
Concrete wall 9 10 8 Removable level 2"(50mm) Φ 3/8"(10mm)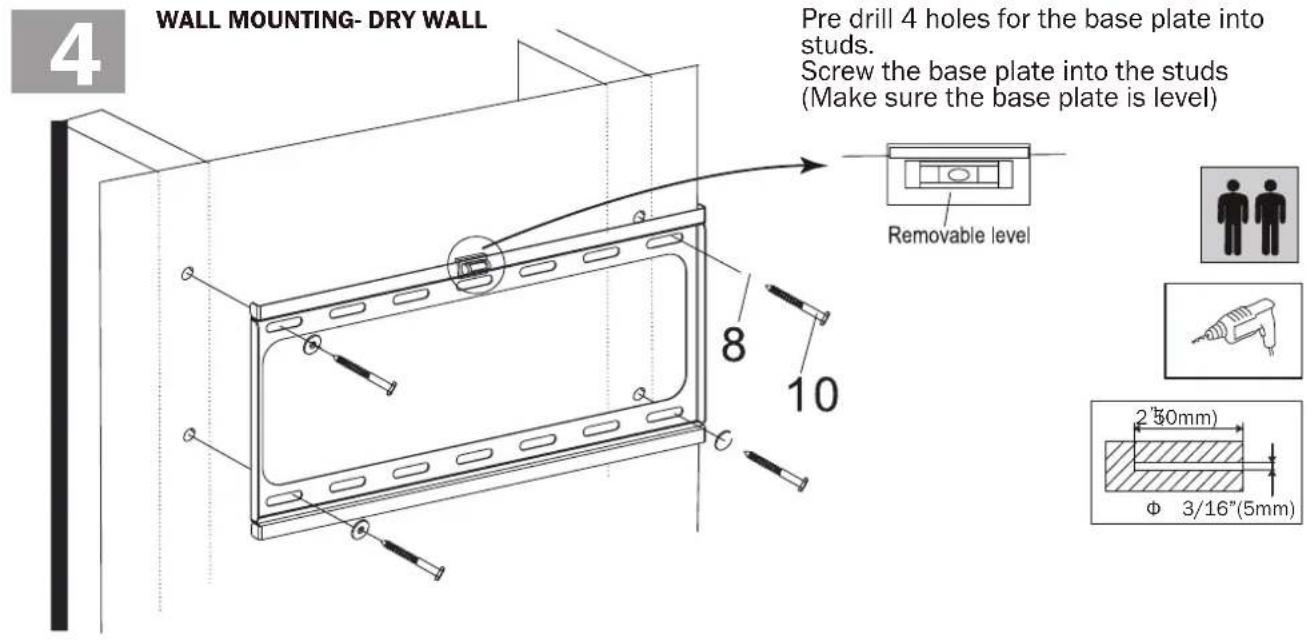
text_image
4 WALL MOUNTING- DRY WALL Pre drill 4 holes for the base plate into studs. Screw the base plate into the studs (Make sure the base plate is level) Removable level 8 10 2"50mm) Φ 3/16"(5mm)5
text_image
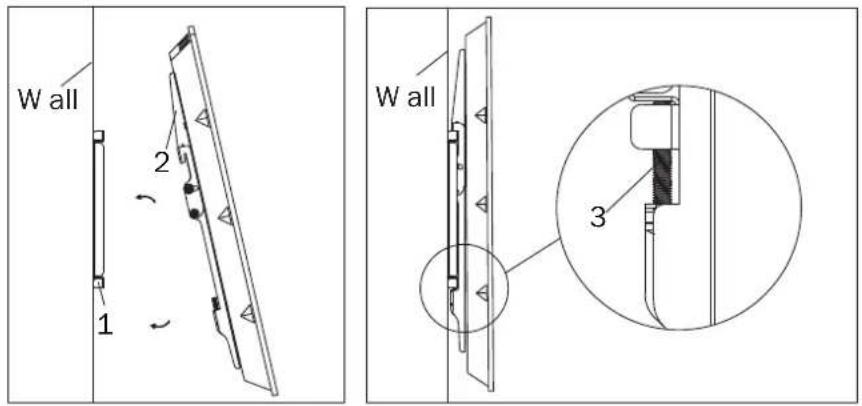
W all 1 2 3 W allAttach the TV to base plate on the wall Set the desired angle of the screen
5 YEAR WARRANTY
Magnavox warrants that if this product purchased by you from Magnavox or a retail outlet is found by Magnavox to be defective in workmanship or materials within 5 years of the date of purchase, Magnavox will (at its election) either repair that product, replace the product, supply an equivalent product or pay the costs of repairing or replacing the product or acquiring an equivalent product. This limited warranty will not extend to or cover any expenses associated with removing, demounting the original product or installing the repaired, replaced or equivalent product or all or any of its components, you must bear these expenses. It also does not cover damage or loss resulting from intentional or unintentional misuse of, tampering with, alterations to or incorrect installation of this product or use of this product for purposes other than that for which it is designed or in a manner inconsistent with the product's instructions. This limited warranty also does not apply to damage or loss resulting from fair wear and tear or events beyond Magnavox control including but not limited to natural disasters. In order to claim under this warranty, you must contact Magnavox and return to Magnavox (via our nominated reply paid address) the product and its components and proof of purchase (including the date and location of purchase) so that Magnavox can verify the defect and your purchase. (PLEASE PROVIDE CONTACT)
text_image
Technical diagram of a mechanical assembly with numbered components and a close-up detail view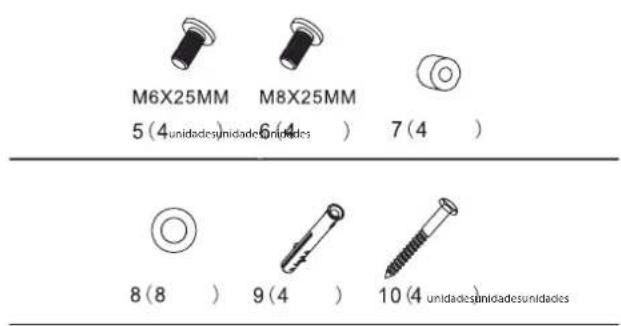
text_image
Technical diagram showing a mechanical assembly with labeled parts and a magnified detail view of a component.2
natural_image
Simple line drawing of a film strip with a pencil and eraser, no text or symbols present3
MONTAJE EN PARED DE MAMPOSTERIA
text_image
Technical diagram of a structural frame with numbered components and a connector pin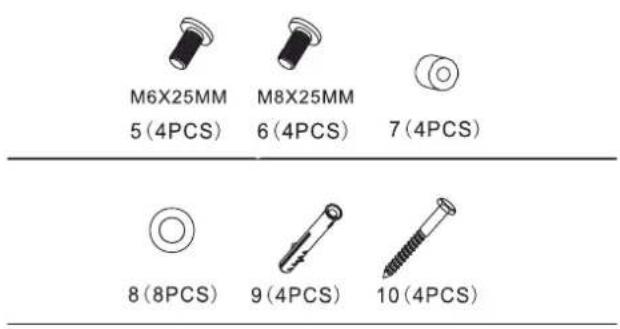
text_image
M6X25MM 5 (4PCS) M8X25MM 6 (4PCS) 7 (4PCS) 8 (8PCS) 9 (4PCS) 10 (4PCS)
INSTALLATION DE MUR SEC INSTALLATION DE MAÇONNERIE
text_image
Technical diagram showing a mechanical assembly with labeled parts and an inset view of a component detail.2
natural_image
Simple line drawing of a rectangular frame with a pencil and oval indentations, no text or symbols present.3
MONTAGE MURAL - MAÇONNERIE
text_image
W all 1 2 3 W allnatural_image
Black metal-framed wall-mounted frame with mounting holes and mounting screws (no text or symbols)MAGNAVOX
MAGNAVOX
MAGNAVOX and SMART. VERY SMART are registered trademarks of Koninklijke Philips N.V. and are used under license from Koninklijke Philips N.V.
Distributed by O.B.O.
Baltimore, MD