DR 750 - Radio ALBRECHT - Free user manual and instructions
Find the device manual for free DR 750 ALBRECHT in PDF.
| Product Type | Portable digital radio DAB+ / FM / Bluetooth |
| Brand | Albrecht |
| Model | DR 750 |
| Operating modes | DAB+, FM, Bluetooth, AUX IN |
| Power supply | Mains adapter 5 V DC (micro-USB) or integrated battery 2000 mAh |
| Battery life | Up to 20 hours |
| Power consumption | 7.5 W (operating); < 1 W (standby) |
| DAB+ frequencies | 174.928 – 239.200 MHz |
| FM frequencies | 87.5 – 108.0 MHz |
| Bluetooth | Version 2.1+ EDR, range up to 10 m, frequency 2.402–2.480 GHz, power 1 mW |
| Supported Bluetooth protocols | A2DP 1.2 |
| Antenna | Telescopic for DAB/FM |
| Connectors | 1 x micro-USB (DC 5V), 1 x AUX input 3.5 mm |
| Display | LCD screen with station, time and status information |
| Presets | Up to 20 stations in DAB+ and 20 in FM |
| Alarm functions | 2 independent alarms with source selection (buzzer, DAB+, FM) and snooze |
| Sleep timer | 15/30/45/60/90 minutes |
| OSD menu languages | German, English, French, Italian |
| Operating temperature | 0 °C to 35 °C |
| Warranty | 2 years |
| Maintenance and cleaning | Wipe with a soft, dry cloth. Do not use chemical or abrasive products. |
| Safety | Do not expose to moisture, extreme temperatures or strong impacts. |
| Spare parts and repairability | The battery is integrated and not user-replaceable. Contact customer service for any repairs. |
| General information | Compliant with directive 2014/53/EU. Recycling according to WEEE regulations. Declaration of conformity available online. |
Frequently Asked Questions - DR 750 ALBRECHT
User questions about DR 750 ALBRECHT
0 question about this device. Answer the ones you know or ask your own.
Ask a new question about this device
Download the instructions for your Radio in PDF format for free! Find your manual DR 750 - ALBRECHT and take your electronic device back in hand. On this page are published all the documents necessary for the use of your device. DR 750 by ALBRECHT.
USER MANUAL DR 750 ALBRECHT
natural_image
Black DAB Radio device with digital clock display showing 23:46, no visible text or symbols on device bodynatural_image
Black rectangular electronic device with a circular lens and a circular lens on its side (no text or symbols visible)
natural_image
Electric charger with attached cable and power plug (no visible text or symbols)
text_image
ALBRECHT. Audio Anleitung Manual3. Erste Schritte
text_image
10:48 System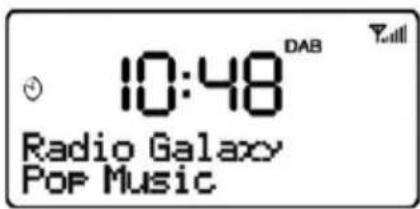
text_image
10:48 Radio Galaxy POP Music4.2. Wecker
text_image
10:48 System4.4. Sprache
text_image
10:48 System (Language)text_image
10:48 DAB Y System4.6. Software Version
text_image
10:48 DAB Scanning... 06.2. Senderliste
text_image
10:48FM 89.45MHznatural_image
Black DAB Radio device with digital clock display showing 23:46 (no text or symbols on device body)Manual
English
Table of content
- Overview and functions.... 15
- Delivery content.... 16
- First steps.... 16
3.1. Antenna 16
3.2. Battery 16 - Main Menu and Settings.... 17
4.1. Sleep Timer 17
4.2. Alarm Clock 17
4.3. Date and Time settings.... 18
4.4. Language.... 18
4.5. Factory Reset 18
4.6. Software version.... 18 - Modes.... 19
- DAB+ Mode 19
6.1.DAB+ Full Scan 19
6.2. Station List.... 19
6.3. Manual station settings 19
6.4. Inactive stations (Prune) 19
6.5.DRC 19
6.6. Save favorite DAB+ station 19
6.7. Recall favorite DAB+ station.... 19
6.8. DAB+ Information 19 - FM Mode 20
7.1. Tune FM stations 20
7.2. FM scan settings 20
7.3. Save favorite FM stations.... 20
7.4. Recall favorite FM stations 20 - Aux-In Mode 20
- Bluetooth Mode 20
- Trouble shooting.... 21
- Technical specifications 22
- Warranty and Recycling Information 22
- CE Declaration of Conformity - Standards and Regulations 23
- Service Address And Technical Hotline (for units sold in Germany) 23
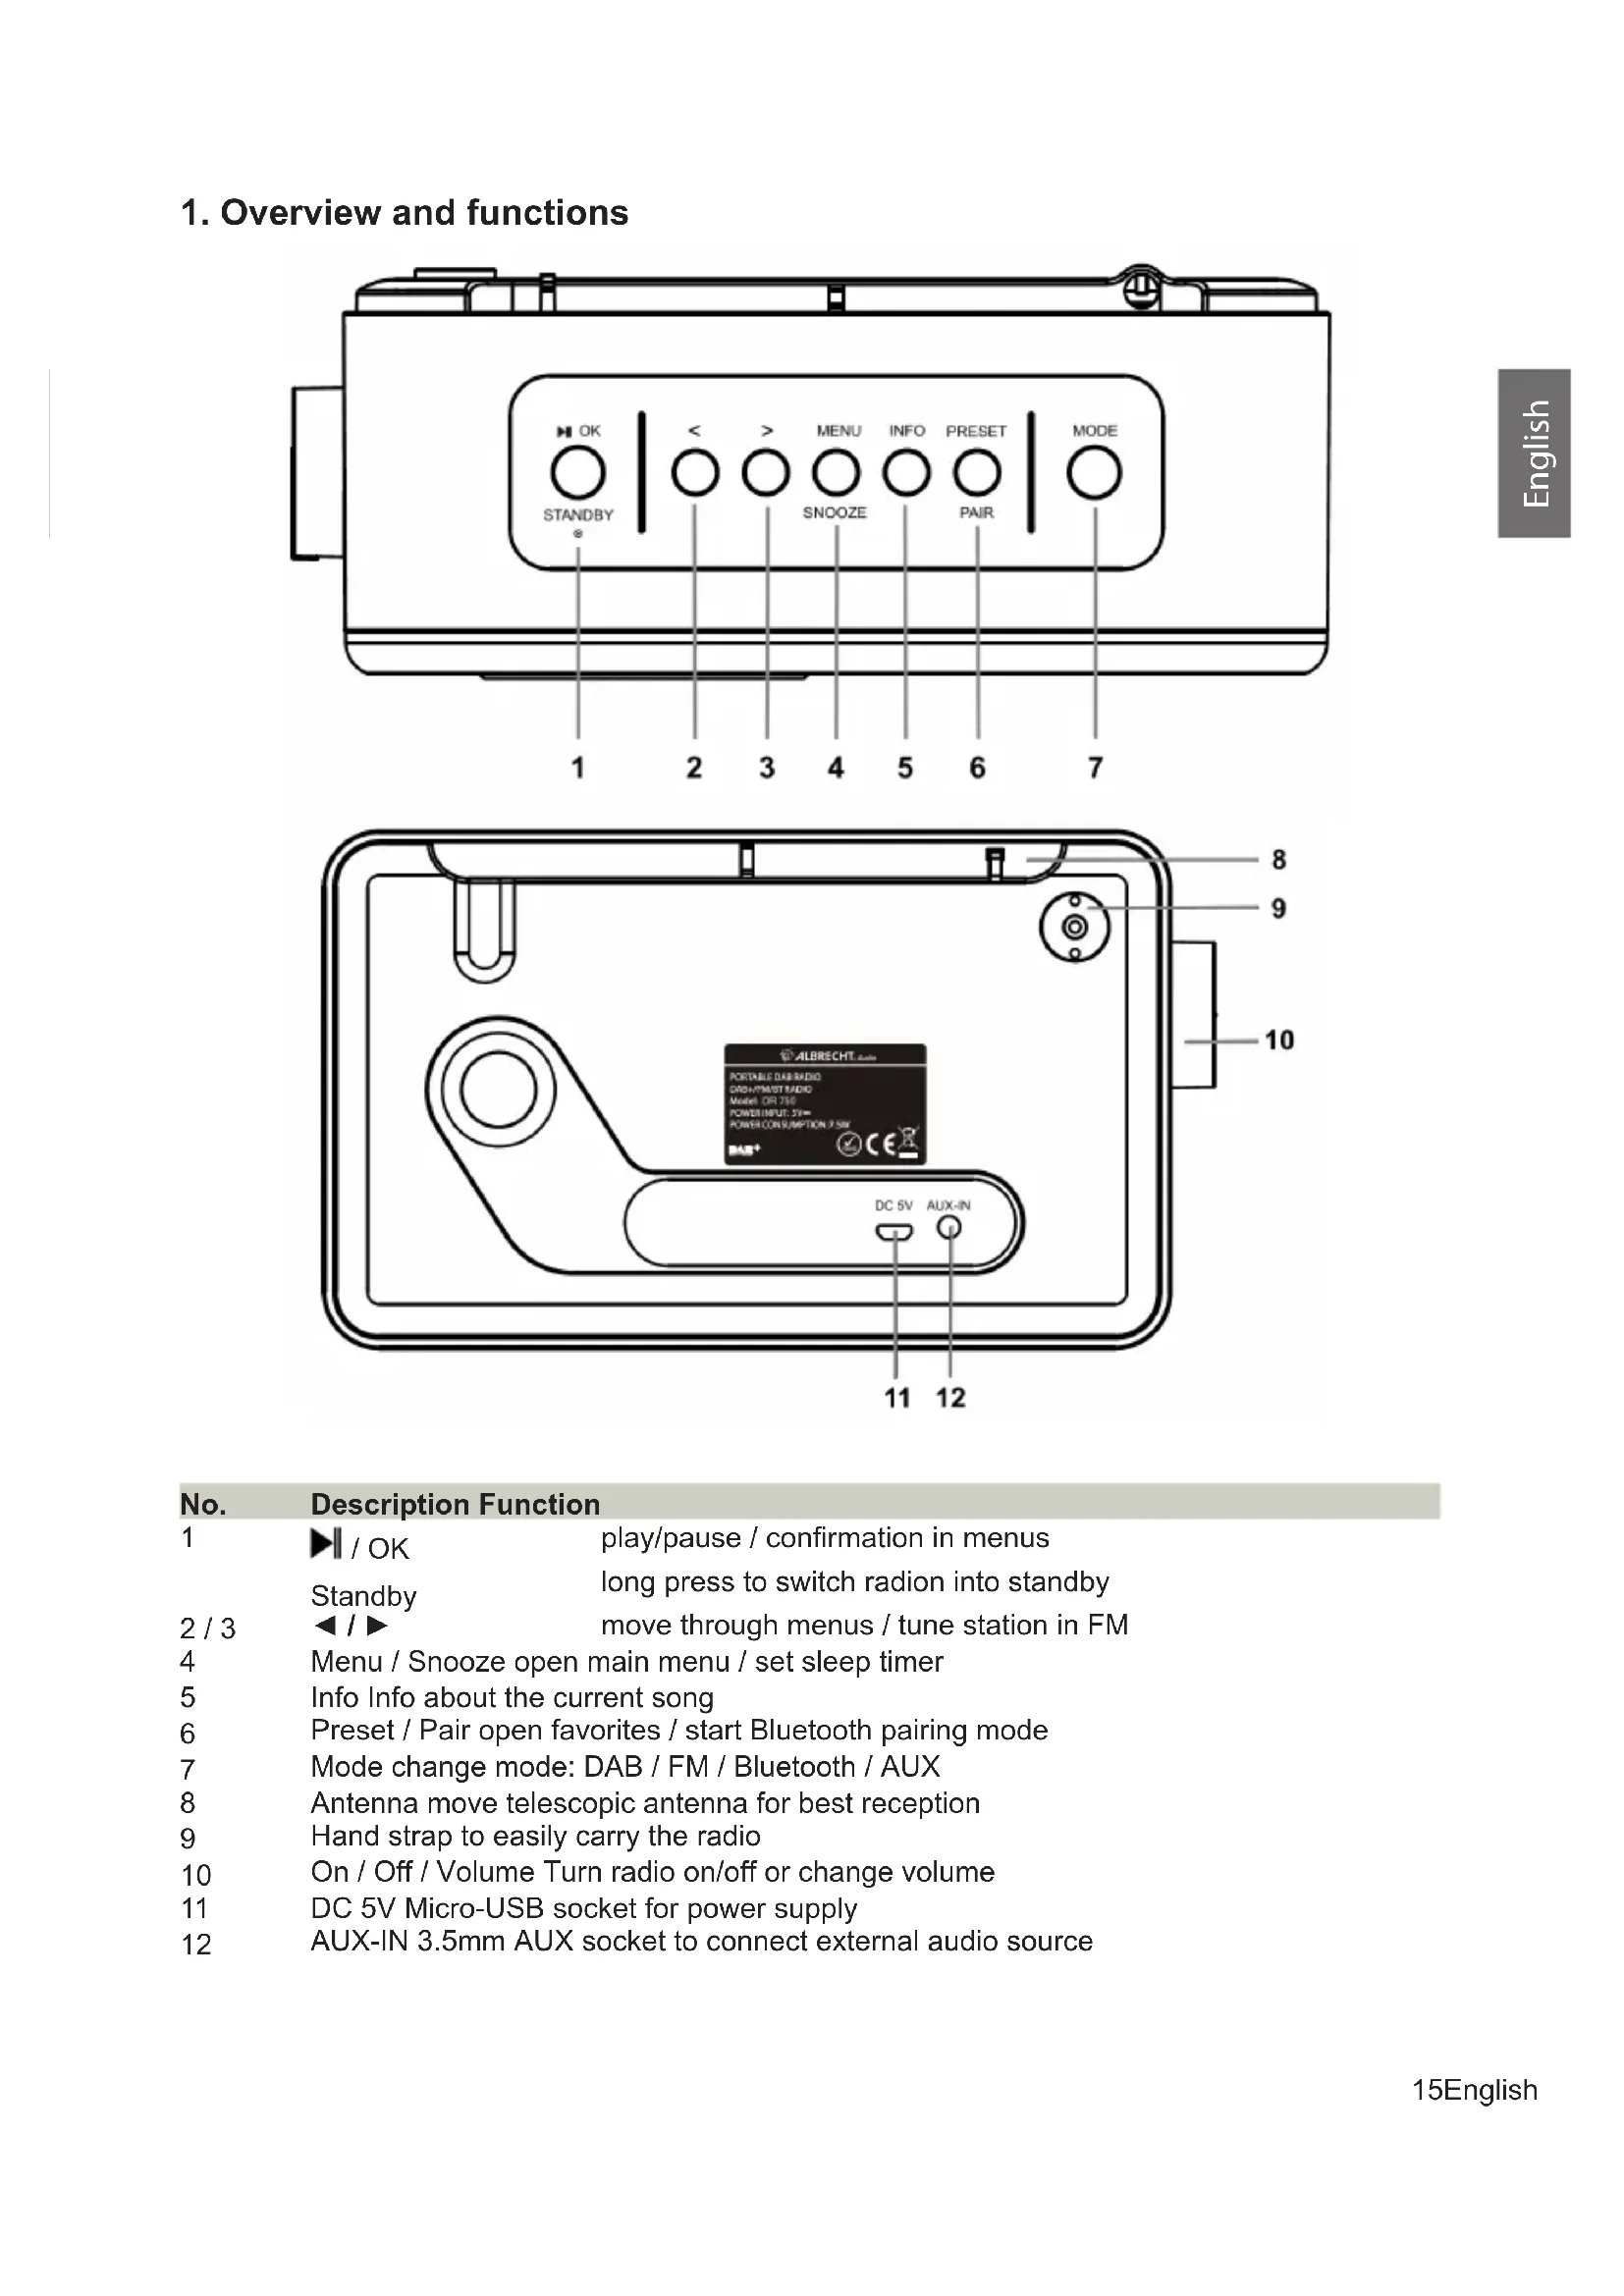
1. Overview and functions
text_image
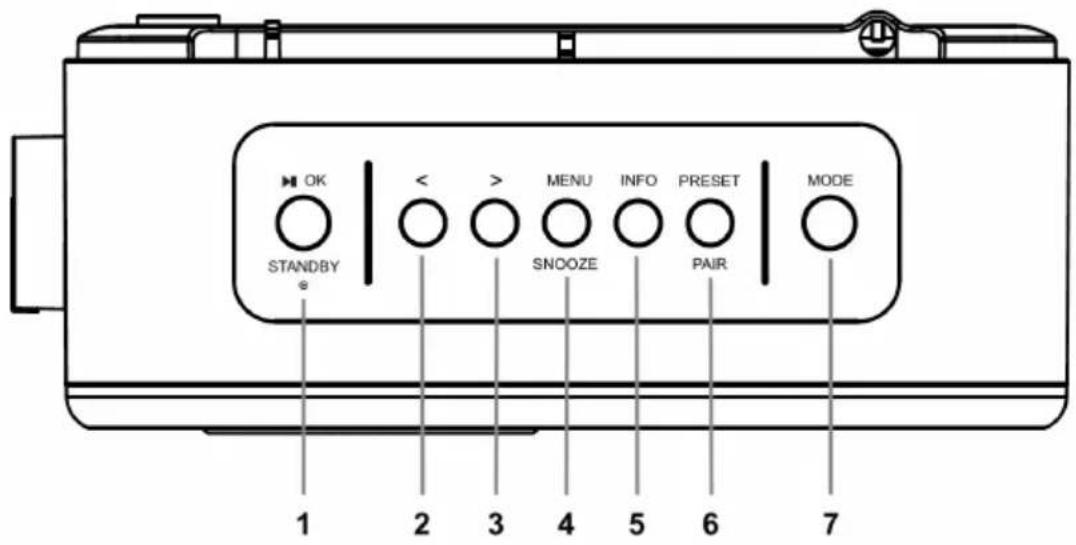
OK STANDBY * 1 2 3 4 5 6 7 < > MENU INFO PRESET MODE SNOOZE PAIR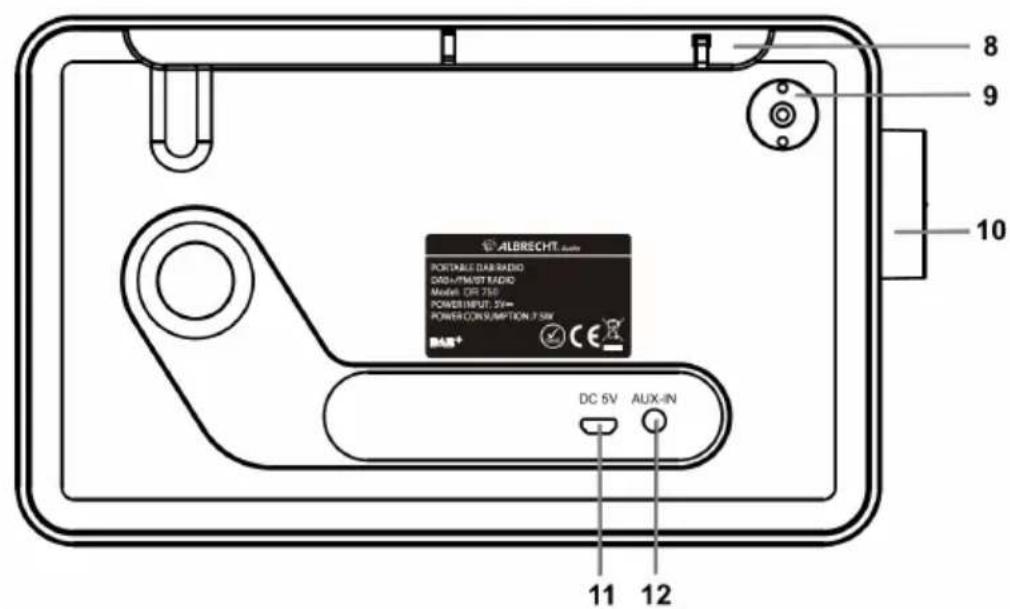
text_image
ALBRECHT PORTABLE RADIO DINJ/PINIST RADIO Model: DR 75V POWER INPUT: 25V~ POWER CONSUMPTION: 7.5W BAR+ DC 5V AUX-IN 11 12 8 9 10No. Description Function
| 1 | ▶/ OK | play/pause / confirmation in menus |
| Standby | long press to switch radion into standby | |
| 2 / 3 | ◀/ ▶ | move through menus / tune station in FM |
| 4 | Menu / Snooze open main menu / set sleep timer | |
| 5 | Info Info about the current song | |
| 6 | Preset / Pair open favorites / start Bluetooth pairing mode | |
| 7 | Mode change mode: DAB / FM / Bluetooth / AUX | |
| 8 | Antenna move telescopic antenna for best reception | |
| 9 | Hand strap to easily carry the radio | |
| 10 | On / Off / Volume Turn radio on/off or change volume | |
| 11 | DC 5V Micro-USB socket for power supply | |
| 12 | AUX-IN 3.5mm AUX socket to connect external audio source | |
2. Delivery content
• ALBRECHT DR 750 Digital Radio
- Micro-USB power supply
- Manual
natural_image
Black rectangular electronic device with a circular lens and a circular button, no visible text or symbols.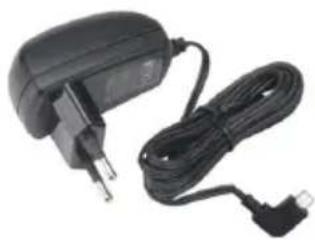
natural_image
Black and white photo of a charging plug with attached cable (no text or symbols visible)
text_image
ALBRECHT. audio Anleitung Manual3. First steps
Connect the DC cable of the power adaptor to the DC IN socket at the back of the radio and plug the power adaptor to the power socket. Turn the volume knob ON/OFF on the left side clockwise to switch on the radio.
If it is the first time to enter DAB mode, the device will automatically start a full scan of all DAB+ stations.
During standby mode, press and hold the STANDBY button to turn the device to operation mode.
Rotate the VOLUME knob to increase or decrease the volume during music playing.
3.1. Antenna
The antenna has already been installed on the device. To get good reception for DAB/FM broadcasting, always extend the antenna to its full length.
3.2. Battery
When you connect the power adapter to the radio, the integrated battery is automatically charged. The battery indicator on the display lights up orange during charging. When the battery is fully charged, the LED lights up green.
Please note that the signal strength might be effected while charging the radio.
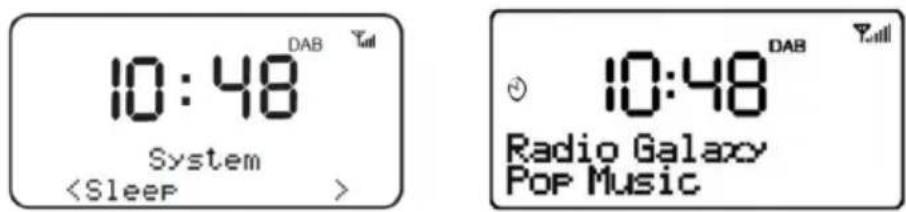
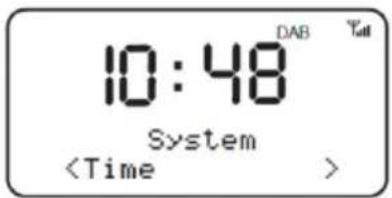
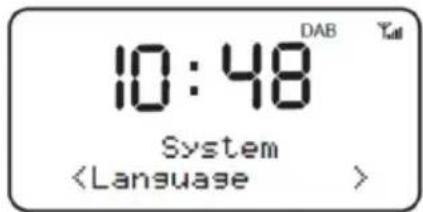
4. Main Menu and Settings
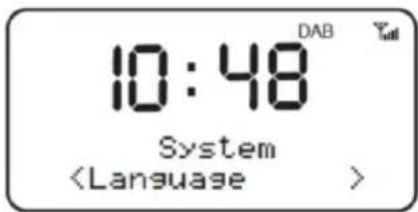
Press the MENU button and select System to enter the main menu and change the devices configuration. Use the ◀ / ▶ buttons to select a menu item and confirm the selection with OK.
4.1. Sleep Timer
Select the Sleep Timer function in the main menu to set a time after which the radio should switch off automatically. This function is useful if you want to listen to the radio before going to sleep.
Select the number of minutes (15/30/45/60/90 min.) after which the radio should switch off. Select Off to disable the sleep timer.
text_image
10:48 System4.2. Alarm Clock
There are 2 different alarm times available. Choose whether you want to set up Alarm1 or Alarm2. Always confirm each setting with OK.

text_image
.10:48 Alarm 1 Setup 10:48 Alarm 1 Wizard On time 06:00 10:48 Alarm 2 SetupTime: Select the desired wake-up time using the ◀/▶ buttons
Duration: the alarm duration time can be set to 15/30/45/60/90 min.
Source: Set here which mode (Buzzer / DAB + / FM) you want to use for the alarm
Repetition: Should alarm sound daily / once / weekend / weekday ?
An alarm symbol on the left side of the display indicates an active alarm time. The clock symbol is also displayed when the radio is in standby.
When the alarm time is reached, the alarm starts quietly and then gets louder continuously. Press the OK button to turn off the alarm. Use the MENU button to activate the snooze function. A symbol appears and the alarm clock sounds again after 10 minutes.
Attention:
The volume set on the rotary knob is also used for the alarm clock. Do not turn the volume down to 0 or turn the radio off using the rotary knob, otherwise there will be no alarm.
4.3. Date and Time settings
You can make the following settings in this menu:
- Set the time manually
- Activate automatic update of the time
- Set the time format to 12/24 hours
- Select date format
text_image
10:48 System4.4. Language
Select the desired OSD menu language:
German, English, French, Italian
text_image
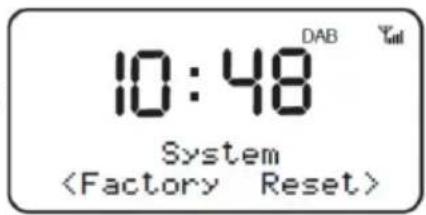
10:48 System (Language)4.5. Factory Reset
If you want to reset the radio to the factory settings, select this item in the main menu. For security reasons you have to confirm your selection again with Yes / No.
Attention: Please note that all individual settings (alarm clock, saved stations, etc.) are deleted with this function!
text_image
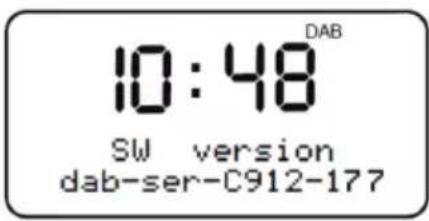
10:48 DAB System4.6. Software version
Shows the software version of the radio.
text_image
10:48 DAB SW version dab-ser-C912-1775. Modes
Press the MODE button to select the operating mode: DAB, FM (FM), Bluetooth, AUX IN.
6. DAB+ Mode
For best reception you should extend the DAB / FM antenna to the maximum length before use. The icon in the upper right corner of the display shows the strength of the DAB / DAB + signal.
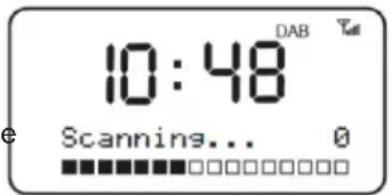
6.1. DAB+ Full Scan
Select Full Scan from the main menu to search for all available DAB + stations. After the search, all stations are shown in the station list.
text_image
10:48 DAB Scannins... 06.2. Station List
If you are in DAB mode, you can use the ◀/▶ buttons to scroll through the station list. To select a station, press OK or wait 3 seconds.
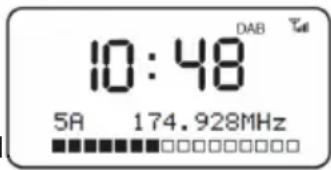
6.3. Manual station settings
In addition to the method described above for scanning and selecting stations from the station list, you can also manually set a specific frequency / channel. For manual tuning, select MENU > Manual tuning and use the ◀/▶ buttons to navigate to the desired frequency / channel
text_image
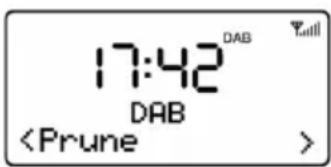
10:48 DAB 5A 174.928MHz6.4. Inactive stations (Prune)
Use this function to remove stations from the station list that are not available anymore.
text_image
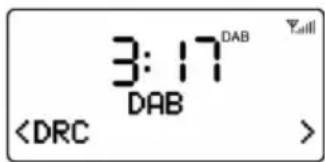
Digital display showing DAB time value and Prune status indicator6.5. DRC
If you are listening to music with a high dynamic range in a noisy environment, you may wish to compress the audio dynamic range. This makes quiet sounds louder, and loud sounds quieter. Select DRC from the main menu and choose high, low or off.
text_image
3:17DAB DABThis function must be supported by the respective station.
6.6. Save favorite DAB+ station
While a DAB+ station is playing, press and hold the PRESET button. Choose a free slot or overwrite an existing favorite. Up to 20 stations can be stored in DAB mode.
6.7. Recall favorite DAB+ station
Press the PRESET button to display a list of all stored stations.
Select a desired station with ◀/▶ and confirm the selection with OK.
6.8. DAB+ Information
While listening to a radio station, you can press the INFO button several times to switch between the different DAB+ information of the station (e.g. frequency, bit rate, signal strength, etc.).
7. FM Mode
The _all icon in the upper right corner of the screen shows the strength of the FM signal detected by the radio.
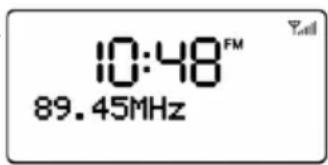
7.1. Tune FM stations
Use the ◀/▶ buttons to change the FM frequency in 0.05 MHz steps. If you hold down one of the two buttons, the radio automatically searches for the next available FM station.
text_image
10:48FM 89.45MHz7.2. FM scan settings
You can choose whether only channels with a strong reception signal or all channels should be found during the station search.
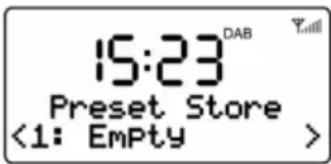
7.3. Save favorite FM stations
While listening to an FM station, press and hold the PRESET button. Choose a free slot or overwrite an existing favorite. Up to 20 stations can be stored in DAB mode.
text_image
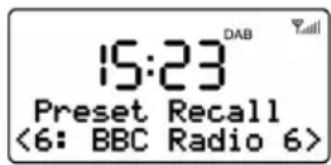
15:23 DAB Preset Store <1: Empty >7.4. Recall favorite FM stations
Briefly press the PRESET button to display a list of all stored stations. Select a desired station with ◀/▶ and confirm the selection with OK.
text_image
15:23 DAB Preset Recall <6: BBC Radio 6>8. Aux-In Mode
In AUX-IN mode you can play audio files from an external source, e.g. from an MP3 player. To play an audio file via AUX-IN mode, follow these steps:
- Turn down the volume on both the DR 750 and the external audio source (if adjustable).
- Connect the external audio source with a 3.5mm audio cable to the AUX-IN socket on the rear of the radio.
- Press the MODE button and select AUX IN in the main menu.
9. Bluetooth Mode
When you select Bluetooth mode the first time, the device starts the pairing mode. Search on your smartphone, tablet or other Bluetooth device for the radio. The device's Bluetooth pairing name is „ALBRECHT DR 750“. If your device requires a password, enter „0000“.
When the connection is successfully established, the screen will show "Bluetooth Connected" and the radio can play the music from your device. You can control the music playback using the ▶ (play / pause) and ◀/▶ (next / last track) buttons.
Next time the radio will automatically connect to your Bluetooth device when it is within range. The Bluetooth range is approx. 10m.
If the radio is connected to a Bluetooth device and you want to connect the radio to a new Bluetooth device, press the PAIR button. The current connection is terminated and you can pair a new device.
10. Trouble shooting
| Error Remedy | |
| The device does not switch on orturnes off suddenly. | 1. Check if the power adaptor is connected properly.2. The device may malfunction when used in areas with strong radio interference. The device will work properly again once interference ceases.3. The normal function of the product may be disturbed by strong Electro-Magnetic Interference. If so, simply reset the product to resume normal operation by following the procedures specified on instruction manual. If failure persists, try to use the product in other location. |
| No Power 1. Ensure that the power adaptor is plugged to the power socket securely.2. Ensure that the battery has been charged. If battery power is low, charge the device by connecting the power adaptor. | |
| No Sound or lower sound 1. Turn up the volume as it may be muted.2. For AUX IN mode, check if the audio cable is connected properly and the volume of the audio source is set high enough. | |
| No signal or hiss in DAB/FM mode. 1. Check the antenna if properly installed or move the antenna to another position. Try to adjust the length of antenna.2. Move the device to another location.3. The signal strength might be effected while charging the radio | |
| Cannot connect with the device via Bluetooth. | 1. The device is connected with another Bluetooth-enabled device. Disconnect that device and then try again. |
| Alarm doesn't work. 1. Switch on the alarm.2. The volume may not be properly set, refer to the solutions of “No sound or lower sound”.3. The source of alarm was set to a station without signal. Change the source of alarm or refer to “No signal or hiss in DAB/FM mode”. | |
11. Technical specifications
| Model Name DR 750 | |
| Modes DAB+/FM/Bluetooth | |
| Battery capacity (included) 2,000 mAh | |
| Max Play Time(with battery) up to 20 hours | |
| Power Consumption 7.5 W | |
| Standby Power Consumption < 1 W | |
| DAB Frequency 174.928 - 239.200 MHz | |
| FM Frequency 87.5 - 108.0 MHz | |
| Bluetooth support V2.1 + EDR | |
| Bluetooth operation range up to 10 meters | |
| Transmission frequency and power 2.402 – 2.480 GHz; 1 mW | |
| Protocols A2DP 1.2 | |
| Working Temperature | 0 °C ~ 35 °C |
12. Warranty and Recycling Information
We are legally obliged to include disposal and warranty information as well as EU declaration of conformity with the use instructions in different countries for every unit. Please find this information on the following pages.
2-Year Warranty From Date Of Purchase
The manufacturer/retailer guarantees this product for two years from date of purchase. This warranty includes all malfunctions caused by defective components or incorrect functions within the warranty period excluding wear and tear, such as exhausted batteries, scratches on the display, defective casing, broken antenna and defects due to external effects such as corrosion, over voltage through improper external power supply or the use of unsuitable accessories. Defects due to unintended use are also excluded from the warranty.
Please contact your local dealer for warranty claims. The dealer will repair or exchange the product or forward it to an authorized service center.
You can also contact our service partner directly. Please include your proof of purchase with the product and describe the malfunction as clearly as possible.
WEEE and Recycling

The European law does not allow any more the disposal of old or defective electric or electronic devices with the household waste. Return your product to a municipal collection point for recycling to dispose of it. This system is financed by the industry and ensures environmentally responsible disposal and the recycling of valuable raw materials.
Notes for battery disposal
The battery used with this product contains chemicals that are harmful to the environment. To preserve our environment, dispose of used battery according to your local laws or regulations. Do not dispose of battery with normal household waste.
For more information, please contact the local authority or your retailer where you purchased the product.
13. CE Declaration of Conformity - Standards and Regulations

Hereby, Alan Electronics GmbH declares that the radio equipment type DR750 is in compliance with Directive 2014/53/EU. The full text of the EU declaration of conformity is available at the following internet address:
www.service.alan-electronics.de/CE-Papiere
14. Service Address And Technical Hotline (for units sold in Germany)
Contact our service hotline by phone +49 6103 / 9481 - 66
or e-mail to service@albrecht-midland.de
Printing errors reserved.
Information in this user manual are subject to change without prior notice.
© 2022 Alan Electronics GmbH - Daimlerstrasse 1g - 63303 Dreieich - Germany
natural_image
Black DAB Radio device with digital display showing 23:46, no visible text or symbols on device bodyGuide d'utilisation
Français
Sommaire
natural_image
Black rectangular electronic device with a circular lens and two circular buttons (no visible text or symbols)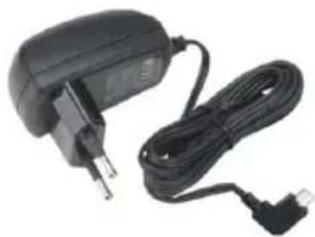
natural_image
Electric charger with attached cable and plug (no visible text or symbols)
text_image
ALBRECHT. Auto Anleitung Manual3. Premières étapes
text_image
10:48 DAB Total System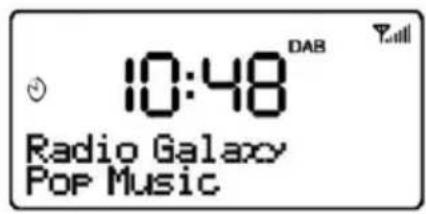
text_image
10:48 DAB Radio Galaxy Pop Music4.2. Réveil
text_image
10:48 System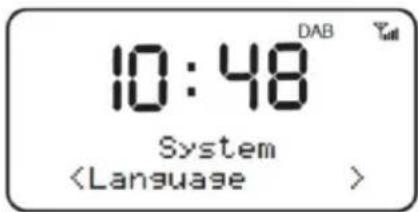
text_image
10:48 System (Language)text_image
10:48FM 89.45MHznatural_image
Black DAB Radio device with digital clock display showing 23:46 (no text or symbols on device body)Manuale
Italiano
Sommario
natural_image
Black rectangular electronic device with a circular lens and two circular buttons (no visible text or symbols)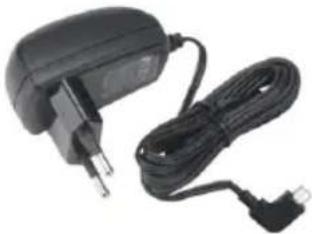
natural_image
Electric charger with black cable and power plug (no visible text or symbols)
text_image
ALBRECHT. Audio Anleitung Manualtext_image
10:48 System