Kubik One - Soundbar Dali - Free user manual and instructions
Find the device manual for free Kubik One Dali in PDF.
User questions about Kubik One Dali
0 question about this device. Answer the ones you know or ask your own.
Ask a new question about this device
Download the instructions for your Soundbar in PDF format for free! Find your manual Kubik One - Dali and take your electronic device back in hand. On this page are published all the documents necessary for the use of your device. Kubik One by Dali.
USER MANUAL Kubik One Dali
natural_image
Close-up of two electronic devices with red and black panels, no visible text or symbols
natural_image
Technical line drawing of a mechanical assembly with a power outlet, pipe, and internal components (no text or symbols)
text_image
DALI.
text_image
DALI.
text_image
DALI.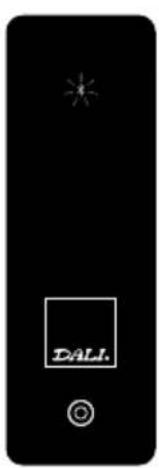
text_image
DALI.Off mute bluet00th bluet00th
paring
fig. 1 fig. 2
CONTENTS / INHALT / INDHOLD / 零部件 / FRANÇAIS
ENGLISH 3
DEutScH 19
DANSK 35
中国 51
frANçAIS 67
CONTENTS
Box coNtENtS 4
INtroDuctIoN 5
uNpAcKING 5
CONNECTIONS
coNNEctloNS 6
SPEAKER SETUP
poSltloNING 8
CONTROLS
coNtroLS 10
PLAYBACK
BLuEtootH SETup 13
APPENDIX
Ir LEArNING 14
ruNNING IN 16
ovErLoAD 16
cLEANING 16
DISpoSAL 16
BOX CONTENTS
KUBIK ONE
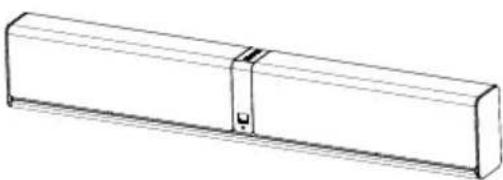 |  |
 Power cable Power cable |  |
 KUBIK Remote KUBIK Remote |  |
 |  |
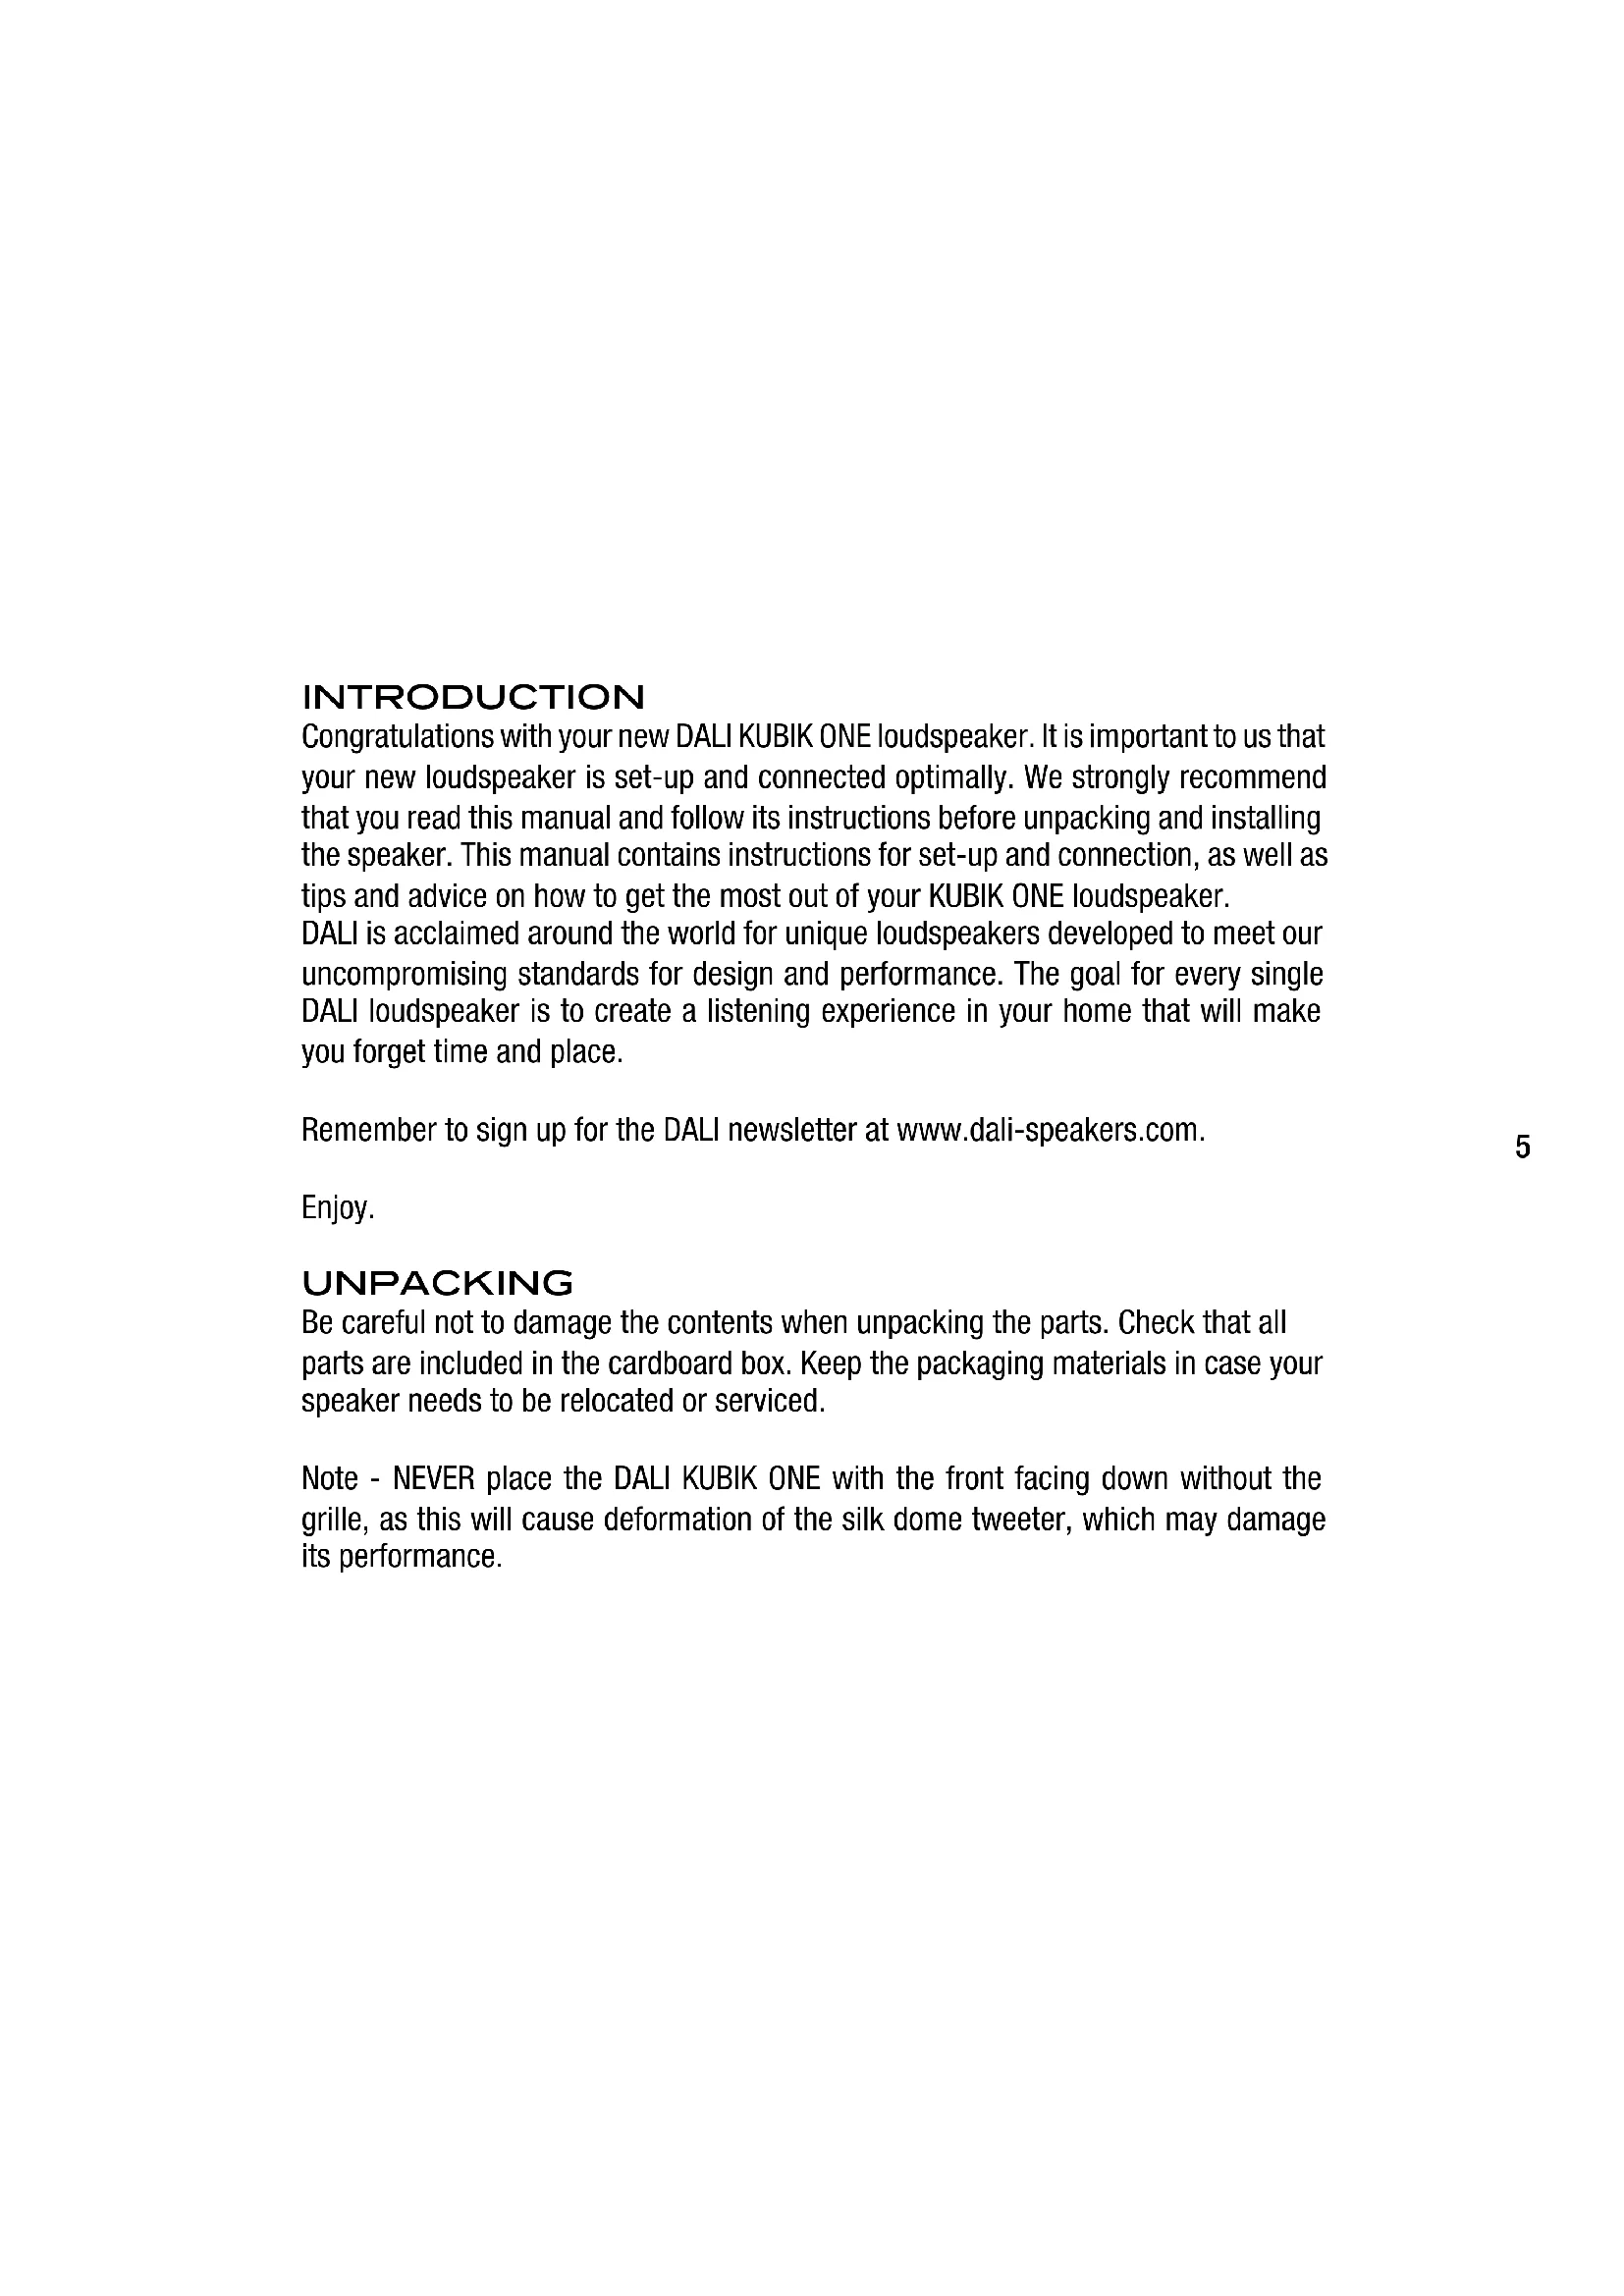
INTRODUCTION
Congratulations with your new DALI KUBIK ONE loudspeaker. It is important to us that your new loudspeaker is set-up and connected optimally. We strongly recommend that you read this manual and follow its instructions before unpacking and installing the speaker. This manual contains instructions for set-up and connection, as well as tips and advice on how to get the most out of your KUBIK ONE loudspeaker.
DALI is acclaimed around the world for unique loudspeakers developed to meet our uncompromising standards for design and performance. The goal for every single DALI loudspeaker is to create a listening experience in your home that will make you forget time and place.
Remember to sign up for the DALI newsletter at www.dali-speakers.com.
Enjoy.
UNPACKING
Be careful not to damage the contents when unpacking the parts. Check that all parts are included in the cardboard box. Keep the packaging materials in case your speaker needs to be relocated or serviced.
Note - NEVER place the DALI KUBIK ONE with the front facing down without the grille, as this will cause deformation of the silk dome tweeter, which may damage its performance.
CONNECTIONS
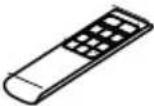
CONNECTIONS
1 USB connector
Connect a Micro USB cable to the KUBIK ONE.
Note – The Micro USB input only works with a PC or MAC (iPad when using the Apple Camera Connection Kit).
2 Optical connector
Connect an optical cable (TOSLINK) to the KUBIK ONE.
3 Optical connector
Connect an optical cable (TOSLINK) to the KUBIK ONE.
4 AUX connector
Connect an analogue source via a RCA (Cinch) cable.
5 Subwoofer connector
Connect any active Subwoofer to the KUBIK ONE.
The KUBIK ONE automatically activates the Subwoofer output when the cable is connected.
CONNECTIONS
text_image
5 4 3 2 1 L R SUB OUT L AUX IN OPTICAL IN OPTICAL IN USB IN
natural_image
Technical line drawing of a mechanical assembly with pipes and components (no text or symbols)KUBIK ONE has a build in cable management bay on the back for securing cables connected to the KUBIK ONE and to let cables from a TV pass hidden behind it.
SPEAKER SETUP
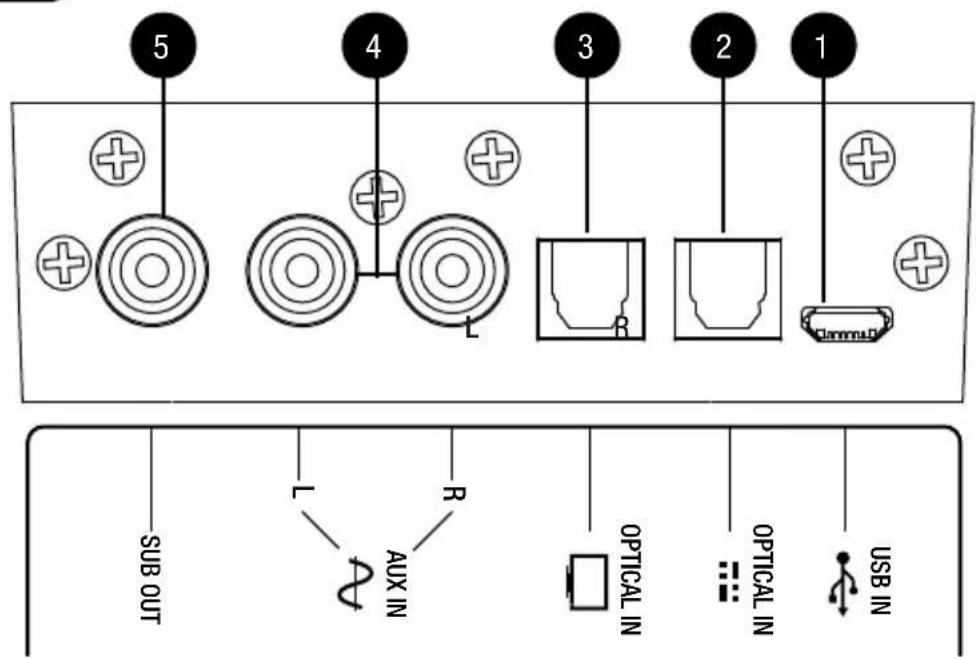
POSITIONING
natural_image
Top-down diagram of a person in bed with an upward arrow and downward arrow, enclosed in a rectangular frame (no text or symbols)KUBIK ONE is a stereo speaker and should be positioned so the centre of the speaker is focused around ear level when seated in the most common listening position.
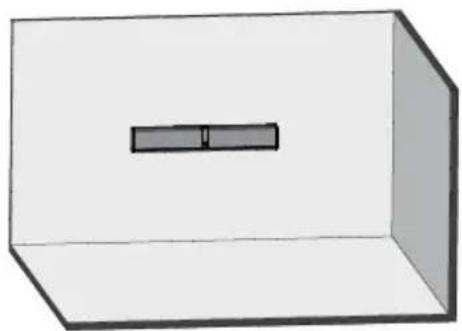
The KUBIK ONE can be used in many scenarios and for multiple purposes. To serve these possibilities DALI has included the option to change Bass Level on the KUBIK ONE. The following Bass Levels are available.
Neutral Authentic bass level for music or TV listening
Bass Enhance Slightly enhanced bass level for music or movie sound in larger rooms
Bass Boost High bass level for music or movie sound in a big room
The bass level description above should be viewed as guidance and as a help to get the most optimal performance from our KUBIK ONE. Adjusting the bass level is in the end a matter of listening and finding what is most suitable for the room and situation.
SPEAKER SETUP
natural_image
Simple 3D diagram of a rectangular box with a small internal rectangle inside (no text or symbols)
text_image
BASS LEVEL • Bass Boost • Bass Enhance • Neutral
natural_image
Simple line drawing of a TV setup with a monitor and two boxes on a sofa, enclosed in a room with legs and a door (no text or symbols)
text_image
BASS LEVEL • Bass Boost • Bass Enhance • Neutral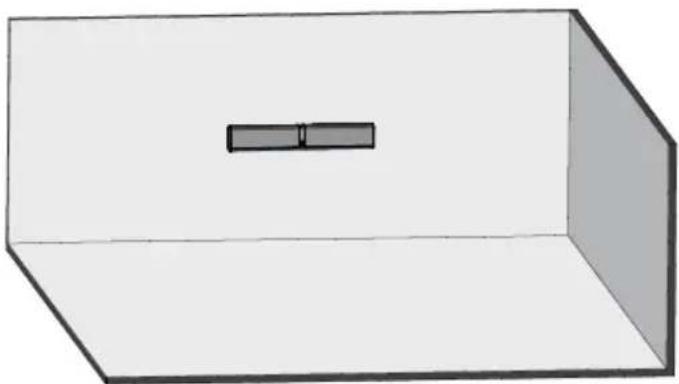
natural_image
3D rendering of a rectangular box with a small rectangular slot on top (no text or symbols)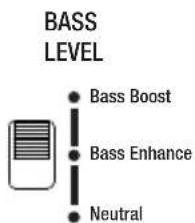
text_image
BASS LEVEL • Bass Boost • Bass Enhance • NeutralCONTROLS
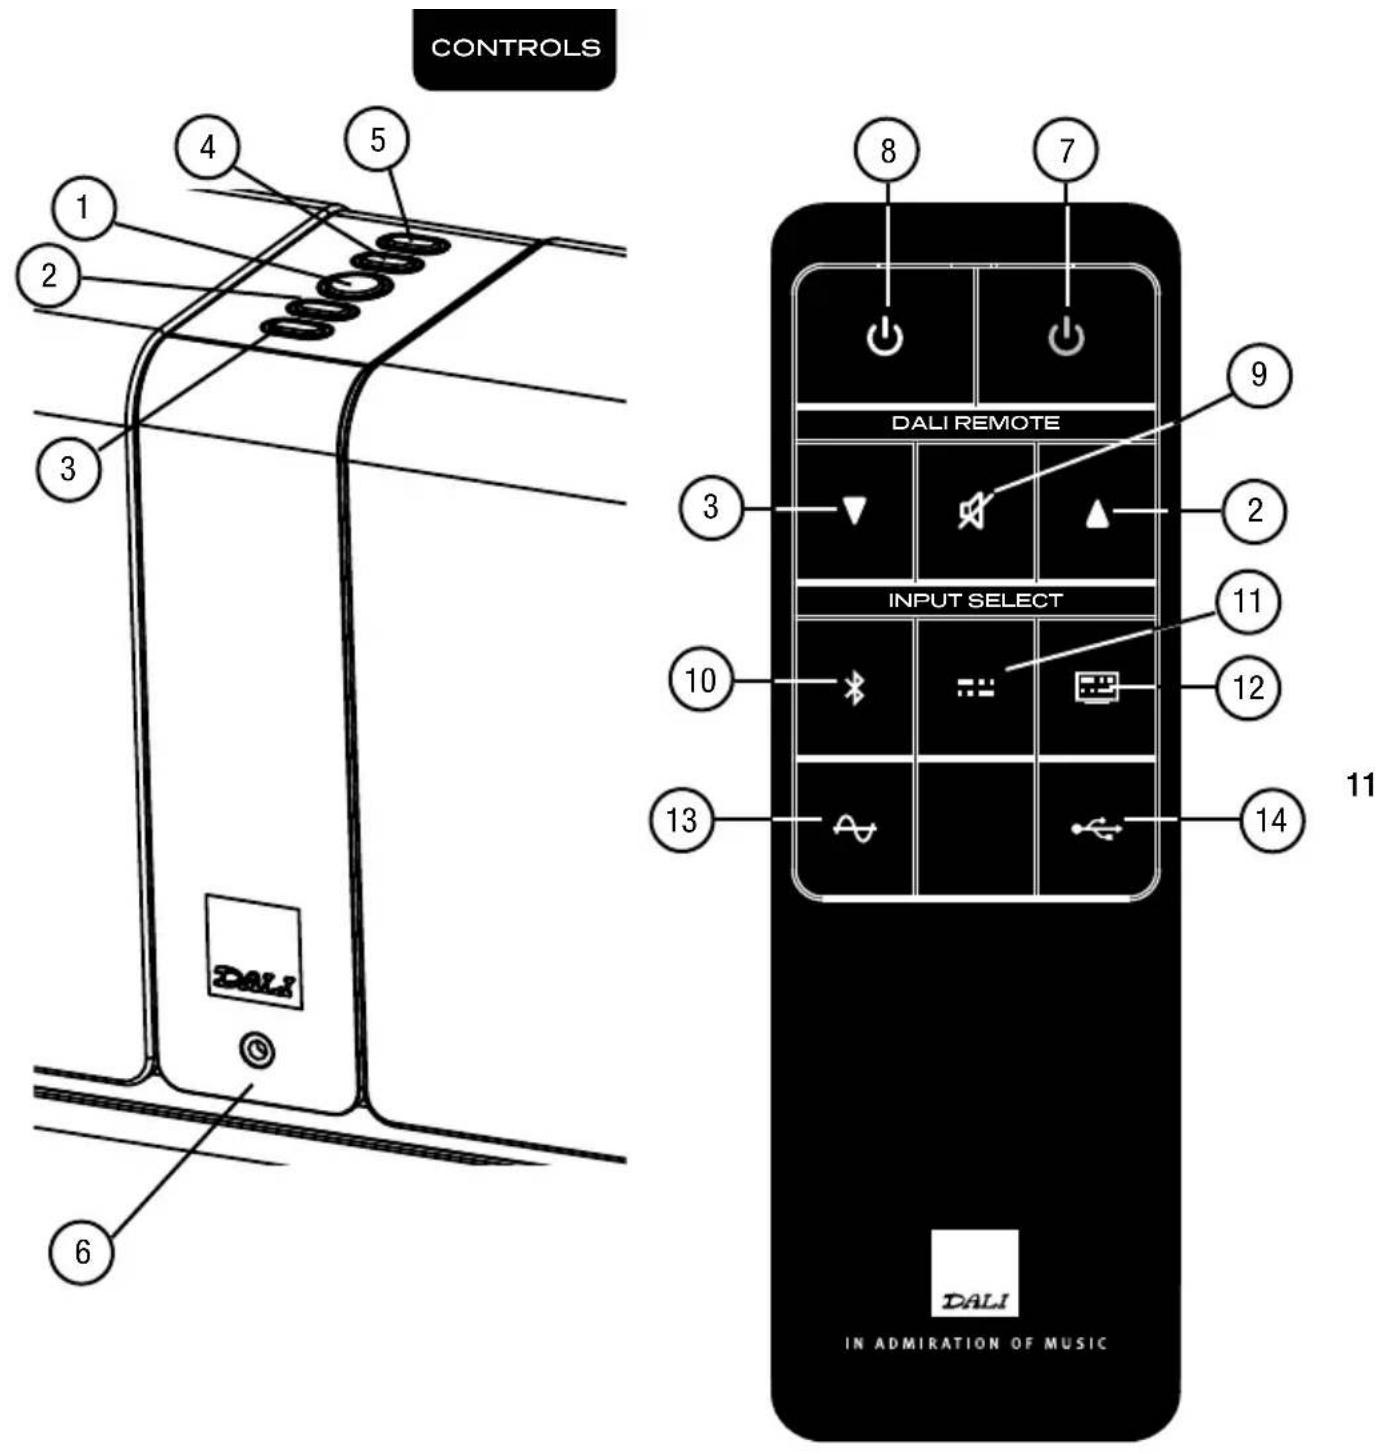
CONTROLS
1 Power Button
To turn on the KUBIK ONE press the Power Button
To turn off the KUBIK ONE press and hold the Power Button for 4 sec
To Mute the KUBIK ONE press the Power Button, press again to un-mute
② Volume up
③ Volume down
④ Input Selector
To change input press the Input Selector button
The light on the front of the KUBIK ONE will indicate the active input type
⑤ IR Learning
Operate the KUBIK ONE from any remote control, see page 14 for more information.
10
⑥ Mini Jack in
The KUBIK ONE automatically selects this input when a cable is connected. Therefore when connected, the KUBIK ONE can only play from this input.
⑦ Power off (Standby mode)
⑧ Power on
⑨ Mute
10 Bluetooth input selector
11 Optical input selector – Audio
12 Optical input selector – TV
13 AUX input selector
14 USB input selector
text_image
CONTROLS DALI REMOTE INPUT SELECT DALI IN ADMIRATION OF MUSIC
text_image
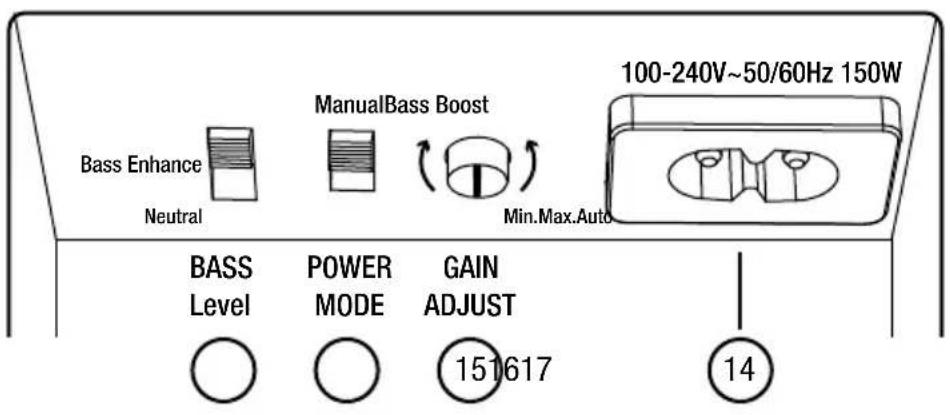
Bass Enhance Neutral ManualBass Boost Min.Max.Auto 100-240V~50/60Hz 150W BASS Level POWER MODE GAIN ADJUST 151617 1412
14 Power Cord Connection
15 Gain adjust
16 Auto Power Mode
Auto
Turns off KUBIK ONE after minutes of inactivity.
Turns on when signal activity is detected from sourced used when put into standby mode.
Manual
Power on/off by using power button or remote.
17 Bass Level (See page 9)
PLAYBACK
BLUETOOTH SETUP
| Action | Status | |
| 1 Select Bluetooth on the KUBIK ONE. | The light next to the × symbol will start flashing, indicating the KUBIK ONE is ready for pairing. | |
| 2 Enable Bluetooth on phone, tablet or PC. | ||
| 3 On the phone, tablet or PC, scan for Bluetooth devices. | DALI KUBIK ONE will show up on the list of Bluetooth devices. | |
| 4 Select 'DALI KUBIK ONE' and finalize the pairing process. | If asked to input a code use four zeros (0000). | |
| 5 KUBIK ONE is now connected to your phone, tablet or PC. | KUBIK ONE is now connected and will play music and video audio. | |
When turned on in Bluetooth mode, or switched to Bluetooth mode via the input selector or remote control, the KUBIK ONE will automatically try to reconnect to the last used phone, tablet or PC.
As long as a phone, tablet or PC is connected to the KUBIK ONE no other phone, tablet or PC can connect. Release Bluetooth connection on phone, tablet or PC to activate pairing process for new phone, tablet or PC.
KUBIK ONE will not function as a hands free speaker for your phone or PC.
Note: To achieve the best audio quality set the volume on your phone, tablet or PC to maximum and use the volume control on the KUBIK ONE.
APPENDIX
IR LEARNING
The IR learning function lets you use an existing remote control to operate the KUBIK ONE. This means that you can use your TV remote control, or any other remote control to adjust the volume and activate any input on the KUBIK ONE. To achieve this you must first enable the KUBIK ONE to accept the IR signals from the remote you wish to use. Follow the simple steps below to activate IR learning for your remote control.
Place yourself in close proximity to the front of the KUBIK ONE. Have both your primary remote control and the KUBIK ONE remote control ready at hand, and the KUBIK ONE turned on.
NOTE: The KUBIK ONE will automatically exit IR learning mode if no user activity is detected for 30 seconds.
NOTE: KUBIK ONE IR learning only works with IR (Infrared) remote controls. Bluetooth, Radio frequency or WiFi based remote controls will not work.
Even though IR is a standard, it is sometimes used differently by manufacturers. For this reason, DALI cannot guarantee that the KUBIK ONE IR learning will work with all IR remote controls on the market.
APPENDIX
| Action Status | ||
| 1 | Start processTo enter IR learning mode press and hold the button directly on the KUBIK ONE control panel. | All indicator lights on the front of the KUBIK ONE will turn on to show IR learning mode is active. |
| 2 | Define functionPress the button directly on the KUBIK ONE or on the KUBIK ONE remote that performs the function that you wish to be transferred to your primary remote control. | The red indicator light on the front of the KUBIK ONE will turn off when the input is accepted. |
| 3 | Define primary remote control button3.1. Press the button on the primary remote that you wish to perform the function indicated in the previous step.3.2. Press and hold the same button for 5 seconds.3.3. Press the same button again. | 3.1. The indicator lights turns off when input is accepted.3.2. The indicator lights turns off when input is accepted.3.3. The indicator lights blinks when final input is accepted. |
| 4 | Continue or exit processTo teach other functionsRepeat step 2 and 3 until all the desired functions have been taught.To exit IR learning modePress and hold the button directly on the KUBIK ONE, alternatively wait 30 seconds. | |
| 5 | You are doneIt is now possible to control the KUBIK ONE from your primary remote. |
If you accidentally assign a wrong primary remote control key to a KUBIK ONE function, just restart the learning process for that function to overwrite.
APPENDIX
RUNNING IN
Like any mechanical system (e.g. a new car), a loudspeaker requires a “running-in” period to perform at its best. You will experience a gradual increase in sound quality during the first period of use. The break-in period will vary depending on use and playback volume (approximately 50 hours at medium volume is recommended). Unlike other mechanical systems, the life-span of a loudspeaker is increased by normal, regular playback of music.
OVERLOAD
If the KUBIK ONE is overloaded it will automatically turn off to protect itself and the power LED will start flashing. Turn on KUBIK ONE manually after approximately 15-20 min.
CLEANING
Clean the cabinets with a soft, dry cloth. If the cabinets are dirty, wipe with a soft cloth dipped in all-purpose cleaner and then well wrung out. Be very careful when wiping the speaker cones, as they are very fragile. Front grilles can be cleaned with a clothes brush and wiped with a wellwrung, lint-free cloth and mild all-purpose cleaner.
16
DISPOSAL
If you want to dispose of this product, do not mix it with general household waste. There is a separate collection system for used electronic products in accordance with legislation that requires proper treatment, recovery and recycling. Private households in the EU member states, Switzerland, Liechtenstein and Norway may return their used electronic products free of charge to designated collection facilities or to a retailer (if you purchase a similar new one). If you reside in countries not mentioned above, please contact your local authorities for the correct method of disposal. By following this process, you will ensure that your disposed product undergoes the necessary treatment, recovery and recycling and thus prevent potential negative effects on the environment and human health.
CAUTION
RISK OF ELECTRIC SHOCK DO NOT OPEN. TO REDUCE THE RISK OF ELECTRIC SHOCK, DO NOT REMOVE THE BACK PANEL. NO USER-SERVICEABLE PARTS INSIDE. REFER SERVICING TO QUALIFIED PERSONNEL.
1 Read instructions - all the safety and operating instructions should be read before the appliance is operated.
2 Retain instructions - the safety and operating instructions should be retained for future reference.
3 Heed warnings - all warnings on the appliance and in the operating instructions should be adhered to.
4 Follow instructions - all operating and use instructions should be followed.
5 Water and moisture - the appliance should not be used near water - for example, near a bathtub, washbowl, kitchen sink, laundry tub, in a wet basement, or near a swimming pool and the like.
6 Carts and stands - the appliance should be used only with a cart or stand if recommended by the manufacturer.
7 Wall or ceiling mounting - the appliance should be mounted to a wall or ceiling only as recommended by the manufacturer.
8 Ventilation - the appliance should be situated so that its location or position does not interfere with proper ventilation. For example, the appliance should not be situated on a bed, sofa, rug, or similar surface that may block the ventilation openings; or placed in a built-in installation, such as a bookcase or cabinet, that may impede the flow of air through the ventilation openings.
9 Heat - the appliance should be situated away from heat sources such as radiators, heat registers, stoves, or other appliances that produce heat.
10 Power sources - the appliance should be connected to a power supply only of the type described in the operating instructions or as marked on the appliance.
APPENDIX


The lightning flash within an equilateral triangle is intended to alert you to the presence of non insulated "dangerous voltage" within the product's enclosure that may be of sufficient magnitude to constitute an electric shock to persons.
The exclamation point within an equilateral triangle is intended to alert you to the presence of important operating and maintenance (servicing) instructions in the literature accompanying the appliance.
11 Power cord protection - power-supply cords should be routed so that they are not likely to be walked on or pinched by items placed on or against them, paying particular attention to cords at plugs, convenience receptacles and the point where they exit from appliance. Appliance coupler serves as disconnecting device.
12 Cleaning - do not use any liquid cleaners. Use only a dry cloth to wipe off dust and grease.
13 Non-use periods - the power cord of the appliance should be unplugged from the outlet when left unused for a long period of time.
14 Object and liquid entry - care should be taken so that objects do not fall and liquids are not spilled into the enclosure through openings.
15 Damage requiring service - the appliance should be serviced by qualified personnel when:
a) The power-supply cord or the plug has been damaged; or
b) Objects have fallen, or liquid has been spilled into the appliance; or
c) The appliance has been exposed to rain; or
d) The appliance does not appear to operate normally, or exhibits a marked change in performance; or
e) The appliance has been dropped, or the enclosure damaged.
16 Servicing - the user should not attempt to service the appliance beyond that described in the opera ting instructions. All other servicing should be referred to qualified service personnel.
DE
INHALT
LIEfEruMfANG 20
EINLEltuNG 21
AuSpAcKEN 21
ANSCHLÜSSE
ANScHLÜSSE 22
INBETRIEBNAHME
AufStELLuNG 24
BEDIENELEMENTE
BEDIENELEMENTE 26
WIEDERGABE
BLuEtootH-EINSTELLuNGEN 29
ANHANG
LErNfuNKtloN fÜR INfrArot-BEfEHLE 30
EINSpIELEN 32
ÜBErLASTuNGSScHutZ 32
rEINIGuNG 32
ENtSorGuNG 32
LIEFERUMFANG
KUBIK ONE
| |
 Power cable Power cable | |
 KUBIK Remote KUBIK Remote |  |
| |
EINLEITUNG
text_image
5 4 3 2 1 L R SUB OUT L AUX IN R OPTICAL IN OPTICAL IN USB IN
natural_image
Technical line drawing of a mechanical assembly with pipes and components (no text or symbols)natural_image
Top-down diagram of a person sitting in a chair with an upward arrow and a horizontal bar above, enclosed in a rectangular frame (no text or symbols)natural_image
Simple 3D diagram of a rectangular box with a small internal rectangle inside (no text or symbols)
text_image
BASS LEVEL • Bass Boost • Bass Enhance • Neutral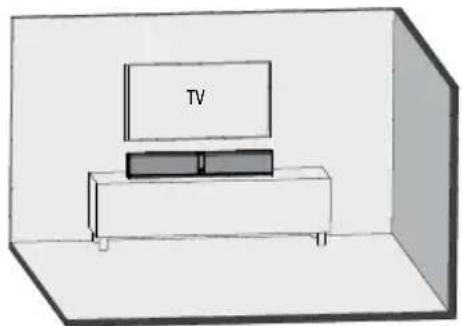
natural_image
Simple line drawing of a TV setup with a monitor and two boxes on a sofa, enclosed in a room with legs and a door (no text or symbols)
text_image
BASS LEVEL • Bass Boost • Bass Enhance • Neutral
natural_image
3D rendering of a rectangular box with a small rectangular slot on top (no text or symbols)
text_image
BASS LEVEL • Bass Boost • Bass Enhance • NeutralBEDIEN- ELEMENTE
BEDIENELEMENTE
1 Netzschalter
text_image
5 4 3 2 1 L R SUB OUT L AUX IN OPTICAL IN OPTICAL IN USB IN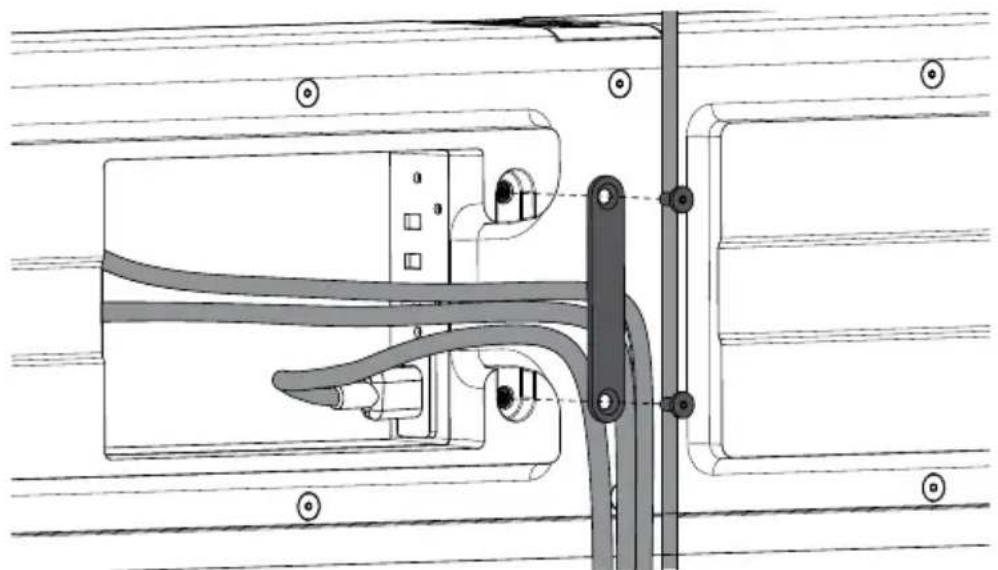
natural_image
Technical line drawing of a mechanical assembly with pipes and components (no text or symbols)natural_image
Top-down diagram of a person sitting in a chair with an upward arrow and downward arrow indicating motion or movement (no text or symbols)natural_image
3D diagram of a rectangular box with a small internal rectangle, no text or symbols present
text_image
BASS LEVEL • Bass Boost • Bass Enhance • Neutral
natural_image
Simple line drawing of a TV setup with a monitor and two boxes on a sofa (no text or symbols)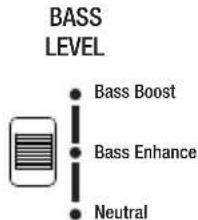
text_image
BASS LEVEL • Bass Boost • Bass Enhance • Neutral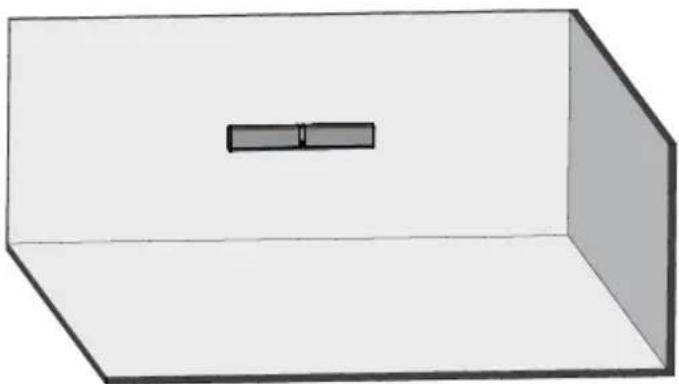
natural_image
3D rendering of a rectangular box with a small rectangular slot on top (no text or symbols)
text_image
BASS LEVEL • Bass Boost • Bass Enhance • NeutralFUNKTIONER OG INDSTILLINGER
FUNKTIONER OG INDSTILLINGER
① Tænd / Sluk
natural_image
Technical line drawing of a mechanical assembly with pipes and components (no text or symbols)natural_image
Top-down diagram of a person sitting in a chair with an upward arrow and a downward arrow, enclosed in a decorative border (no text or symbols)natural_image
3D diagram of a rectangular box with a small internal rectangle, no text or symbols present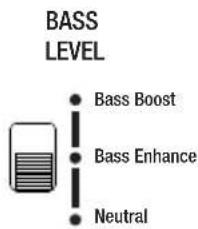
text_image
BASS LEVEL • Bass Boost • Bass Enhance • Neutral
natural_image
Simple line drawing of a TV setup with a monitor and two boxes on a sofa, enclosed in a room with legs and a door (no text or symbols)
text_image
BASS LEVEL • Bass Boost • Bass Enhance • Neutral
natural_image
3D rendering of a rectangular box with a small rectangular slot on top (no text or symbols)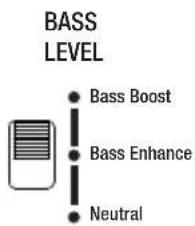
text_image
BASS LEVEL • Bass Boost • Bass Enhance • Neutral控制
控制
① 电源键
coNflGurAtloN BLuEtootH 77
ANNEXES
ApprENtISSAGE Ir 78
roDAGE 80
SurcHArGE 80
NEttoYAGE 80
MISE Au rEBut 80
CONTENU DE LA BOÎTE
KUBIK ONE
| |
 Power cable Power cable | |
| KUBIK Remote | |
| |
INTRODUCTION
text_image
5 4 3 2 1 L R SUB OUT L AUX IN OPTICAL IN OPTICAL IN USB IN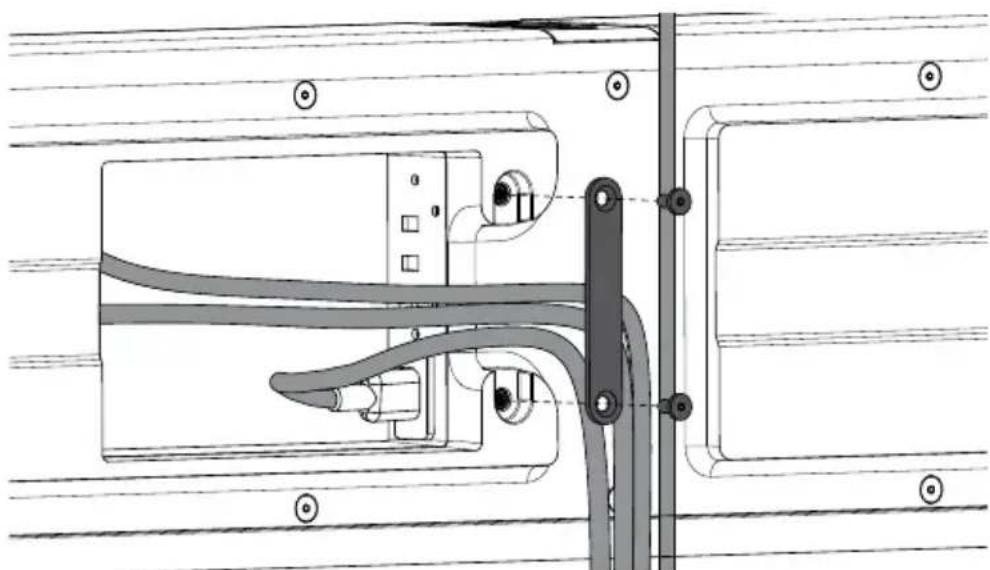
natural_image
Technical line drawing of a mechanical assembly with no visible text or symbolsnatural_image
Top-down diagram of a person in a seated position with an upward arrow above, enclosed in a rectangular frame (no text or symbols)72
natural_image
Simple 3D diagram of a rectangular box with a small internal rectangle inside (no text or symbols)
text_image
BASS LEVEL • Bass Boost • Bass Enhance • Neutral
natural_image
Simple line drawing of a TV setup with a monitor and two boxes on a sofa, enclosed in a room with legs and a door (no text or symbols)
text_image
BASS LEVEL • Bass Boost • Bass Enhance • Neutral
natural_image
3D rendering of a rectangular box with a small rectangular slot on top (no text or symbols)
text_image
BASS LEVEL • Bass Boost • Bass Enhance • NeutralCOMMANDES
COMMANDES
| KUBIK ONE | |
| Frequency Range +/-3dB [Hz] 48-22,000 | |
| Maximum SPL [dB] 103 per channel | |
| Crossover Frequency [Hz] 3,000 | |
| Crossover Principle DSP based digital IIR, 2. order | |
| High Frequency Driver 2 x 25 mm Soft Textile Dome | |
| Low Frequency/midrange Driver(s) 2 x 5.25” Wood Fibre Cone | |
| Enclosure Type Closed box | |
| Continuous IEC Power Output [RMS watt] 4 x 25 | |
| Input Impedance [Ω] 25k | |
| Connection Input(s) 3.5 mm mini jack, RCA (Cinch)Optical (Toslink), USB (Micro) | |
| Wireless Input(s) BluetoothTM Apt-X | |
| Connection Output(s) Sub out | |
| Amplifier Type Fully digital Class D, open loop type | |
| Recommended Placement Keyhole mounting On-Wall, Shelf, Stand | |
| Recommended Distance From Wall [cm] | 0 - 30 |
| Functions | IR Learning, Power On/Off, Source Select, Standby (Auto Power) On/Off, Volume, Volume (Gain) |
| Standby Power Consumption [W] | <0,5 |
| Maximum Power Consumption [W] 150 | |
| Dimensions (HxWxD) [mm] | 162 x 980 x 102 |
| Weight [kg] | 9,6 |
| Accessories Included | Mains Cable (1.5m), Manual, Remote Control, Bumpers |
| Optional Accessories | Interchangeable Grilles |
| Finish | Black Grille, Ice Grille, Red Grille |
All technical specifications are subject to change without notice.

text_image
DALI
IN ADMIRATION OF MUSIC
DALI Denmark +45 9672 1155
www.dali-speakers.com