
GD250 - Camcorder GiiNii - Free user manual and instructions
Find the device manual for free GD250 GiiNii in PDF.

User questions about GD250 GiiNii
0 question about this device. Answer the ones you know or ask your own.
Ask a new question about this device
Download the instructions for your Camcorder in PDF format for free! Find your manual GD250 - GiiNii and take your electronic device back in hand. On this page are published all the documents necessary for the use of your device. GD250 by GiiNii.
USER MANUAL GD250 GiiNii
© 2014 GiiNii Tech Corporation All rights reserved.
D.03.07.14
GD-250 Dash Cam User Manual
www.giinii.com

GD-250
Dash Cam
User Manual
Table of Contents
About this Guide 3
FCC Statement. 3
WEEE Notice 3
Notes on Installation 4
Caution 4
1 Introduction 5
1.1 Features 5
1.2 Package Contents 5
1.3 Product Overview 6
2 Getting Started 7
2.1 Inserting the Memory Card 7
2.2 Installing in Vehicles 8
2.2.1 Mount to Windshield 8
2.2.2 Adjust the device position 9
2.3 Connecting to Power 10
2.4 Powering the Dash Cam On / Off 10
2.4.1 Auto Power On/Off 10
2.4.2 Manual Power On/Off 10
2.5 Initial Settings 11
2.5.1 Set the Date and Time 11
3 Using the Dash Cam 12
3.1 Recording Videos 12
3.1.1 Record videos while driving 12
3.1.2 Manual Video Recording 12
3.1.3 Emergency Recording 12
3.1.4 The Recording Screen 13
3.1.5 Taking Photos 14
3.2Playback Videos and Photos 14
3.2.1 Deleting Files 15
4 Adjusting the Settings 16
4.1 Using the Menu 16
4.2 Menu Tree 17
5 Specifications 18
About this Guide
The content in this document is for information purpose and is subject to change without prior notice. We made every effort to ensure that this User Guide is accurate and complete.
However, no liability is assumed for any errors and omissions that may have occurred.
The manufacturer reserves the right to change the technical specifications without prior notice.
FCC Statement
This equipment has been tested and found to comply with the limits for a Class B digital device, pursuant to Part 15 of the FCC Rules. These limits are designed to provide reasonable protection against harmful interference in a residential installation. This equipment generates, uses and can radiate radio frequency energy and, if not installed and used in accordance with the instructions, may cause harmful interference to radio communications. However, there is no guarantee that interference will not occur in a particular installation. If this equipment does cause harmful interference to radio or television reception, which can be determined by turning the equipment off and on, the user is encouraged to try to correct the interference by one or more of the following measures:
- Reorient or relocate the receiving antenna.
- Increase the separation between the equipment and receiver.
- Connect the equipment into an outlet on a circuit different from that to which the receiver is connected.
- Consult the dealer or an experienced radio/TV technician for help.
This device complies with Part 15 of the FCC Rules. Operation is subject to the following two conditions: (1) This device may not cause harmful interference, and (2) this device must accept any interference received, including interference that may cause undesired operation.
FCC Caution: Any changes or modifications not expressly approved by the party responsible for compliance could void the user's authority to operate this equipment.
WEEE Notice
Disposal of Waste Electrical and Electronic Equipment and/or Battery by users in private households in the European Union

This symbol on the product or on the packaging indicates that this can not be disposed of as a household waste. You must dispose of your waste equipment and/or battery by handling it over to the applicable take-back scheme for the recycling of electrical and electronic equipment and/or battery. For more information about recycling of this equipment and/or battery, please contact your city office, the shop where you purchased the equipment or your household waste disposal service. The recycling of materials will help to conserve natural resources and ensure that it is recycled in a manner that protects human health and environment.
Notes on Installation
- Install the device near the rear-view mirror to obtain the best open-field view. Do NOT install the Dash Cam in a location that will obstruct your required driving view.
- Make sure that the lens is within the wiping range of the windscreen wiper to ensure a clear view even when it rains.
- Do not touch the lens with your fingers. Finger grease may be left on the lens and will result in unclear videos or snapshots. Clean the lens on a regular basis.
- Do not install the device on a tinted window. Doing so may damage the tint film.
- Make sure that the installation position is not hindered by the tinted window.
Caution
Use the authorized charger only.
Never disassemble or attempt repair of this product. Doing so may damage the Dash Cam, cause electric shock and void your product warranty.
Never short-circuit the battery.
Exposing the Dash Cam to open flames can cause explosion.
Due to local laws and vehicles safety considerations, do not manually operate the device while driving.
GiiNii Global Company is NOT responsible for the loss of any data/content during operation.
Before mounting, please check with the local DMV for the traffic laws of the location/method to mount appropriately.
Audio recorded with the video may not be valid jurisdictional evidence; and it may be illegal to present such audio to the jury in some states.
AV out port uses normal AV cable.
Before you start using the Car Dash Cam it is assumed that you agree to the above statements.
1 Introduction
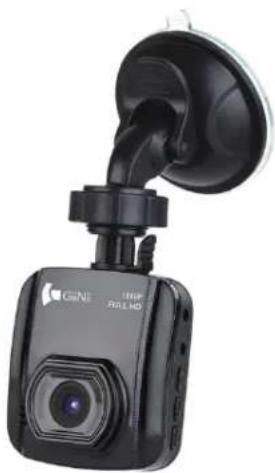
Thank you for purchasing this advanced Dash Cam. This device is specifically designed for real time video and audio recording when driving.
1.1 Features
- HD camera (1920x1080 @ 30fps)
2.0" LCD color screen - 120 degree Wide angle lens
Automatic Emergency recording for collision detection
Supports micro-SDHC up to 32GB (Class 6 or greater speed required for HD video recording)
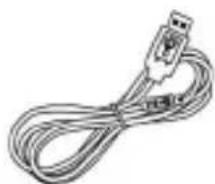
1.2Package Contents
The package contains the following items. If there are any missing or damaged items, contact your dealer immediately.
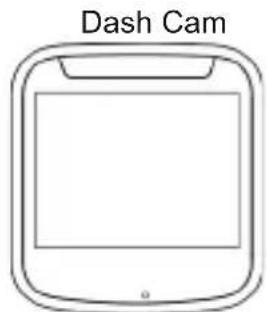
Quick start guide
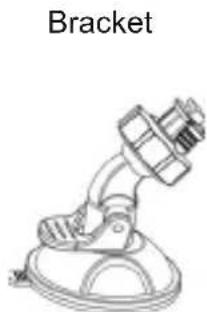
USB cable

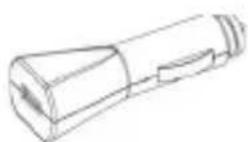
Car adapter

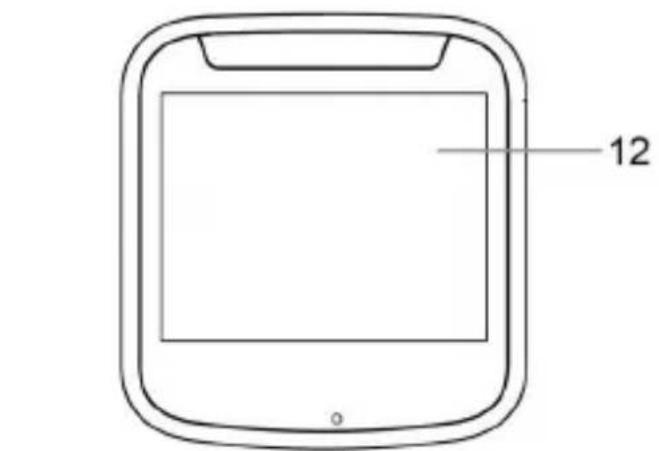
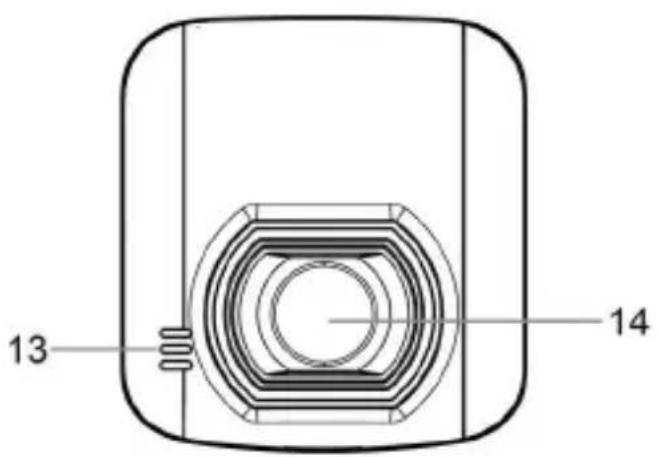
1.3 Product Overview
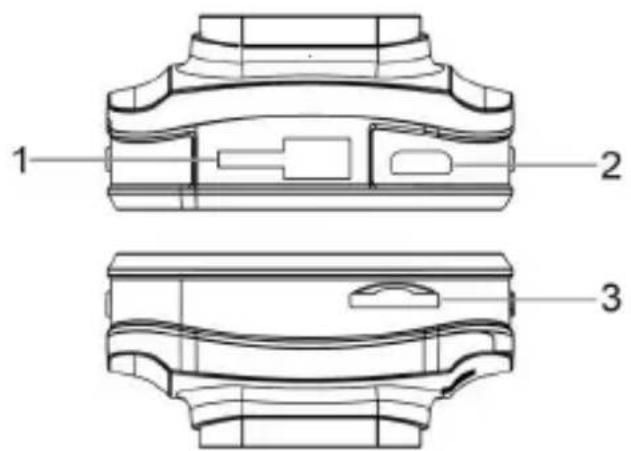
| No. Item | |
| 1 | Bracket Socket |
| 2 | USB Connector |
| 3 | Memory Card Slot |
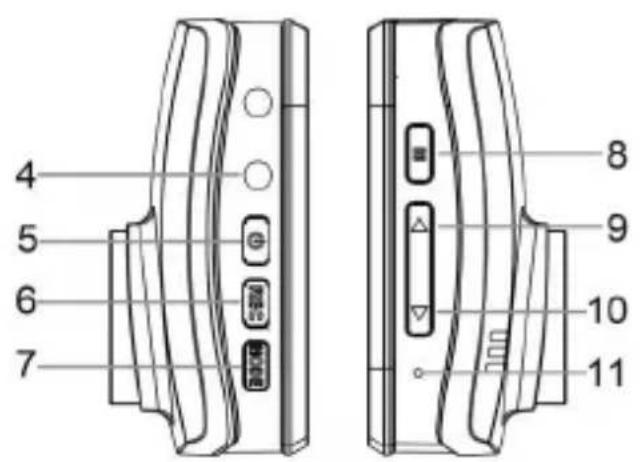
| 4 | AV/OUT |
| 5 | Power Button |
| 6 | REC(OK) |
| 7 | Mode Button (M) |
| No. Item | |
| 8 | Menu |
| 9 | Up Button (▲) |
| 10 | Down Button (▼) |
| 11 | Reset |
| 12 | LCD Panel |
| 13 | Speaker |
| 14 | Wide Angle Lens |
2Getting Started
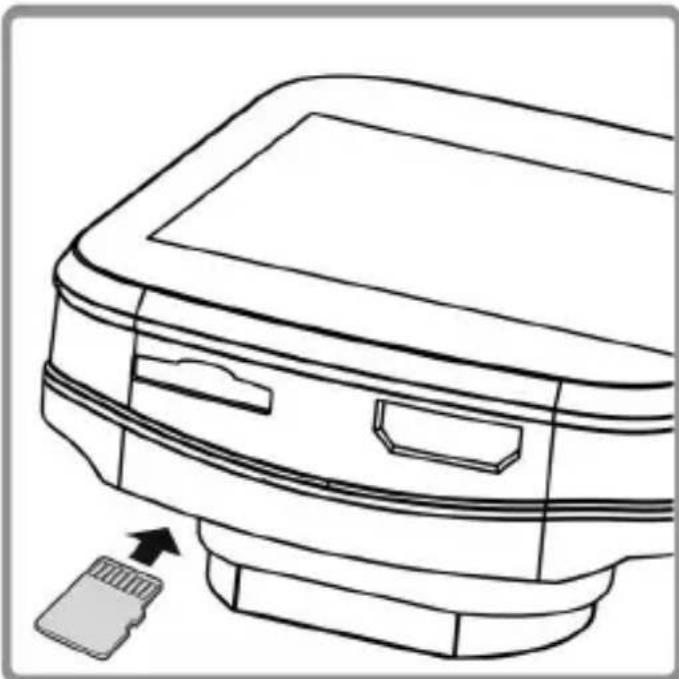
2.1 Inserting the Memory Card
Insert the memory card with the gold contacts facing the back of the Dash Cam. Push the memory card until it clicks into place. (Use class 6 or above the micro SD cards for this Dash Cam; It is recommended to format the micro SD cards before the initial use.)
To remove the memory card
Push the edge of the memory card inward until you hear/feel it click, then allow it to push out until you can remove it from the slot.
Note:
- Do not remove or insert the memory card when the device is powered on. This may damage the memory card.
- It is recommended to use a 16 or 32 GB, Class 6 speed or above micro SD card.
- It is recommended to format the micro SD cards before the initial use.
2.2 Installing in Vehicles
2.2.1 Mount to Windshield
- Attach the bracket to the device. Slide and push until the connection is firm.
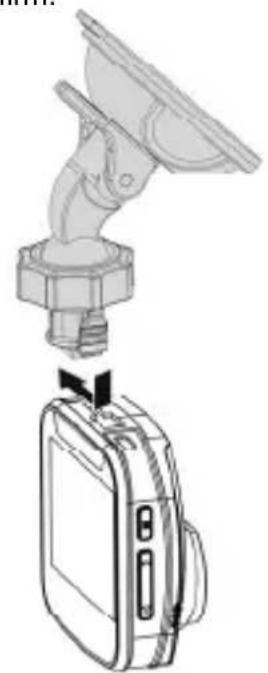
- With the suction-cup laying flat, position the suction-cup on the windshield.
- Hold the base firmly on the windshield and press down the clamp to mount the car holder to the windshield. Make sure the base is securely locked in place.

Warning: Do not install the device on a tinted window. Doing so may damage the tint film.
2.2.2 Adjust the device position
- Rotate the knob to swivel the device vertically.
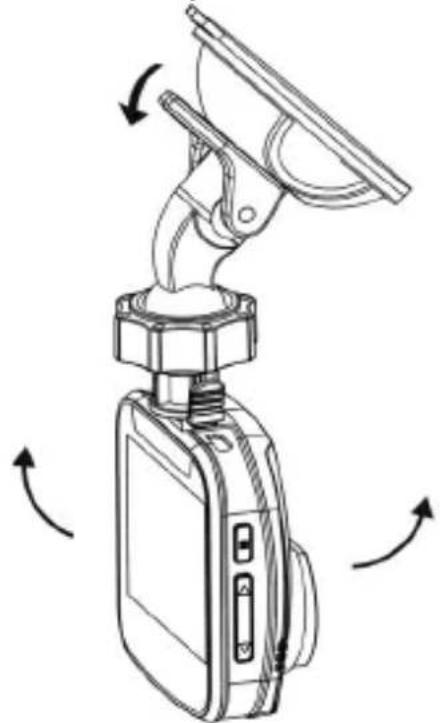
- Rotate the knob to swivel the device horizontally up to 360^ .
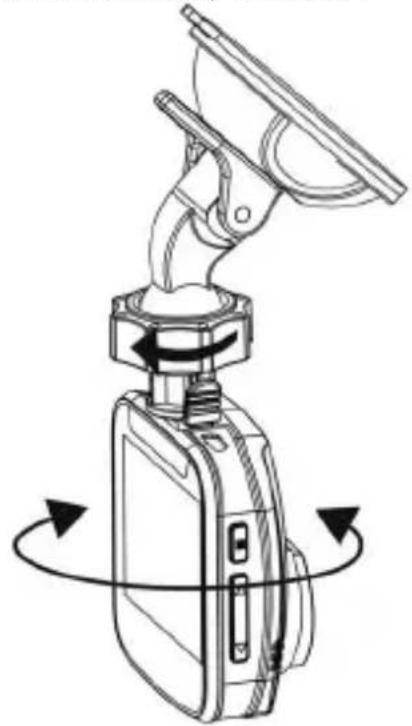
- Then tighten the knobs to make sure the device is securely locked in place.
2.3 Connecting to Power
Use only the supplied car adapter to power up the device and charge the built-in battery.
-
Connect one end of the car adapter to the USB connector of the Dash Cam.
-
Plug the other end of the car charger to the cigarette lighter socket of your vehicle. Once the vehicle engine is started, the Dash Cam automatically powers on.
Note:
Please take note if the environment temperature reaches 115^ or above, the car adapter still can supply power to Dash Cam, but it may not charge the battery. This is characteristic of Li-lon battery and is not a malfunction.
2.4 Powering the Dash Cam On / Off
2.4.1 Auto Power On/Off
Once the vehicle engine is started, the Dash Cam automatically turns on. If the Automatic Record function is enabled, the recording will automatically start right after the Dash Cam powers on.
Once the vehicle engine shuts down, the Dash Cam automatically saves the recording and turns off the power within 10 seconds.
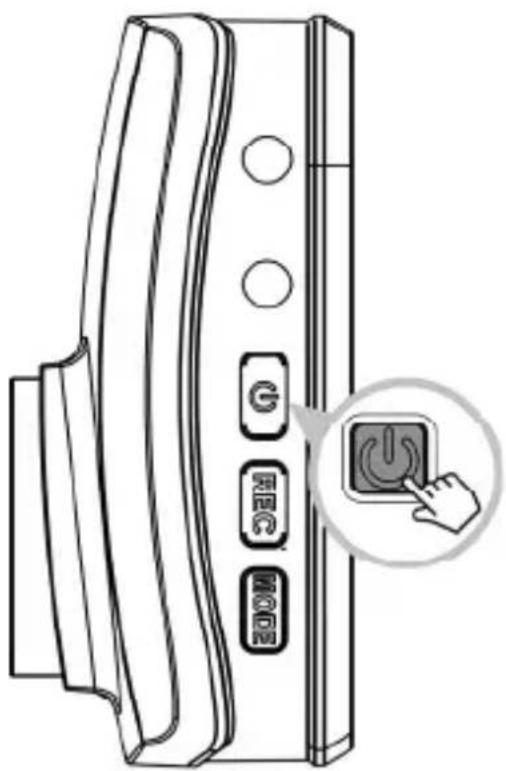
2.4.2 Manual Power On/Off
To manually turn on the power, press the POWER button.
To turn off, press and hold the POWER button for at least 3 seconds.
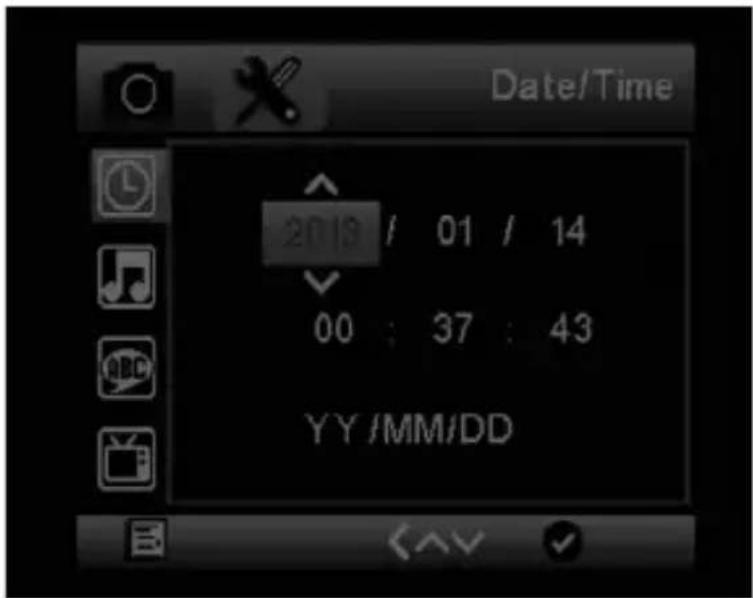
2.5 Initial Settings
2.5.1 Set the Date and Time
To set the correct date and time, do the following:
- Press t
the
M button to enter the menu.
-
Press the / button to select Date/Time and press the button.
-
Press the / button to adjust the value and press the REC button to move to another field.
-
Repeat step 3 until the date and time setting is complete.
3 Using the Dash Cam
3.1 Recording Videos
3.1.1 Record videos while driving
When the vehicle engine starts up and the Automatic Record function is enabled, the Dash Cam automatically turns on and starts recording.
Recording will automatically stop when the engine is switched off.
Or, press the REC button to stop recording manually.
Note:
On some cars, the recording will continue when the engine is switched off.
If this happens, do one of the following:
- Manually turn off the cigarette lighter socket if possible..
- Remove the car adapter from the cigarette lighter.
3.1.2 Manual Video Recording
- Press the
REC button to start recording.
- Press the
REC button to stop recording.
Note:
- One video file is saved for every 2, 3 to 5 minutes of recording.
- The device saves the recording on the memory card. If the memory card capacity is full, the oldest file in the memory card is overwritten.
3.1.3 Emergency Recording
During normal video recording, if vehicle is engaged in unusual collision or impact, Emergency recording will start automatically. However, to turn on manual Emergency Recording, simply press the M button to begin emergency recording mode. The "Emergency" message will be displayed immediately on the upper left corner of the screen, and the recorded file will be continuous and protected from being overwritten.
To stop the recording, press the REC button.
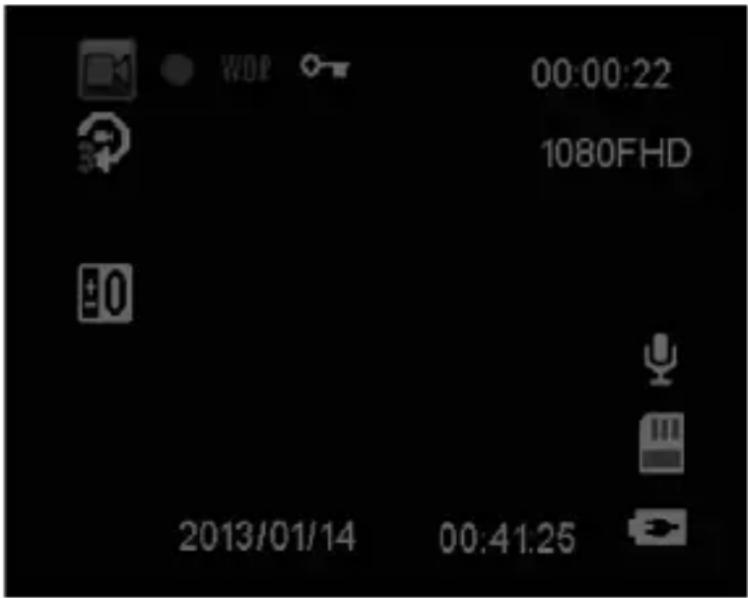
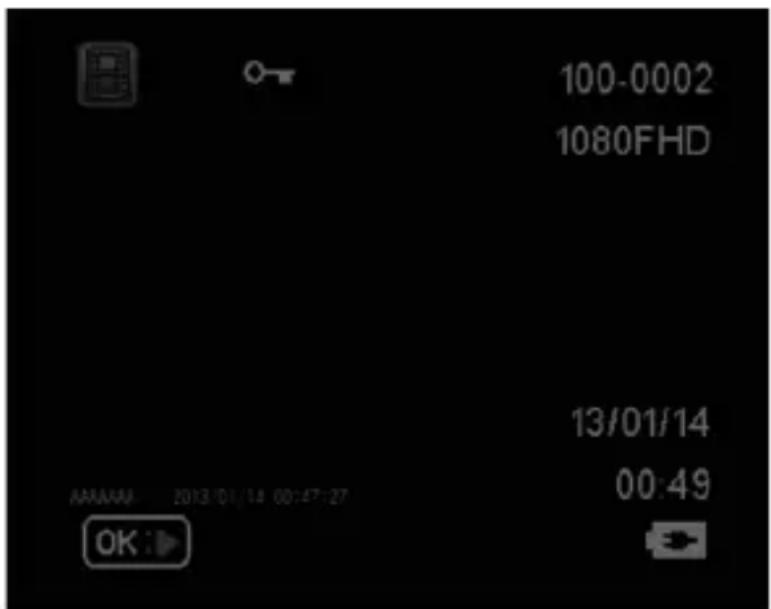
3.1.4 The Recording Screen

| No. | Item Description | |
| 1 | Date and time | Indicates the current recording date and time. |
| 2 | Resolution | Indicates the current video resolution. |
| 3 | Battery | Indicates the estimated remaining battery power or if it is being charged. |
| 4 | Guide icon (Emergency) | Press the M button to continuously record the video in one file until the recording is manually stopped. |
| 5 | WDR | Wide Dynamic Range |
| 6 | Loop Recording | Loop Recording Time |
| 7 | Micro Phone | Micro Phone ON/OFF |
3.1.5 Taking Photos
You can also use this Dash Cam to take photos of the current scene.
From the standby screen, press the Mode button become photo mode and press the REC button to take a photo.

Note: If recording is in progress, press the REC button to stop the recording first.
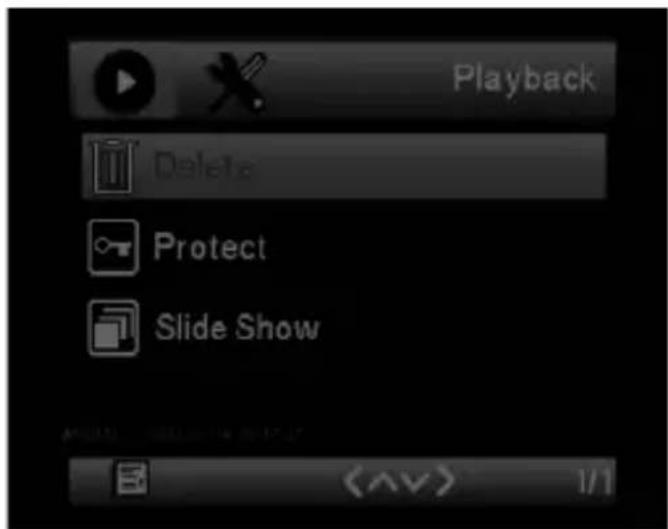
3.2Playback Videos and Photos
- If recording is in progress, press the REC button to stop recording.
The standby screen is displayed.
- Press the Mode button twice to enter the playback mode.
- Press the / button to select the file category that you want to browse and press the REC button.
- Press the / button to view the next or the previous file and press the REC button to view the file in full screen.
3.2.1 Deleting Files
To delete file(s), do the following:
- If recording is in progress, press the REC button to stop recording.
- Press the Mode button twice to enter the playback mode.
- Press the / button to select File, press M to delete file.
- Press the / button to select an option.
| Item Description | |
| Delete One Delete the current displayed file. | |
| Delete All Deletes all files. | |
- Press the REC button to confirm delete.
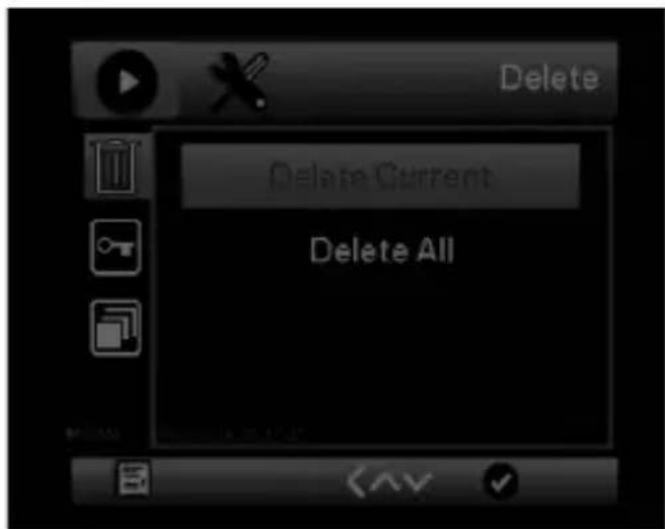
Note:
Deleted files CANNOT be recovered. Ensure the files have backup before deletion.
4 Adjusting the Settings
4.1 Using the Menu
You can customize the video recording and other general settings via the on-screen display (OSD) menus.
- If recording is in progress, press the REC button to stop recording.
- Press the M button to open the menu.
- Press the / button to select a menu option and press the REC button to enter the selected menu.
- Press the / button to select the desired setting and press the button to confirm the setting.
- Press the M button to exit the menu.
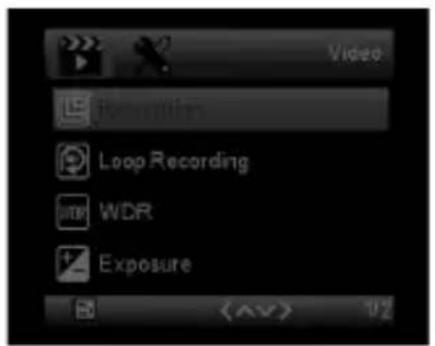
4.2 Menu Tree
Refer to the below table for details on menu items and available menu options.
| Menu option | Description | Available option |
| Resolution Set the des | red video resolution. | 1080FHD 720P 60FPS 720P 30FPS WVGA VGA |
| Loop recording 2 Minute | to 5 Minute Off/2 Minute, 3Minute or 5 Minute | |
| WDR | Wide Dynamic Range | ON |
| Exposure | +2.0, +5/3, +4/3, +1.0, +2/3, +1/3, +0.0, -1/3, -2/3, -1.0, -4/3, -5/3, -2.0 | |
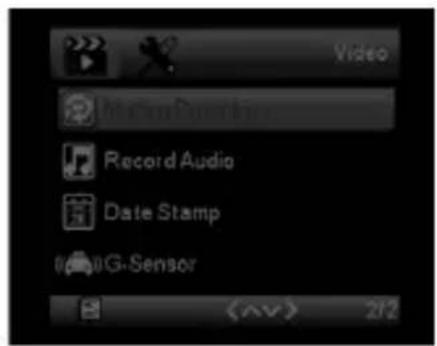
| Motion Detection | Enable/Disable the motion detection. If this function is enabled and the power off button is pressed, the system alert message. Under motion detection mode, the device will automatically start recording when any object movement is detected. | On/Off |
| Record Audio Recording | with audio On/Off | |
| Date Stamp Recording | with date On/Off | |
| G-sensor Adjust G-sensor sensitivity | Off/High/Middle | e/Low |
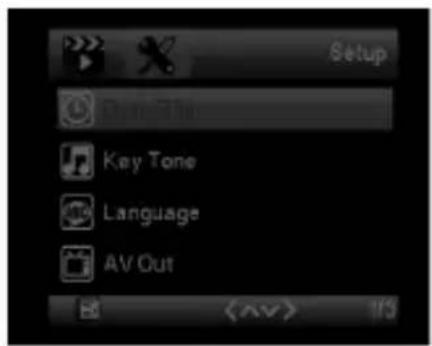
| Date/Time | Set the date/time | Press ▲/▼ button to adjust the value, press the REC button to switch the field and confirm. |
| Key Tone | Button Key Sound OFF/NO | |
| Language Set up language | English, French, Spanish, Portuguese, Deutsch, Italian, Simplified Chinese, Traditional Chinese, Russia, Japanese | |
| AV Out Set up AV Out mode | PAL/NTSC | |
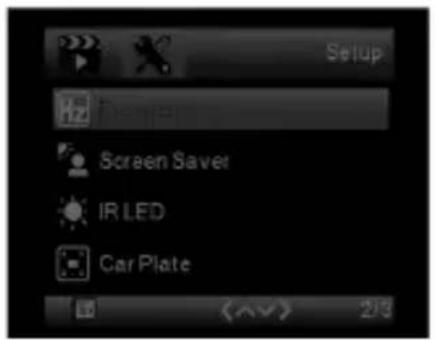
| Frequency | Adjust light frequency | 50Hz/60Hz |
| Screen Saver | Set up Screen Saver | Off/3 Minute, 5 Minute or 10Minute |
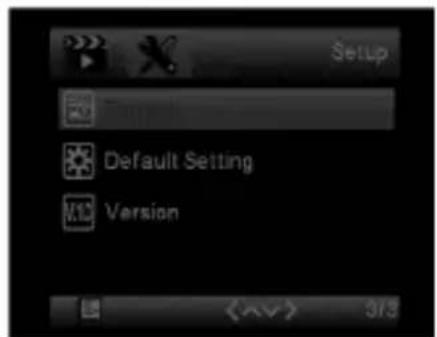
| Format | Format the memory card. Warning: Once a format has been initiated, ALL content on the micro SD card will be deleted CANNOT be restored or recovered. | OK/Cancel |
| Default Setting | Reset all options to the factory default settings. | OK/Cancel |
| Firmware version | Showing firmware version |
5 Specifications
| Item Description | |
| Image sensor CMOS sensor | |
| Effective pixels 2304 x 1536 | |
| Storage media Supports Micro SDHC, up to 32GB class 6 or above | |
| LCD display 2.0" LCD color TFT (230K pixels) | |
| Lens Wide Angle Fixed Focus lens F3.0; f=3.6+/-5%mm | |
| Focus range 1.5m~Infinity | |
| Movie Clip | Resolution: Full HD (1920 x 1080),30fps; HD (1280 x 720), 30fps |
| H.264 | |
| Still image (Photograph) Resolution: 3M (2048 x 1536) | |
| Format: DCF (JPEG, Exif: 2.2) | |
| Shutter Electronic shutter Auto:1/2 ~1/2000 sec. | |
| G-Sensor 3-Axis G-Force sensor | |
| ISO Auto | |
| White Balance Auto | |
| Microphone Yes | |
| Speaker Yes | |
| Interface Micro USB, AV Out | |
| Battery Built-in Li Ion rechargeable (This battery is NOT replaceable) | |
| Operating Temperature | -10° ~ 60°C |
| Operating Humidity | 20 ~ 70% RH |
| Storage Temperature | -20° ~ 70°C |
| Dimensions 55 x 27 x 60 mm | |
| Weight | Approx. 44g (1.6 oz) |
| Car Charger | INPUT:DC12-24V,OUTPUT:DC 5V/1A |
GD-250
Dash Cam
Manual de Nombre