
Blendy Pro 577 - Blender ARIETE - Free user manual and instructions
Find the device manual for free Blendy Pro 577 ARIETE in PDF.
| Product Type | Blender |
| Brand | Ariete |
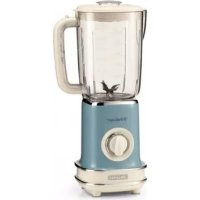
| Model | Blendy Pro 577 |
| Bowl capacity | 2.0 liters (max 400 ml for hot liquids) |
| Speed | Variable with rotary knob (low and high speed) |
| Automatic functions | Blend, crush ice, pulse |
| Power supply | Mains, voltage to check according to country |
| Bowl material | Plastic (graduated cup) |
| Blades | Stainless steel (not specified, estimate) |
| Safety | Double safety: bowl and lid, automatic stop if bowl lifted, lid locked |
| Cleaning | Bowl, lid, cap dishwasher safe (top rack); motor body with damp cloth |
| Included spare parts | 2 spare transmission gaskets |
| Repairability | Repairs only by Ariete authorized center |
| Use | Household use only |
| Compliance | CE 1935/2004 (food contact) |
Frequently Asked Questions - Blendy Pro 577 ARIETE
User questions about Blendy Pro 577 ARIETE
0 question about this device. Answer the ones you know or ask your own.
Ask a new question about this device
Download the instructions for your Blender in PDF format for free! Find your manual Blendy Pro 577 - ARIETE and take your electronic device back in hand. On this page are published all the documents necessary for the use of your device. Blendy Pro 577 by ARIETE.
USER MANUAL Blendy Pro 577 ARIETE
The necessary precautions must be taken when using electrical appliances, and these include the following:
Make sure that the voltage on the appliance rating plate corresponds to that of 1. the mains electricity.
Never leave the appliance unattended when connected to the power supply; 2. unplug it after every use.
Never place the appliance on or close to sources of heat.3.
Always place the appliance on a flat, level surface during use.4.
Never leave the appliance exposed to the elements (rain, sun, etc....).5.
Make sure that the power cord does not come into contact with hot surfaces.6.
This appliance must not be used by children. Keep the appliance and related cord 7. out of reach of children.
This appliance cannot be used by people with reduced physical, sensorial or mental 8. capabilities, with little or no experience unless supervised or trained beforehand about safe use of the appliance and being aware of arising risks.
Children are not allowed to play with the appliance.9.
Never place the appliance body, plug or power cord in water or other liquids; 10. always wipe clean with a damp cloth.
Always unplug the appliance if left unattended and before assembling, disas-11.
semlbing or cleaning it.
- Always make sure that your hands are thoroughly dry before using or adjusting the switches on the appliance, or before touching the power plug or power connections.
13.Never touch the moving parts.
Never insert hands into the goblet whilst the appliance is plugged in (Fig. 6). 14. Always use the food presser.
-
The blades are very sharp; take care when cleaning.
-
Do not operate the appliance when it is empty.
17.Never use the appliance if the blade is damaged.
Place the foods for blending inside the blender goblet and fit the goblet onto the 18. power base before plugging the appliance into the mains power.
The product has been designed to operate only when the blender goblet is cor-19. rectly fitted. If it still does not start, take the product to your nearest authorised
assistance centre.
Do not use the handle on the goblet to carry the blender.20.
Wait for the blade to stop completely before removing the cover.21.
To prevent accidents or damage to the appliance, always keep hands and cooking 22.
utensils well away from blades and any moving parts.
To unplug the appliance, grip the plug and remove it directly from the power 23.
socket. Never pull the power cord to unplug the appliance.
Should the power cord be damaged, have it be repaired by the manufacturer or 24.
related service centre, otherwise by a similar skilled person, to prevent any risk.
All repairs, including power cord replacement, are to be carried out only by the
Service Centre or the technicians authorized by Ariete, to prevent any risk.
In case of using extension leads, these must be suitable for the appliance power 25.
to avoid danger to the operator and for the safety of the environment in which the
appliance is being used. Extension leads, if not suitable, can cause operating
anomalies.
Do not threaten the safety of the appliance by using parts that are not original or 26.
which have not been approved by the manufacturer.
This appliance is designed for HOME USE ONLY and may not be used for com-27.
mercial or industrial purposes.
This appliance complies with the EC regulation 1935/2004 concerning the materi-28.
als and objects intended to come in contact with food.
Any changes to this product that have not been expressly authorised by the 29.
manufacturer may lead to the user's guarantee being rendered null and void.
In the event that you decide to dispose of the appliance, we advise you to make 30.
it inoperative by cutting off the power cord. We also recommend that any parts
that could be dangerous be rendered harmless, especially for children, who may
play with the appliance or its parts.
- Packaging must never be left within the reach of children since it is potentially dangerous.

- For disposing the appliance in an adequate manner, according to the
European Directive 2012/19/EC, please read the appropriate leaflet attached.
DO NOT THROW AWAY THESE INSTRUCTIONS
APPLIANCE DESCRIPTION (Fig. 1)
A Filler cap
B Lid
D Graduated goblet
D Blades
E Motor body
F Operating dial
G Automatic operation button for mixing
H Automatic operation button for crushing ice
I Automatic pulse operation button
L Connecting joint
M Food presser
HOW TO OPERATE
This appliance is equipped with a dual safety device, on the motor body (E) and on the lid (
The motor body safety device allows to stop the operation when the goblet is raised (C). The safety device on the lid stops or prevents operation when the lid is not properly positioned on the goblet.
The lid is equipped with a hook that engages in the handle and that, connected to the motor body, prevents the operation without a specific contact.
- Make sure the appliance is unplugged and the operation dial (F) is on position "0".
- Position the goblet (C) on the motor body (E), always with the handle in the position shown in Fig. 2, matching the arrow on the goblet side with the one on the motor body.
- Cut fruit and vegetable into small pieces and place them into the goblet (C) adding water or milk in an amount not exceeding the MAX 2.0 l level (the minimum filling is 400ml ).
- Position the lid (B) on the goblet (C) so that the lid hook engages with the goblet handle and press it slightly downwards until it locks in place (Fig. 3).
- Close the upper hole of the lid (B) by inserting the apposite cap (A) and rotating it clockwise (Fig. 4). Make sure the lid (B) and the cap (A) are properly inserted to prevent food from coming out during the processing stages.
- Plug power cord into a socket. The red light underneath the "Pulse" (I) button will start blinking and will show that the appliance is ready for use.
- Start the appliance by turning the operating dial (F) clockwise up to the first or the second notch (low speed) to start the blades. According to requirements, the speed can be increased by rotating the dial (F) further.
If the appliance should fail to start, make sure the goblet and the lid are fitted properly. The appliance is fitted with a dual safety device to prevent it from operating if the goblet is not fitted or if it has been fitted incorrectly and prevents the blade from rotating if the lid is not suitably closed.
- To stop the operation, turn the operating dial (F) to «0».
- For using the automatic operation, turn the operating dial (F) clockwise to "M"; the 3 automatic operation buttons (G-H-I-) will go on in blue. According to requirements, press the required button. After 30 seconds downtime, the selection will be reset; the "Pulse" light (I) will flash again in red, the other two will go off and it will be necessary to position the handle on the "0" position to select the program.
Automatic operation button for mixing (G):
in this mode, the appliance will start mixing automatically. The speed will increase up to its maximum, by starting and stopping for 1 minute, and then will go off. THE operation can be stopped at any time, by pressing the button again.
Automatic operation button for crushing ice (H):
the appliance will work automatically in this mode, by starting and stopping several times until ice is completely crushed. The operation will stop by pressing the button again.
Pulse operation button (I):
press and release the button to stop operation. For best results, keep pressed for a very short period (2/3 seconds).
- During use, it is possible to add foods into the goblet, by lifting out the filler cap (A) after having switched off the appliance. Press inserted food using the apposite presser (M) - Fig. 5.
- It may be necessary to switch the appliance off several times in order to remove food residues from the goblet sides. In this case, switch the appliance off and unplug it.
- Remove the cap and the lid and remove eventual remains inside the goblet by means of an appropriate spatula.
WARNING:
Prepare the container with the food to mix and put it on the motor body before plugging the appliance in.
Never remove the lid (B) during use or when the goblet is positioned on the motor body: a safety closing system locks the lid on the goblet. Remove the goblet from the motor body before lifting the lid to avoid damages to the safety lock.
Never pour hot liquids into the blender. The liquids must be within 50^ and must not exceed the 800 ml level in the goblet.
Keep the food presser away from blades to avoid damage.
DISASSEMBLY OF THE BLENDER
- Unplug the appliance and wait for the blades to stop completely before removing the goblet (C) from the base.
- To remove the lid (B), remove the goblet (C) from the motor body so that the safety device locks and the lid can be removed easily without the risk of damaging the lock.
- Pour the contents into a glass.
CLEANING AND MAINTENANCE
Do not disassemble the appliance or try to intervene in any way inside it. Keep the appliance properly clean and tidy to ensure an optimal quality of prepared food and a longer life of the machine itself.
- The goblet (C), the lid (B), and the cap (A) may be put in the upper part of the dishwasher.
- Use a slightly damp cloth for cleaning the motor base. Do not use potentially abrasive products.
- Clean blade thoroughly.
WARNING:
Never place the appliance body, plug or power cord in water or other liquids; always wipe clean with a damp cloth.
Even when not in use, unplug the appliance before fitting or removing the single parts or before cleaning.
Be very careful during cleaning of blade as it is extremely sharp.
NOTE:
The package contains 2 connecting joints (L). They are spare parts to replace the damaged part already present in the product on the motor body (E).
To replace the part:
- remove the goblet (C) from the motor body (E);
- remove the old joint by using the pliers (Fig. 7);
- insert a new joint (Fig. 8);
- make sure the new adapter is at the same height as the joint support (Fig. 9).
INSTRUCTIONS IMPORTANTES
LIRE CES INSTRUCTIONS AVANT L'EMPLOI.
HnkOrda He norpykaTb KOpnyc MOTopa, 3neKtpnueckyU BnIky I npOBoB B Body nI IN 10 dpyrHe XnDkoCTn. DnI INx OuchTKn NcNoIb3OBAtB TOnbKO BJaXHyIO TkaHb.
Bcerda otcoeHHaTe yCTpoiCTBO OT cETn, ecnn octabIaeTe er0 6e3 npncMo-11. Tpa n nepeD c6opko, pa36opko nnu uNcTKoJ.
Heo6xOIMO TtataTeIbHO BbICyIITb pyKn, npeJde Yem HaxmMaTb n peryIInpo-12. BaTb KHONKn np6Opa N DoTaPnBaTbCra Do BNkN PpOBoA n 3JIeKTPnuecknx DeTajEi.
HnkOrda He doTpaNbTaBcra Do dBxKyuxcA Detanei. 13.
- HnKorda He BCTaBnaIte pyKn B yaShky, KOrda npnbop nOdkJIoucen K 3NeKTpoCetn (pnc.6). Bcerda nCnoJb3yIte ToIkaTeIb.
Hoxn ouehb octpbe. Cobnoatb npedeBHyIO OCTOPOXHOCTb BO BpeMnx 15. Mblb.
- He pa6oTaTb c np6opom BxOIOCTyIO.
He noIb3OBaTbcra np6opom, ecn HOx NOBpeKdEh.17.
18.ChaçaIa IomecTb IpoDyKTbI DJIa N3MeJbYeHnB E'MKoCTb N yCTaHOBTb ee Ha KOpNyc MOTopa, IN TOJIbKO IocJIe 3TOrO IODCoEiHNHTb BnIKy IpoBODa K 3JIeKTPnueckoP03eTke.
Прибор устpoeh тakIM obpa3OM, чTO OH ьдET pa6OTaTb TOnbKO B TOM cIyuae, 19. ecn erO éMKoCTb yctaHOBJIeHa npabNtBHo. Ecn пri6Op He BKIOUaETcra, To erO hyxHO OTHECTN B CneunaIN3INPOBaHHYIO cepBnCHyIO MaCTepCKyIO.
He noHnMaIte 6IeHep 3a pyUky cTaKaHa.20.
Ipejde yem cHmMaTb KpbIshky,doXdaTbcra NOnHOJ OCTaHOBKn HOxa.21.
Bo n36eXaHne noIyuEHH na TpaBM n noBpeXdEHH npnbopa Bcerda dePkaTb pyKn 22. KxOHhble npHaADJIeXHOCTn Ha paCCTOaHH nO T dBIXyUHXc daTaJIe npnbopa.
23.При OTcoeHHeHn OT 3JIeKTPnuecko Po3eTKn 6paTbCrykamn HeNocpeICTBeHHO 3a 7TeNCeIb. HNKOrda He TReHyTb 3a npOBOD dIra TORO, YTO6bl BbITa- uHTb erO.
Ecnn shnyp nntaan noBpeJdeH, OH doJIKeH 6bITb 3aMeHeH npOn3BOOnTeJeM, 24. erO cepBnCHbIM areHTOM nn DpyrIM KBaIINΦNcIPoBaHHbIM CneuAnCTOM BO n36exKaHne onaChocTn. Bce peMOHThIe pa60tbl, BKIOUay 3aMeHy shHpa nTTAHn, DOJIKNbI PpON3BOOnTbCra TOnbKO B cepBnCHOM ueHTpe nn yNoIHO-MoueHHbIM TexnKOM Ariete Boon36exKaHne onaChocTn.
25. B clyuae nCnoIb3OBaHn yIINHTeJe IocJHne DOJXHbI COOTBeTCTBOBaTb MoIHOCTn np60pa BO n36exaHne OAnCHOCTn dJa OpeaTopa N 6e3OanCHOCTn pa6oey cpebl. HenoIxDxOJaUne yIINHTeJe MOrT npNBecTN K HeNCpPaBHOCTn.
Дя obecneueHЯ 6e3oNaChocTи npi6opa nCNoIb3yIe TOnbKO peKOMeHnye-26. Mble npOIN3BOIDNTeJIem 3aIaChbIe qaCTn I akceccyapbl.
Ipn6op npedna3nueH TOlbKO IJIa BbITOBOIO NcNOJb3OBAHnI n He 27. DoJIxeh IcNoB3OBaTbcra B IpON3BOIDCTBeHHbIX IIN KOMMepuecknx UeJax.
Прибор сооветсъует Нормати By EC 1935/2004 o mateрnaлax n n3delenyx, 28.
празнаЗнayehньх дя Контakta C ПишевIMN рожуКтам.
Bhocmblc n3MeHnB np6op, cnn OHn YETKO He yka3aHbI npOn3BOJnte-29. Iem, MoryT npNBecTN K NOTepe 6e3oNaChOCTN IN rapaHTnEro 3KcnnyatauCo CTOPOHbI NOTpe6nteJIa.
B clyuae ecn Bbl peunn Bblbocntb 3TOT npnbop, pekomhnyetcnapepe-30. 3aTb 3JIeKTPnueCKn IPOBOd IJRA HeBO3MOXHOCTN eRO dIaIbHeJWeTO NcNoJIb- 3OBAHNA. PekomHdyETcraTakKe oBe3BpeiNTb Te qactn npnbopa, KOtOpbIE MOryT ppeDCTaBJIaTb ONaCHOCTb, B clyuae INX NcNoJIb3OBAHnA DeTbMn DJIa CBOUX nrg.
CocTAbHbIe yactn ynaKOBKn He doJXhbl OCTaBJIaTbcB B MeCTax,doCTyHbIX 31.
dJa dTei, TaK KaK OHN MOrY TnpedCTaBJIaTb NCTOuHnK ONaCHOCTN.
"Pulse" (I) Hauhet Mrratb, noka3bBaar roTOBHOCTb np6opa.
- BкнючITE npi6op, NOBepHyB pyky ynpaBneHnA (F) no yacoboi cTpeJIke do nepBOrO nIIN BTOporo ⅢeJyka (Hn3ka cKOpocTB), uTo6bl aKTbNpOBaTb HOxN. B 3aBNCIMOCtN OT BaInx NOTpe6-HOCTe Bbl MOKeTe yBeJIuHHTb cKOpocTB, CHOBa NOBepHyB pyky (F).
Ecnn npnbop He nauhnaet pa6oTaB, y6eHntecb, yTO qaIka N KpbIka pacnoIoxKeHbl npabNbHO. Pnp6op ochaueH dBOINbIM npedoxpaHnTeNbHbIM (3aunTHbIM) yCTPOINCTBOM, KOtOpoe npedOTbpaIaet pa6OBy, ecnn qaIka OTCyTCTByET IIN yCTaHOBeHa HnPaBnBHO, n npedOTbpaIaet BpaIeHne HOKe, ecnn KpbIka 3akpbIta HnPaBnBHO.
-Длг toro,чтобь octaHOBnTB npu6op,nOBepHnTe peryIaTOp(F)В nIoJxHe «0».
-ДяИСПОЛБ3OBAHЯ abTOMaTnueckoro pexIMa NOBepHIne pyKy ynpabLeHnry (F) no YacobOY CTpeIKe B nOLOXeHne «M»; 3 KnaBnUHN abTOMaTnueckoro ynpabLeHnry (G-H-I) 3aroprTcN HmUM cBeTom. B 3aBnCmOCTn OT BaINx NOTpe6HocTe HaxMITE HxKHyIO KnaBnUShy. NocNe 30 cekyHd 6e3deJCTBnR BbIbOp 6yIeT c6poWeH; INDnKaTOP «Pulse» (I) ChOBa NaHET MIRaTb KpaChbIM, Dba dpynx IORachyt, n pyKyu Heo6xODIMO yCTaHOBnTB B nOLOXeHne «O», UTO6bl CdeNaTb BbIbOp nporpamMbI.
Khonka aemomamueecko ynpaehn CmeuuaHm (G):
PnBop B 3TOM pexime HaHET CMeUINBaHne aBTOMaTnueCKN: CKOpOCTb yBeJIuHTcRdo MaKcMMyMa, 3anyCTITcR n OCTaHOBNTcR ha 1 MInHyT, NocJe Yero OTKnIOHTcR. MOXHO B IIO6oB MoMeHT npepBaTb OEPaCNUH, Haxab KONky eIe pa3.
Khonka aemomamuuecko0y ynpaehnua3MeIbyeHEm Iba(H):
Pn6op B 3tOM pexime 6ydt pa6oTaB aBTOMaTneCKn, HeckOJIbKO pa3 3aynckacb n octaHaBnBaRcB, Noka JeI d NoJIHOCTbH He packoJETc. NobTOpHOe HaxaTne KnaBnIN BbIKIOuHT np6Op.
Khonka umnylbcHozO ynpaJIeHua (I):
Haxmnte n OTnyctnte KhoNky, YTObI npepBaTb onepaun. ONTImaJIbHOe nCNoJIb3OBAHne - HaxaTne Ha ouehk KopOTKoe Bpem (2/3 cek.).
-BoBpempaobtbpn6bopamoxno doabnaytb npdyktb B ctaKaH, noHnB np6ky (A), npedBapntelbHO BblIOuHb np6Op. IpotoJKNHTe npodyktb C nOmoUbToKateTg (M) (pnc. 5).
- Bo3MOxH0, Bam npiDeTc8 BbIKIHOaTb npi6Op HeCKOJIbKO pa3, qTO6bl ydaIHTb OCTaTKI\PuIc COCTeHOK cTaKaHa. Ecnn 3To npoN3OJdeT, BbIKIHOuNTe npi6Op n OTcoEduHInTe ceTeBOw SHyp.
- Chnmtte npobky n Kpbliuky n C NOMOuHcneuaIbHoro uHaTeYdaHtye ydaHtTe ocTaKn Niu c BHyTpehHei CTeHKn CTaKaHa.
BHIMAHHE:
Iodzomobme emkocmb c nuueebimu npodykmamu u ycmaHObe ee Ha Kopnyc deuzame, npexde yem nodknouamb buNKy K po3emke.
Hukozda He chumaume KpbuKy (B) 80 6pemra paobm npubopa uuu Ko2da yawka ycmaHOeHa Ha Kopnyce deuzamela: cucmema npedoxpanumelhbx 3amkoe qukcupyem KpbuKy Ha yawke. Chumume yawky c Kopnyca deuzamela, npexde yem noDHummb KpbuKy, ymo6bI He noepedumb 3auenky.
Hukozda He nomeuäme 6IeHep 2opyue kudkocmu. Temnepamypa kudkocmeu He doJxHa npeBliawmb 50^ a obbem - 800 mI e yauke.
He npubuxkaume monkameNB K HoxaM, ymo6bI He noBpeDumb ux.
PA36OPKA BJIENDEPA
- BbInbTe BnIky n3 po3eTKn I NOdoXdnte, NOKa HOxN NOHOCbHO OCTaHOBraTc, npexde yem CHMaTb yaUKy (C) c OCHOBaHn.
- YTo6bI Ch8tB KpbIshky (B), ChIMnTe yAshky (C) c Kopnyca DBratEny, pa36nokpyr 3aueKky; KpbIshka JERKO CHIMETcR.
- BbIeIte cmy3n BCtakaH.
YHCTKA N TEXOBJNYKBAHNE
He pa3bpaai Te npibop Hn He nItaTecb KaKIM-JIbO o6pa3OM BMeWnBaTbcB Hero. YTo6bl rapaHTnpOBaTb ONtMaJIbHoe KaueCTBO NIIeBbIX npOdyKTob 60Jee dIITeJIbHbIK cPOK CJIyX6bl, codepxatb npibop B NOIHOH qNCTOTE.
- YaIy (C), KpbIuKy (B), npo6ky (A) moXHO mbITb B nocydomoeHoi MaunHe Ha BepxHne IOnKe.
-Дя ounstkn 6Ioka DBiratela nCnoIb3yIte cIeRka BnaXHyTO KaHb. He nCnoIb3yIte a6pa3nHBhe yNCTaune cpeDCTBa.
TtataTeNbO OuNCTte HOK.
BHIMAHHE:
Hukozda He onyckaume Kopnyc npubopa u cemeo u hyp e body unu dpyzue kudkocmu; dny uucmku ucnonb306amb bnaJHy o mkaHb.
Даже мозда, козда усmpоцмeo He ucnonьзуемся, omknюаUME ezo om 3nekmpueecko pouemku u daume emy ocmbimb neped mohmupobko unu u3eueHuem KomnneKmyuuxдя уucmku.
Будme ocobehno ocmoopxHbI BO bpeMa Yucmku HoJa: HOX OyeHb Ocmpbiu.
PIMMEYAHNE:
B ynpaKOBke nmeetc2 npnBOHbIX MyΦTbI (L). 3To 3anachbIe qactN, noJnxJaIne 3aMeHe B clyu-ye nobpeXdEHHyKe nmeoIeS C B npOdyKTe DetAIN Ha Kopnyce Dbratela (E).
UTo6bI 3aMeHnTb DeTaJIb:
- CHIMITE yawky (C) ckopnyca Dnuratae (E);
- C NOMOUIIIOCKORYB CHIMNTE WAPHnP (pnc. 7);
-yCTaHOBnTe HOByo MyΦTy (pnc.8); - y6eIntecb, uTO HObI INepeXoHNK paCNOIOxH e HTo Jx E Blicote OTHOcHTeBHO depxatela MyΦTbI (pnc. 9).
Дату n3roTOBHeHЯ уka3aHa Na kOpnyce n3deJIЯ B 3aIuФрOBaHHOM BnDE SN wk/yrabcdefg, rDe WK - HeJeI npON3BOdCTBa
yr-ROI pON3BOIDCTBa
abcdefg - cepnHbI HOMep n3dJIIny
CoOTBcTByeT Tpe6oBaHnA M
TP TC 004/2011 «O 6e3oNaChocTn Hn3KOBbThOro o6OpydoBaHn, yTbePckdEn PeuHenem
Komnccn TamoxeHHoro coo3a N768 ot 16 abrycta 2011 roda
ONUCAHHI INPUCPTPOIO (mJI.1)
A Kobnaok dny oTbopy
B KpnuKa
C NocyUnHa 3 BiDiMtKampiBnA
D Hoxi
E Kopnyc DBrnryHa
F PyuKa BMnKaHHa
G Khonka abTomatnHoi po60Tn dIe nepemJIIOBaHHa
H Khonka abTomatnueo'po6oTn dny noDpi6HeHHy IbOdy
I Khonka abTomatnuho'i po6OTn B imnybchomy peximi (PULSE)
L 3'eHnYBaIbHa DetaIb nepedaui pyxy
M トoxa npdyktib
IHCTPyKlii 3 KOPNCTyBAHHa
LcE npncptpiyctaTKOBaHn noDbBIM 3axnCTOM 6e3neKn: Ha Kopnyci DburyHa (E) i Ha Kpnu(B).
3axnct 6e3neKn Ha Kopnyci DBrHyHa dae 3Mory npinnHnTn po6Otu y BnnaKy niDnTn NOcydHi (C); 3axnct 6e3neKn Ha KpnsuipnHnRcpo6Otu a6o He BMnKaepnCTpi, kkuo KpnKyu He nocydihi BCTaHOBNeHo HeBipHo.
Ha Kpnu i nepe6aueho 3atnckau, y cyk, k y cbo u yepr 3'ndyctbci 3 Kopnycom Dnryha, a b pa3i BiCyTHOCTi nepe6auyBaHO KOHTAKTy 6nOKye BMkaHn npncpto.
-ПереконатиьTomу,ло ппстрии BiD'EDнано BiД Мерж eNeKtpnHOrO CTpyMy, a TakoX lo pyka Дя ретулованя робочoro pexmmy (F) BnctabNeHa y noLoxKeHHa "0".
- BctaHOBnTn nocdyHy (C) Ha Kopnyc DnHyHa (E) TAKIM YInHom, 06 pyka 6yna y noJoxeHHI RaHa Man. 2: cTriKn 36Oky Ha nocdyHnHa Ta Ha Kopnyci DnHyHa NOBVHHI cnIBnadATn.
- Hapi3aTn fpykTu Ta OBOci Ta NOKJAcTu iX y NocuHy (C), DoJIHTN BOdy a6o MoJIOKOB TaKiBkoCTi, 06 He nepeBnUyBaBCa MAKcImaJIbHni PiBeHb 2,0 JITpn (MiHimaJIbHni PiBeHb HANOBHIOBAHHr cKnadae 400 m).
- BctahOBHTN KpUshky (B) Ha nocuDInHy (C) TaKMM uHOM, 06 KpuIka BCTaBnIacry pyuKy nocyDHH, IereHbKO HATNCHTN Do xapaKTePHoro knaaHnra (MaI.3).
- 3akpntu Bepxhi OTBip y Kpnui (B) 3a donomoro BIDnoBIDHoro KOBnaUka (A), kni cniD nobepHyTu 3a roHHNKOBOO CTPIKIO (MaI.4). IpeBipu, uo6 KpuKy (B) ta KOBnauok (A) 6yIo BCTaHOblneHO BipHo, iHaKwe Ni d Yac po6OTn PPOdyKTm MoKytb BVtikatn i3 NocyduHN.
- Bctabntu Bnky npoBdy XnBHeHnB pO3eTKy eJeKtpnHOrO cTpyM. YepBoHn CbiTIOiHnKaTOp nI KhoNkoU "Pulse"/>ImnyJbCn"(I) noUHe 6JIIMaTn, IIO CBIDHTb npo rOtOBHicTB npncTpoDo po60Tu.
- YbIMKHyTn npictri, noBepHyBn pykny perynobHna po60n (F) 3a roHHNKOBIO CTpiKOIO do nepworo knaaHn a6o do npyroTo KnaaHn (Hn3bKa wBnDkiCTb), 6o6 HOxI noaann npaOBAtn. B 3anexHocti Bd notpe6 moXHa NiDbNtTu WBnDkiCTb, noBepHyBn pyky (F) ue pa3.
Якwo npinctpii He BMnkaetbcra, nepebipntu, lo6 nocyduhy Ta Kpnkky 6yno BcTaHOBNeH npabnlbHo. Iprncpti yctatkoBaHm noDbiHm 3axnCTom 6e3neKn, 0o He do3BOJyE yBIMKHTn npinctpi, kwo nocdyHy He BcTaHOBNeH o abo kso ii BcTaHOBNeH HeBipHo, a TAKX 6IOKye poboty Hoxib, kwo Kpnka He 3akpTa HaJeKHMM YINOM.
- 506 npinnHnTn po6Oty, noBepHyTn pyuKy perynoBaHHa(F) B noJoxeHHa «0».
-Дя роботи в abTomatunHomy peximi noBepHytn pyky perynHOBAHHa (F) 3a roDHHKOBOO CTpiIKoIO Ha "M"; 3 KhoKn abTomatunHoro peximy po60Tu (G-H-I) 3acBITbCSc nHIM KOIbOpom. HatncHTu baxaHny kHonky i3 Tpbox B 3aJexHoCTi BiD notpe6n. Jkso He HATncHTu baxaHny Khonky npOTrOM HAcTyHNx 30 cekynd, npucTpi3HOBy nepeJe y peXm OUYBaHHa; CBiTIO-iHdkatop "Pulse"/Imnybcn" (I) 3HOBy 6nMaTMme chePBOnHM, i cnid 6yde noBepHytn pyky perynHOBAHHa Y noLoKeHHa "0", 5o6 Bn6paTn nporpaMy.
Khonka azmomamuhoi po6omu dna nepemelnoeaHn (G):
y cIbOMy pexmI npIcTpii nouHae aBtOMaTuHHe nepemEnIOBaHHra; 36IbIbUeTbcrdo MaKcImaJIbHOi, BMkaOuNcB Ta 3ynHraOuNcB Ha 1 XBNInHy, notim BmMkaetbcra. MOXHA npINHTn po60Ty y 6yd-ky MNTb, HATNCHyBUn dIra cboTO KhoNkY 3HOBy.
Khonka aemomamuhoi po6omu dna nodpi6HeHHra Ibody (H):
y zbomy pexnmi npncpii nouHa e ABtOMaTuHy po60Ty, BMkaOChc Ta 3ynHauChc KjIbKa pa3iB,do nobHoro no. dpi6HeHHa IbOdy. Pn noBTOpHOMy HATNCKaHHi Ha KHONKy npncpti npnnHae po60Ty.
Khonka po6omu e imnybchomy pexumi (l):
HaTnCKaTI i BiDnyckaTI KhoNkY dIy npuHHeHHr po6OTn. ONTImaJIbHIM E BnKOpNCtAHHr Ha npotra3i KopOTKOrO npomixkU yacy (2/3 cek.).
-Пд час роботи можнадодаьати порукtndo посуни,дя сбого спд сноату ВIMКутп писчий,аNotIM 3нгтп КOBпачok(A).Пдштobхуbatи порукtnа домorою inhctpymehtaштохач(a)(MaI.5).
- Moxe BnHKHyTN Heo6xHicTb y HeoHopa3OBOMy BmKKaHHi npcTpoU, 06 BnDaJIHTN 3aIIuKn npOyKTIB 3i CTINOK nocdyHH. JaKIO BnHKAc Taka Heo6xHicTb, cIiD CnepSy BmKHyTN npICTIa Ta BiD'EDHaTN npoBID JxNBHeHHa BiD MepeXeJekTpnuHoro cTpyM.
- 3нятNi KOBnaOk Ta KapuKу, 3a ДОпOMою BiДиОВiДHoI NonaTkn BnДaJIntN 3aIIuSkn npOdyKTiB i3 nocyduHH.
YBARA:
Iidzomyamu nocdyuny npucmpoio i3 npodykmau dny 3miuybaHHa, cmaHOumu II Ha Kopnyc deuzyna neped mum, kecmaeJmu bukky e po3emky enekmpuHozcmpymy.
3a6bopohembc3himamu kpuuky (B) nid yac po6omu, a makox kkuo nocyuHa 8cmaHOeHa Ha Kopnyci dBuayHa; cucmema 3axucmy 6e3neku 6nokyec kpuuky Ha nocyuHi. Naped mum, YK 3Hmu kpuuky, cnid npubpamu nocyuHy 3 Kopnycy dBuayHa, uo6 He nowkodumu 3axuche 3akpumm.
3a6opohembcra 3anueamu y 6nHepezapry piuHy. Temnepamypa pduHu He noBuHa nepebuuyama 50^ , a ii pieHb y nocyuHi - 800 mI.
Tpumamu umoexaunodani iid hoxie, uo6 e nowkodmu ix.
ED = 1
J 1
Jooi J 5 1 jill n a
J 1
JlaiyI eil Iabwio g aibbawg jgljg 1gag
(1)
i 1
y
J111 1
aai g aiai g aiai iiai
aaiia aiei i 1
jglllgblssydi gill jblal y
jglly jlll jla 1
1
aaii iiaaa aaii iiaaa
45.50 g 413111111111111111111111
Ai Bj
Jg jgey gagall bgs y Jg 1
JSSI JSSS
.45jai1 jzly 1y
p. (1)
pabll baa aag l ail
10
1 17
ailljraaii 15 jieaiy
1
Jill J
19
J 1
g 11 e g a a b w y
j 1 j 1 1 1 1 1 1 1 1 1 1 1 1 1 1 1 1 1
Ae liu
J 1234567890
J 1234567890
J 1234567890
2^a - 1 = 0
J 1 1
Ariete" 10
J. j J. j j j j j j j j j j j j j j j j j j j j j j j j j j j j j j j j j j j j j j j j j j j j j j j j j j j j j j j jj j j j j j j j j j j j j j j j j j
jglal
e 111111111111111111111111
.
1940 1
ailllll lll
j 19
Jlaiil 11111111111
Jn Jn Jn Jn Jn Jn Jn Jn Jn Jn Jn Jn Jn Jn Jn Jn Jn Jn Jn Jn Jn Jn Jn Jn Jn Jn Jn Jn Jn Jn Jn Jn Jn Jn Jn Jn Jn Jn Jn Jn Jn Jn Jn Jn Jn Jn Jn Jn Jn Jn Jn
. 1
gii j 5j p la l l b y ie jbi aill gao knnn no

CE/19/4.17 4
a aalaae
i 1
()jg
A
C. 1,2,3 B. 1,2,3 , 3,4
sul C
D
E
F
blill jdlil Jj G
H
()
Jaiy Juao L
pabll bina 10g M
puiuuii
(B) 100 (E) 100
jL (C) 1 j
y 1000
1 1
J 1
.
(E)(C)
J 1
aC (C) 1
()
J 1 (C) (B)
()
Bjoc 10g 100 (A) 100 (B)
A (A) 15000000000000000000000000000000000000000000
J
(1) “Jill” j J 1000
jgl jg j 1 y
aill 1 yll aell lll (F) jll
(F)
.
jolal jy jg jll. kki 15i y i jn jai jie jie jie jie jie jie jie jie jie jie jie jie jie jie jie jie jie jie jie jie jie jie jie jie jie jie jie jie jie
a a a a a a a a a a a a a a a a a a a a a a
$$ \therefore \text {b l i} \quad \text {J S i} \quad \text {e l b e l l} \quad \text {g l e} \quad p i \quad 1 2! $$
$$ \because \cdot^ {\prime \prime} g _ {0} (F) \downarrow_ {j = 1} ^ {i = j} \downarrow_ {j = 1} ^ {i = j} \downarrow_ {j = 1} ^ {i = j} \downarrow_ {j = 1} ^ {i = j} $$
GgM" 1111111111111111111111111111111111111111111
$$ : (G) \quad \begin{array}{l} \text {b l a s s} \ \text {j i a l t i a l} \ \text {j} \end{array} $$
i 1
$$ . \dot {s} \dot {r} \dot {a} \dot {o} r o r j i l $$
$$ : (H) \overrightarrow {c ^ {\prime}} \overrightarrow {c} \overrightarrow {c ^ {\prime}} \overrightarrow {c ^ {\prime}} \overrightarrow {c ^ {\prime}} \overrightarrow {c ^ {\prime}} \overrightarrow {c ^ {\prime}} \overrightarrow {c ^ {\prime}} $$
Jalai jll Jaa
$$ \therefore \lim _ {x \rightarrow - \infty} \frac {\sin x}{x ^ {2}} = \frac {\sin x}{x ^ {2}} $$
$$ : (I) \dot {s} \text {d i s t a t e} $$
y
$$ . \left(\wp \dot {1} \dot {\wp} ^ {\prime} / \wp\right) $$
A (A) 1
$$ . (0) \quad J _ {k} (M) p a b l l b i e s o g p d i s w l y l l l d j p q r s t a b l k j $$
s .e 11 j 1 1 1 1 1 1 1 1 1 1 1 1 1 1 1 1 1 1
$$ \cdot \text {e l} _ {\text {日}} \text {日} _ {\text {日}} \text {日} _ {\text {日}} \text {日} _ {\text {日}} \text {日} _ {\text {日}} \text {日} _ {\text {日}} \text {日} _ {\text {日}} \text {日} _ {\text {日}} \text {日} _ {\text {日}} \text {日} _ {\text {日}} \text {日}. $$
J 1
$$ : 4 \dots \dots \dots $$
J 1 J 1
$$ \therefore \lim _ {x \to 0} \frac {\sin x}{x + 1} $$
g:Jalal p j 151 g 1 1 (B) 11j l
j 1. j.
$$ . j a l y i $$
y
$$ . \text {s l i} \quad \dot {\alpha} \quad \dot {\alpha} \quad \dot {\alpha} \quad \dot {\alpha} \quad \dot {\alpha} \quad \dot {\alpha} \quad \dot {\alpha} \quad \dot {\alpha} \quad \dot {\alpha} \quad \dot {\alpha} \quad \dot {\alpha} \quad \dot {\alpha} $$
aai 1
by
(C)1J 1
j
111 111 111 111 111 111 111 111 111 111 111 111 111 111 111 111 1
a
.
aillg 1
j 1 j 1
J 1
(A)(B)(C)
.
.
A = - 4t + 52t
p 12

- DO NOT THROW AWAY THESE INSTRUCTIONS
- APPLIANCE DESCRIPTION (Fig. 1)
- HOW TO OPERATE
- Automatic operation button for mixing (G):
- Automatic operation button for crushing ice (H):
- Pulse operation button (I):
- WARNING:
- DISASSEMBLY OF THE BLENDER
- CLEANING AND MAINTENANCE
- NOTE:
- INSTRUCTIONS IMPORTANTES
- LIRE CES INSTRUCTIONS AVANT L'EMPLOI.
- Khonka aemomamueecko ynpaehn CmeuuaHm (G):
- Khonka aemomamuuecko0y ynpaehnua3MeIbyeHEm Iba(H):
- Khonka umnylbcHozO ynpaJIeHua (I):
- BHIMAHHE:
- PA36OPKA BJIENDEPA
- YHCTKA N TEXOBJNYKBAHNE
- PIMMEYAHNE:
- ONUCAHHI INPUCPTPOIO (mJI.1)
- IHCTPyKlii 3 KOPNCTyBAHHa
- Khonka azmomamuhoi po6omu dna nepemelnoeaHn (G):
- Khonka aemomamuhoi po6omu dna nodpi6HeHHra Ibody (H):
- Khonka po6omu e imnybchomy pexumi (l):
- YBARA:
Brand : ARIETE
Model : Blendy Pro 577
Category : Blender