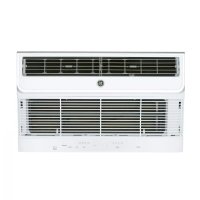
AJCM08AWH - Air Conditioning GE - Free user manual and instructions
Find the device manual for free AJCM08AWH GE in PDF.


| Product Type | Raised mount air conditioner for window or wall |
| Brand | GE |
| Model | AJCM08AWH |
| Color | White |
| Dimensions (W x H x D) | 66 x 40 x 46 cm (without front grille) |
| Power Supply | 115 V, 60 Hz, 12 A (refer to nameplate) |
| Cooling Capacity | 8,000 BTU/h |
| Power Consumption | Approximately 900 W |
| Operating Modes | Cool, Fan, Eco, Dry |
| Fan Speed | Auto, Low, Med, High |
| Remote Control | Yes (CR2025 battery included) |
| Wi-Fi Connectivity | Yes (compatible with SmartHQ) |
| Air Filter | Washable, cleaning reminder after 250 hours |
| Sleep Function | Yes, 8-hour program |
| Airflow Direction | Adjustable vents (up/down, left/right) |
| Compressor Start Delay | 3 minutes (overheat protection) |
| Outside Ventilation | Yes, with removable exhaust door |
| Included Parts | Remote control, safety brackets, screws, sealing strips |
| Warranty | 2 years parts and labor |
| Safety | Built-in current interrupt device in plug |
Frequently Asked Questions - AJCM08AWH GE
User questions about AJCM08AWH GE
0 question about this device. Answer the ones you know or ask your own.
Ask a new question about this device
Download the instructions for your Air Conditioning in PDF format for free! Find your manual AJCM08AWH - GE and take your electronic device back in hand. On this page are published all the documents necessary for the use of your device. AJCM08AWH by GE.
USER MANUAL AJCM08AWH GE
SAFETY INFORMATION 3
USING THE AIR CONDITIONER 4
WI-FI SETUP 7
CARE AND CLEANING 9
INSTALLATION INSTRUCTIONS 10
TROUBLESHOOTING TIPS......12
CONSUMER SUPPORT Warranty 15
Consumer Support. 16
Write the model and serial numbers here:
Model #
Serial #
You can find the this information on a label attached to the right side of the chassis.
OWNER'S MANUAL & INSTALLATION INSTRUCTIONS
Cool Only Models
AJCQ06LWH
AJCQ08AWH
AJCQ10AWH
AJCQ10DWH
AJCQ12AWH
AJCQ12DWH
AJCQ14DWH
Cool Only High Mount Models
AJCM08AWH
AJCM10AWH
AJCM10DWH
AJCM12DWH
Heat/Cool Models
AJEQ08AWH
AJEQ10DWH
AJEQ12DWH
AJEQ14DWH
Heat/Cool High Mount Models
AJEM12DWH
Heatpump Models
AJHQ08AWH
AJHQ12DWH
ESPANOL
For a Spanish version of this manual, visit our Website at GEAppliances.com.
For a French version of this manual, visit our Website at GEAppliances.ca.
THANK YOU FOR MAKING GE APPLIANCES A PART OF YOUR HOME.
Whether you grew up with GE Appliances, or this is your first, we're happy to have you in the family.
We take pride in the craftsmanship, innovation and design that goes into every GE Appliances product, and we think you will too. Among other things, registration of your appliance ensures that we can deliver important product information and warranty details when you need them.
Register your GE appliance now online. Helpful websites and phone numbers are available in the Consumer Support section of this Owner's Manual. You may also mail in the pre-printed registration card included in the packing material.

GE APPLIANCES
IMPORTANT SAFETY INFORMATION READ ALL INSTRUCTIONS BEFORE USING THE APPLIANCE
WARNING
For your safety, the information in this manual must be followed to minimize the risk of fire, electric shock or personal injury.
Use this appliance only for its intended purpose as described in this Owner's Manual.
This air conditioner must be properly installed in accordance with the Installation Instructions before it is used.
- Never unplug your air conditioner by pulling on the power cord. Always grip plug firmly and pull straight out from the receptacle.
- Replace immediately all electric service cords that have become frayed or otherwise damaged. A damaged power supply cord must be replaced with a new power supply cord obtained from the manufacturer and not repaired. Do not use a cord that shows cracks or abrasion damage along its length or at either the plug or connector end.
- Turn the unit OFF and unplug your air conditioner before cleaning.
For your safety...do not store or use combustible materials, gasoline or other flammable vapors or liquids in the vicinity of this or any other appliance.
If the receptacle does not match the plug, the receptacle must be changed out by a qualified electrician.
WARNING
USE OF EXTENSION CORDS
RISK OF FIRE. Could cause serious injury or death.
DO NOT use an extension cord with this air conditioner.
DO NOT use surge protectors or multi-outlet adaptors with this air conditioner.
HOW TO CONNECT ELECTRICITY
Do not, under any circumstances, cut or remove the third (ground) prong from the power cord. For personal safety, this appliance must be properly grounded.
DO NOT use an adapter plug with this appliance.
The power cord of this appliance is equipped with a 3-prong (grounding) plug which mates with a standard 3-prong (grounding) wall outlet to minimize the possibility of electric shock hazard from this appliance.
Power cord includes a current interrupter device. A test and reset button is provided on the plug case. The device should be tested on a periodic basis by first pressing the TEST button and then the RESET button while plugged into the outlet. If the TEST button does not trip or if the RESET button will not stay engaged, discontinue use of the air conditioner and contact a qualified service technician.
Have the wall outlet and circuit checked by a qualified electrician to make sure the outlet is properly grounded.
Where a 2-prong wall outlet is encountered, it is your personal responsibility and obligation to have it replaced with a properly grounded 3-prong wall outlet.
The air conditioner should always be plugged into its own individual electrical outlet which has a voltage rating that matches the rating plate.
This provides the best performance and also prevents overloading house wiring circuits which could cause a fire hazard from overheated wires.
See the Installation Instructions, Electrical Requirements section for specific electrical connection requirements.
For appliance recycling information please visit GEAppliances.com/recycling.
READ AND SAVE THESE INSTRUCTIONS
Using the Air Conditioner - Controls
Appearance may vary.


Air Conditioner Controls
- Lights below the touch pads on the control panel indicate
the selected settings
1. POWER
Turns air conditioner on and off.
2.DISPLAY
Displays the temperature setting.
3. MODE
Use to set HEAT (on some models), COOL, FAN, ECO, or DRY modes. Indicator lights on the controls will show the mode selected.
4. TEMP INCREASE (+) / DECREASE (-) PADS
Use to set temperature when in HEAT (on some models), COOL, ECO, or DRY modes.
5. FAN SPEED
Use to set the fan speed at AUTO, LOW, MEDIUM, or HIGH. Indicator lights will show the speed selected.
6. FILTER
Monitors accumulated fan run time as a reminder to clean the filter.
7.WI-FI
This unit is GE Appliances Wi-Fi Connect Enabled.
8. SLEEP
Allows room temperature to increase in Cool mode or decrease in Heat mode during sleeping hours.

Remote Control
To ensure proper operation, aim the remote control at the signal receiver on the air conditioner.
The remote control signal has a range up to 21 feet.
The remote control will control the unit even if connected to the Wi-Fi.
Make sure nothing is between the air conditioner and the remote control that could block the signal.
Make sure the battery is fresh and installed correctly—see the Care and Cleaning section.
Using the Air Conditioner - Features
To Adjust Fan Speeds
Press the FAN SPEED button to select the FAN SPEED in four steps - AUTO, LOW, MED, or HIGH. Each time the button is pressed, the fan speed mode is shifted.
For some models, the fan speed can not be adjusted under HEAT mode. In DRY mode, the fan speed is controlled at low automatically.
In AUTO, the fan speed will automatically operate at the speed needed to provide optimum comfort. If the room needs faster cooling to meet the set temperature, the fan will automatically increase. If the room needs less cooling, the fan will automatically decrease.
SLEEP
SLEEP set the unit to gradually change setting over an 8 hour period to allow for increased energy savings during sleeping hours. The SLEEP mode is available only in COOL and FAN only settings.
Press the SLEEP mode pad and its light will illuminate. The FAN indicator will stay at the same setting but the air conditioner will automatically change the FAN speed to low in either the COOL or FAN only mode.
In FAN only mode, the fan will stay in the LOW speed setting for 8 hours. After 8 hours, the air conditioner will resume the settings that were in place before the SLEEP mode pad was pressed.
In COOL and HEAT modes, the fan will stay in LOW speed setting for 8 hours from the time the SLEEP mode pad was pressed. The air conditioner will raise the set point 2^(1^) in cooling (lower the set point in heating) in 30 minutes and 2^(1^) more in another 30 minutes where it will remain for another 7 hours. After this 8-hour period, the unit will resume the settings that were in place before the SLEEP mode pad was pressed.
While the unit is in SLEEP mode, pressing any pad will return it to the settings that were in place before the SLEEP mode was pressed.
Check Filter
Press the FILTER button to initiate this feature. This feature is a reminder to clean the air filter for more efficient operation.
The LED (light) will illuminate after 250 hours of operation. To reset after cleaning the filter, press the FILTER button and the light will go off.
To Select the Operating Mode
To choose operating mode, press the MODE button. Each time you press the button, a mode is selected in a sequence that goes from HEAT (on some models), COOL, FAN, ECO, and DRY only. The indicator light will be illuminated and remain on once the mode is selected.
Models AJHQ08AWH and AJHQ12DWH are Heatpumps and the heating function will automatically switch between electric heat mode and heatpump mode to maintain room set temperature and to reduce operating costs. At outdoor temperatures below 40^(4.4^) , the unit will operate in electric heat mode only. The AJHQ08AWH is not intended to be the sole source of heat.
To operate in FAN only Mode:
- Use this function only when cooling or heating (on some models) is not desired. You can choose any fan speed you prefer.
During this function, the display will show the actual
room temperature, not the set temperature in the cooling or heating (on some models) mode.
In FAN only mode, the temperature is not adjustable.
To operate in ECO Mode:
- With this feature, the unit will operate in COOL mode only. The fan will operate with the compressor to cool the space. The fan will continue to run for 3 minutes after the compressor stops and the room set temperature has been met. The fan then cycles on for 2 minutes at 10 minute intervals until the room temperature is above the set point, at which time the compressor turns on and cooling starts.
To operate in DRY Mode:
In this mode, the air conditioner will generally operate in the form of a dehumidifer. Since the conditioned space is a closed or sealed area, some degree of cooling will occur. In DRY mode, the fan operates in LOW fan speed only.
To change the temperature display from Fahrenheit to Celsius, press - and + together and hold for 3 seconds.
Control Panel Lights
This unit has a control panel lights ON/OFF feature that turns them off when there is no activity for more than 1 minute. To wake up the lights, press any pad on the controls and the lights will come on to show the previous settings. To turn this feature off, press and hold the
SLEEP pad for 3 seconds. The unit will beep to signal a successful toggle off of this feature.
Pressing the DISPLAY on the wireless remote will turn the control panel lights off immediately.
Using the Air Conditioner - Features
Additional Features
The "Cool" circuit has an automatic 3 minute delayed start if the unit is turned off and on quickly. This prevents overheating of the compressor and possible circuit breaker tripping. The fan will continue to run during this time. There is a 2 second delay for the compressor to stop when selecting fan or heat. This is to cover the possibility of
having to roll through to select another mode.
The control will maintain the set temperature within 1^ between 62^ and 86^ in cool or heat mode (on some models).
After a power outage, the unit will remember last setting and return the unit to that setting when power is restore.
Air Direction
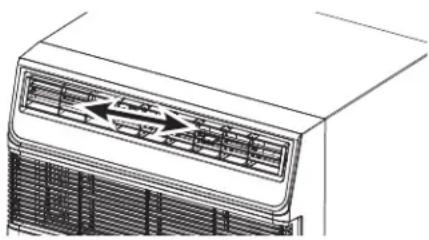
Adjustable louvers control air flow direction.
The louvers will allow you to direct the air flow up or down and left or right throughout the room as needed until the desired left/right direction is obtained. Pivot horizontal louvers until the desired up/down direction is obtained.
Ventilation
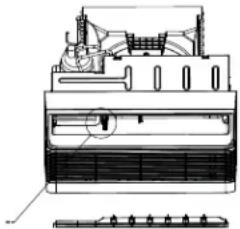
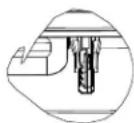
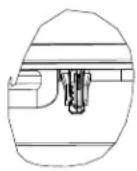
To open the ventilation port, remove the adjustable air discharge louvers by gently pulling forward the right end until it is released from the pivot point. Shift the louvers to the right to release the left end from its pivot point. To open the ventilation port, pull the lever forward. The lever will lock in place. To replace the air discharge louvers, reverse the
above procedure
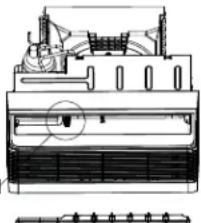
Vent Door Open Vent Door Closed
Remote Wall Thermostat (Heat/Cool models only)
All heat/cool models are capable of being controlled by a 24 VAC remote wall thermostat. The thermostat control connection board is located behind a metal cover on the right side of the metal chassis cover. To open the cover, remove the Phillips head screw and lift from the slots at the bottom. To properly connect the wiring from a remote wall thermostat, follow these steps:
- Order the 8-pin connector from GE Appliances Service. Call 1-800-626-2002 and order WP26X24981. A connector is required for each unit being controlled by a wall thermostat
- Install the remote thermostat according to the directions included with it.
- Using wire nuts included with the 8-pin connector, connect the wiring from the wall thermostat per the following; (Proper connection of the wiring is critical. Improper hookups could result in damage to the air conditioner components and may not be covered by the product warranty) After properly making the wire nut connections, wrap the 7 connectors together with electrical tape and push them into the lower right corner of the control box opening to keep them out of the way. Route the thermostat wiring out the bottom of the opening at the notch and replace the metal cover.
| Connector Wire Color Codes | Thermostat Connections |
| Black Common | |
| White Electric Heater | |
| Yellow Compressor | |
| Blue B terminal (heatpump model is only) | |
| Green Fan High | |
| Tan Fan Low | |
| Red 24 VAC |
NOTE: When the thermostat is installed and power is applied, the control display will not illuminate and the unit is automatically controlled by the wall thermostat.
NOTE: When using Wi-Fi, a remote wall thermostat will not function. If a thermostat is installed, Wi-Fi has operation priority.
Do Not Operate the unit in COOL mode when outdoor temperatures are below 64^(18^)
GE Appliances SmartHQ (for customers in the United States)
GE Appliances SmartHQ Enabled. If your Air Conditioner (AC) has a Connected Appliance Information label located on the outside as shown below, your AC is GE Appliances SmartHQ Enabled. A WiFi communication card is built into the product allowing it to communicate with your smart phone for remote monitoring, control and notifications. Please visit GEAppliances.com/connect to learn more about connected appliance features, and to learn what connected appliance apps will work with your smart phone.
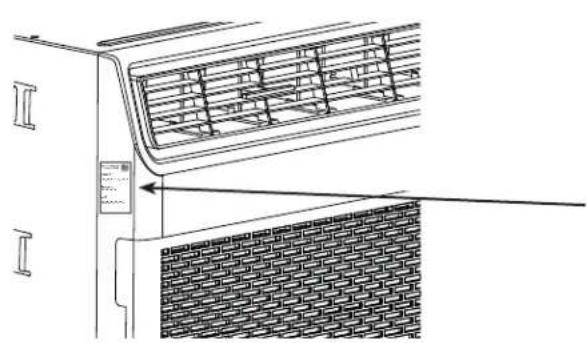
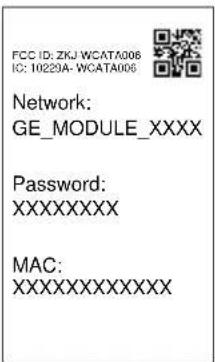
WiFi Connectivity: For assistance with the appliance or the ConnectPlus network connectivity (for models that are WiFi enabled or WiFi optional), please call 1-800-220-6899.
WiFi Setup
How it Works
Download the GE Appliances App
Use the app to connect your room air conditioner to WiFi
Once connected, use the app to turn down your air conditioner as you leave work.
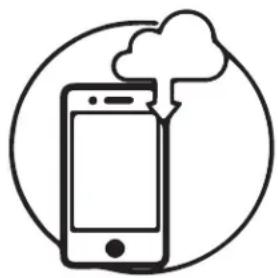
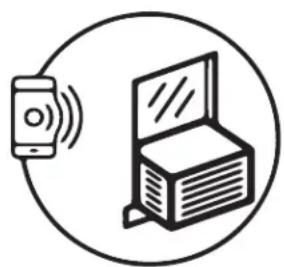
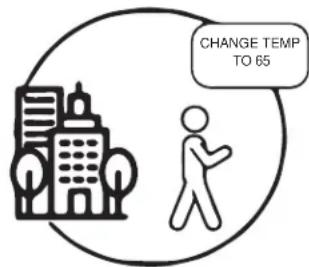
Getting Started
To connect your room air conditioner, you'll need the GE Appliances SmartHQ App. The app will walk you through the connection process. Download the app from iTunes or Google Play.


All connected appliance data is held in strict accordance with the GE Appliances Connected Data Privacy Policy. Visit geappliances.com/privacy/privacy_policy_ connected to view this policy.
Questions about SmartHQ
Get answers you need about setting up WiFi appliances and connecting to your home network in our support articles.
Visit products.geappliances.com/appliance/gea-support-search-content to view wifi connect room air conditioner support articles.
REGULATORY INFORMATION
FCC/IC Compliance Statement:
This device complies with Part 15 of the FCC Rules. Operation is subject to the following two conditions:
- This device may not cause harmful interference.
- This device must accept any interference received, including interference that may cause undesired operation.
This equipment has been tested and found to comply with the limits for a Class B digital device, pursuant to Part 15 of the FCC Rules. These limits are designed to provide reasonable protection against harmful interference in a residential installation. This equipment generates, uses and can radiate radio frequency energy and, if not installed and used in accordance with the instructions, may cause harmful interference to radio communications. However, there is no guarantee that interference will not occur in a particular installation. If this equipment does cause harmful interference to radio or television reception, which can be determined by turning the equipment off and on, the user is encouraged to try to correct the interference by one or more of the following measures:
- Increase the separation between the equipment and receiver.
- Connect the equipment into an outlet on a circuit different from that to which the receiver is connected.
- Consult the dealer or an experienced radio/television technician for help.
Labelling: Changes or modifications to this unit not expressly approved by the manufacturer could void the user's authority to operate the equipment.
This product has Wi-Fi capability and requires Internet connectivity and a wireless router to enable interconnection with an Energy Management System, and/or with other external devices, systems or applications.
Care and Cleaning
Air filter
To access the filter, grasp the front grille louvers on both sides at the recess and pull forward. Remove the filter by lifting up and out. Note the filter direction when re-installing.
Wash the filter using liquid dishwashing detergent and warm water. Rinse the filter thoroughly. Gently shake
excess water from the filter.
Be sure the filter is thoroughly dry before replacing. Or, instead of washing, you may vacuum the filter until clean.
NOTE: Never use hot water over 104^ (40^) to clean the air filter. Never attempt to operate the unit without the air filter.
Energy Saving Note
In order to reach maximum energy saving and comfort, it is recommended to use a cover to insulate the unit when the unit is not in use. The recommended cover size for the unit is 26'' × 17'' × 5'' ( W × H × D ).
NOTE: Unplug the unit before installing a cover.
Cabinet
-
Be sure to unplug the air conditioner to prevent shock or fire hazard. The cabinet and front may be dusted with an oil-free cloth or washed with a cloth dampened in a solution of warm water and mild liquid dishwashing detergent. Rinse thoroughly with a damp cloth and wipe dry.
-
Never use harsh cleaners, wax, or polish on the cabinet front.
- Be sure to wring excess water from the cloth before wiping around the controls. Excess water in or around the controls may cause damage to the air conditioner.
- Plug in the air conditioner.
Outdoor Coils
-
The coils on the outdoor side of the air conditioner should be checked regularly.
-
If they are clogged with dirt or soot, they may need to be professionally cleaned, a service available through GE Appliances service or other service companies.
How to Insert the Batteries in the Remote Control
- Remove the battery cover by rotating it to the unlock position.
- Insert a new battery, making sure that the (+) and (-) of the battery are installed correctly, (+) side up.
- Reattach the cover by rotating it back into the lock position.
NOTES:
- Use 1 CR2025 (3 VDC) battery. Do not use rechargeable batteries.
- Remove the battery from the remote control if the system is not going to be used for an extended period of time.
Front Grille Removal
The front grille can be removed for a more thorough cleaning.
To remove:
- Grasp the front grille louvers on both sides at the recess and pull forward
- Remove the filter by pulling forward and out.
- Grasp the bottom of the grille and carefully pull forward about 1" or until the security brackets limit the travel forward.
- Remove the two Phillips head screws located in the upper corners of the grille louver opening.
- Grasp the left and right rear edges of the grille about 6^ from the top and pull outward to release the tabs on the inside of the grille from the slots in each side of
the metal chassis cover. When released pull out both bottom corners of the grill while carefully lifting up to release the 4 tabs on the inside top of the grille from the slots in the metal chassis cover
6. To release the multi-pin low-voltage electrical connector from the user interface, press the rear of the tab and gently pull apart.
Front Grille Re-installation:
- Reconnect the multi-pin low voltage connector.
- Before engaging the 4 tabs on the inside top of the grille, align the ventilation lever on the chassis into the mating slot on the inside of the discharge opening in the grille. After ensuring proper alignment of the ventilation lever, push the grille toward the chassis and the tabs should snap into the slots on the metal chassis cover.
For more help, visit GEAppliances.com
BEFORE YOU BEGIN
Read these instructions completely and carefully.
- IMPORTANT - Save these instructions for local inspector's use.
- IMPORTANT - Observe all governing codes and ordinances.
Note to Installer - Be sure to leave these instructions with the consumer.
Note to Consumer - Keep these instructions for future reference. - Skill level - Installation of this appliance requires basic mechanical skills.
Completion time - Approximately 1 hour
We recommend that two people install this product. - Proper installation is the responsibility of the installer.
Product failure due to improper installation is not covered under the Warranty. - You MUST use proper installation procedures as described in these instructions when installing this air conditioner.
ELECTRICAL REQUIREMENTS
CAUTION
Do not, under any circumstances, cut or remove the third (ground) prong from the power cord.
Do not change the plug on the power cord of this air conditioner.
Aluminum house wiring may present special problems—consult a qualified electrician.
Power cord includes a current interrupter device. A TEST and RESET button are provided on the plug case. The device should be tested on a periodic basis by first pressing the TEST button and then the RESET button while plugged into the outlet. If the TEST button does not trip or if the RESET button will not stay engaged, discontinue use of the air conditioner and contact a qualified service technician.
IMPORTANT NOTE
For optimal energy efficiency and performance, we recommend using the RAB26 or the RAB46B wall sleeves with the RAG13A rear grille.
For Existing Wall Sleeves
For Existing Wall Sleeves
Note that the air conditioner dimensions are: Width-26"
Height-15 3 / 4
Depth-18 14 ” (without front grille)
Depth-16" (rear of chassis to rear edge of front grille) Install air conditioner according to these instructions to achieve the best performance. Installing this air conditioner in existing sleeves that do not allow for proper fit or have proper outdoor grilles may affect performance and could void the manufacturer's warranty.
Parts Included
- Security bracket and screws for a 26" wall sleeve (2)
Remote Control (1)
Weather Seal Strips Installation
To improve sealing on non-GE Wall Sleeves or older wall sleeves that have damaged or missing gaskets, we have provided two foam pads with adhesive that can be installed on the sides of the chassis per the below instructions.
Note: These gaskets may not be necessary with a new RAB26A sleeve install.
- Remove all packaging and packing material from the unit.
- Put the chassis on a table or install it approximately 34 of the way into the sleeve.
- Locate the "bump" or raised area in the metal on each side of the unit right behind the front cover. The foam strip should be located right behind the raised area.
- Wipe each side with a cloth to make sure the area is clean.
- Peel the backing off one piece of foam and starting at the top corner of side, adhere it from top to bottom just behind the bump on the flat surface.
- Repeat on right side ensuring you do not put the foam strip over the removable cover on the right side.
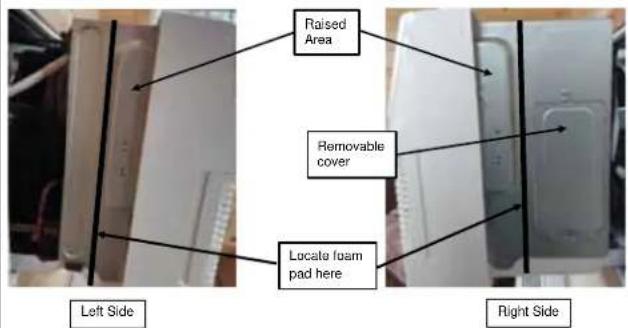
- When sliding the unit into the sleeve gently compress the pads to help it move behind the flange of the sleeve.
- Be cautious of the foam pads when removing the unit from the sleeve as well.
Security Brackets Installation (It is important to install these brackets to prevent the chassis from being pushed into the room from the outside.)
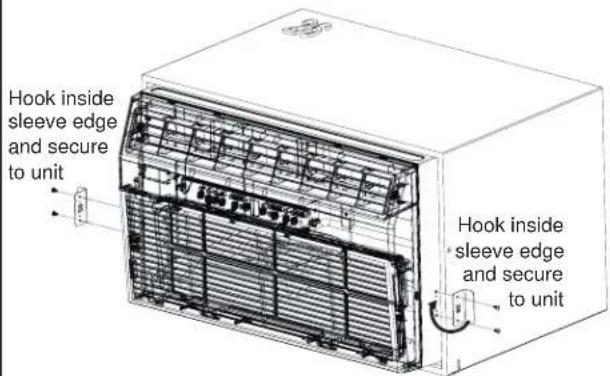
The brackets must be installed so the flanges are hooked behind the inside flanges of the wall sleeve. Using the screws provided, attach the brackets on the sides of the chassis.
To install the security bracket without fully removing the front grille:
1. Grasp the front grille louvers on both sides at the recess and pull forward.
2. Remove the filter by pulling forward and out.
3. Remove the two Phillips head screws located in the upper corners of the grille louver opening. Do not discard screws.
4. Grasp the left and right rear edges of the front grille about 6" from the top and pull outward to release the tabs on the inside of the grille from the slots in each side of the metal chassis cover. When released pull out both bottom corners of the front grille about 1" to expose the two screw holes on the lower area of the metal chassis cover.
5. Locate the 2 metal brackets stamped 26" that were included with the air conditioner. Hook the short flange of the bracket behind the sleeve inside edge and rotate it so the long side can be pressed flat against the metal chassis cover. Adjust so the bracket can be secured to the metal chassis cover by 2 screws included with the bracket. Only one bracket will be needed and can be installed on either side of the chassis.
6. To reinstall the front grille, push the lower corners to toward the sleeve until the side tabs click into the mating slots. Reinstall the two screws removed earlier and replace the filter and louvers.
For 26" sleeves, hook the short flange of the 26" bracket behind the sleeve inside edge and secure to the unit with the two screws provided. Repeat on the opposite side.
Troubleshooting Tips... Before you call for service
| Problem Solution | |
| Air conditioner does not start | Wall plug disconnected. Push plug firmly into wall outlet. |
| House fuse blown or circuit breaker tripped. Replace fuse with time delay type or reset circuit breaker. | |
| Plug current device tripped. Press the RESET button. | |
| Power is OFF. Turn power ON. | |
| Air from the unit does not feel cold enough | Room temperature below 62°F (17°C). Cooling may not occur until room temperature rises above 62°F (17°C). |
| Temperature sensor behind air filter may be touching cold coil. Keep it from the cold coil. | |
| Set to a lower temperature. | |
| Compressor stopped when changing modes. Wait for 3 minutes after set to the COOL mode. | |
| Air conditioner cooling, but room is too warm. Ice is forming on cooling coil behind decorative front. | Outdoor temperature below 64°F (18°C). To defrost the coil, set FAN ONLY mode. |
| Air filter may be dirty. Clean the filter. Refer to Care and Cleaning section. To defrost, set to FAN ONLY mode. | |
| Thermostat set to cold for night-time cooling. To defrost the coil, set to FAN ONLY mode. Then, set temperature to a higher setting. | |
| Dirty air filter, or the air is restricted. Clean the air filter. Refer to Care and Cleaning section. | |
| Temperature is set too high. Set the temperature to a lower setting. | |
| Air directional louvers positioned improperly. Position louvers for better air distribution. | |
| Front of unit is blocked by drapes, blinds, furniture, etc, which restricts air distribution. Clear blockage in front of unit. | |
| Doors, windows, registers, etc, may be open. Close doors, windows, registers. | |
| Unit recently turned on in hot room. Allow additional time to remove “stored heat” from walls, ceiling, floor, and furniture. | |
| Air conditioner turns on and off rapidly | Dirty air filter, the air is restricted. Clean air filter. |
| Outside temperature extremely hot. Set FAN speed to a higher setting to cool outdoor cooling coil. | |
| Noise when unit is cooling | Air movement sound. This is normal. If too loud, set to a slower FAN setting. |
| Improper installation. Refer to installation instructions or check with installer. | |
| Water dripping INSIDE when unit is cooling | Improper installation. Tilt air conditioner slightly to the outside to allow water drainage. Refer to installation instructions, and check with installer. |
| Water dripping OUTSIDE when unit is cooling | Unit removing large quantity of moisture from humid room. This is normal during excessively humid days. |
| Room too cold Set temperature to low. Increase set temperature. | |
| Error code “AS” in the display | Room temperature sensor error. Unplug the unit and plug it back in. If error repeats, call for service. NOTE: In Fan only mode, it will display “LO” or “HI”. |
| Error code “HS” in the display | Electric heating sensor error. Unplug the unit and plug it back in. If error repeats, call for service. |
| Error code “.” in the display | Evaporator temperature sensor error. Unplug the unit and plug it back in. If error repeats, call for service. |
GE Appliances Air Conditioner Limited Warranty
All warranty service must be provided by our Factory Service Centers, or an authorized Customer Care® technician. To schedule service, visit us on-line at GEAppliances.com/service, or call 800.GE.CARES (800.432.2737). Have serial number and model number available when calling for service. In Canada, contact your distributor.
For The Period Of: GE Appliances Will Replace:
| Two Years From the date of the original purchase | GE Appliances Will Replace: Any part of the air conditioner which fails due to a defect in materials or workmanship. During this limited two-year warranty, GE Appliances will also provide, free of charge, all labor and related service to replace the defective part. |
| Five Years From the date of the original purchase | GE Appliances Will Replace: Any part of the sealed refrigerating system (the compressor, condenser, evaporator, reversing valve, and all connecting tubing) which fails due to a defect in materials or workmanship. During this three-year additional warranty, GE Appliances will also provide, free of charge, all labor and related service to replace the defective part. |
What GE Appliances Will Not Cover:
Service trips to your home to teach you how to use the product.
- Improper installation, delivery or maintenance. If you have an installation problem, or if the air conditioner is of improper cooling capacity for the intended use, contact your dealer or installer. You are responsible for providing adequate electrical connecting facilities.
Failure of the product resulting from modifications to the product or due to unreasonable use including failure to provide reasonable and necessary maintenance.
In commercial locations, labor necessary to move the unit to a location where it is accessible for service by an individual technician.
- Replacement of house fuses or resetting of circuit breakers.
Failure due to corrosion on models not corrosion-protected. - Damage to the product caused by improper power supply voltage, accident, fire, floods or acts of God.
- Incidental or consequential damage caused by possible defects with this air conditioner.
Damage caused after delivery.
EXCLUSION OF IMPLIED WARRANTY--Your sole and exclusive remedy is product repair as provided in this Limited Warranty. Any implied warranties, including the implied warranties of merchantability or fitness for a particular purpose, are limited to two years or the shortest period allowed by law.
This limited warranty is extended to the original purchaser and any succeeding owner for products purchased for home use within the USA. If the product is located in an area where service by a GE Appliances Authorized Servicer is not available, you may be responsible for a trip charge or you may be required to bring the product to an Authorized GE Service location for service. In Alaska, the limited warranty excludes the cost of shipping or service calls to your home.
Some states do not allow the exclusion or limitation of incidental or consequential damages. This limited warranty gives you specific legal rights, and you may also have other rights which vary from state to state. To know what your legal rights are, consult your local or state consumer affairs office or your state's Attorney General.
Warrantor: GE Appliances, a Haier company
Louisville, KY 40225
Consumer Support
GE Appliances Website
Have a question or need assistance with your appliance? Try the GE Appliances Website 24 hours a day, any day of the year! You can also shop for more great GE Appliances products and take advantage of all our on-line support services designed for your convenience. In the US: GEAppliances.com In Canada, contact your distributor.
Register Your Appliance
Register your new appliance on-line at your convenience! Timely product registration will allow for enhanced communication and prompt service under the terms of your warranty, should the need arise. You may also mail in the pre-printed registration card included in the packing material. In the US: GEAppliances.com/register
Schedule Service
Expert GE Appliances repair service is only one step away from your door. Get on-line and schedule your service at your convenience any day of the year. In the US: GEAppliances.com/service or call 800.432.2737 during normal business hours.
For Canadian customers, call your distributor for service and/or replacement parts.
Extended Warranties
Purchase a GE Appliances extended warranty and learn about special discounts that are available while your warranty is still in effect. You can purchase it on-line anytime. GE Appliances Services will still be there after your warranty expires. In the US: GEAppliances.com/extended-warranty or call 800.626.2224 during normal business hours.
For Canadian customers, contact your distributor.
Parts and Accessories
Individuals qualifed to service their own appliances can have parts or accessories sent directly to their homes (VISA, MasterCard and Discover cards are accepted). Order on-line today 24 hours every day. In the US: GEApplianceparts.com or by phone at 877.959.8688 during normal business hours.
Instructions contained in this manual cover procedures to be performed by any user. Other servicing generally should be referred to qualified service personnel. Caution must be exercised, since improper servicing may cause unsafe operation.
For Canadian customers, contact your distributor.
Contact Us
If you are not satisfied with the service you receive from GE Appliances, contact us on our Website with all the details including your phone number, or write to:
In the US: General Manager, Customer Relations | GE Appliances, Appliance Park | Louisville, KY 40225
GEAppliances.com/contact
For Canadian customers, contact your distributor.
INFORMATION DE SECURITE...3
UTILISANT LE CLIMATISEUR...4
CONFIGURATION
DU WI-Fl 7
ENTRETIEN ET NETTOYAGE....9
INSTRUCTIONS
D'INSTALLATION 10
CONSEILS DE DÉPANNAGE....12
SOUTIEN AU CONSOMMATEUR
Garantie limitée 13
Garant: GE Appliances, a Haier company
Louisville, KY 40225
Au Canada: Prodsupport.mabe.ca/crm/Products/ProductRegistration.aspx
Au Canada: GEAppliances.ca/en/support/service-request ou composez le 800.561.3344
Prolongation de garantie
Au Canada: GEAppliances.ca/en/support/purchase-extended-warranty ou composez le 800.290.9029
GEAppliances.com/ge/service-and-support/contact.htm
Au Canada : Director, Consumer Relations, Mabe Canada Inc. | Suite 310, 1 Factory Lane | Moncton, N.B. E1C 9M3 GEAppliances.ca/en/contact-us
con WI-FI Incorporado de 26” ACONDICIONADORES DE AIRE
Garante: GE Appliances, a Haier company
Louisville, KY 40225
GEAppliances.com/contact