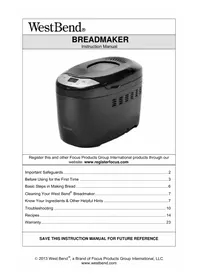
41410 - Bread maker WestBend - Free user manual and instructions
Find the device manual for free 41410 WestBend in PDF.


| Product type | Bread machine |
| Brand | WestBend |
| Model | 41410 |
| Approximate dimensions | 30 x 25 x 35 cm |
| Approximate weight | 5.5 kg |
| Power supply | 120 V ~ 60 Hz, 600-800 W (estimated) |
| Pan capacity | 1.5 lb (0.68 kg), 2.0 lb (0.91 kg), 2.5 lb (1.1 kg) |
| Programs | 12 programs: Basic, French, Whole wheat, Sweet, Super rapid, Sandwich, Gluten free, Mix, Dough, Cake, Jam, Bake |
| Main features | LCD display, delay timer up to 13 h, crust color setting (light/medium/dark), keep warm 1 h, automatic shut-off, ingredient addition signaled by beep |
| Pan coating | Non-stick |
| Care and cleaning | Clean the pan with warm soapy water, never immerse the pan or wash it in the dishwasher. Do not use abrasive cleaners. |
| Safety | Polarized plug, short cord, automatic shut-off in case of overheating, grounding not required |
| Spare parts | Bread pan, kneading paddles (available on order) |
| Repairability | One-year limited warranty, contact customer service at (866) 290-1851 |
| General information | Manual available in French, 73 pages, free download |
Frequently Asked Questions - 41410 WestBend
User questions about 41410 WestBend
0 question about this device. Answer the ones you know or ask your own.
Ask a new question about this device
Download the instructions for your Bread maker in PDF format for free! Find your manual 41410 - WestBend and take your electronic device back in hand. On this page are published all the documents necessary for the use of your device. 41410 by WestBend.
USER MANUAL 41410 WestBend
Register this and other Focus Products Group International products through our website: www.registerfocus.com
Important Safeguards 2
Before Using for the First Time 3
Basic Steps in Making Bread 6
Cleaning Your West Bend® Breadmaker 7
Know Your Ingredients & Other Helpful Hints 7
Troubleshooting 10
Recipes 14
Warranty. 23
SAVE THIS INSTRUCTION MANUAL FOR FUTURE REFERENCE
IMPORTANT SAFEGUARDS

CAUTION
To prevent personal injury or property damage, read and follow all instructions and warnings.
When using electrical appliances, basic safety precautions should always be followed including the following:
- Read all instructions.
- Do not touch hot surfaces. Use handle or knobs. Always use hot pads or oven mitts when handling hot bread and bread pan.
- To protect against electric shock do not immerse cord, plugs, or other electric parts in water or other liquids.
- Close supervision is necessary when this appliance is used by or near children.
- Unplug the appliance from outlet when not in use and before cleaning. Allow to cool before putting on or taking off parts.
- Do not operate any appliance with a damaged cord or plug or after the appliance malfunctions or if the appliance is dropped or damaged in any manner. If you experience any problems with your appliance, unplug it immediately from the electrical outlet. For service information see warranty page.
- The use of accessory attachments not recommended by Focus Products Group International may cause fire, electric shock, or injury to persons.
- Do not use this appliance outdoors.
- Do not let cord hang over the edge of a table or counter, or touch hot surfaces.
Do not place on or near a hot gas or electric burner, or in a heated oven. - Extreme caution must be used when moving an appliance during operation.
- To disconnect, turn control to "OFF," then remove plug from wall outlet.
- Do not use appliance for other than intended use.
- Avoid contacting moving parts.
- Do not let cord contact hot surface, including the stove.
- This appliance has a polarized plug (one blade is wider than the other). To reduce the risk of electric shock, this plug is intended to fit into a polarized outlet only one way. If the plug does not fit fully into the outlet, reverse the plug. If it still does not fit, contact a qualified electrician. Do not attempt to modify the plug in any way.
- Set breadpan on hot pad, trivet or other heat protective surface. Do not set hot breadpan directly on the counter, table or other surface.
- Do not put hand inside oven chamber after bread pan is removed. Heating unit will still be hot.
- Do not use your breadmaker with a converter or transformer. This will destroy the electronic controls.
- Do not attempt to repair this appliance yourself.
-
A short power-supply cord is provided to reduce risks resulting from becoming entangled in or tripping over a longer cord.
-
Longer, detachable power-supply cords or extension cords are available and may be used if care is exercised in their use. While use of an extension cord is not recommended, if you must use one, the marked electrical rating of the detachable power-supply cord or extension cord should be at least as great as the electrical rating of the appliance. If the appliance is of the grounded type, the extension cord should be a grounding-type 3-wire cord. The cord should be arranged so that it will not hang over the counter top or tabletop where it can be pulled by children or tripped over.
- For household use only.
SAVE THESE INSTRUCTIONS
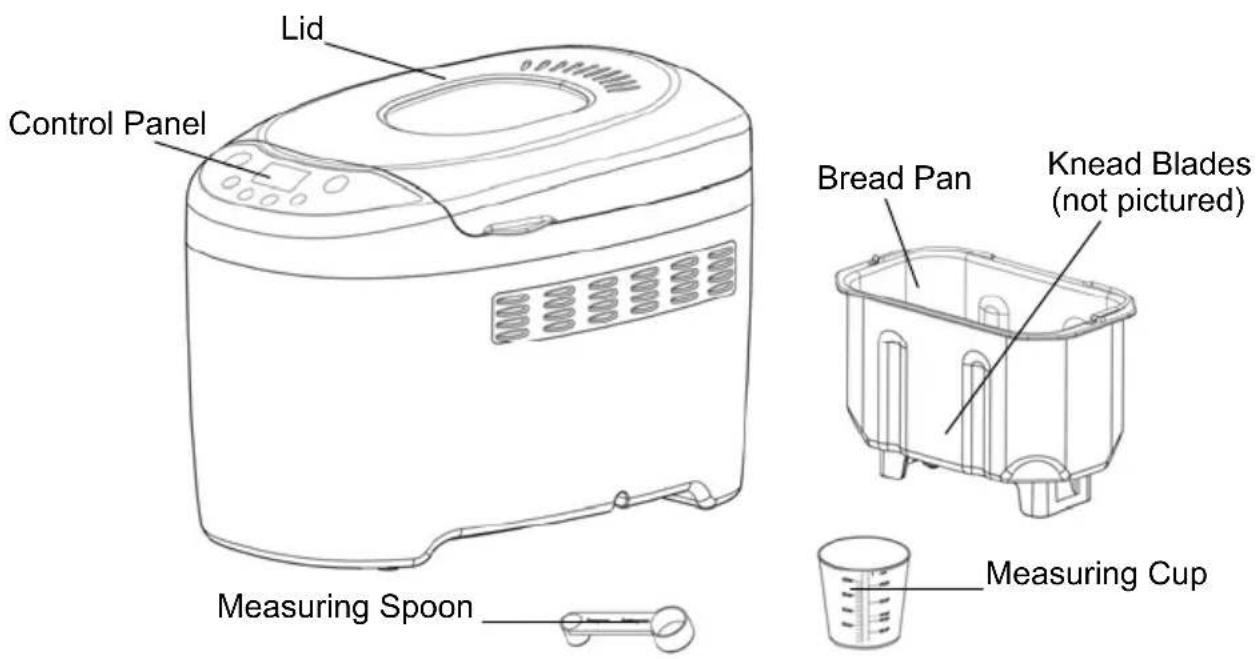
BEFORE USING FOR THE FIRST TIME
Check all packaging material carefully before discarding. Many accessory parts are contained within the packaging material. Remove the plastic film from the display before use. Always clean your new appliance thoroughly before using; refer to the "Cleaning Your Automatic Breadmaker" section of this manual.
Before the first use, add a cup of water to the bread pan and place in the baking chamber. Leaving the lid open, follow basic instructions to run the breadmaker on the (12) "Bake" setting for one full cycle to burn off any residual manufacturing oils.
Get to know your new West Bend® Breadmaker. The control panel on your breadmaker was designed to be very easy to use. Please review the following features to better understand the control panel.
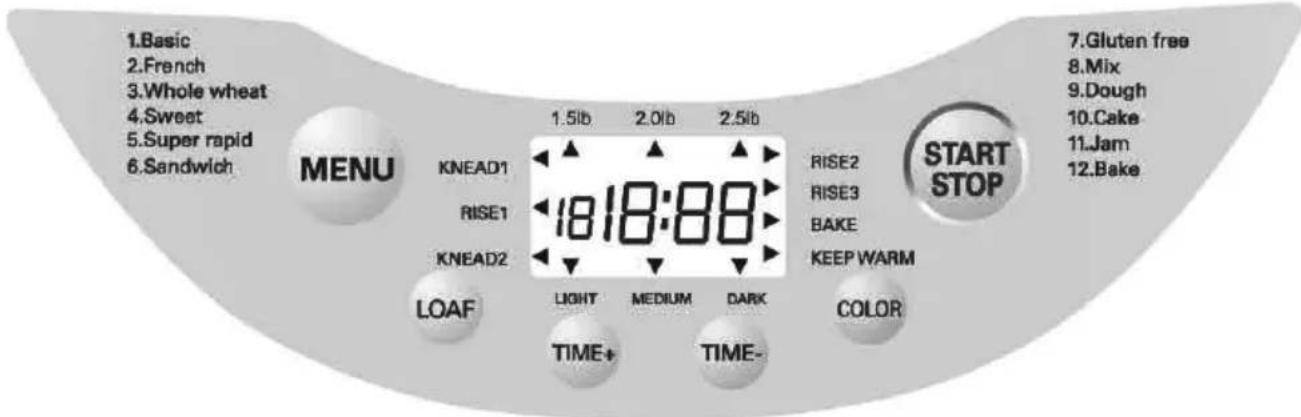
CONTROL PANEL and FUNCTIONS
LCD DISPLAY: Remove the plastic film from the display before use. The display indicates when the appliance is ready for use. When the appliance is first plugged in, there will be an audible beep and the default program is displayed. "1 3:20" appears on the display. The "1" specifies which program is selected (1-12 programs) and the "3:20" is the length of the program in hour: minutes. The position of the marking at the top of the display indicates the weight of the loaf selected (2.5, 2.0 or 1.5 lb) with 2.5 lb as the default. The position of the marking at the top of the display indicates the degree of browning that is selected (light, medium, or dark) with medium as the default. As the program proceeds the digits of the time displayed will decrease progressively indicating remaining time. During operation the status of the program is indicated in the display with a mark at the active program mode; "Time," "Preheating," "Kneading," "Pause," "Rising," "Baking," "Keep Warm," and program "End."
"START/STOP" Button: The "START/STOP" button is used to start or cancel a program. A short alert is heard with each press of the "START/STOP" button. Press this button when the Breadmaker is idle to start the program. When the breadmaker is active, press and hold this button to cancel the program. If you do cancel the program, the breadmaker will return to its default settings for the chosen menu selection. All customized settings will be lost if the program is cancelled. You must set all desired program settings before starting the program. The program cannot be changed after the cycle has begun, unless you cancel the cycle.
"TIME +" and "TIME -" Buttons: The "TIME +" and "TIME -" buttons are used to set a delayed program end time. Only the following programs can be used with the delay timer: (1) "Basic," (2) "French," (3) "Whole wheat," (4) "Sweet," (5) "Super rapid," (6) "Sandwich," (7) "Gluten free," (9) "Dough," and (12) "Bake." The (10) "Cake" and (11) "Jam" programs can not be started with the delay timer. The delay hours and minutes will be added to the preprogrammed times for the specific program. The time indicated in the display is the time until the end of the cycle. The maximum time delay is 13 hours per program. Note: When delay start time has been selected, press "START/STOP" button. As time counts down, the " : " will blink to indicate that it is working.
DELAY START: The maximum time delay is 13 hours per program.
Example: It is 8:30 p.m. and you would like the bread ready for the next morning at 7:00 a.m. Determine the time difference, 7:00 a.m. is 10 hours and 30 minutes ahead of 8:30 p.m. Press the "TIME +" or "TIME -" buttons until 10:30 appears in the display.
NEVER use the time delay function when using perishable ingredients such as milk, eggs, fruit, yogurt, etc!.
"COLOR" Button: "COLOR" cycles to select the crust darkness: LIGHT, MEDIUM, and DARK. The default color is MEDIUM.
"LOAF" Button: The "LOAF" button adjusts the various programs for the selected loaf size; 2.5 lb, 2.0 lb or 1.5 lb. This button is only applicable for the following programs: "Basic," "French," "Whole wheat," "Sweet," "Super rapid," "Sandwich," "Gluten free," and "Cake."
"MENU" Button: Use the "MENU" button to select the desired program. In general, use the following suggested programs for the following specialties.
MENUSLECTIONS
Menu 1: "Basic" for white, rye, potato, egg, garlic and similar breads. The "Basic" setting can be used for almost any bread recipe containing mostly bread flour.
Menu 2: "French" for the preparation of particularly light white and Italian breads. This is not suitable for baking recipes requiring butter, margarine, or milk.
Menu 3: "Whole wheat" for breads containing 50% or more whole wheat, cracked wheat, buttermilk wheat and like breads.
Menu 4: "Sweet" for preparing breads with raisins, cinnamon, apricots and similar ingredients.
Menu 5: "Super rapid" for preparing loaves in under 2 hours.
Menu 6: "Sandwich" for baking lightly textured bread with a thinner crust, perfect for at-home sandwiches.
Menu 7: "Gluten free" for Gluten free recipes.
Menu 8: "Mix" for the preparation of doughs without yeast with no baking.
Menu 9: "Dough" for the preparation of dough with no baking.
Menu 10: "Cake" mix and bake; designed for use with yeast cakes and boxed cake mixes.
Menu 11: "Jam" pre-programmed setting to cook marmalades and jams.
Menu 12: "Bake" for baking and browning of breads, cakes, or even casseroles. This setting is perfect for additional baking of breads that are too light or have not baked completely through. Bake time is 1 hour. In this program, there are no knead or rest cycles.
ALERTS, SOUNDS and OTHER GENERAL FUNCTIONS
Alert: The alert sounds:
- At the pressing of any button that allows function selection. If the button doesn't beep, that function choice is not available.
- An alert may sound during the second kneading cycle of some settings to signal that the cereals, fruits, nuts or other ingredients can be added.
- When the end of the program is reached.
- During the warming phase at the end of the baking procedure the alert sounds several times.
Power Interruption: If there is a brief power interruption of less than five minutes, the program position is stored in memory and the machine will resume when the power is restored.
Over-temp Error: If the display shows "H:HH" after the program has been started, it means that the temperature inside of bread pan is too high. You should stop the program and unplug the power cord immediately. Open the lid and let the machine cool down completely before using again.
- A small amount of smoke and/or odor may occur upon heating due to the release of manufacturing oils - this is normal.
- Some minor expansion/contraction sounds may occur during heating and cooling - this is normal.
BASIC STEPS IN MAKING BREAD
Always clean your new appliance thoroughly before using. Refer to "Cleaning Your Breadmaker" section.
- Insert the bread pan; place the bread pan in the center of the baking chamber. When the bread pan is pressed lightly in the center, the fixing device locks into place. To remove the bread pan, pull with medium force on the bread pan carrying handle. CAUTION: The handle is hot after baking. Use oven mitts or hot pads when removing a hot bread pan.
- Position the knead blades on to the shafts in the bottom of the bread pan, matching the hub shapes with the shaft shapes. You may need to twist the bars slightly for the knead blades to drop in place. Make sure the knead blades are pushed down on the shaft all the way. The knead blade is all the way down when the top of the shaft is flush with the top of the knead bar.
- Add ingredients to the bread pan in the order listed in the recipe; liquids first, then the butter or margarine, next the dry ingredients and finally the yeast. For best results level the dry ingredients before adding the yeast. Note: Ingredients and measuring are the key to successful breadmaking. We highly recommend reading the "Know Your Ingredients and Other Helpful Hints" section of this manual before making bread.
- Plug the breadmaker cord into a 120 volt, AC electrical outlet ONLY.
- Use the "MENU" button to select the desired program menu. (see pg. 5)
- Use the "LOAF" button to select the desired loaf size.
- Use the "COLOR" button to select the desired crust darkness.
- If desired, use the "TIME +" and "TIME -" buttons to set the elapsed time for when the program is to be completed (see pg. 4).
-
Press the "START/STOP" button to begin the program. After the breadmaker has been turned on, the programmed setting cannot be changed without canceling the program. To change the setting, hold the "START/STOP" button down until the alert sounds; program the control as desired and turn back on.
-
A small amount of smoke and/or odor may occur upon heating due to the release of manufacturing oils - this is normal.
-
Some minor expansion/contraction sounds may occur during heating and cooling - this is normal.
-
When the bread is done, an alert will sound. Turn the breadmaker off by holding the "START/STOP" button down until the alert sounds. Unplug the cord from the electrical outlet. If the breadmaker is not turned off after the cycle is complete, the breadmaker will automatically go into a one hour "Keep Warm" mode. If the machine is not turned off after the end of the "Keep Warm" period, the machine will turn itself off.
- Remove the bread pan. CAUTION: The handle is hot after baking. Use oven mitts or hot pads when removing a hot bread pan.
- Invert the bread pan and shake gently until the loaf falls out. Place the bread on a rack to cool 15 to 20 minutes. The knead blade will normally stay in the bread pan when the bread is removed, but may on occasion slide out in the bread.
CAUTION: The knead blade is very hot, remove with care. If making another loaf of bread right away, be sure the machine is turned off, unplugged, and allowed to cool for 15 to 20 minutes with the cover open.
High Altitude Adjustment: Reduced air pressure at high altitudes causes yeast gases to expand more rapidly and the dough to rise more quickly. The dough can rise so much that when it begins to bake, it will collapse due to overstretching of the gluten structure. To slow the rising of the dough, reduce the amount of yeast by 14 teaspoon at a time until you find the right amount. You can also reduce the amount of liquid by a teaspoon or two. Some experimentation will be needed when using your breadmaker at high altitudes.
CLEANING YOUR BREADMAKER
- Unplug the cord from the electrical outlet and allow the appliance to cool completely before cleaning.
- Immediately after the bread is removed from the bread pan, fill the bread pan half full with warm water and a small amount of dish soap. Allow the bread pan to soak for 5 to 20 minutes or until the knead blades can be lifted off of the shafts. You may need to twist the knead blades slightly to loosen. If the knead blades are difficult to remove after soaking, secure the cross bar on the underside of the bread pan while twisting the knead blades to loosen. Wash the inside of the bread pan and knead blade with a soft cloth, rinse and dry. Use a mild detergent. Never use chemical cleaning agents, oven cleaners, abrasive scouring pads, or cleansers on the bread pan or knead blade as damage to the coating or finish can occur. Replace the knead blade on the shaft.
- Never immerse the bread pan in water or wash in an automatic dishwasher as damage to the bearing that turns the knead blade can occur. Wipe the inside of the oven chamber and the outside surfaces of the breadmaker with a damp cloth if necessary. Never dip the appliance in water or fill the baking compartment with water! The lid cannot be removed for cleaning.

NOTE: The coating on the inside of bread pan may change color over time; this is normal and does not affect the bread.
KNOW YOUR INGREDIENTS AND OTHER HELPFUL HINTS
Although bread making seems very basic, it is a science and the proportions of ingredients are critical. The most important step in using your bread maker is to measure the ingredients precisely and accurately. Read the following information to better understand the importance each ingredient plays in the bread making process. Always make sure the ingredients are fresh.
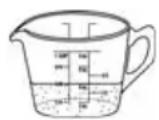
- Measure the liquid ingredients in see-through measuring cups with accurate markings. Place the cup on a flat surface and measure at "Eye Level," not at an angle. All measurements must be accurate. Always use liquids between 80 - 90^ (27-32°C) to assure optimal yeast activity.
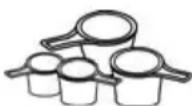
- Spoon the dry ingredients into the appropriate measuring cups or spoons, and then level off with table knife. All ingredients measured in measuring spoons and cups must be level, not rounded or heaping.
- Never scoop measuring cups into dry ingredients. This will compress the ingredients into the cup and cause the dough to be dry which will result in a short loaf of bread.
BREAD FLOUR should be used in your bread maker. It contains more gluten-forming proteins than all-purpose flour and will provide well-formed loaves with good structure. Several different brands of bread flour are available. Do not use self-rising or cake flour in your bread maker.
WHOLE WHEAT FLOUR can be used in your bread maker using the "Whole wheat" bread setting. Whole wheat flour contains the entire wheat kernel, including the bran and germ. Therefore, breads made with 100 percent or a high percentage of whole wheat flour will be lower in height and heavier in texture than bread made with bread flour. The "Whole wheat" setting on your bread maker is programmed to better develop the structure of wheat breads for optimum results.
RYE FLOUR can be used in combination with bread flour in the preparation of rye or pumpernickel bread. However, it cannot be used alone as it does not contain enough protein to develop adequate gluten for structure.
SUGAR AND OTHER SWEETENERS provide food for the yeast, add height and flavor to the bread and give the crust a golden color. Types of sweeteners that can be used include sugar, brown sugar, honey, molasses, maple syrup, corn syrup and fruits, dried or fresh. Do not use artificial sweeteners as a substitute for sugars and other natural sweeteners; artificial sweeteners turn bitter when subjected to baking temperatures, the yeast will not react properly, and poor results will be attained.
When measuring sticky sweeteners, such as honey, coat the measuring spoon with vegetable oil before measuring the sweetener. This will allow the sweetener to slide off the spoon without sticking.
MILK enhances flavor and increases the nutritional value of bread. Any type of milk; dry, whole, 2% , 1% , skim, buttermilk or canned evaporated milk can be used in making bread. Refrigerated milk may be warmed to 80 - 90^ (27 - 32^) however do not overheat (above 100^ , 38^ ) as this could affect the yeast activity. Do not use regular milk when using the "Delay Start" function. Use dry milk and water as a substitute.
WATER used in combination with dry milk can be substituted for regular milk and must be used when using the "Delay Start" function as regular milk can spoil when left at room temperature for several hours. Use lukewarm water, about 80 - 90^ (27-32°C). Do not use water above 100^ (38°C) as this could affect the yeast.
BUTTER, MARGARINE, SHORTENING and OILS serve several purposes in bread making as they tenderize the bread, add flavor and richness. Butter and margarine are interchangeable in recipes. Butter and margarine can be used right from the refrigerator. Cut cold butter or margarine into smaller pieces for faster blending during the knead cycle. Low-fat or fat-free bread can be made by substituting equal amounts of unsweetened applesauce or plain yogurt for the amount of fat recommended in the recipe. Using less fat will affect the height, tenderness and texture of the bread, which is normal.
EGGS add color, richness and leavening to bread. Use only large eggs. No premixing is needed. Egg substitutes can be used in place of fresh eggs. One egg equals 14 cup of egg substitute. To reduce cholesterol, you can substitute two (2) egg whites for a large egg in the recipes without affecting the end result. Watch the dough during the knead cycle as some minor adjustment may be needed to get the dough to the right consistency.
SALT has several functions in making bread. It controls yeast growth while strengthening the gluten structure to make the dough more elastic and also adds flavor. Use ordinary table salt in your bread maker. Using too little or eliminating the salt will cause the dough to over rise. Using too much can prevent the dough from rising as high as it should. "Light" salt can be used as a substitute for ordinary table salt, providing it contains both potassium chloride and sodium. Use the same amount as recommended for table salt. When adding salt to the bread pan, add to one corner to keep it away from the yeast, especially when using time delay as the salt can affect the yeast activity.
YEAST is a living organism, which through fermentation, feeds on carbohydrates in flour and sugar to produce carbon dioxide gas that makes the bread rise. Active dry, fast rising or bread machine yeast can be used in your bread maker. Use only the amount stated in the recipes. Using a little more can cause the dough to over rise and bake into the top of the bread maker. Fast rising yeast and bread machine yeast are virtually the same and interchangeable with one another. Do not use compressed yeast as poor results may be obtained. A 1/4 -ounce envelope of yeast contains 214 teaspoons. Yeast can also be purchased in bulk so you can measure the exact amount needed. Once opened, keep refrigerated. Always make sure yeast is fresh and has not passed the "Use By" date.
SPECIAL NOTE ON FLOUR: All flours are affected by growing conditions, milling, storage, humidity, etc. While not visibly different, you may need to make some minor adjustments when using different brands of flour as well as compensating for the humidity in your area. Always store bread flour in an airtight container. Store whole grain flours, whole wheat and rye, in a refrigerator to prevent them from becoming rancid. Measure the amount of flour as directed in each recipe, but make any adjustments after the first 3 - 4 minutes of continuous kneading.
CHECKING THE DOUGH: Making changes to the dough is easy. This can be done during the knead cycle only. Do not turn off the breadmaker to adjust dough.
- Touch the dough. If it feels a little sticky and there is a slight smear of dough under the knead blade, no adjustment is necessary.
- If the dough is very sticky, clinging to the sides of the pan, and is more like a batter than a dough, add one tablespoon of flour. Allow the flour to be mixed completely into the dough before making any more adjustments. To prevent heat from escaping, open the cover of the bread maker only to add flour.
- If the dough is dry and the bread maker appears to be laboring, add one teaspoon of lukewarm water. Allow water to be completely mixed into the dough before making any additional adjustments and keep lid closed to keep heat in the appliance.
Dough is "just right" when it is smooth in appearance, soft to the touch, leaves a slight residue on your finger, and the bottom of the bread pan is clean of dough residue.
SPECIAL NOTE ON CINNAMON AND GARLIC: Adding too much cinnamon or garlic can affect the texture and size of the loaf obtained. Cinnamon can break down the structure of the dough, affecting height and texture. Too much garlic can inhibit the yeast activity. Use only the amount of cinnamon and garlic recommended in the recipe.
CREATING ARTISAN BREAD CRUSTS: Just before the bread baking cycle begins, open the cover of the bread maker and carefully brush the top surface of the dough with a lightly beaten egg white that has been mixed with 1 teaspoon of water. If desired, slash the top of the dough 14 to 12 inch deep with a sharp knife into desired design. Leave plain or sprinkle with seeds, herbs, grated parmesan or romano cheeses, or other desired toppings. Press toppings gently into the dough to ensure it adheres and will not fall off. Close the cover and allow bread to bake.
For best results, use only the beaten egg white with water to treat the crust before the bake cycle begins. This mixture will ensure that toppings will stick and not fall off when bread is removed from the pan.
Do not use vegetable oil cooking sprays to treat crusts, as the cooking sprays can be flammable when exposed to the bread maker's heating unit.
Crust can also be treated after bread is done baking. Remove bread from the bread pan and place on a rack. Lightly brush the top of the loaf with melted butter, margarine, olive oil, or vegetable oil and sprinkle desired topping on to the bread's top.
GLUTEN FREE BREAD: Always use room-temperature ingredients. Do not use eggs directly from the refrigerator. Instead, place them in a bowl of warm water until they reach room temperature. Gluten free bread dough will have more of a muffin batter texture than a typical bread dough texture. This is normal. If you desire a lighter loaf of gluten free bread, try beer bread or bread made with club soda or ginger ale.
HIGH ALTITUDE ADJUSTMENT: Reduced air pressure at high altitudes causes yeast gases to expand more rapidly and the dough to rise more quickly. The dough can rise so much that when it begins to bake, it will collapse due to overstretching of the gluten structure. To slow the rising of the dough, reduce the amount of yeast by 14 teaspoon at a time until you find the right amount. You can also reduce the amount of liquid by a teaspoon or two. Some experimentation will be needed when using your breadmaker at high altitudes.
CYCLE TIME CHART: Please refer to the last page of this manual for a complete breakdown of each cycle.
TROUBLESHOOTING GUIDE
Review the following Problems, Possible Causes and Solutions below. GLUTEN FREE TROUBLESHOOTING
Gluten free breadmaking can be tricky. To prevent baking a dense brick of bread rather than a fluffy loaf, use these helpful tips.
- Use room-temperature ingredients, including eggs.
- Reverse the normal order of adding ingredients. Start with the yeast and dry ingredients, add half the wet ingredients, and then start the cycle. Allow the ingredients to mix for several minutes and gradually add the remaining wet ingredients.
- Observe the dough during the knead cycle. If the breadmaker has difficulty mixing ingredients thoroughly, use a spatula to scrape around the pan to assist.
- Use an instant read thermometer to take the temperature of your bread before you remove it from the bread pan. If internal temperature has not reached 205 - 210^ , your loaf will be under done. Bake on the bake cycle for additional time, until internal temperature is between 205 - 210^ .
LOAF SIZE & SHAPE
Short loaves
- Wheat breads will be shorter than white breads due to less gluten forming protein in whole-wheat flour.
- Not enough liquid - Increase liquid by 1-2 teaspoons.
- Sugar omitted or not enough added - Assemble ingredients as listed in recipe.
- Wrong type of flour used - Do not use all-purpose flour.
- Not enough yeast used or too old - Measure amount recommended and check freshness date on package.
- Wrong type of yeast used - Use fast rising or bread machine yeast. Do not use compressed yeast.
Flat loaves, no rising
- Yeast omitted - Assemble ingredients as listed in recipe.
- Yeast too old - Check expiration date.
- Liquid too hot - Use lukewarm liquids 80 - 90^ (27-32°C).
- Too much salt added - Use amount recommended in recipe.
- Sugar or other sweetener omitted - Assemble ingredients as listed in recipe.
Top and sides cave in
- Too much liquid - Reduce liquid by 1-2 teaspoons.
- Too much yeast - Use recommended amount.
Gnarly or knotted top, not smooth
- Not enough liquid - Increase liquid by 1-2 teaspoons.
- Too much flour - Measure flour accurately, leveling off measuring cup.
Loaves uneven, shorter on one end
- Dough too dry preventing even rise in bread pan – Increase liquid by 1-2 teaspoons.
Collapsed while baking
- May be caused from baking in high altitude – Make adjustment for high altitude baking by reducing yeast by 14 teaspoon and reducing liquid by 1-2 teaspoons.
BREAD TEXTURE
Heavy, dense texture
- Too much flour - Measure accurately, leveling off measuring cup.
- Not enough yeast - Add recommended amount of yeast.
- Not enough sugar - Add recommended amount of sugar.
Open, coarse, or holey texture
Salt omitted - Assemble ingredients as listed in recipe.
- Too much yeast - Add recommended amount of yeast.
- Too much liquid - Reduce liquid by 1-2 teaspoons.
Bread doesn't slice well, very sticky
- Sliced while too hot - Allow bread to cool on rack at least 15-20 minutes before slicing to release steam.
- Not using proper knife - Use a good bread knife or electric knife.
Center of loaf raw, not baked through
- Too much liquid - Reduce liquid by 1-2 teaspoons.
- Power outage during operation - If the power goes out during operation for longer than 5 minutes, the breadmaker will remain off when the power is restored. Remove the unbaked loaf from the bread pan and start over with fresh ingredients.
- Forgot to put knead blade in bread pan – Always make sure the knead blade is on the shaft in bottom of the bread pan before adding ingredients.
CRUST and COLOR THICKNESS
Dark crust color/too thick
- Too much sugar - Reduce sugar by half.
Loaf of bread is burned
- Breadmaker is malfunctioning - See Warranty page for service information.
Crust too light
- Not enough sugar or fat – Increase sugar or fat by half the amount recommended.
BREAD PAN PROBLEMS
Knead blade cannot be removed
- Add warm water to the bread pan and allow the knead blade to soak before trying to remove. Follow the cleaning instructions. You may need to twist the knead blade slightly after soaking to loosen. Do not immerse the bread pan in water.
Bread sticks to bread pan/difficult to shake out
- Can happen over prolonged use – Wipe the inside of the bread pan, from the ribs down with vegetable oil or solid shortening. Or add 1 tsp. vegetable oil to the liquid in the bread pan before adding dry ingredients. Do not use vegetable spray as sticking can worsen. Or, let bread sit in bread pan for 10 minutes before shaking out. Replacement bread pan may be ordered. See Warranty section.
MACHINE MECHANICS
Ingredients not mixed
- Did not start machine - After programming the control panel, press the "START/STOP" button to turn on.
- Forgot to put knead blade in bread pan – Always make sure the knead blade is on the shaft in the bottom of the bread pan before adding ingredients.
Burning odor noted during operation
- Ingredients spilled inside oven - Be careful not to spill ingredients when adding to the bread pan as they will burn on the heating unit and cause smoke.
- Bread pan leaks - Replacement bread pan may be ordered. See Warranty section.
- Exceeding capacity of bread pan - Do not use more ingredients than recommended in recipe and always measure accurately.
Machine unplugged by mistake or power lost during use for longer than 5 minutes. How can I save the bread?
- If machine is in knead cycle, reprogram to the same bread setting and turn the machine back on.
- If machine is in rise or bake cycle, preheat conventional oven to 350^ (177°C). Carefully remove the bread pan from the machine and bake on rack in center of oven for 20-25 minutes or until golden brown.
Alert sounds, display shows "H:HH" and machine cannot be turned on.
- Breadmaker too hot to make consecutive loaves – Unplug the cord from the outlet and allow to cool with the bread pan removed and cover open for 15-20 minutes. Plug the cord back in the outlet, add bread pan and start machine. If you are making consecutive loaves of bread, this error message is not uncommon and does not indicate defect in the bread maker.
Alert sounds, display shows "L:LL" and machine cannot be turned on.
- Breadmaker is too cold to make bread. Move breadmaker to a warmer location. Let breadmaker sit, with lid open, in a warm room for half an hour and try your setting again.
Alert sounds, display shows "E:E0" and machine cannot be turned on.
- Breadmaker is malfunctioning - See Warranty section for service information.
Alert sounds, display shows "E:E1" and machine cannot be turned on.
- Breadmaker is malfunctioning - See Warranty section for service information.
RECIPES
Pre-packaged bread mixes can be used in your breadmaker. Simply follow the instructions given for the specific bread mix. Unless otherwise stated for the bread mix, use the 1.5 lb. setting for loaf size. Follow standard practices; liquid ingredients into the bread pan first, then dry ingredients with the yeast, if required, going in last. Following are some made-from-scratch bread recipes to get you started. A supplemental recipe book is also available at www.westbend.com, in our care and use manuals section under support.
For All Settings: Add liquids to the bread pan first, then dry ingredients. Level the dry ingredients; quarter the butter or margarine and add to the corners. Make an impression in the center of the dry ingredients and add the yeast. Close the lid, select "Menu," choose setting desired, select "Color," then select "Loaf" to size indicated in recipe.
BASIC
The following breads should be baked on setting 1, "Basic."
Old Fashioned White Bread
1.5 Pound Loaf INGREDIENTS 2.0 Pound Loaf
114 cups + 2 tbsp.
Milk, 80^ F
2 tbsp. Butter or Margarine 2 tbsp.
313 cups Bread Flour 4 cups
112 tbsp. Sugar 2 tbsp.
114 tsp. Salt 112 tsp.
2 tsp. Active Dry Yeast 214 tsp.
-or-
112 tsp. Bread
Machine/Fast Rise Yeast 2 tsp.
112 cups + 2 tbsp.
-or-
Garlic Bread
1.5 Pound Loaf
INGREDIENTS
2.0 Pound Loaf
1 14 cup
Water, 80^ F
2 tbsp.
Butter or Margarine
313 cups
Bread Flour
2 tbsp. Dry Milk
2 tbsp.
1 tbsp.
Dried Parsley Flakes
1 tbsp. Sugar
Salt 112 tsp.
1 1 / 4 tsp.
Garlic Powder
½-1 tsp.
Active Dry Yeast
2 tsp.
-or-
-or-
112 tsp.
Bread Machine/Fast Rise Yeast
1 ½ cups
2 tbsp.
4 cups
1 ½ tbsp.
1-1 12 tsp.
2 1/4 tsp.
-or-
2 tsp.
Walnut Bread
| 1.0 Pound Loaf INGREDIENTS 2.5 Pound Loaf | ||
| ½ cup + 1 tbsp. | Water, 80° F | 1½ cups + 1 tbsp. |
| 1 | Egg | 1 |
| 2 tbsp. Butter | or Margarine 5 tbsp. | |
| 2 tbsp. Dry Milk | 5 tbsp. | |
| 1 tbsp. Honey | 2 tbsp. | |
| 1/5 cup Walnut | ¾ cup | |
| 2 cups Bread | Flour 4½ cups | |
| 2 tbsp. Sugar | 4 tbsp. | |
| ¾ tsp. Salt | 1½ tsp. | |
| 1 tsp. Active | Dry Yeast | 1½ tsp. |
Classic Rye Bread
| 1.5 Pound Loaf | INGREDIENTS | 2.0 Pound Loaf |
| 1¼ cups + 1 tbsp. | Water, 80°F 1½ cups | |
| 1 tbsp. | Butter or Margarine | 1 tbsp. |
| 2¾ cups | Bread Flour | 3 cups |
| 1 cup | Medium Rye Flour | 1¼ cups |
| 2 tbsp. | Dry Milk | 2 tbsp. |
| 1½ tbsp. | Sugar 1½ tbsp. | |
| 1¼ tsp. | Salt | 1½ tsp |
| 2 tsp. | Caraway Seed, optional | 2 tsp. |
| 2 tsp. | Active Dry Yeast 2¼ tsp. | |
| -or- | -or- | -or- |
| 1½ tsp. | Bread Machine/Fast Rise Yeast | 2 tsp. |
Sesame Bread
| 1.0 Pound Loaf | Ingredients | 2.5 Pound Loaf |
| ½ cup + 3 tbsp. | Water, 80° F | 1½ cups + 3 tbsp. |
| 2 tbsp. | Butter or Margarine | 5 tbsp. |
| 2 tbsp. | Dry Milk | 5 tbsp. |
| 2 tbsp. | Sesame Seeds | 4 tbsp. |
| 2 cups | Bread Flour | 4¾ cups |
| 2 tbsp. | Sugar 4 tbsp. | |
| ¾ tsp. | Salt | 1½ tsp. |
| 1 tsp. | Active Dry Yeast | 1½ tsp. |
FRENCH
The following should be baked on setting 2, "French."
French Bread
1.0 Pound Loaf INGREDIENTS 2.5 Pound Loaf
12 cup + 3 tbsp. Water, 80^ F
1 tbsp. Butter or Margarine 3 tbsp.
2 cups Bread Flour 4 13 cup
1 tbsp. Sugar 2 tbsp.
1 tsp. Salt 134 tsp.
1 tsp. Active Dry Yeast 114 tsp.
112 cups + 3 tbsp.
WHOLE WHEAT
The following recipes should be baked on setting 3, "Whole wheat."
If the bread collapses during the baking period, add 1 or 112 tablespoons vital wheat gluten to the recipe for respective loaf size to prevent this from happening. Vital wheat gluten can be found at most health food stores.
100% Whole Wheat Bread
1.5 Pound Loaf INGREDIENTS 2.0 Pound Loaf
1 cup + 2 tbsp. Water, 80^ F 114 cups + 3 tbsp.
1
1 tbsp.
1 tbsp.
2 tbsp. Butter or Margarine
ine
313 cups
2 tbsp.
114 tsp. Salt
2 tsp. Active Dry Yeast
-or-
112 tsp.
Egg,
Molasses
Honey
Whole wheat Flour
Dry Milk
112 tsp.
214 tsp.
-or-
Bread Machine/Fast Rise Yeast
Large
112 tbsp.
112 tbsp.
4% cups
2 tbsp.
-or-
2 tsp.
Wheat 'N Yogurt Bread
1.5 Pound Loaf INGREDIENTS 2.0 Pound Loaf
1 cup
1/2 cup
2 tbsp. Butter or Margarine
or Margarine
Water, 80^ F
Plain Nonfat Yogurt
2 tbsp.
1 1/3 cups Bread Flour 1 12 cups
2 cups
2 tbsp.
2 tbsp.
1 14 tsp.
2 tsp. Active Dry Yeast
Whole wheat Flour
Dry Milk
Brown Sugar, Packed 2 tbsp.
Salt
1 cup + 2 tbsp.
23 cup
2 3/4 cups
2 tbsp.
1 ½ tsp.
-or-
2 tsp.
-or-
1 ½ tsp.
Bread Machine/Fast Rise Yeast
The following recipes should be baked on setting 6, "Sweet."
Nuts can be added at the sound of the alert, or at the beginning with the rest of the ingredients.
Coconut Bread
| 1.0 Pound Loaf INGREDIENTS 2.5 Pound Loaf | ||
| ½ cup + 2 tbsp. | Water, 80° F | 1½ cups + 2 tbsp. |
| 1 | Egg | |
| 2 tbsp. Butter or Margarine 4 tbsp. | ||
| ¼ cup Dry Milk ½ cup | ||
| 1 tbsp. Honey 2 tbsp. | ||
| ¼ cup Coconut* ½ cup | ||
| 2 cups Bread Flour 4½ cups | ||
| ¼ cup Sugar ½ cup | ||
| 1 tsp. Salt 1½ tsp. | ||
| 1½ tsp. Active Dry Yeast | 1½ tsp. | |
- Add half of the coconut during the second knead cycle, then add the rest before the bake cycle.
Raisin Bread
| 1.0 Pound Loaf INGREDIENTS | 2.5 Pound Loaf | ||
| 1/2 cup + 2 tsp. | Water, 80°F | 1½ cups + 1 tbsp. | |
| 2 tbsp. | Butter or Margarine | 4 tbsp. | |
| 2 cups Bread Flour | 5 cups | ||
| ¼ cup Dry Milk | ½ cup | ||
| 3 tbsp. | Sugar | ½ cup | |
| ¾ tsp. | Salt 1½ tsp. | ||
| 1 | Egg | 1 | |
| 1 tsp. | Active Dry Yeast | 1½ tsp. | |
| 1 tbsp. Honey | 2 tbsp. | ||
| ¼ cup | Raisins | ½ cup | |
| ¼ cup | Chopped Nuts (optional) | ½ cup | |
SUPER RAPID
For all of the following recipes, follow these general guidelines. The following should be baked on setting 5, "Super rapid." Many recipes can be converted to the Super rapid cycle. Use your recipe of choice and add an additional teaspoon of yeast for those recipes using yeast. DO NOT use any quick bread recipes on this setting.
Basic Super Rapid Bread
SANDWICH
| 1.0 Pound Loaf INGREDIENTS 2.5 Pound Loaf | ||
| ½ cup + 1 tbsp. | Water, 80° F | 1 cup + 4 tbsp. |
| 1 | Egg | |
| 1 tbsp. Butter or Margarine 3 tbsp. | ||
| 1 tbsp. Dry Milk 3 tbsp. | ||
| 2 cups Bread Flour 4¾ cups | ||
| 2 tbsp. Sugar 4 tbsp. | ||
| 1 tsp. Salt | 1½ tsp. | |
| 2 tsp. Active Dry Yeast | 3½ tsp. | |
The following recipe should be baked on setting 6, "Sandwich."
Sandwich White Bread
| 1.5 Pound Loaf INGREDIENTS | 2 Pound Loaf | ||
| 1 cup | Water, 80° F | 1 1/3 cups | |
| 2 tbsp. Butter or Margarine | 2 1/2 tbsp. | ||
| 2 tbsp. Dry Milk | 2 1/2 tbsp. | ||
| 2 3/4 cups + 2 tbsp. | Bread Flour | 3 3/4 cups | |
| 2 tbsp. Sugar | 3 tbsp. | ||
| 1 1/2 tsp. | Salt | 1 1/2 tsp. | |
| 1 tsp. | Active Dry Yeast | 1 1/4 tsp. | |
| Or | |||
| 3/4 tsp. | Bread Machine Yeast | 1 tsp. | |
LOW CARB & GLUTEN FREE
For all of the following recipes, follow these general guidelines. All Gluten free and Low Carb breads should be baked on setting 7, "Gluten free." Gluten free breads must first have liquid ingredients whisked together in a separate bowl to ensure proper blending. Break eggs into a 2 cup measuring cup and add recommended amount of water before mixing in the liquid ingredients. Use room temperature ingredients, and if you notice issues with your loaves, reverse the normal order of adding ingredients. Start with the yeast and dry ingredients, add half the wet ingredients, and then start the cycle. Allow the ingredients to mix for several minutes and gradually add the remaining wet ingredients.
Gluten free Bread
2 Pound Loaf INGREDIENTS
1 cup + 2 tbsp. Water*, 80^ F
3
4 tbsp. Melted Butter or Canola Oil
1 tsp. Cider Vinegar
2 cups White Rice Flour
3 / 4 cups Potato Starch Flour
1 / 4 cup Tapioca Flour
13 cup Non-fat Dry Milk
3 tbsp. Sugar
1 tbsp. Xanthan Gum
1 ½ tsp. Salt
1 tbsp. Active Dry Yeast
Eggs*
- Place eggs in measuring cup, then add water to the measuring cup, fill to 114 cup.
Lemon Poppyseed Gluten free Bread
2 Pound Loaf
INGREDIENTS
1 cup + 2 tbsp. Water*, 80^ F
3
4 tbsp. Melted Butter or Canola Oil
2 tsp. Lemon Extract (Gluten free)
2 cups White Rice Flour
3/4 cups Potato Starch Flour
1 / 4 cup Tapioca Flour
13 cup Non-fat Dry Milk
3 tbsp. Sugar
1 tbsp. Xanthan Gum
112 tsp. Salt
1 tbsp. Poppy Seeds
1 tbsp. Active Dry Yeast
Eggs*
*Place eggs in measuring cup, then add water to the measuring cup, fill to 134 cup.
Whole wheat & Seed Low Carb Bread
2 Pound Loaf INGREDIENTS
212 cups Water, 80^
1 / 4 cup Olive oil
1 tsp. Agave Syrup
1 tsp. Salt
1 cup Unprocessed Wheat Bran
4 cups Whole wheat Flour
2 pkg. Bread Machine/Fast Rise Yeast
12 cup Flax Seeds, roughly ground
14 cup Sunflower Seeds, Hulled
2 tbsp. Pumpkin Seeds, Roasted
Mix
The following recipes should be baked on setting 8, "Mix."
Basic Pasta Dough
INGREDIENTS
13 cup + 1 tbsp. All-purpose Flour
12 cup + 2 tbsp. Semolina Flour
6
1
112 tsp.
2 tbsp.
Egg
Large Egg
Olive Oil
Milk
Yo
After knead cycle has completed, remove the dough ball from the bread pan. Place in a plastic bag or under a damp towel to keep moist, and let rest for 30 minutes. Cut into quarters then roll thin through a pasta roller or use a rolling pin to roll to desired thickness.
DOUGH
The following recipes should be baked on setting 9, "Dough."
Pizza Dough
Single Crust INGREDIENTS
3 / 4 cup Water, 80^ F
214 cups All-Purpose Flour
1 / 2 tsp. Sugar
1 / 2 tsp. Salt
2 tbsp. Vegetable Oil
2 tsp. Active Dry|Yeast
-or-
1 12 tsp. Bread Machine/Fast Rise Yeast
-or-
When dough is done, turn breadmaker off and remove the bread pan. Place the dough onto a floured surface. Knead about 1 minute, then let rest for 15 minutes.
Roll dough out to fit 12- or 14-inch pizza pan. Place dough on greased pan. If a crisper crust is desired, sprinkle the pan with cornmeal before placing the dough.
Press the dough into the pan, forming and edge. Let the dough rise in a warm, draft free place for 20 to 25 minutes.
Spread pizza sauce evenly over crust, then top with favorite meat, toppings, and shredded cheese. Bake in an oven, preheated to 425^ , for 20 to 25 minutes or until browned on top. Let rest 5 minutes before cutting.
Basic Dinner Rolls/Bread Sticks
1.5 Pound Loaf INGREDIENTS
3 / 4 cup + 1 tbsp. Water, 80^ F
3 tbsp. Butter or Margarine
3 cups Bread Flour
312 tbsp. Sugar
2 tbsp. Dry Milk
1 tsp.
2 tsp.
-or-
112 tsp.
Salt
Active Dry Yeast
-or-
Bread Machine/Fast Rise Yeast
Softened Butter or Slightly Beaten Egg White
After dough cycle has completed, remove bread pan from breadmaker and then remove dough. Place dough onto a slightly floured surface for 15 minutes. Shape dough into desired roll shape, place on greased baking sheet, cover and place in a warm, draft free area for 45 minutes to rise. Once dough has doubled in size, lightly brush the tops with butter or egg white and bake in a 350^ F oven for 15-20 minutes, or until golden brown. Serve warm.
CAKE
The following recipe should be baked on setting 10, "Cake."
Breadmaker Coffee Cake
For Cake INGREDIENTS
| 1 cup milk | egg |
| 1 tbsp. butter | |
| 2 ¼ cup bread flour | |
| ¼ cup sugar | |
| 1 tsp. salt | |
| 2 tsp. active dry yeast | |
| For Topping INGREDIENTS | |
| ½ cup sugar | |
| 2 tbsp. butter, melted | |
| 1 tsp. cinnamon | |
| ½ cup chopped pecans or walnuts | |
| For Glaze (Optional) | INGREDIENTS |
| 2 tbsp. milk | |
| 1 tsp. softened butter | |
| 1 cup powdered sugar | |
| ½ tsp. vanilla | |
When done, test cake by inserting a toothpick into the cake. If baking is not complete, cook for an additional 10 minutes on the "Bake" setting of your breadmaker. If baking is complete, remove bread pan from breadmaker and let cool for 10 minutes and prepare the topping and optional glaze.
Prepare topping by mixing all dry ingredients into the melted butter. If glaze is desired, whisk all glaze ingredients together until well combined and not lumpy. When cake is cool, remove from bread pan. Cut cake in half vertically to create two equal halves with a flat surface. Top cake with topping and glaze, serve warm.
JAM
The following recipe should be baked on setting 11, "Jam."
Breadmaker Strawberry Jam
| INGREDIENTS | |
| 2 cups | Granulated Sugar |
| 2 tbsp. | Powdered Low Sugar Fruit Pectin |
| 3 cups | Fresh Strawberries, washed, hulled, and sliced |
Yields 3 cups finished jam.
English - 22
PRODUCT WARRANTY
Appliance 1 Year Limited Warranty
Focus Products Group International, LLC ("the Company") warrants this appliance from failures in the material and workmanship for one (1) year from the date of original purchase with proof of purchase, provided that the appliance is operated and maintained in conformity with the Instruction Manual. Any failed part of the appliance will be repaired or replaced without charge at the Company's discretion. This warranty applies to indoor household use only.
This warranty does not cover any damage, including discoloration, to any non-stick surface of the appliance. This warranty is null and void, as determined solely by the Company, if the appliance is damaged through accident, misuse, abuse, negligence, scratching, or if the appliance is altered in any way.
THIS WARRANTY IS IN LIEU OF ALL IMPLIED WARRANTYES, INCLUDING WARRANTYES OF MERCHANTABILITY, FITNESS FOR A PARTICULAR PURPOSE, PERFORMANCE, OR OTHERWISE, WHICH ARE HEREBY EXCUSED. IN NO EVENT SHALL THE COMPANY BE LIABLE FOR ANY DAMAGES, WHETHER DIRECT, INDIRECT, INCIDENTAL, FORSEEABLE, CONSEQUENTIAL, OR SPECIAL ARISING OUT OF OR IN CONNECTION WITH THIS APPLIANCE.
If you think the appliance has failed or requires service within its warranty period, please contact the Customer Care Department at (866) 290-1851, or e-mail us at customercare@focuspg.com. A receipt proving the original purchase date will be required for all warranty claims, hand written receipts are not accepted. You may also be required to return the appliance for inspection and evaluation. Return shipping costs are not refundable. The Company is not responsible for returns lost in transit.
Valid only in USA and Canada
REPLACEMENT PARTS
Replacement parts, if available, may be ordered directly from the Company several ways. Order online at www.westbend.com, e-mail customercare@focuspg.com, over the phone by calling (866)290-1851, or by writing to:
Focus Products Group International, LLC.
Attn: Customer Care Dept.
P.O.Box 2780
West Bend, WI 53095
To order with a check or money order, please first contact Customer Care for an order total. Mail your payment along with a letter stating the model or catalog number of your appliance, which can be found on the bottom or back of the appliance, a description of the part or parts you are ordering, and the quantity you would like. Your check should be made payable to Focus Products Group International, LLC.
Your state/province's sales tax and a shipping fee will be added to your total charge. Please allow two weeks for processing and delivery.
This manual contains important and helpful information regarding the safe use and care of your product. For future reference, attach dated sales receipt for warranty proof of purchase and record the following information:
Date purchased or received as gift:
Where purchased and price, if known:
Item number and Date Code (shown bottom/back of product):
WestBend®
MACHINE À PAIN
Mode d'Emploi
ALARME, SONS, ET FONCTIONS GENERALES
2 tasses Farine à poin 5 tasses
2 ½ tasses Eau, 80^ F
Focus Products Group International, LLC.
Attn: Customer Care Dept.
P.O.Box 2780
West Bend, WI 53095
Focus Products Group International, LLC.
Atencion: Customer Care Dept.
P.O.Box 2780
West Bend, WI 53095
- IMPORTANT SAFEGUARDS
- CAUTION
- To prevent personal injury or property damage, read and follow all instructions and warnings.
- SAVE THESE INSTRUCTIONS
- BEFORE USING FOR THE FIRST TIME
- CONTROL PANEL and FUNCTIONS
- MENUSLECTIONS
- ALERTS, SOUNDS and OTHER GENERAL FUNCTIONS
- BASIC STEPS IN MAKING BREAD
- Always clean your new appliance thoroughly before using. Refer to "Cleaning Your Breadmaker" section.
- CLEANING YOUR BREADMAKER
- KNOW YOUR INGREDIENTS AND OTHER HELPFUL HINTS
- TROUBLESHOOTING GUIDE
- Review the following Problems, Possible Causes and Solutions below. GLUTEN FREE TROUBLESHOOTING
- LOAF SIZE & SHAPE
- Short loaves
- Flat loaves, no rising
- Top and sides cave in
- Gnarly or knotted top, not smooth
- Loaves uneven, shorter on one end
- Collapsed while baking
- BREAD TEXTURE
- Heavy, dense texture
- Open, coarse, or holey texture
- Bread doesn't slice well, very sticky
- Center of loaf raw, not baked through
- CRUST and COLOR THICKNESS
- Dark crust color/too thick
- Loaf of bread is burned
- Crust too light
- BREAD PAN PROBLEMS
- Knead blade cannot be removed
- Bread sticks to bread pan/difficult to shake out
- MACHINE MECHANICS
- Ingredients not mixed
- Burning odor noted during operation
- Machine unplugged by mistake or power lost during use for longer than 5 minutes. How can I save the bread?
- RECIPES
- BASIC
- Old Fashioned White Bread
- Pound Loaf INGREDIENTS 2.0 Pound Loaf
- Garlic Bread
- Pound Loaf
- INGREDIENTS
- Pound Loaf
- Walnut Bread
- Classic Rye Bread
- Sesame Bread
- FRENCH
- French Bread
- WHOLE WHEAT
- 100% Whole Wheat Bread
- Wheat 'N Yogurt Bread
- The following recipes should be baked on setting 6, "Sweet."
- SUPER RAPID
- LOW CARB & GLUTEN FREE
- Gluten free Bread
- Pound Loaf INGREDIENTS
- Lemon Poppyseed Gluten free Bread
- Pound Loaf
- Whole wheat & Seed Low Carb Bread
- Mix
- The following recipes should be baked on setting 8, "Mix."
- Basic Pasta Dough
- DOUGH
- The following recipes should be baked on setting 9, "Dough."
- Pizza Dough
- Single Crust INGREDIENTS
- Basic Dinner Rolls/Bread Sticks
- Pound Loaf INGREDIENTS
- CAKE
- JAM
- PRODUCT WARRANTY
- Appliance 1 Year Limited Warranty
- REPLACEMENT PARTS
- WestBend®
- MACHINE À PAIN
- ALARME, SONS, ET FONCTIONS GENERALES
Brand : WestBend
Model : 41410
Category : Bread maker