
T24C350AR - Monitor SAMSUNG - Free user manual and instructions
Find the device manual for free T24C350AR SAMSUNG in PDF.



| Product Type | 24-inch LED TV monitor with built-in TV tuner |
| Brand | Samsung |
| Model | T24C350AR |
| Screen Size | 24 inches (diagonal) |
| Resolution | 1920 x 1080 pixels (Full HD) |
| Dimensions with Stand (W x H x D) | Approximately 55.5 x 40.5 x 18.5 cm |
| Weight with Stand | Approximately 3.5 kg |
| Power Supply | 100-240 V AC, 50/60 Hz |
| Power Consumption | Approximately 30 W (typical), less than 0.5 W in standby |
| Connectivity | HDMI (x2), VGA (D-Sub), Component input, AV input, audio output, antenna port |
| Main Features | Remote control with Braille points, Media Play, PIP, Program Guide, Sports Mode, digital subtitles |
| Supplied Accessories | Remote control, AAA batteries (x2), power cord, D-Sub cable, adapter, stand base, quick installation guide, safety manual |
| Care and Cleaning | Clean with a soft, dry cloth. Do not use chemicals or liquids. Unplug before cleaning. |
| Safety | Do not block ventilation slots. Avoid humidity and heat sources. Use only recommended accessories. |
| Spare Parts and Repairability | Parts available via Samsung after-sales service. Repair by authorized technician recommended. |
| General Information | Manufacturer's warranty: 2 years. Customer support: 800-SAMSUNG (depending on country). Firmware updates via USB. |
Frequently Asked Questions - T24C350AR SAMSUNG
User questions about T24C350AR SAMSUNG
0 question about this device. Answer the ones you know or ask your own.
Ask a new question about this device
Download the instructions for your Monitor in PDF format for free! Find your manual T24C350AR - SAMSUNG and take your electronic device back in hand. On this page are published all the documents necessary for the use of your device. T24C350AR by SAMSUNG.
USER MANUAL T24C350AR SAMSUNG
Contact SAMSUNG WORLDWIDE If you have any questions or comments relating to Samsung products, please contact the SAMSUNG customer care centre.
| Country Customer Care Centre Web Site | ||
| AUSTRALIA 1306 362 634 www.sci.org.com | ||
| NEW ZEALAND 0800 SAMSUNG (0800 735 785) www.samsung.com | ||
| CHINA 400 810 5838 www.samsung.com | ||
| HONG KONG (850) 3598-4058 www.samsung.com/ink (Chinese) | www.samsung.com/nk or (English) | |
| INDA 1800 3608 8282 | 1800 298 8282 | www.samsung.com/n |
| INDONESIA 9008-112-5856 | 021-6950-7777 | www.samsung.com/d |
| JAPAN 0170-027-587 www.napan.com | ||
| MALAYSIA 1000-05-0588 www.saiung.com/ny | ||
| PHILIPPINES | 1400-04SAMSUNG(726-7861) for FLDT1400-05SAMSUNG(726-7861) for Digital1-800 8 SAMSUNG(726 7864) for Globe02-501-5777 | www.samsung.com/n |
| SINGAPORE | 1800-04SAMSUNG(726-7861) | www.samsung.com |
| THAILAND 1800-25-0332 | 00-501-0332 | www.samsung.com/n |
| TAIWAN | 0800-8704-009096-096-068 | www.samsung.com |
| VIETNAM | 1 600 088 898 | www.samsung.com |
| GEORGIA 0418-055-565 | www.samsung.com | |
| ASIMENA | 2-800-05-005 | www.samsung.com |
| AFERRARIAN | 081-65-65-655 | www.samsung.com |
| UZEBKISTAN 8-10-800-030-05-030 | www.samsung.com | |
| KYNDY2STAY | 00-800-65-65-650 | www.samsung.com |
| TADUKISTAN 8-10-800-05-05-900 | www.samsung.com | |
| MONGOLIA | 7-700-665-6565 | www.samsung.com |
| BEIJARUS 510-800-208-25-200 | www.samsung.com | |
| MX DOYA 5800-618-40 | www.samsung.com | |
© 2013 Samsung Electronics Co., Ltd. All rights reserved.
BN68-D4796L-01

Thank you for purchasing this Samsung product.
To receive more complete service, please register
your product at
www.samsung.com/register


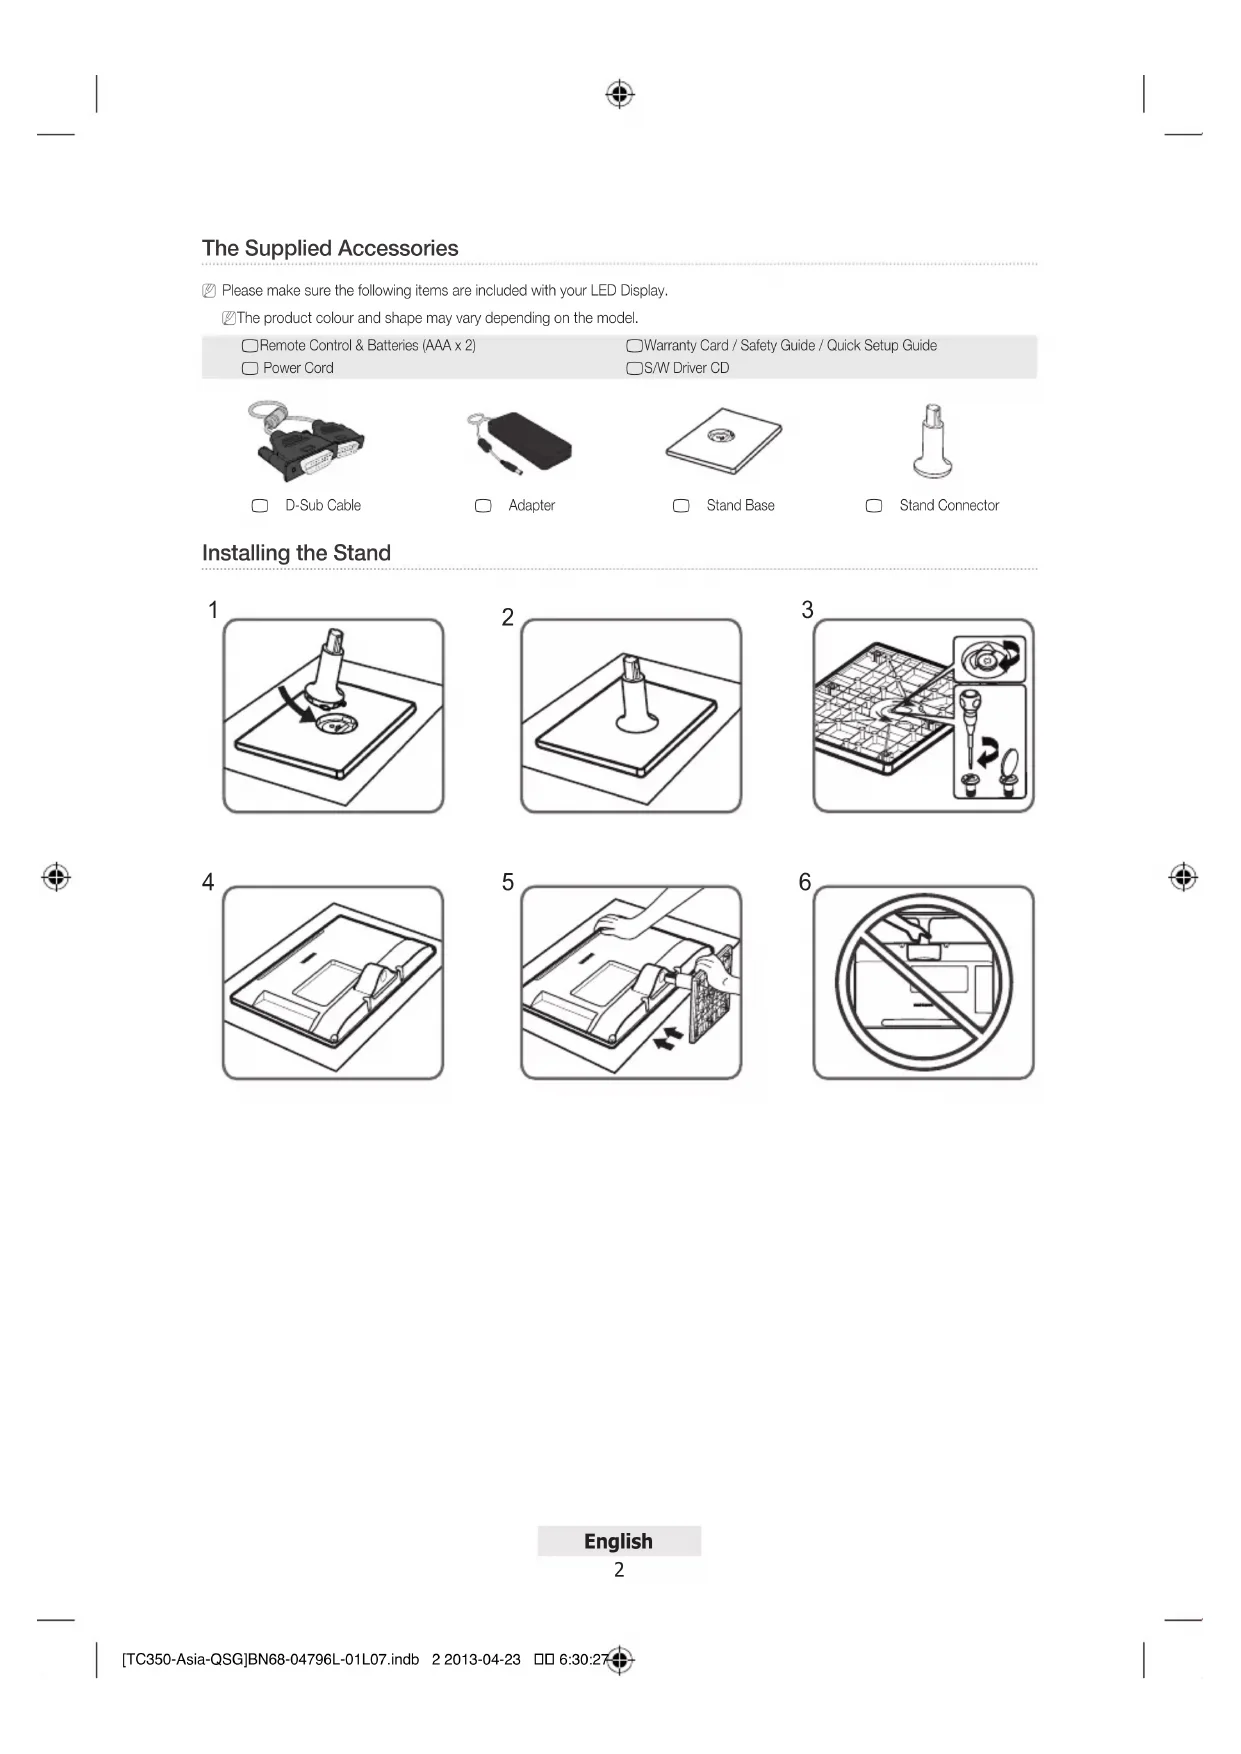
The Supplied Accessories
Please make sure the following items are included with your LED Display.
The product colour and shape may vary depending on the model.
☐ Remote Control & Batteries (AAA x 2)
□ Warranty Card / Safety Guide / Quick Setup Guide
Power Cord
□ S/W Driver CD
D-Sub Cable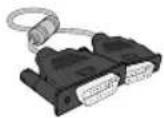
Adapter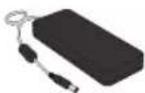
Stand Base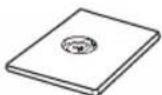
Stand Connector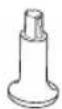
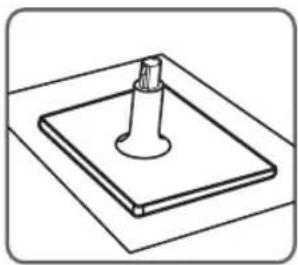
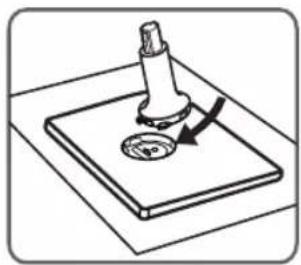
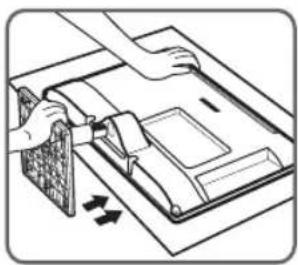
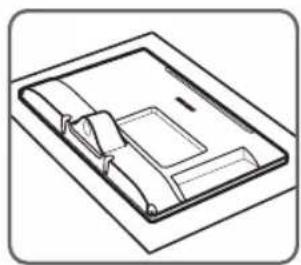
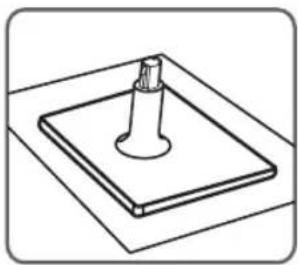
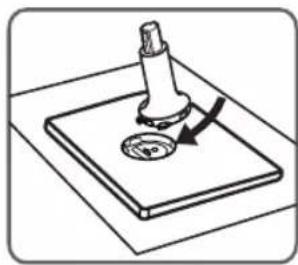
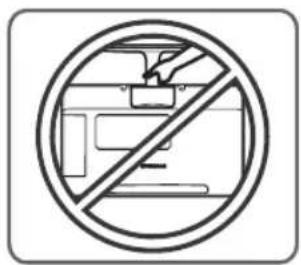
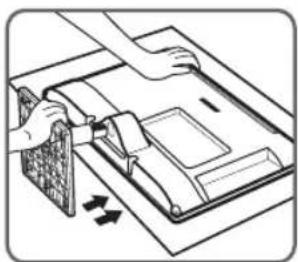
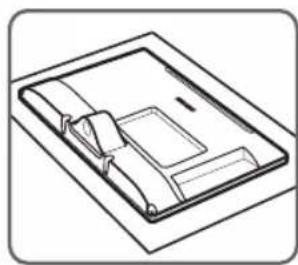
Installing the Stand
1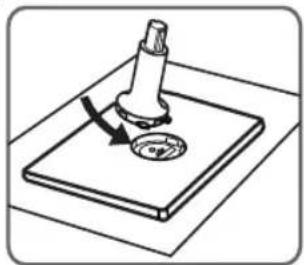
2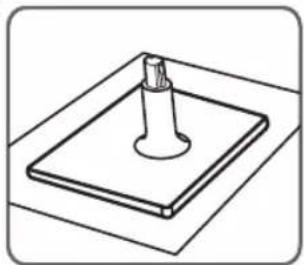
3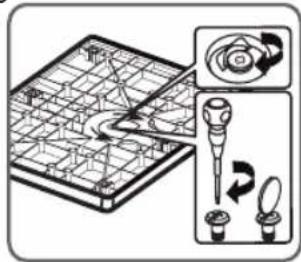
4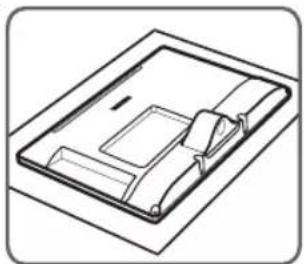
5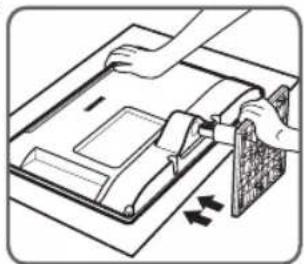
6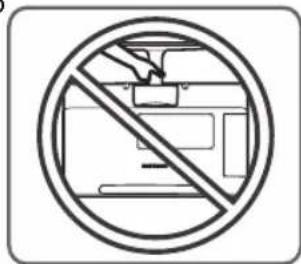
English
Connecting to an AV Device
The product colour and shape may vary depending on the model.
![graph TD A["USB"] --> B["HD/LED"] B --> C["USB/LED"] C --> D["HD/LED"] D --> E["HD/LED"] E --> F["HD/LED"] F --> G["HD/LED"] G --> H["HD/LED"] H --> I["HD/LED"] I --> J["HD/LED"] J --> K["HD/LED"] K --> L["HD/LED"] L --> M["HD/LED"] M --> N["HD/LED"] N --> O["HD/LED"] O --> P["HD/LED"] P --> Q["HD/L…](/content/2026/03/536254/images/7d7cebe7d5edc89a16d5e7eb91a67bd1ce4df3e33c6d7c76e76c924658b950d3.jpg)
![graph TD A["Device"] --> B["Component Out"] B --> C["Audio OUT"] B --> D["Component Out"] B --> E["Audio OUT"] B --> F["Audio OUT"] B --> G["Audio OUT"] B --> H["Audio OUT"] B --> I["Audio OUT"] B --> J["Audio OUT"] B --> K["Audio OUT"] B --> L["Audio OUT"] B --> M["Audio OUT"] B --> N["Audio OUT"]…](/content/2026/03/536254/images/fb9743715358d4893fb3d4eec39ec2e2ba3d7cf249913061e96293f184ea691c.jpg)
English
Connecting to a PC
The product colour and shape may vary depending on the model.
![graph TD A["Audio Cable (Not Supplied)"] --> B["HDMI to DVI Cable (Not Supplied)"] B --> C["Video Cable (Not Supplied)"] C --> D["USB1: USB"] D --> E["PC Box"] E --> F["USB2: USB"] F --> G["PC Box"] G --> H["USB3: USB"] H --> I["PC Box"] I --> J["USB4: USB"] J --> K["PC Box"] K --> L["USB5: USB"] L…](/content/2026/03/536254/images/edf6dfefd9b78528b2ad6143ae8f2e3a65a36bff47a9cf68eb94322eda5e7c06.jpg)
Connecting to an Antenna
When the LED display is initially powered on, basic settings proceed automatically.
☑ Preset: Connecting the mains and antenna.
![graph LR A["AntIN"] --> B["Aerial Cable (Not Supplied)"] B --> C["ANT OUT"]](/content/2026/03/536254/images/c966b04ddb9d7466c213a48e978e2bafdf05e73b36e2de944d9e34d27739916e.jpg)
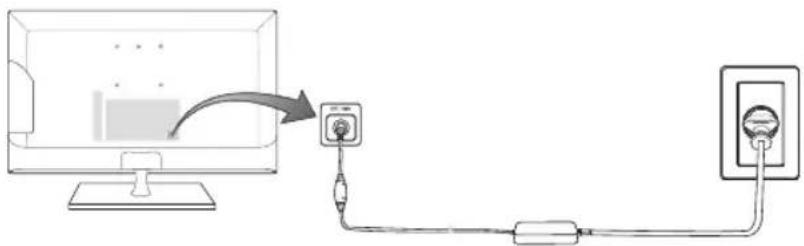
Connecting the Power
② The picture may vary depending on the model.
English
Viewing the Control panel
The product colour and shape may vary depending on the model.
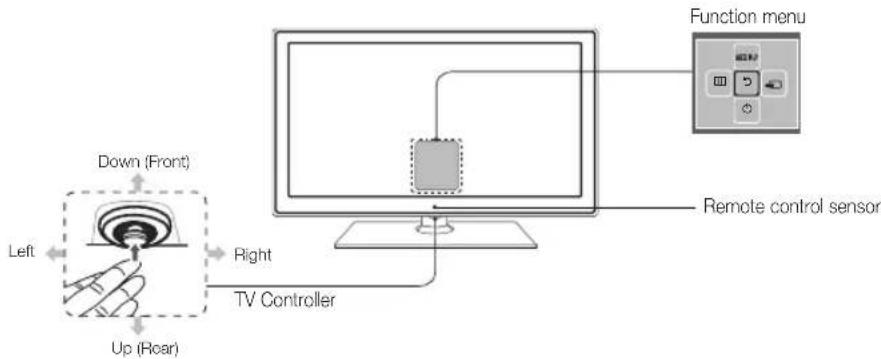
Power on: Turn the TV on by pressing the Controller when the TV is in standby mode.
| Adjusting the volume | Adjusts the volume by moving the controller from side to side when the power is on. |
| Selecting a channel | Select a channel by moving the Controller backwards and forwards when the power is on. |
| Using the function menu | To view and use the Function menu, press and release the Controller when the power is on. To close the Function menu, press and release the Controller again. |
| Selecting the MENU | With the Function menu visible, select the MENU by moving the Controller to the left. The OSD (On Screen Display) Menu appears. Select an option by moving the Controller to the right. Move the Controller to the right or left, or backwards and forwards to make additional selections. To change a parameter, select it, and then press the Controller. |
| Selecting the MEDIA.P | With the Function menu visible, select MEDIA.P by moving the Controller backwards. The MEDIA.P main screen appears. Select an application by moving the Controller, and then pressing the Controller. |
| Selecting the Source | With the Function menu visible, open the Source by pushing the Controller to the right. The Source screen appears. To select a source, move the Controller back and forth. When the source you want is highlighted, press the Controller. |
| Power off (○) | With the Function menu visible, select Power off (○) by pulling the Controller forwards, and then press the Controller. |
To close the Menu, MEDIA.P or Source, press the Controller for more than 1 second.
When selecting the function by moving the controller to the forwards/backwards/left/right directions, be sure not to press the controller. If you press it first, you cannot operate it to move the forwards/backwards/left/right directions.
Setup
The initial setup dialog appears when the TV is first activated.
Follow the on-screen instructions to finish the initial setup process, including menu language choice, country choice, channel source choice, channel scan, and more.
At each step, either make a choice or skip the step.
Users can manually perform this process at a later time under the System > Setup menu.
Changing the Input Source
Source
When you are watching a program and you want to watch a movie on your DVD player or Blu-ray player, or switch to your cable box or STB satellite receiver, you need to change the Source.
TV / PC / HDMI1/DVI / HDMI2 / AV / Component
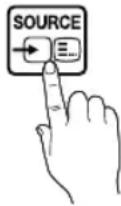
- Press the SOURCE button on your remote. The Source screen appears.
- Select a desired external input source.
Alternatively, you can access the Source screen by selecting the SOURCE button on your remote.
You can only choose external devices that are connected to the product. In the displayed Source list, connected inputs are highlighted.
In the Source, TV, and PC are always stays activated.
How to Use Edit Name
Edit Name lets you associate a device name to an input source. To access Edit Name, open the Tools menu when the Source list is displayed. The following selections appear under Edit Name:
VCR / DVD / Cable STB / Satellite STB / PVR STB / AV Receiver / Game / Camcorder / PC / DVI PC / DVI Devices / TV / IPTV / Blu-ray / HD DVD / DMA: Select an input jack, and then select the name of the device connected to that jack from the list that appears.
You connect a PC to the HDMI IN 1 (DVI) port with an HDMI cable, assign PC to HDMI1/DVI in Edit Name.
If you connect a PC to the HDMI IN 1 (DVI) port with an HDMI to DVI cable, assign DVI PC to HDMI1/DVI in Edit Name.
* You connect an AV device to the HDMI IN 1 (DVI) port with an HDMI to DVI cable, assign DVI Devices to HDMI1/DVI in Edit Name.
Information
You can see detailed information about the channel on TV or the selected external device.
Refresh
If the external devices are not displayed in the Source list, open the Tools menu, and then select Refresh, and then search for the connected devices.
This function is only available if Anynet+ function is turned on.
Viewing the Remote Control
This is a special remote control for the visually impaired and has Braille points on the Channel and Number buttons.
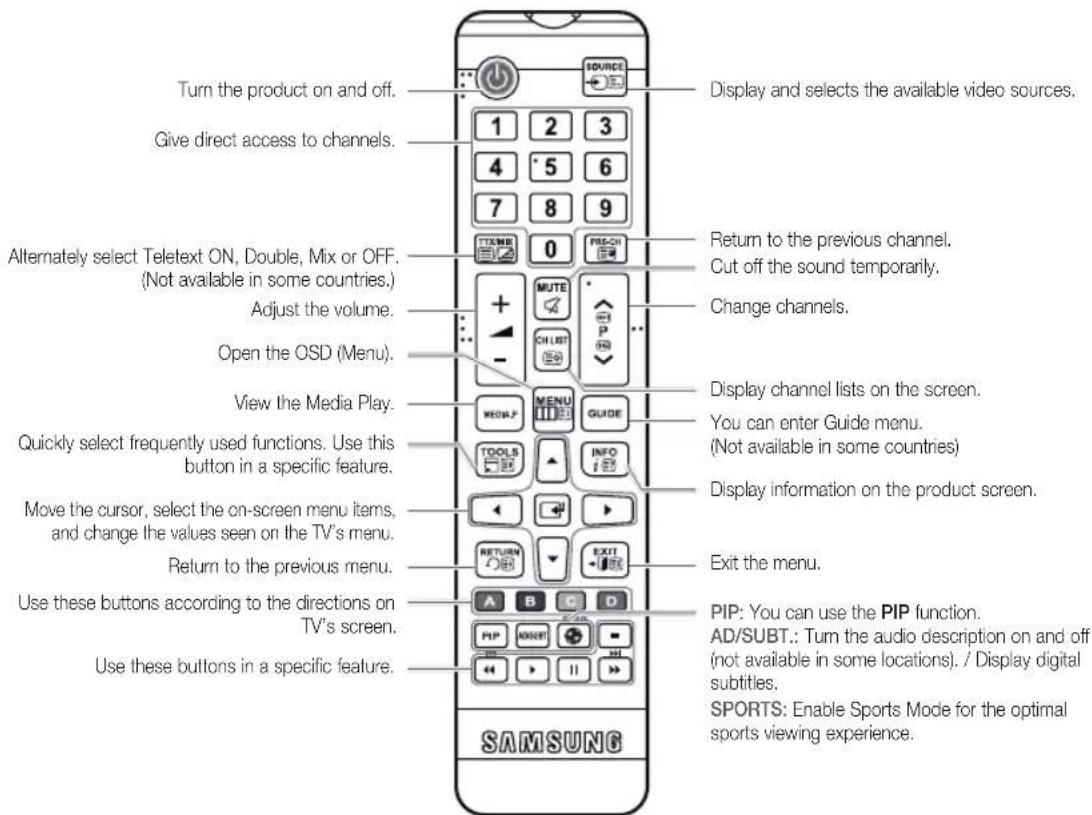
Installing batteries (Battery size: AAA)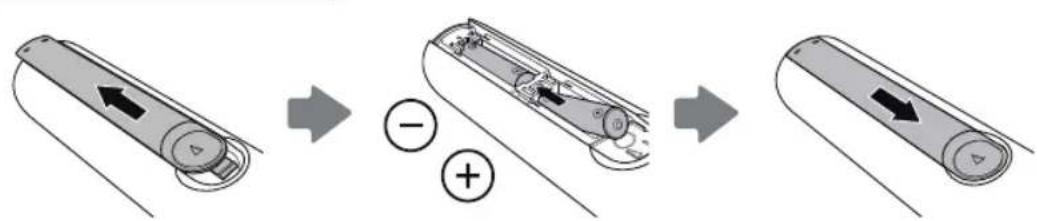
English
Troubleshooting
If you have any questions about the LED Display, first refer to this list. If none of these troubleshooting tips apply, please visit "www.samsung.com," then click on Support, or contact the call centre listed on the back-cover of this manual.
| Issues Solutions and Explanations | |
| The product won't turn on. | Make sure the AC power cord is securely plugged in to the wall outlet and the product.Make sure the wall outlet is working.Try pressing the button on the product to make sure the problem is not the remote. If the product turns on, refer to “Remote control does not work” below. |
| There is no picture/video. | Check the cable connections. Remove and reconnect all cables connected to the product and external devices.Set the video outputs of your external devices (Cable/Sat Box, DVD, Blu-ray etc) to match the product's input connections. For example, if an external device's output is HDMI, it should be connected to an HDMI input on the product.Make sure your connected devices are powered on.Be sure to select the correct input source.Reboot the connected device by unplugging it, and then reconnecting the device's power cable. |
| The remote control does not work. | Replace the remote control batteries. Make sure the batteries are installed with their poles (+/-) in the correct direction.Clean the sensor's transmission window on the remote.Try pointing the remote directly at the product from 5~6 feet away. |
| The cable/set top box remote control doesn't turn the product on or off, or adjust the volume. | Programme the Cable/Set remote control to operate the product. Refer to the Cable/Set-Top-Box user manual for the SAMSUNG product code. |
- You can keep your LED display in optimum condition by upgrading to the latest firmware on the website (samsung.com → Support → Downloads) via USB.
This page is intentionally left blank.
□ Remote Control & Batteries (AAA x 2)
2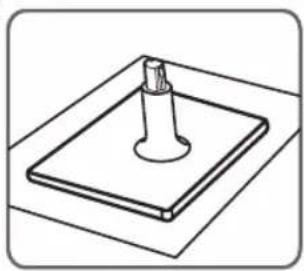
3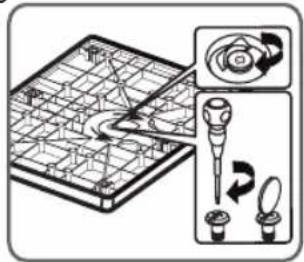
4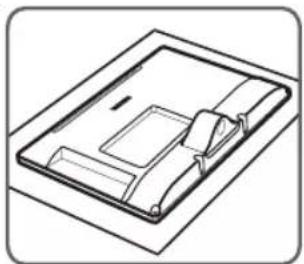
5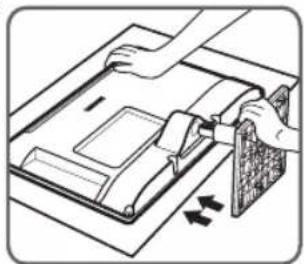
6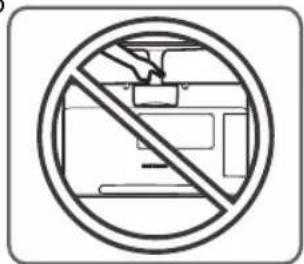
Indonesian
Indonesian
Viewing the Control Panel
Indonesian
Troubleshooting
This page is intentionally left blank.
Accessories supplied
2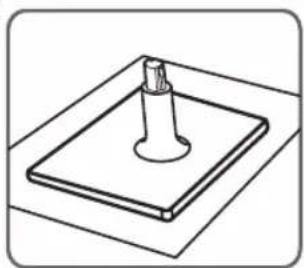
3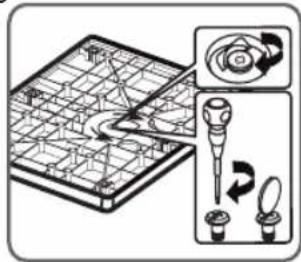
4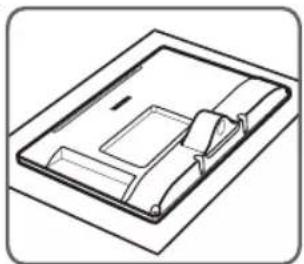
5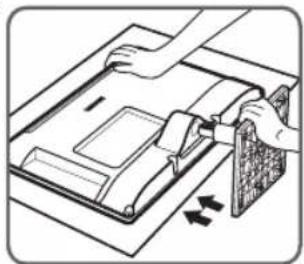
6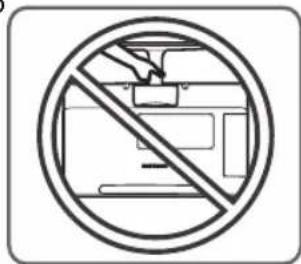
French
French
French
This page is intentionally left blank.
Accessories supplied
2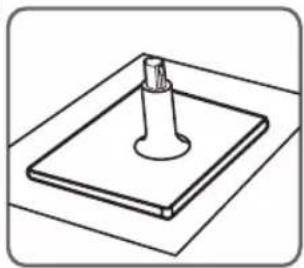
3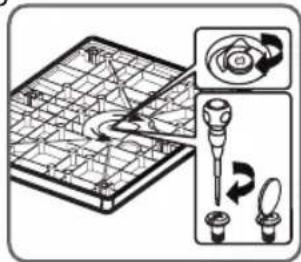
4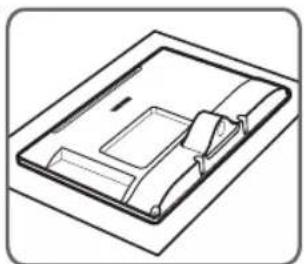
5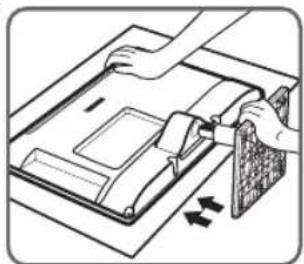
6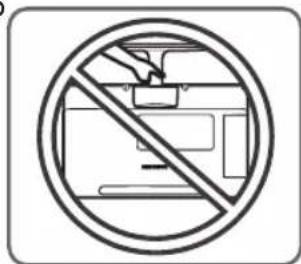
Vietnamese
Vietnamese
Vietnamese
Troubleshooting
This page is intentionally left blank.
2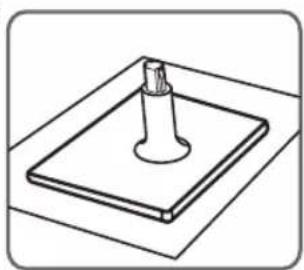
3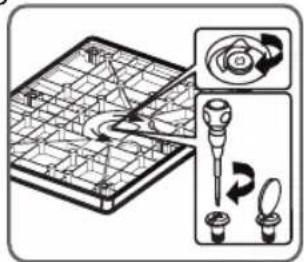
4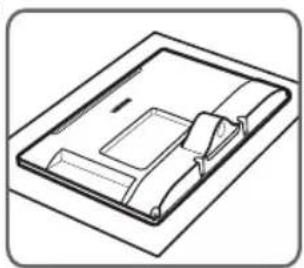
5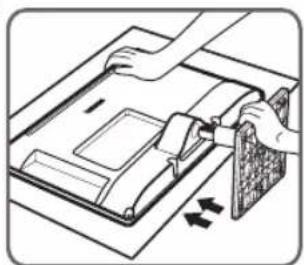
6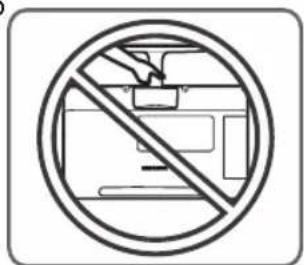
Russian
Russian
Russian
Russian
This page is intentionally left blank.
2
1
6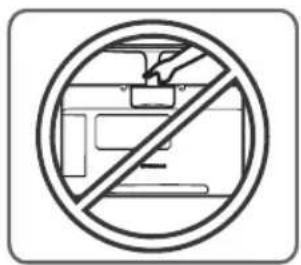
5
4
Arabic
2
Connecting to a device
For the model. √ √ √ √ √ √ √ √ √ √ √ √ √ √ √ √ √ √ √ √ √ √ √ √ √ √ √ √ √ √ √ √ √ √ √ √ √ √ √ √ √ √ √ √ √ √ √ √ √ √ ∞
![graph TD A["USB Port"] --> B["USB 1.0V"] A --> C["USB 2.0V"] A --> D["USB 3.0V"] B --> E["USB 4.0V"] C --> F["USB 5.0V"] D --> G["USB 6.0V"] E --> H["USB 7.0V"] F --> I["USB 8.0V"] G --> J["USB 9.0V"] H --> K["USB 10.0V"] I --> L["USB 11.0V"] J --> M["USB 12.0V"] K --> N["USB 13.0V"] L --> O["USB 14…](/content/2026/03/536254/images/9ad9e162958520e80a7b9b965a29426110d158cb20db9d4967f9d061a24e1fe8.jpg)
![graph TD A["COMPONENT / Audio"] --> B["VIDEO OUT"] A --> C["AUDIO OUT"] A --> D["COMPONENT OUT"] A --> E["Audio OUT"] B --> F["VIDEO OUT"] C --> G["AUDIO OUT"] D --> H["Audio OUT"] E --> I["Audio OUT"] style A fill:#f9f,stroke:#333 style B fill:#ccf,stroke:#333 style C fill:#ccf,stroke:#333 style D…](/content/2026/03/536254/images/ac55dc7a27ec31ce5fb91f0bd6713da056917943ce821a409e90ea2d22a8c327.jpg)
Arabic
Connecting to a computer
Arabic
Control panel overview
Arabic
This page is intentionally left blank.
3
2
1
6
5
4
2
AV
- THE SUPPLIED ACCESSORIES
- INSTALLING THE STAND
- CONNECTING TO AN AV DEVICE
- CONNECTING TO A PC
- CONNECTING TO AN ANTENNA
- CONNECTING THE POWER
- VIEWING THE CONTROL PANEL
- SETUP
- CHANGING THE INPUT SOURCE
- SOURCE
- TV / PC / HDMI1/DVI / HDMI2 / AV / COMPONENT
- INFORMATION
- REFRESH
- VIEWING THE REMOTE CONTROL
- TROUBLESHOOTING
- THIS PAGE IS INTENTIONALLY LEFT BLANK
- ACCESSORIES SUPPLIED
- FRENCH
- AV
Brand : SAMSUNG
Model : T24C350AR
Category : Monitor