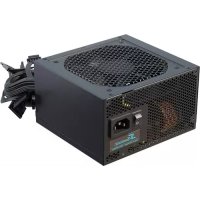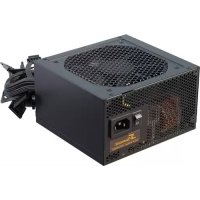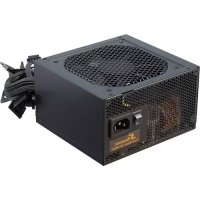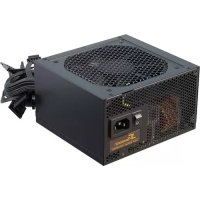
G12 GC750 - Power Supply (PC) SEASONIC - Free user manual and instructions
Find the device manual for free G12 GC750 SEASONIC in PDF.



| Product Type | PC Power Supply |
| Brand | Seasonic |
| Model | G12 GC750 |
| Rated Power | 750 W |
| 80 PLUS Certification | Gold |
| Form Factor | ATX |
| Dimensions (L x W x H) | 140 x 150 x 86 mm |
| Weight | 2.5 kg |
| Modular Cabling | Yes |
| Fan | 120 mm |
| Integrated Protections | OVP, UVP, SCP, OCP, OTP |
| Main Connectors | 1 x 20/24 pin ATX, 1 x 4+4 pin CPU, 2 x 6+2 pin PCIe, 6 x SATA, 3 x Molex |
| ErP 2013 Compatibility | Yes |
| Cooling Technology | Silent, Thermostat-controlled |
| Maintenance and Cleaning | Regularly dust the fan and grilles with a dry cloth or compressed air. Do not open the unit. |
| Safety | Never open the power supply. Use only the provided cables. Store in a dry place. |
| Spare Parts and Repairability | Modular cables are available from Seasonic customer service. The unit is not user-serviceable. |
| Warranty | Against manufacturing defects during the legal warranty period. See conditions at www.seasonic.com |
Frequently Asked Questions - G12 GC750 SEASONIC
User questions about G12 GC750 SEASONIC
0 question about this device. Answer the ones you know or ask your own.
Ask a new question about this device
Download the instructions for your Power Supply (PC) in PDF format for free! Find your manual G12 GC750 - SEASONIC and take your electronic device back in hand. On this page are published all the documents necessary for the use of your device. G12 GC750 by SEASONIC.
USER MANUAL G12 GC750 SEASONIC
POWER SUPPLY INSTALLATION GUIDE
1. Remove your old PSU (power supply unit)
natural_image
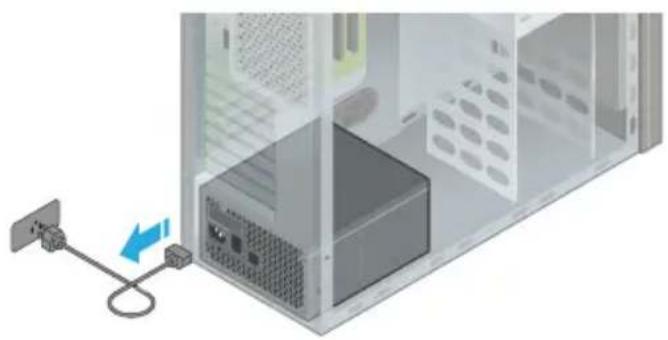
3D diagram of a server rack with an attached cable and power outlet, showing internal components without any text or symbols.1.1. Disconnect your AC power cord from the wall socket and the back of the power supply.
natural_image
Illustration of a mechanical assembly with a cylindrical component and a base block, no text or symbols present.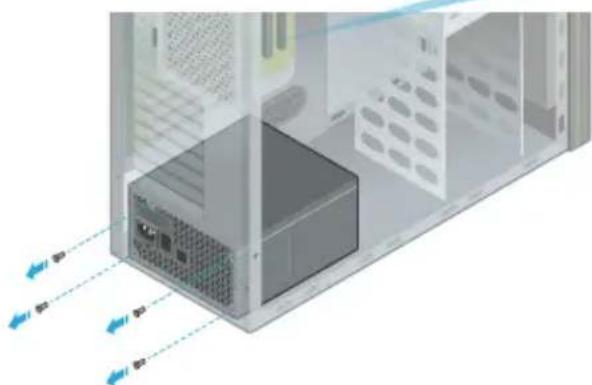
natural_image
3D diagram of a computer tower internal structure with ventilation ducts and ventilation grilles (no text or symbols)1.2. Disconnect all DC cable connectors.
1.3. Remove all 4 mounting screws.

natural_image
3D illustration of a server rack with an internal device and a blue arrow pointing to it (no text or symbols)1.4. Remove your old PSU.
natural_image
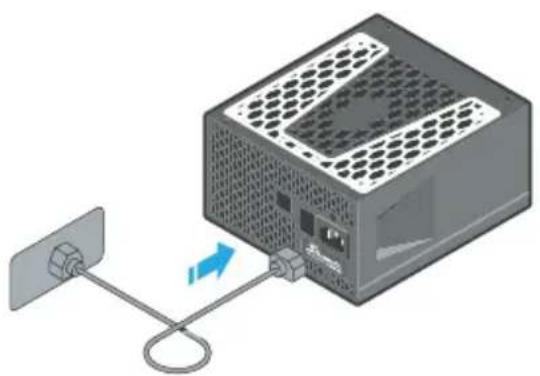
Diagram of a computer power adapter connected to a wall-mounted cable, showing internal components and connection (no text or symbols)2.1. Plug the AC power cord into the PSU. Make sure that the AC power is coming directly from the wall outlet.
It is recommended to use a high quality surge protector to protect the PSU and the system.
text_image
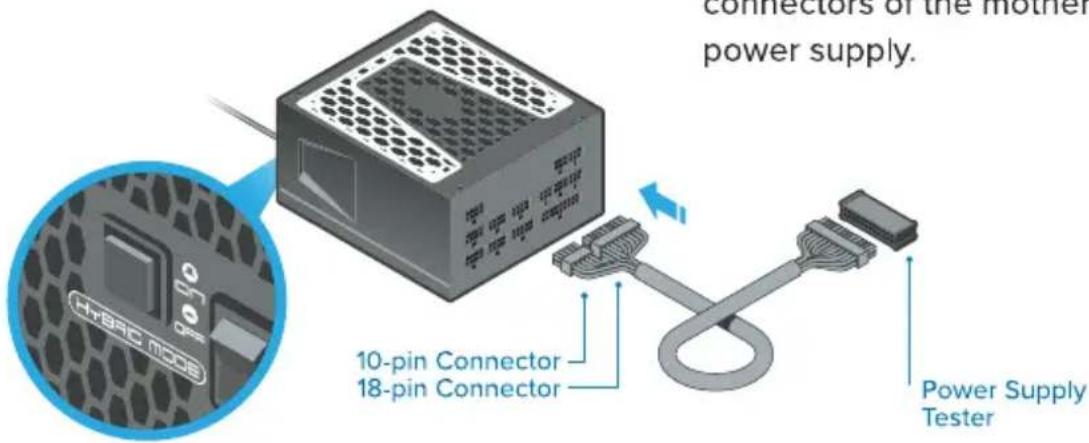
connectors of the mother power supply. HYBAC MODE 10-pin Connector 18-pin Connector Power Supply Tester2.2. Connect both the 18-pin and 10-pin connectors of the motherboard cable to the power supply.
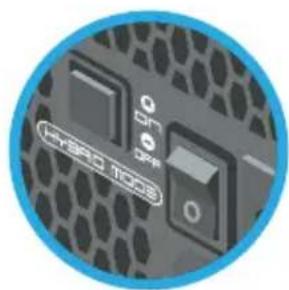
2.3. If you power supply features a fan control switch, set it to Normal Mode.
In Hybrid or Fanless Mode (S ^3 FC) the fan will not turn.
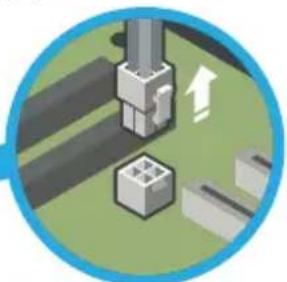
2.4. Attach the Power Supply Tester to the 24-pin motherboard connector. There is a notch on the Tester that fits directly into the notch on the 24-pin connector.
natural_image
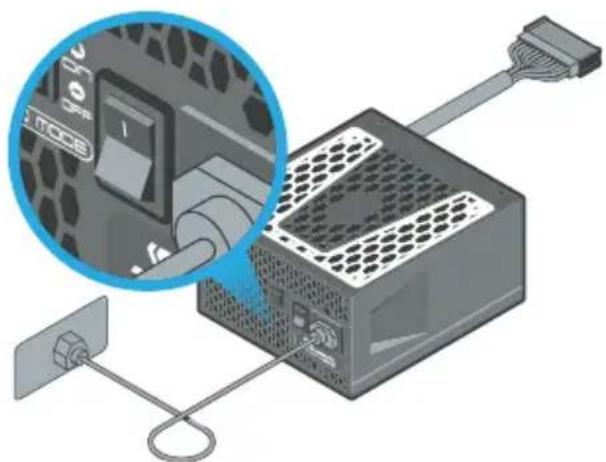
Illustration of a computer power adapter with an inset close-up showing a key inserted into the socket (no text or symbols present)2.5. Turn on the power supply by setting the I/O switch to the "I" (ON) position.
If the power supply fan starts spinning then your PSU is working.
The drawings illustrate a fully modular PSU with a fan control switch; the features of your actual PSU might vary.
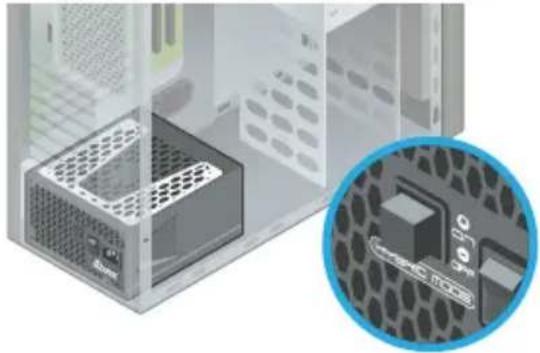
3.1. Bottom of the case
The fan control setting determines the optimal PSU placement.
natural_image
Illustration of a computer tower with an inset close-up showing a hexagonal grid structure (no text or symbols)In "Hybrid" mode
Seasonic recommends to install your PSU with ventilation top cover facing UPWARD, towards the direction of the motherboard. This will ensure natural heat dissipation.
Fanless PSU
The PSU must be mounted into the computer case with the ventilation top cover facing UPWARD.
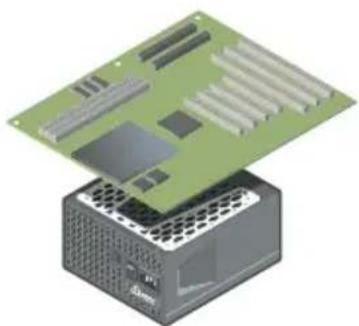
3.2. Flat Desktop-, SFX- or ITX systems
natural_image
Illustration of a green circuit board placed on top of a black hardware unit (no text or symbols visible)3.3. Top of the case
natural_image
3D rendering of a computer tower case showing internal components and ventilation slots (no text or symbols)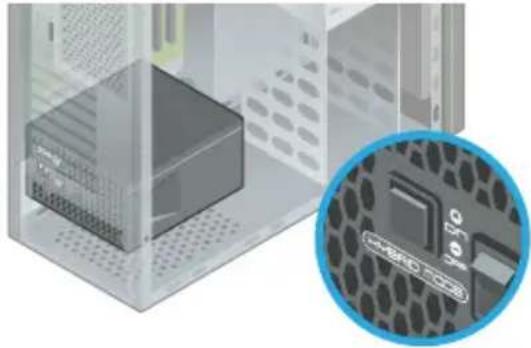
natural_image
Isometric view of a server rack unit with a highlighted internal component (no text or symbols visible)In "Normal" mode
Although the direction of mounting is optional, it is not recommended to install the PSU with the ventilation top cover facing downward if there are no ventilation holes on the bottom of the case.
To learn about the ventilation of your computer case, please refer to the case manufacturer's instruction manual.
In general, it is recommended to mount the PSU with the ventilation top cover facing the motherboard. Due to the different varieties of case layouts, however, please also consult the case manufacturer's instruction manual for more information.
Seasonic recommends the PSU to be mounted with its ventilation top cover facing DOWNWARD.
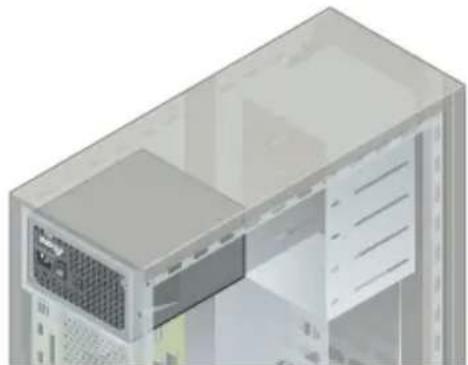
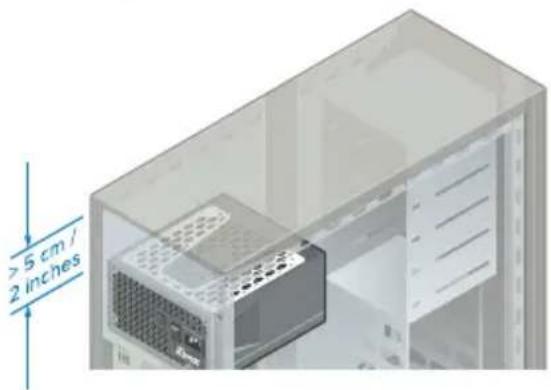
3.3. Top of the case
text_image
> 5 cm / 2 inches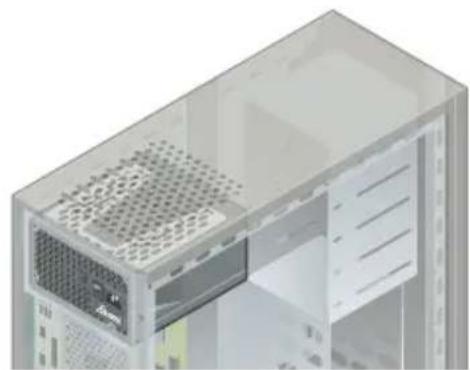
natural_image
3D rendering of a computer tower case with visible internal components and ventilation grilles (no text or symbols)Mount the power supply with the ventilation top cover facing UPWARD only if there is enough space (at least 5 cm / 2 inches) available between the PSU ventilation top cover and the metal plate of the case, and only if the case has a ventilation panel on top.
4. Install your Seasonic PSU
text_image
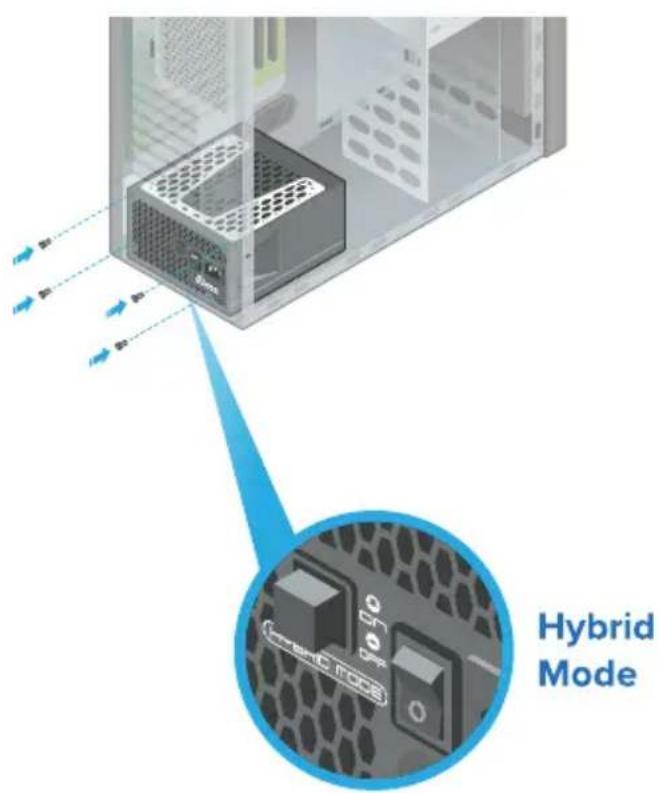
Hybrid Mode4.1. Secure all 4 mounting screws.
4.2. Make sure the PSU switch is in the "O" (OFF) position.
4.3. Select the fan control type if your PSU has this option.
natural_image
Close-up of a computer motherboard with hexagonal pattern and control buttons (no readable text or symbols)Normal Mode
natural_image
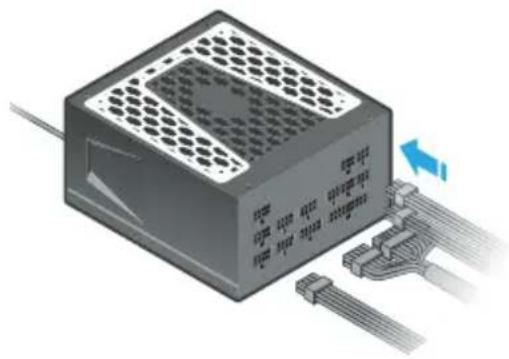
3D illustration of a rectangular electronic component with hexagonal top and internal structure, connected to a connector with cable (no text or symbols visible)4.4. Connect all the necessary system DC cables (Motherboard, CPU, VGA, HDD, Optical Drivers, etc). The connectors should click to lock in.
ATTENTION! Use only cables provided by Seasonic! Should you require additional cables, please contact Seasonic.
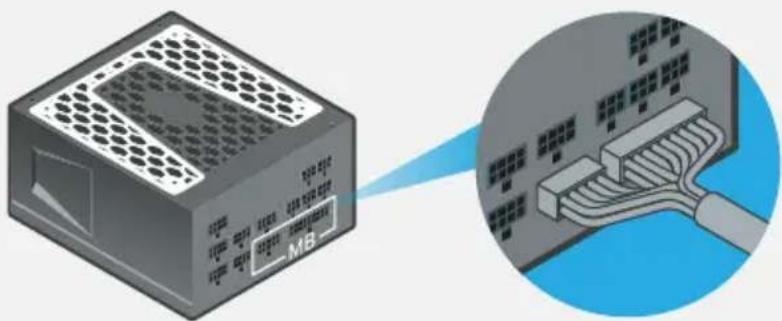
Motherboard cable
Make sure both Motherboard connectors on the PSU side are properly connected.
text_image
Diagram showing a computer RAM module connected to an Ethernet cable with labeled ports and connection points.CPU and PCIe cables (8-pin connectors)

natural_image
Illustration of a stack of gray blocks labeled 'PSU' on a blue circular background (no additional text or symbols)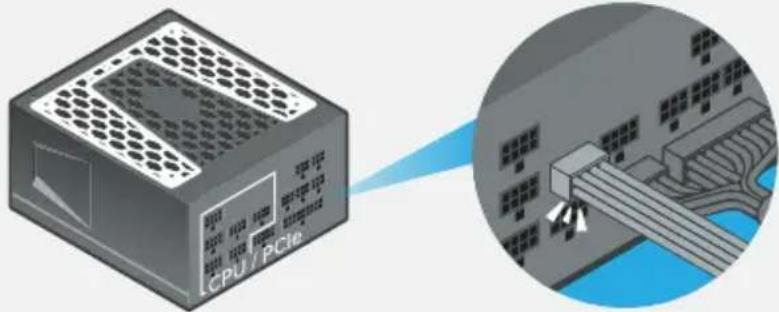
natural_image
Illustration of a computer hardware unit (CPU/PCIe) with an inset close-up showing internal components (no text or symbols visible)Peripheral cables (6-pin connectors)

natural_image
Isometric illustration of a stack of gray blocks labeled 'PSU' on a blue circular background (no additional text or symbols)
text_image
IDE / SATA / Molex 1000 1000 1000 1000 1000 1000 1000 1000 1000 1000 1000 1000 1000 1000 1000 1000 1000 1000 1000 1000 1000The drawings illustrate a fully modular PSU with a fan control switch; the features of your actual PSU might vary.
High powered graphics cards are usually outfitted with two (or three) PCIe power connector slots. Seasonic prefers the use of two (or three) separate PCIe cables to connect these cards to your power supply.
Recommended Standard
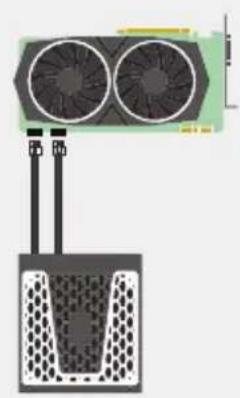
natural_image
Diagram of a heat exchanger with two fans and cooling unit (no text or symbols)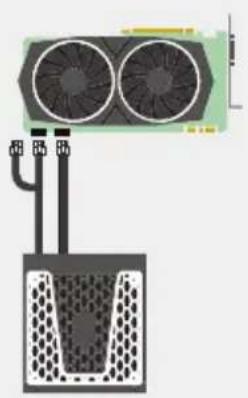
natural_image
Diagram of a heat exchanger with cooling fans and cooling pipes (no text or labels)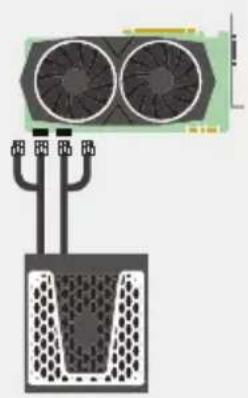
natural_image
Diagram of a heat exchanger with cooling fans and a porous liquid container (no text or symbols)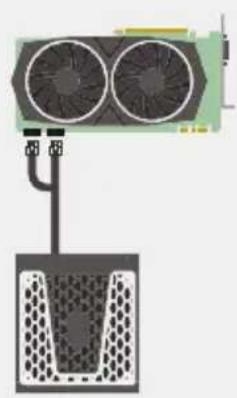
natural_image
Diagram of a heat exchanger with cooling fan and cooling tower (no text or symbols)ATTENTION! The intended use of the PSU is to power PC systems. For mining usage, please contact Seasonic for special cables.
natural_image
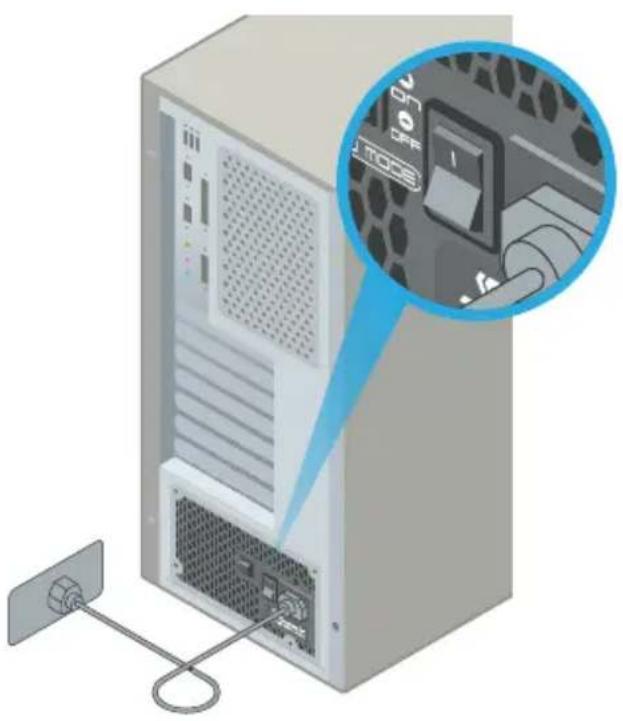
Illustration of a desktop computer tower with an attached cable and a magnified inset showing a device labeled '200E MODE' (no text beyond label)4.5. Connect the AC power cord to the PSU. Plug the AC power cord into the wall socket.
4.6. Click the AC ON/OFF switch to the "I" (ON) position.
Register
Your
Power
Supply
seasonic.com/ product-registration

text_image
QR code image containing encoded data, no visible human-readable textSeasonic®
Tech Support Online Chat on SEASONIC.COM
Seasonic®
POWER SUPPLY USER'S MANUAL
NETZTEIL BENUTZERHANDBUCH
BLOC D'ALIMENTATION MANUEL D'UTILISATEUR
Power supply
■ Modular cable pack
■ User manual
- AC power cord
- Accessory bag
II. WARNING! IMPORTANT SAFETY INFORMATION
■ NEVER, under any circumstances, open the power supply unit. High voltage inside. WARRANTY IS VOID once the cover is removed.
■ DO NOT insert any object into the fan grill or the ventilation area of the power supply unit.
- DO NOT place any object in front of the fan or the ventilation area of the power supply unit that may obstruct or restrict airflow.
■ USE ONLY the Seasonic modular cables provided with the power supply unit.
- Keep the power supply unit in a dry environment, away from humidity.
- The power supply unit is for integration into a computer system and not intended for external or outdoor usage.
III. Power Supply Removal
- Please first read Chapter II. Warning! Important Safety Information above.
- Make certain that your system is entirely powered off; set the power supply's AC power switch to the "O" (OFF) position and disconnect the power cord from the AC outlet.
- Open the computer case (please refer to the manufacturer's user manual).
- Carefully disconnect all the power supply's connectors from the mainboard and the peripherals.
- Unscrew the mounting screws securing the power supply unit to the back panel of the case.
- Carefully remove the power supply from the case.
IV. Power Supply Installation
- Place the Seasonic power supply into the space provided within the case and use the four mounting screws provided in the accessory bag to secure it to the back panel of the case. Do not over-tighten the screws.
a. For power supplies with a built-in fan, the fan side top cover should be facing the mainboard. (Depending on the type of computer case, this can mean either upwards or downwards facing fan cover.)
b. For fanless power supplies, Sea Sonic recommends to mount fanless power supplies into the computer case with their ventilation cover facing UPWARDS. However, there are extra mounting-screw holes provided on the back of the power supply to allow for reverse mounting, if necessary
- Mainboard connection:
a. DO NOT force the connectors into place; the connectors are "keyed" so they can only fit one way. Make sure the connectors lock in their place securely.
b. Connect the power supply end of the 24/20-Pin convertible connector to the appropriate receptor on the power supply unit.
c. Connect the mainboard end of the 24/20-Pin convertible connector to the mainboard. Depending on the mainboard, you may need to either attach or detach the 4-Pin module of the 24/20-Pin connector.
d. Connect the + 12 V 4-Pin connector and the EPS + 12 V connector, if applicable.
e. If your system requires dual EPS + 12 V connectors, please connect the 8-Pin end of the second CPU 8-Pin connector into the appropriate 8-Pin receptor on the power supply unit. Then connect the mainboard end of this 8-Pin connector to the mainboard.
- Peripheral components connection:
a. Connect one end of the peripheral cable to the power supply and the other end to the component.
b. DO NOT use excessive force to attach the connectors; the connectors are "keyed" so they can only fit one way.
c. Make sure that the connectors lock in tightly and securely.
-
Close the computer case according to the manufacturer's instructions.
-
Plug in the AC power cord provided in the box and switch the AC On/Off switch on the back panel of the power supply to the "I" (On) position.
-
You are now ready to start your computer powered by Seasonic.
V. Troubleshooting
If the power supply unit fails to function properly, please go through the below checklist.
- Check to make sure the AC power cord is properly connected to the AC source and the power supply unit.
- Check to make sure the AC source is On.
- Check to make sure the AC On/Off switch on the back panel of the power supply unit in the "I" (On) position.
- Check and secure all mainboard and peripheral connectors.
-
The AC on/off switch on the back of the power supply unit can be toggled between "I" and "O" a few times with a 0.5 second delay in between to make sure the power supply unit is reset.
-
If you are still experiencing difficulties to get the power supply unit to function properly, please visit www.seasonic.com for further technical support instructions.
Notes
The operation of power supply is a "pull" technology, which means that the unit only provides the power as demanded by the mainboard and the system components.
If there is a mainboard malfunction, the power supply will not turn on.
- If there is a peripheral component malfunction, the power supply will not provide power to that particular component.
This power supply complies with the newest ErP 2013 requirements. For proper system function please update your main-board BIOS to the newest version and configure the BIOS in accordance to ErP 2013 requirements - enable all Energy Savings functions for standby and normal operations and disable audio always-on. Please consult your motherboard manufacturer for further assistance.
VI. Warranty
Seasonic's warranty covers all power supplies beginning from the date of purchase, against defects in materials or workmanship. During the warranty period, Sea Sonic maintains the discretion to either repair units or replace broken components with parts of similar or equal performance, provided that:
■ The product is returned to the point of purchase, postage prepaid.
The product was properly used according to the manufacturer's intended purposes.
The product was not damaged due to acts of nature, such as lightening, flood or fire.
The product's cover was never removed and the warranty sticker was not broken.
For additional details, please visit www.seasonic.com/rma
Notes
- Warranty terms may vary between different geographic regions.
- For consumers in Australia – Our goods come with guarantees that cannot be excluded under the Australian Consumer Law. You are entitled to a replacement or refund for a major failure and compensation for any other reasonably foreseeable loss or damage. You are also entitled to have the goods repaired or replaced if the goods fail to be of acceptable quality and the failure does not amount to a major failure.
Local distributor:
Powerhouse PC Australia
service@powerhousepc.com.au
www.powerhousepc.com.au
PO Box 6139 Silverwater, NSW 2128, Sydney, Australia
Tel: +61 2 9648 6268
Fax: +61 2 9648 6269
VII. Disclaimer
All efforts have been made to ensure accuracy of all information provided herein. Sea Sonic assumes no liability, expressed or implied, for any damage(s) occurring to your system's components or other devices as a result of any mistake or omission during power supply installation or removal, or due to any defect or failure of the product itself.
Please visit our homepage www.seasonic.com for further details.

DEUTSCH
I. Lieferumfang
- Anschlüsse am Mainboard:
Global: support@seasonic.com
America: ssa.support@seasonic.com
Europe: sse.support@seasonic.com
HEADQUARTERS
Sea Sonic Electronics Co., Ltd.
8F, #19, Alley 360, Sec.1,
Neihu Road, Neihu, Taipei,
Taiwan, R.O.C.
EUROPEAN OFFICE
Sea Sonic Europe B.V.
Everdenberg 117,
4902 TT Oosterhout,
The Netherlands
www.seasonic.com
This manual is printed on environmentally friendly material.