
DMCS3770ROT - Monitor Tripp Lite - Free user manual and instructions
Find the device manual for free DMCS3770ROT Tripp Lite in PDF.

| Product Type | Mobile Cart for Rotating Display |
| Brand | Tripp Lite |
| Model | DMCS3770ROT |
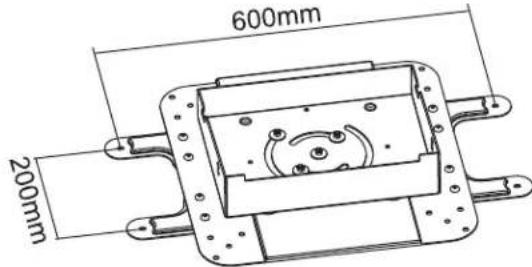
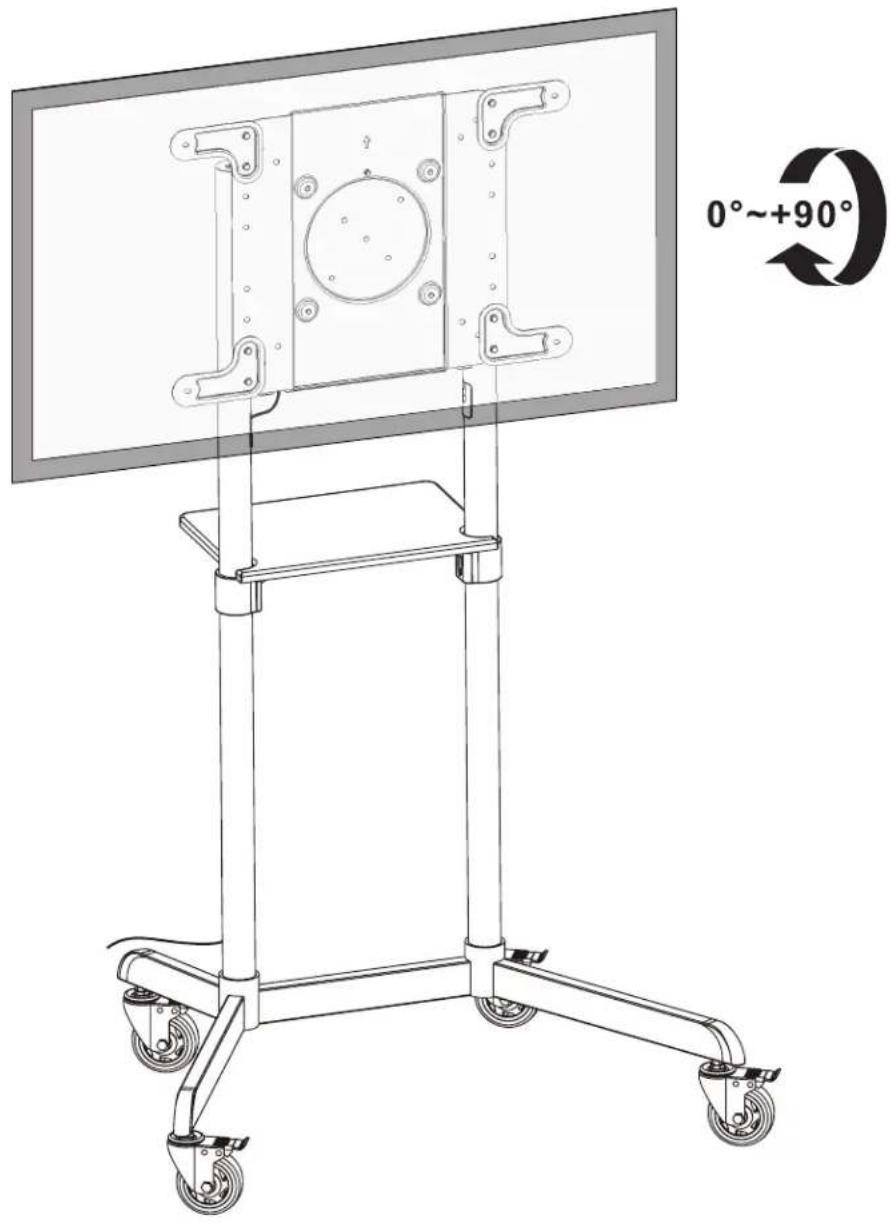
| VESA Compatibility | 200 x 200 / 300 x 300 / 350 x 350 / 400 x 200 / 400 x 400 mm (with adapter: 600 x 200 mm) |
| Screen Orientation | Landscape or Portrait (adjustable rotation) |
| Tilt | Adjustable (tilt angle adjustable) |
| Cable Management | Integrated (cable covers and cable ties) |
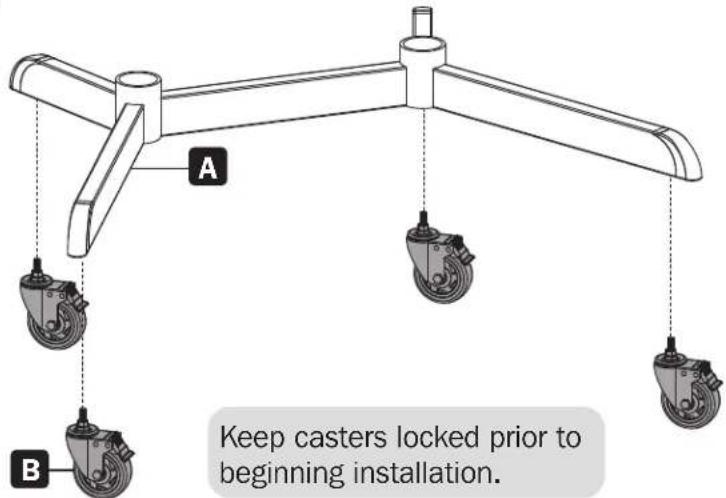
| Casters | 4 swivel casters (lockable) |
| Material | Steel (base and columns) |
| Warranty | 5-year limited (parts and labor) |
| Maintenance | Visual safety check every 3 months |
| Installation | Recommended by a professional; use an assistant for lifting |
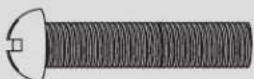
| Included Accessories | VESA mounting kit, hex keys (4 mm and 5 mm), cable ties, cable covers |
| Spare Parts | Contact Tripp Lite customer service |
| Usage | Indoor only |
| Mounting Type | Height-adjustable columns |
Frequently Asked Questions - DMCS3770ROT Tripp Lite
User questions about DMCS3770ROT Tripp Lite
0 question about this device. Answer the ones you know or ask your own.
Ask a new question about this device
Download the instructions for your Monitor in PDF format for free! Find your manual DMCS3770ROT - Tripp Lite and take your electronic device back in hand. On this page are published all the documents necessary for the use of your device. DMCS3770ROT by Tripp Lite.
USER MANUAL DMCS3770ROT Tripp Lite
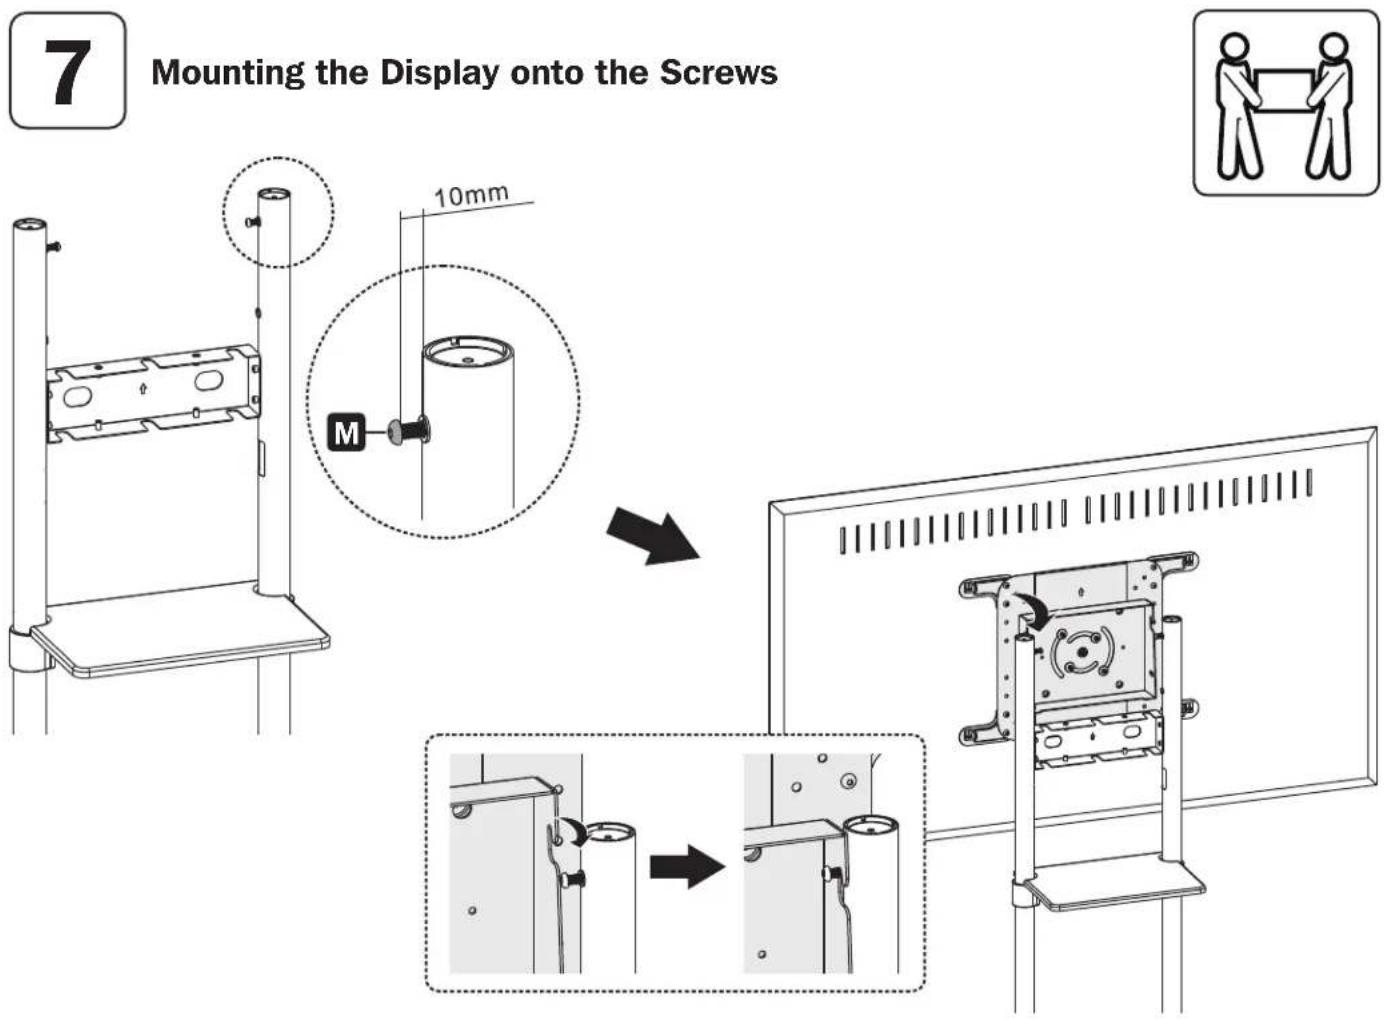
WARNING! Always use an assistant or mechanical lifting equipment to safely lift and position equipment.

200x200/300x300 350x350/400x200 400x400/600x200 600x400


Espanol 19 • Français 37 • Peccepiñ 55 • Deutsch 73
WARRANTY REGISTRATION
Register your product today and be automatically entered to win an ISOBAR® surge protector in our monthly drawing!

triplite.com/warranty


Manufacturing Excellence.
1111 W. 35th Street, Chicago, IL 60609 USA • tripplite.com/support
Copyright © 2020 Tripp Lite. All rights reserved.
Important Safety Instructions

CAUTION
- Read the entire instruction manual before you start assembly and installation. If you have questions about any of the instructions or warnings, contact Tripp Lite Support.
- Use with products heavier than the rated weights indicated may result in instability, causing possible injury.
- Mounts must be attached as specified in these instructions. Improper installation may result in damage or serious personal injury.
- Safety gear and proper tools must be used. This product should only be installed by professionals.
- Ensure the supporting surface will safely support the combined weight of the equipment and all attached hardware and components.
- Use the mounting screws provided and DO NOT OVERTIGHTEN the mounting screws.
- This product contains small items that could be a choking hazard if swallowed. Keep these items away from children.
- This product is intended for indoor use only. Using this product outdoors could lead to product failure and personal injury.
- Check that the bracket is secure and safe to use at regular intervals (at least every three months).
Warranty and Product Registration
5-Year Limited Warranty
Sellw r 5 years from the date of initial purchase. If the product should prove defective in material or workmanship within that period, Seller will repair or replace the product, at its sole discretion.
THIS WARRANTY DOES NOT APPLY TO NORMAL WEAR OR TO DAMAGE RESULTING FROM ACCIDENT, MISUSE, ABUSE OR NEGLECT. SELLER MAKES NO EXPRESS WARRANTIES OTHER THAN THE WARRANTY EXPRESSLY SET FORTH HEREIN. EXCEPT TO THE EXTENT PROHIBITED BY APPLICABLE LAW, ALL IMPLIED WARRANTYES, INCLUDING ALL WARRANTYES OF MERCHANTABILITY OR FITNESS, ARE LIMITED IN DURATION TO THE WARRANTY PERIOD SET FORTH ABOVE; AND THIS WARRANTY EXPRESSLY EXCUSES ALL INCIDENTAL AND CONSEQUENTIAL DAMAGES. (Some states do not allow limitations on how long an implied warranty lasts, and some states do not allow the exclusion or limitation of incidental or consequential damages, so the above limitations or exclusions may not apply to you. This warranty gives you specific legal rights, and you may have other rights which vary from jurisdiction to jurisdiction.)
WARNING: The individual user should take care to determine prior to use whether this device is suitable, adequate or safe for the use intended. Since individual applications are subject to great variation, the manufacturer makes no representation or warranty as to the suitability or fitness of these devices for any specific application.
PRODUCT REGISTRATION
Visit tripplitc.com/warranty today to register your new Tripp Lite product. You'll be automatically entered into a drawing for a chance to win a FREE Tripp Lite product!*
- No purchase necessary. Void where prohibited. Some restrictions apply. See website for details.
Tripp Lite has a policy of continuous improvement. Specifications are subject to change without notice. Images may differ slightly from actual products.
Parts List
IMPORTANT: Before beginning installation, be sure you have received all the parts listed below. If any parts are missing or faulty, contact Tripp Lite for replacements.
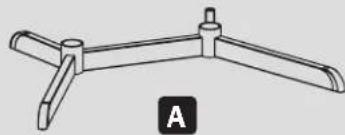
Base
(x1)

B
Caster
(x4)

C
Base Column
(x2)
D
Upper Column
(x2)
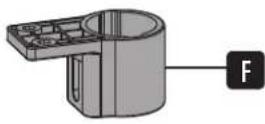
E
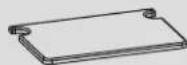
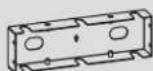
Equipment Shelf
(x1)

F
Shelf Mounting
Bracket
(x2)
G
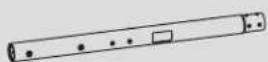
Front Cover
(x1)
H
Mounting Plate
(x1)
1
Rear Cover
(x1)

J
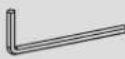
VESA Extension
Adapter Arm
(x2)

K
VESA Extension Adapter Arm
(x2)

L
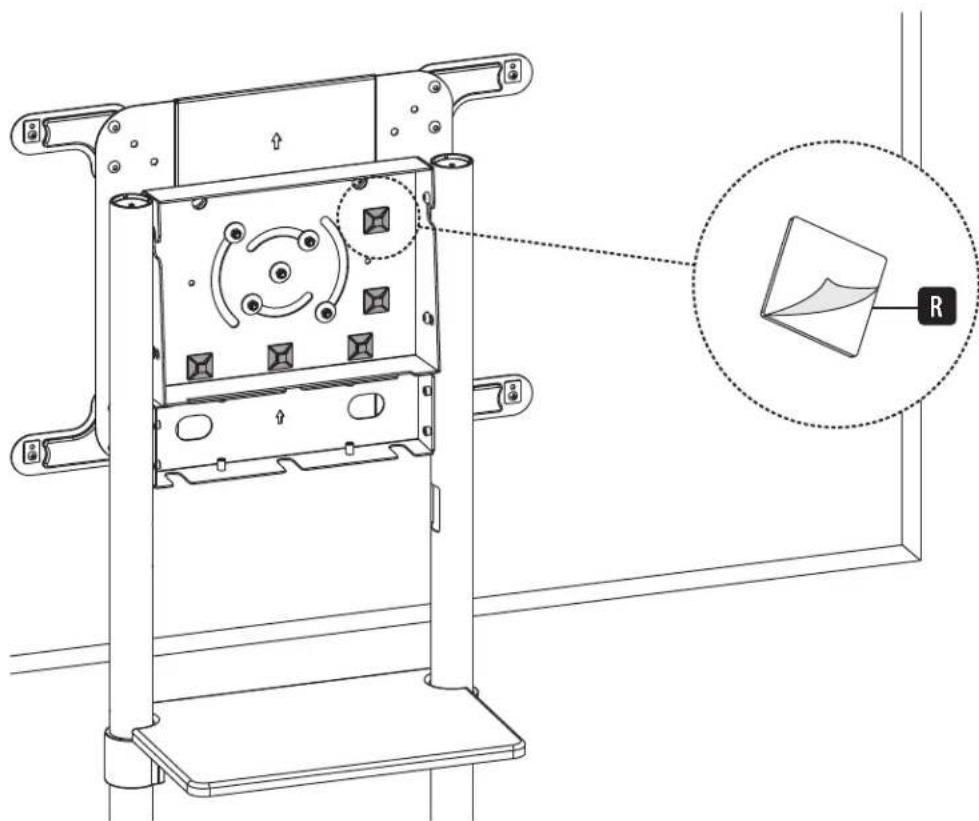
Cable Cover
(x4)

R
Cable Clip Holder
(x5)

s
Cable Clip
(x5)
Package P

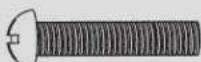
M
M8 x 20
(x8

1
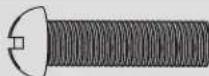
M6x8
(x8)

0
M6 x 12
(x16)

P
M6 x 18
(x1)

Q
M8×8
(x8)

T
M6 Wrench
(x1)

U
M10 Wrench
(x1)
V
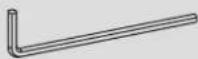
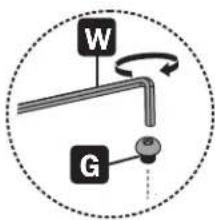
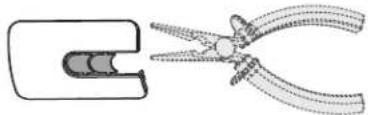
4mm Hex Key
(x1)
W
5mm Hex Key
(x1)
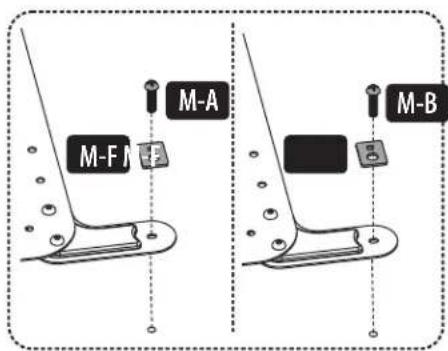
Package M

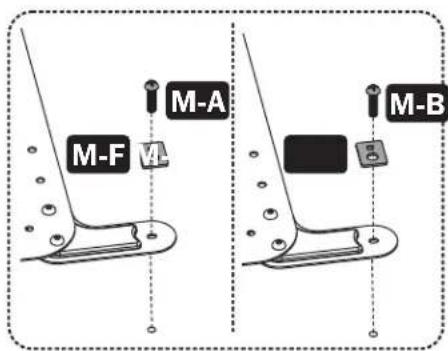
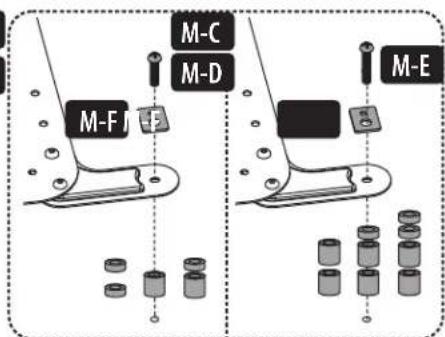
M-A
M5 x 14
(x4)

M-B
M6x14
(x4)
M-C
M6 x 30
(x4)

M-E
M8 x 50
(x4)

M-F
Washer
(x4)

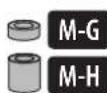
M-G
Small Spacer
(x8)
M-D
M8×30

(x4)
M-H
Big Spacer
(x8)
Required for Installation


Assembly and Installation
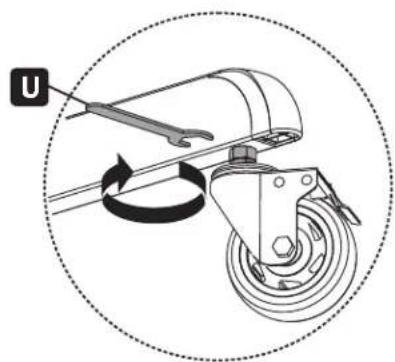
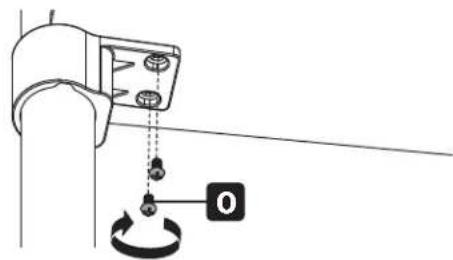
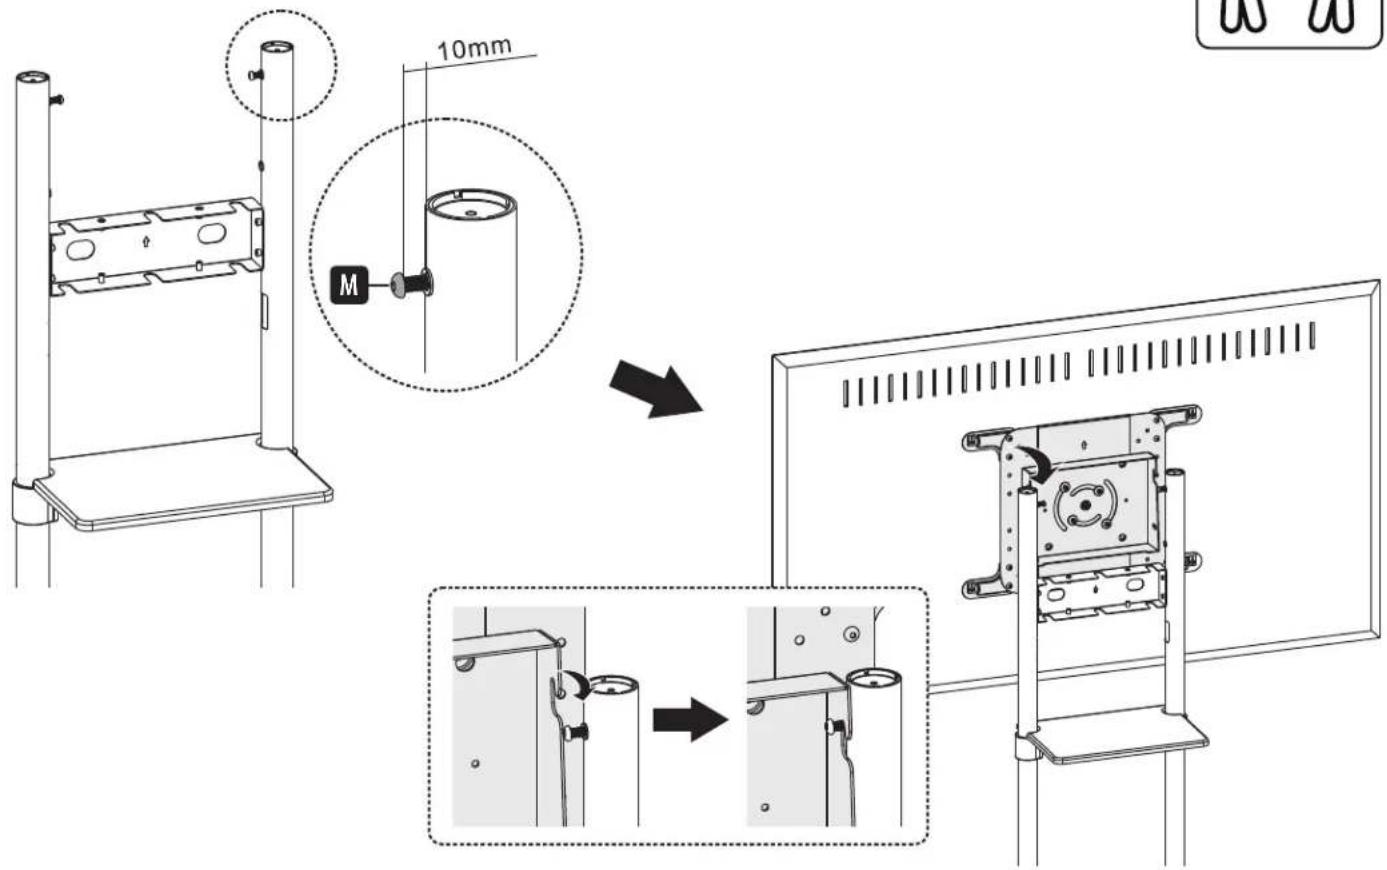
1 Installing the Wheel Casters
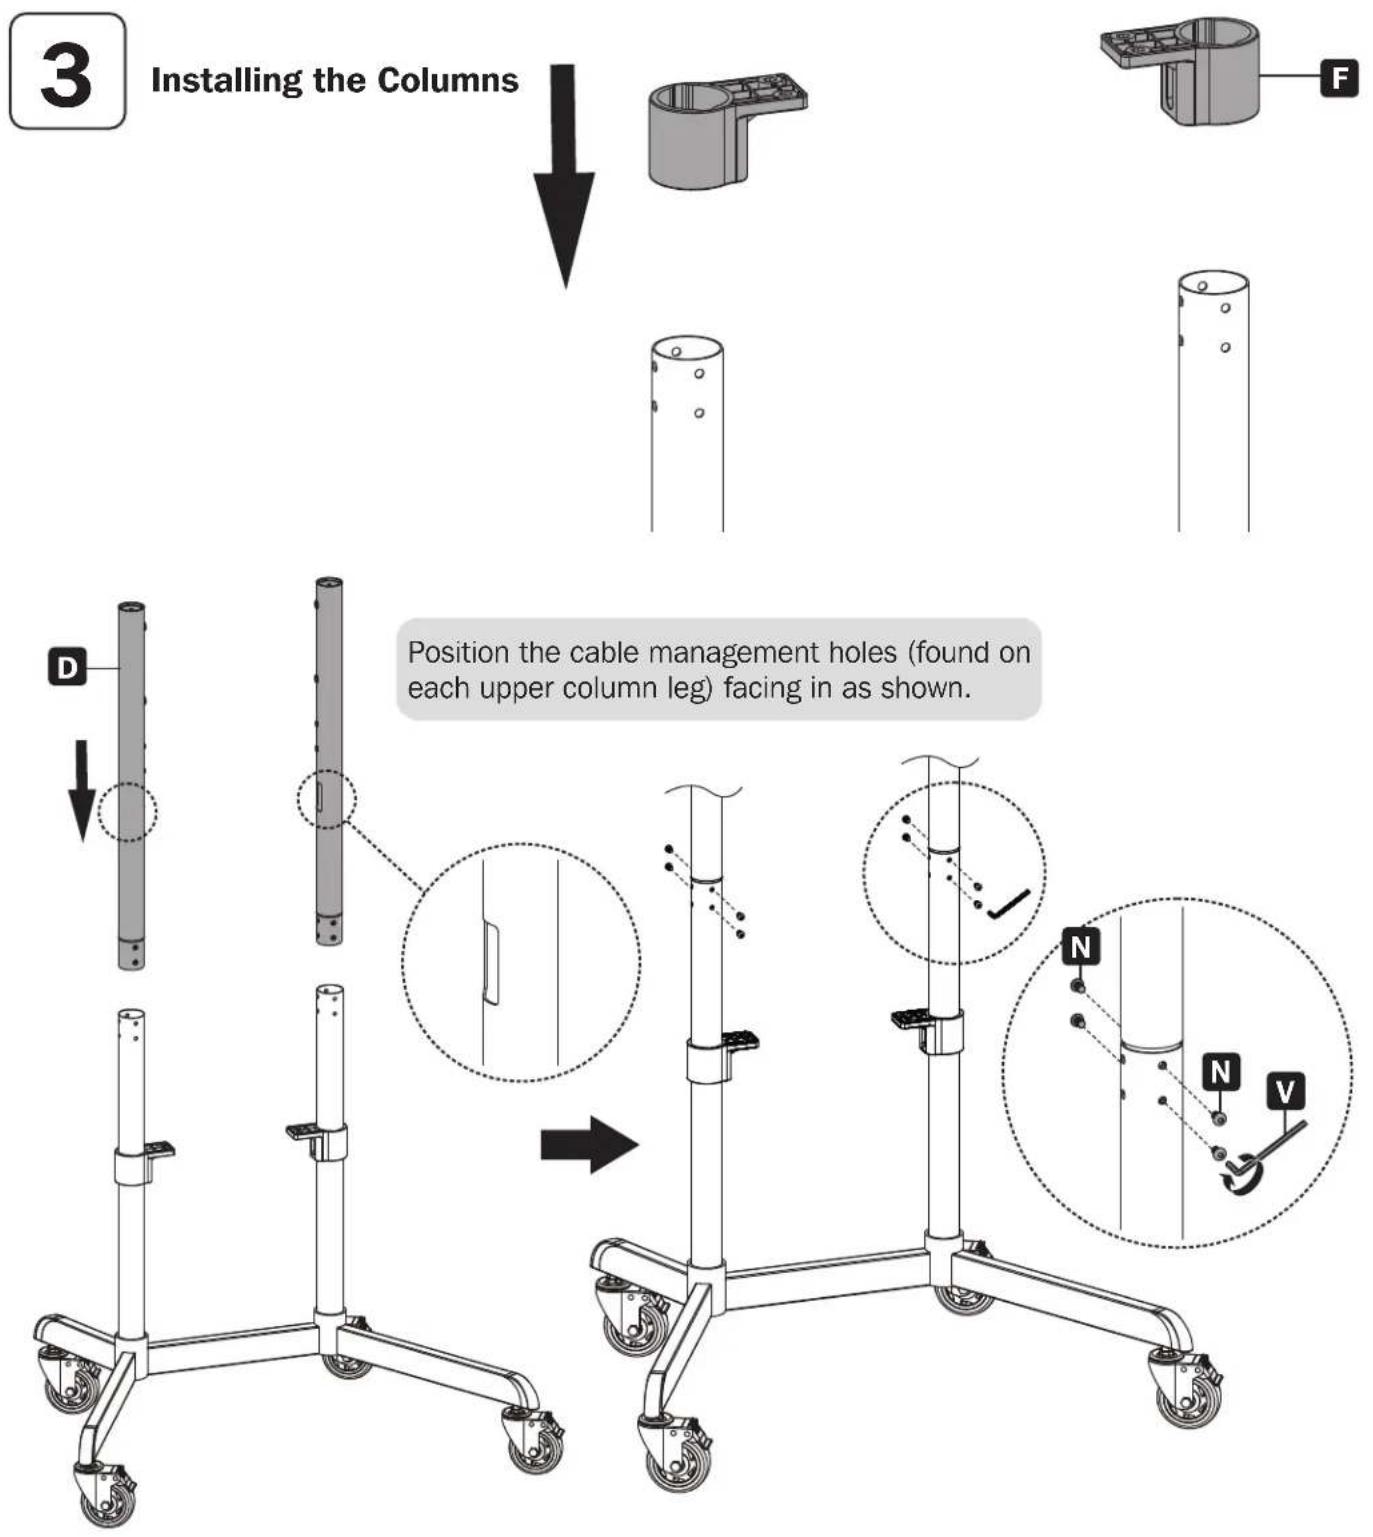
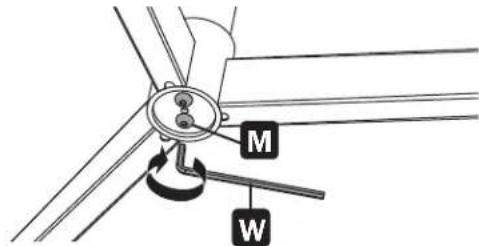
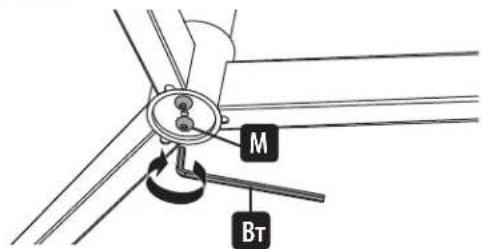
2 Attaching the Columns to the Base
Align the column as shown, ensuring the cable management holes and the shorter legs are on the same side.

Do not fully tighten the screws M.
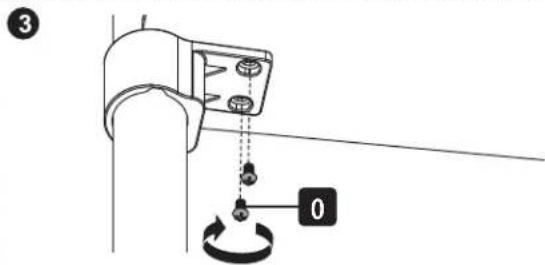
Assembly and Installation
Assembly and Installation
Assembly and Installation
5
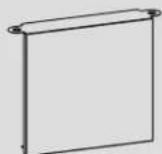
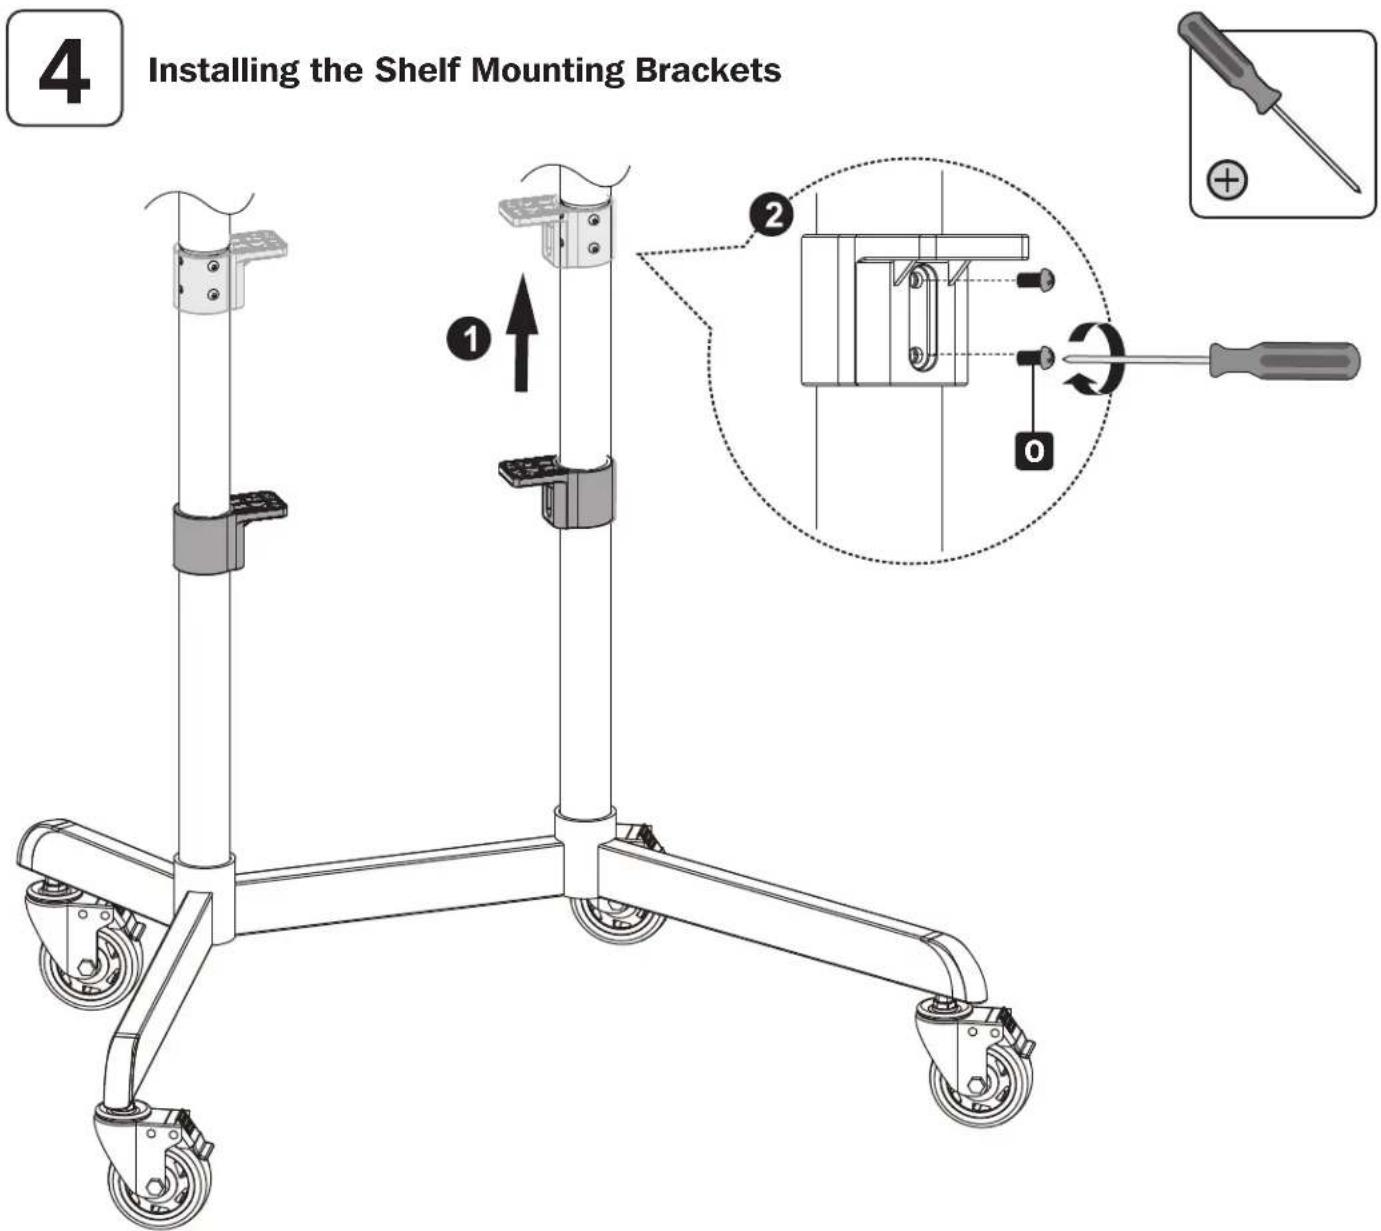
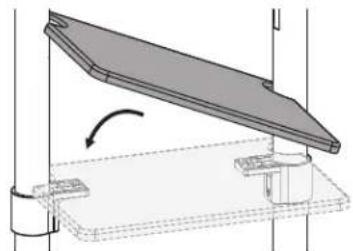
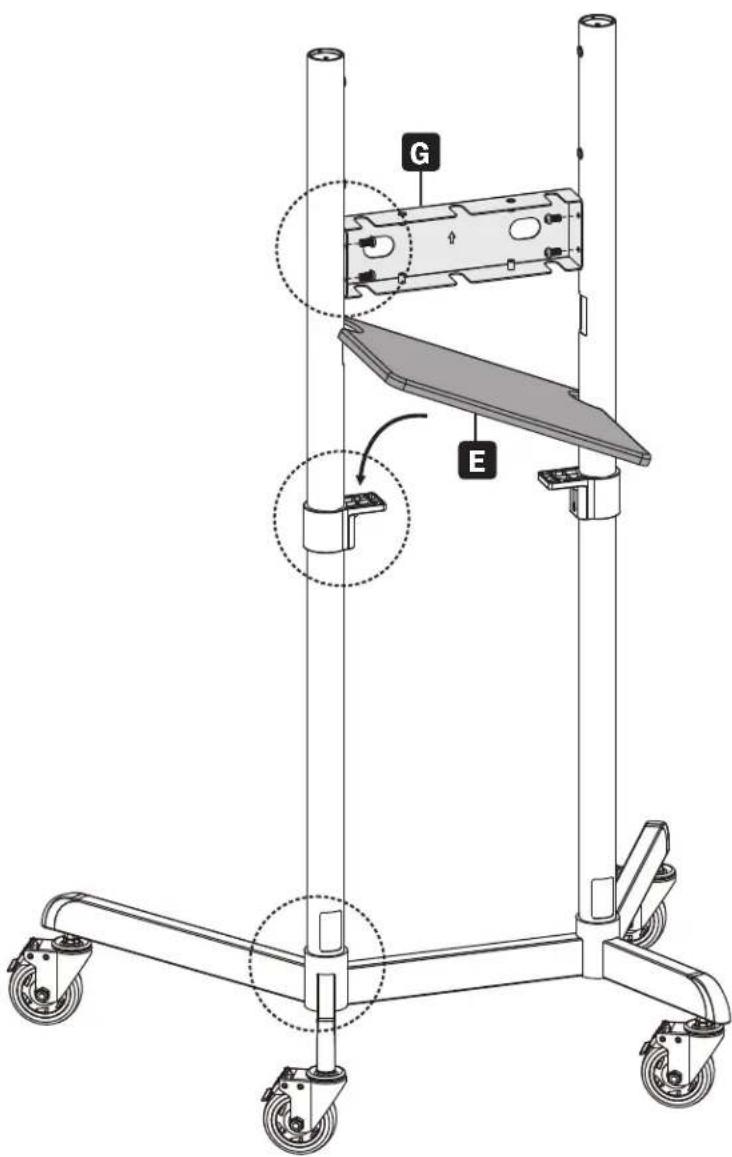
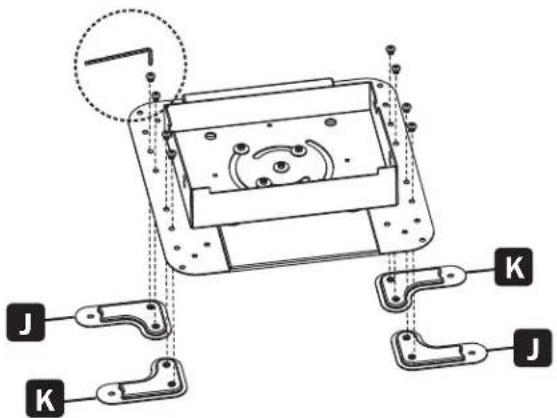
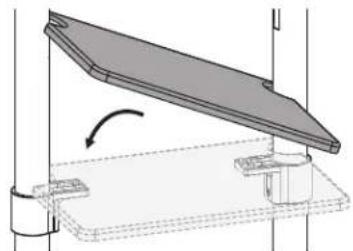
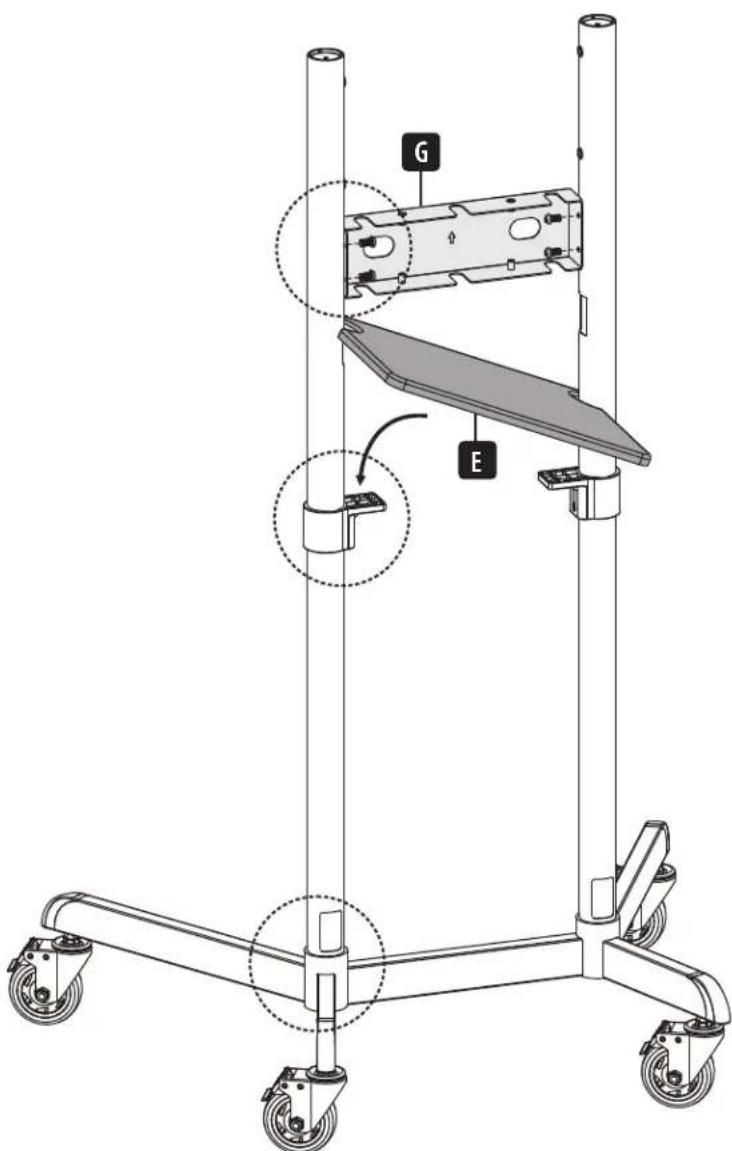
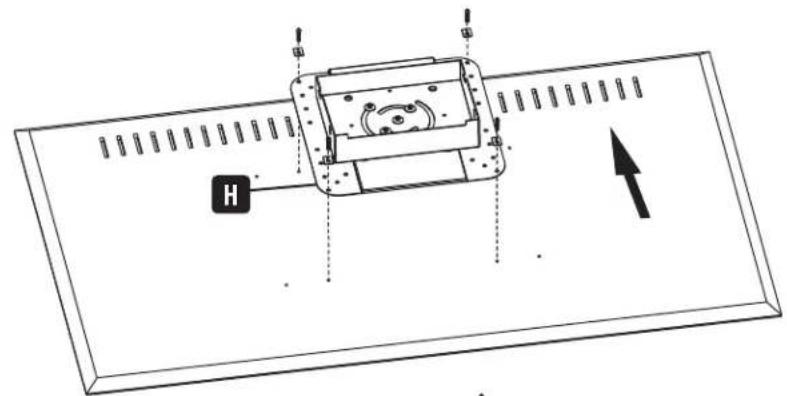
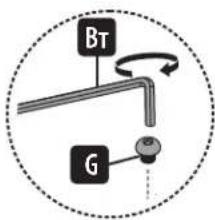
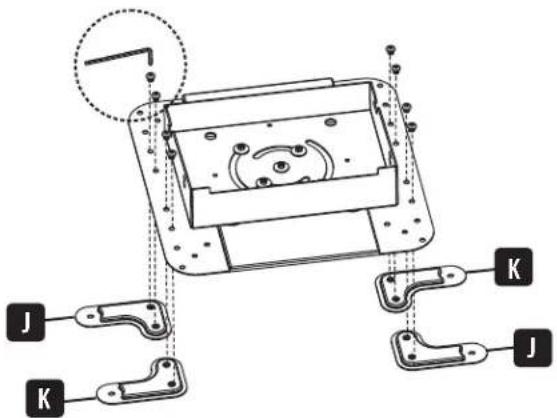
Installing the Front Cover and Equipment Shelf

Position G as indicated, ensuring the front of G and the longer legs are on the same side.

Make sure E and the shorter legs are on the same side.
3

4
CAUTION: Fully tighten the screws M under the base.
Assembly and Installation

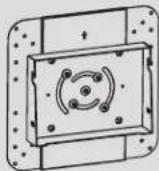
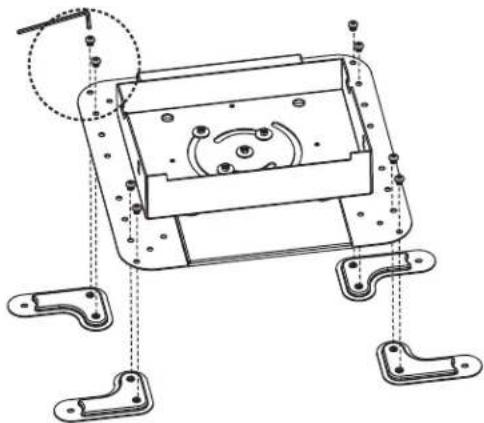
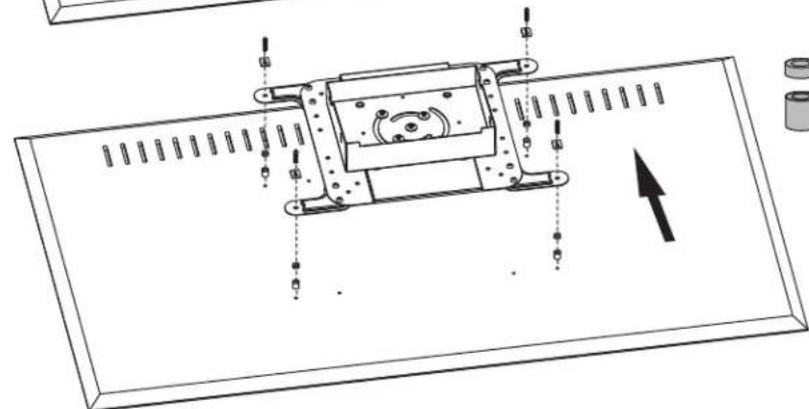
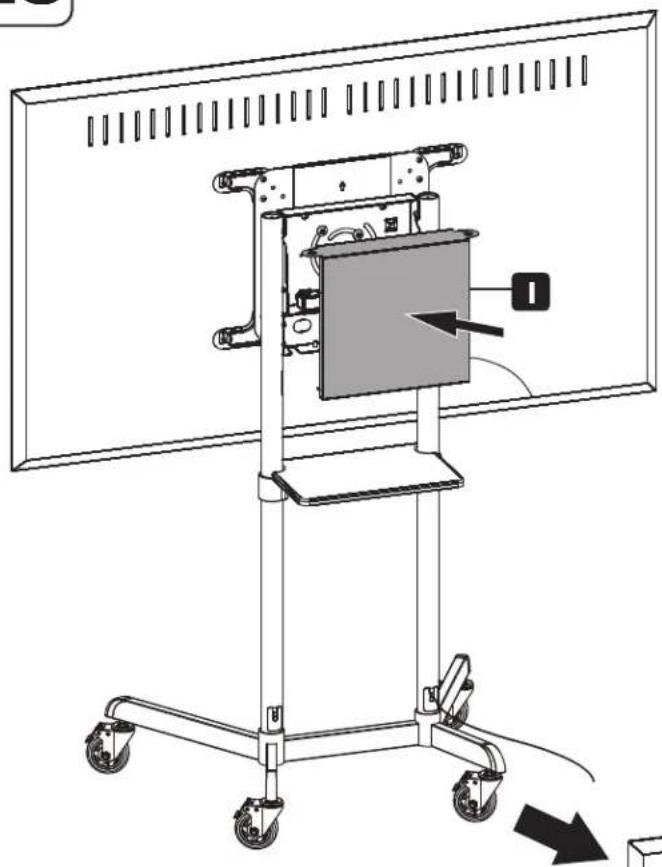
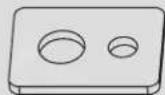
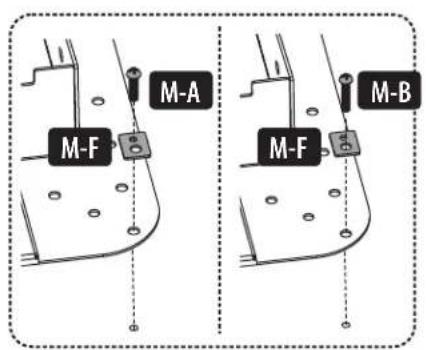
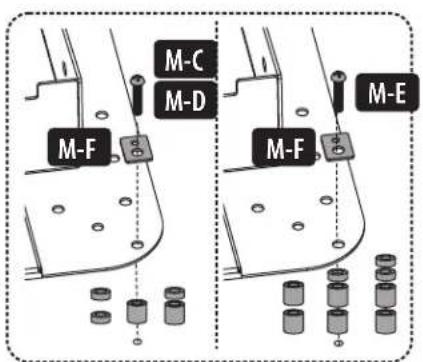
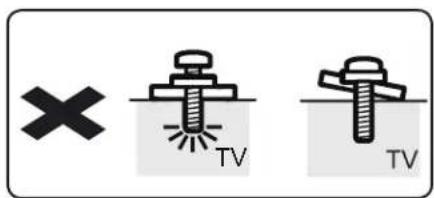
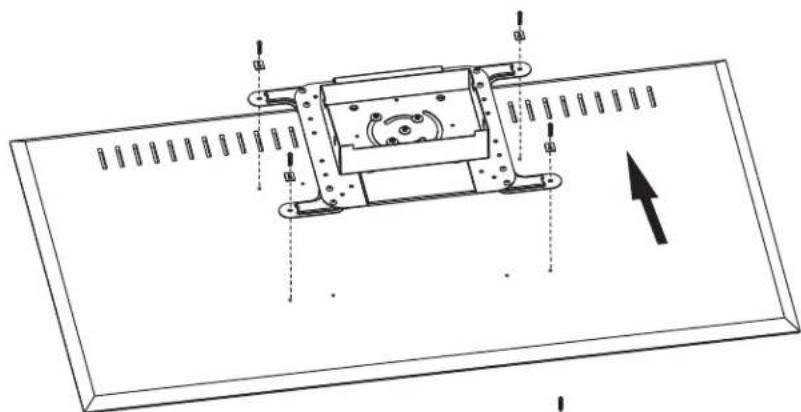
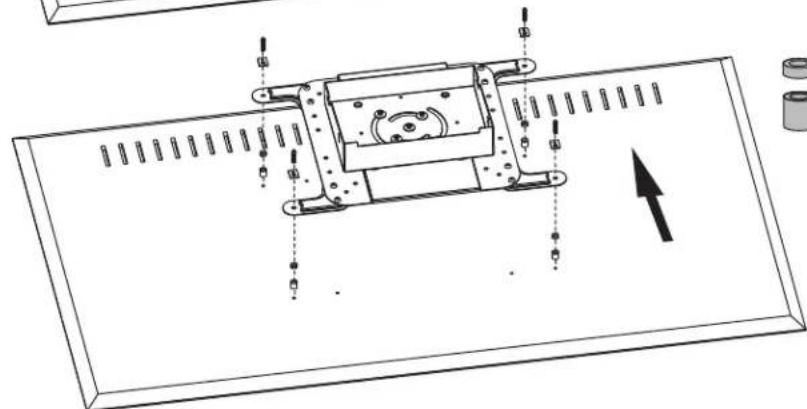
Attaching the Mounting Plate to the Display
VESA 200x200 / 300x300 / 350x350 / 400x200/ 400x400

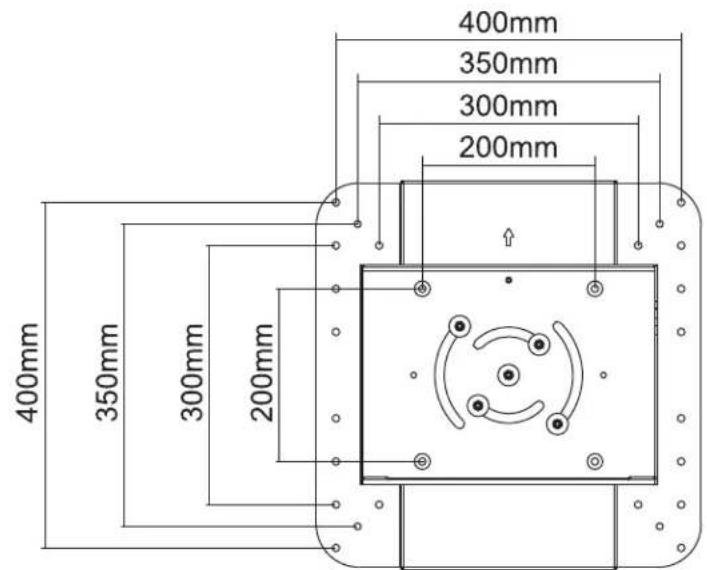
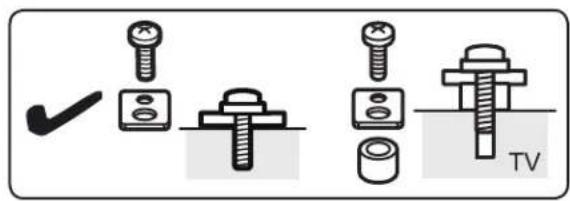


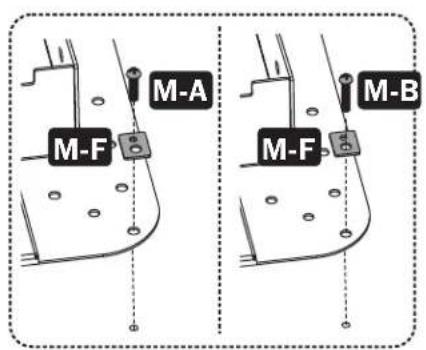
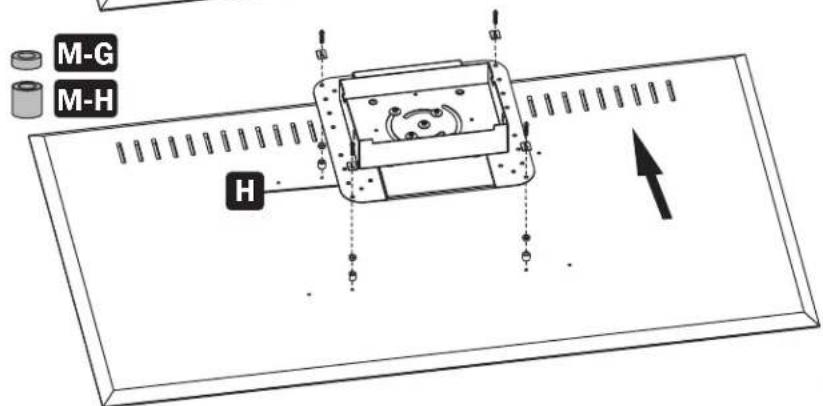
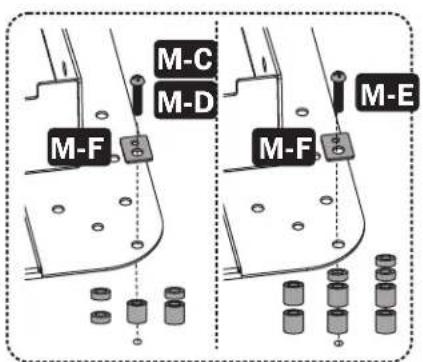
Note: Choose the appropriate screws, washers and spacers (if necessary) according to the type of screen.
Assembly and Installation

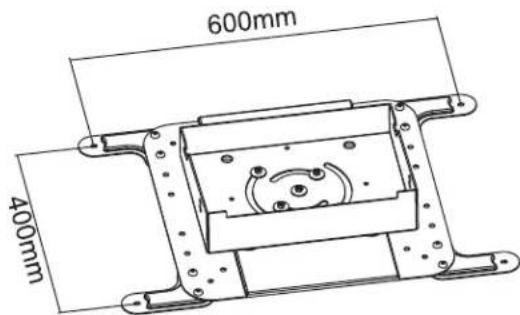
6B-1: Installing the VESA Extension Adapter Arms
VESA 600 x 200


VESA 600 x 400
Assembly and Installation

6B-2: Attaching the Mounting Plate to the Display


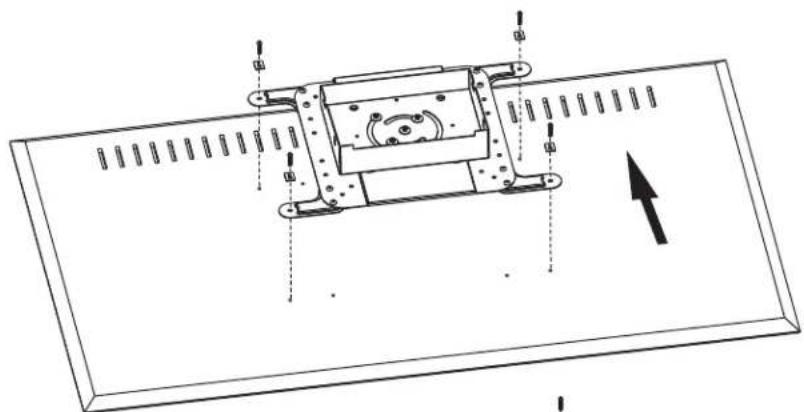

Note: Choose the appropriate screws, washers and spacers (if necessary) according to the type of screen.
Assembly and Installation

CAUTION: Adjust the columns to the desired height before installing the display. To adjust the height of the columns after the display is installed, remove the equipment shelf before adjusting the columns to the desired height.
Assembly and Installation

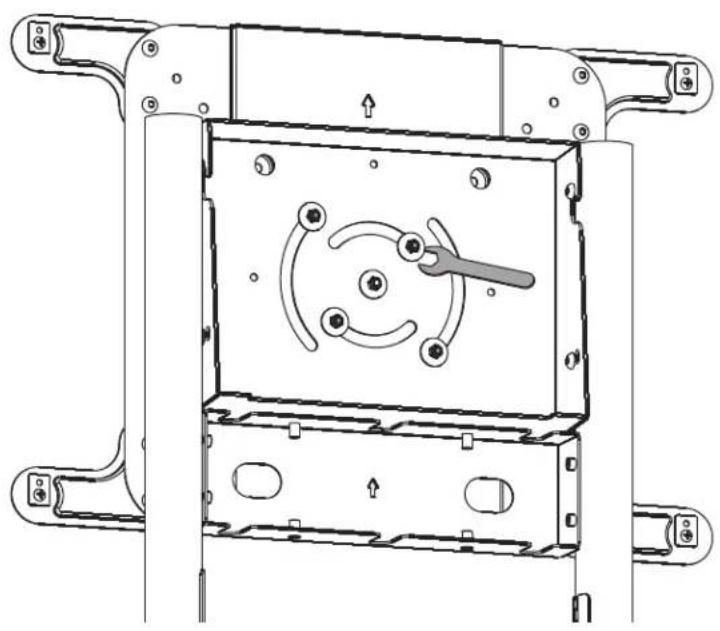
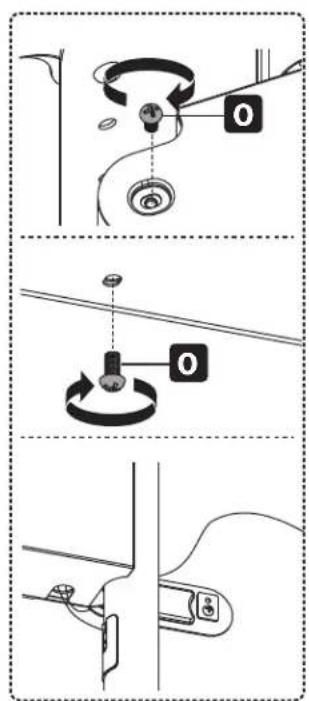
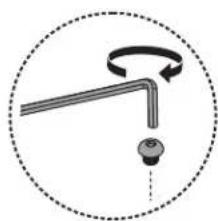
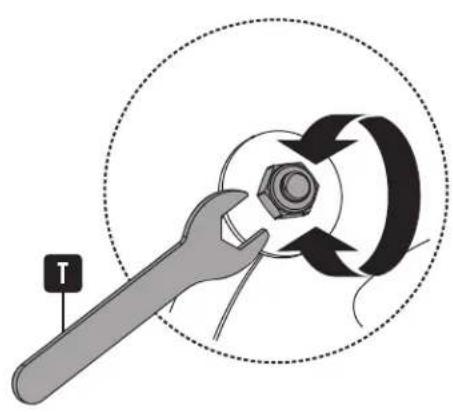
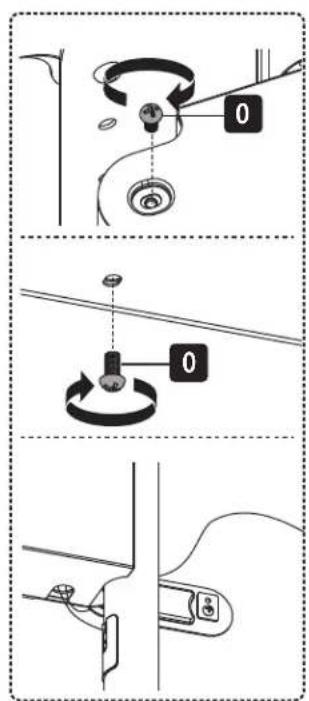
Adjusting the Tilting Angle of the Display


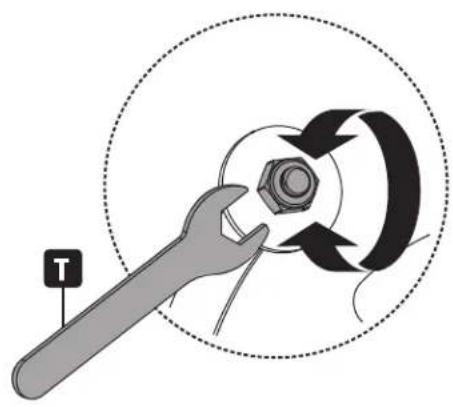
Adjusting the Rear Bolts Securely
Assembly and Installation

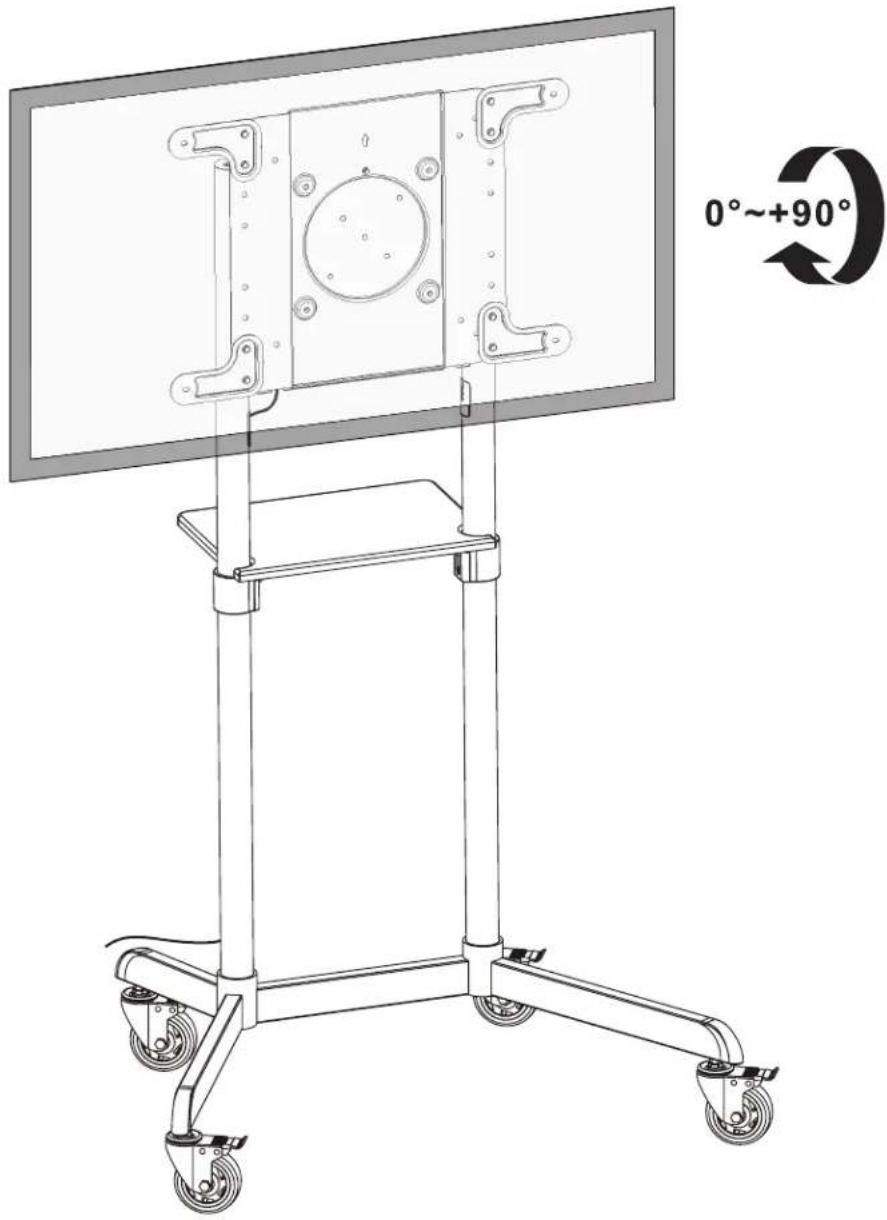
Fixing the Display in Landscape / Portrait Position (Optional)

Assembly and Installation

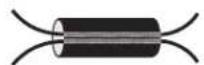
Routing the Cables


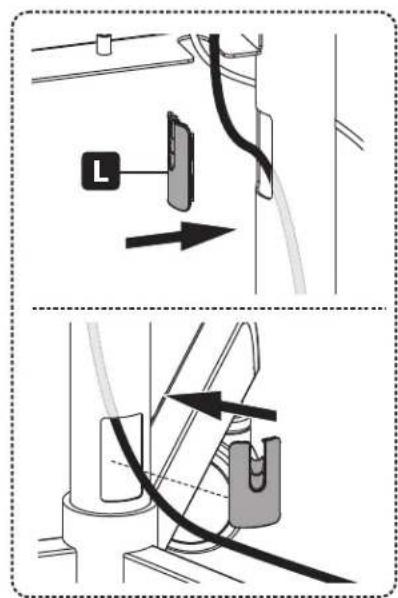
11B-1: Attaching the Cable Clip Holders
Assembly and Installation
11B
11B-2: Routing Cables through the Cable Clips
Assembly and Installation

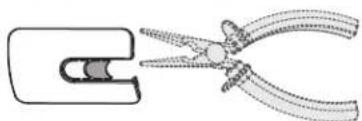
Attaching the Cable Covers


2a

2b


2c

Assembly and Installation

Attaching the Rear Cover


Assembly and Installation

Maintenance
- Check at regular intervals (at least every three months) to be sure the bracket remains secure and safe to use.
- Please visit tripplite.com/support if you have any questions.


Manufacturing Excellence
1111 W. 35th Street, Chicago, IL 60609 USA · triplite.com/support
1111 W. 35th Street, Chicago, IL 60609, EE UU · triplite.com/support

W
Have Hexagonal
de 5 mm (x1)
Paquete M

M-A
M5 x 14
(x4)
M-B
M6x14
(x4)
M-C
M6 x 30
(x4)
M-E
M8×50
(x4)
M-F
Arandela
(x4)
1111 W. 35th Street, Chicago, IL 60609, EE UU • triplite.com/support
1111 W. 35th Street, Chicago, IL 60609 USA tripplite.com/support
1111 W. 35th Street, Chicago, IL 60609 USA triplite.com/support
PykoBODCTBO N0Ib30BaTeJia
He 3aTnBaTe do ynopa BnHTbI M.
C6opka n yctaHOBKa

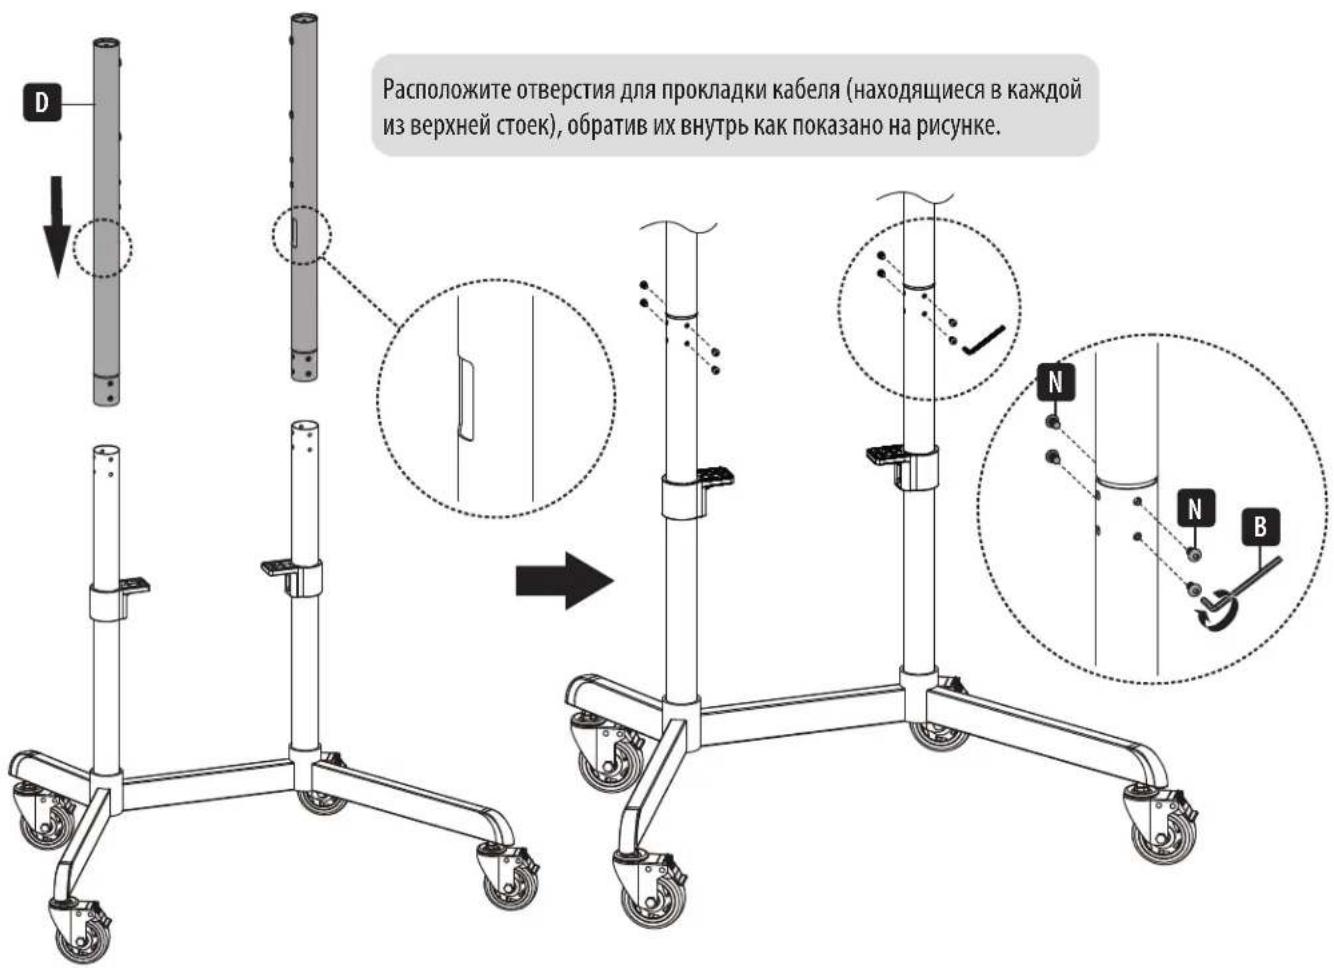
YCTaHOBkA CToeK

PacnoJoxnTe OTBepCTnaI npoknaIkn Ka6ena (HaxoJaIneCBA KKaIdoN3 BepxHei CToE), 6paTnB IV BHyTpB KaK NOKa3aHo Ha pncyHKe.
C6opka n yctaHOBKa
C6opka n yctaHOBKa
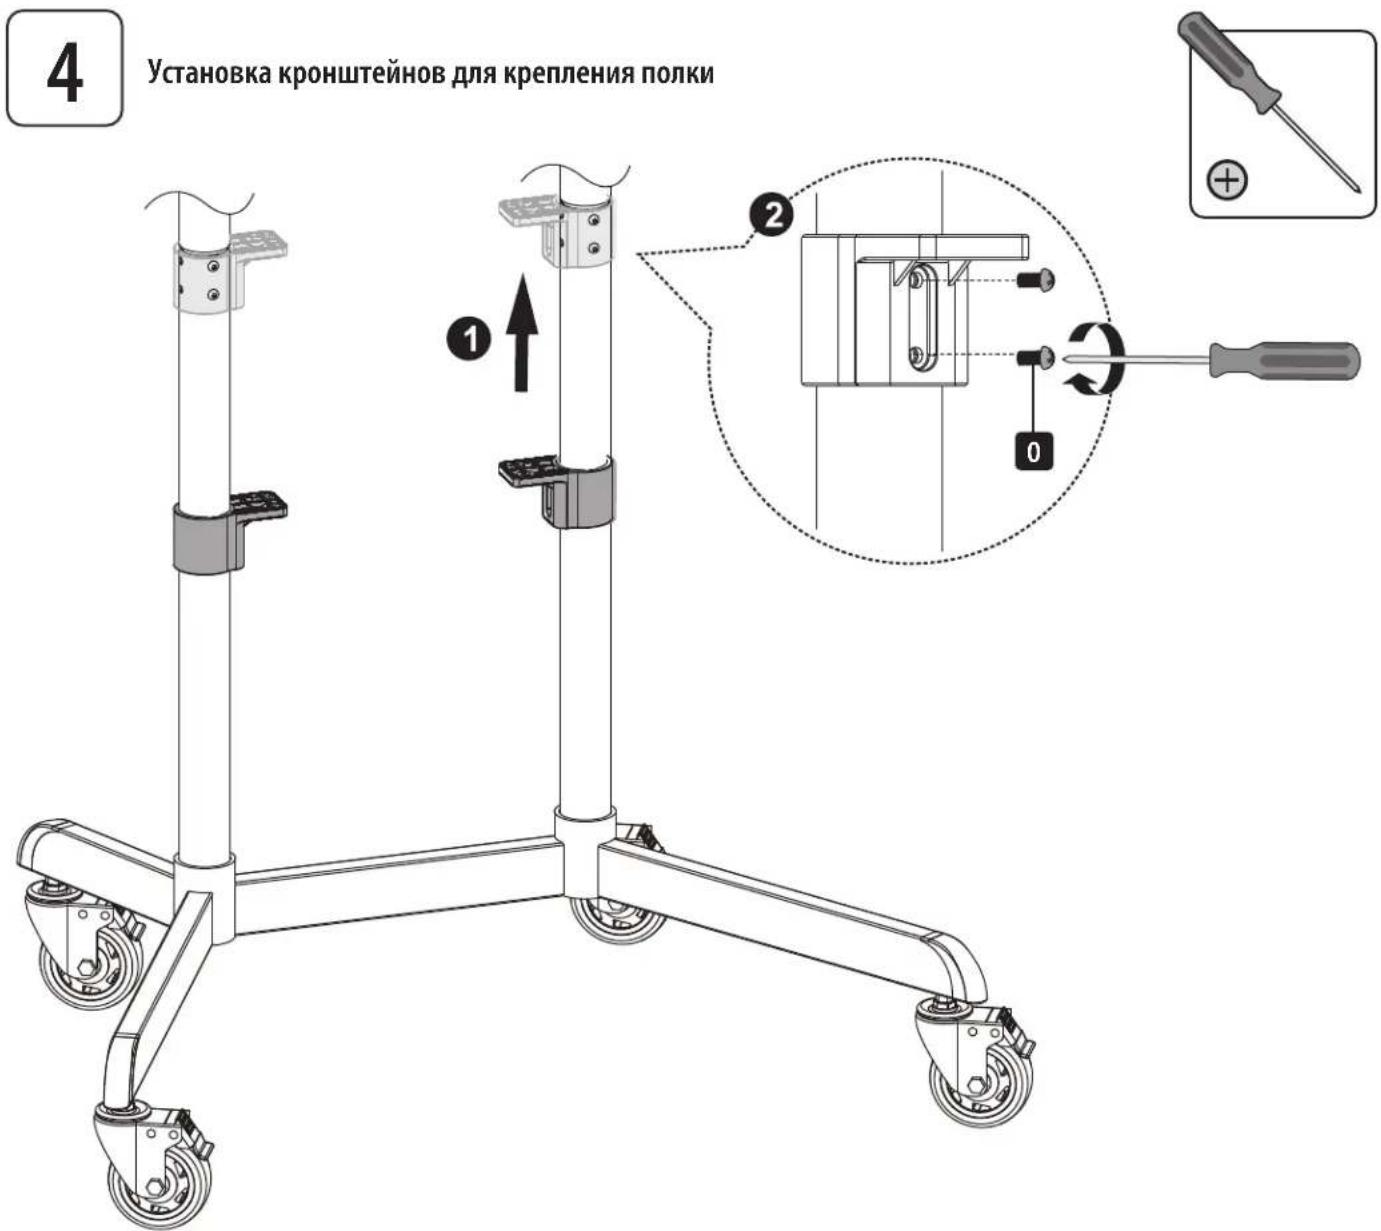
5
YcTahOBKa BepxHei 3aIyUkN I NpIKn DnI O6OpyObaHn

1 PaonoloxnTe G KaK nokazHa npCynKe, YTo6bl NueBa HaCTb G 60Jee dHHbIe CTOnKn HaxOINNCb Ha ODHc TOpOHe.

2 Y6eIITecb B TOM,HTO E N 60onee KopoTKe CToKn HaxoJATcH Ha ODHoN CTopoHe.
BHIMAHHE!3aTAHHTe do ynopa BnHTbI M NOJ OCHOBaHMeM.
C6opka n yctaHOBKa
6A
KpenneHme MoTtXkHOIJIaCTnHbIK DcNpJeIO
VESA 200x200 / 300x300 / 350x350 / 400x200/400x400


Ppumuehue. Bbepume coomemeyuue bunmbi, uaiobu npocmaa (npu neofoomcm) 8 coomemcu munm kpaHa.
C6opka n yctaHOBKa

6B-1:YcTaHObKa pa3DbNkHbIX coeDHHTeNbHbIX pbUarOB VESA
VESA 600 x 200
VESA 600 x 400


C6opka n yctaHOBKa
6B
6B-2:KpenneHMe MOHTaXHOI nlaCTnHbI K dncnJeIO


Ppumueaue. Bbepume coomemcmyuue buhms, uabby npocmaekn (npu neo6xodmucm) coombemcmbu c munom kpaHa.
C6opka n yctaHOBKa
7 KpenneHne duCnpeHa BnHTax


BHMMAHNE! Npepe yctaHOBKo DNcPnE OtperynpuYte BbICOTy onOpHBIX CToe.K. Dna perynnpOBKn BbICOTb CToeK noCte yCTaHOBKn DNcPnE CHMNTe PONky dnoobopyoHa, npexJe Yem 3aФNKCuPOBaTb CTouKn Ha HxHHO BbICOTe.
C6opka n yctaHOBKa
8 Perynnpobka yrna haknoha dincnne
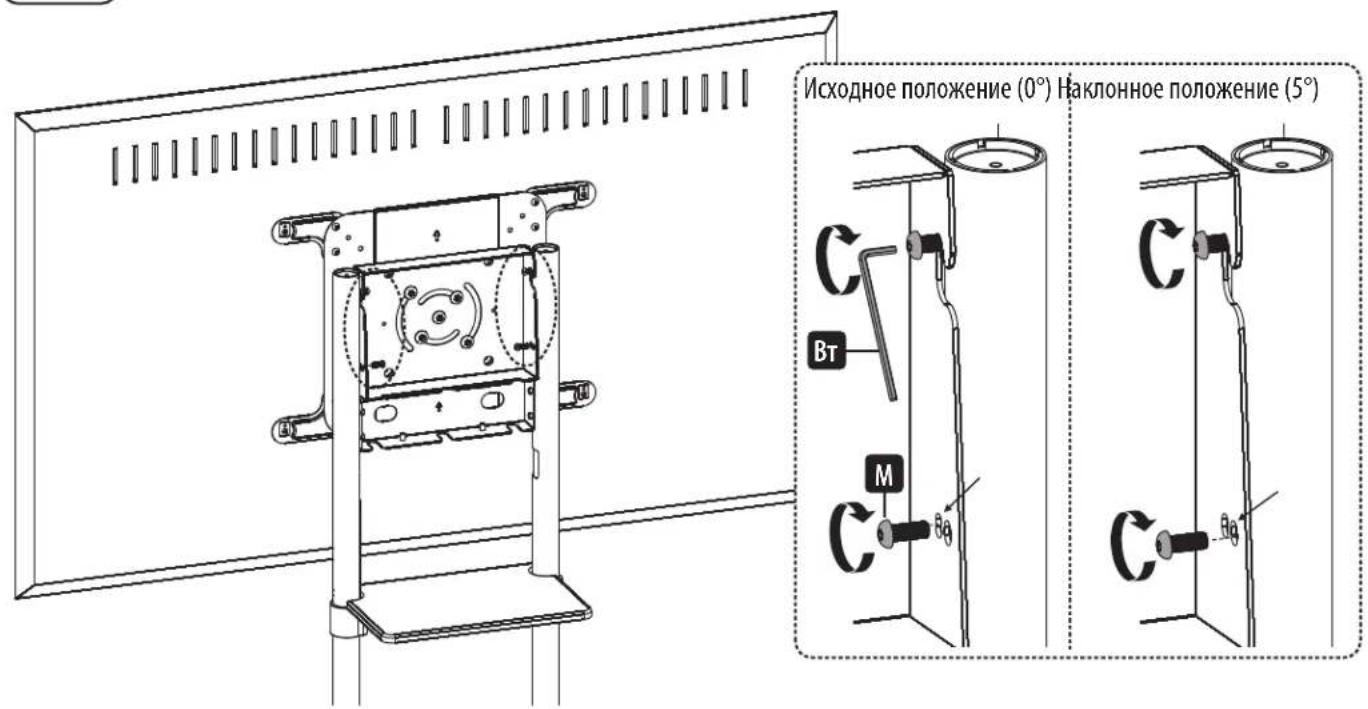
9 Perynipobka 3aHnx 6oTob c fHKcauei

C6opka n yctaHOBKa
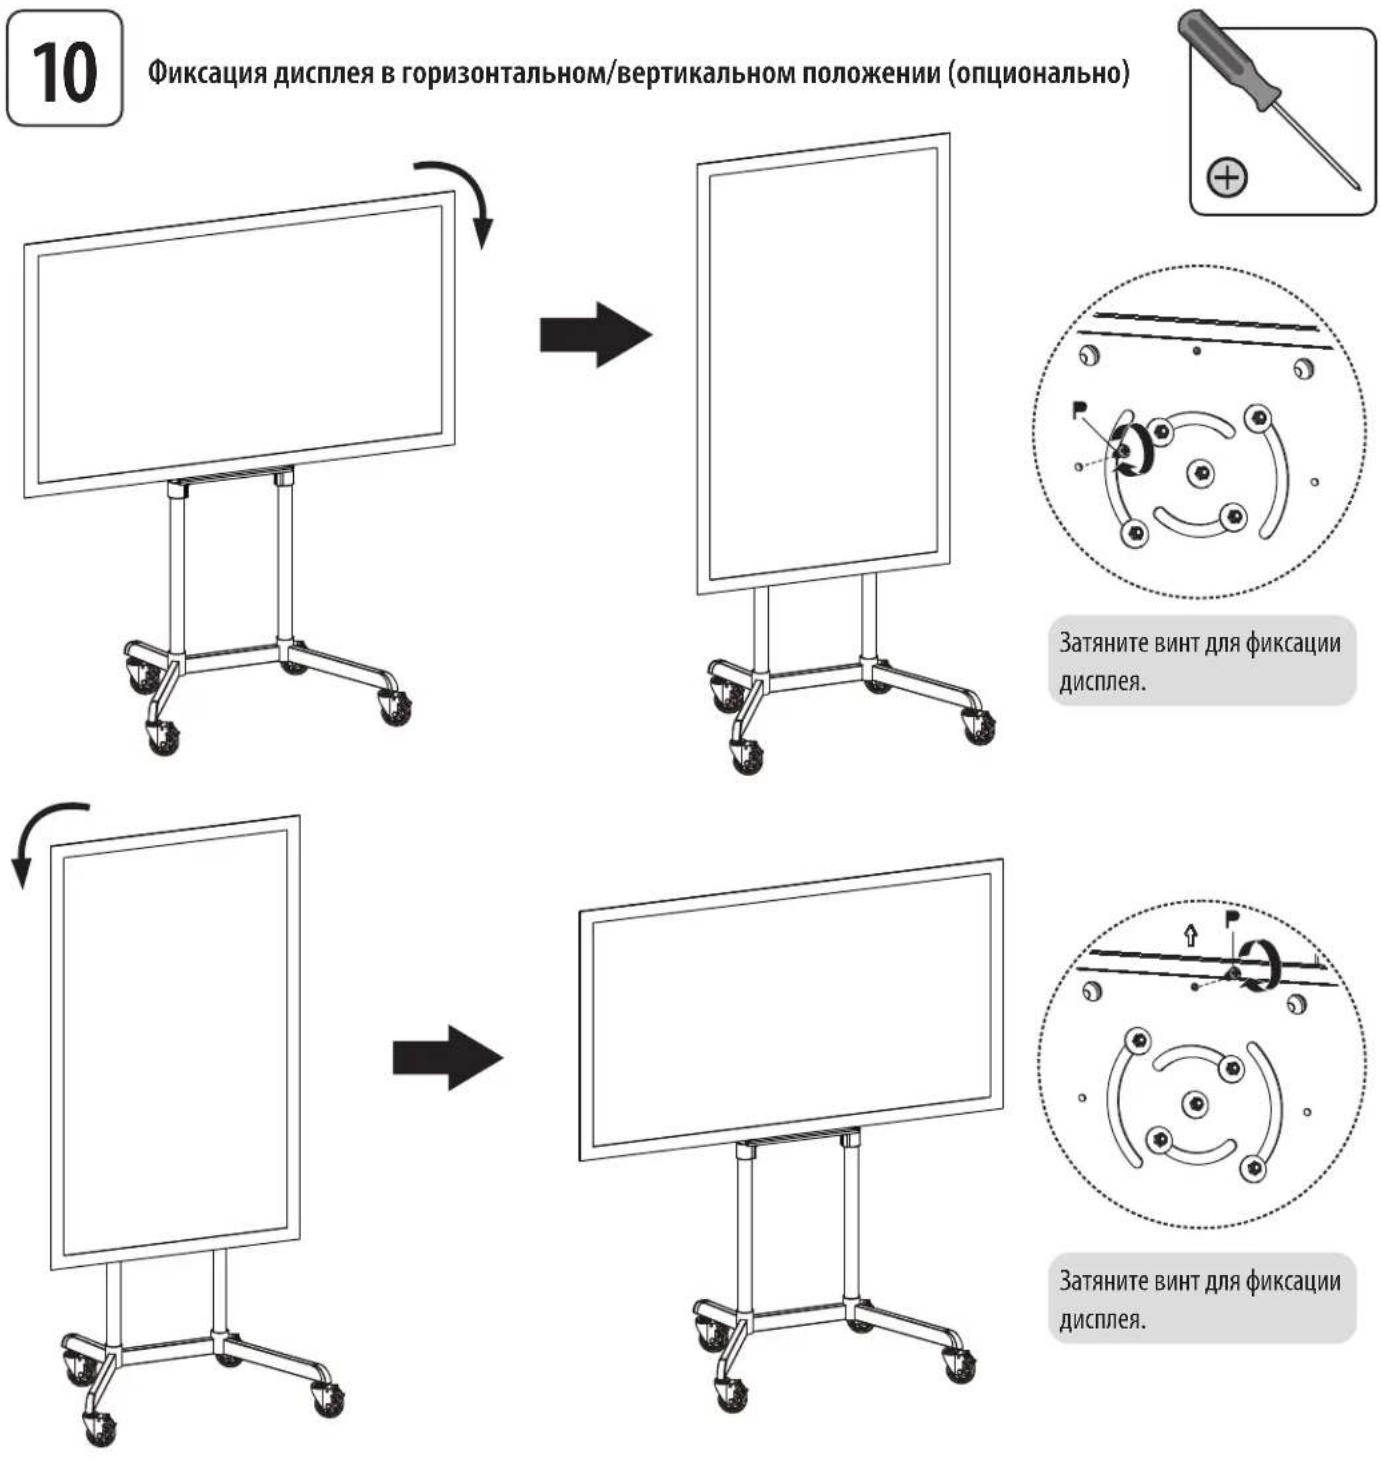
C6opka n yctaHOBka
11A
IpoKnaKa Ka6eNei


11B
11B-1:KpenenHe NepKaTeNe Ka6eNbHbIX XoMyTOB
11B
11B-2:Прokладka ka6eNeчep3 ka6eNbHbIe xOMyTbI

C6opka n yctaHOBKa

Kpenenne 3aunTHbIX KpbIweK Ka6ebHbIX KaHaNoB


2a


2b


2c


C6opka n yctaHOBKa

Kpenenne 3aAne 3arLyukn


C6opka n yctaHOBka
14
TexHmueckoe 6cnyKuBaHne
Peynphno (he pexe, yem pa3 B tpr meca) npoepeyte hadekhoct kpeenneH KpoHtmeHa H 6e03napocht ero nCIOJIb3OBAHNA.
B cnuyae Bo3nHKOBHeMa KaKx-1n6 BoNpocOB nocTe nte triplite.com/support.


1111 W. 35th Street, Chicago, IL 60609 USA • tripplite.com/support
Manufacturing Excellence
1111 W. 35th Street, Chicago, IL 60609 USA · triplite.com/support