Millenia LP Trio - Soundbar Paradigm - Free user manual and instructions
Find the device manual for free Millenia LP Trio Paradigm in PDF.

| Brand | Paradigm |
| Model | Millenia LP Trio |
| Product Type | Passive Soundbar |
| Rated Power | 50 W (as per example in manual) |
| Power | Passive, requires external amplifier |
| Connections | Push terminals accepting bare wires or pins |
| Mounting | Wall or table mount (wall bracket and table screws included) |
| Recommended Cable Gauge | 16 AWG up to 4.5 m, 14 AWG up to 9 m, 12 AWG beyond |
| Care and Cleaning | Soft damp cloth, avoid abrasive or corrosive products |
| Safety | Secure mounting to prevent falling; use screws suitable for wall and weight |
| Warranty | 5 years against defects in materials and workmanship |
| Recycling (Europe) | Compliant with WEEE directive; free take-back by distributor |
| Break-in | Several hours of use for optimal sound |
| Operating Temperature | Above 10 °C (50 °F) to prevent ferrofluid thickening |
Frequently Asked Questions - Millenia LP Trio Paradigm
User questions about Millenia LP Trio Paradigm
0 question about this device. Answer the ones you know or ask your own.
Ask a new question about this device
Download the instructions for your Soundbar in PDF format for free! Find your manual Millenia LP Trio - Paradigm and take your electronic device back in hand. On this page are published all the documents necessary for the use of your device. Millenia LP Trio by Paradigm.
USER MANUAL Millenia LP Trio Paradigm
natural_image
Simple 3D line drawing of a rectangular frame with diagonal lines, no text or symbols present
natural_image
Pure electrical circuit lines without any symbolsMILLENIA™ LP TRIO
OWNERS MANUAL
IMPORTANT: READ BEFORE WALL-MOUNTING YOUR SPEAKERS.

Wall mount your speaker securely enough so that it cannot fall and cause personal injury or damage to property.

Paradigm DOES NOT supply hardware for mounting speakers to the wall. Hardware shown in this manual is for example only and will vary depending on the wall type. Always use screws appropriate for wall type and weight of speakers.

If installing into drywall, install into 1/2" (13 mm) or 5/8" (16 mm) drywall only. Screws must be long enough to go through anchor bolts (not supplied) and firmly into drywall.
NON LIABILITY: We are aware that the mounting assemblies provided for speaker in this manual could be used for purposes and in ways other than those for which they were intended. The manufacturer, distributor, retailer and their respective agents cannot be held responsible or liable for injuries or property damage—direct, indirect or consequential—arising from the use of or inability to use these products safely and properly. Every effort has been made to provide accurate, error-free installation instructions. Paradigm Electronics Inc. disclaims liability for difficulties that may arise from the misinterpretation of information contained in these instructions.

RECYCLING AND REUSE GUIDELINES (Europe)

In accordance with the European Union WEEE (Waste Electrical and Electronic Equipment) directive effective August 13, 2005, we would like to notify you that our speakers may contain regulated materials which, upon disposal, require special reuse and recycling processing. For this reason Paradigm Electronics Inc. (the manufacturer of Paradigm speakers and Anthem electronics products) has arranged with its distributors in European Union member nations to collect and recycle this product at no cost to you. To find your local distributor please contact the dealer from whom you purchased this product or go to our website at www.paradigm.com.
Please note that only the product falls under the WEEE directive. When disposing of packaging and other shipping material we encourage you to recycle through the normal channels.
TABLE OF CONTENTS
Your New Speaker....2
How To Avoid Speaker Damage ..... 2
Your Listening Room .... 3
Placement 4
Connection....4
Installation....5
Troubleshooting 6
Limited Warranty 7
Wall Mounting
(mounting screws not provided)

text_image
Technical schematic diagram of a mechanical or optical system with labeled components and directional arrows
natural_image
Pure mechanical part diagram showing a diagonal line with mounting holes and a central rectangular feature (no text or symbols)Table Top Mounting
(mounting screws provided)

natural_image
Technical line drawings of three mechanical components: a screw, a bracket with a nut, and a flat nut (no text or symbols)YOUR NEW SPEAKER
Break-In
Although your speaker will sound great 'out of the box', it will sound even better once it's 'broken in.' Allow your speaker to play for several hours before you begin to listen critically.
Drivers use ferro-fluid that can thicken at temperatures below 10^ C ( 50^ F). Surround material used in the bass/midrange units is made of a compound that may stiffen in colder temperatures. If your speaker has been transported or stored in the cold, let it warm to room temperature before use.
Cleaning
Your speaker has a premium finish that must be treated with care. Use only a damp, soft cloth to clean. Never use strong, abrasive or corrosive cleaning products. Common household cleaning products should be avoided.
Speaker Grilles
Your speaker is designed to be played with the grille either on or off.
HOW TO AVOID SPEAKER DAMAGE
To prevent damage to your speaker, please read the following guidelines before hooking it up
Amplifier Distortion — The #1 Culprit!
Amplifier distortion is the principle cause of speaker damage. When listening at higher volume levels, your amplifier may run out of clean power and begin to produce a distorted signal if levels are increased any further. This will damage any brand of speaker very quickly. (See your Authorized Paradigm Dealer for amplifier recommendations).
A More Powerful Amplifier is Safer
When choosing an amplifier, always select an amplifier with a power rating greater than that of the speaker. Using a 100 watt per channel amplifier on a 50 watt speaker allows the amplifier adequate headroom in order to provide a distortion free signal. Conversely, using a 40 watt per channel amplifier on a 50 watt speaker limits the amplifier's headroom. This causes the amplifier to enter its distortion level much sooner, potentially damaging the speaker.
Volume Control
Do not be fooled by the Volume Control of your receiver/preamplifier. It only adjusts listening level—it is not a "power-output" dial. The amount of amplifier power actually used at a given Volume Control setting depends solely on the nature of the music you are listening to.
At a given Volume Control setting a quiet section of music will use less amplifier power than a loud section. With typical pop-rock, jazz or large scale classical music, the rated output power of many receivers/amplifiers is often reached when the Volume Control is between the "11 and 1 o'clock" settings (with bass/treble and loudness controls not used—otherwise rated power may be reached at even lower Volume Control settings).
HOW TO AVOID SPEAKER DAMAGE (continued)
Remember, all amplifiers produce distortion when operated beyond their rated output power. The resulting distortion will damage all speakers! Exercise caution! If you listen at loud levels, be careful to listen for the point of audible distortion—if the speakers begin to sound distressed turn the Volume Control down or your speakers and/or amplifier(s) will be damaged! This type of damage constitutes abuse and is not covered by the warranty. If louder volumes are desired, obtain a more powerful amplifier.
There is a Limit!
Although more powerful amplifiers are safer, there is a point at which you could have more power than the speaker can handle. At that point you will overpower the speaker and damage it. Exercise caution! At loud levels do not increase bass/treble controls from zero and ensure that all loudness/contour/bass EQ buttons are off (otherwise rated output power will be reached at lower volume control settings).
The Right Amount of Power
A power-range rating is given as a guide to indicate the approximate minimum and maximum power input of your Millennia LP Trio speaker. Amplifiers that exceed your speaker's power-range rating are recommended. Their greater power reserves provide better sound. However, exercise caution! Use the speakers within their power-range rating to prevent damage (keep listening levels below the point of excessive woofer cone excursion).
YOUR LISTENING ROOM
Your speaker is designed to provide state-of-the-art sound in a wide variety of domestic settings. Note however, that room construction, dimensions, even furnishings all play a part in the quality of sound you ultimately achieve. Your listening room will impose its own character on the performance capabilities of any speaker system. The extra care taken in installation will result in greater listening enjoyment. Try to follow these guidelines:
- Mid and high frequencies are affected by the amount of soft furnishings in your room—curtains, carpets, sofas, wall coverings, etc. An excess of such items can result in a somewhat dull sound. The same room without any soft furnishings can produce an overall bright sound. The typical quantity of soft furnishings found in most living environments provides the right acoustic characteristics to allow the speakers to sound balanced;
- Concrete floors and walls tend to aggravate low-frequency standing wave problems and are less preferred;
- Rooms where height, width and length are similar should be avoided as they can exhibit significant low-frequency standing wave problems. This may result in reduced clarity. If no other room is possible, experiment with speaker placement to minimize problems.
PLACEMENT
Accurate Timbre
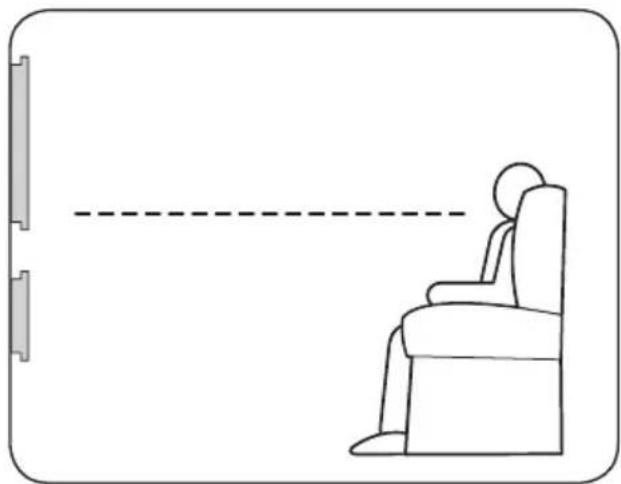
For the most accurate and natural timbre, position speaker so that sound from the high-frequency drivers reaches the listener at approximately ear level. Keep in mind, your speaker will allow for higher than usual placement of the high-frequency drivers, a particularly important feature when wall mounting.
natural_image
Line drawing of a person seated in a chair facing a dashed line, with no text or symbols present.CONNECTION
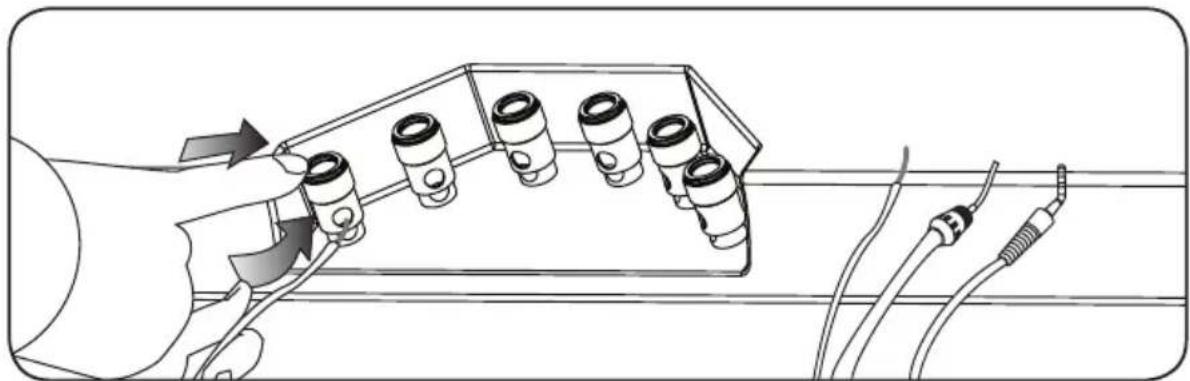
Make sure to turn your amplifier off before making or breaking any signal connections! Millenia LP Trio is designed with easy-to-use push-style binding posts that accept bare wire or pins. Assign the same colour to the (+) and (-) terminals on both the speaker and the amplifier. Make certain that all connections are tight.
natural_image
Diagram of a mechanical assembly with multiple cylindrical components and wires, no visible text or symbolsThe following chart identifies the minimum gauge requirements for various cable lengths:
| MINIMUM GAUGE REQUIREMENTS | ||
| LENGTH | DIAMETER | GAUGE |
| Under 4.5 m (15 ft) 1.3 mm | (0.05 in) 16 awg | |
| Under 9 m (30 ft) 1.6 mm (0.06 in) | 14 awg | |
| Over 9 m (30 ft) 2.0 mm (0.08 in) | 12 awg | |
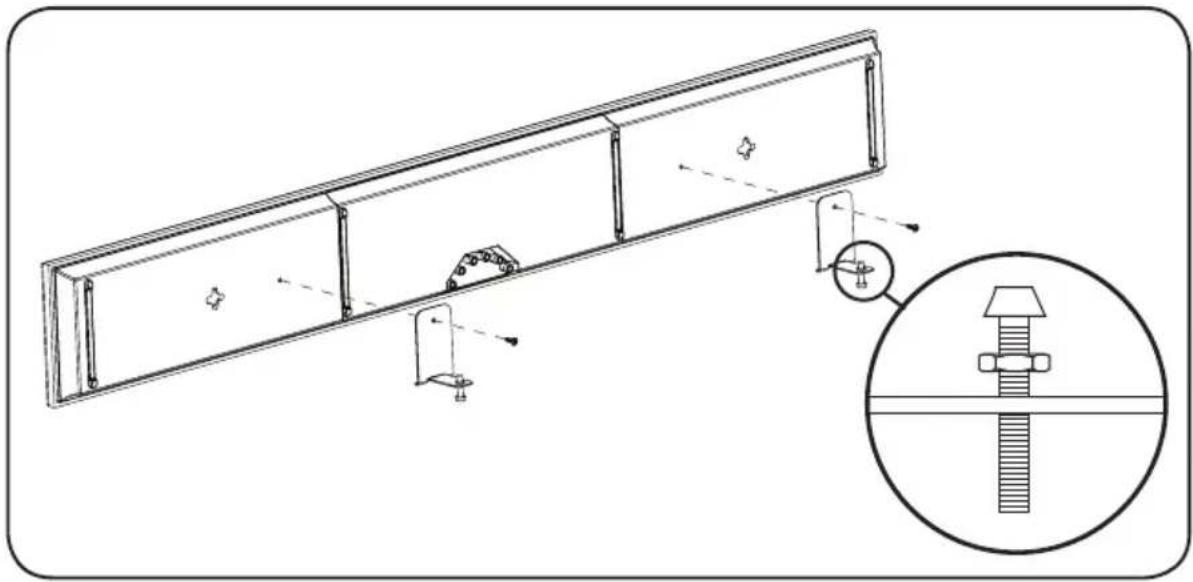
INSTALLATION
If you are not comfortable performing the following instillation procedure, have a professional perform the installation (see your dealer about hiring a professional).
Wall Mounting:
Required tools (Not included):
- Ruler
- Level
• Electric drill and 1/4" (6.35 mm) and 1/8" (3.175 mm) drill bits - Screwdriver
- 3 - 1-1/2" (38.1 mm) screws
Required tools (Included):
- Wall template
-
Wall bracket
-
Locate mounting location using a level and the installation template.
- Mark the pilot hole locations.
- Drill the pilot holes using a 1/8" drill bit. If a pilot hole DOES NOT hit a stud, widen that pilot hole using a 1/4" drill bit and install a wall anchor at that location.
- Using appropriate screws, mount the wall bracket as shown.
- Hold the speaker, guiding the wall mount bolts into the keyholes.

natural_image
Technical line drawing of a mechanical assembly with no visible text or symbols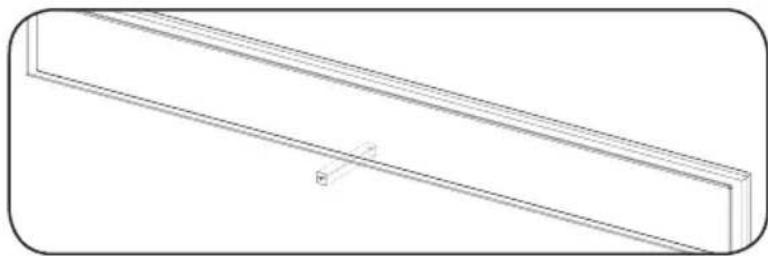
natural_image
Pure technical line drawing of a rectangular beam or support structure without any text, numbers, or symbolsThe grille logo is magnetic and can be removed.
INSTALLATION (continued)
Tabletop:
Required tools (Not included):
- Phillips screwdriver
Required tools (Included):
• Tabletop Mounting Brackets
- 2 - #8 x 3/4" screws
1. Using a phillips screwdriver and #8 x 3/4 inch screws, attach both horizontal stands (supplied) to the back of the speaker.
2. Turn the bolts in the horizontal stands to level the speaker or to adjust the angle.
natural_image
Technical line drawing of a mechanical assembly with mounting bracket and bolt, showing internal components and alignment (no text or symbols)TROUBLESHOOTING
| SOLUTIONPROBLEM | |
| No Sound | Make sure receiver, preamp or amplifier is plugged in and turned on.Check power outlet at the wall is working.Are headphones plugged in, or is the system on Mute?Re-check all connections. |
| No Sound from One or More Speakers | Check your balance control.Check that all power cords are properly plugged in and functioning. |
| Lack of Bass or Dislocated Image | One or more speakers may be connected out of phase (their polarity is reversed).Re-check to ensure that each speaker's cable is connected with correct polarity: red (+) to red (+) and black (-) to black (-). |
LIMITED WARRANTY
Your new speaker is warranted to be and remain free of manufacturing and/or material defects for a period of five (5) years from the date of original purchase. Within the time period specified, repair, replacement or adjustment of parts for manufacturing and/or material defects will be free of charge to the original owner.
Thermal or mechanical abuse/misuse is not covered under warranty.
Limitations:
- Warranty begins on date of original retail purchase from an Authorized Paradigm® Reference Dealer only. It is not transferable:
- Warranty applies to product in normal home use only. If product is subjected to any of the conditions outlined in the next section, warranty is void:
- Warranty does not apply if the product is used in professional or commercial applications.
Warranty is Void if:
• The product has been abused (intentionally or accidentally);
- The product has been used in conjunction with unsuitable or faulty equipment;
- The product has been subjected to damaging signals, derangement in transport, mechanical damage or any abnormal conditions:
- The product (including cabinet) has been tampered with or damaged by an unauthorized service facility;
• The serial number has been removed or defaced.
Owner Responsibilities:
- Provide normal/reasonable operating care and maintenance;
- Provide or pay for transportation charges for product to service facility;
- Provide proof of purchase (your sales receipt given at time of purchase from your Authorized Paradigm® Reference Dealer must be retained for proof-of-purchase date).
Should servicing be required, contact your nearest Authorized Paradigm® Reference Dealer, Paradigm Electronics Inc. or Import Distributor (outside the U.S. and Canada) to arrange, bring in or ship prepaid, any defective unit. Visit our website, www.paradigm.com for more information.
Paradigm Electronics Inc. reserves the right to improve the design of any product without assuming any obligation to modify any product previously manufactured.
This warranty is in lieu of all other warranties expressed or implied, of merchantability, fitness for any particular purpose and may not be extended or enlarged by anyone. In no event shall Paradigm Electronics Inc., their agents or representatives be responsible for any incidental or consequential damages. Some jurisdictions do not allow limitation of incidental or consequential damages, so this exclusion may not apply to you.
Retain this manual and your sales receipt for proof of warranty term and proof of purchase.

text_image
P Paradigm®natural_image
Simple line drawing of a rectangular frame with diagonal lines, no text or symbols present
natural_image
Pure electrical circuit lines without any symbolsMILLENIA ^MC LP TRIO
MANUEL DE L'UTILISATEUR

Please note that only the product falls under the WEEE directive. When disposing of packaging and other shipping material we encourage you to recycle through the normal channels.
TABLES DES MATIÈRES
(vis de montage non fournies)

text_image
Technical schematic diagram of a mechanical assembly with labeled components and motion indicators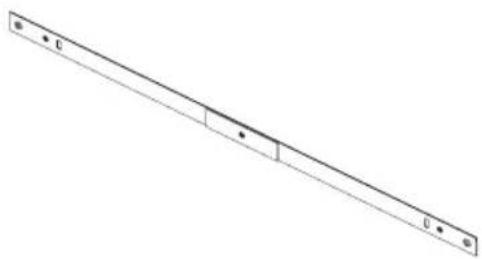
natural_image
Pure mechanical part diagram showing a diagonal line with mounting holes and a central rectangular feature (no text or symbols)natural_image
Technical line drawing of a screw, a bracket, and a nut (no text or symbols)VOTRE NOUVELLE ENCEINTE
Rodage
natural_image
Line drawing of a person seated in a chair facing a wall, with no text or symbols present.RACCORDEMENT
natural_image
Diagram of a hand connecting a device to wires, showing cable routing and connector placement (no text or symbols)Outils requis (non inclus):
Outils requis (inclus):
natural_image
Technical line drawing of a mechanical assembly with mounting brackets and a rectangular frame (no text or symbols)
natural_image
Pure 3D geometric diagram of a rectangular prism with diagonal lines and an angle label (no text or symbols)Outils requis (non inclus):
- Tournevis cruciforme
Outils requis (inclus):
natural_image
Technical line drawing of a mechanical assembly with mounting bracket and inset view of a bolt (no text or symbols)DÉPANNAGE