USER MANUAL DTR 4500 GRUNDIG
Do not drop the device and do not expose it to liquid, moisture or humidity. These might lead to damage to the device.
- If the device is moved from a cold environment into a warmer one, do let it adapt to the new temperature before operate the device. Otherwise, it might lead to condensation and cause malfunctions in the device.
- Do not use the device in the dust environment as dust can damage the interior electronic components and lead to malfunctions in the device.
- Protect the device from strong vibrations and place it on stable surfaces.
- Do not attempt to disassemble the device.
- If the device is not using for a long period of time, disconnect it from the power supply by unplugging the power plug. This is to avoid the risk of fire.
- The ventilation should not be impeded by covering the ventilation openings with items, such as newspapers, tablecloths, curtains, etc.
- No naked flame sources, such as lighted candles, should be placed on the apparatus.
- To maintain the compliance with the RF exposure requirement, place the product at least 20~cm (8 inches) from nearby persons except when operating the controls.
Power Supply

outlet should be installed near the device and should be easily accessible.
- Never touch the power plug with wet hands and never pull on the power cable when pulling the plug out of the power socket.
- This lightning flash with arrowhead symbol within an equilateral triangle is intended to alert the user to the presence of non-insulated "dangerous voltage" within the product's enclosure that may be of sufficient magnitude to constitute a risk of electric shock.
- The exclamation point within an equilateral triangle is intended to alert the user to the presence of important operating and maintenance instructions in the literature accompanying the appliance.
- Make sure the electrical voltage specified on the device and its power plug is corresponding to the voltage of the power socket. Do not apply excessive or incorrect voltages to the device, the device may not function properly and have an adverse effect on external circuitry. Furthermore, the device itself may become damaged or burnt.
-
The device is connected to the mains with the power adaptor. Pull out the power adaptor when you want to completely disconnect the device from the mains.
-
The normal function of the product may be disturbed by strong Electro-Magnetic Interference. If so, simply reset the product to resume normal operation by following the instruction manual. In case the function could not resume, please use the product in other location.
- Risk of explosion if the battery is replaced by an incorrect type-disposal of a battery into fire or a hot even, or mechanically crushing.
- Leaving a battery in an extremely high temperature surrounding environment that can result in an explosion or the leakage of falctable liquid or gas.
- A battery subjected to extremely low air pressure that may result in an explosion or leakage of flammable liquid or gas.
- The device may malfunction when used in areas with strong radio interference. The device will work properly again once there is no more interference.

The device is a class II or double insulated electrical appliance. It has been designed in such a
way that it does not require a safety connection to electrical earth. The type plate is located on the rear of the device.
Risks associated with high volumes
Listening the device with headphones, always reduce the volume before put on the
headphones. After the headphones are positioned properly, increase the volume to the desired level.
- To prevent possible hearing damage, do not listen at high volume for long periods.
Maintenance / Cleaning
- Always power off the unit when cleaning it.
- Never use any harsh or strong solvents to clean the device since these may damage the surface of the device. Dry, soft cloth is appropriate, however, if the device is extremely dirty, it may be wiped off with a slightly moist cloth. Make sure the device is dried off after cleaning.
- Never open the device casing, The manufacturer will not accept any liability for damage resulting from improper handling.
Dear Customer,
Congratulations on the purchase of your GRUNDIG Digital Radio DTR4500.
Please read the following instructions carefully in order to enjoy the use of your product with the Grundig quality for many years.
Responsible approach!

GRUNDIG focuses on contractually agreed social working conditions with fair wages for both internal employees and suppliers. Efficient use of the raw materials and reducing
plastic waste amount for a few tons each year are also contained amongst our priority targets. Moreover, all of our accessories can be used for at least 5 years.
For a future worth living.
Grundig.
Controls and Parts
See the figure on page 3.
- Display
- Tuning/Seek
- Preset BT Pair
- Standby/Mode
- Menu/Info
- Alarm/Back
- Knob (Play/Pause, Volume, Navigate, OK/ Scan)
- DAB/FM Antenna
- On/Off switch
- DC IN
- Headphone
- AUX IN
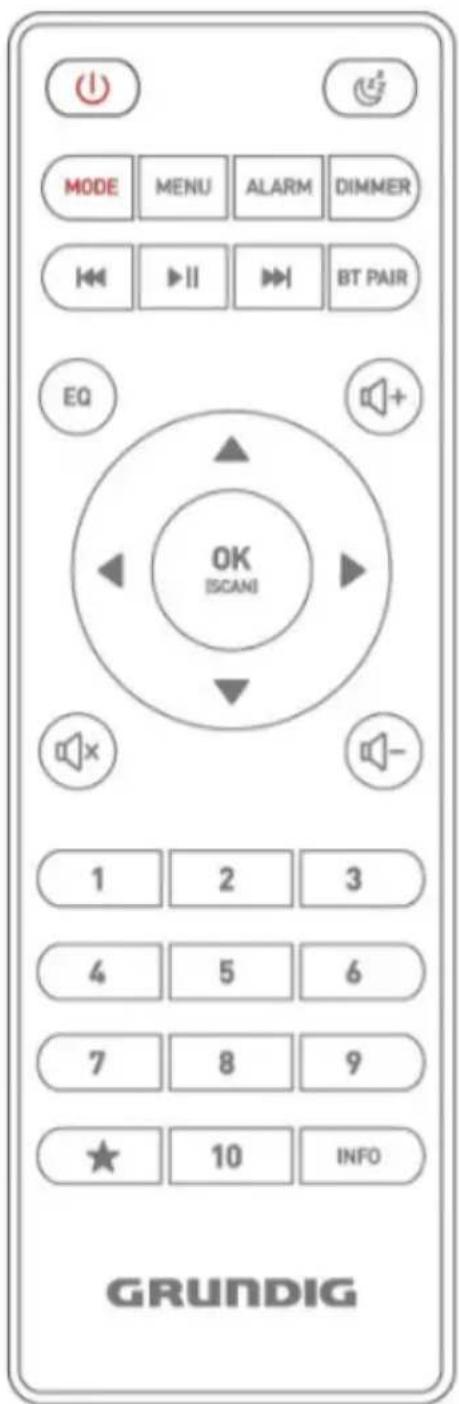
| 1 | Device power on/off; alarm off |
| 2 | Set sleep time; enable snooze during alarm |
| MODE | Open, close mode selection |
| MENU | Open, close menu |
| ALARM | Set Alarm |
| DIMMER | Adjust the backlight level |
| III | Start playback, pause |
| «» | Select track |
| BT PAIR | Hold down to turn Bluetooth discoverable |
| ▲ | Move up; FM: Set frequency |
| ▼ | Move down; FM: Set frequency |
| ↓ | Move left, step back |
| ► | Move right, step next |
| OK | Confirm entry; FM: DAB: slideshow in full screen |
| EQ | Select equalizer preset |
| × | Mute, unmute |
| + - | Adjust volume |
| 1...10 | Number buttons: retrieve saved favorite station, hold down to save station |
| ★ | Select favorite stations, hold down to save favorite |
| INFO | Display FM station info (Name, PTY, RT, fre-quence)Display DAB station info (station, track, artist etc.) |
Connection and Preparation
Connect to the speaker and power socket using the AC adaptor. Switch on the device, it starts up.
Connecting an audio source via AUX in
Use a standard 3.5mm audio cable to connect the audio output from the external device to the audio input sockets on the back of the device.
Connecting the headphones
- Turn the volume down before using the headphones.
- Insert the headphone plug (standard 3.5mm into the headphone socket at the back of the device.
GENERAL FUNCTIONS
On the playing screen, rotate the knob or press + /> on the remote control to adjust the volume. Switch off the sound by pressing on the remote control.
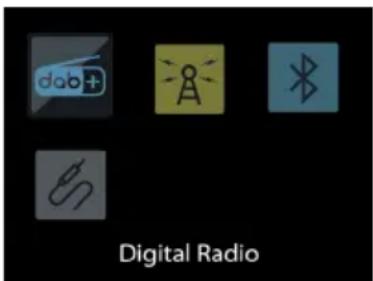
Press /MODE on the device or MODE on the remote control to select modes.
Press and hold MENU/INFO or MENU on the remote control to open the menu. Press it again to close the menu and return to playing screen.
On the menu, rotate the knob or press arrow keys on the remote control to move along the entries.
Press OK/SCAN to confirm; press ALARM/ BACK or on the remote control to step back.
Press and hold MODE on the device or press on the remote control to switch to standby mode. The time, date and any active alarm times display on the screen.
Press /MODE « on the device or press » « on the remote control to wake up from standby.
Presets
Number of presets: DAB+: 40IFM: 40
To store preset, press and hold PRESET/BTPAIRor until the display shows the save preset screen. Select one of the presets to save the currently playing station.
Store 1-10 preset stations by directly pressing and hold numbers 1 10 / 0 on the remote control.
To play a preset, press PRESET/BTPAIR or then select one of the listed preset stations. When a preset station is playing, it shows n (1, 2 etc) at the bottom of the screen. Recall 1-10 preset stations by directly pressing the number keys on the remote control.
While stream/DAB/FM is playing, the screen shows some information about the station, press >MENU/ INFO or >INFO to view.
MAIN OPERATION
DAB+ Radio
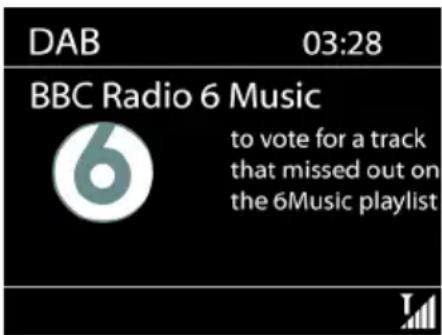
DAB mode receives DAB/DAB+ digital radio and displays information about the station, stream and track playing.
Scanning for stations
The first time you select DAB radio mode, or if the station list is empty, the radio automatically performs a full scan to see what stations are available. You may also need to start a scan manually to update the list of stations.
To start a scan manually, choose Full scan. To scan only stations with good signal strength, select Local scan. Once the scan is complete, the radio shows a list of available stations.
To remove stations that are listed but not unavailable, choose Prune invalid. Turn the navigate reel to view a list of stations and press
When the device is overloaded
The device may process large amount of data after a period of operation, no matter in which mode, it will cause the system freeze or malfunction. Reboot the device if necessary.
First-time Setup
When powering the device on for the first time, it enters DAB mode and automatically scans the stations.
to select.
Once selected, the station plays and the screen show information about station, track or show as broadcast.
On the playing screen, press ALARM/BACK or on the remote control to view the station list.
When the slideshow is displayed on the playing screen, press OK/SCAN to view the full screen size of the picture.
Settings
- Prune invalid: Enter To remove stations that listed but unavailable.
- Dynamic range compression (DRC): If you are listening to music with a high dynamic range in a noisy environment, you may wish to compress the audio dynamic range. This makes quiet sounds louder, and loud sounds quieter. You can change DRC as off, low or high.
- Station order: You can choose the order of the DAB station list to be either Alphanumeric, Ensemble or Valid. Ensemble lists groups of stations that are broadcast together on the same ensemble. Valid lists valid stations first, alphabetically, then off-air stations.
FM Radio
FM radio mode receives analogue radio from the FM band and displays RDS (Radio Data System) information about the station and where broadcast.

The first time you select FM radio mode, or if the station list is empty, the device will run auto scan and save the stations to the preset list.
To find a station, press OK/SCAN. The frequency display starts to run up as the device scans the FM band. Alternatively, you can scan up or down by press and hold TUNING - or TUNING +.
Settings
- Scan to Preset: Run the auto scan function once, the stations will be saved to preset.
- Scan settings: By default, FM scans strong stations only. Stop at any available station. To change the scan settings to stop at the stations with weak signal strength, choose all stations.
- Audio settings: All stereo stations are reproduced in stereo. For weak stations, this may result in a poor signal-to-noise ratio (hiss), choose to forced mono.
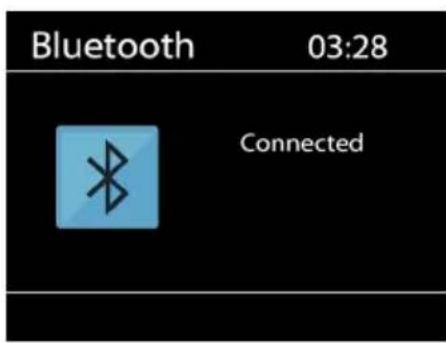
Bluetooth
In Bluetooth mode, you can turn on the Bluetooth of your Bluetooth device. From your Bluetooth device, search the device Grundig DTR 4500 to pairing. If the pairing is successful, it displays Connected on the screen. Control the music playback from your Bluetooth device.
AUX
In AUX in mode plays audio from an external source. Turn the volume low on both the radio and, if adjustable, the audio source device. Enter AUX mode, then adjust the volume as required.

Sleep
To set the sleep timer, select Sleep under Main menu. Or press on the remote control to set. Choose from Sleep OFF, 15, 30, 45, 60 or 90 minutes and confirm. Once you select a sleep period, the system returns to the now playing screen.
Alarm
There are two versatile wake-up alarms with snooze facility. Each alarm can be set to start in a particular mode.
Select Alarms under Main menu to set or change an alarm. Alternately, press and hold ALARM/ BACK on the device, or press ALARM on the remote control to configure.

For each parameter, press OK to set.
After setup all the parameters, press ALARM/ BACK or on the remote control to save and. The screen shows active alarms with an icon at the bottom left.
At the set time, the alarm will sound. To temporarily silence, press on the remote control. You can change the snooze period. The radio returns to standby for the set period, with the silenced alarm icon flashing.
Press MODE or press on the remote control to turn it off.
Equalizer
Several preset EQ modes are available: Normal, Classic, Jazz, Pop, Rock, Speech and
My EQ. Press EQ to select. A user-defined setting is available; create your own EQ under My EQ Setup, with custom bass, treble and loudness settings. Then choose My EQ to activate the customized EQ settings.
Time/Date
Set the time manually or auto update, time format, time zone.
Set Time/Date: set the date and time manually.
Auto Update: from any (the system gets the time from DAB station or FM stations with RDS), from Digital Radio, from FM or No Update
Set 12/24 Hour: Select 12 Hour display format or 24 Hour display format. If you select the
12-hour format, the display shows "AM" in the morning or "PM" in the afternoon after the time.
Set Date Format: Select DD-MM-YYYY or MM-DD-YYYY as date display.
Backlight
You may change the power-on backlight level to High, Medium or Low. And adjust the timeout duration which the radio turns to standby backlight level when it has not been controlled.
Language
Change it as your preference.
Factory Reset
Resetting all user settings to default values, so that time and date, network configuration and presets are lost. However, current software version of the radio is maintained.
Software Update
For service purpose.
Software Version
View the firmware version.
| Error Remedy | |
| The device does not switch on. Check it the power | plug is connected properly. |
| No sound. 1. Turn on the sound as it may be muted | 2. Increase the volume.
3. Pull any connected headphone or speaker from the connector jack.
4. Check the speaker cables. |
| Hiss in FM mode 1. Check/move the antenna. | 2. Move the radio. |
| No stations available / burbling / intermittent in DAB mode. | 1. Check/move the antenna.
2. Rescan local stations only (high-strength).
3. Check the local DAB coverage. |
| All other undetermined cases. The radio may process large amount of data after a period of operation, no matter in which mode, it will cause the system freeze or mal-function. Reboot the device if necessary. |
| Model number DTR 4500 | |
| Display 2.4", 320 x 240, TFT colour display |
| Network supported Bluetooth (BT 5.0, Supports A2DP, AVRCP profiles) |
| Frequency band Bluetooth: 2.402 - 2.48 GHz |
| Radio frequency power transmitted Bluetooth: 4.5dBm |
| DAB / DAB+ Band III, 174.928 - 239.200 MHz |
| FM 87.5 - 108.0 MHz | |
| Battery (Remote Control) 2 x 1.5V AAA | |
| Standby power consumption <1.0W | |
| Operating temperature | 0 °C - 35 °C |
| Speaker power output 2 x 5W RMS | |
| Speaker Impedance Full range: 6Ω | |
| Signal-to-noise ratio >60 dB | |
| Frequency response 50Hz - 20kHz | |
| Audio Connections | 3.5mm headphone socket (back)
3.5mm AUX IN socket (back) |
| Dimensions | 210mm(L) x 115mm(H) x 120mm(D) |
| Weight | 1.32 kg |
| AC Adaptor |
| Manufacturer | Jiangsu Chenyang Electron Co., Ltd. |
| Address: | No.58 Chenyang Road, Hexi Industrial Park, Huangtang Town, 212364 Danyang City, Jiangsu Province, China |
| Type | CYCB18-120150E |
| Input | 100 – 240V~, 50/60 Hz, 0.5A |
| Output | 12.0V----1.5A 18.0W ◆◎ |
| Average Active Efficiency | 85.19% |
| Efficiency at Low Load (10%) | 81.55% |
| No-load Power | 0.06W |
| Safety Class | II |
Compliance with the WEEE Directive and Disposing of the Waste Product:
This product complies with EU WEEE Directive (2012/19/EU). This product bears a classification symbol for waste electrical and electronic equipment (WEEE).
This symbol indicates that this product shall not be disposed with other household wastes at the end of its service life. Used device must be returned to official collection point for recycling
of electrical and electronic devices. To find these collection systems please contact to your local authorities or retailer where the product was purchased. Each household performs important role in recovering and recycling of old appliance. Appropriate disposal of used appliance helps prevent potential negative consequences for the environment and human health.
Compliance with RoHS Directive
The product you have purchased complies with EU RoHS Directive (2011/65/EU). It does not contain harmful and prohibited materials specified in the Directive.

Packaging materials of the product are manufactured from recyclable materials in accordance with our National Environment Regulations. Do not dispose of
the packaging materials together with the domestic or other wastes. Take them to the packaging material collection points designated by the local authorities.
Technical data
This device is noise-suppressed according to the applicable EU directives.
This product fulfils the European directives 2014/53/EU, 2009/125/EC and 2011/65/EU.
Never open the device casing. The manufacturer will not accept any liability for damage resulting from improper handling.
You can find the CE declaration of conformity for the device in the form of a pdf file on the Grundig Homepage www.grundig.com/downloads/doc.
The type plate is located at the rear of the device.


