
TR 3200 DAB - Radio GRUNDIG - Free user manual and instructions
Find the device manual for free TR 3200 DAB GRUNDIG in PDF.
| Product type | DAB+/FM/Internet radio with Bluetooth and USB player |
| Brand | Grundig |
| Model | TR 3200 DAB |
| Dimensions (W × H × D) | 210 × 115 × 120 mm |
| Weight | Approx. 1.4 kg |
| Power supply | Mains adapter 100-240 V~, 50/60 Hz, output 12 V = 2.0 A |
| Power consumption (network standby) | < 2.0 W (standby with connection), < 1.0 W (other) |
| Radio frequency bands | DAB/DAB+: Band III (174.928 - 239.200 MHz); FM: 87.5 - 108.0 MHz (RDS) |
| Wi-Fi | IEEE 802.11 b/g/n, 2.4 GHz, security WEP/WPA/WPA2 |
| Bluetooth | Version 4.0, A2DP profile, range up to 10 m |
| Audio output power | 2 × 7 W RMS (DIN 45324, 10% THD) |
| Frequency response | 20 Hz - 20 kHz |
| Connections | AUX input (3.5 mm), headphone jack (3.5 mm), USB port (for MP3 playback), telescopic antenna |
| Main features | Internet radio, DAB/DAB+, FM, Bluetooth, USB player, dual alarm, programmable sleep timer, presets (10 per source), station information display |
| Maintenance and cleaning | Clean with a dry, clean cloth. Do not use detergents. |
| Safety | Splash protection, do not obstruct ventilation, do not open the casing, keep batteries away from children, RF separation distance ≥ 20 cm |
| Spare parts and repairability | Removable mains adapter, remote control battery (2 × AAA). Repair by professional only. |
| General information | Compliant with EU directives 2014/53/EU, 2009/125/EC, 2011/65/EU. Class II (double insulation). |
Frequently Asked Questions - TR 3200 DAB GRUNDIG
User questions about TR 3200 DAB GRUNDIG
0 question about this device. Answer the ones you know or ask your own.
Ask a new question about this device
Download the instructions for your Radio in PDF format for free! Find your manual TR 3200 DAB - GRUNDIG and take your electronic device back in hand. On this page are published all the documents necessary for the use of your device. TR 3200 DAB by GRUNDIG.
USER MANUAL TR 3200 DAB GRUNDIG
Manufacturer: Dongguan Guanjin Electronics Technology Co., Ltd.
Adresse: Block 16 Qiantou New Industrial Park, Niushan, Dongcheng District Guangdong Province, P.r. China.
Art: KPTEC K25V120200G
Eingang: 100 - 240 V\~, 50/60 Hz 0.6A
Ausgang: 12V =2.0A

PRESET/ Internet Radio, DAB, FM
flowchart
graph TD
    A["Medienserver auf der Festplatte (NAS / Network Attached Storage)"] --> B["Modem/Router"]
    B --> C["Laptop"]
    C --> D["SIPT"]
    D --> E["SIPT"]
    E --> F["SIPT"]
    F --> G["SIPT"]
    G --> H["SIPT"]
    H --> I["SIPT"]
    I --> J["SIPT"]
    J --> K["SIPT"]
    K --> L["SIPT"]
    L --> M["SIPT"]
    M --> N["SIPT"]
    N --> O["SIPT"]
    O --> P["SIPT"]
    P --> Q["SIPT"]
    Q --> R["SIPT"]
    R --> S["SIPT"]
    S --> T["SIPT"]
    T --> U["SIPT"]
    U --> V["SIPT"]
    V --> W["SIPT"]
    W --> X["SIPT"]
    X --> Y["SIPT"]
    Y --> Z["SIPT"]
    Z --> AA["SIPT"]
    AA --> AB["SIPT"]
    AB --> AC["SIPT"]
    AC --> AD["SIPT"]
    AD --> AE["SIPT"]
    AE --> AF["SIPT"]
    AF --> AG["SIPT"]
    AG --> AH["SIPT"]
    AH --> AI["SIPT"]
    AI --> AJ["SIPT"]
    AJ --> AK["SIPT"]
    AK --> AL["SIPT"]
    AL --> AM["SIPT"]
    AM --> AN["SIPT"]
    AN --> AO["SIPT"]
    AO --> AP["SIPT"]
    AP --> AQ["SIPT"]
    AQ --> AR["SIPT"]
    AR --> AS["SIPT"]
    AS --> AT["SIPT"]
    AT --> AU["SIPT"]
    AU --> AV["SIPT"]
    AV --> AW["SIPT"]
    AW --> AX["SIPT"]
    AX --> AY["SIPT"]
Hinweise:
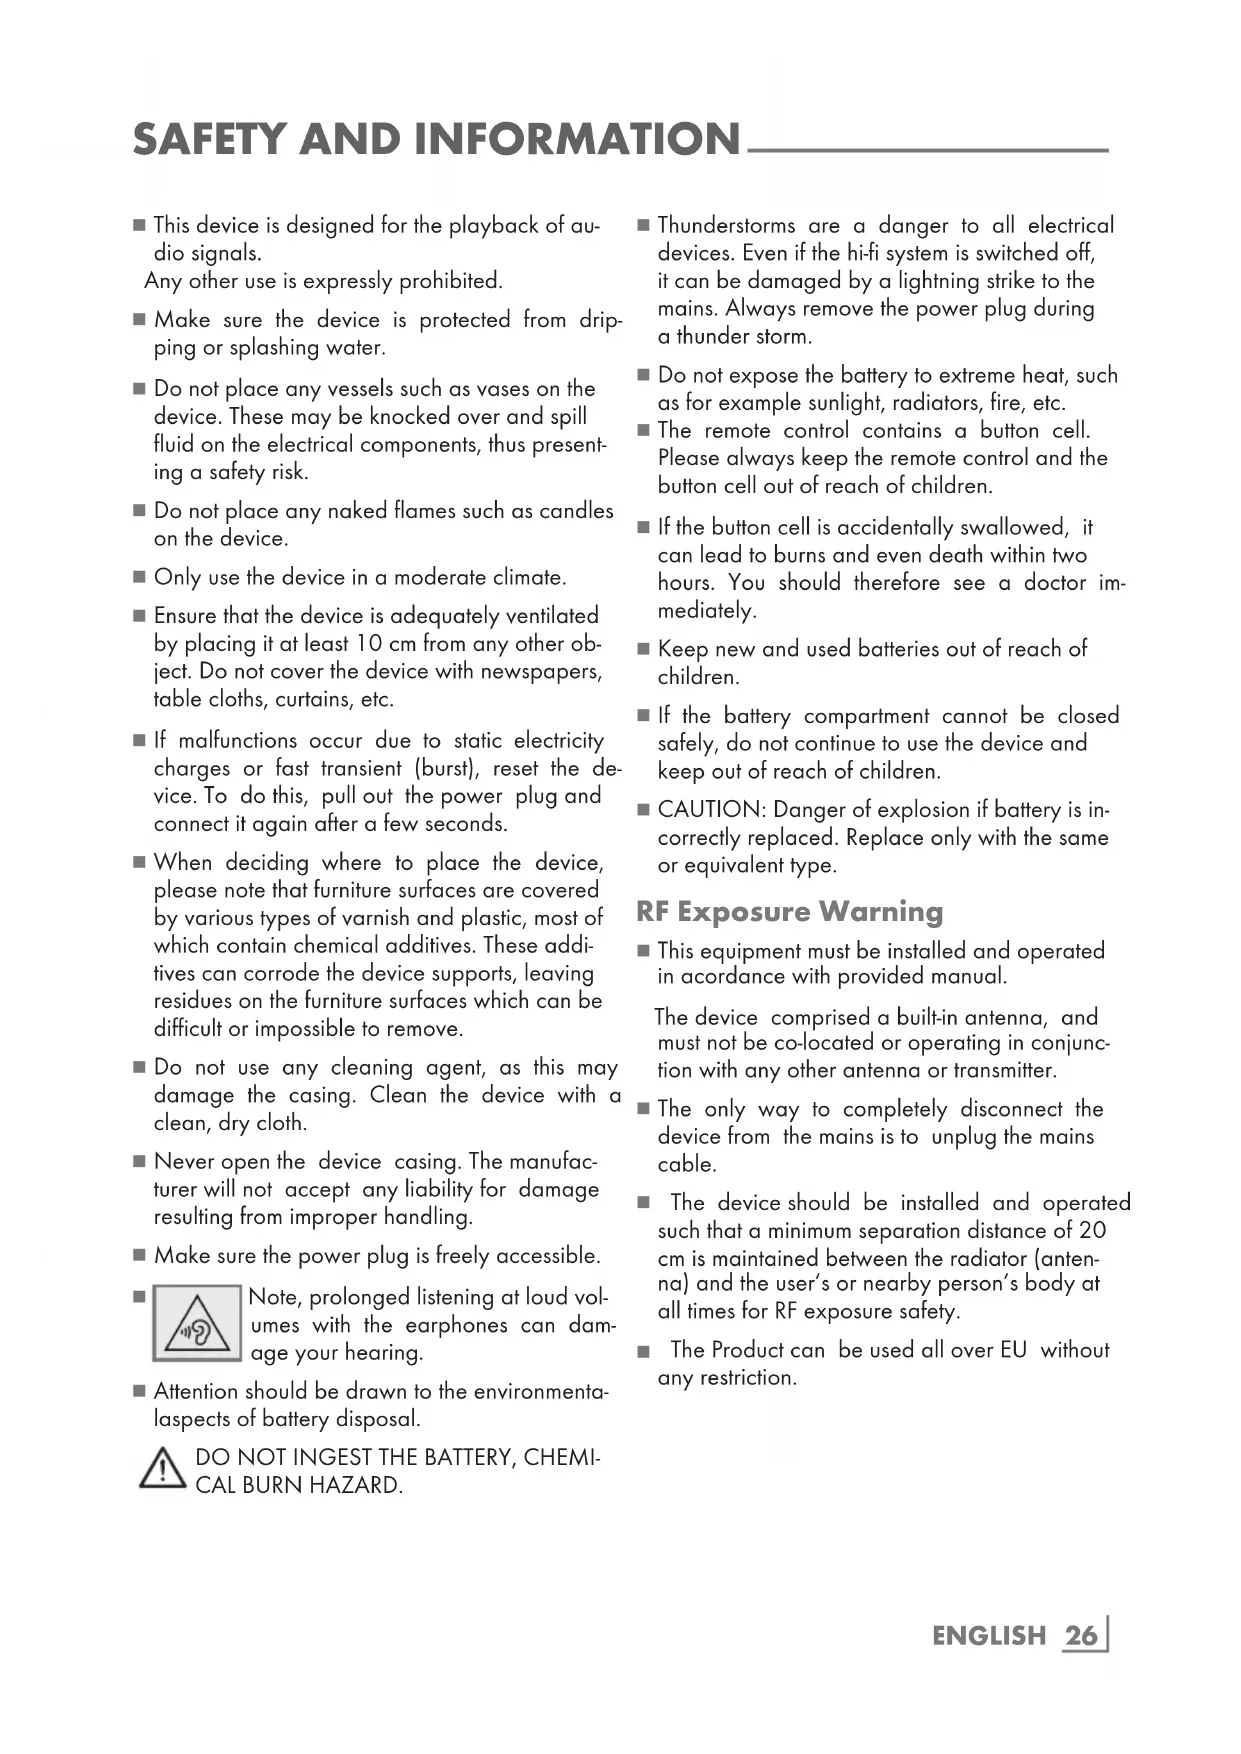
■ This device is designed for the playback of audio signals.
Any other use is expressly prohibited.
■ Make sure the device is protected from dripping or splashing water.
- Do not place any vessels such as vases on the device. These may be knocked over and spill fluid on the electrical components, thus presenting a safety risk.
- Do not place any naked flames such as candles on the device.
■ Only use the device in a moderate climate.
■ Ensure that the device is adequately ventilated by placing it at least 10 cm from any other object. Do not cover the device with newspapers, table cloths, curtains, etc.
If malfunctions occur due to static electricity charges or fast transient (burst), reset the device. To do this, pull out the power plug and connect it again after a few seconds.
- When deciding where to place the device, please note that furniture surfaces are covered by various types of varnish and plastic, most of which contain chemical additives. These additives can corrode the device supports, leaving residues on the furniture surfaces which can be difficult or impossible to remove.
- Do not use any cleaning agent, as this may damage the casing. Clean the device with a clean, dry cloth.
■ Never open the device casing. The manufacturer will not accept any liability for damage resulting from improper handling.
■ Make sure the power plug is freely accessible.
Note, prolonged listening at loud volumes with the earphones can damage your hearing.
■ Attention should be drawn to the environmental-aspects of battery disposal.
DO NOT INGEST THE BATTERY, CHEMICAL BURN HAZARD.

■ Thunderstorms are a danger to all electrical devices. Even if the hi-fi system is switched off, it can be damaged by a lightning strike to the mains. Always remove the power plug during a thunder storm.
- Do not expose the battery to extreme heat, such as for example sunlight, radiators, fire, etc.
■ The remote control contains a button cell. Please always keep the remote control and the button cell out of reach of children.
If the button cell is accidentally swallowed, it can lead to burns and even death within two hours. You should therefore see a doctor immediately.
- Keep new and used batteries out of reach of children.
If the battery compartment cannot be closed safely, do not continue to use the device and keep out of reach of children.
■ CAUTION: Danger of explosion if battery is incorrectly replaced. Replace only with the same or equivalent type.
RF Exposure Warning
■ This equipment must be installed and operated in accordance with provided manual.
The device comprised a built-in antenna, and must not be co-located or operating in conjunction with any other antenna or transmitter.
■ The only way to completely disconnect the device from the mains is to unplug the mains cable.
The device should be installed and operated such that a minimum separation distance of 20 cm is maintained between the radiator (antenna) and the user's or nearby person's body at all times for RF exposure safety.
■ The Product can be used all over EU without any restriction.
Technical data

This device is noise-suppressed according to the applicable EU directives. This product fulfils the European directives 2014/53/ EU, 2009/125/EC and 2011/65/EU.
You can find the CE declaration of conformity for the device in the form of a pdf file on the Grundig Homepage www.grundig.com/downloads/doc.
The type plate is located on the back side of the device.
WLAN
Network standard: IEEE 802.11 b,g,n
This model supports all the transfer rates according to the standard IEEE 802.11 b/g/n wireless (WiFi).
Safety: Supports WEP, WPA and WPA2
Safety Class: II
Power output:
DIN 45324, 10%THD 2X7W
Frequency response: 20 Hz - 20 KHz
Max. power consumption:
Operating < 24W, Stand-by < 1.0W
Frequency band:
DAB/DAB+ Band III (174.928 - 239.200
MHz)
FM 87.5 - 108.0 MHz, support RDS
Dimension and weight:
L×H×D 210×115×120 mm
Weight approx. 1.4 kg
Frequency bands:
WiFi: 2.412 - 2.472 GHz
Bluetooth: 2.402 - 2.480 GHz
Maximum radio-frequency power transmitted:
WiFi: 20dBm
Bluetooth: 4dBm
Networked standby <2.0W
Another condition <1.0W
AC Adaptor
Manufacturer: Dongguan Guanjin Electronics Technology Co., Ltd.
Address: Block 16 Qiantou New Industrial Park, Niushan, Dongcheng District Guangdong Province, P.r. China.
Type: KPTEC K25V120200G
Input: 100 - 240 V\~, 50/60 Hz 0.6A
Output: 12V =2.0A

Safety Class: II
Technical and design modifications reserved.
Compliance with the WEEE Directive and Disposing of the Waste Product:
This product complies with EU WEEE Directive (2012/19/EU). This product bears a classification symbol for waste electrical and electronic equipment (WEEE).

This product has been manufactured with high quality parts and materials which can be reused and are suitable for recycling. Do not dispose of the waste product with normal domestic
and other wastes at the end of its service life.
Take it to the collection center for the recycling of electrical and electronic equipment. Please consult your local authorities to learn about these collection centers.
Compliance with RoHS Directive
The product you have purchased complies with EU RoHS Directive (2011/65/EU). It does not contain harmful and prohibited materials specified in the Directive.
Package information

Packaging materials of the product are manufactured from recyclable materials in accordance with our National Environment Regulations. Do not dispose of the packaging materials together with the domestic or other wastes. Take them to the packaging material collection points designated by the local authorities.

The lightning flash represented by the arrow symbol in an equilateral triangle is intended to alert users to the presence of the high voltage within the device which could cause an electric shock.

This equipment is a class II or double insulated electrical appliance. It has been designed in such a way that it does not require a safety connection to electrical earth.

Please read the entire manual carefully before operating this device.
POWER SUPPLY
Mains operation
Check that the mains voltage on the type plate (on the back of the device) corresponds to your local mains supply. If this is not the case, contact your specialist dealer.
1 Plug Adapter DC connector in the DC IN socket on the device.
2 Plug Adapter AC connector into the socket (100 - 240 V\~, 50/60 Hz).
Caution:
■ The device is connected to the mains with the power cable. Pull out the power cable when you want to completely disconnect the device from the mains.
Unplug the mains plug to disconnect the device from the mains. Make sure the power plug is easily accessible during operation and not hindered by other objects.
■ The mains plug or appliance coupler is used as disconnect device, the disconnect device shall remain readily operable.
See the figure on page 3.
Controls on the front
Display
Shows various information such as channel name, time, alarm time, volume and the menu.
/MODE
Press and hold the button, turns the device on and off.
Press "MODE" button then turn the Volume knob clockwise or anticlockwise to scroll left or right through the mode list until it is highlighted and press OK.
Menu/INFO
Press and hold to enter menu.
Press to display information of the Internet, DAB or FM radio stations, and music.
ALARM/BACK
Press and hold to enter the alarm menu.
Press to go back one step.
OK
Confirms settings.
- Turn the button, adjusts the volume.
Also moves up/down on the menu by turning the knob.
Also scans next station by pressing the knob in FM mode.
PRESET/
BT PAIR
Internet Radio, DAB, FM modes: press and hold to open saving-preset menu; press to open the preset menu.
In Bluetooth mode: press and hold to make the device BT discoverable.
▲ Tuning+
In DAB mode: selects
▼ Tuning-
DAB radio stations
from the program list. In FM mode: tunes
FM radio stations. Selects menu options.
In Bluetooth mode: select the previous or next track.
Controls on the back
Antenna
Telescopic antenna for DAB/DAB+ and FM reception.
AUX IN Audio signal input (stereo/mono) for connecting to an external device.

Earphone socket (3.5 mm stereo plug).
USB
USB socket for connecting MP3 player, a USB memory stick or a card-reading device.
DC IN
For connecting the power supply unit
ON/OFF
It is a switch, to power on or off the device.
The remote control
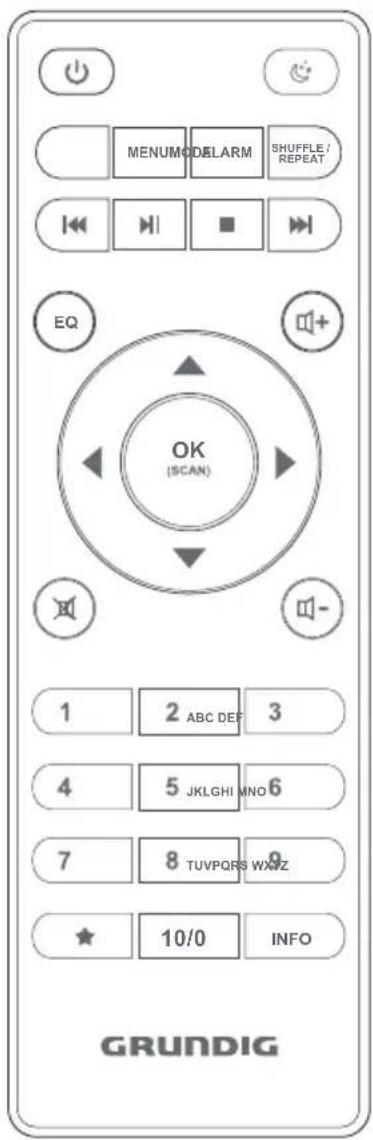
Switches the device to standby mode and from standby mode to the last input source selected.
Sets and deactivates the sleep tim- er. Activates snooze when alarm.
MODE Selects the audio sources for Internet radio, Music player, DAB radio, FM radio, Bluetooth and Aux In modes.
MENU Opens the main menu (depending on the operating mode selected) and switches back to the display for the time, date and other information.
ALARM Press to set the alarm time.
SHUFFLE/REPEAT
◀◀▶
In external data media mode is for USB and shared music playback.
In external data media mode: select tracks forwards or backwards.
Starts and pauses playback.
In external data media mode: press to stop the playing track.
1 ... 9 Number buttons, stores and selects presets for Internet, DAB and FM stations (in Internet and tuner mode). Also to input numbers or letters when searching stations, entering password.
10/0 Preset buttons for storing and selecting radio stations. Also to input numbers or letters when searching stations, entering password.
OK Confirms selected option. Also scans next station by pressing the knob in FM mode.
▼/▲ Moves the cursor in the menu up or down.
In FM mode: Switches the frequency backwards or forwards in 50 kHz step. Press and hold for quick switching the frequency, it stops when release the button In DAB mode: Press to move up or down the stations stored in the station list.
Switches in the menu one step forwards.
Switches in the menu one step backwards.
★ Press and hold to open saving preset menu; press to open the preset menu.
INFO Displays information on the Internet, DAB and FM radio stations as well as when using the music archive.
Switches the loudspeaker of the device to mute and back on again.
☐ + / ☐ - Sets the volume.
CONNECTION AND PREPARATION
Connecting external devices
Notes:
■ Switch the device off before you connect external devices.
1 Use a standard audio cable to connect the audio output of the external device to the socket »AUX IN« on the back of the device.
Connecting an MP3 player or a USB memory stick
The device supports most MP3 Players or USB memory sticks.
Note:
■ The device must be switched off while the USB connection is being made. If it is not switched off, data could be lost.
1 Connect the USB interface of the MP3 player to the »USB« socket on the device using a standard USB cable;
or
insert the USB plug of the USB memory stick in the »USB« socket on the device.
Notes:
■ To remove the MP3 player or the USB memory stick, switch off the device and pull out the cable for the data medium.
■ The USB socket on the device does not support a connection for a USB extension cable and is not designed for directly connecting to a computer.
Connecting the headphones
1 Insert the headphone plug (ø 3.5 mm) into the »○« socket on the back of the device.
- The loudspeakers of the device are switched off.
Note:
■ Excessive sound pressure from the earphones or headphones can cause hearing loss.
Changing the remote control battery
1 Pull out the battery compartment.
2 Insert the battery (1.5V x 2 AAA/R03/UM-4) making sure that the polarity is correct.
3 Push in the battery compartment.
Notes:
- Do not expose the batteries to extreme heat, caused for example by direct sunlight, heaters or fire.
■ Remove the batteries when they are flat or when you know that the device will not be used for a long period of time. The manufacturer accepts no liability for damage caused by leaking batteries.
Environmental note:
■ Batteries, including those which do not contain heavy metal, should not be disposed of with household waste. Always dispose of used batteries in accordance with local environmental regulations.
CONNECTION AND PREPARATION
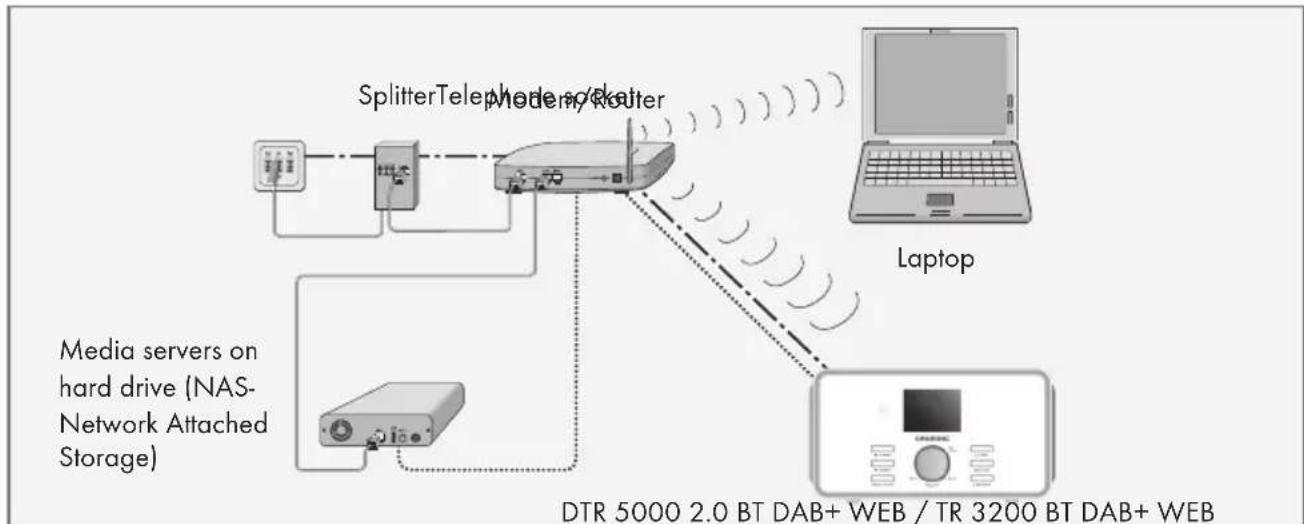
WLAN connection to the internet
flowchart
graph TD
    A["Media servers on hard drive (NAS-Network Attached Storage)"] --> B["Splitter Telephone Router"]
    B --> C["Laptop"]
    B --> D["Data/Control Panel"]
    style A fill:#f9f,stroke:#333
    style B fill:#ccf,stroke:#333
    style C fill:#cfc,stroke:#333
    style D fill:#fcc,stroke:#333
Notes:
■ The quality of the radio signal depends on the distance between the device and your modem/router.
■ The substance of the building at the installation site can also affect this.
Note:
The lines represent the function.
First Installation using the installation assistant "Wizard"
When you connect the device to the mains, or after factory reset, the display will show the Grundig logo. The Wizard installation assistant then appears, which guides you through the installation step by step.
Notes:
■ For Wi-Fi connection, please make sure, that the Wi-Fi router is switched on.
■ The network name (SSID) must be visible and the MAC address of the device may be entered in the Wi-Fi router.
■ Perform the registration process in the proximity of the router in order to avoid problems with the Wi-Fi range.
Start First Installation
1 First switch on, the device enters setup Wizard directly.
- Display: »Setup wizard« menu opens.
2 Select the push button »YES« by pressing »« or »« or by turning the Volume Knob and confirm by pressing »OK«.
- Display: »Language« menu opens.
3 Select your preferred language by pressing »« or »« or by turning the Volume Knob and confirm by pressing »OK«.
- Display: »Date/Time« menu opens.
4 Select the hour format »12« or »24« by pressing »◀ or »◀ or by turning the Volume Knob and confirm by pressing »OK«.
- Display: »Auto update« menu opens.
5 Select the input source from which the automatic time synchronisation should be performed.
Selection options:
- »Update from DAB«;
- »Update from FM«;
- »Update from Network«;
- »No update« (No automatic time synchronisation).
6 Select one of the options by pressing » « or
» or by turning the Volume Knob and confirm by pressing on the Volume Knob or »OK« on the remote control.
- The menu »Set timezone« appears (only if »Update from Network« was selected).
Note:
If »Update from DAB« or »Update from FM« was selected, continue from point 9.
7 Select the time zone by pressing »« or »« ▲ or by turning the Volume Knob and confirm by pressing »OK«.
- Display: »Daylight savings« menu opens.
8 Select Daylight savings (for Central Europe) by pressing »« or »« or by turning the Volume Knob to select »ON«, and confirm by pressing »OK«.
Normal time is set using »OFF«.
- The menu »Internet Setup« appears.
9 If the device is to be switched on via the network, select the »YES« button with »▼ or » « or by turning the jog shuttle and confirm with »OK«. If the device is not to be switched on (low stand-by power), select the »NO« button with »▼ or » « or by turning the jog shuttle and confirm with »OK«.
- The menu »Wlan region« appears.
10 Select one of the WLAN regions by pressing » or » or by turning the Volume Knob and confirm by pressing »OK«.
(This setting depends on the location where you are operating your Cosmopolit 4.)
- The »SSID« menu appears, and the available networks (access points) are displayed.
Notes:
If the connection to the router is via a WLAN, there are two options, depending on the router in use: If the router supports [WPS], then continue operation from step 10/11 or step. 10/12. If the router does not support [WPS], then continue operation from step 13.
If the network name (SSID) is suppressed on the WLAN router for security reasons, the network cannot be found. It must then be entered manually. Select the option »[Manual config]« with » « or » « or by turning the Volume Knob and press »OK« to confirm. Continue with the chapter "Special Settings" - "Registering the device ..." (see "Long manual").
11 Select your wireless [WPS] network with » or » or by turning the Volume Knob and press » OK« to confirm.
Note:
There are two options for logging on to a [WPS] network: using the push button on the router or by entering a PIN on the router.
12 Select the option »Push-Button« with »▼« or »▲« or by turning the Volume Knob and press »OK« to confirm.
Activate the »Push Button« function on the router (menu or button) and press »OK« on the device within 2 minutes.
- Display: »Please wait, connecting« and then »Connected«.
End setting with »OK« on the device;
or_
13 Select the option »PIN« with »▼« or »▲« or by turning the Volume Knob and press »OK« to confirm.
- Display: PIN number that specifies the device.
Enter the PIN number in the router menu and confirm.
- Display: »Please wait, connecting« and then »Connected«.
14 Select your wireless network (SSID) with » or » or by turning the Volume Knob and press » OK« to confirm.
- Key menu opens, the cursor is positioned in the first input position.
Note:
If the network is encrypted, the network key (security code WEP or WPA) must be entered.
15 Enter your wireless security code:
Select the first character (capital and small letters, numbers, symbols) with »«,»«, ▲ »« or »« or by turning the Volume Knob and press »OK« to confirm.
Repeat the procedure for all characters.
After you finish entering all characters, select the push button »OK« with »▼«, »▲«, »« or »« or by turning the Volume Knob and press »OK« to confirm.
- The menu »Internet Setup« appears, the network registration is processed.
- Display: »Please wait, connecting« and then »Connected«.
- After successful registration, the message »Setup wizard completed« appears.
Notes:
■ You can choose between numbers, lower and upper case letters, and special characters.
■ Press » « or » « or by turning the Volume Knob to scroll through the menu pages (numbers, letters, special characters, etc.).
If you make a mistake during entry, press »«, »«, »« or »« or by turning the Volume Knob to select the push button »BKSP« and press »OK« to confirm. The last character is deleted.
If you wish to exit the menu prematurely, press »«, »«, »« or »« or by turning the Volume Knob to select the push button »CANCEL« and press »OK« to confirm.
16 Press »OK« to end the setting.
Setting DAB stations
Automatic station search
If you first switch on the device in DAB mode, the automatic station search starts.
During the search, the first line shows the number of stations found, and the second shows the search scale.
After the end of the search, an alphanumeric arrangement of stations appears. If no stations are found, the DAB menu appears in the display.
1 To enter DAB mode, either press »Menu/INFO« button -> select "Main menu" -> DAB or press »MODE« button then turn the Volume knob clockwise or anticlockwise to scroll left or right through the mode list until DAB Radio is highlighted and press »OK«.
Note:
In the »DAB Radio« – »Full scan« menu, you can restart a new “Automatic station search”. This may be necessary when the location of the device is changed.
Sorting channels
You can sort the station list stored during the station search in three different ways.
- »Alphanumeric«: all stations are sorted alpha-numerically (default setting).
- »Ensemble«: all stations are sorted by ensemble.
- »Valid«: active stations are listed first, stations that are not active are shown with a question mark.
1 Press »MENU« to open the DAB menu.
2 Select the option »Station order« by pressing »▼ or »▲or by turning the Volume Knob and confirm by pressing »OK«.
3 Select your settings by pressing »« or »« or by turning the Volume Knob and confirm by pressing »OK«.
Setting FM stations
Setting the search mode
There are two different automatic scan setting modes.
1 To enter FM mode, either press »Menu« button -> select "Main menu" -> FM or press »MODE« button then turn the Volume knob clockwise or anticlockwise to scroll left or right through the mode list until FM Radio is highlighted and press »OK«.
3 Select the option »Scan setting« by pressing » or » or by turning the Volume Knob and confirm by pressing »OK«. - Display: »Strong stations only?«.
4 Select your setting (»YES« or »NO«) using »« or »« or by turning the Volume Knob and confirm by pressing »OK«.
5 Press »MENU« to end the setting.
Automatic station search
1 Press and hold »« or » « or press the Volume Knob. When you release the button, the automatic search stops at the next station.
Note:
■ Press Menu button and select the option »ATS« and confirm by pressing »OK«. Select the option »YES« and confirm by pressing »OK«. The automatic station search starts, searches and stores the radio stations.
Tuning stations manually
1 Move the frequency forward in brief steps by repeatedly pressing » or » «
- The frequency goes up or down in 50 kHz steps.
Saving FM radio stations on presets
1 Search for the FM station as described.
2 To store station on a preset, press and hold »OK« button until “favourites added” appears on the display.
Note:
■ Long press »PRESET/BT PAIR« button until the display shows the save preset screen.
■ Press »PRESET/BT PAIR« button the select one of the preset stations. During the playing »★, 2...« appears on the display.
■ The 1 to 10/0 button on the remote control are for the preset stations.
3 To store more stations, repeat steps 1 and 2 as many times as necessary.
Switching on and off
1 Switch on the device from standby mode by press and hold »/MODE « on the device or press »« on the remote control.
- Display: The system switches to the last source selected.
2 Switch the device to standby mode by press and hold »/MODE« on the device or press »« on the remote control.
- Display: The current time and date.
Selecting the input source
1 Press »MODE« button on device or remote control then turn the Volume knob clockwise or anticlockwise to scroll left or right through the mode list »Internet Radio«, »Music player«, »DAB Radio«, »FM radio«, »Bluetooth Audio«, »AUX in«.
Adjusting the volume
1 Adjust the volume by pressing »« or » «on the remote control or rotate the Volume Knob on the device.
Muting
1 Activate and deactivate mute with » «on the remote control.
- Display: » « appears when activated, disappears when deactivated.
Automatic switch-off
1 The device switches automatically to stand-by after 15 minutes, if:
- The device is in the "Stop" position;
- No audio signal is present at the »AUX IN« socket.
2 Switch on the device again to continue using the device.
INTERNET RADIO MODE
Listening to an Internet radio station
You can browse the catalogue of Internet radio stations and classify them by genre (style of music), by country or by popularity.
Selecting the internet radio stations input source
1 To enter internet radio mode, either press and hold »Menu/INFO« button on the device -> select "Main menu" -> Internet radio or press »MODE« button then turn the Volume knob clockwise or anticlockwise to scroll left or right through the mode list until Internet radio is highlighted and press »OK«.
Selecting Internet radio stations according to search criteria
Selecting the Internet radio menu
1 Press and hold »Menu/INFO« on the device, or press »MENU« on remote control.
2 Select the option »Station list« by pressing »▼ or »▲or by turning the Volume Knob and confirm by pressing »OK«.
3 Select the option »Stations« by pressing »or »or by turning the Volume Knob and confirm by pressing »OK«.
Searching for Internet radio stations in the »Genre« category
1 In the »Stations« menu, select the option »Genre« by pressing »or »or by turning the Volume Knob and confirm by pressing »OK«.
2 Press » or » or turn the Volume Knob to select the search criteria (e.g. »Alternative«, »Ambient«) and confirm by pressing »OK«.
- A country selection is displayed.
3 Select the country by pressing » « or » « or by turning the Volume Knob and confirm by pressing »OK«.
- The first radio stations for the country chosen are displayed.
4 Select the station by pressing »« or » «or by turning the Volume Knob and confirm by pressing »OK«.
- »Connecting...« and then »Loading« appears in the display, after a short time the station is played.
Searching for Internet radio stations by name
1 In the »Stations« menu, select the option »Search stations« by pressing »« or »« or by turning the Volume Knob and confirm by pressing »OK«.
- Enter the station name.
Notes:
■ Press » «, » «, » « or » « to select letters and confirm by pressing »OK«. The cursor jumps to the next input position.
If you make a mistake during entry, press »«, »«, »« or »« or turn the Volume Knob to select the push button »BKSP« and press »OK« to confirm. The last character is deleted.
If you want to exit the menu prematurely, press »▼«, »▲«, »◀« or »▶« or turn the Volume Knob to select the push button »CANCEL« and press »OK« to confirm.
If the station name is entered, press »▼«, »▲«, »« or » «or turn the Volume Knob to select the push button »OK« and press »OK« to confirm. »Please wait Loading« then appears in the display.
■ A list of the station names is then displayed which match the search item.
2 Select the station by pressing »« or »« or by turning the Volume Knob and confirm by pressing »OK«.
- »Connecting...« and then »Loading« appears in the display, after a short time the station is played.
Storing Internet radio stations on presets
1 Search for the Internet radio station as described.
2 To store station on a preset, press and hold down the required preset button »1« to »10«, until "Preset stored" appears.
- The stored station with a preset number then appears in the display.
Note:
■ Long press »PRESET/BT PAIR« button until save preset screen appears, press »1« to »10«.
3 To store more stations, repeat steps 1 and 2 as many times as necessary.
Opening preset Internet stations
1 Open the Internet radio station by pressing one of the number buttons »1...10« on the remote control.
2 Press »PRESET/BT PAIR« and select the listed preset station.
- »★n (★1, ★2...) « appears in the display, after a short time the station is played.
Playing the contents of a USB memory stick
1 If switching off the device from standby mode press and hold »/MODE« on the device or press »« on the remote control.
2 Connect the USB interface of the MP3 player to the »USB« socket on the device (on the back side), using a standard USB cable;
or
insert the USB plug of the USB memory stick in the »USB« socket (on the back side) on the device.
3 If switching on the device from standby mode press and hold »/MODE« on the device or press »« on the remote control.
4 To enter Music player mode, either press »Menu« button -> select "Main menu" -> Music player or press »MODE« button then turn the Volume knob clockwise or anticlockwise to scroll left or right through the mode list until Music player is highlighted and press »OK«.
- Display: »Music player« submenu opens.
5 Select the option »USB playback« by pressing »« or »«or by turning the Volume Knob and confirm by pressing »OK«.
- The content of the USB appears in the display.
Note:
If no USB memory stick has been inserted, »No USB device found« appears in the display after a short time. Insert the USB by referring to the "Connecting an MP3 player or a USB memory stick" section.
6 Select the file or track by pressing » « or » « ▲ or by turning the Volume Knob.
7 Press »OK« to start playback.
- Display: Playback starts, elapsed playing time, total playing time and file information appears in the display.
8 Press »▶II« on the remote control to play or pause the playback. Press »◀◀▶▶« to play previous/next track or press and hold them to rewind / fast forward. Also, press »■« to stop the track and return to the track list.
Selecting the DAB input source
1 To enter DAB radio mode, either press »MENU« button -> select "Main menu" -> DAB radio or press »MODE« button then turn the Volume knob clockwise or anticlockwise to scroll left or right through the mode list until DAB radio is highlighted and press »OK«.
Selecting a DAB station – from presets
1 Open a DAB station by pressing »1« to »10«.
Selecting a DAB station – from the station list
The available DAB stations are stored in a »Station list«.
1 Open the DAB menu using »MENU«.
2 Alternatively, on the playing screen, press »▲ Tuning+, ▼ Tuning-« on the device or »√ « on the remote control to play previous / next station stored in the station list.
3 Select a DAB station by pressing »« or »« or by turning the Volume Knob, and open by pressing »OK«.
- Display: »Playing«, the DAB station selected can be heard.
Displaying DAB station information
1 To display information on the current DAB station, press »INFO« repeatedly. - The following displays appear in succession: The location and the frequency; reference to signal interference, e.g. »Signal error 10« (at optimum signal »Signal error 0«); Bit rate, broadcasting format and the channel; the current date; radio text as ticker text
Note:
■ The information is displayed continuously until »INFO« is pressed again.
Removing DAB radio stations from the program list
If you move to a different part of the country, you should remove DAB radio stations, which are no longer available from the program list. These DAB radio stations are marked with "?".
1 Press and hold »Menu/INFO« on the device to open the menu.
2 Select the option »Prune invalid« with »▼/▲« and confirm by pressing »OK«.
- A confirmation message is displayed.
3 Select the option »Yes« with »◀ ▶«.
Note:
■ To cancel the function select the option »No« with »◀ ▶«.
4 Press »OK« to confirm setting.
5 Press »Menu/INFO« to end the setting.
- In the program list you will find only available radio stations.
Selecting the tuner input source
1 For the main menu way, press and hold »Menu/INFO« on the device, or press »MENU« on remote control right through the mode list until DAB radio is highlighted and press »OK«.
Selecting stations – from presets
1 In the »FM radio« mode, press »1« to »10« on the remote control to select the presets from 1 to 10.
Selecting stations – from the list Recall Preset
1 Press » «.
2 Select the presets from 1 to 10 by pressing » or » or by turning the Volume Knob.
3 Confirm the preset by pressing »OK«.
Setting stereo or mono reception
1 Press »MENU« to open the menu.
2 Select the option »Audio setting« by pressing »▼ or »«or by turning the Volume Knob and confirm by pressing »OK«.
3 Switch to mono reception by selecting the »YES« button using »« or »« or by turning the Volume Knob and confirm by pressing »OK«. Stereo reception is set using the »NO« button.
4 Press »MENU« to end the setting.

Bluetooth®
Bluetooth device compatibility
Your DTR 5000 2.0 BT DAB+ WEB, TR 3200 BT DAB+ WEB connects with all Bluetooth devices that support the A2DP profile including the most smartphones, laptops and tablets.
Selecting the input source Bluetooth
1 To enter Bluetooth Audio mode, either press and hold »Menu/INFO« button on the device -> select »Main Menu« -> Bluetooth or press »MENU« button on remote control and apply same procedure as above.
- Display: Bluetooth icon flashing on the bottom right corner of the display.
Pairing Bluetooth device
1 Activate on the Bluetooth device the Bluetooth function.
2 Start on the Bluetooth device the search function.
- After a short period of time, your Grundig DTR5000, TR3200 is displayed on the Bluetooth device.
3 Select the Grundig DTR5000, TR3200 on the Bluetooth device and connect it.
4 Once the Bluetooth device is connected to your device, the BT icon becomes steady.
Note:
Although the DTR 5000 2.0 BT DAB+ WEB, TR 3200 BT DAB+ WEB can only stream audio from one device at a time, it is capable of being paired with up to eight devices.
Connecting a paired Bluetooth Device
Notes:
- You will only need to pair your Bluetooth device with the unit one time.
The next time your Bluetooth device and the DTR 5000 2.0 BT DAB+ WEB, TR 3200 BT DAB+ WEB are in range of each other, and the Bluetooth feature is turned on, they will automatically connect.
The DTR 5000 2.0 BT DAB+ WEB, TR 3200 BT DAB+ WEB will only automatically connect to the last Bluetooth Device it was connected to.
If your paired device does not automatically connect, navigate to the Bluetooth menu on your device and select the unit from the list.
Play Audio signal from your Bluetooth device
1 Start playback on the Bluetooth Device.
2 Adjust the volume using » « or » « .
3 End playback on the Bluetooth Device.
Notes:
- Various functions may also be controlled from the DTR 5000 2.0 BT DAB+ WEB, TR 3200 BT DAB+ WEB. Select Playback-Pause using »▶II«, press »▶II« again to resume playback; select previous title by pressing »◀◀«, select next title by pressing »▶◀«.
- Keep in mind that depending on the used Bluetooth device and the structural conditions the wireless range can be up to 9 m.
Disconnect the Bluetooth device
1 Switch off the Bluetooth function at the Bluetooth device or long press »PRESET/BT PAIR« button.
- Display changes to: Flashing BT icon.
Reconnecting the Bluetooth device
If you move out of range or turn off the Bluetooth feature on your device, the unit will disconnect from your device.
2 To reconnect, simply access the Bluetooth Manager on your Bluetooth device and select the Grundig DTR5000, TR3200.
Note:
In case of the registered DTR 5000 2.0 BT DAB+ WEB, TR 3200 BT DAB+ WEB cannot connect to the Bluetooth device again, please remove the Grundig DTR5000, TR3200 from the Bluetooth device list, search and connect again.
Automatic shutdown
If Bluetooth is selected as input source and no Bluetooth device is connected, the DTR 5000 2.0 BT DAB+ WEB, TR 3200 BT DAB+ WEB switches automatically to Stand-by mode after 15 minutes.
ALARM MODE
Setting the alarm times and mode
1 Press »◀« to switch on the device.
2 Press and hold »Menu/INFO« on the device, select »Menu/INFO« → »ALARM«
3 Alternatively, press and hold »ALARM/BACK« on the device or press »ALARM« on remote control.
- Display: »Alarm | Off [00:00]« and »Alarm 2: Off [00:00]«.
4 Select »Alarm 1« or »Alarm 2« with volume knob on the device or »▼/▲« on the remote control.
5 Select the option »Alarm I« with left and right button and confirm by pressing »OK«.
- Display: »Alarm I«.
6 Enable: Off, Daily, Once, Weekends or Weekdays [Select the option with volume knob on the device or »▼/▲« on the remote control, and confirmed by pressing »OK« ].
7 Time: [set hour and minute, with volume knob on the device or »▼/▲« on the remote control, and confirmed by pressing »OK« ].
8 Mode: »Buzzer, Internet radio, DAB or FM« [Select the option with volume knob on the device or »▼/▲« on the remote control, and confirmed by pressing »OK« ].
9 Preset: Last listened, or Preset 1-10 (Internet radio, DAB or FM is set, no such setting if Buzzer was selected) [Select the option with volume knob on the device or »/▲« on the remote control, and confirmed by pressing »OK« ]
10 Volume: 0-32 [adjust with volume knob on the device or »▼/▲« on the remote control, and confirmed by pressing »OK« ].
11 Save [confirmed by pressing »OK«, otherwise the alarm setting is not saved].
Interrupting the alarm
1 Press any key on the device or » «on remote control while the alarm is sounding.
- Display: 5 minutes
- The alarm (signal tone or radio) stops.
Note:
■ The alarm will sound again depending on how often a button has been pressed (1 time = after 5 minutes, 2 times = 10 minutes, 3 times = 15 minutes, 4 times = 30 minutes.
Cancelling alarm stand-by
1 To cancel the alarm, press and hold »/MODE« on the device or press »« on the remote control.
Activating and deactivating the alarm
1 Press »◀« to switch off the device.
2 Press and hold »ALARM/BACK« to deactivate or reactivate the alarm stand-by.
Note:
■ 1 time = alarm 1 On, 2 times = alarm 1 On and alarm 2 On, 3 times = alarm 1 Off and alarm 2 On, 4 times = alarm 1 Off and alarm 2 Off.
Sleep Timer
The device has a sleep timer which switches off in radio mode at a preset time. It is possible to adjust the sleep time between 15 and 60 minutes in 15 minute increments.
Select the switch-off time for the sleep timer
1 Press »◀« to switch on the device.
2 Press and hold »MENU/INFO« on the device, select Main Menu → Sleep
3 Alternatively, press » « on remote control to adjust the sleep time.
4 Set the switch-off time with »◀▶« (in 15 minutes increments) and confirm by pressing »OK«.
- Display: » « with the remaining time.
Notes:
■ To check the remaining switch-off time press briefly »Sleep«.
- You can set the switch-off time also by pressing »« (in 15 minutes increments) until the display shows »Sleep OFF«.
Switch off the sleep timer
1 To switch off the sleep timer earlier, press sleep logo and adjust to »Sleep Timer OFF« and confirm by press »OK«.
Set the display illumination – for the stand-by mode
You can choose whether the display is always displayed on level in the stand-by mode or whether it displayed dim level after a desired time (10, 20, 30, 45, 60, 90, 120 or 180 second).
1 Press and hold »Menu/INFO« on the device to open the menu, select System Settings → Backlight.
2 Select the option »System settings« with »√« and confirm by pressing »OK«.
3 Select the option »Back light« with »▼«▲ and confirm by pressing »OK«.
4 Select the desired option "On" or 10, 20, 30, 45, 60, 90, 120 or 180 second) with »▼«▲ and confirm by pressing »OK«.
5 Press »Menu/INFO« to end the setting.
Note:
■ The display is illuminated after pressing any button.
Call up the software version
1 Press and hold »Menu/INFO« on the device or »Menu« on remote control to open the menu.
2 Select the option »System settings« with »▼ «▲and confirm by pressing »OK«.
3 Select the option »Info« with »▼/▲« and confirm by pressing »OK«.
- Display: Actual software version. For more information press »/«
4 Press and hold »Menu/INFO« on the device or »Menu« on remote control to end the display.
Deleting all settings (Reset)
This function enables you to reset all the custom settings back to the default settings. All settings are lost when you do this.
1 Open the menu with press and hold »Menu/INFO«.
2 Select the option »System settings« with »▼« and confirm by pressing »OK«.
3 Select the option »Factory reset« with »▼« and confirm by pressing »OK«.
- A safety confirmation is displayed.
4 Select the option »Yes« with »◀ ▶«.
Note:
■ To cancel the function select the option »No« by pressing »◀ ▶«.
5 Press »OK« to confirm setting.
- Display: »Restarting«.
Software Update
From time to time, software upgrades may be created with bug fixes and/or additional features. You can either check manually or set DTR 5000, TR3200 BT to check periodically automatically (this is the default). If newer available software is detected, you will be asked if you want to go ahead with an update. If you agree, the new software is then downloaded and installed. After a software upgrade, all user settings are maintained.
Note:
■ Before starting a software upgrade, ensure that DTR 5000, TR3200 BT is plugged into a stable main power connection. Disconnecting power during an upgrade may permanently damage the unit.
INFORMATIONS RELATIVES À LA SÉCURITÉ
Service < 24 W, veille < 1,0 W
Fabricant: Dongguan Guanjin Electronics Technology Co., Ltd.
Adresse: Block 16 Qiantou New Industrial Park, Niushan, Dongcheng District Guangdong Province, P.r. Chine.
Type : KPTEC K25V120200G
Informations relatives aux em- ballages


- Hinweise:
- RF Exposure Warning
- Technical data
- WLAN
- Power output:
- Max. power consumption:
- Frequency band:
- Dimension and weight:
- Frequency bands:
- Maximum radio-frequency power transmitted:
- AC Adaptor
- Compliance with the WEEE Directive and Disposing of the Waste Product:
- Compliance with RoHS Directive
- Package information
- POWER SUPPLY
- Mains operation
- Caution:
- Controls on the front
- Display
- /MODE
- Menu/INFO
- ALARM/BACK
- OK
- PRESET/
- BT PAIR
- ▲ Tuning+
- ▼ Tuning-
- Controls on the back
- Antenna
- USB
- DC IN
- ON/OFF
- The remote control
- CONNECTION AND PREPARATION
- Connecting external devices
- Notes:
- Connecting an MP3 player or a USB memory stick
- Note:
- Connecting the headphones
- Changing the remote control battery
- Environmental note:
- WLAN connection to the internet
- First Installation using the installation assistant "Wizard"
- Start First Installation
- Setting DAB stations
- Automatic station search
- Sorting channels
- Setting FM stations
- Setting the search mode
- Tuning stations manually
- Saving FM radio stations on presets
- Switching on and off
- Selecting the input source
- Adjusting the volume
- Muting
- Automatic switch-off
- INTERNET RADIO MODE
- Listening to an Internet radio station
- Selecting the internet radio stations input source
- Selecting Internet radio stations according to search criteria
- Selecting the Internet radio menu
- Searching for Internet radio stations in the »Genre« category
- Searching for Internet radio stations by name
- Storing Internet radio stations on presets
- Opening preset Internet stations
- Playing the contents of a USB memory stick
- Selecting the DAB input source
- Selecting a DAB station – from presets
- Selecting a DAB station – from the station list
- Displaying DAB station information
- Removing DAB radio stations from the program list
- Selecting the tuner input source
- Selecting stations – from presets
- Selecting stations – from the list Recall Preset
- Setting stereo or mono reception
- Bluetooth®
- Bluetooth device compatibility
- Selecting the input source Bluetooth
- Pairing Bluetooth device
- Connecting a paired Bluetooth Device
- Play Audio signal from your Bluetooth device
- Disconnect the Bluetooth device
- Reconnecting the Bluetooth device
- Automatic shutdown
- ALARM MODE
- Setting the alarm times and mode
- Interrupting the alarm
- Cancelling alarm stand-by
- Activating and deactivating the alarm
- Sleep Timer
- Select the switch-off time for the sleep timer
- Switch off the sleep timer
- Set the display illumination – for the stand-by mode
- Call up the software version
- Deleting all settings (Reset)
- Software Update
- INFORMATIONS RELATIVES À LA SÉCURITÉ
- Informations relatives aux em- ballages
Brand : GRUNDIG
Model : TR 3200 DAB
Category : Radio