Debut Kit - Computer drum ALESIS - Free user manual and instructions
Find the device manual for free Debut Kit ALESIS in PDF.
User questions about Debut Kit ALESIS
0 question about this device. Answer the ones you know or ask your own.
Ask a new question about this device
Download the instructions for your Computer drum in PDF format for free! Find your manual Debut Kit - ALESIS and take your electronic device back in hand. On this page are published all the documents necessary for the use of your device. Debut Kit by ALESIS.
USER MANUAL Debut Kit ALESIS
User Guide (English)
Introduction
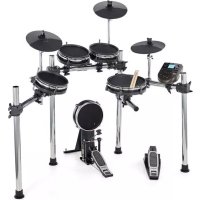
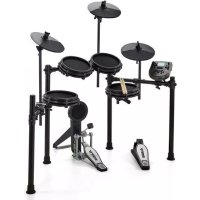
Box Contents
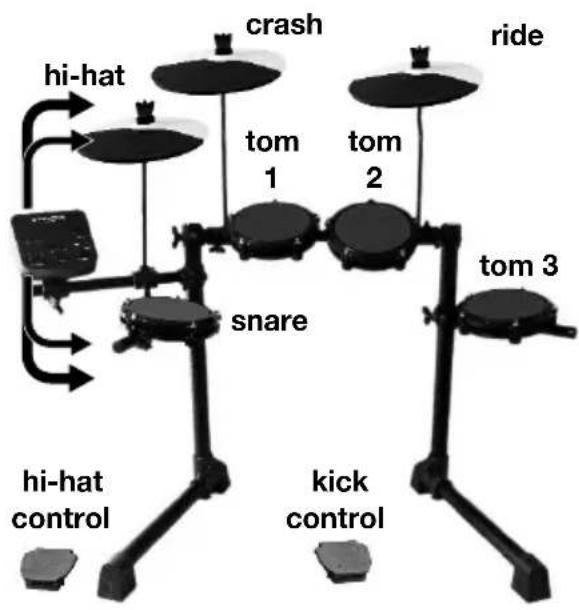
Debut drum rack, assembled including:
Debut sound module
(4) 6'' / 15.2 cm drum pads
(3) Cymbal poles
(3) 10^ / 25 cm Cymbal pads
(2) Floor pedals (hi-hat and kick)
Cable snake
Sound module power adapter
(2) Sticks
Drum Stool
Headphones
Drum key
Velcro strap
User Guide
Safety & Warranty Manual
Support
For the latest information about this product (system requirements, compatibility information, etc.) and product registration, visit alesis.com.
For additional product support, visit alesis.com/support.
Assembly
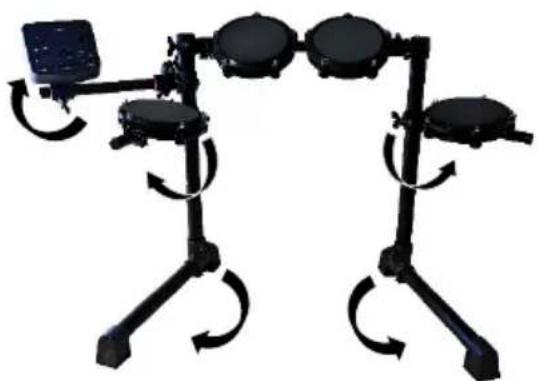
- Remove the Debut drum rack, cymbals and cymbal poles from each of their boxes.
Place the drum rack (as shown, right) on a flat, level surface.
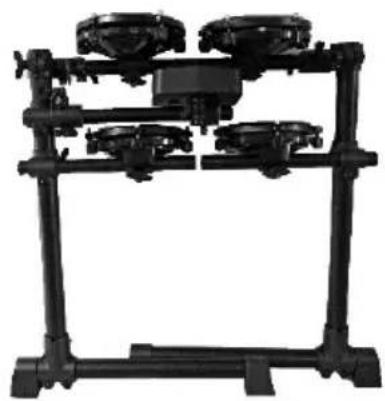
- Unfold the rack legs and loosen the joints of each rack arm to unfold.
If needed, flip the drum module arm vertically and then tighten to set it in place.
Once the kit has been fully expanded, retighten the joint clamps so the arms are secure.
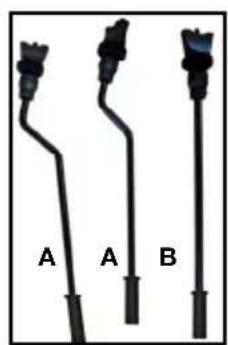
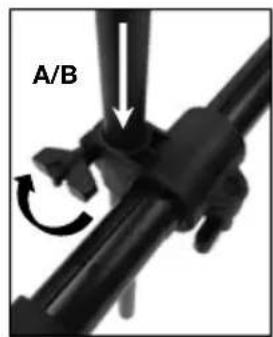
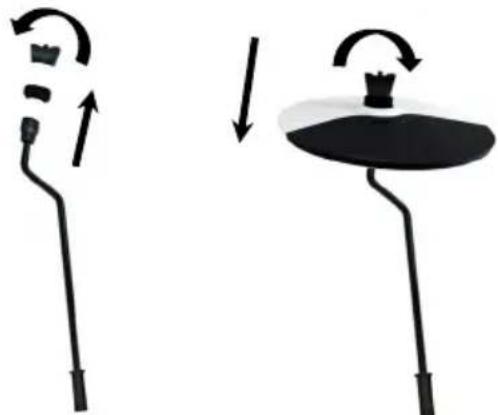
- Insert the cymbal arms to the empty cymbal clamps on the rack arms and tighten to secure.
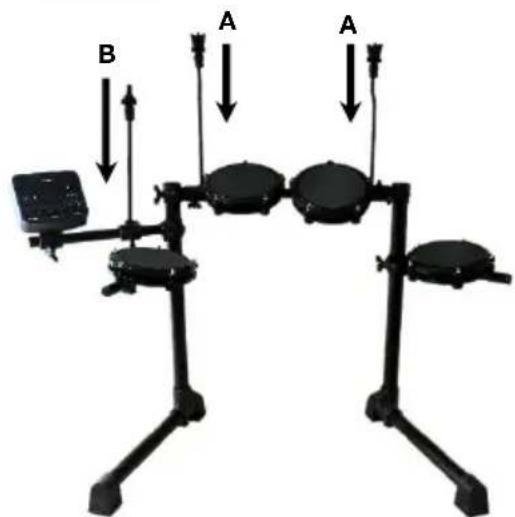
- Remove the wing-nuts and washers from each cymbal stand.
Attach the cymbal pads to the poles.
Reattach the wing-nuts and washers and tighten to secure the cymbal to the pole.
- Connect the multipin head of the included cable snake to the port on the bottom side of the Debut module.
Tighten the two screws to secure the cable snake to the module.
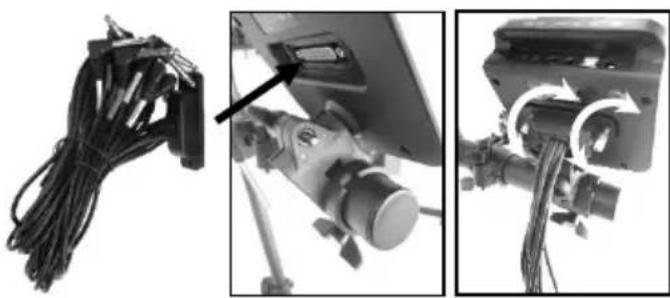
- Connect the labeled 1/4'' cables at the tail end of the cable snake to each respective drum pad, cymbal and foot pedal in the drum kit.
Secure the cables using the Velcro strap.
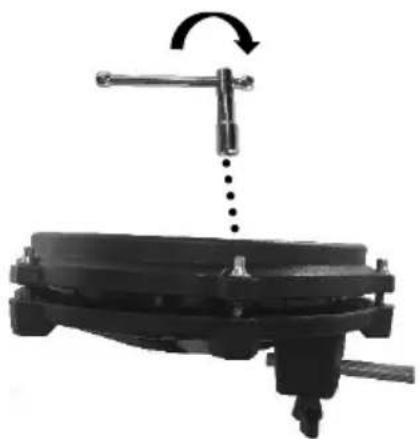
Feel free to adjust the tension of each mesh head by evenly tightening each tension rod with the included drum key
The tighter the tension, the more rebound and responsive the drum head will have. Welcome to your real drum experience!
Module Features
Top Panel
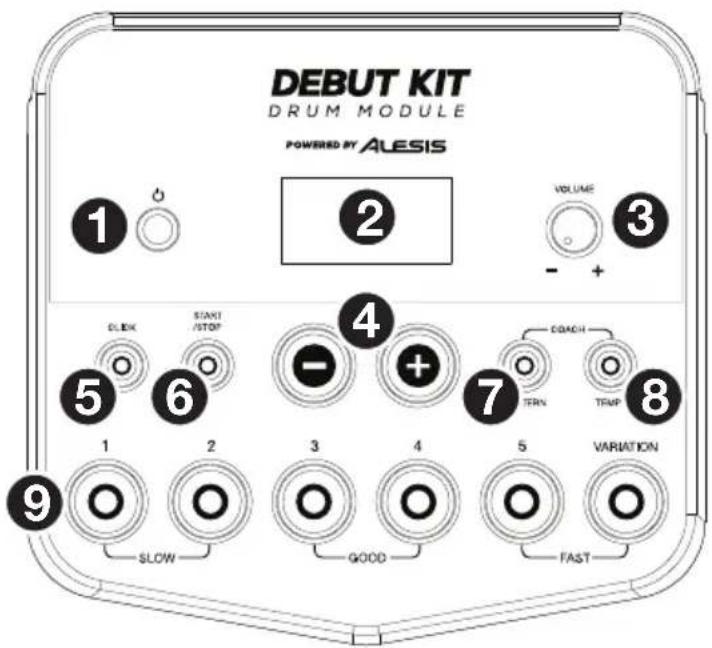
- Power Button: Press this button to turn the drum module on. Press and hold it for 2 seconds to turn the drum module off.
- Display: This screen shows information relevant to the drum module's current function and operation.
- Volume Knob: Turn this knob to adjust the volume of the Main Outputs and Phones Output.
-
- / +: Press either of these buttons to decrease or increase the value shown in the display.
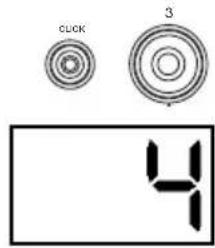
- Click Button: Press this button to turn the metronome ("click") on or off. See Using the Metronome (Click) for more information.
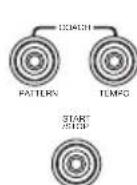
- Start/Stop Button: Press this button to start or stop playback of a pattern. See Playing Along with Patterns for more information.
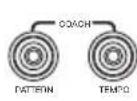
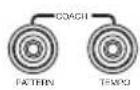
- Pattern Button: Press this button to enter Pattern Mode. Press both this button and the Tempo Button simultaneously to use the Built-In Drum Coach. See Playing Along with Patterns and Using the Built-In Drum Coach for more information.
- Tempo: Press this button to enter Tempo Mode and use the - / + buttons to adjust the tempo. Press both this button and the Pattern Button simultaneously to use the Built-In Drum Coach. See Using the Metronome (Click) and Using the Built-In Drum Coach for more information.
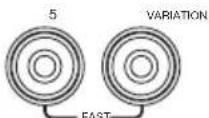
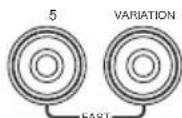
- 1-5/Variation Buttons: Press any one of these buttons to enter Kit Mode and select a Kit. When using the Built-In Drum Coach, you can use these buttons to select an exercise. See Using Kits and Using the Built-In Drum Coach for more information.
Rear Panel
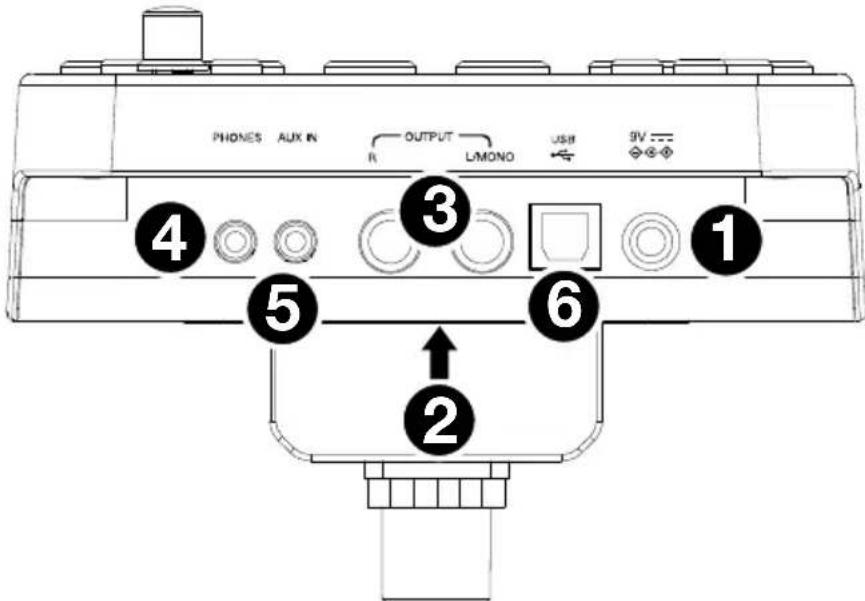
- Power Jack: Use the included power adapter (9 V, 500 mA, center pin-positive) to connect this jack to your power outlet.
- Cable Snake Input: Connect the head of the included cable snake here. Connect the cables at the tail end of the cable snake to your kit's triggers (drum pads, cymbal pads, and pedals).
- Main Outputs: Use standard 1/4'' mono cables (not included) to connect these outputs to your monitor, amplifier, or PA system. Adjust the volume of these outputs with the Volume Knob on the top panel.
- Phones Output: Connect standard 1/8" stereo headphones (not included) to this output. Adjust the volume of this output with the Volume Knob on the top panel.
- Aux In: Use a 1/8" stereo cable (not included) to connect an external audio device (smartphone, CD player, etc.) to this input.
- USB Port: Use a standard USB cable (not included) to connect your computer to this port, which allows you to send and receive MIDI messages to and from your computer. See MIDI for more information.
Operation
Playing the Pads
Try hitting the pads with different amounts of force to experiment with the different sounds produced by the module!
The hi-hat sound will vary based on the position of the hi-hat controller pedal:
- Open hi-hat: With your foot off the pedal, hit the hi-hat pad.
- Closed hi-hat: With your foot pressing the pedal all the way down, hit the hi-hat pad.
- Pedal close: Press the hi-hat pedal all the way down without hitting the hi-hat pad.
- Splash: Quickly press the hi-hat pedal all the way down, and then release it immediately.
Selecting a Kit
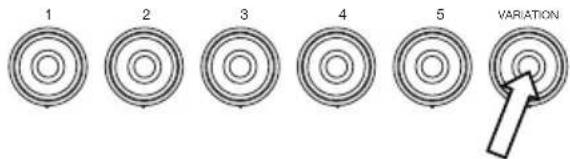
To select one of the module's 10 preset kits, do one of the following:
- Press the Variation button so it is lit red, and then press the 1, 2, 3, 4, or 5 button to select Kit 1, 2, 3, 4, or 5 respectively.
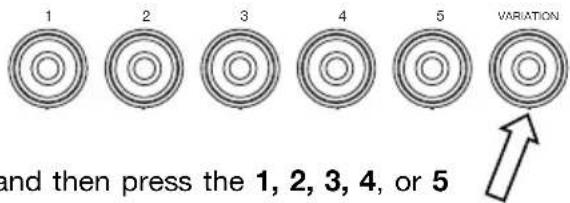
- Press the Variation button so it is lit green, and then press the 1, 2, 3, 4, or 5 button to select Kit 6, 7, 8, 9, or 10 respectively.
The Kit Number will appear in the Display. Once you have selected a kit, you can select others by repeating one of the steps above or by using the - / + buttons.
Adjusting Kit Volumes
To adjust the volume of each separate kit:
-
Do one of the following:
-
With the Variation button lit red, doublepress the 1, 2, 3, 4, or 5 button to select Kit 1, 2, 3, 4, or 5 respectively.
- With the Variation button lit green, double-press the 1, 2, 3, 4, or 5 button to select Kit 6, 7, 8, 9, or 10 respectively.
- The Display will show the volume level (L00 - L32). Use the - / + buttons to set the kit's volume level (the default volume level is L28).
- Wait 4 seconds. The kit's new volume setting will be saved automatically.

Playing Along with Patterns
Selecting and Playing a Pattern
To select one of the 30 preset patterns:
- Press the Pattern button to enter Pattern Mode. The button's LED will light up, and the Display will show the current Pattern Number.
- Use the - / + buttons to select a pattern. (You can hold down the - or + button to scan quickly through the list).
- Press the Start/Stop button to start the pattern's playback.
- Play along to the pattern!
- Press the Start/Stop button to stop the pattern's playback.


Adjusting the Pattern Volume
To adjust the volume of each separate pattern:
- Double-press the Pattern button.
- The Display will show the volume level (00 - 32). Use the - / + buttons to set the pattern's volume level (the default volume level is 25).


Using the Metronome (Click)
You can use the built-in metronome ("click") to help you keep time while practicing with the built-in Drum Coach or with patterns. You can change the metronome's tempo (speed), volume, sound, and time signature.
Turning the Metronome On or Off
To turn the metronome on or off, press the Click button.

Adjusting the Metronome Tempo
To adjust the metronome's tempo (speed):
- Press the Tempo button.
- The Display will show the current tempo (30 - 280) in BPM ("beats per minute"). Use the - / + buttons to set the new tempo.
- Wait 4 seconds. The drum module will automatically save the new setting.


Adjusting the Metronome Volume
To adjust the metronome's volume:
- Double-press the Click button.
- The Display will show the volume level (L00 - L32). Use the - / + buttons to set the metronome's volume level (the default volume level is L25).
- Wait 4 seconds. The drum module will automatically save the new setting.


Changing the Metronome Sound
To change the metronome's "click" sound:
- Press the Click button and 1 button simultaneously.
-
The Display will show CL ("click") and the number of the sound (CL1 - CL5). Use the - / + buttons to set the metronome sound:
-
CL1: Chime and click (default)
- CL2:Clave
- CL3: Side-stick
- CL4: Cowbell
- CL5: Vocal


- Wait 4 seconds. The drum module will automatically save the new setting.
Changing the Metronome Time Signature
To change the metronome's time signature:
- Press the Click button and 2 button simultaneously.
- The Display will show the current time signature. Use the - / + buttons to select a time signature: 1/2, 2/2, 3/4, 4/4, or 6/8.
- Wait 4 seconds. The drum module will automatically save the new setting.


Changing the Metronome Interval
To change the metronome's note division (the note value it measures with each click):
- Press the Click button and 3 button simultaneously.
- The Display will show the current interval. Use the - / + buttons to select a new interval: 2 (half note), 3 (triplet), 4 (quarter note), 6 (sextuplet), 8 (eighth note), or 16 (sixteenth note). The default is 4.
- Wait 4 seconds. The drum module will automatically save the new setting.
Using the Built-In Drum Coach
The Built-In Drum Coach contains five different exercises to help you develop and improve your accuracy, stamina, and sense of tempo: Beat Check, Gradual Up/Down, Rhythm Change Up, Follow Me, and Drum Mute.
To use the Built-In Drum Coach, press the Pattern button and Tempo button at the same time. Then, press the 1, 2, 3, 4, or 5 button that corresponds to the exercise you want to do. The Display will show which exercise you have selected:
- Beat Check (bCH)
- Gradual Up/Down (GuD)
- Rhythm Change Up (C-U)
- Follow Me (FLo)
5.Drum Mute (d-U)
Beat Check
This exercise evaluates your sense of timing and how accurately you play along with the metronome.
To use Beat Check:
- Press the Pattern button and Tempo button at the same time. Then press the 1 button.
- Set the metronome's time signature and interval (as described in Using the Metronome (Click)).
- Press the Start/Stop button to begin.
-
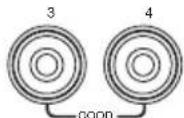
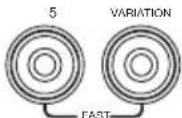
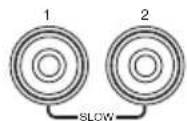
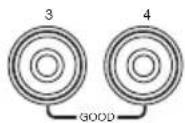
Hit the pads in time with the metronome. The six LEDs of the 1-5/Variation buttons indicate how accurate or "in time" you are.
-
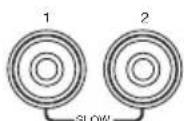
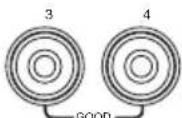
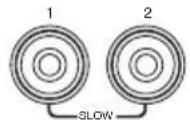
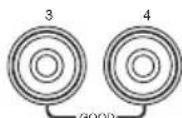
When you are right on the beat, the 3 and 4 buttons light up.
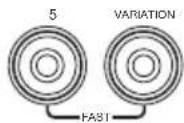
- When you are slightly off the beat, the 2 or 5 button will light up.
- When you are off the beat, the 1 or Variation button will light up.
- When you are completely off the beat, no buttons will light up.


- Press the Start/Stop button to stop.
Gradual Up/Down
This exercise evaluates how quickly you can play while still maintaining accurate time.
To use Gradual Up/Down:
- Press the Pattern button and Tempo button at the same time. Then press the 2 button.

-
Set the metronome's time signature and interval (as described in the Using the Metronome (Click) section).
-
Press the Start/Stop button.
-
Do one of the following:
-
Press the 1 button to select G-1 Mode. In this mode, the tempo automatically decreases or increases by 5 BPM every 4 measures, depending on your accuracy.
-
Press the 2 button to select G-2 Mode. In this mode, the tempo automatically decreases or increases by 1 BPM each measure (The starting tempo is your metronome's current setting).


-
Hit the pads in time with the metronome. The six LEDs of the 1-5/Variation buttons indicate how accurate or "in time" you are.
-
When you are right on the beat, the 3 and 4 buttons light up.
-
When you are slightly off the beat, the 2 or 5 buttons will light up.
-
When you are off the beat, the 1 or Variation button will light up.
-
When you are completely off the beat, no buttons will light up.
- Press the Start/Stop button to stop.
Rhythm Change Up
This exercise helps you practice changing rhythms while still maintaining accurate time.
To use Rhythm Change Up:
- Press the Pattern button and Tempo button at the same time. Then press the 3 button.


-
Press the Start/Stop button.
-
Press the 1, 2, or 3 button or use the - / + buttons to select a rhythmic progression, shown below:

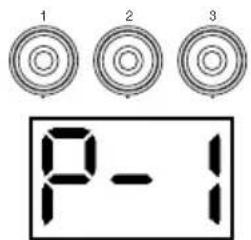
-
Press the Start/Stop button to begin.
-
Hit the pads in the rhythm you selected (above) and in time with the metronome (the starting tempo is your metronome's current setting). The six LEDs of the 1-5/Variation buttons indicate how accurate or "in time" you are:
-
When you are right on the beat, the 3 and 4 buttons will light up.
- When you are slightly off the beat, the 2 or 5 button will light up.
- When you are off the beat, the 1 or Variation button will light up.
- When you are completely off the beat, no buttons will light up.
The Display will show your score:
0-29:OK
30-59:Good
60-79: Very Good
80-100:Excellent
Follow Me
This exercise helps you identify different drums by their sound and memorize drum rhythms that use the entire drum kit. In this exercise, the drum module will alternate between (1) a drum pattern and (2) a metronome track of the same length during which you play the drum pattern yourself.
To use Follow Me:
- Press the Pattern button and Tempo button at the same time. Then press the 4 button.


-
Press the Start/Stop button.
-
Use the - / + buttons to select the drum pattern you want to play in.
-
Press the Start/Stop button to begin.
-
When you hear the drum pattern, try to identify which pads are being played and when. During the metronome track that follows, play the same drum pattern in time with the metronome. For reference, the Display will show the current beat. The six LEDs of the 1-5/Variation buttons indicate how accurate you are.
-
Press the Start/Stop button to stop.

Drum Mute
This exercise lets you silence specific parts of various drum patterns so that you can test different drumming techniques as you fill in the gaps while playing along with the pattern.
To use Drum Mute:
- Press the Pattern button and Tempo button at the same time, and then press the 5 button.


- Press the Start/Stop button.
- Use the - / + buttons to select the drum pattern you want to play to.
- Press one or several of the 1-5/Variation buttons to select the sound or sounds you want to mute:
1: Kick drum
2: Snare drum
3: Hi-hat
4: Toms
- 5: Crash and ride cymbals
- Variation: Percussion
- Press the Start/Stop button to begin.
- Play freely along with the drum pattern you hear. The drum pattern will not include any sounds you muted in Step 4, allowing you to create your own part.
- Press the Start/Stop button to stop.
Automatic Power-Off
To save energy, the drum module will power off automatically after 30 minutes of no activity. If you do not need this feature, disable it by powering off the drum module and then pressing and holding the Start/Stop button while powering it back on. PoF will appear on the display to confirm the feature is off.
Note: After powering off, this feature will be re-enabled. Repeat the procedure described above to disable the feature when you power on the module again.
MIDI
About MIDI
MIDI (Musical Instrument Digital Interface) is a standard way in which certain electronic musical devices can communicate with each other. When two MIDI devices are connected, they can send/receive MIDI "messages" over either a 5-pin MIDI cable or a standard USB cable (depending on ports available on the devices).
In the case of the Debut Drum Module, you can connect its USB port to a USB port on your computer with a standard USB cable (sold separately). All MIDI messages will travel to and from your computer over this connection. This allows you to do one of two things:
- Use an electronic drum kit connected to the drum module to trigger sounds on an external MIDI device (e.g., a sequencer, your computer if you use software that can receive MIDI notes, etc.). See Triggering Sounds on an External MIDI Device later in this section.
- Use an external MIDI device to play sounds in the drum module. See Using the Drum Module as the Sound Module later in this section.
Triggering Sounds on an External MIDI Device
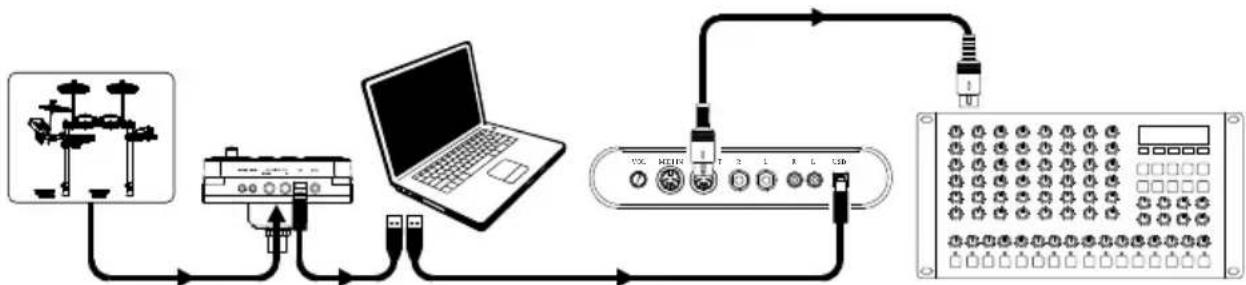
- Using a standard USB cable (not included), connect the drum module's USB port to a USB port on your computer.
- If you are triggering sounds in software, skip to the next step.
If you are triggering sounds in an external MIDI device, make sure that device is connected to your computer (either directly via USB or through a USB-MIDI interface).
- Set the active track of your MIDI software, sequencer, etc. to Channel 10, and start recording.
- Play your electronic drum kit. The MIDI information will be sent to your computer, sequencer, etc.
- Stop recording.
Using the Drum Module as the Sound Module
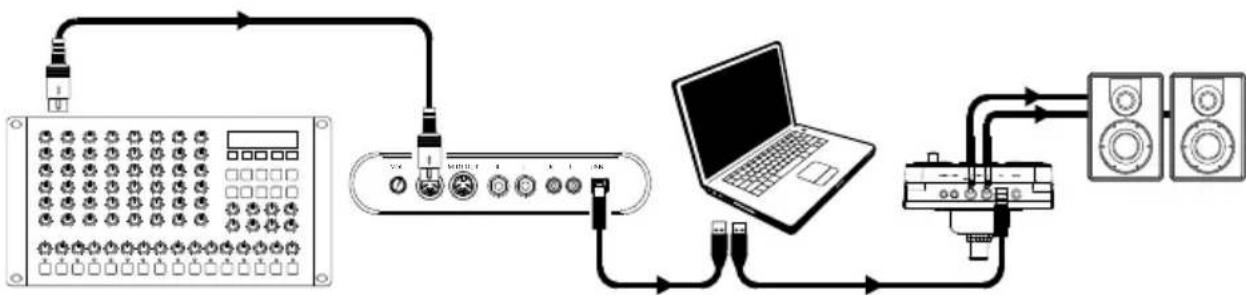
- Using a standard USB cable (not included), connect the drum module's USB port to a USB port on your computer.
- If you are using software to play the drum module's sounds, skip to the next step. If you are using an external MIDI device to play the drum module's sounds, make sure that device is connected to your computer (either directly via USB or through a USB-MIDI interface).
- Set the active track of your MIDI software, sequencer, etc. to the desired channel (1-16). Note: Channel 10 of the drum module is reserved for drum sounds.
- Play your sequencer or other external device to hear the drum module's internal sounds.
Follow Me (accompagnement)
Technical Specifications
| Kits | 10 preset kits; 5 General MIDI (GM) kits |
| Sequencer | 30 Patterns; 12 "Follow Me" patterns |
| Resolution | 192 ticks per quarter note |
| Maximum Polyphony | 64 |
| Display | 3-digit LED |
| Tempo | 30 – 280 BPM |
| Connectors | 25-pin trigger input jack (for cable snake) 1/8" TRS headphone output 1/4" TS main outputs (right and left/mono) 1/8" TRS auxiliary input USB port (MIDI) Power jack |
| Power | 9 V, 500 mA, center pin-positive |
| Dimensions (width x height x depth; sound module only) | 5.8" x 7.2" x 4.4" 147 mm x 183 mm x 112 mm |
| Weight (sound module only) | 1.1 lbs. 0.5 kg |
Specifications are subject to change without notice.
Trademarks & Licenses
Alesis is a trademark of inMusic Brands, Inc., registered in the U.S. and other countries. All other product names, company names, trademarks, or trade names are those of their respective owners.