SWS2326W - Audio Amplifier PHILIPS - Free user manual and instructions
Find the device manual for free SWS2326W PHILIPS in PDF.



User questions about SWS2326W PHILIPS
0 question about this device. Answer the ones you know or ask your own.
Ask a new question about this device
Download the instructions for your Audio Amplifier in PDF format for free! Find your manual SWS2326W - PHILIPS and take your electronic device back in hand. On this page are published all the documents necessary for the use of your device. SWS2326W by PHILIPS.
USER MANUAL SWS2326W PHILIPS
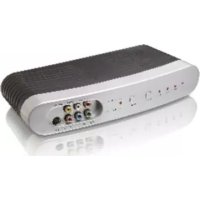
Congratulations on your purchase of PHILIPS Multi-video input A/V switcher. Your A/V switcher is designed to accept up to 4 signals from any AV equipment and deliver them to a TV or a Home Theater System. The switcher accepts video input signals from component, s-video or composite video sources and audio input signals from a stereo audio source to provide a single audio/video output to your TV. NOTE:The switcher can convert an s-video signal to composite video, and vice versa. But it can not convert component video signals. The switcher is designed to operate either in Manual mode or Automatic mode.
Parts Required
You will need the following items, not supplied with your AV switcher.
Stereo audio cable
Component video cable OR
S-Video cable OR
Composite Video cables

Connection
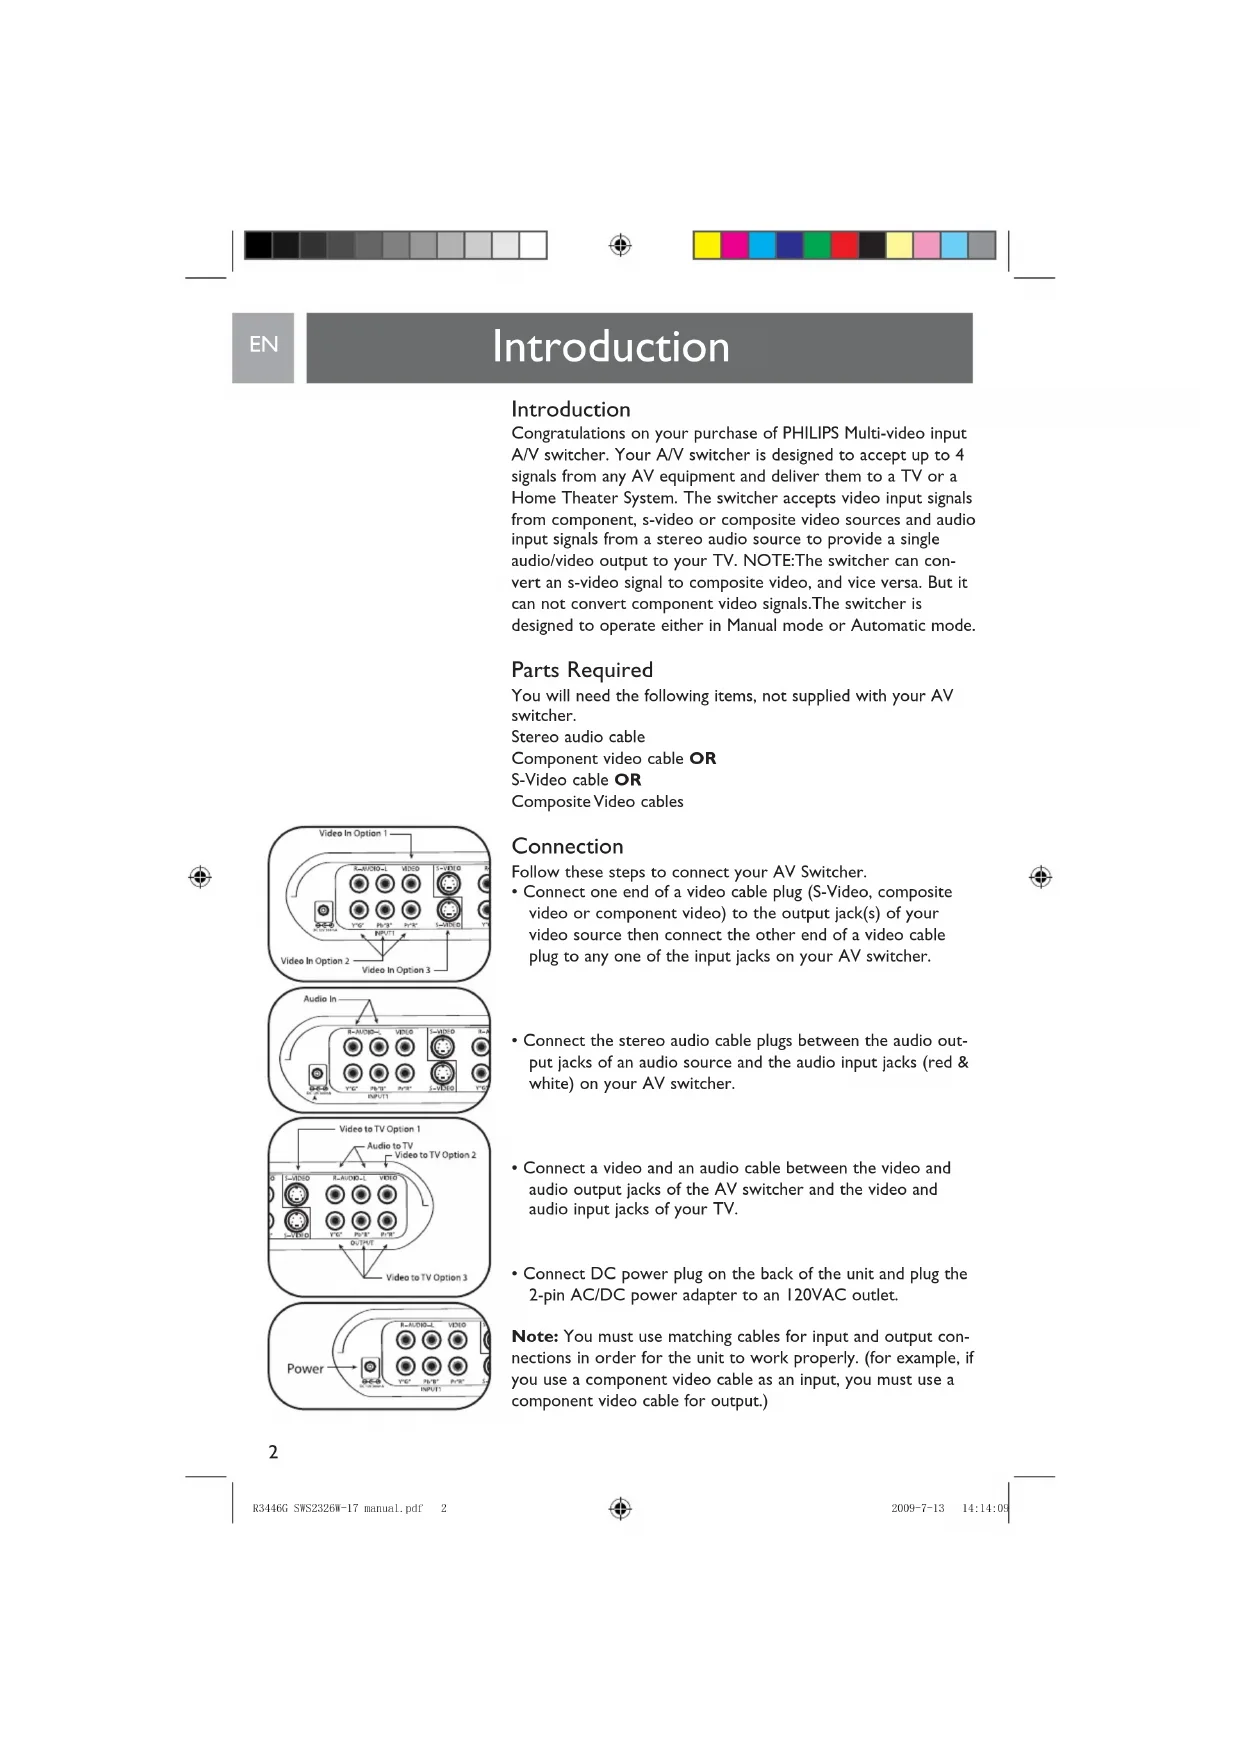
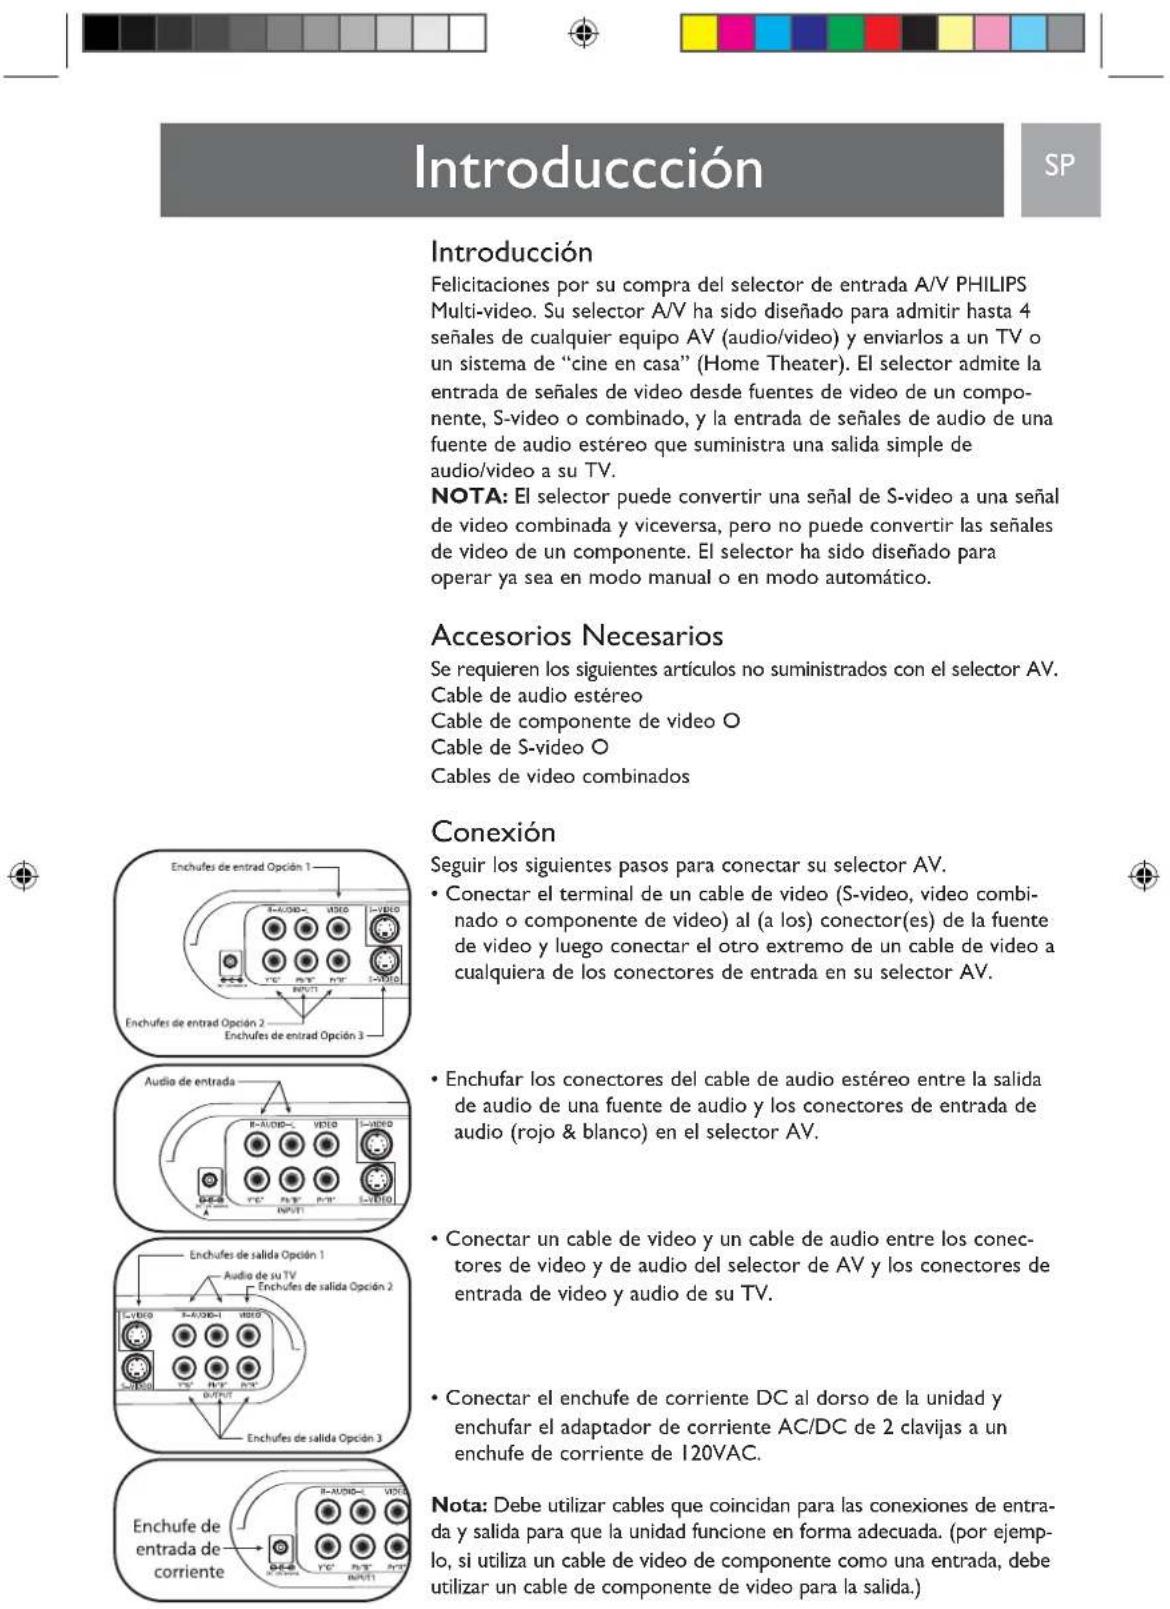
Follow these steps to connect your AV Switcher.
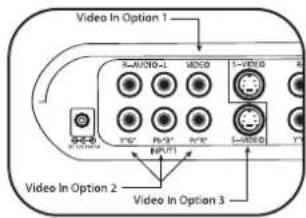
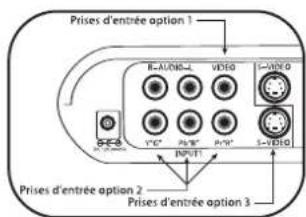
- Connect one end of a video cable plug (S-Video, composite video or component video) to the output jack(s) of your video source then connect the other end of a video cable plug to any one of the input jacks on your AV switcher.
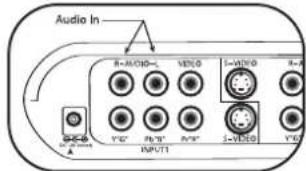
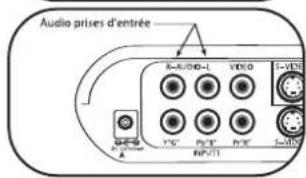
- Connect the stereo audio cable plugs between the audio output jacks of an audio source and the audio input jacks (red & white) on your AV switcher.
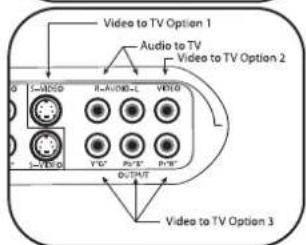
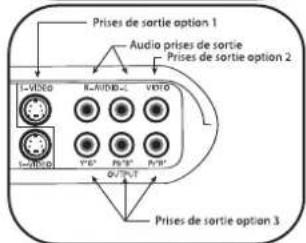
- Connect a video and an audio cable between the video and audio output jacks of the AV switcher and the video and audio input jacks of your TV.
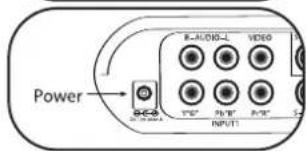
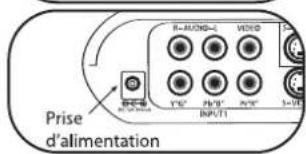
- Connect DC power plug on the back of the unit and plug the 2-pin AC/DC power adapter to an I20VAC outlet.
Note: You must use matching cables for input and output connections in order for the unit to work properly. (for example, if you use a component video cable as an input, you must use a component video cable for output.)
Operation
EN
MODE Button
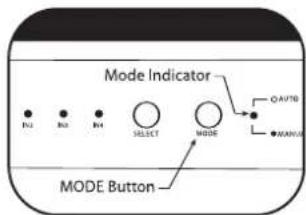
The MODE button toggles between the automatic mode and the manual mode. In the automatic mode, the red LED is normally ON. In the manual mode, the red LED is OFF. By default, the AV switcher will be in the automatic mode. To change from an automatic mode to manual mode, simply press the MODE button once, the red LED will turn OFF.
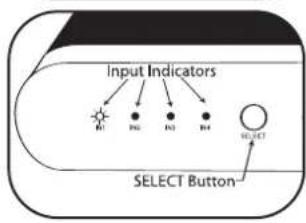
SELECT Button
The SELECT button is available only when the AV switcher is in the manual mode. By default, the AV switcher selects input-1 when switching from automatic mode to manual mode. To select a desired input simply press the SELECT button and the AV switcher changes inputs from Input-1 to Input-2 and IN2 LED will be lit. Press the SELECT button again, Input-3 will be selected and IN3 LED will be lit. Pressing the SELECT button again will select next input which is Input-4 and IN4 LED will be lit. The input selection is cyclic.

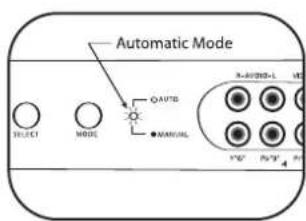
Automatic Mode Operation
When the MODE LED is ON, the unit is in automatic mode. The unit automatically searches for all video inputs to find the last active video signal. The unit is designed to select the last active video input automatically. For Example:
If a user selected video inputs in this sequence IN1 IN2 IN3 IN4, at this time, the video output will be from IN4 (front Input). If there is no video signal for IN4 input, the unit automatically switches to next previous input source. (in this case, it will be IN3).
If the user selects video input in this sequence: IN1 IN3 IN4 IN2, at this time, the video output will be IN2. If there is no video signal for IN2 input, the unit will switch to next previous video input source (in this case, it will be IN4).
Note: When the switcher is in automatic mode and the user decides to change to Manual mode, the output of this unit will be routed to the last active input.
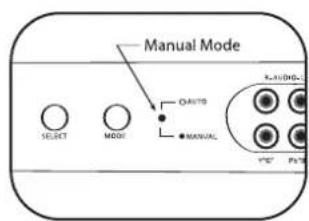
Manual Mode Operation
When the user presses the MODE button, the unit enters into manual mode. The mode indicating LED will go off, the LED IN1 will be lit. The output of this box will be routed to IN1. If the user presses the SELECT button, the LED IN2 will be lit and LED IN1 will go off. The output of this box will now be routed
EN
Operation
to input 2. This procedure is cyclic, user can manually change inputs from IN1 to IN4 in sequence.
Note: When the unit is being used in the Manual mode operation and the user changes to Automatic mode, the operation will begin as outlined in the Automatic Mode Operation.
Technical Support
Technical Support
For Technical Support send an email with the model number of the product and a detailed description of your problem to:
Email:accessorsupport@philips.com
Warranty

Limited One-Year Warranty:
Philips warrants that this product shall be free from defects in material, workmanship and assembly, under normal use, in accordance with the specifications and warnings, for one year from the date of your purchase of this product. This warranty extends only to the original purchaser of the product, and is not transferable. To exercise your rights under this warranty, you must provide proof of purchase in the form of an original sales receipt that shows the product name and the date of purchase. For customer support or to obtain warranty service, please call 1-919-573-7854. THERE ARE NO OTHER EXPRESS OR IMPLIED WARRANTY. Philips' liability is limited to repair or, at its sole option, replacement of the product. Incidental, special and consequential damages are disclaimed where permitted by law. This warranty gives you specific legal rights. You may also have other rights that vary from state to state.
Printed in China
SP
Operacion
Operacion
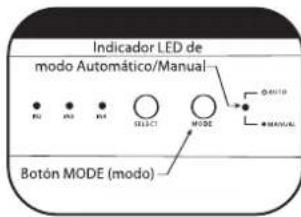
Botón MODE
Cable composant video OU
Cable s-video OU
Cables video composite

8
Connexion
Assistance Technique
Assistance technique
Courriel:accessorsupport@philips.com
Garantie
Specifications are subject to change without notice.
Trademarks are property of Philips Accessories and Computer Peripherals
2006© Philips Accessories and Computer Peripherals, Ledgewood, NJ USA
www.philips.com
X
12