USER MANUAL HPI214B BEKO
natural_image
Simple geometric diagram showing a circle inside a square (no text or symbols)
HPI 214 B
ENFRSRSQMK
01M-8864783200-4618-01
01M-8864773200-4618-01
01M-?-4618-01

Please read this manual first!
Dear Customers!
Thank you for selecting a Beko product. We hope that you get the best results from your product which has been manufactured with high quality and state-of-the-art technology. Therefore, please read this entire user manual and all other accompanying documents carefully before using the product and keep it as a reference for future use. If you handover the product to someone else, give the user manual as well. Follow all warnings and information in the user manual.
Remember that this user manual is also applicable for several other models. Differences between the models are explicitly described in the manual.
Meanings of the Symbols
Following symbols are used in the various section of this manual:

Important information and useful hints about usage.

WARNING: Warnings for dangerous situations concerning the safety of life and property.
Warning for electric shock.
Warning for hot surfaces.

Do not immerse.

This product has been produced in environmentally friendly, modern facilities.
INDEX
ENGLISH 05-17
FRANÇAIS 18-31
СРПСКИ 32-44
SHQIPTARE 45-57
МАКЕДОНСКИ 58-71
1 Important instructions and warnings for safety and environment
This section contains safety instructions that will help protect from risk of personal injury or property damage. Failure to follow these instructions shall void any warranty.
1.1 General safety
- This appliance can be used by children aged from 8 years and above and persons with reduced physical, sensory or mental capabilities or lack of experience and knowledge if they have been given supervision or instruction concerning use of the appliance in a safe way and understand the hazards involved.
Children shall not play with the appliance. Cleaning and user maintenance shall not be made by children unless they are older than 8 and supervised.
- Keep the appliance and its cord out of reach of children less than 8 years.
• Installation and repair procedures must always be performed by Authorized Service Agents.
The manufacturer shall not be held responsible for damages arising from procedures carried out by unauthorized persons which may also void the warranty. Before installation, read the instructions carefully.
- Do not operate the product if it is defective or has any visible damage.
- Ensure that the product function knobs are switched off after every use.
1.2 Electrical safety
- If the product has a failure, it should not be operated unless it is repaired by an Authorized Service Agent. There is the risk of electric shock!
- Only connect the product to a grounded outlet/line with the voltage and protection as specified in the “Technical specifications”. Have the grounding installation made by a qualified electrician while using the product with or without a transformer. Our company shall not be liable for any problems arising due to the product not being earthed in accordance with the local regulations.
1 Important instructions and warnings for safety and environment
- Never wash the product by spreading or pouring water onto it! There is the risk of electric shock!
- The product must be disconnected during installation, maintenance, cleaning and repairing procedures.
- If the power connection cable for the product is damaged, it must be replaced by the manufacturer, its service agent or similarly qualified persons in order to avoid a hazard.
- The appliance must be installed so that it can be completely disconnected from the mains supply. The separation must be provided by a switch built into the fixed electrical installation, according to construction regulations.
- Any work on electrical equipment and systems should only be carried out by authorized and qualified persons.
- In case of any damage, switch off the product and disconnect it from the mains. To do this, turn off the fuse at home.
- Make sure that fuse rating is compatible with the product.
Metallic objects such as knives, forks, spoons and lids should not be placed on the hotplate since they can get hot.
1.3 Product safety
- The appliance and its accessible parts become hot during use. Care should be taken to avoid touching heating elements. Children less than 8 years of age shall be kept away unless continuously supervised.
- Never use the product when your judgment or coordination is impaired by the use of alcohol and/or drugs.
- Be careful when using alcoholic drinks in your dishes. Alcohol evaporates at high temperatures and may cause fire since it can ignite when it comes into contact with hot surfaces.
- Do not place any flammable materials close to the product as the sides may become hot during use.
- Keep all ventilation slots clear of obstructions.
1 Important instructions and warnings for safety and environment
- Do not use steam cleaners to clean the appliance as this may cause an electric shock.
- Unattended cooking on a hob with fat or oil can be dangerous and may result in fire. NEVER try to extinguish a fire with water, but switch off the appliance and then cover flame e.g. with a lid or a fire blanket.
- Danger of fire: Do not store items on the cooking surfaces.
- If the surface is cracked, switch off the appliance to avoid the possibility of electric shock.
• After use, switch off the hob element by its control and do not rely on the pan detector.
- Metallic objects such as knives, forks, spoons and lids should not be placed on the hob surface since they can get hot.
- The appliance is not intended to be operated by means of an external timer or separate remote-control system.
- Vapour pressure that build up due to the moisture on the hob surface or at the bottom of the pot can cause the pot to move. Therefore, make sure that the oven surface and bottom of the pots are always dry.
- Hotplates are equipped with “Induction” technology. Your induction hob that provides both time and money savings must be used with pots suitable for induction cooking; otherwise hotplates will not operate. See.General information about cooking, page 14, selecting the pots.
- As induction hobs create a magnetic field, they may cause harmful impacts for people who use devices such as insulin pump or pacemaker.
- Use only hob guards designed by the manufacturer of the cooking appliance or indicated by the manufacturer of the appliance in the instructions for use as suitable or hob guards incorporated in the appliance. The use of inappropriate guards can cause accidents.
• Prevention against possible fire risk!
- Ensure all electrical connections are secure and tight to prevent risk of arcing.
- Do not use damaged cables or extension cables.
- Ensure liquid or moisture is not accessible to the electrical connection point.
1 Important instructions and warnings for safety and environment
1.4 Intended use
- This product is designed for domestic use. Commercial use will void the guarantee.
- This appliance is for cooking purposes only. It must not be used for other purposes, for example room heating.
- The manufacturer shall not be liable for any damage caused by improper use or handling errors.
1.5 Safety for children
- Accessible parts may become hot during use. Young children should be kept away.
- The packaging materials will be dangerous for children. Keep the packaging materials away from children. Please dispose of all parts of the packaging according to environmental standards.
- Electrical products are dangerous to children. Keep children away from the product when it is operating and do not allow them to play with the product.
- Do not place any items above the appliance that children may reach for.
1.6 Disposing of the old product
Compliance with RoHS Directive:
The product you have purchased complies with EU RoHS Directive (2011/65/EU). It does not contain harmful and prohibited materials specified in the Directive.

Packaging materials of the product are manufactured from recyclable materials in accordance with our National Environment Regulations. Do not dispose of the packaging materials together with the domestic or other wastes. Take them to the packaging material collection points designated by the local authorities.
1 Important instructions and warnings for safety and environment
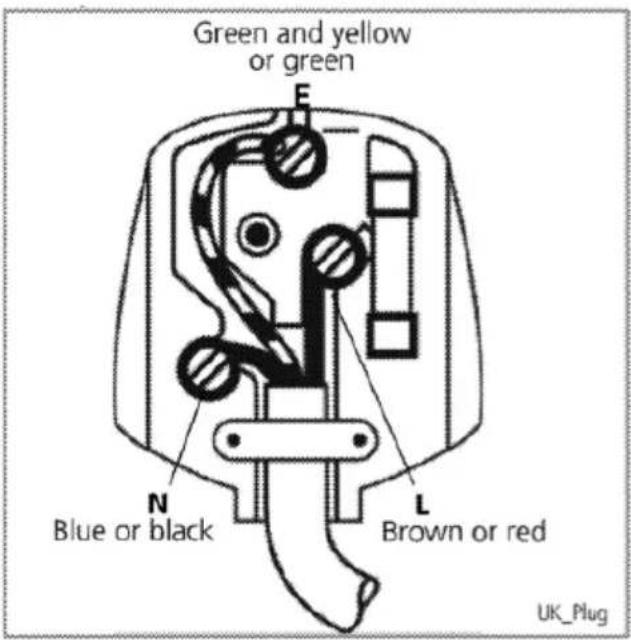
1.8 Plug Wiring
The moulded plug on this appliance incorporates a 13 A fuse. Should the fuse need to be replaced an ASTA approved BS1362 fuse of the same rating must be used. Do not forget to refit the fuse cover. In the event of losing the fuse cover, the plug must not be used until a replacement fuse cover has been fitted. Colour of the replacement fuse cover must be the same colour as that visible on the pin face of the plug Fuse covers are available from any good electrical store.
- Fiting a different plug
- As the colours of the wires in the mains lead of this appliance may not correspond with the coloured markings identifying the terminals on your plug, proceed as follows:
- Brown cable = L (Live)
- Blue cable = N (Neutral)
- Green/yellow cable must be connected to ground (E) the
- With the alternative plugs a 13 A fuse must be fitted either in the plug or adaptor or in the main fuse box. If in doubt contact a qualified electrician.
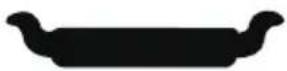
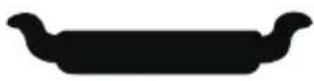
2.1 Overview
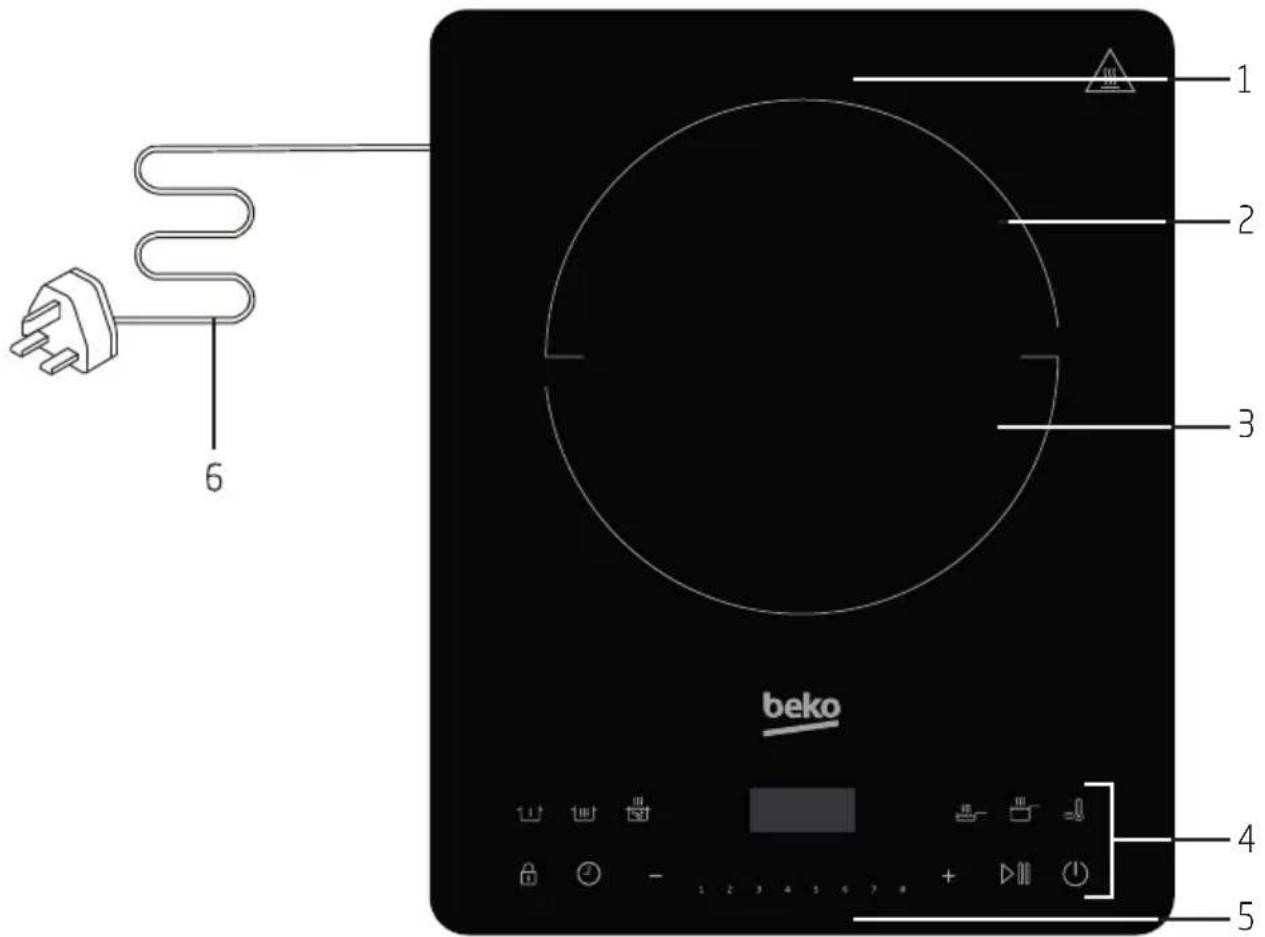
- Air vent
- Ceramic plate
- Cooking zone indicator
- Control panel
- Air entry
- Power cord
2.2 Technical data
| Applied voltage/ frequency | 220-240 V ~ 50/60Hz |
| Rated power | 2000 W |
| Dimension (mm) | 360x290x45 |
| Net weight | 2.65 kg |
2.3 Control panel
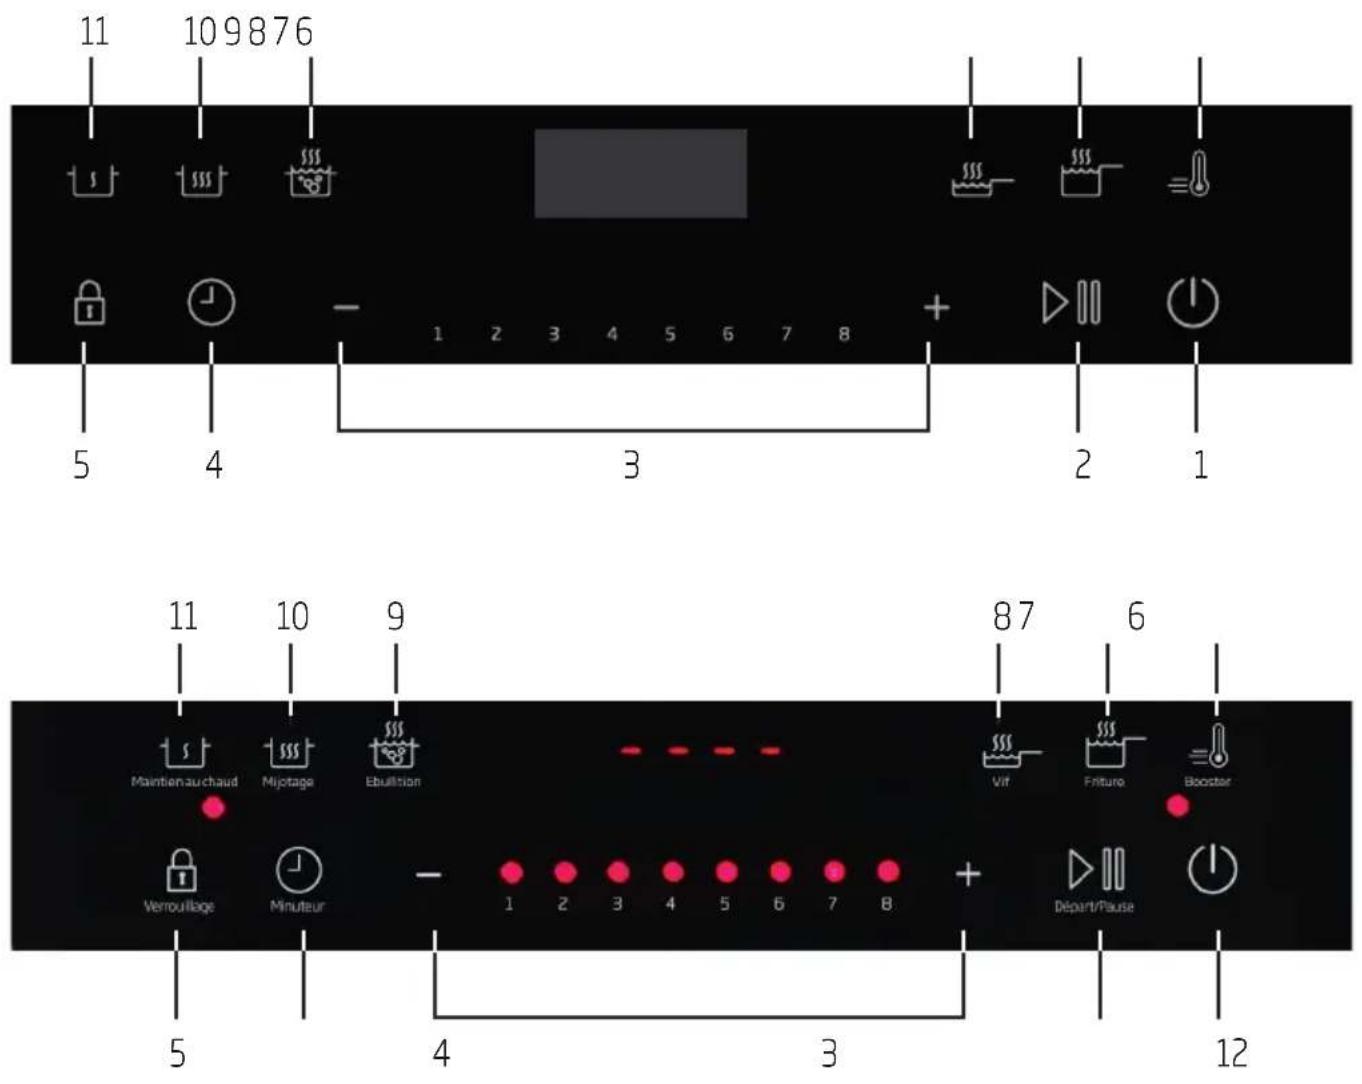
-
ON/STANDBY
-
Pause
-
Power regulating controls
-
Timer
-
Child lock
-
Boost
-
Deep fry
-
Fry
-
Boil
-
Simmer
-
Keep warm
| Value |
| Type of hob Freestanding | |
| Number of cooking zones and/or areas 1 | |
| Heating technology (induction cooking zones and cooking areas, radiant cooking zones, solid plates) | Induction cooking zone |
| For circular cooking zones or area: diameter of useful surface area per electric heated cooking zone, rounded to the nearest 5 mm | 20.0 cm |
| Energy consumption per cooking zone or area calculated per kg (EC electric cooking) 199.5 Wh/kg | |
| Energy consumption for the hob calculated per kg (EC electric hob) 199.5 Wh/kg | |
It is recommended to select power setting level 2 to achieve maximum energy efficiency.
The energy consumption of a domestic electric hob (EC electric hob) is measured in Wh per kg of water heated in a normalised measurement (Wh/kg) considering all cookware pieces under standardized test conditions and rounded to the first decimal place. Standard EN60350-2:2013 was used as reference for the measurement and calculation.
2.4 Before using New Induction hob
- Read this guide, taking special note of the "Safety Warnings" section.
- Remove any protective film that may still be on your ceramic plate.
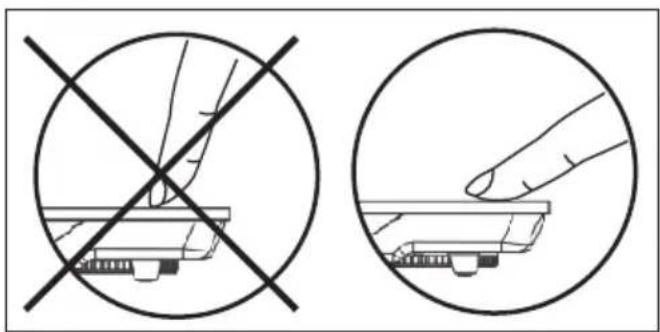
2.5 Using the Touch Controls
- The controls respond to touch, so you don't need to apply any pressure.
• Use the ball of your finger, not its tip.
- You will hear a beep each time a touch is registered.
- Make sure the controls are always clean, dry, and that there is no object (e.g. a utensil or a cloth) covering them. Even a thin film of water may make the controls difficult to operate.
natural_image
Two circular diagrams showing a hand holding a small electronic component and a finger touching it, both crossed by a diagonal line (no text or symbols)
3 Operation
3.1 Placing the pot on the ceramic plate
- Make sure the air vents are not blocked and keep utensils away from the immediate surrounds of the ceramic plate.
- Make sure the cookware which has food or liquid is placed in the center of ceramic plate.
3.2 Connect to power source
- Insert the plug into the wall socket.
- After the power supply is connected, the buzzer sounds. The display shows "L", indicating that the induction hob is in standby mode.
3.3 Turn on
- After pressing the "ON/STANDBY" button, the induction hob is ready for heating. Press the function button to start heating.
- After pressing the "ON/STANDBY" button, if no function button are pressed, the induction hob will switch off automatically.
- In working mode, if there is no proper pot on the ceramic plate, the induction hob will not heat up and the alarm will sound to indicate that a pot is required. About One minute later, it will switch off automatically.
3.4 Function
3.4.1 Power function
- In order to select the power intensity you can:
- Either press the "+/-" buttons.
- To guide you, lights appear above each temperature level.
3.4.2 Keep warm mode
When the appliance is in operation, press the "Keep warm" button if you want to keep your food or liquid warm. The appliance will automatically set to the lowest power and will stop after 120 minutes. To set again the power, press "+ / -" button to enter normal power mode.
3.4.3 Simmer mode
To use this mode, press on the "Simmer" button. A lamp lights up. The induction hob enters the sim-mer state, the default power level shall be level 2. Press "+/-" button to enter normal power mode.
3.4.4 Boil mode
Boil mode is for boiling water. To use this mode, press on the "Boil" button. A lamp lights up. The default power level shall be level 8. In this mode, the default working time is 15 minutes.

It is recommended to put water that occupies 30%-80% of the pot capacity when boiling water. The water can't exceed 2L.
3.4.5 Fry mode
To use this mode, press on the "Fry" button. A lamp lights up. The default power level shall be level 5. After several minutes, it will turn to 3 level power. Press "+/-" button to enter normal power mode.
3.4.6 Deep fry mode
To use this mode, press on the "Deep fry" button. A lamp lights up. The default power level shall be level 8. After several minutes, it will turn to 7 level power. Press "+/-" button to enter normal power mode.
3 Operation
3.4.7 Boost mode
The boost button switches the hob to the highest power level. By pressing the boost button again the appliance will go back to the power o origin. If you use the other function mode first, when press the boost button again, the appliance will go back to the old function mode.
3.5 How To Lock
If you use the other function mode first, when press the boost button again, the appliance will go back to the old function mode.
Press the "Lock" button to start lock function. The "Lock" indicator lights up. Now only the "ON/STANDBY" button can be used to switch off the appliance, all the other operations are locked.
Press the "Lock" button for several seconds to quit the lock function. The "lock" indicator turns off.
3.6 Timer
- To use the timer, press the "Timer" button. The digital screen will indicate "0:00". Within several seconds, press the "+/-" buttons to adjust the cooking time. Each press will increase or decrease the time for 1 minute. If you press the button longer, the time will increase or decrease by increments of 10 minutes. The timer can be set from 1 minute to 180 minutes. Once the time is set, the digital screen will flicker during several seconds before heating. To cancel the timer function, press again on the timer button.
- Boil, boost function mode cannot use "Timer".
3.7 Pause
- Press the "Pause" button to stop heating. When the induction hob is in pause, press the "Pause" button again or select a cooking mode to quit the pause status and return to the normal heating process.
- After setting Pause, the induction hob stops heating. After reaching the default pause time, if the pause state is not cancelled, the induction hob may alarm and automatically switch off.
3.8 Switch Off
- When the operating time is over, the induction hob switches off automatically.
- Press the "ON/STANDBY" button to turn off the appliance.
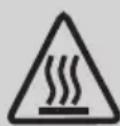
Do not touch the surface of the ceramic while "H" is displayed, it means the temperature is high. While "L" is displayed, it means the temperature is low.
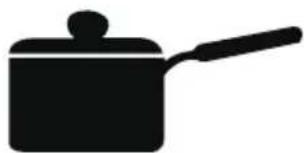
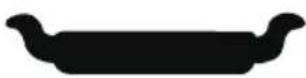
4 Compatible cookware
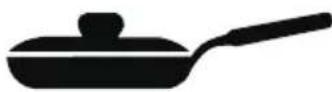
Iron oil frying pan
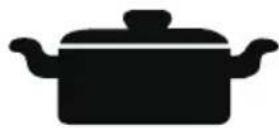
Stainless steel por Iron pan
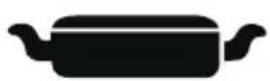
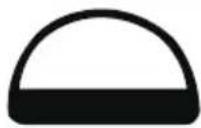
Iron kettle

natural_image
Silhouette of a kettle with a handle and spout (no text or symbols)
Enamel stainless steel kettle
natural_image
Silhouette of a cooking pot with a lid and handle (no text or symbols)
Enamel cooking
utensil
Iron plate
- Requirement for pot materials: Containing magnetic inducting materials.
-
Shape requirement: Flat bottom, with the diameter more than 14.5 cm and less than 20 cm.
-
After the first use, some white spots would appear at the bottom of the pot. This is normal.
- Please pour some vinegar into the pot, heat it at about 60-80 °C, then wipe the spots away with brush.
• Incompatible pots material: Glass, ceramic, aluminium, copper and other non magnetic material.
- If the pot is removed, the induction hob will stop heating immediately. After the buzzer sounds for 1 minutes, it will go into standby mode automatically.
5 Cleaning and maintenance
- Before cleaning, please switch off the appliance first and then disconnect the power plug from the power outlet. Wait till the hob plate has cooled before cleaning.
- After using the induction hob for a long time, the opening of air inlet/air outlet will build up with dust or other dirt, please wipe it with a soft dry cloth. Dust in the air inlet and outlet can be cleaned by using a soft brush or a mini vacuum cleaner.

Please do not rinse it with water.
For oil spots on the hob plate, wipe by using a soft moist cloth with a little tooth paste or mild detergent. And then use a soft moist cloth to wipe it until no stain remains.
When not using it for a long time, please disconnect the power plug from the power outlet and protect the induction hob from any dust or bugs.
6 Troubleshooting
| Abnormalities Key checking points and trouble shooting |
| After plugging in the power cord and pressing the "ON/STANDBY" key, the indicator and display do not light up. | Is the power plug properly connected?Is the switch, power outlet, fuse or power cord damaged? |
| The "ON/STANDBY" indicator lights up and the display works normally, but heating does not start. | Is the pot material proper?Is the appliance in a "Preset" working status?For other causes, please take the appliance to a repairing and maintenance site to be fixed. |
| Heating suddenly stops during the process. | Is the temperature of the oil too high when frying dishes?Is the temperature of the surroundings very high? Is the air inlet or air outlet of the induction hob blocked?Is the default heating time of the induction hob over?The self-safety protection of the induction hob starts, wait for several minutes and connect power to use it. |
| Code of failure | E3 E6 | Wait a moment and press the "ON/STANDBY" button when the temperature of the hotplate becomes normal, the induction hotplate will operate as usual. |
| E7 E8 | Turn off the hotplate, when the voltage becomes normal, and then turn on the hotplate, it will operate as usual. |
| E1 E2 E4 E5 Eb EA • Please contact the customer service department. |
| U1 • Main board and display board communicate failure |
During using, if there are some abnormal cases, please unplug immediately and disconnect power. For any failure of the product, please contact the customer service department.
Product Guarantee
12 months breakdown and repair guarantee
Guarantor: Beko plc, 1 Greenhill Crescent, Watford, Hertfordshire. WD18 8UF
The guarantee does not in any way diminish your statutory or legal rights.
Your appliance has the benefit of our manufacturer's guarantee which covers the product for 12 months from the date of original purchase.
This gives you reassurance that if within that time, your appliance is proven to be defective because of either workmanship or materials, we will at our discretion either repair or replace your appliance.
The appliance must be correctly installed, located and operated in accordance with the instructions contained in the user manual. The guarantor disclaims any liability for accidental or consequential damage.
The Guarantee is subject to the following conditions:
- Documentary proof of the original purchase date is provided.
- The appliance has been installed and operated correctly and in accordance with our operating and maintenance instructions.
The appliance is used only on the electricity supply on the rating plate.
■ The appliance has only been used for normal domestic purposes.
The appliance has not been altered, serviced, dismantled or otherwise interfered with by any person.
The appliance is used in the United Kingdom or Republic of Ireland.
- Any parts removed during repair work or any product that has been replaced becomes our property.
The guarantee is not transferrable if the product is resold.
The Guarantee does not cover:
■ Transit, installation or delivery damage.
- Accidental damage.
- Misuse or abuse.
- Replacement of any consumable item or accessories. These include but are not limited to: plugs, cables, light bulbs, knobs, filters and flaps.
- Repairs or replacements required as a result of unauthorised repairs or inexpert installation that fails to meet the requirements contained in the user guide or instruction book.
■ Repairs to products used in commercial or non-residential household premises.
How to obtain after sales service, help or general advice
Please keep your purchase receipt or other proof of purchase in a safe place as you will need to show us this document if your product requires attention within the guarantee period.
Please also record your product details below, which will allow you to access our services more quickly and help us identify your product. The model number is printed on the front of the user guide and the serial and model number is shown on your products rating plate.
| Model number | Serial number | Purchased from | Date of purchase |
| | | |
Please call our UK based Customer Service department if you need help or advice from us:
| United Kingdom and Northern Ireland: | 0333 207 9710 |
| Republic of Ireland: | 01 862 3411 |
| You can also contact us through our website: | www.beko.co.uk |
natural_image
Two circular diagrams showing a hand holding a small electronic component, with no text or symbols present.
3 Fonctionnement
natural_image
Silhouette of a cooking pot with a lid and handle (no text or symbols)
Casserole en émail
Plaque de cuisson
3 Rad
natural_image
Silhouette of a kettle with a handle and spout (no text or symbols)
natural_image
Silhouette of a cooking pot with a lid and handle (no text or symbols)
natural_image
Two circular diagrams showing a hand holding a small electronic component and a finger touching it, both crossed by a 'X' symbol (no text or labels present)
3 Funksionimi
natural_image
Silhouette of a vintage kettle with a handle and spout (no text or symbols)
natural_image
Silhouette of a cooking pot with a lid and handle (no text or symbols)
Pjatë hekuri
natural_image
Two circular diagrams showing a hand holding a small electronic component and a magnified view of the device (no text or symbols)
3 Ракување
natural_image
Silhouette of a kettle with a handle and spout (no text or symbols)
natural_image
Silhouette of a cooking pot with a lid and handle (no text or symbols)