
ION Robot RV750 - Robot vacuum SHARK - Free user manual and instructions
Find the device manual for free ION Robot RV750 SHARK in PDF.
| Product type | Robot vacuum |
| Brand | Shark |
| Model | ION Robot RV750 |
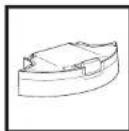
| Power supply | Integrated rechargeable battery + mains charging dock |
| Main features | Automatic cleaning, Auto-Sense navigation, scheduling via SharkClean app |
| Cleaning modes | Full cleaning, Max mode (maximum power), manual cleaning |
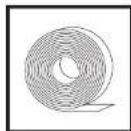
| Forbidden zone | BotBoundary strip (physical limitation to cut) |
| Connectivity | Wi-Fi 2.4 GHz, SharkClean app (iOS/Android) |
| Sensors | Drop sensors (anti-fall), limit sensors, front bumper |
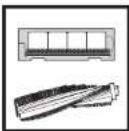
| Main brush | Multi-surface rotating brush with removable blue cap |
| Side brushes | Two side brushes (4 supplied, 2 installed) |
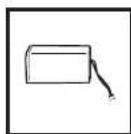
| Dustbin | Removable bin with integrated filter, manual emptying |
| Filter | Dry-clean filter (do not wash), replacement recommended |
| Battery | Rechargeable (type RVBAT100), first charge up to 5 hours |
| Maintenance | Empty bin after each use, regular cleaning of filter, brushes, sensors, and wheels |
| Safety | Drop sensors for stairs, automatic stop in case of obstacle, use on hard floors and carpets |
| Warranty | Limited 2-year warranty (commercial + legal) |
| Spare parts available | Filter, side brushes, battery, brush kit, dustbin, BotBoundary strip |
| App | SharkClean for remote control, scheduling, cleaning history |
| Light indicators | Charge level (blue), Wi-Fi connection (blue/red), error (red) |
Frequently Asked Questions - ION Robot RV750 SHARK
User questions about ION Robot RV750 SHARK
0 question about this device. Answer the ones you know or ask your own.
Ask a new question about this device
Download the instructions for your Robot vacuum in PDF format for free! Find your manual ION Robot RV750 - SHARK and take your electronic device back in hand. On this page are published all the documents necessary for the use of your device. ION Robot RV750 by SHARK.
USER MANUAL ION Robot RV750 SHARK
Robotic Vacuum Cleaner
Roboter Staubsauger
Robot aspirador
Aspirateur robot
Robot aspirapolyvere
RV750EU
GEBRAUCHSANWEISUNG
INSTRUCTIONS
INSTRUCCIONES
GUIDE D'INSTRUCTIONS
ET GARANTIE SHARK
ISTRUZIONI
WILLKOMMEN!
VIELEN DANK, DASS SIE SICH ZUM KAUF DES SHARK* ION ROBOT
1. SCHRITT: SHARKCLEAN APP
BOTBOUNDARY STREIFEN
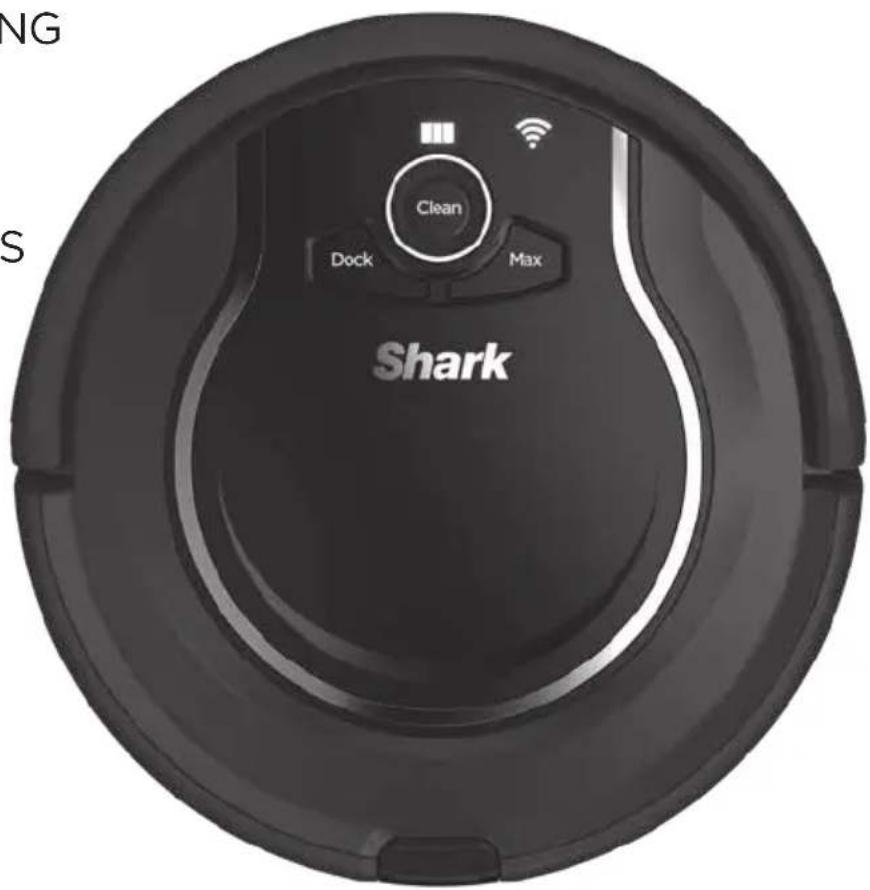
- Shark* ION Robot Vacuum Cleaner
- Shark* Charging Dock
- Two packs of Side Brushes (2x spare brushes)
4.BotBoundary Strip Pack
STEP 1: DOWNLOAD THE SHARKCLEAN APP
Using your Smartphone.
STEP 2: REGISTER YOUR PURCHASE
Use the SharkClean Aop to register your Shark ^c ION Robot. Enter the model and serial numbers.
STEP 3:GET STARTED
For easy set-up follow the steps on the Quick Start Guide. Additional product information can be found in this document to help with set up and troubleshooting.
NOTE: Your Robot will speak English during set-up. Once you connect your phone to the Robot, the language of your Robot will change to the same language in your phone settings.
PLEASE READ CAREFULLY AND KEEP FOR FUTURE REFERENCE.
This instruction manual is designed to help you get a complete understanding of your new Shark® ION Robot Vacuum Cleaner.
For more information about your new Shark* ION Robot Vacuum Cleaner, please visit Sharkclean.eu
CONTENTS
Important Safety Instructions 4
Quick Start Guide 6
Getting to know your Shark' ION Robot 10
Dock Set-up 12
Installing the Side Brushes 12
Charging Dock Set-Up 12
Charging the Shark'ION Robot 13
Charging 13
Charge Indicator Lights 14
Using the SharkON Robot 10
Buttons and Indicator Lights 15
BotBoundary Strip 16
The SharkClean App 17
WI-FI Troubleshooting 16
Maintenance 18
Emptying the Dust Bin 18
Cleaning and Replacing the Filter 19
Cleaning the Multi-Surface Brush-Roll 20
Cleaning the Sensors and Charging Pads 21
Cleaning the Side Brushes 21
Cleaning the Wheels 22
Replacing the Battery 23
Troubleshooting 24
License Agreement 25
Guarantee 26

This marking indicates that this product should not be disposed with other household wastes throughout the EU. To prevent possible harm to the environment or human health from uncontrolled waste disposal, recycle it responsibly to promote the sustainable reuse of material sources. To return your used device, please use the return and collection systems or contact the retailer where this product was purchased. They can take this product for environmental safe recycling.
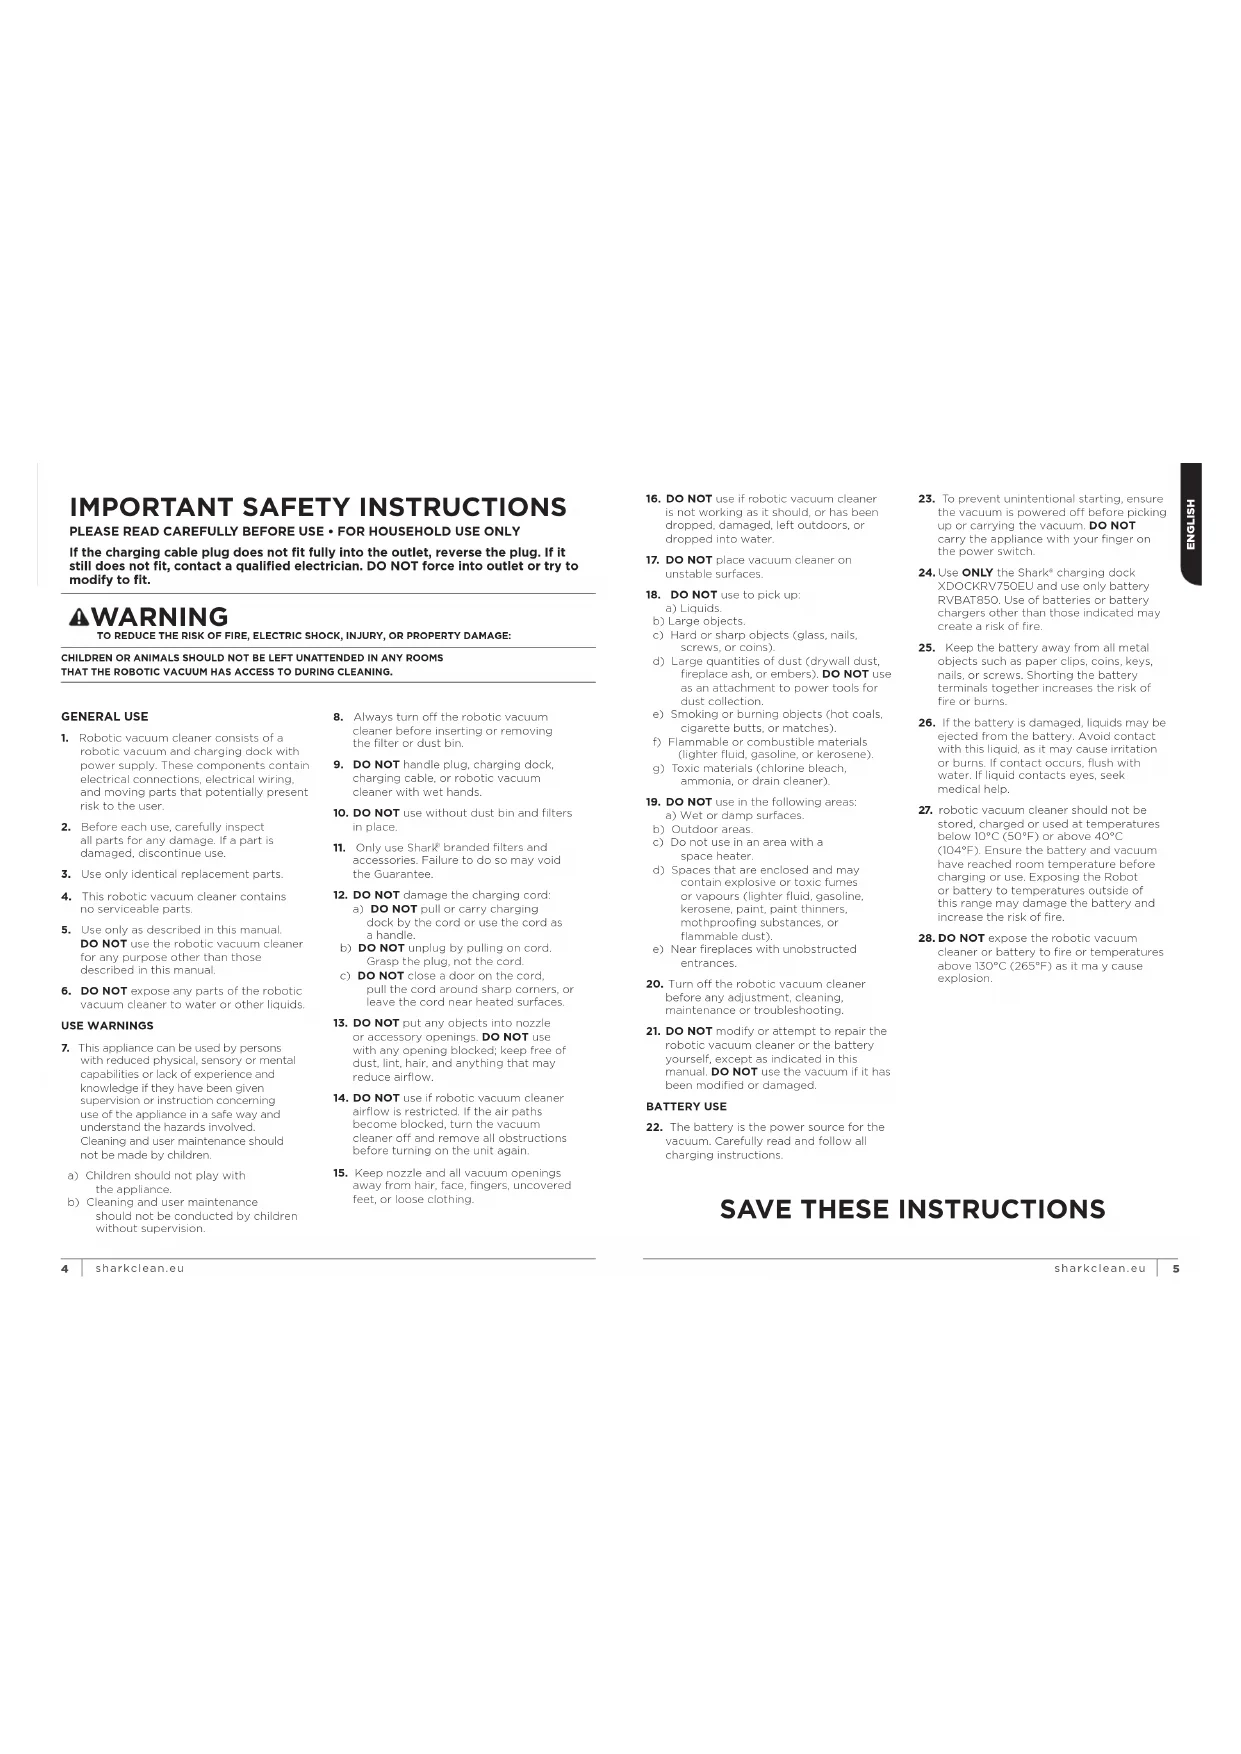
IMPORTANT SAFETY INSTRUCTIONS
PLEASE READ CAREFULLY BEFORE USE • FOR HOUSEHOLD USE ONLY
If the charging cable plug does not fit fully into the outlet, reverse the plug. If it still does not fit, contact a qualified electrician. DO NOT force into outlet or try to modify to fit.
AWARNING
TO REDUCE THE RISK OF FIRE, ELECTRIC SHOCK, INJURY, OR PROPERTY DAMAGE:
CHILDREN OR ANIMALS SHOULD NOT BE LEFT UNATTENDED IN ANY ROOMS
THAT THE ROBOTIC VACUUM HAS ACCESS TO DURING CLEANING.
GENERALUSE
- Robotic vacuum cleaner consists of a robotic vacuum and charging dock with power supply. These components contain electrical connections, electrical wiring, and moving parts that potentially present risk to the user.
- Before each use, carefully inspect all parts for any damage. If a part is damaged, discontinue use.
- Use only identical replacement parts.
- This robotic vacuum cleaner contains no serviceable parts.
- Use only as described in this manual. DO NOT use the robotic vacuum cleaner for any purpose other than those described in this manual.
- DO NOT expose any parts of the robotic vacuum cleaner to water or other liquids.
USEWARNINGS
- This appliance can be used by persons with reduced physical, sensory or mental capabilities or lack of experience and knowledge if they have been given supervision or instruction concerning use of the appliance in a safe way and understand the hazards involved. Cleaning and user maintenance should not be made by children.
a) Children should not play with the appliance.
b) Cleaning and user maintenance should not be conducted by children without supervision.
- Always turn off the robotic vacuum cleaner before inserting or removing the filter or dust bin.
-
DO NOT handle plug, charging dock, charging cable, or robotic vacuum cleaner with wet hands.
-
DO NOT use without dust bin and filters in place.
-
Only use Shark® branded filters and accessories. Failure to do so may void the Guarantee.
- DO NOT damage the charging cord a) DO NOT pull or carry charging dock by the cord or use the cord as a handle.
b) DO NOT unclug by pulling on cord. Crasp the plug, not the cord.
c) DO NOT close a door on the cord. pull the cord around sharp corners, or leave the cord near heated surfaces. - DO NOT put any objects into nozzle or accessory openings. DO NOT use with any opening blocked; keep free of dust, lint, hair, and anything that may reduce airflow.
- DO NOT use if robotic vacuum cleaner airflow is restricted, If the air paths become blocked, turn the vacuum cleaner off and remove all obstructions before turning on the unit again.
-
Keep nozzle and all vacuum openings away from hair, face, fingers, uncovered feet, or loose clothing.
-
DO NOT use if robotic vacuum cleaner is not working as it should, or has been dropped, damaged, left outdoors, or dropped into water.
-
DO NOT place vacuum cleaner on unstable surfaces.
-
DO NOT use to pick up
a) Liquids.
b) Large objects.
c) Hard or sharp objects (glass, nails, screws, or coins).
d) Large quantities of dust (drywall dust, fireplace ash, or embers). DO NOT use as an attachment to power tools for dust collection.
e) Smoking or burning objects (hot coats, cigarette butts, or matches).
1) Flammacole or combustible materials (lighter fuel, gasoline, or kerosene).
g) Toxic materials (chorine bleesch, ammonia, or drain cleaner).
- DO NOT use in the following areas: a) Wet or damp surfaces. b) Outdoor areas.
c) Do not use in an area with a space heater.
d) Spaces that are enclosed and may contain explosive or toxic fumes or vapours (lighter fluid, gasoline, kerosene, paint, paint thinners, mothproofing substances, or flammable dust).
e) Near fireplaces with unobstructed entrances.
- Turn off the robotic vacuum cleaner before any adjustment, cleaning, maintenance or troubleshooting.
- DO NOT modify or attempt to repair the robotic vacuum cleaner or the battery yourself, except as indicated in this manual DO NOT use the vacuum if it has been modified or damaged.
BATTERY USE
-
The battery is the power source for the vacuum. Carefully read and follow all charging instructions.
-
To prevent unintentional starting, ensure the vacuum is powered off before picking up or carrying the vacuum. DO NOT carry the appliance with your finger on the power switch.
24.Use ONLY the Sharkc charging dock XDOCKRV750EU and use only battery RVBAT850. Use of batteries or battery chargers other than those indicated may create a risk of fire. - Keen the battery away from all metal objects such as paper clips, coins, keys, nails, or screws. Shorting the battery terminals together increases the risk of fire or burns.
- If the battery is damaged, liquids may be ejected from the battery. Avoid contact with this liquid, as it may cause irritation or burns. If contact occurs, flush with water. If liquid contacts eyes, seek medical help.
- robotic vacuum cleaner should not be stored, charged or used at temperatures below 10^ (50^) or above 40^ (104^) . Ensure the battery and vacuum have reached room temperature before charging or use. Exposing the Robot or battery to temperatures outside of this range may damage the battery and increase the risk of fire.
- DO NOT expose the robotic vacuum cleaner or battery to fire or temperatures above 130^ (265^) as it may cause explosion.
QUICK START GUIDE
2 WAYS TO CLEAN
1- WITH the SharkClean App.
Download the SharkClean App using an Android or iOS smartphone.
2 - WITHOUT the SharkClean App.
By simply pressing the Clean or Dock button on the Robot.
SECTION A - PREPARED THE ROBOT
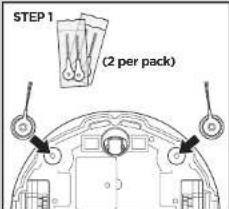
STEP1 Locate the brushes which are stored in the box (4 brushes supplied).
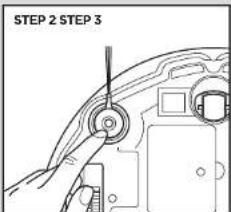
STEP 2 Firmly press two brushes onto the square pegs. Save the remaining brushes for future use.
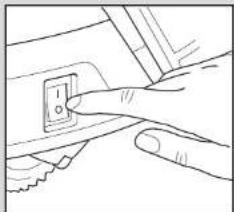
STEP3 Switch on the Robot.
SECTION B - PREPARING THE CHARGING DOCK
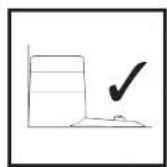
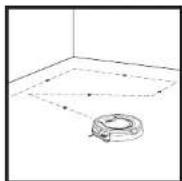
STEP1 Find a permanent location for the Charging Dock, with its back against a wall, in an area with a good Wi-Fi signal. For best results, set up Charging Dock on a hard floor.
The space surrounding the Charging Dock is only a guide. The Robot will often operate in smaller spaces, but it is recommended to give the Robot a wide space to dock more easily.
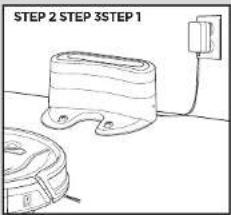
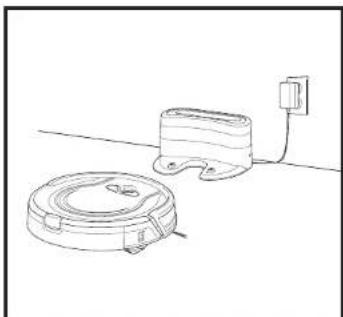
STEP2 Plug in the Charging Dock
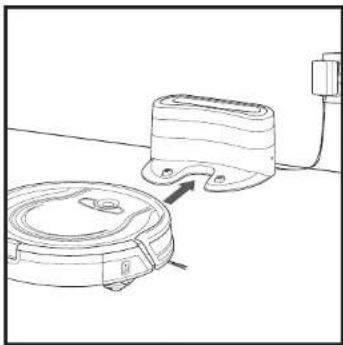
STEP 3 Place the Robot on the Charging Dock to charge. You will hear a beep when charging begins and the light on the side of the Charging Dock will change from green to blue.
SECTION C - SETTING UP THE APP
STEP1-DOWNLOAD THE SHARKCLEAN APP
Search SHARKCLEAN using your smartphone
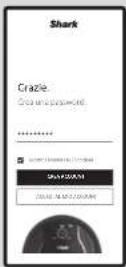
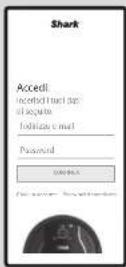
STEP 2 - CREATE AN ACCOUNT
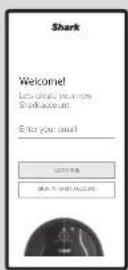
EMAIL
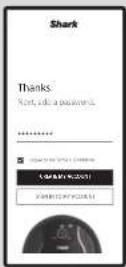
PASSWORDCONFIRMATIONSIGN IN

STEP 3 - CONNECT YOUR ROBOT TO WI-FI
GET STARTED POWER ON LOCATION PAIRING WI-FI CONNECTED
1 ADD A Robot: Click on the Menu icon in the App and Add a Robot
2 GET STARTED: Click on 'Get Started' and have your WI-Fi password to hand.
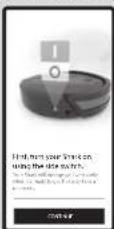
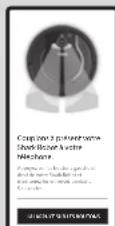
3 POWER ON: Switch on the Snark' ION Robot by turning the on/off switch to the on' position (located on the side of the Robot). Press continue' in the App.
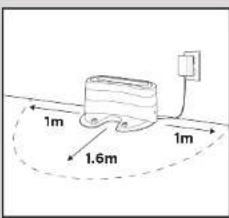
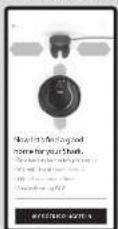
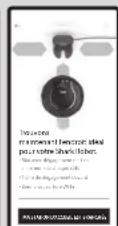
4 LOCATION: Position the Charging Dock Base on a flat surface with in either side and 1.6m clearance in front. Then plug into the mains power.
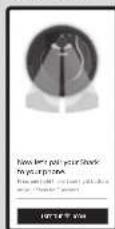
5 PAIRING:Pair your phone to the SharkON Robot by pressing the left and right buttons on your SharkON Robot.
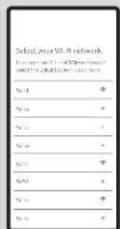
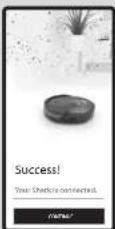
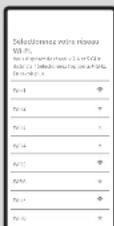
6 WI-Fi: Select 'SharkXXXXXX' in your WI-Fi settings and then return to the SharkClean App. In the SharkClean App proceed to connect your Shark'ION Robot to WI-Fi by entering your WI-Fi password.
7 CONNECTED: Wait 1-2 mins for your Shark® ION. Robot to connect to Wi-Fi.
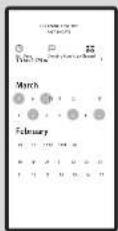
STEP4-SCHEDUED CLEANING
SCHEDULE A WHOLE-HOME CLEAN
START CLEANING CLEANING HISTORY
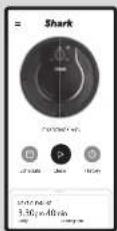
STEP 5 - CONTROLLING THE ROBOT
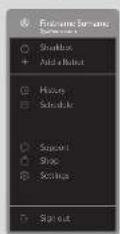
MENU
RETURN TO DOCK
SECTION D - PREPARING YOUR HOME
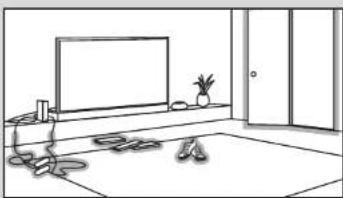
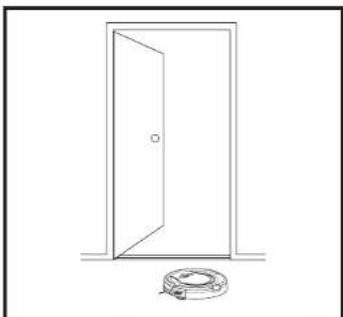
STEP1 Clear cords and remove small objects, clothing or curtains from floors to prevent tangling. STEP2 Open all the Interior doors in your home so that your Robot can access and clean your home without obstruction.
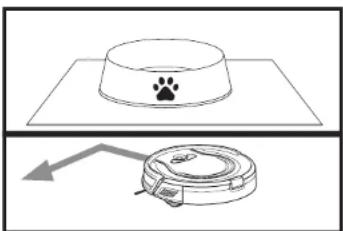
STEP 3 Use the BotBoundary strip included in the box to keep your Robot out of the areas you would like it to avoid:
- Near power cords or chargers, around pet bowls and near TV cables that might cause tangles.
WHAT TO EXPECT

You can set up a schedule to clean your whole home using the app.
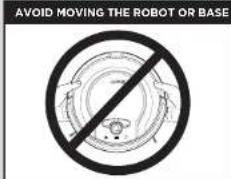
While your Robot is cleaning, do not pick it up and move it, or move the charging Base—this could impact the Robot's ability to map your home.
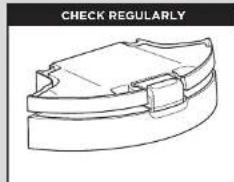
During the first few weeks, your Robot will empty more often than usual.
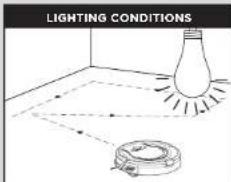
Run your Robot in well-lit conditions. If you are running your Robot at night, make sure to turn on the lights.
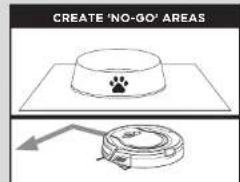
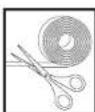
Use the BotBoundary strip supplied in the box to create 'no-go' areas. Simply cut the BotBoundary strip to size and place in front of areas where you want the Robot to avoid.
NOTE: Due to development changes the images shown here may differ from actual app.
GETTING TO KNOW YOUR SHARK⁺ ION ROBOT GETTING TO KN
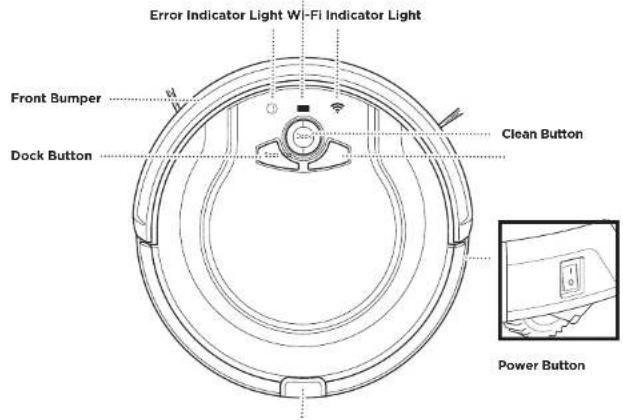
Charge Indicator Lights
Dust Bin Release Button

DUR SHARK\* ION ROBOT
BOTBOUNDARY STRIP
With Auto-Sense Navigation, your Robot uses an array of sensors to navigate around walls, furniture logs, and other obstacles while it cleans. The Robot may gently bump into obstructions or into in one spot, and it may not cover every area in a single cleaning. For best results, prepare your home as indicated below, and schedule a daily clean to ensure all floor areas are regularly maintained.
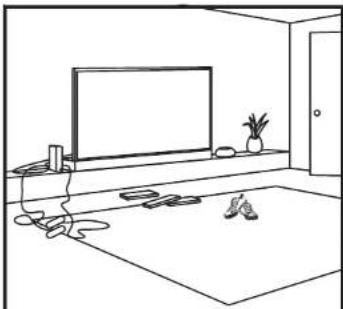
CORDS AND OBSTRUCTIONS
Before cleaning, clear away cords and other obstructions or block off the area with the included BotBoundary Strip, which can be found in the box.
DOORWAY THRESHOLDS
Your Robot may have some trouble clearing some high thresholds. Block off high thresholds with BotBoundary strip.
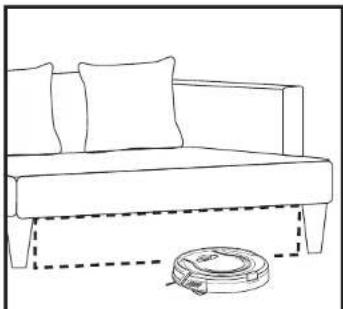
LOW-CLEARANCE FURNITURE
To prevent your Robot from becoming trapped under furniture, use BotBoundary Strip.
RETURNING TO DOCK
If your Robot roams too far, it could have trouble finding the Charging Dock. It may be helpful to block off part of your home with BotBoundary strip.
DOCK SET-UP
INSTALLING THE SIDE BRUSHES CHARGING
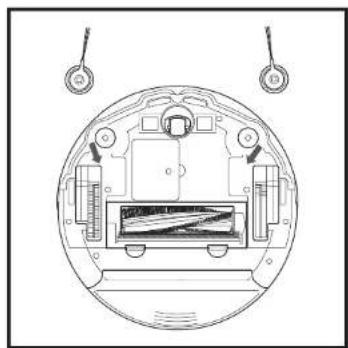
Attach the two Side Brushes (included) onto the square pegs on the bottom of the Robot. There is an additional spare slot included in the box.
Firmly press two brushes onto the square pegs. Save the remaining brushes for future use.
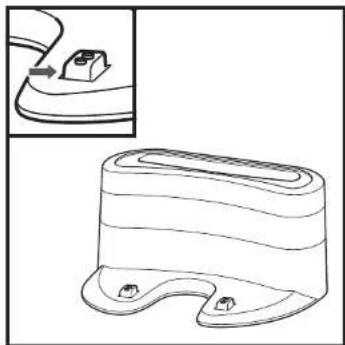
CHARGING DOCK SET-UP
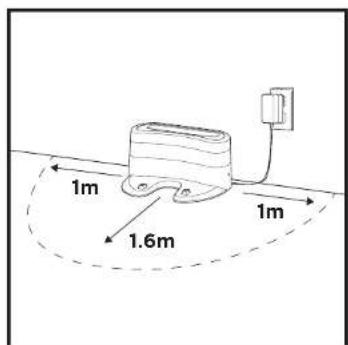

The space surrounding the charging dock is only a guide. The Robot will often operate in smaller spaces, but it is recommended to give the Robot a wide space to allow it to clock more easily.
- Choose a level surface in a central area.
- Remove any objects that are closer than 1m from either side of the clock, or closer than 1.6m from the front of the clock.
- Place the clock with its back against the wall, then plug it into a socket.
The Indicator light on the dock will illuminate green when the dock has power.
The dock must be plugged in continuously for the Robot to find it.
CHARGING THE SHARK ion ROBOT
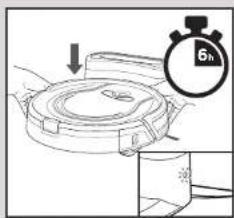
IMPORTANT: The Shark® ION Robot has a pre-installed rechargeable battery. Battery must be fully charged before using your Robot. It may take up 5 hours to fully charge for the first time.
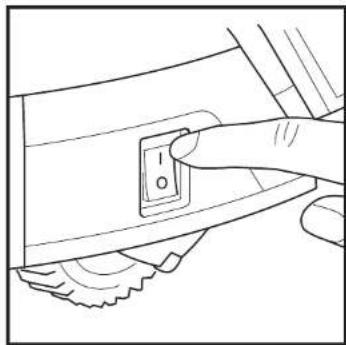
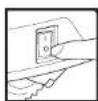
To charge, the Power button on the side of the Robot must be in the ON position (I).
When the cleaning cycle is complete, or if the battery is running low, the Robot will search for the dock. If your Robot doesn't return to the dock, its charge may have run out:
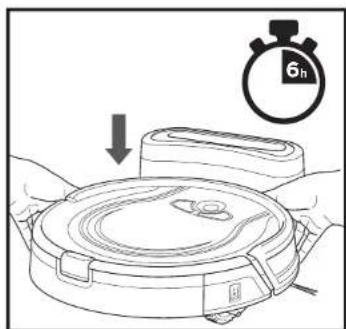
If the Robot has no charge and cannot return to the charging dock, place it on the clock manually and charge for up to 5 hours.
NOTE: When manually placing the Robot on the dock, make sure the Charging Contacts on the bottom of the Robot are aligned with the dock. To ensure the Robot is docked correctly, refer to the Charge Indicator Lights section (see page 14).
CHARGING THE SHARKION ROBOT
CHARGE INDICATOR LIGHTS


In Use
Low Charge

Charge Xcel

Fall Charge

Cha

1. 实验原理

1. 实验原理

1.

or Off

The blue charge indicator lights show how much charge is remaining.
- While the Robot is charging, all three blue LED lights will cycle. When charging is complete, all three blue lights will illuminate steadily.
- If the Robot is idle and away from the charging dock for 10 minutes, it will enter Sleep Mode, and the lights will turn off.
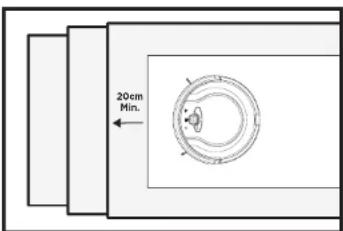
- If all the indicator lights are off, then the Robot is in Sleep Mode, the power switch is turned OFF (O) or there is no charge remaining. Turn the power switch ON (I). Press any button to ensure the Robot is not in Sleep Mode. If all indicator lights remain off, there is no charge. Place the Robot on the dock, leaving a 2cm space between the front of the Robot and the face of the dock. When the Robot is docked correctly and begins to charge, it will beep and the charge indicator lights will cycle.
NOTE: If the low charge light is blinking red, there is not enough charge for the Robot to return to the dock. Manually place the Robot on the dock, leaving a 2cm space between the front of the Robot and the face of the dock.
Turn off the power switch if the Robot is not going to be used for a long period of time, this will help preserve the battery.
USING THE SHARK\*ION ROBOT
MANUAL CLEANING MODE
To manually start a cleaning cycle:
Step 1: Press the Clean button on the Robot.
Step 2: Press the Dock button to stop the Robot before it finishes cleaning and automatically returns to the Base.
IMPORTANT: Before cleaning an entire room for the first time, we recommend that you first test your Robot on a small section of the floor to ensure there is no scratching.
USING THE SHARKION ROBOT
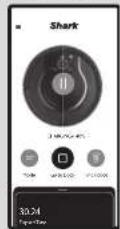
BUTTONS AND INDICATOR LIGHTS
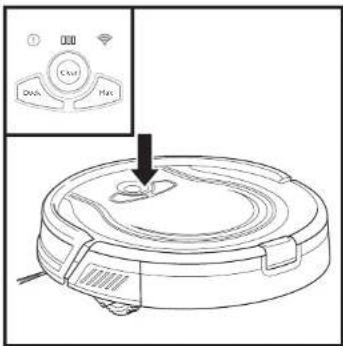
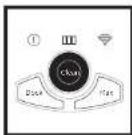
CLEAN BUTTON
Press to begin a long-running cleaning session. Press again to stop.
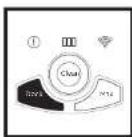
DOCK BUTTON
Press to stop cleaning and send the Robot back to the charging dock.
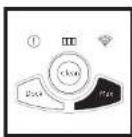
MAX MODE BUTTON
Press for more powerful cleaning.
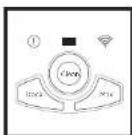
CHARGE INDICATOR
Dispays the amount of charge remaining in the battery.
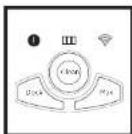
"ERROR INDICATOR
See Troubleshooting section for full list of error codes.
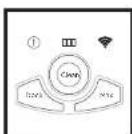
WI-FI INDICATOR
Blue light: connected to Wi-Fi Red light: not connected.
Flashing blue: Set-up mode.
No light: not set up yet.
USING THE SHARKION ROBOT
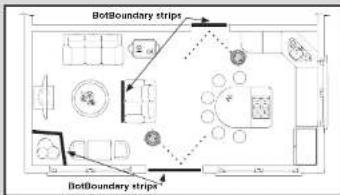
BotBoundary Strip
To keep your Robot away from certain areas, such as pet bowls, fragile objects, wires, or doorways, use the BotBoundary strip to quickly and easily create "no-go zones".
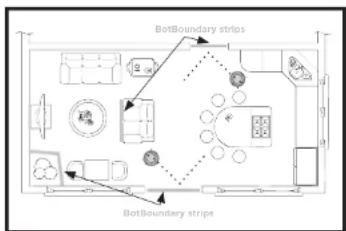
Identify areas or objects you want the Robot to avoid.
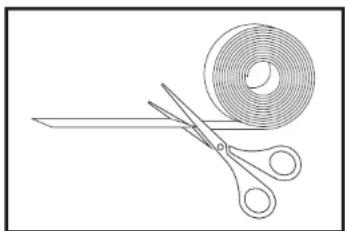
Cut the BotBoundary strip to the dosired length (45cm minimum) so that it spans the length of the doorway or object you want to block off.
Generally, botboundary strips are not needed on stairs because your Robot's cliff sensors will prevent it from falling off ledges. For your Robot's cliff sensors to work properly, all runners, rugs, or carpets must be at least 20cm from any stairs (or extend over the edge of the stairs.) If a runner, rug or carpet edge is less than 20cm from the stairs and can't be moved, use a BotBoundary strip to block off the stairs.
Use the BotBoundary strip supplied in the box to create 'no-go' areas. Simply cut the BotBoundary strip to size and place in front of areas that you want the Robot to avoid.
NOTE: To prevent bumping, place strip at least 5cm in front of the object you want to block off.
THE SHARKCLEAN APP
DOWNLOAD THE APP
Download the SharkClean App using an Android or iOS smartphone,
CREATE AN ACCOUNT
Step 1: Enter your email address.
Step 2: Enter a password.
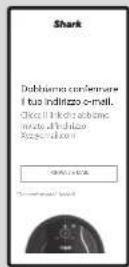
Step 3: Confirm your email.
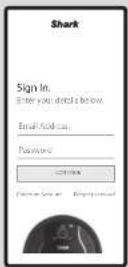
Step 4: Sign in to the SharkClean App with your email and password.
ADD A ROBOT
Step 1: Click on the menu button in the SharkClean App and 'Add a Robot'.
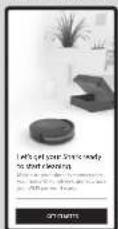
Step 2: Click on 'Get Started'.
Step 3: Switch your Robot into the 'ON' position.
Step 4: Find a good home for your Robot Charging Dock.
Step5:Pair your phone to the SharkON Robot by pressing the left and right buttons on your SharkON Robot.
Step 6: Select 'SharkXXXXXX' in your WI-FI settings, and then return to the SharkClean App.
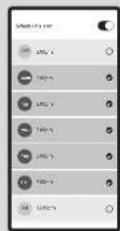
Step 7: Select your WI-Fl network and enter your WI-Fl password.
Step 8: Wait 1-2 mins for your Shark* ION Robot to connect to WI-Fi.
Step 9: Start cleaning!
WI-FI TROUBLESHOOTING
To use the App, your phone must be connected to a 2.4GHz network.
The App will only work on a 2.4GHz network.
Typical home Wi-Fi networks support both 2.4GHz and 5GHz.
- Do not use a VPN or a proxy server.
- Make sure Wi-Fi isolation is turned off on the router.
- For technical support please visit sharkclean.eu
ERROR CODE PROBLEM
| 1 (RED) + Wi-Fi indicator (RED Flashing) | Wrong password for Wi-Fi |
| 1 (Flashing red) + Wi-Fi (RED) | SSID cannot be found, try connecting again |
| 1 + Wi-Fi (Flashing RED alternately) | Wrong user name or password for your Shark account |
| 1 + Wi-Fi (Flashing RED at the same time) | Cannot connect to Wi-Fi |
MAINTENANCE
CAUTION: Turn off power before performing any maintenance.
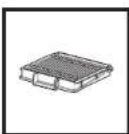
EMPTYING THE DUST BIN
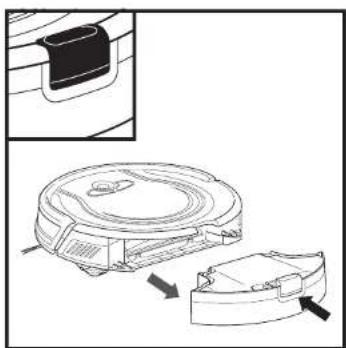
Empty dust bin after each use. Process the Dust Bin Release Button and slide out the dust bin.
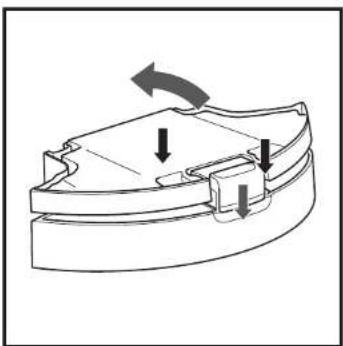
To open the dust bin lid, press and hold the button while lifting the lid, using the finger slots.
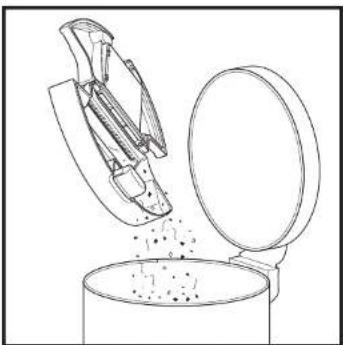
Empty the debris into your household dust bin.
MAINTENANCE
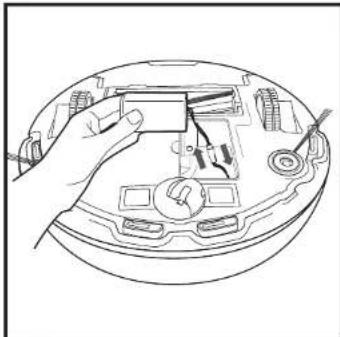
CLEANING AND REPLACING THE FILTER
Regularly clean the filter inside the Robot's dust bin. For replacement filters and parts please visit sharkclean.eu
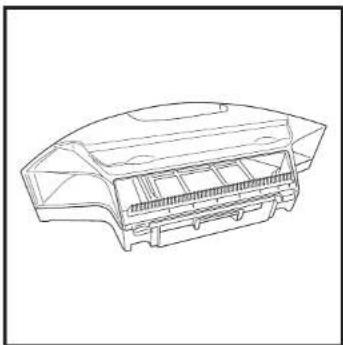
Remove and emomy the dust bin. Clean any hair or debris off the comb on the back of the dust bin.
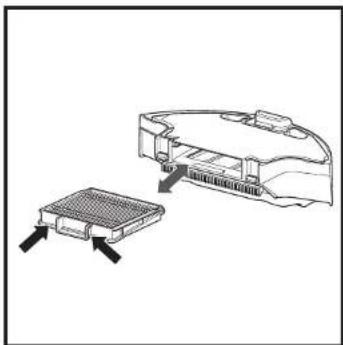
Pull filter out of the dust bin by the tabs.
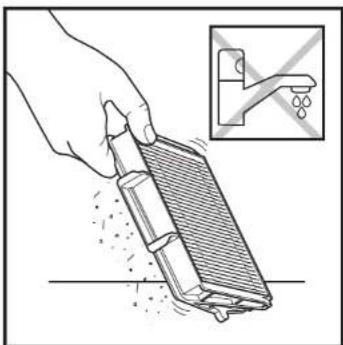
Lightly tap the filter to remove dust and debris.
IMPORTANT: Do NOT use water when cleaning the filter.

Reinsert the filter into the Robot dust bin and slide the dust bin back into the Robot.
MAINTENANCE
CLEANING THE MULTI-SURFACE BRUSH-ROLL
The brush-roll needs occasional maintenance.
Replace brush-roll when visibly worn. See sharkclean.eu for replacement parts.
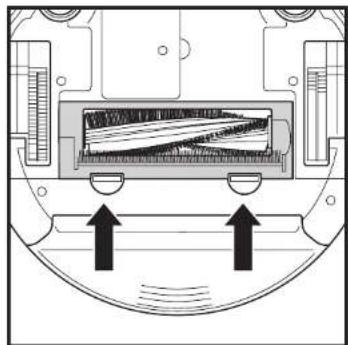
Push up on the labs on the brush-roll access door, then lift off the door.
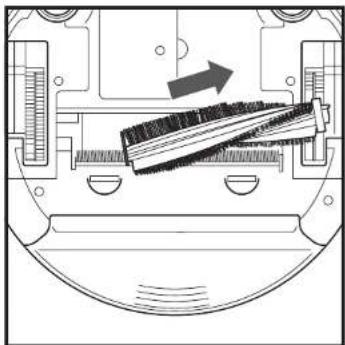
Lift out the brush-roll.
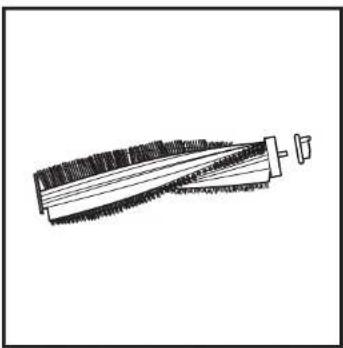
Remove the blue cap on the end of the brush-roll. Do not let the metal cylinder inside the cap fall out. Clean off any hair or debris, then replace cap. Clean the brush-roll whenever hair appears.
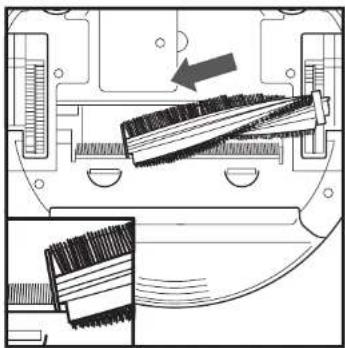
Reinstall the brush-roll, inserting the flat end first. Close the brush-roll access door and press down until it clicks into place.
NOTE: if the metal cylinder fails out of the brush-roll cap, reinsert it in the hole on the inside of the cap. When cutting away debris, be sure not to cut the brush-roll or any other parts of the Robot
MAINTENANCE
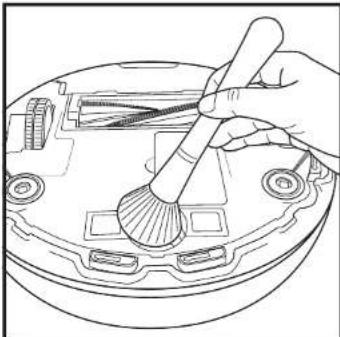
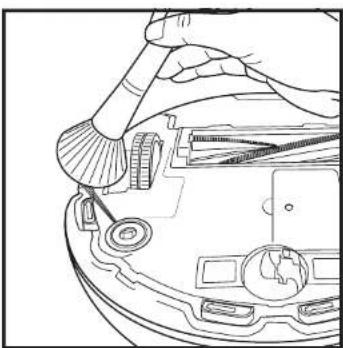
CLEANING THE SENSORS AND CHARGING PADS
CLEAN SENSORS AND CHARGING PADS AS NEEDED, Clean with a dry cloth or cleaning brush. Gently dust off the sensors and pads located on the bottom of the Robot.
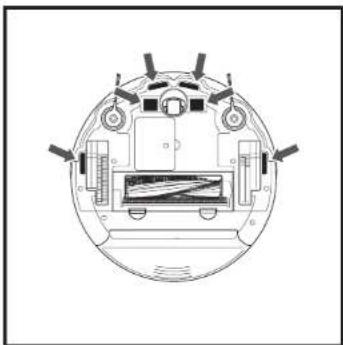
IMPORTANT: The Robot uses CIFF sensors to avoid stairs and other stoop drops. Sensors may work less effectively when they are dirty. For best results, clean sensors regularly.
CLEANING THE SIDE BRUSHES
NOTE: Remove any side brushes that are bent or damaged. To remove a brush, lift it off its peg. See Installing the Side Brushes for instructions on how to attach and remove the brushes. NOTE: Cloth is not included
MAINTENANCE
CLEANING THE WHEELS
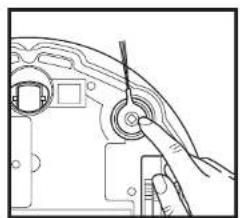
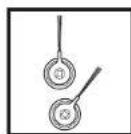
REMOVE AND CLEAN FRONT WHEEL REGULARLY. See sharkclean.ou for replacement parts.

Pull the Front Caster Wheel from its housing and remove any debris buildup.
Clean the wheel housing, then reinsert the caster wheel.
NOTE: Leverage may be required to remove the wheel. NOTE: Brush not included.
Clean the drive wheel housing when needed by rotating the wheel while dusting.
MAINTENANCE
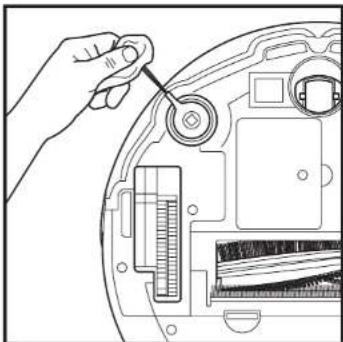
REPLACING THE BATTERY

To remove the battery, turn the unit over and unscrew the battery cover with a screwdriver.
Unplug the old battery from its connector, then plug in the new battery. Replace battery cover and screw it back into place.
NOTE: This appliance contains batteries that are only replaceable by skilled persons. NOTE: Screwdriver is not included.
PARTS AND ACCESSORIES
Filter
SlideBrushes
Battery
Multi-Surface Brushroll Kit
Dust Bin
BotBoundary Strip
To purchase replacement parts please visit sharkclean.eu
TROUBLESHOOTING
If any error lights are illuminated or flashing on your Shark ^心 ION Robot, see the error code chart below:
ERROR CODE PROBLEM SOLUTION
| ALL LED LIGHTS are off POWER OFF | Power may be turned off or battery may need charging. Turn power switch to On position. If no response, place Robot on dock to charge. | |
| CLEAN (RED) + ! flashing together | SUCTION FAILURE | Suction motor failure. Remove blockages and clean filters. Remove dust bin and make sure nothing is blocking suction. |
| CLEAN (RED) flashing | ROBOT STUCK ON AN OBSTACLE | Robot may be stuck on an obstacle. Move Robot to a new location on a level surface. |
| MAX flashing | ROBOT OR BUMPER STUCK | Robot may be stuck on an obstacle. Move Robot to a new location on a level surface. Front bumper may be jammed. Check bumper. |
| DOCK flashing | BOTBOUNDARY SENSOR ERROR | Your Robot's BotBoundary sensors are reporting an error. |
| CLEAN (RED) + DOCK flashing together | CLIFF SENSOR ERROR | Cliff sensors are reporting an error. Wipe cliff sensors with a clean cloth. Robot cannot start due to an error. Turn off the power switch on the side of the Robot, wait five seconds, then turn power back on. Ensure your Robot is on a level surface with no obstructions. |
| CLEAN (RED) + MAX flashing together | DUST BIN OPEN / MISSING | The dust bin has been removed and needs to be reinserted. |
| MAX + ! flashing together | SIDE BRUSH ERROR | A side brush is stuck. Remove debris from side brushes. |
| CLEAN (RED) + MAX +! flashing together | WHEEL STUCK A whel | Is stuck. Remove debris from whee! |
| DOCK + MAX +! flashing together | BRUSH-ROLL BLOCKAGE | Blockage in brush-roll. Remove obstruction. |
| DOCK + ! flashing together | DOCK ERROR | Make sure you are using the dock that came with your Robot. |
| CLEAN (BLUE) + MAX +! flashing together | ROBOT OBSTRUCTION | The Robot is caught in a tight space or on an obstacle. There is something stuck in the Robot's front bumper. Clean any obstructions or debris from the bumper. Gently push the bumper up and down and back and forth, making sure it moves smoothly. |
| CLEAN + DOCK + MAX +! flashing together | WHEEL OBSTRUCTION | The Robot's wheels might be stuck, or something might be caught in them. Check the wheels for obstructions and remove anything that might be stuck or wrapped around the wheels. Press down on the wheels, then let them spring back into place. Rotate wheels back and forth. |
SharkNinja
TWO (2) YEAR LIMITED GUARANTEE
When a consumer buys a product in the Europe, they get the benefit of legal rights relating to the quality of the product (your "statutory rights"). You can enforce these rights against your retailer. However, at Shark we are so confident about the quality of our products that we give you an additional manufacturer's guarantee of two years. These terms and conditions relate to our manufacturer's guarantee only - your statutory rights are unaffected. Every Shark machine comes with a free parts and labour guarantee. You'll also find online support at www sharkclean.
How do I register my extended Shark guarantee?
You can register your guarantee online within 28 days of purchase. To save time, you'll need the following information about your machine:
Model Number
-
Serial Number (only if available)
-
Date you received the machine (from your in-store receipt or delivery note) To register online, please visit www.sharkcleanen.
IMPORTANT
The manufacturer's guarantee covers your product for 2 years starting on the date of delivery.
Please keep your receipt at all times. Should you need to use your guarantee we will need your receipt to verify the information you have supplied to us is correct. The inability to produce a valid receipt may invalidate your
How long are new Shark machines guaranteed for?
Our confidence in our design and quality control means that your new Shark vacuum cleaner is guaranteed for two years.
What is covered by the free Shark guarantee?
Repair or replacement of your Shark machine (at Shark's discretion to decide whether to replace or repair) including all parts and labour. A Shark guarantee is in addition to your legal rights as a consumer.
What is not covered by the free Shark guarantee?
1 Blockages - For details of how to unblock your vacuum cleaner, please refer to the Instructions.
2 Normal wear and tear of parts which require regular maintenance and/or replacement to ensure the proper functioning of your unit.
3 Accidental damage, faults caused by negligent use or care, misuse, neglect, careless operation or handling of the vacuum cleaner which is not in accordance with the Shark Instructions supplied with your machine.
4 Use of the vacuum cleaner for anything other than normal domestic household purposes.
5 Use of parts not assembled or installed in accordance with the operating instructions.
6 Use of parts and accessories which are not Shark spares.
7 Faulty installation (except where installed by Shark).
Where can I buy genuine Shark spares and accessories?
Shark spares and accessories are developed by the same engineers who developed your Shark vacuum. You'll find a full range of Shark spares, replacement parts and accessories for all Shark machines at www.sharkclean.eu. Please remember that using non-Shark spares may invalidate your manufacturer's guarantee. However, your statutory rights are unaffected.
END-USER LICENSE AGREEMENT FOR SHARKNinja SOFTWARE
www.SharkClean.co.uk/EULA
PASO 3: CONECTE SU ROBOT A LA RED WIFI
EMPLACEMENT JUMELAGE WI-FI CONNECTÉ
Bouton Clean (Nettoyer)
L'APPLICATION SHARKCLEAN
TELECHARGEZ L'APPLICATION
In the period ended December 31, 2005, the following amounts are included in the balance sheet: (a) the total amount of capital employed in the sample region; (b) the total number of employees in the sample region; and (c) the total number of employees in the sample region. The financial statements for each country are presented separately.
Thee aasususususususususususususususususususususususususususususususususususususususususususususus
PASSWORD CONFERMA ACCESSO
PASSAGGIO 3 - COLLEGARE L'ASPIRAPOLVERE ROBOT ALLA RETE WI-FI
ENGLISH Illustrations may differ from actual product. We are constantly striving to improve our products; therefore the specifications contained here in are subject to change without notice.
© 2020 SharkNinja Operating LLC. SHARK is a registered trademark of SharkNinja Operating LLC.
- Robotic Vacuum Cleaner
- RV750EU
- WILLKOMMEN!
- VIELEN DANK, DASS SIE SICH ZUM KAUF DES SHARK* ION ROBOT
- SCHRITT: SHARKCLEAN APP
- BOTBOUNDARY STREIFEN
- STEP 1: DOWNLOAD THE SHARKCLEAN APP
- STEP 2: REGISTER YOUR PURCHASE
- STEP 3:GET STARTED
- PLEASE READ CAREFULLY AND KEEP FOR FUTURE REFERENCE.
- CONTENTS
- IMPORTANT SAFETY INSTRUCTIONS
- AWARNING
- GENERALUSE
- USEWARNINGS
- BATTERY USE
- QUICK START GUIDE
- WAYS TO CLEAN
- SECTION A - PREPARED THE ROBOT
- SECTION B - PREPARING THE CHARGING DOCK
- SECTION C - SETTING UP THE APP
- STEP1-DOWNLOAD THE SHARKCLEAN APP
- STEP 2 - CREATE AN ACCOUNT
- STEP 3 - CONNECT YOUR ROBOT TO WI-FI
- GET STARTED POWER ON LOCATION PAIRING WI-FI CONNECTED
- STEP4-SCHEDUED CLEANING
- STEP 5 - CONTROLLING THE ROBOT
- SECTION D - PREPARING YOUR HOME
- WHAT TO EXPECT
- GETTING TO KNOW YOUR SHARK⁺ ION ROBOT GETTING TO KN
- DUR SHARK\* ION ROBOT
- BOTBOUNDARY STRIP
- DOCK SET-UP
- INSTALLING THE SIDE BRUSHES CHARGING
- CHARGING DOCK SET-UP
- CHARGING THE SHARK ion ROBOT
- CHARGING THE SHARKION ROBOT
- CHARGE INDICATOR LIGHTS
- USING THE SHARK\*ION ROBOT
- MANUAL CLEANING MODE
- USING THE SHARKION ROBOT
- BUTTONS AND INDICATOR LIGHTS
- THE SHARKCLEAN APP
- DOWNLOAD THE APP
- CREATE AN ACCOUNT
- ADD A ROBOT
- WI-FI TROUBLESHOOTING
- To use the App, your phone must be connected to a 2.4GHz network.
- MAINTENANCE
- EMPTYING THE DUST BIN
- CLEANING AND REPLACING THE FILTER
- CLEANING THE MULTI-SURFACE BRUSH-ROLL
- CLEANING THE SENSORS AND CHARGING PADS
- CLEANING THE SIDE BRUSHES
- CLEANING THE WHEELS
- REPLACING THE BATTERY
- PARTS AND ACCESSORIES
- TROUBLESHOOTING
- SharkNinja
- TWO (2) YEAR LIMITED GUARANTEE
- How do I register my extended Shark guarantee?
- How long are new Shark machines guaranteed for?
- What is covered by the free Shark guarantee?
- Where can I buy genuine Shark spares and accessories?
- END-USER LICENSE AGREEMENT FOR SHARKNinja SOFTWARE
- PASO 3: CONECTE SU ROBOT A LA RED WIFI
- L'APPLICATION SHARKCLEAN
- TELECHARGEZ L'APPLICATION
- PASSAGGIO 3 - COLLEGARE L'ASPIRAPOLVERE ROBOT ALLA RETE WI-FI
Brand : SHARK
Model : ION Robot RV750
Category : Robot vacuum